Jelly Bean Sweater: From Start to Finish
Transcript for Video: Jelly Bean Sweater - From Start to Finish
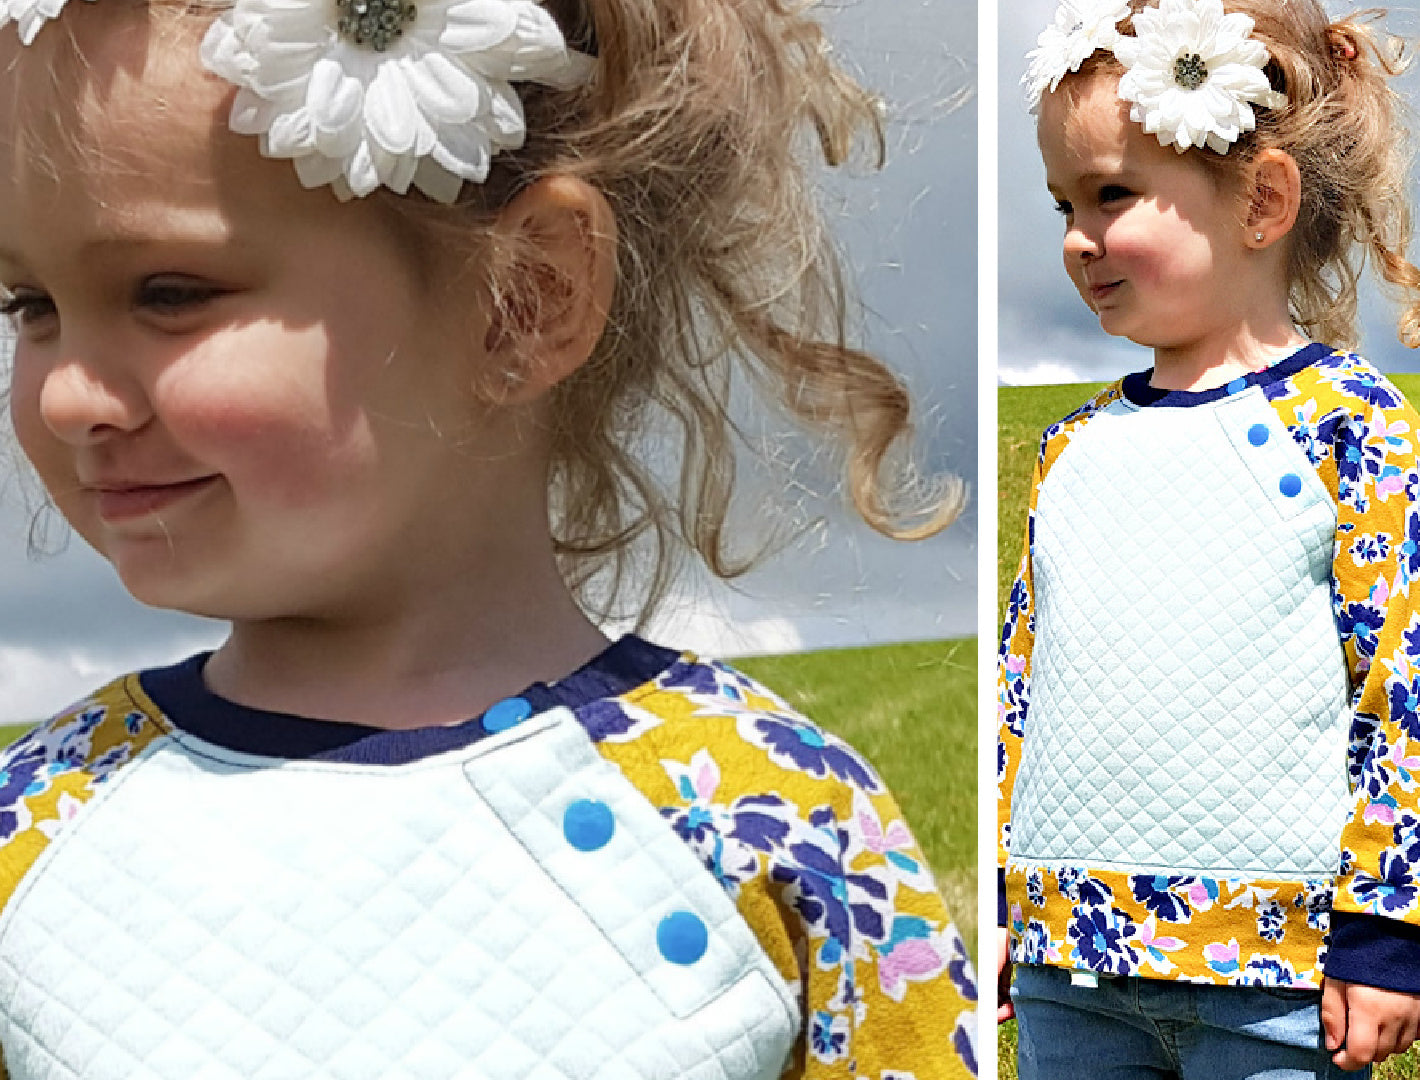
And it's a really nice pattern because it has got a closure, which means that if your kid has a problem with something going over their head, then it's no issue either because you've got the closure which you can open up. And I think it's a great technique to put into your little box of things that you know how to do. It's very, very simple to do. It's actually not complicated — we're just working with two facings here really, and they just go on top of each other and that's it.
The problem doing this was to do the pattern for you — now that wasn't easy. But now you've got the pattern, it's awfully easy.
About My Patterns
All my patterns, as some of you might already know, come in single files.
So for all the children's patterns you've got one file per size, and of course you get all the sizes that are included with the pattern.
That means:
- you can cut it out in any type of space
- you don't need much room
- you don't waste paper
- smaller sizes fit on fewer sheets
- you keep your sanity
For example:
A size 3 might have 6–7 pages, while a size 8 might have 12 pages.
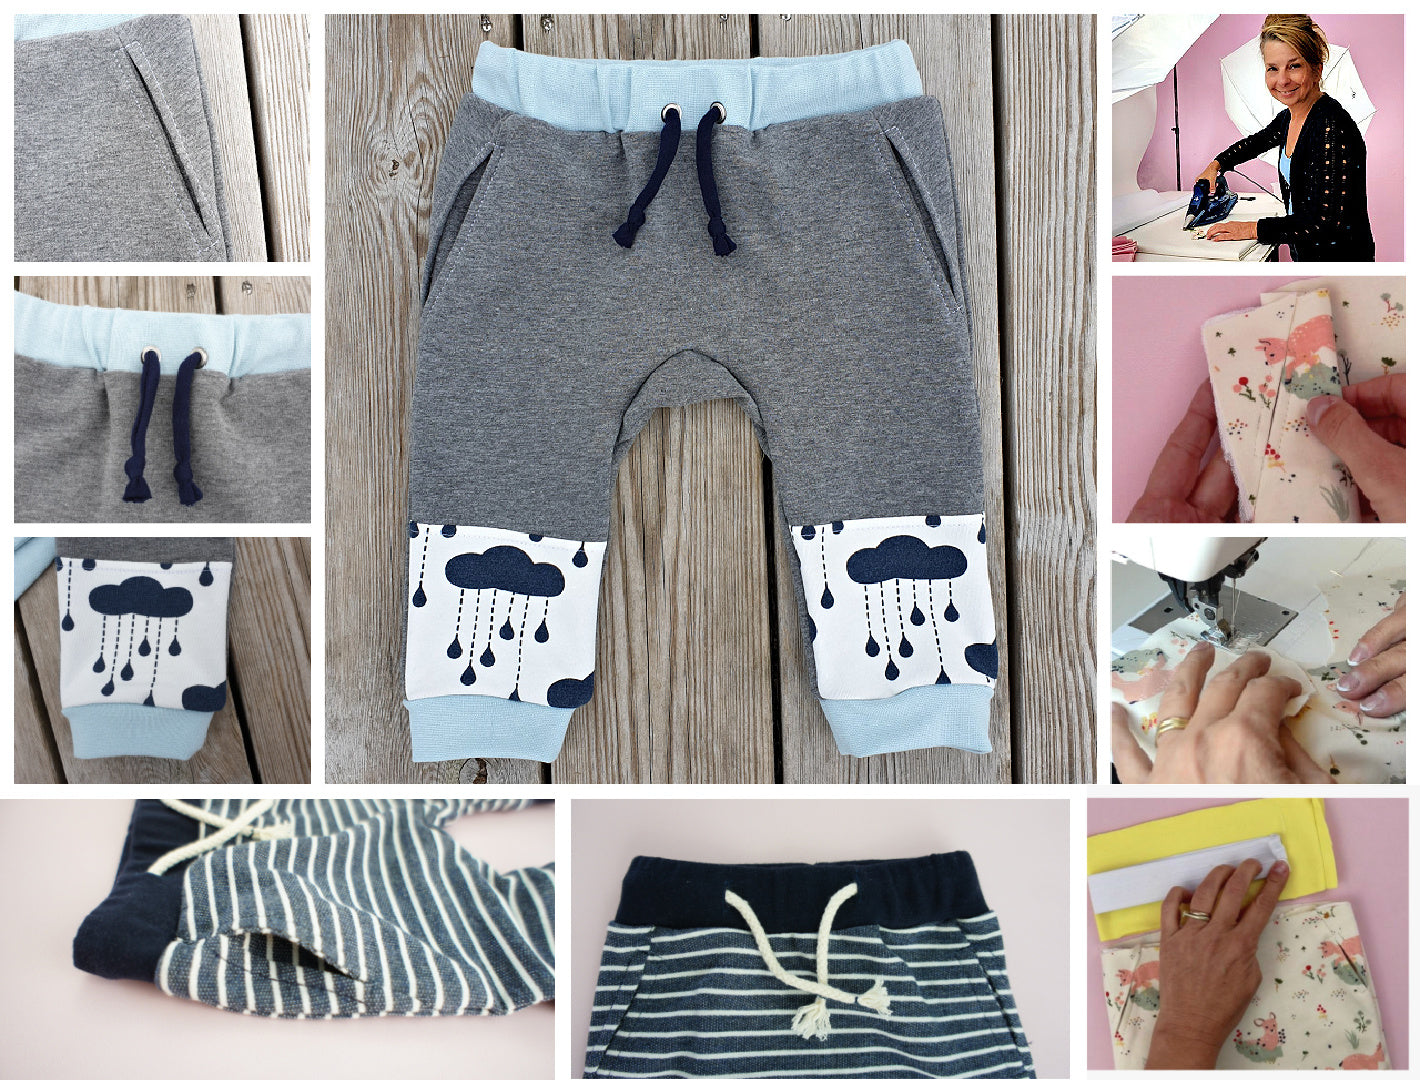
Matching Jogger Bottoms
What goes with this gorgeous little sweater are these Java bottoms.
They have some really ingenious pockets which were pretty difficult to do — but they're not proper welt pockets. They’re practiced seams, and well… there's a trick to it.
There is a video here on YouTube for that as well.
I’m going to put the link in the top right-hand corner of this video, and it's also in the info box so you can find everything you need down there.
I think they make a really, really super pair together.
Suitable Fabrics
Let’s begin and have a look at what fabrics are suitable.
Here I've used some sweatshirt fabric, which is really cool.
It only has two-way stretch, and not even that much. You don't need a lot of stretch because the sweatshirt is quite roomy.
But you should not use:
- woven fabric with no stretch
- very lightweight fabrics
That will not work.
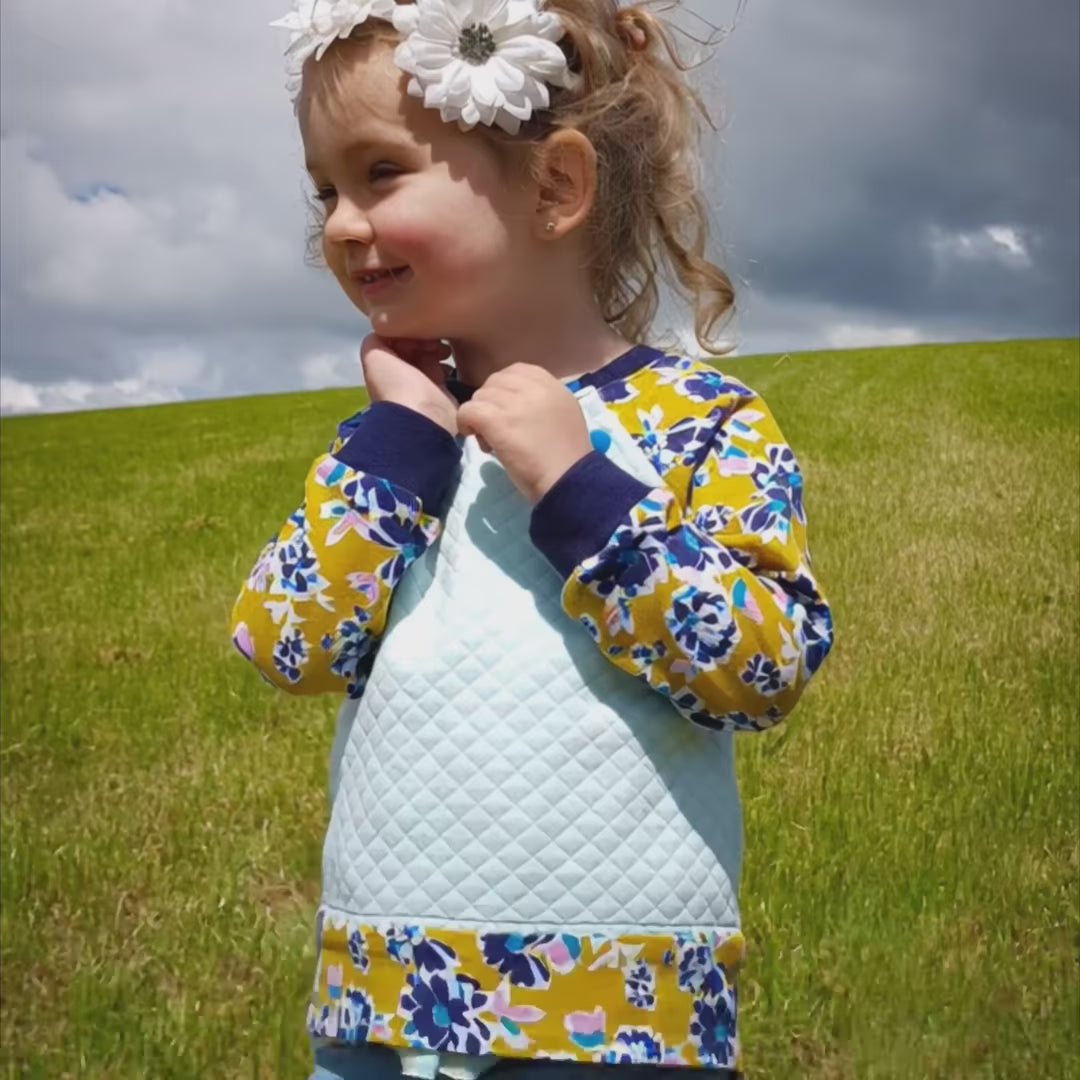
It is a Raglan sweatshirt, and as you can see blended in here on the side, we've made loads of different ones and we absolutely love this little sweatshirt.
You can go wild:
- heavier sweat fabrics
- heavier knit fabrics
Just no wovens.
Closure Options
As the closure I've used KamSnaps, which are always very good.
You could also use metal snaps if you already know KamSnaps and want a challenge.
But for beginners, I would stick with KamSnaps.
Cutting the Sleeves
Because we've got a closure, we've got a right sleeve and a left sleeve, and you need to cut them out so that they're facing absolutely correctly to get the right and left sleeve.
In the academy I also have a chapter showing you how to adapt the pattern quickly to make the standard version without the closure.
You don't necessarily need it — the head will go through — but I think it's a really nice design feature.
Hem Options
We’ve got two different ways of finishing the hem trim:
- a plain hem trim
- a high‑low hem trim
The high‑low version is shown in the little picture blended in on the side.
In this video I'm going to show you what to do if the fabric is really thick and you want it to be nice and flat.
With lighter fabrics you don’t need this method.
Materials Used
I've used:
- interfacing to reinforce the placket
- yellow topstitching thread
- light blue standard cotton thread
Here you can see the interfacing that I'm going to put onto the placket, and I'm just quickly going to cut that.
Interfacing the Placket
Let’s get started.
The first thing we're going to do is iron on those interfacing bits.
You don't need any steam for that — my iron is one of these miraculous American irons that never turns off the steam. It's a really cheap one.
Do the other side as well.
Then I need to overlock that little edge at the top — or “serge” if you're in America.
Sewing the Sleeves
Now I'm going to sew the sleeves to the front.
On the other side we are only closing it up to where the placket is — we’re going 1 cm higher than where the placket starts.
Then I'm going to place the back on as well like this.
Flip the back over, put it on, and pin the other sleeve seams.
Now I'm going to sew those in.
As always, we have a 1 cm seam allowance.
Overlocking and Preparing the Placket
With all my seams now closed, I need to overlock them.
Now I fold over my placket so that I can clearly see the overlocking, and then we're just overlocking this edge.
Pull it around a bit, make sure you don't cut into it — that is a real risk.
You might want to turn off your knife if you're not sure.
Pressing and Overlapping the Placket
Now we can proceed to iron all our sleeves into the front.
Here where I've got my opening, I can now fold it over where it needs to be so that it overlaps, leaving a little bit standing on the front piece.
Now I'm going to sew this down.
Lengthen your stitch length — 3.5 or even 4.
On your presser foot you need to find a fixed point to go down.
Use the same fixed point on all three seams and leave out the opening.
Neckband
Now we're going to do the neckband.
Close the short sides first with a 1 cm seam allowance.
Cut off your seam allowances so it's nice and small — because we are going to put a KamSnap in there, and if it's really thick, the KamSnap won’t go in.
Iron the whole thing lengthways in half.
Attaching the Neckband
The first thing to do is to half your sweatshirt.
You will see that it's exactly on the seam there.
Here I'm putting my back onto the center back — which is not the actual center back, but the folded center.
Here you can see it goes just where the placket starts.
Then I stretch the neckband and work my fingers to the middle, putting pins all the way around.
Once we've sewn it in, we're going to sew across here to stitch in the placket as well.
If you did that in one go and just folded it over, it would give an ugly nose.
Trust me — it will always move.
Sewing the Neckband
Make sure everything is even and then sew it in.
I'm using a foot‑width seam allowance here.
Make sure nothing slips out at the front — it always wants to do that.
Folding and Stitching the Placket
Now the next step is to fold over the placket really tightly.
Pin it, then turn it over to the other side.
Do it from the underside so you can see the stitching line.
Hit the same stitching line — it gives you a beautiful result.
Overlocking the Neckline
Now I can go back to the overlocker.
I'm lining it up with a point on my machine — it's the Brother Lock 1034D.
It's a very cheap machine but it's done me for years.
Now I'm going to press this over my ironing board — lots of steam.
Topstitching the Opening
Next step: topstitching the opening.
Because the front placket is a little wider than the back one, you should have no issue doing this.
Start on the underarm seam.
Stitch length 3.5 to 4 (or even 4.5 depending on your machine).
Use the same fixed point as before.
Turn at the top and stitch across.
If you're unsure, mark the line with a textile pen first.
Adding a Second Stitch Line (Optional)
I'm adding a second line just to see what it looks like.
It's not really necessary.
You could also add two stitching lines where you topstitch onto the sleeve — up to you.
Adding the KamSnaps
Now we're going to put the KamSnaps on.
Press down hard to make an indent.
Use the awl to push through all layers.
KamSnap parts:
- flat cap
- cap with thicker rim
- cap with sharp rim
First:
Put the flat cap through from the underside.
Add the thicker rim on top.
Press with the tool.
Second:
Push the prong through from the top side.
Add the sharp rim.
Press again.
Done.
Closing the Side Seams
Now we can move on to the next bit — closing the side seams.
Do it in one go.
It gives us another look at our placket — isn’t it fantastic?
Sew from the lower end all the way up.
1 cm seam allowance.
Make sure nothing folds over.
Then overlock the seam.
Pressing the Seams
Iron the seams towards the center back.
Do this on both sides.
Cut off overlapping threads.
Hem Trim and Cuffs
Now we're going to do the cuffs and the hem trim.
The hem trim has the front and back twice each.
Sew front and back together at the side seam.
Do the wrist cuffs now as well — no point going back later.
Iron all seam allowances apart.
Hem Trim Technique
Now we continue with the hem trim.
Put the two hem trim pieces inside each other, right sides facing.
Close the lower curved edge — not the straight edge.
Cut back the seam allowances.
Iron the seam apart.
Turn and roll the edge out.
Press all the way around.
Attaching the Hem Trim
Put the trim over the sweatshirt.
Attach only one side — this is why it will lie flat.
The top part will be overlocked later.
Pin and sew the lower edge.
Then overlock the top edge.
Topstitching the Hem Trim
Fold the hem trim so the seam sits neatly.
Pin vertically.
Topstitch above and below the seam.
This gives a very commercial look.
Press everything well.
Cuffs
We have arrived at the last part — the cuffs.
Place the ends on top of each other and press.
Turn the top inside out.
Place the cuff inside — never outside.
Match the seam to the underarm seam.
Stretch to the other side.
Sew in place.
Overlock the seam.
Final Press
Give the cuffs a gentle press — and we are done.
Thank you everyone for watching to the end, and I hope to see you soon again with another project from Frocks & Frolics. Bye for now.