


BUBBLE GUM JOGGERS
BUBBLE GUM JOGGERS


Regular price
€7,95 EUR
Regular price
Sale price
€7,95 EUR
Unit price
per
Couldn't load pickup availability
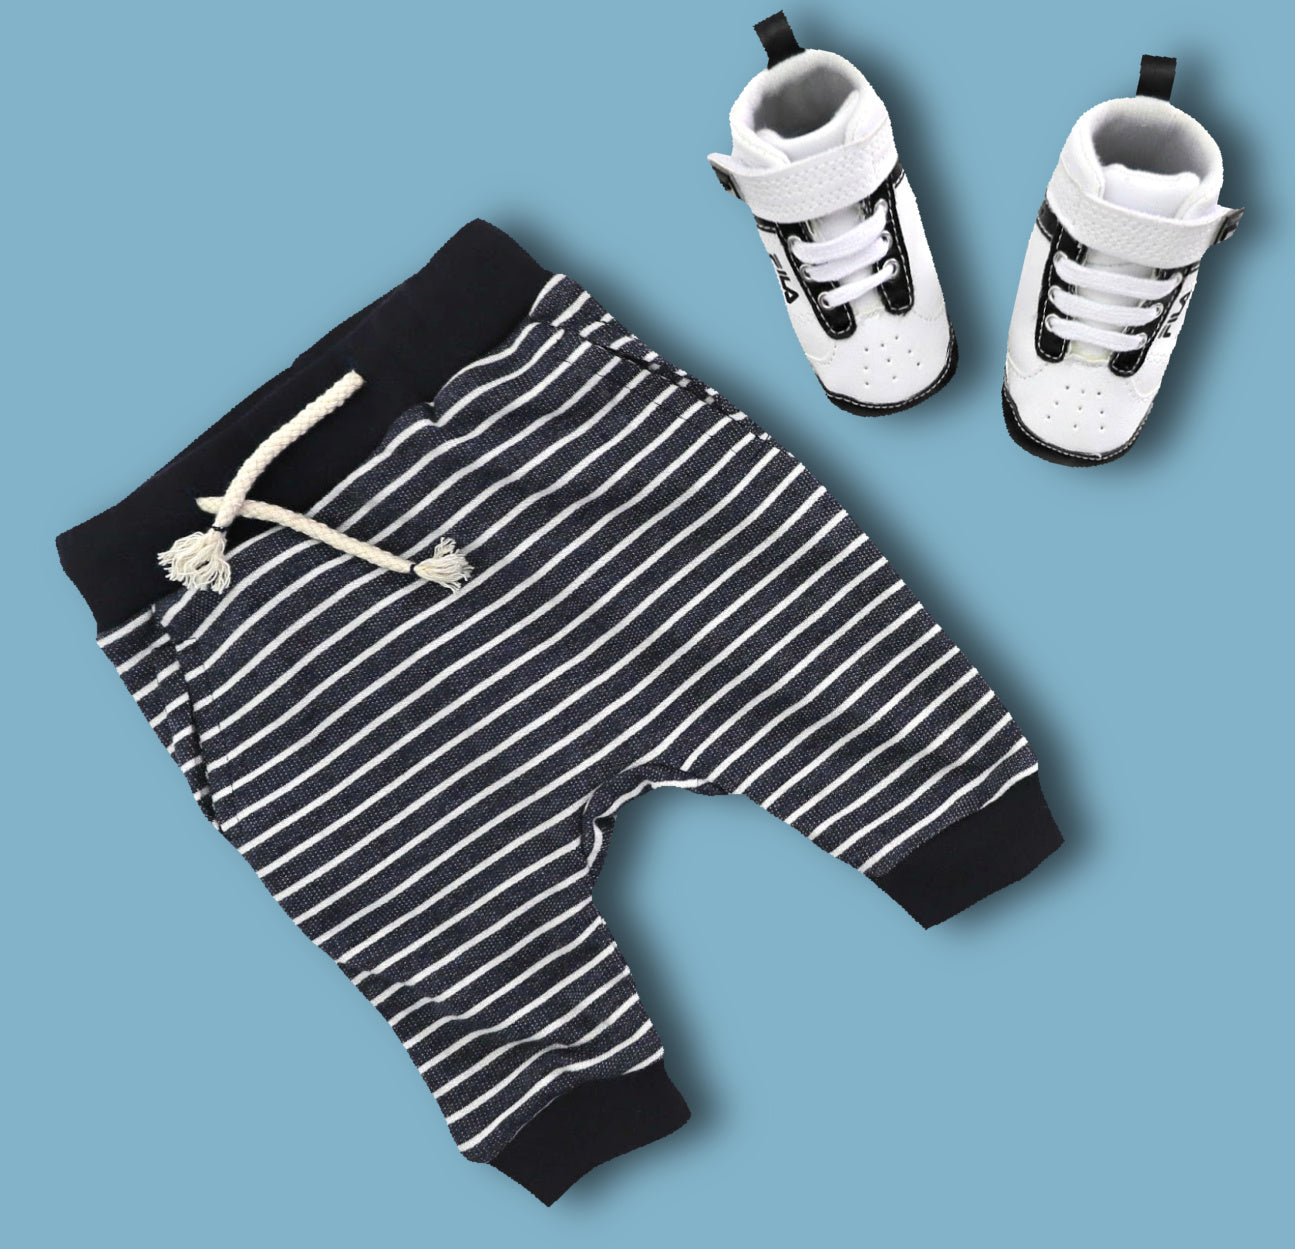
Our Bubble Gum Joggers sew up the sweetest little romper‑style baby pants. With a soft elastic waistband, neat leg cuffs, and magical side pockets that look just like welt pockets (psst… they’re wonderfully easy to sew), these joggers keep tiny legs comfy from morning wiggles to afternoon naps.
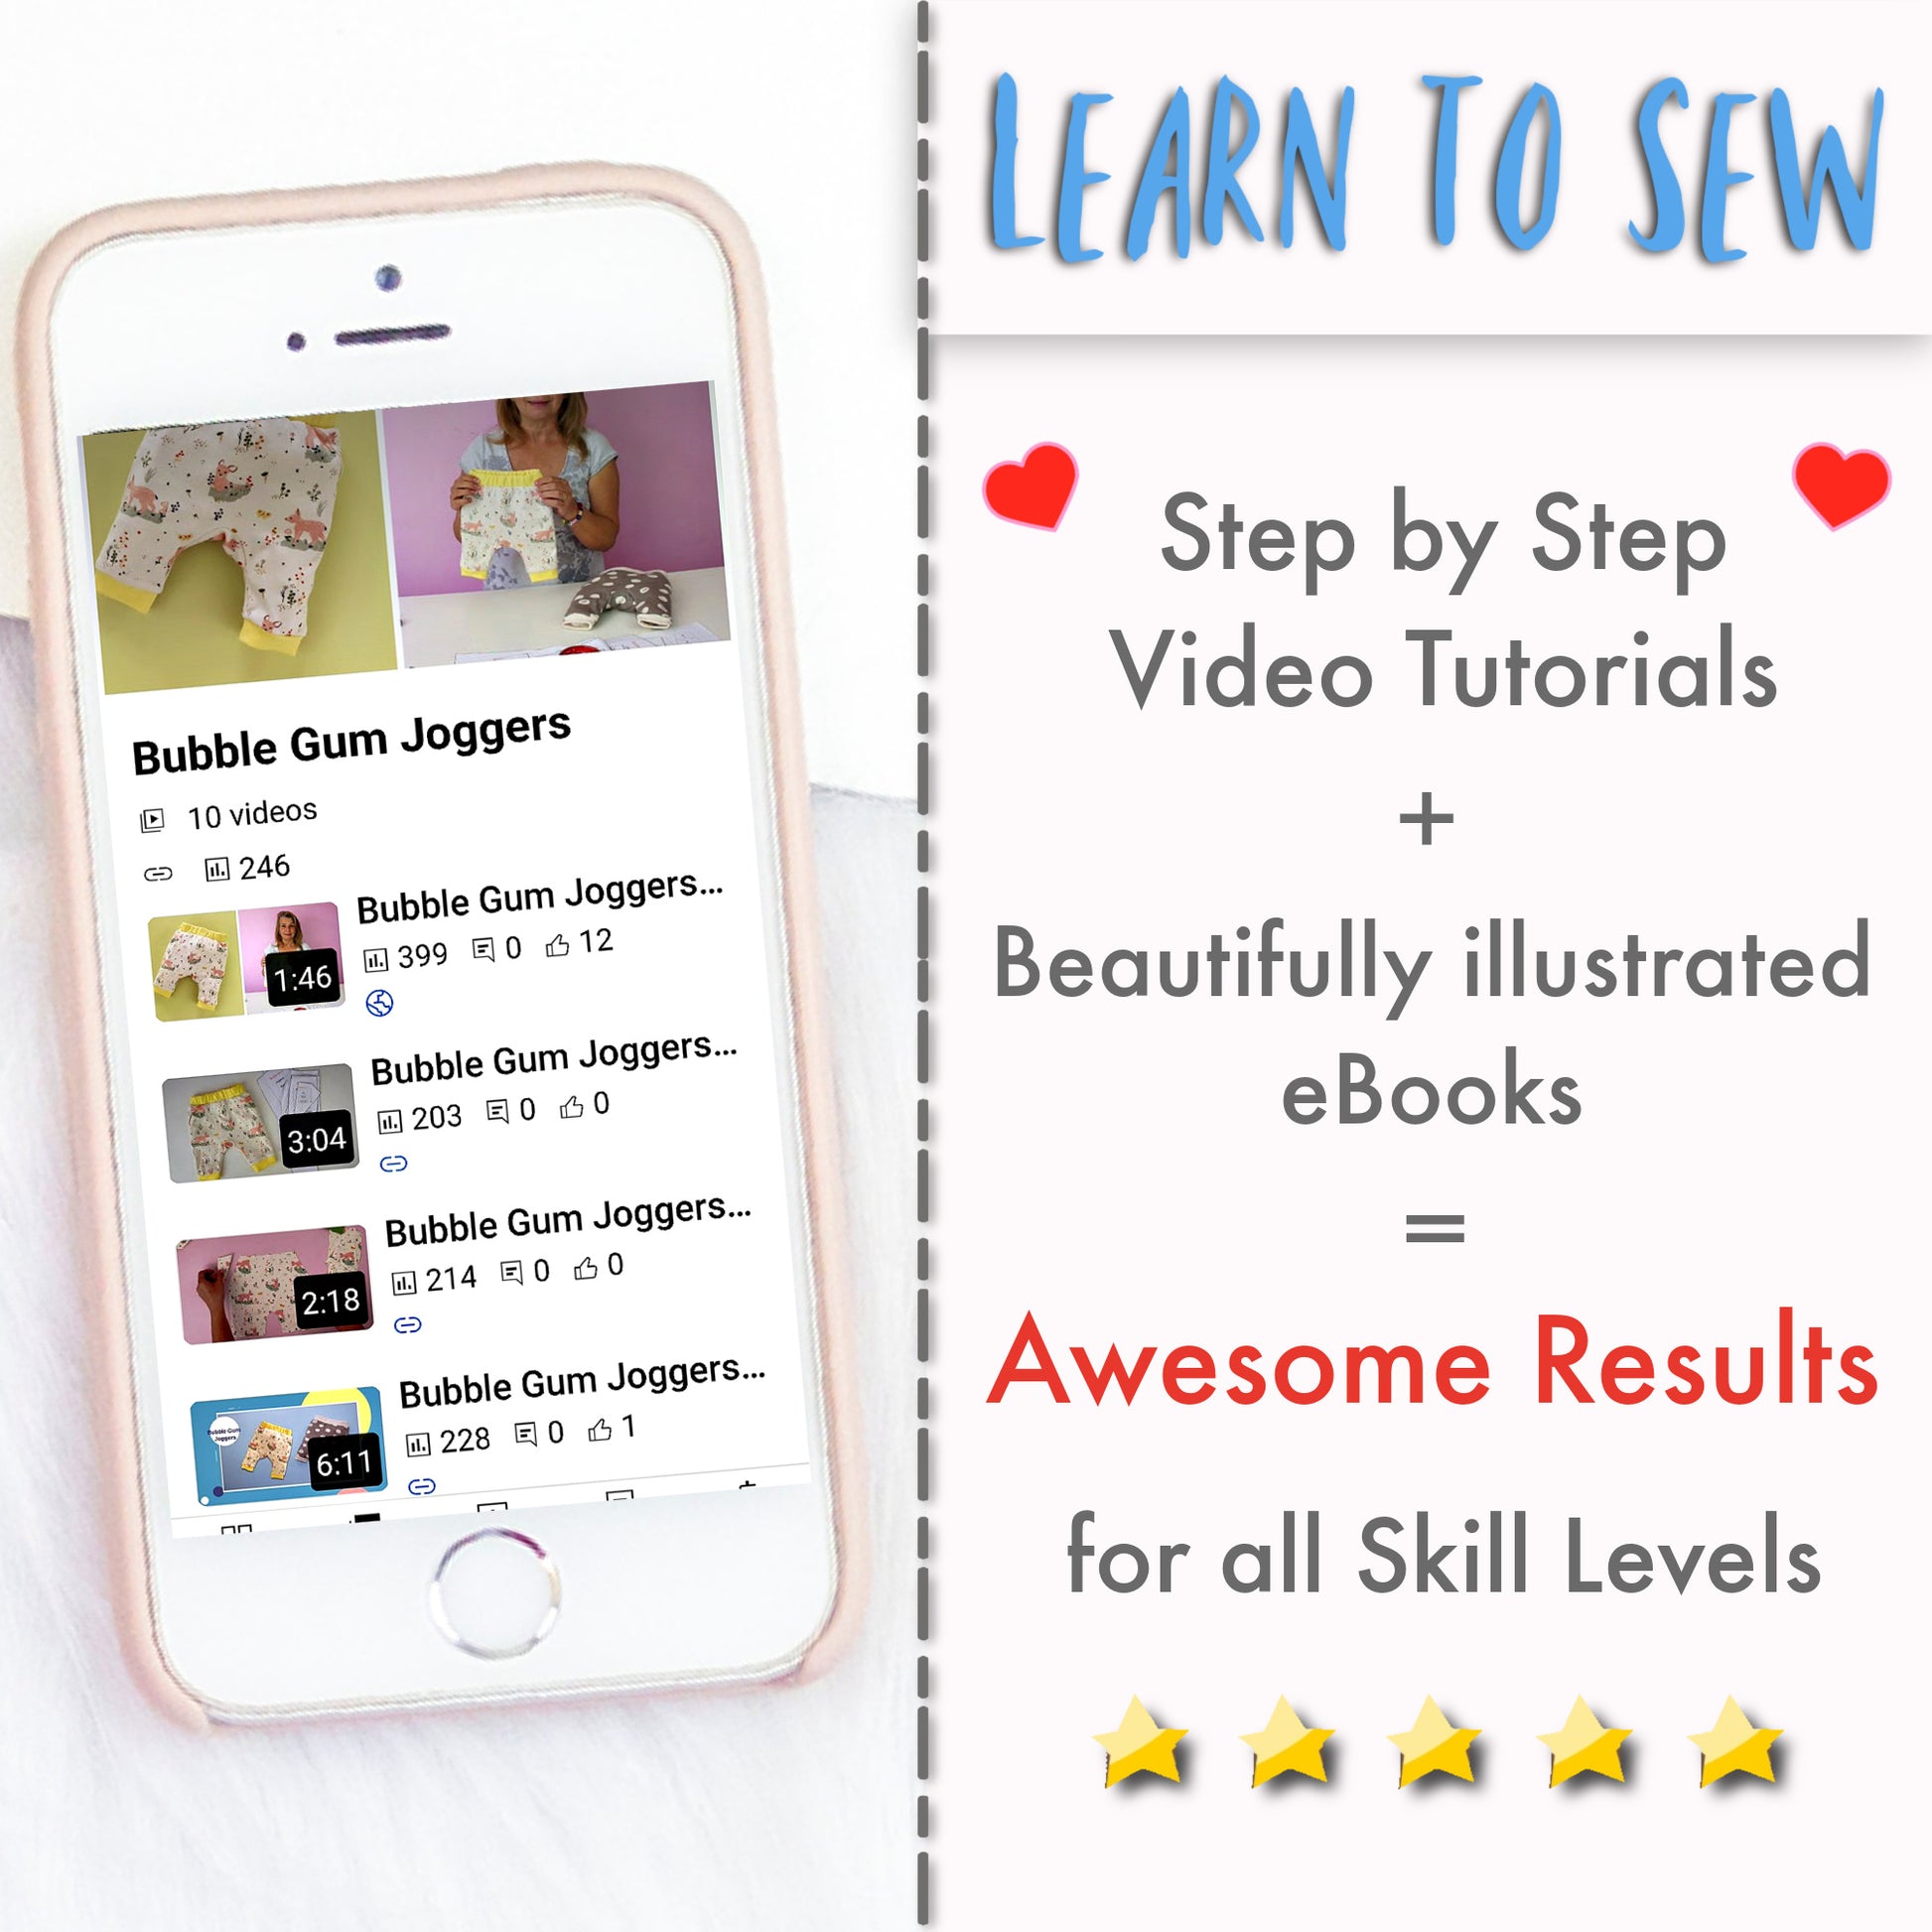
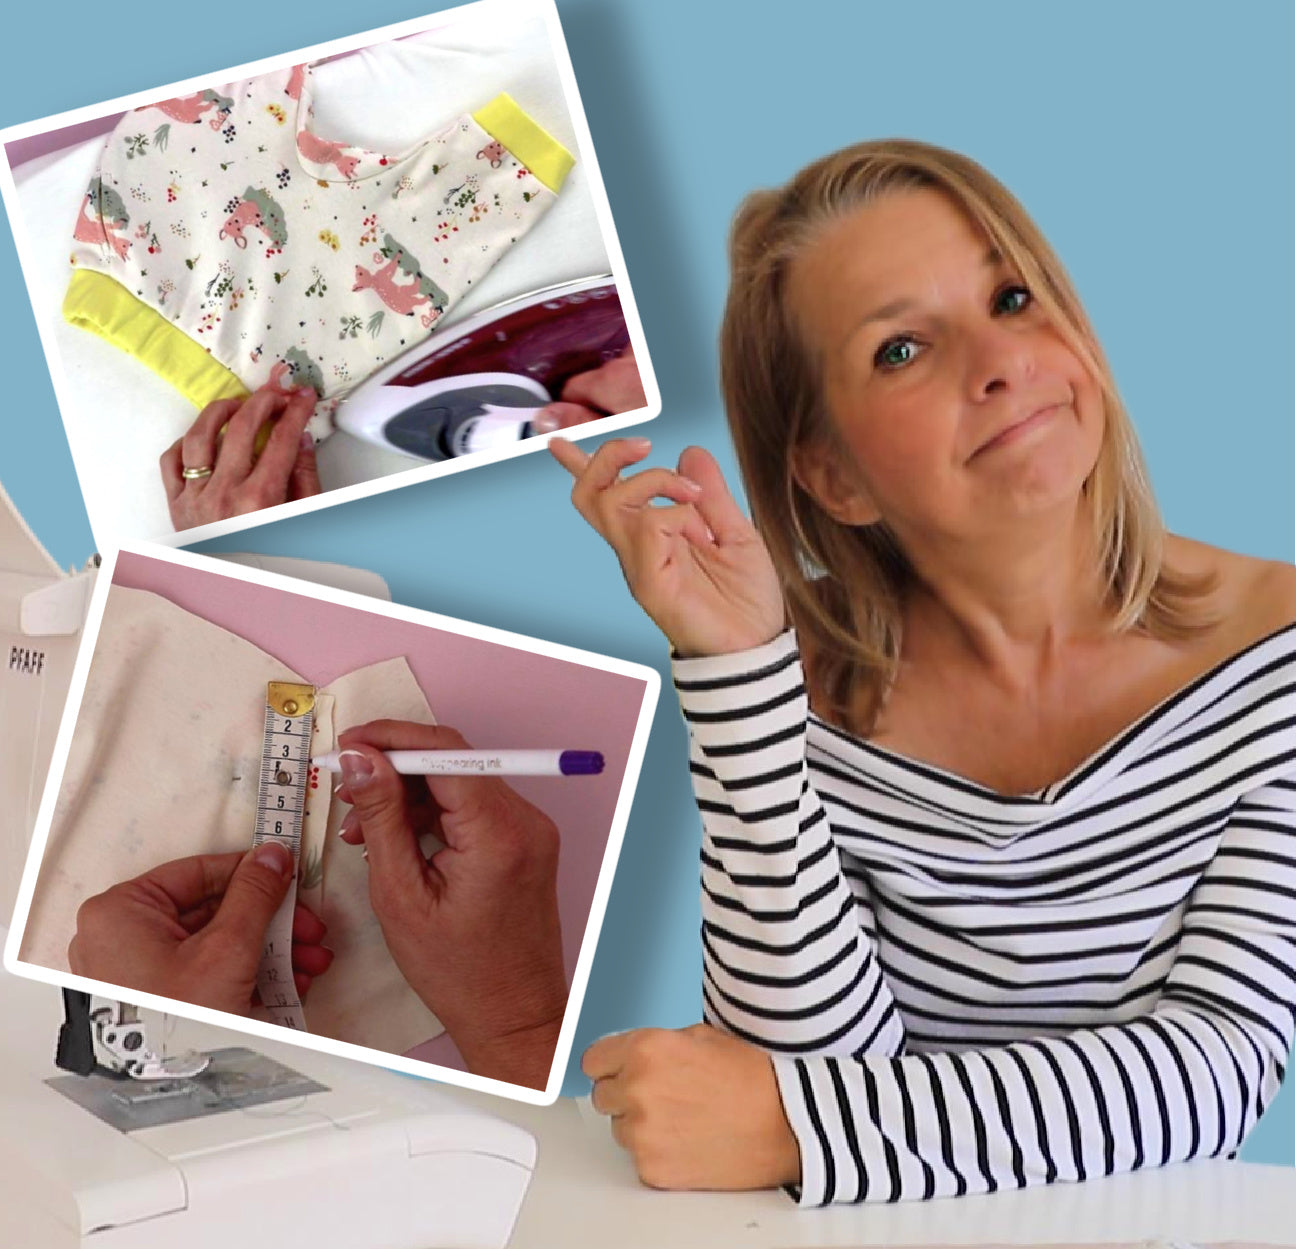
The baby pants sewing pattern comes with a step‑by‑step video guide to walk you through every stitch. Just scroll down a little — the tutorials are right where you need them.
A happy little project for digital sewing days, and a firm favourite for tiny tumblers everywhere.
Pattern Download Includes
Pattern Download Includes
Design Options
Design Options
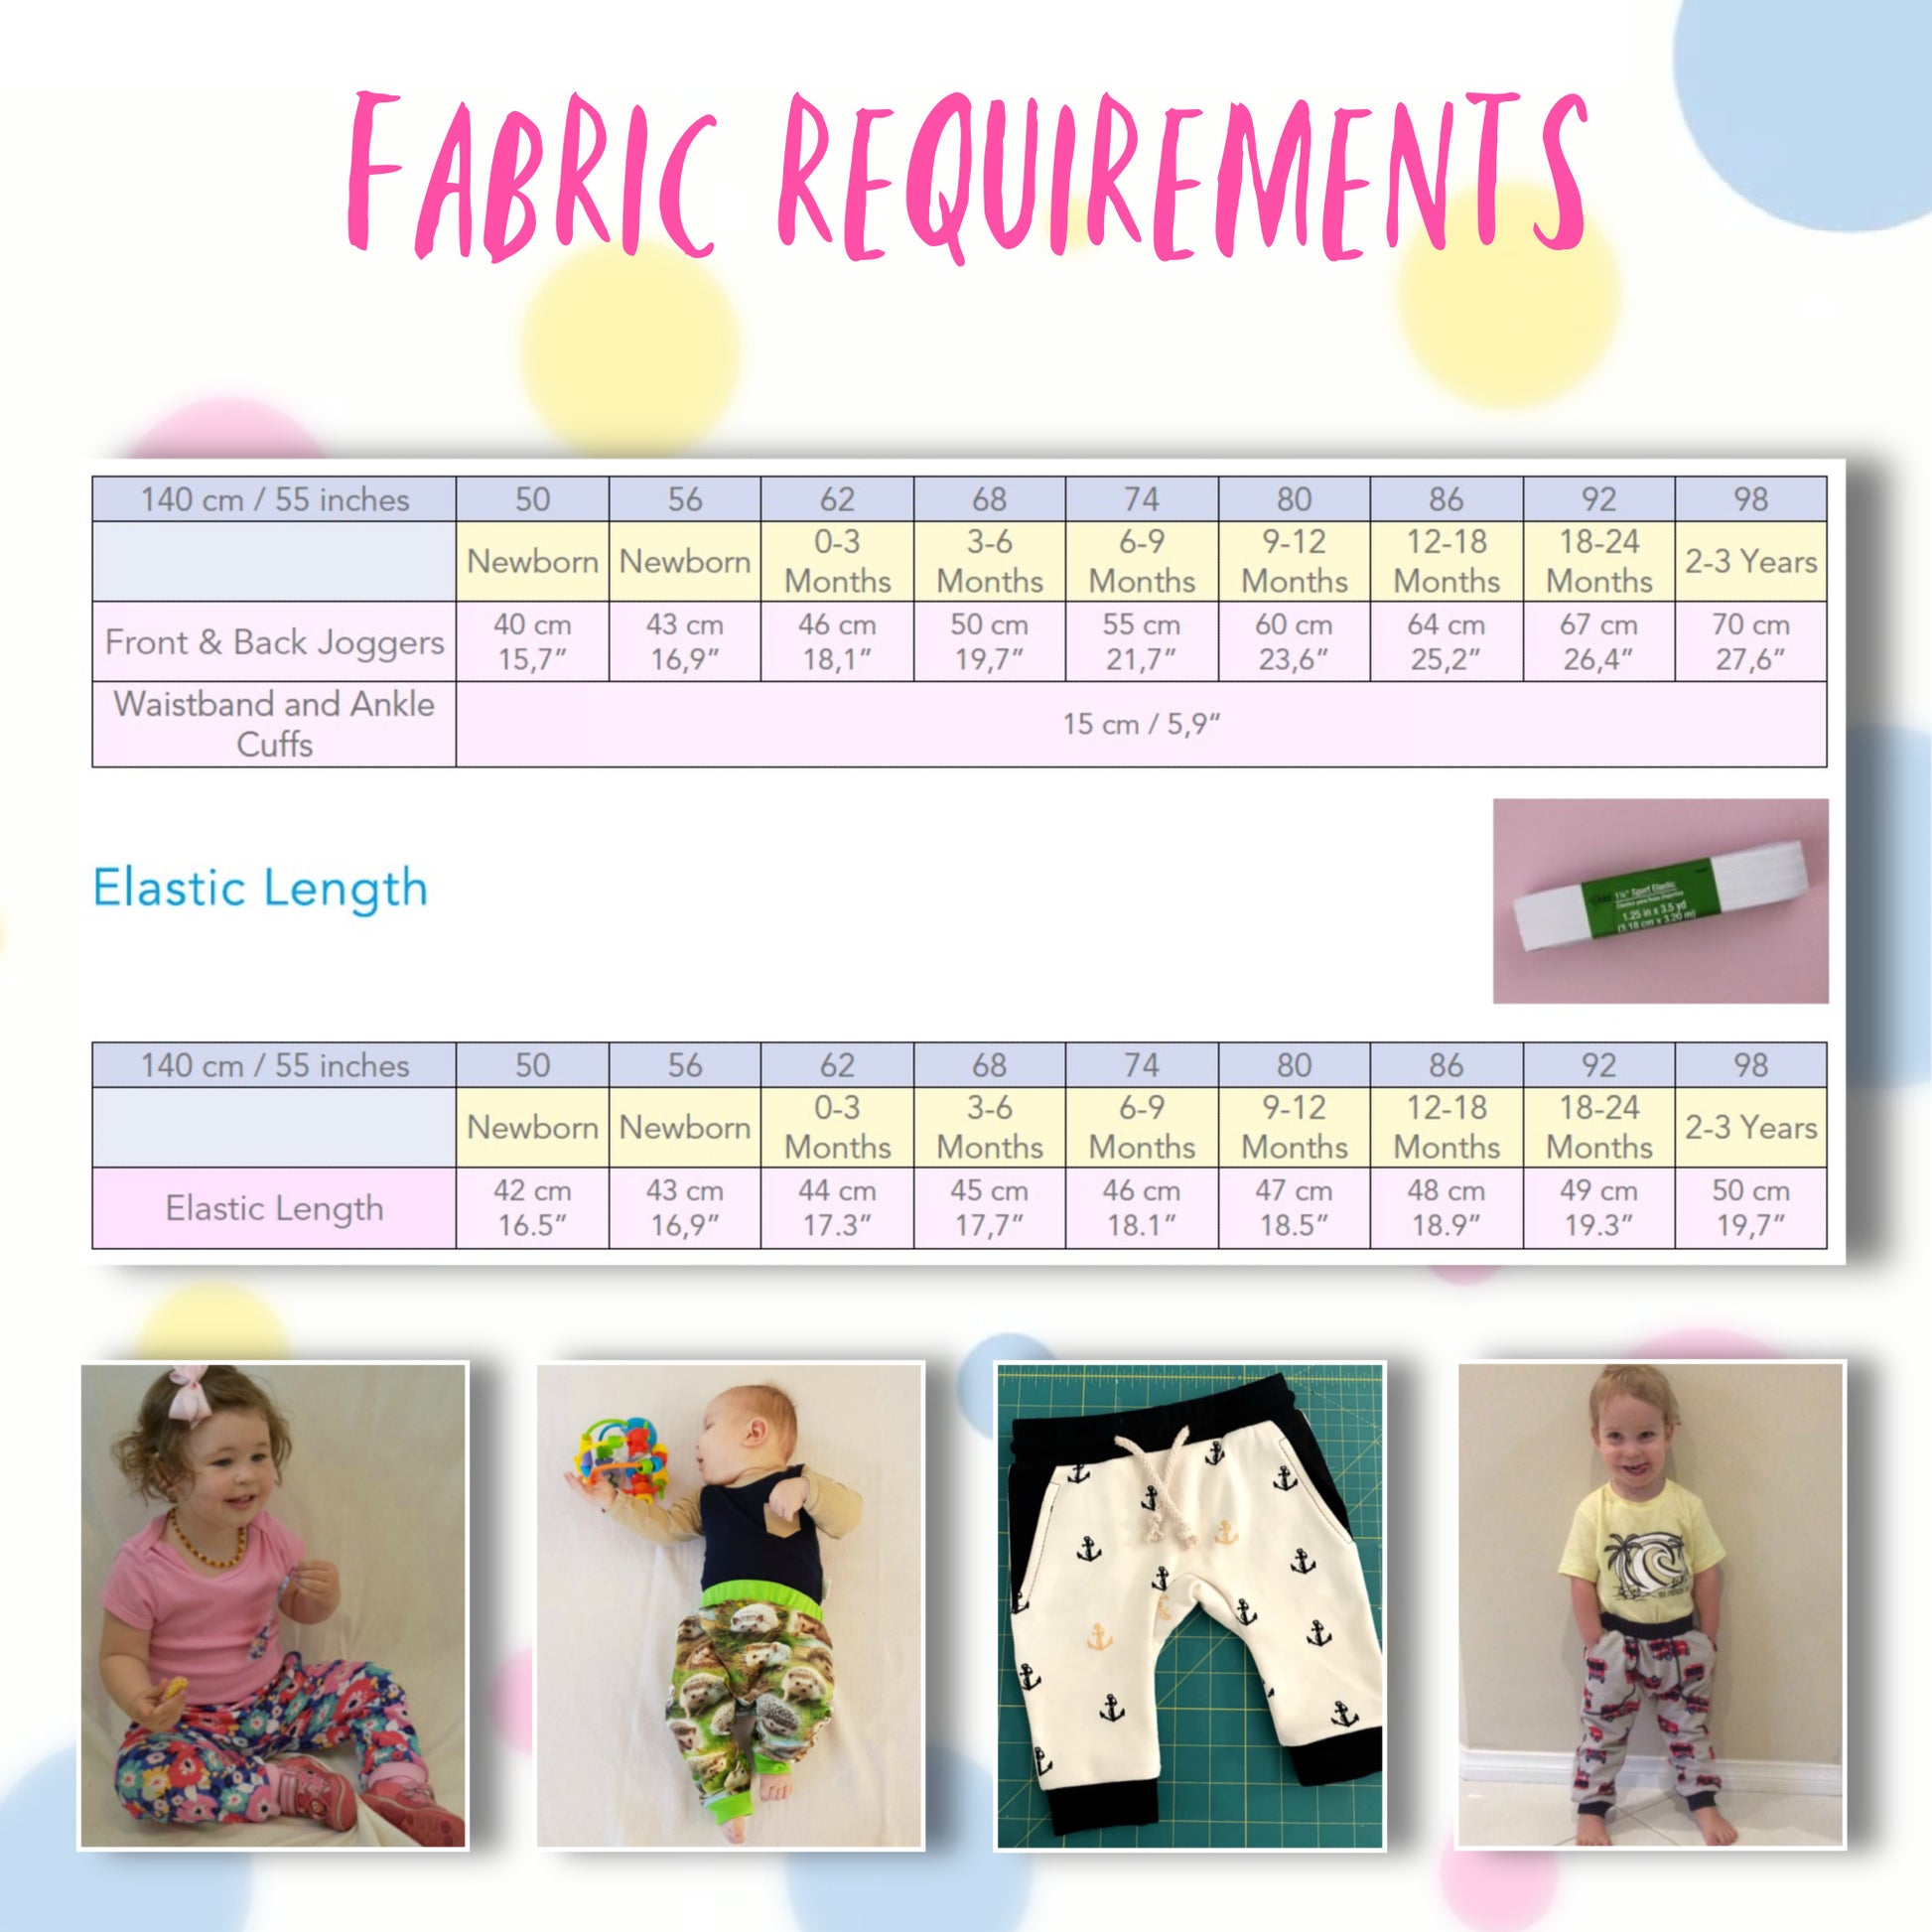
Fabric Requirements
Fabric Requirements
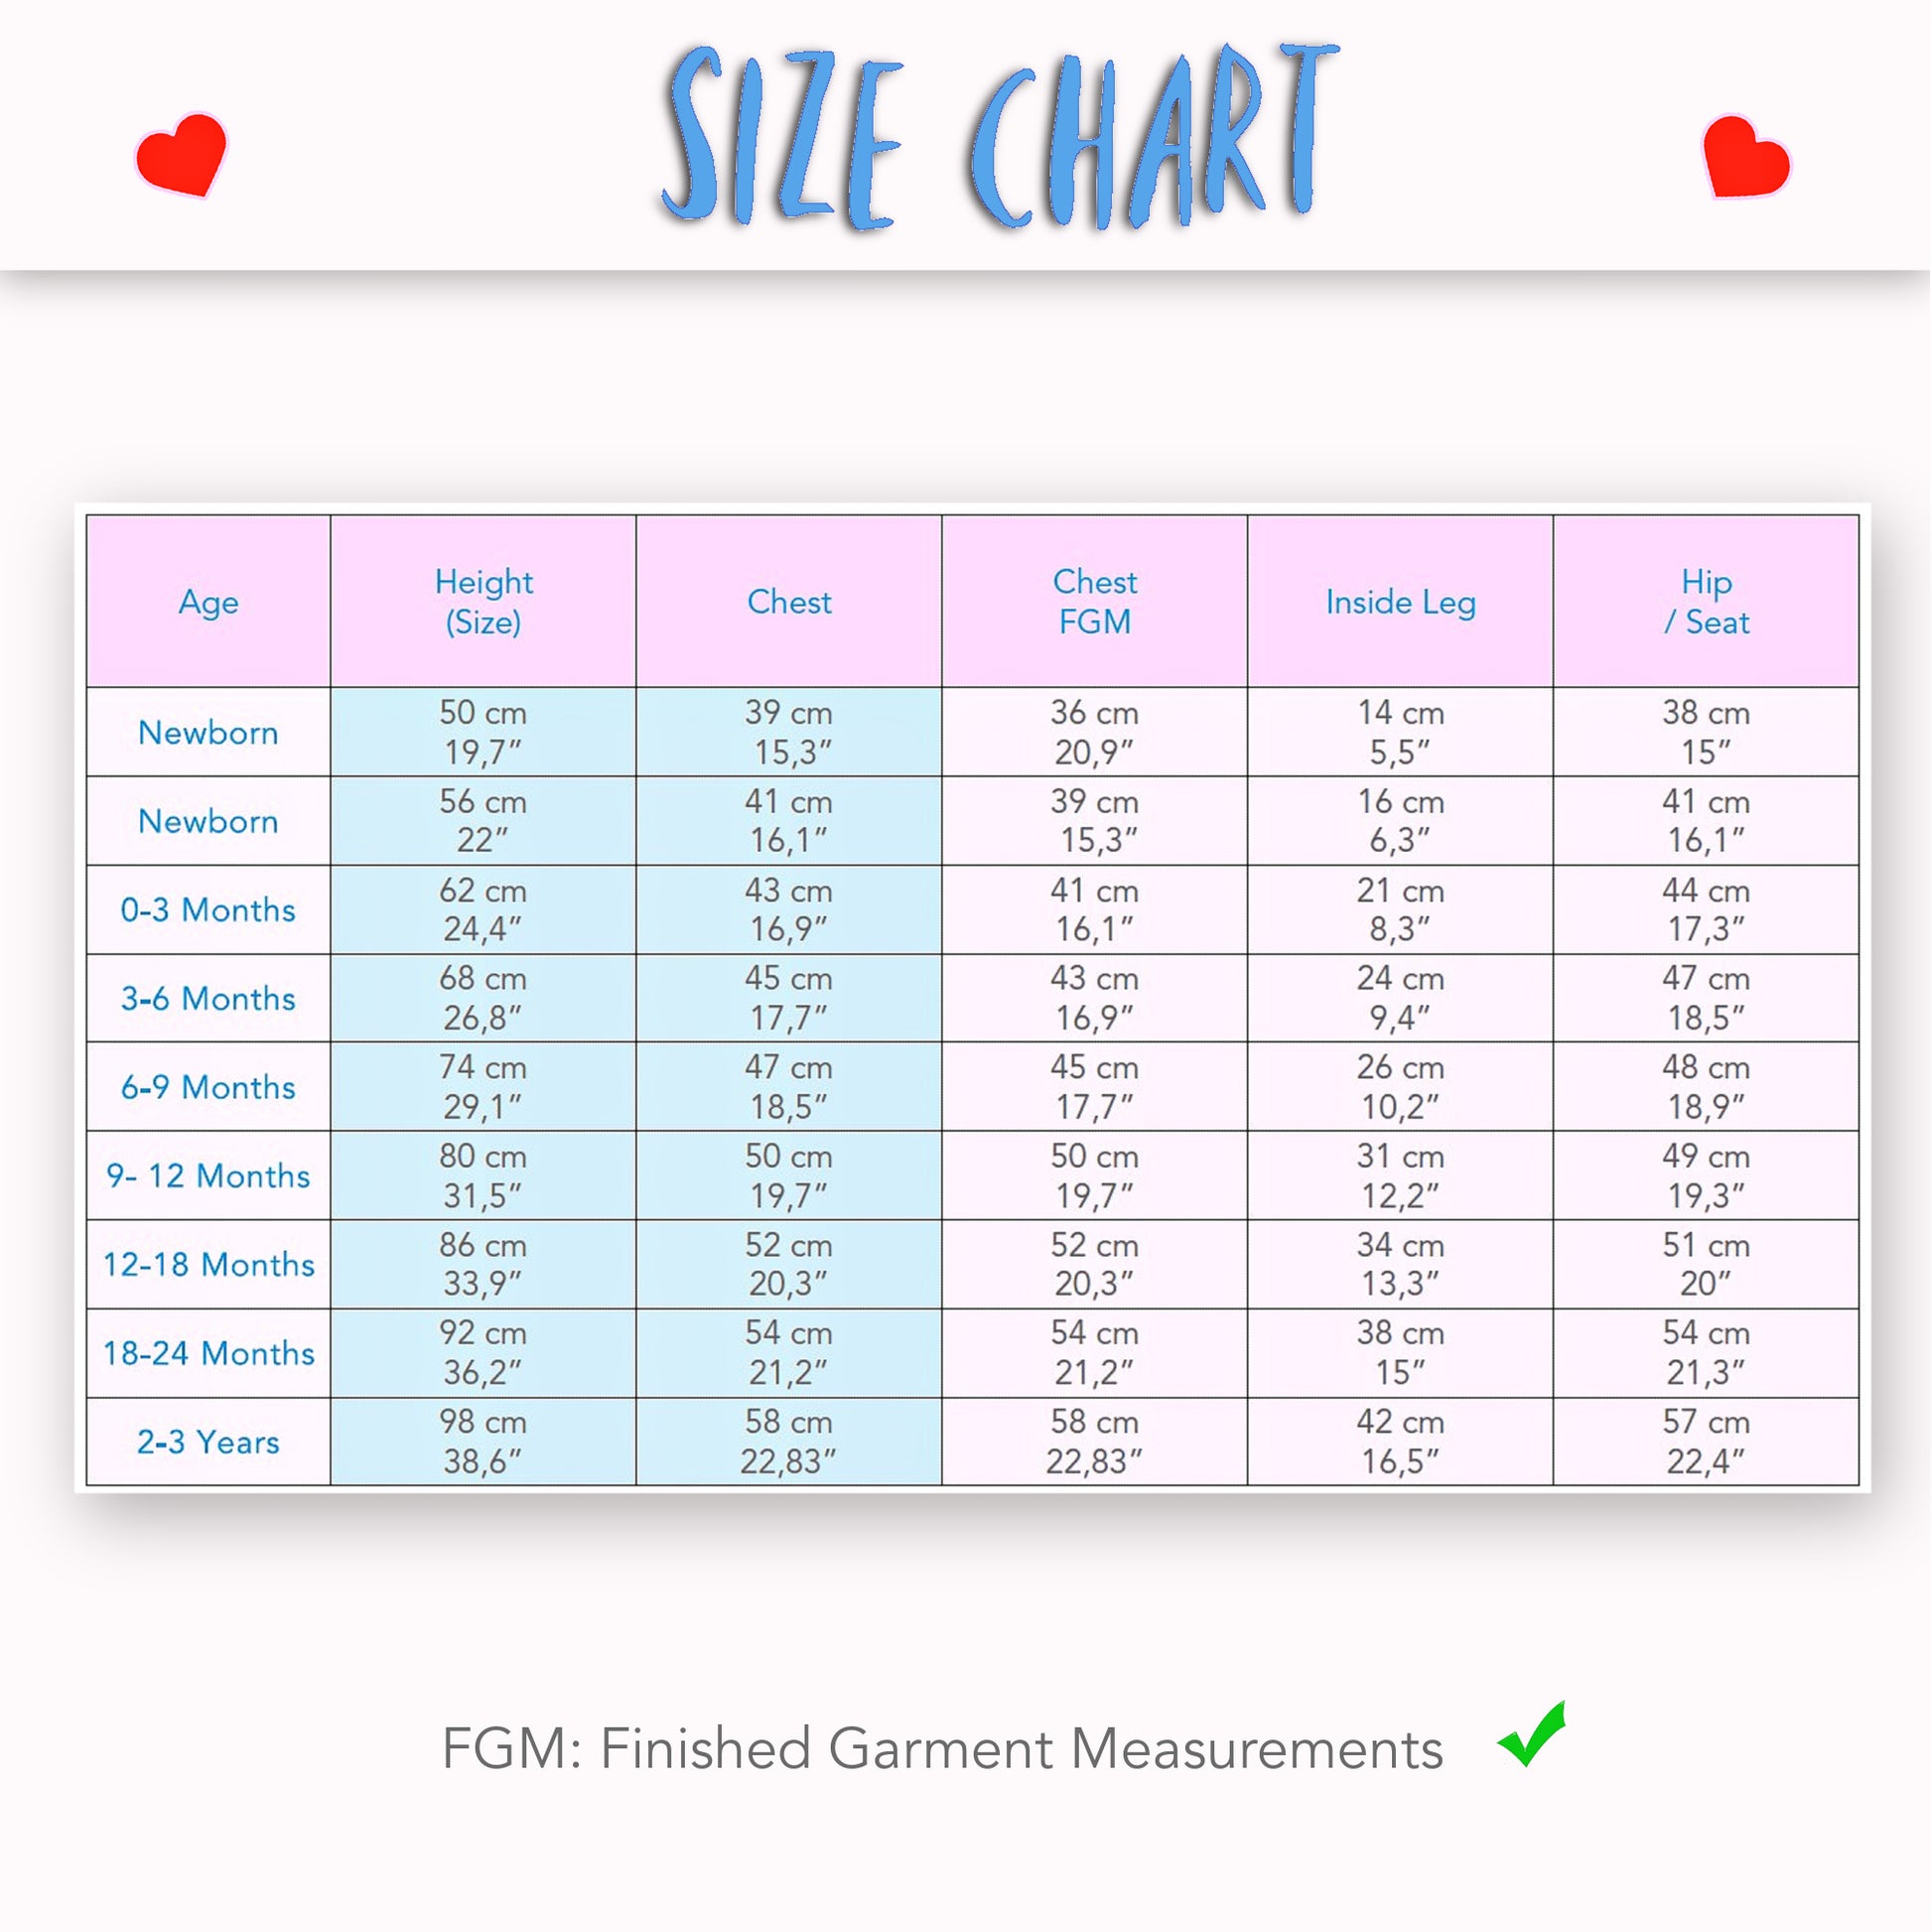
Available Sizes
Available Sizes
Please Read
Please Read


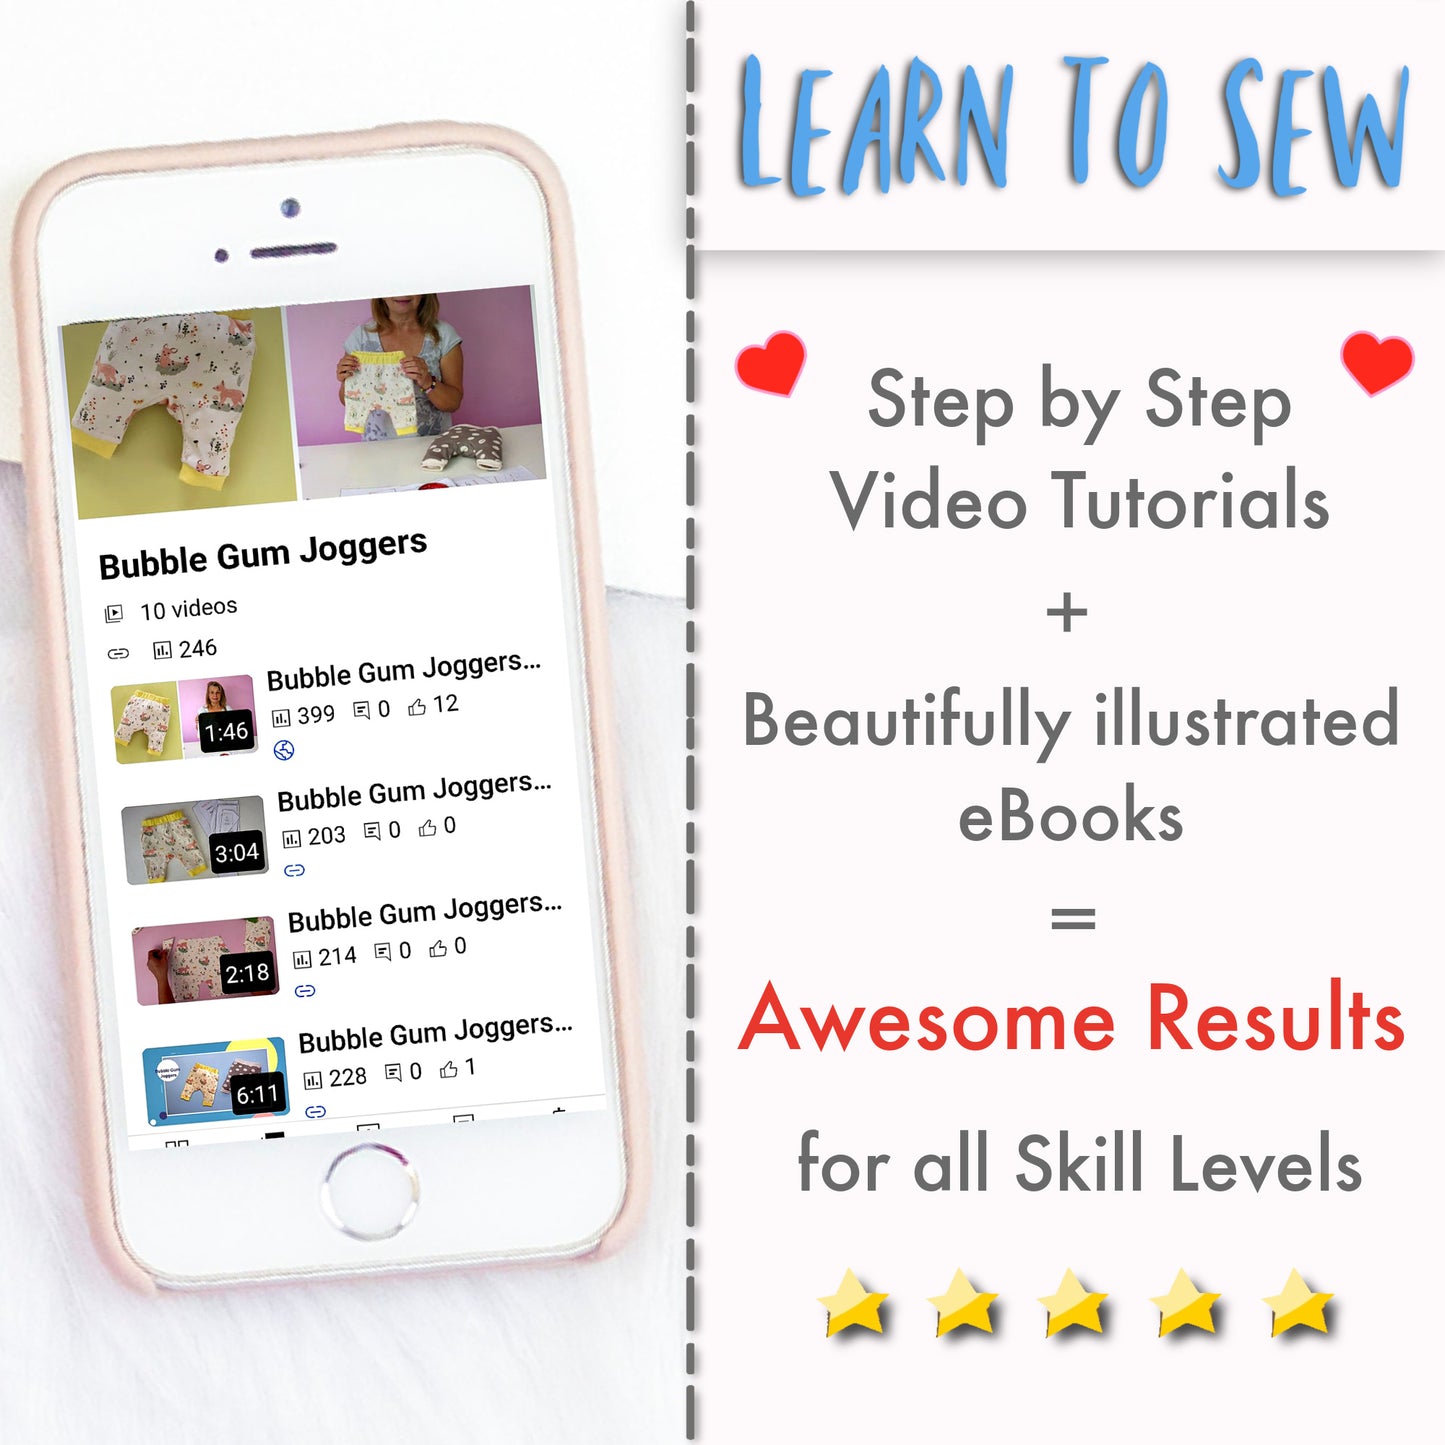


STEP-BY-STEP VIDEO TUTORIALS
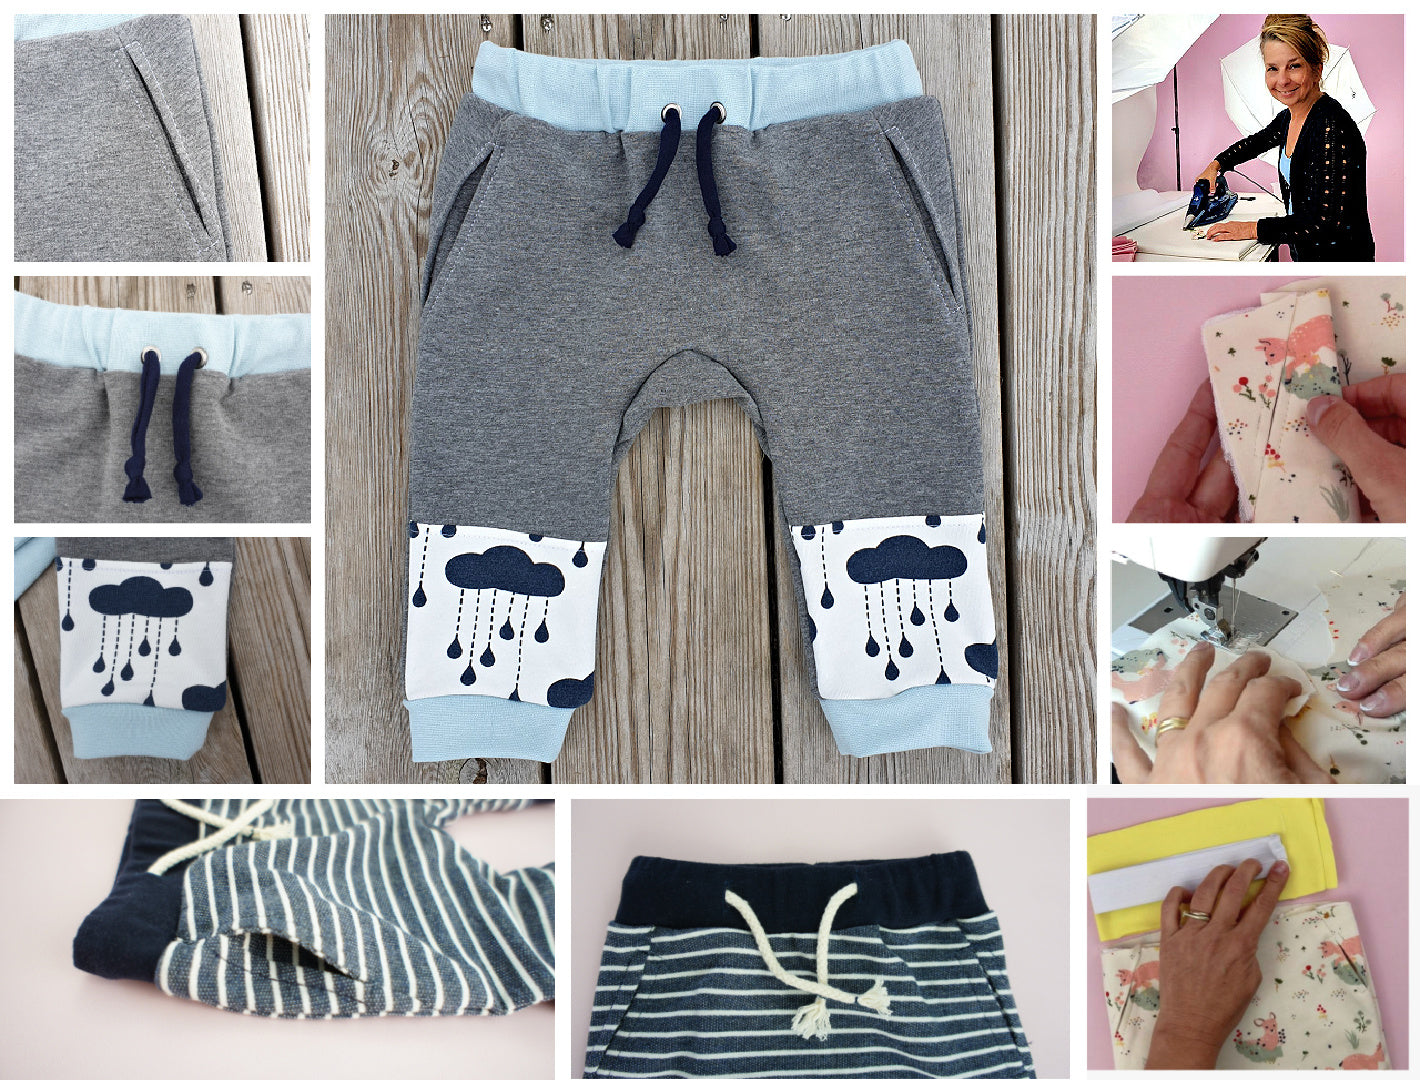
BUBBLE GUM JOGGERS: INTRODUCTION TO THE PROJECT

THE PATTERN

CUTTING OUT

THE POCKETS

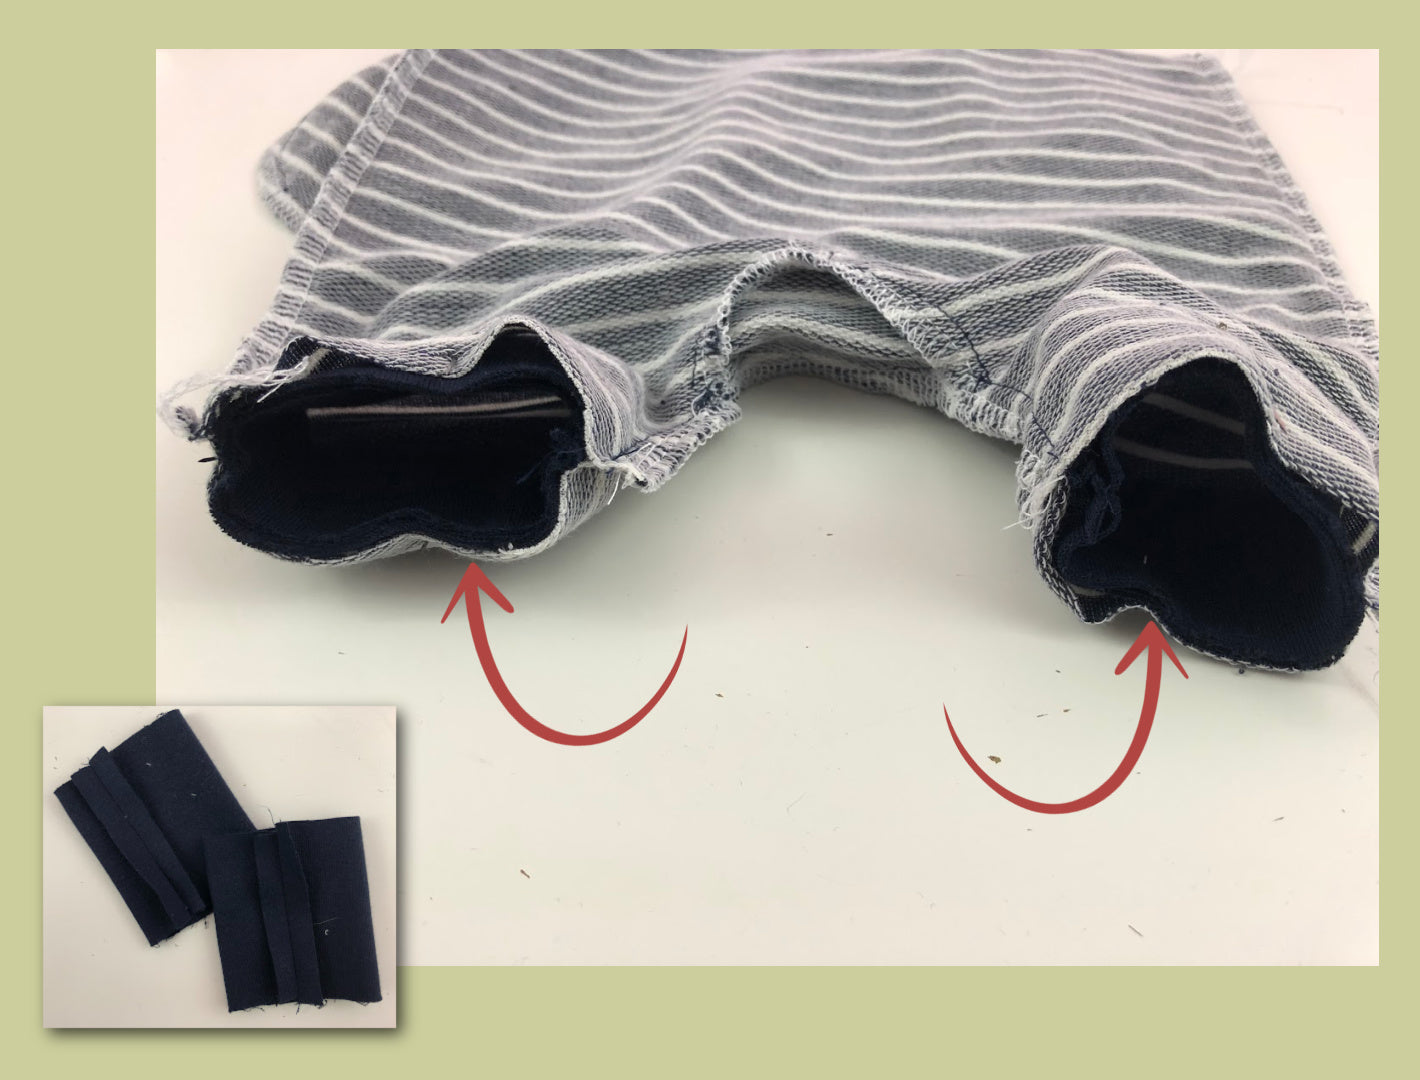
GUSSET

INNER LEG SEAM

SIDE SEAMS

WAISTBAND
ANKLE CUFFS

