Skip to product information
1 of 43

VINTAGE BUNDLE

VINTAGE BUNDLE

Filled Circle
Filled Circle
Filled Circle
Empty Circle
Empty Circle
Regular price $45.00 USD
Regular price $80.00 USD Sale price $45.00 USD
Sale Sold out

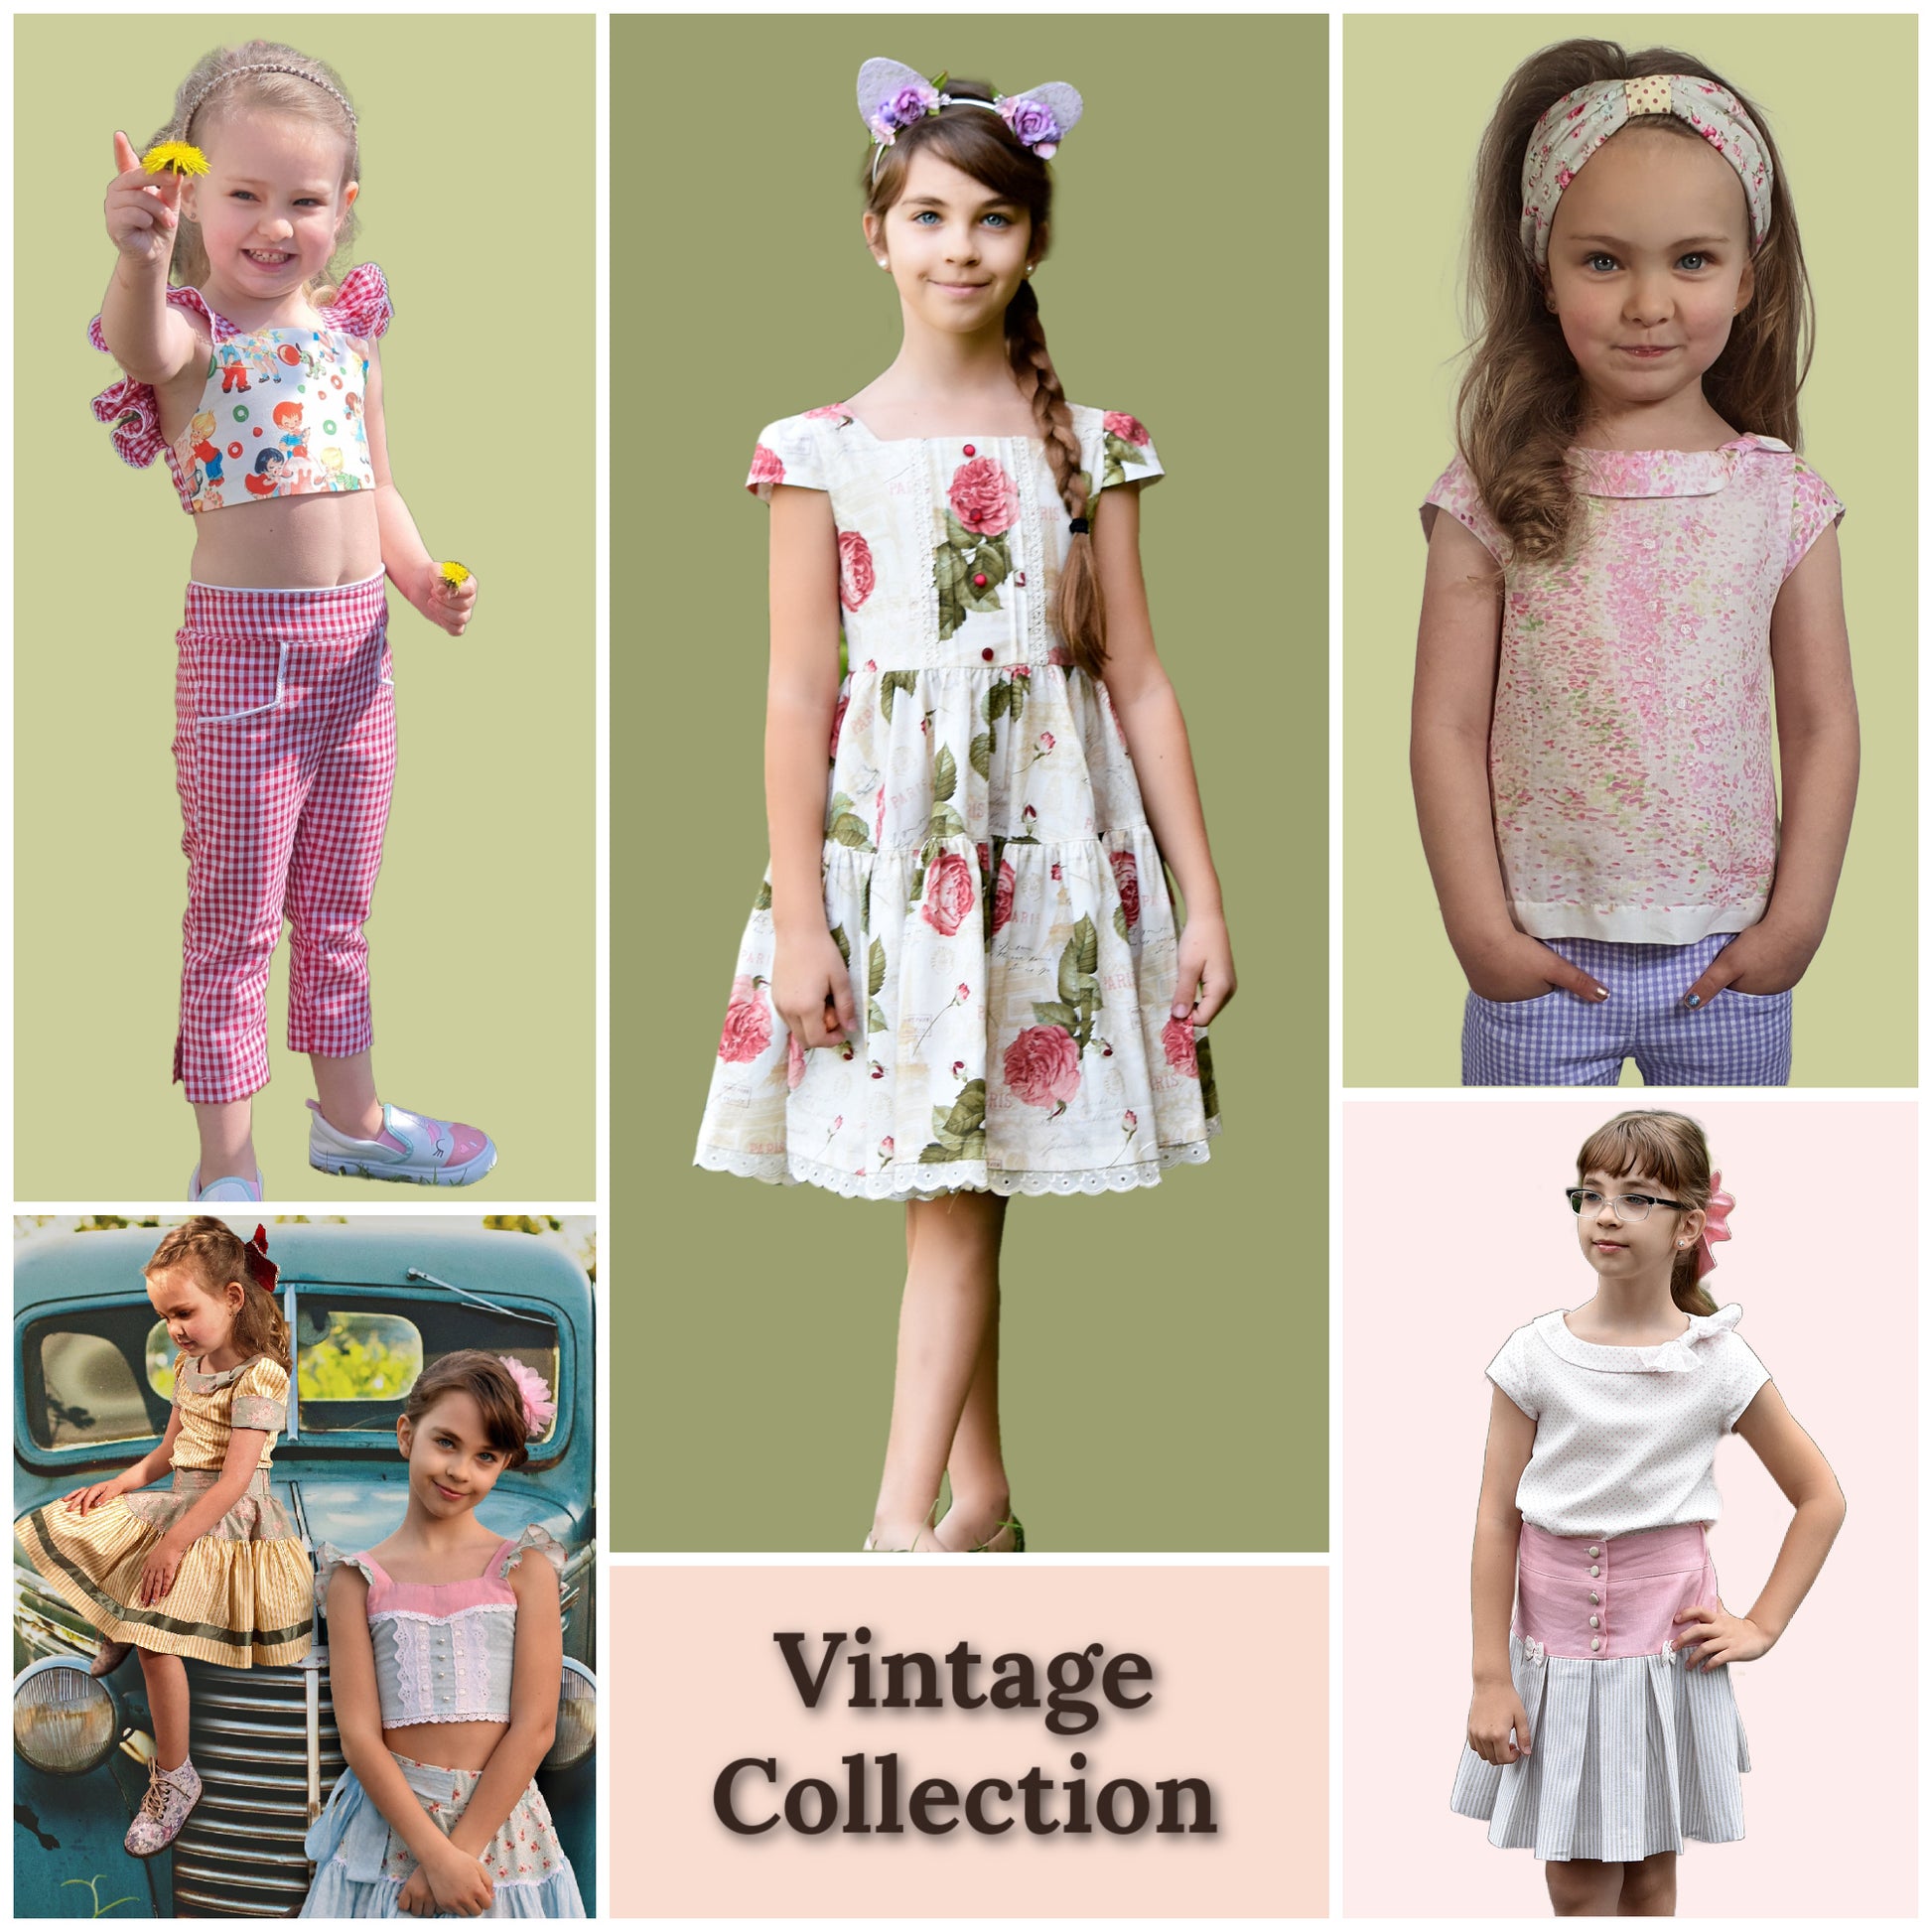
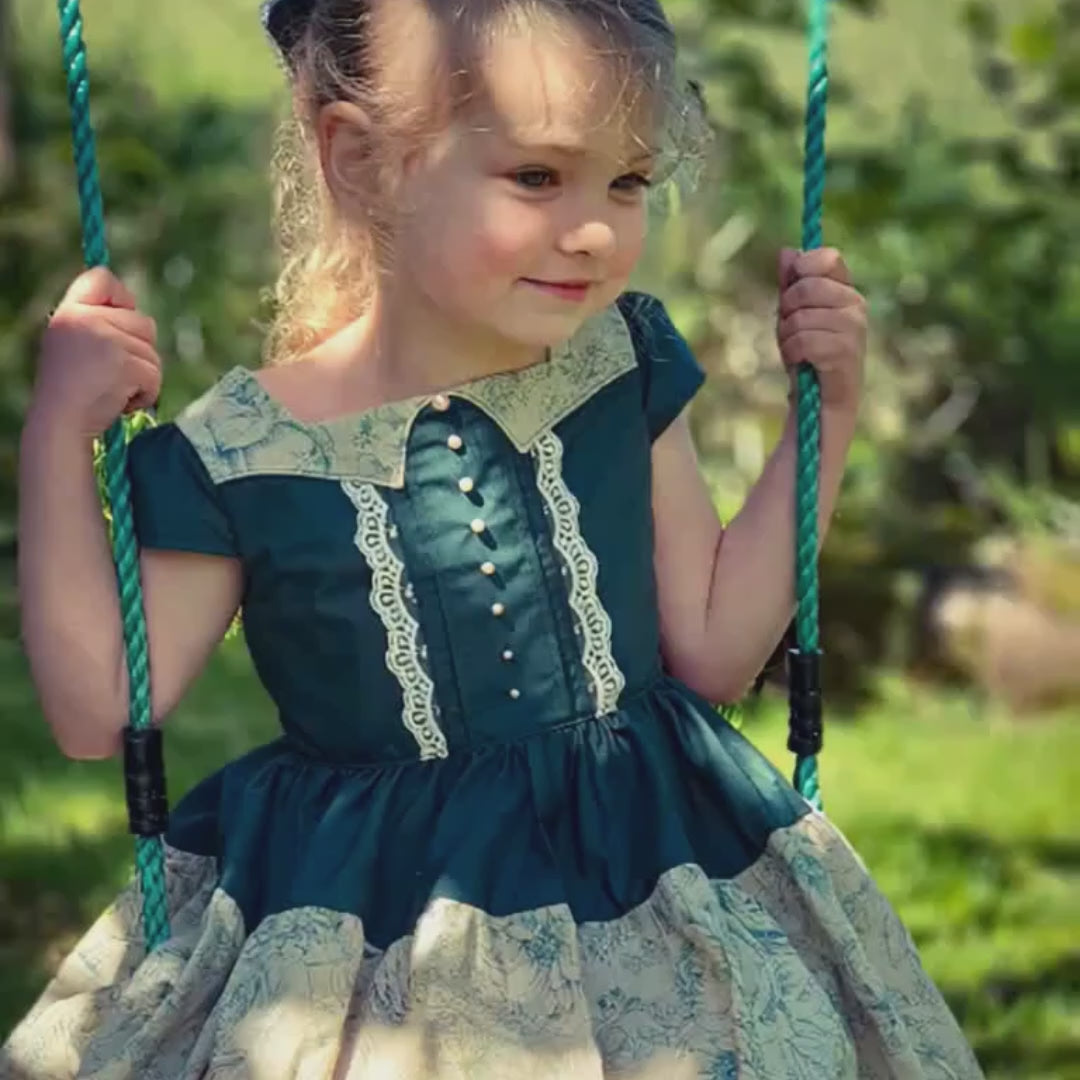
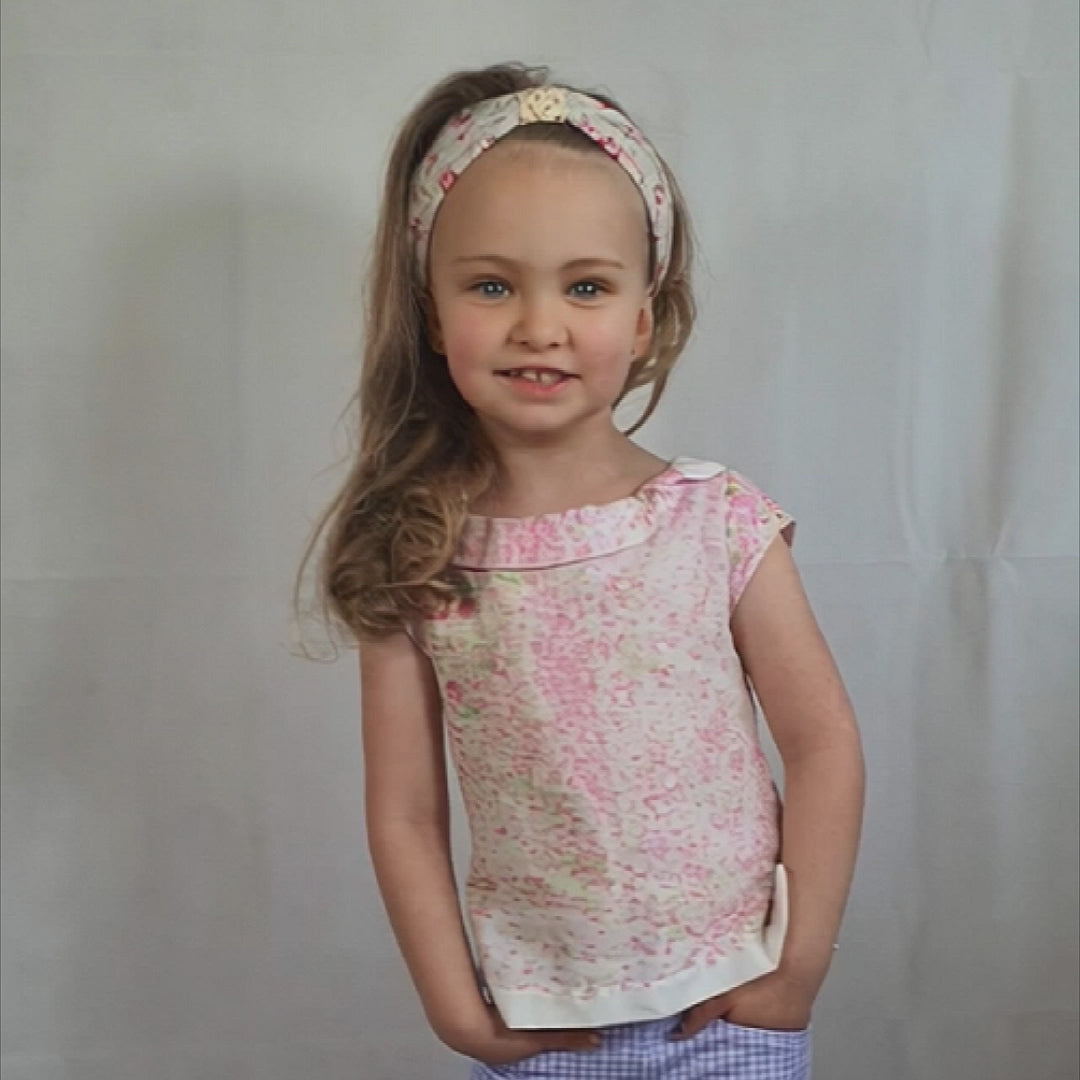
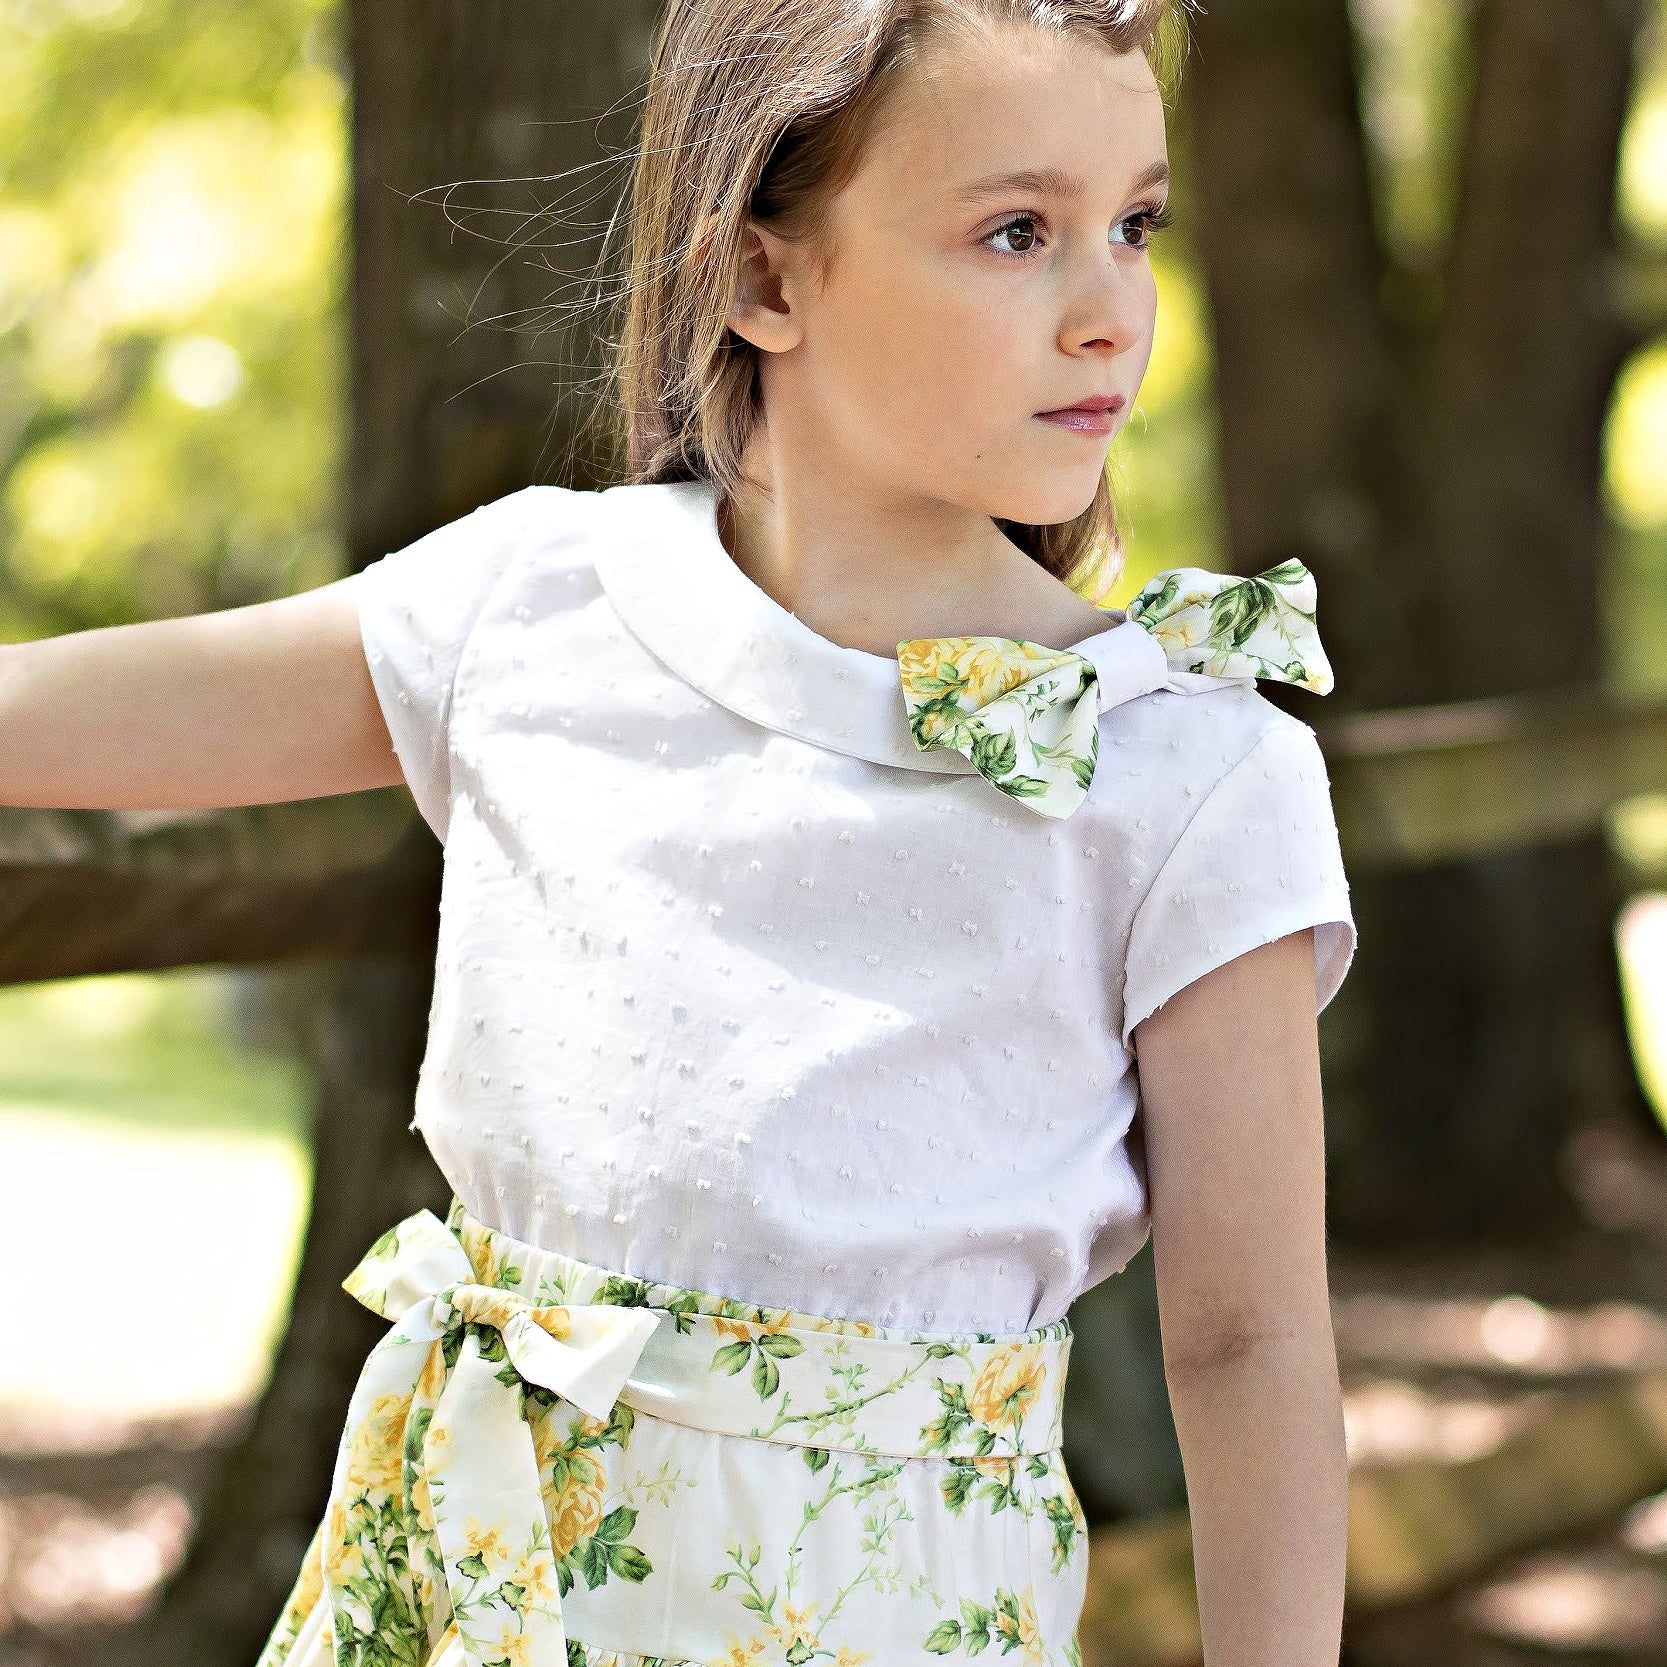
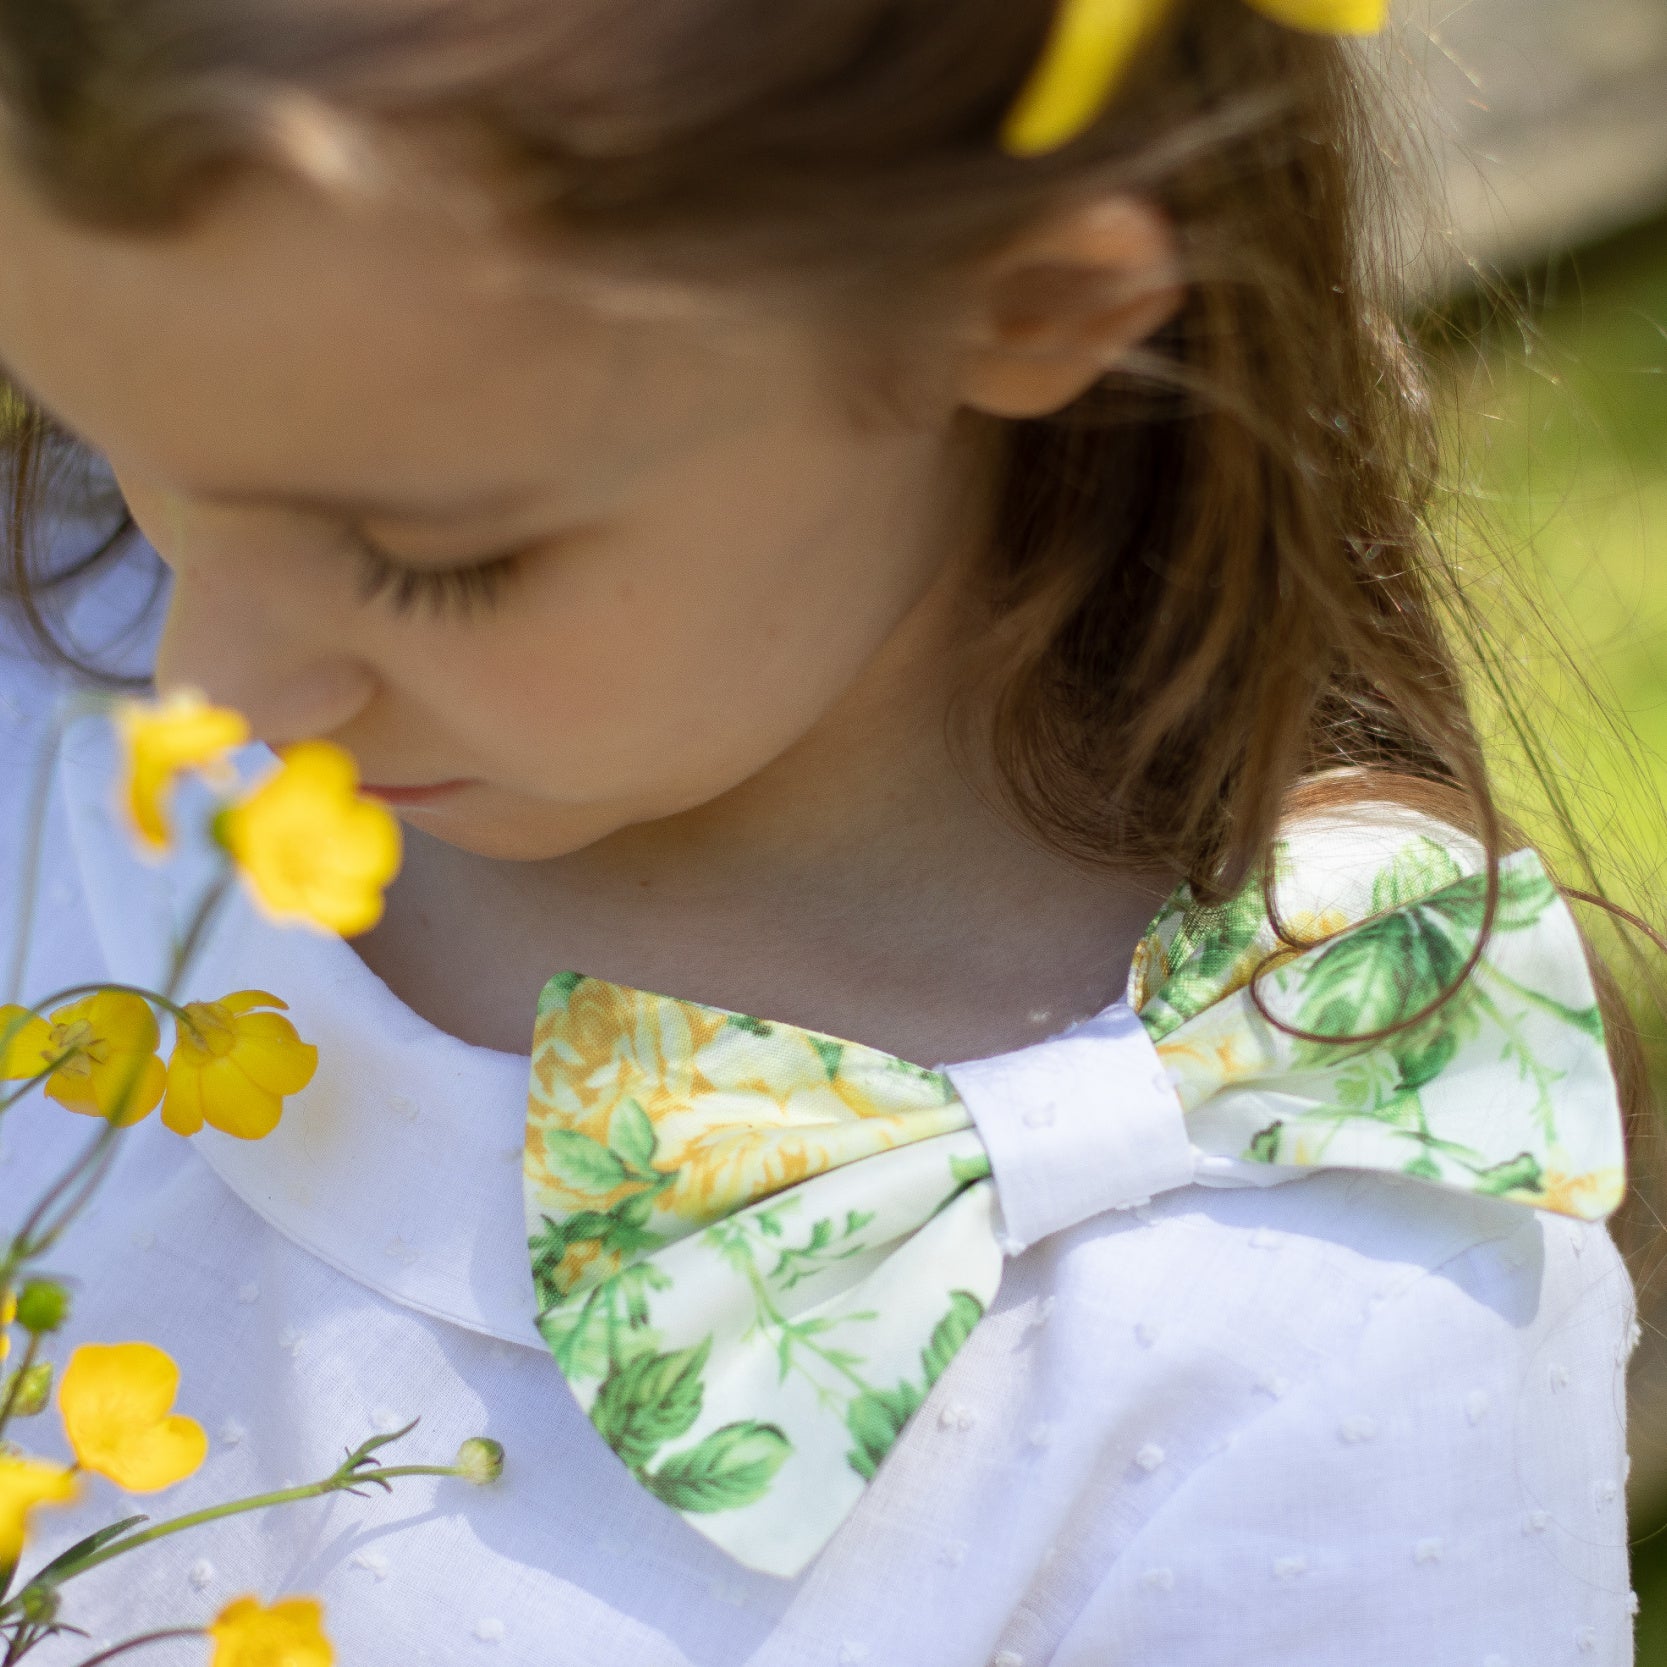
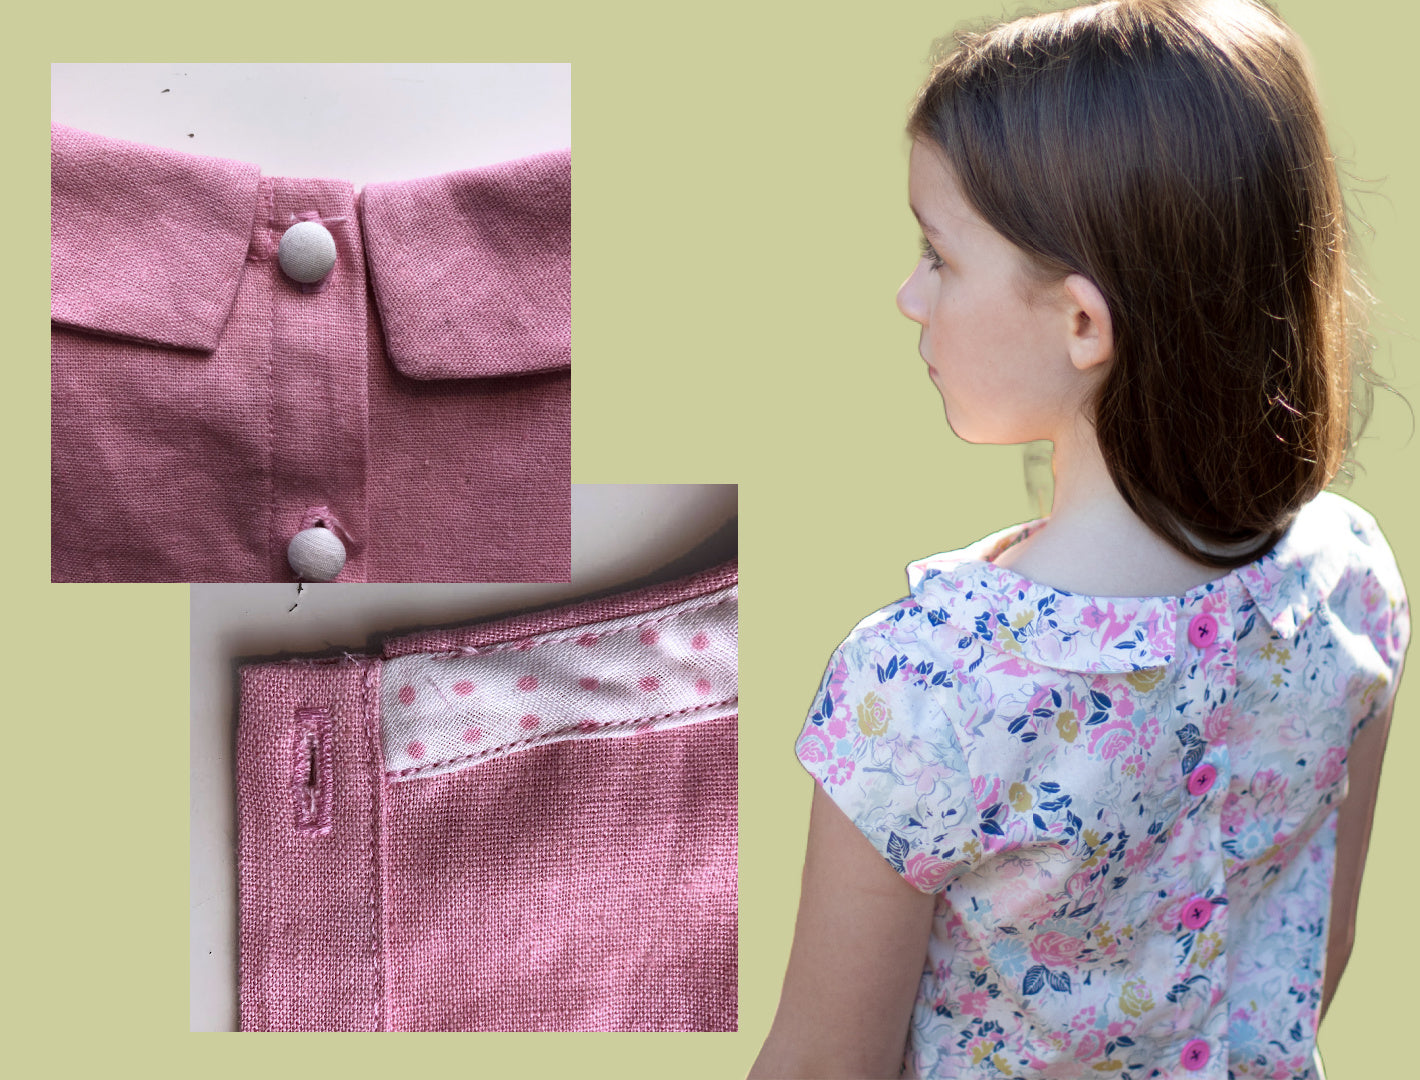
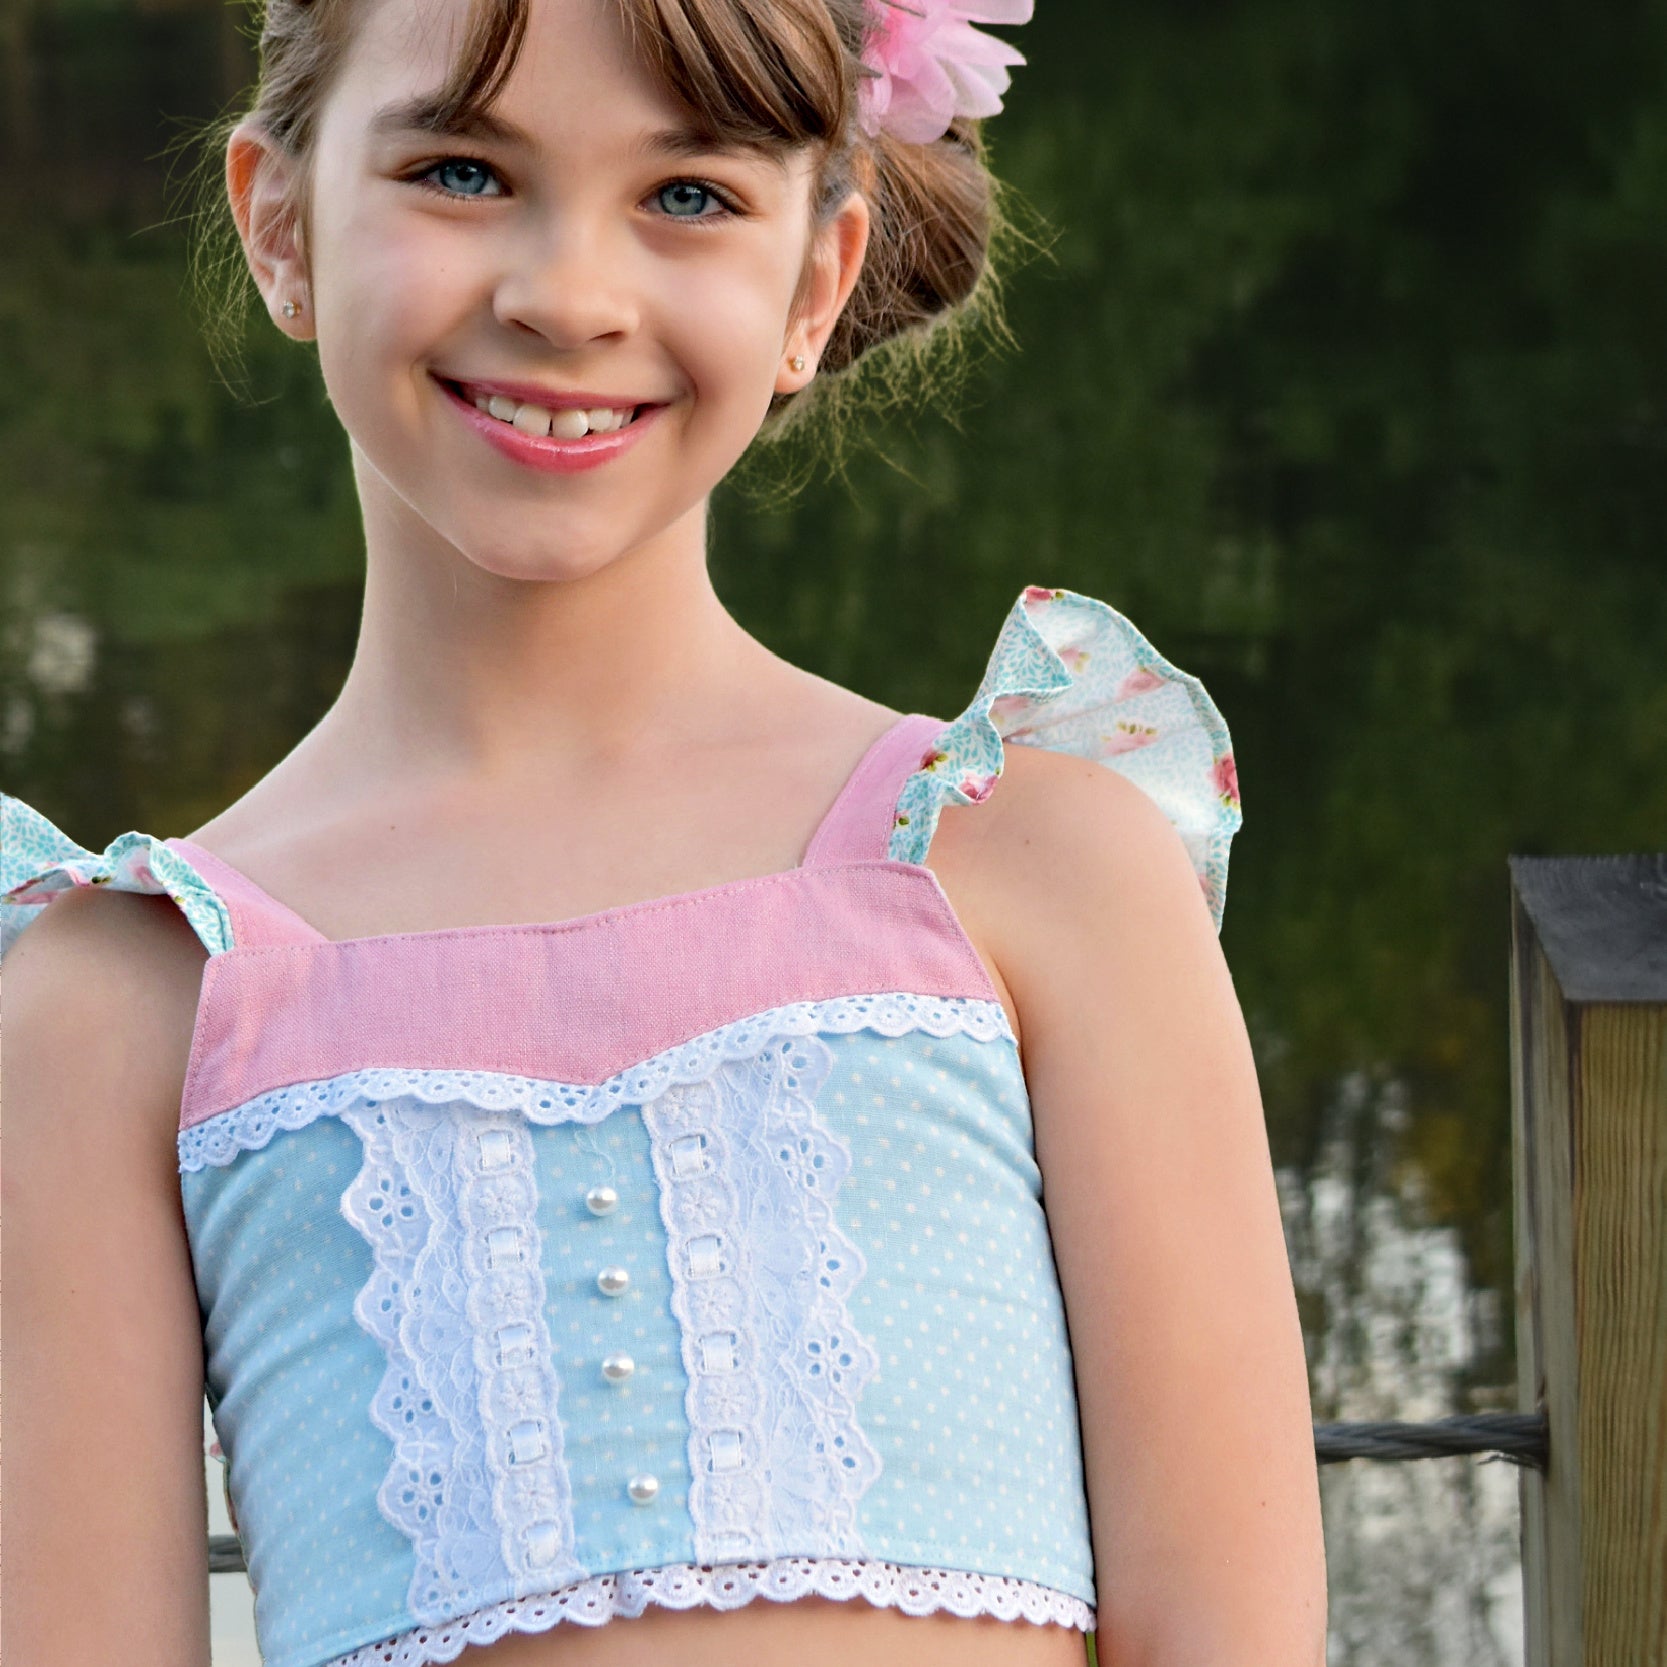
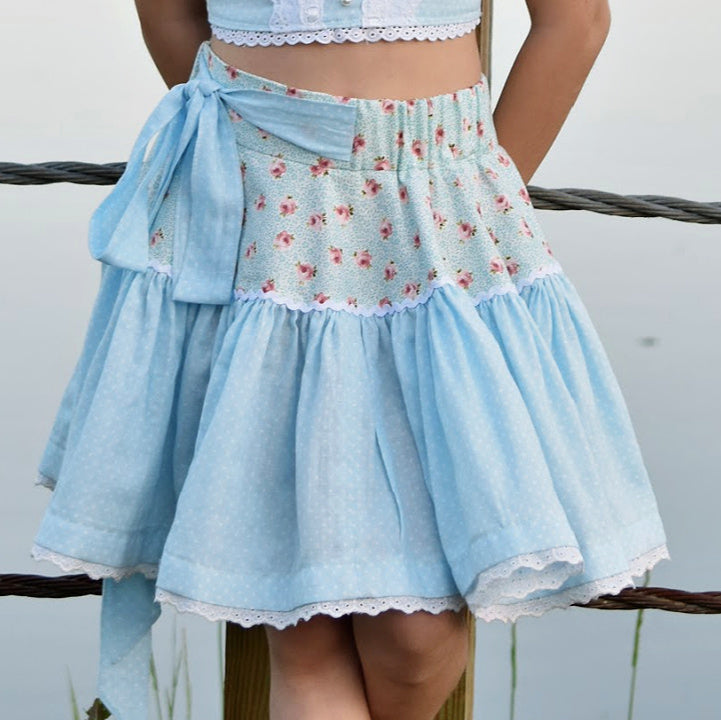
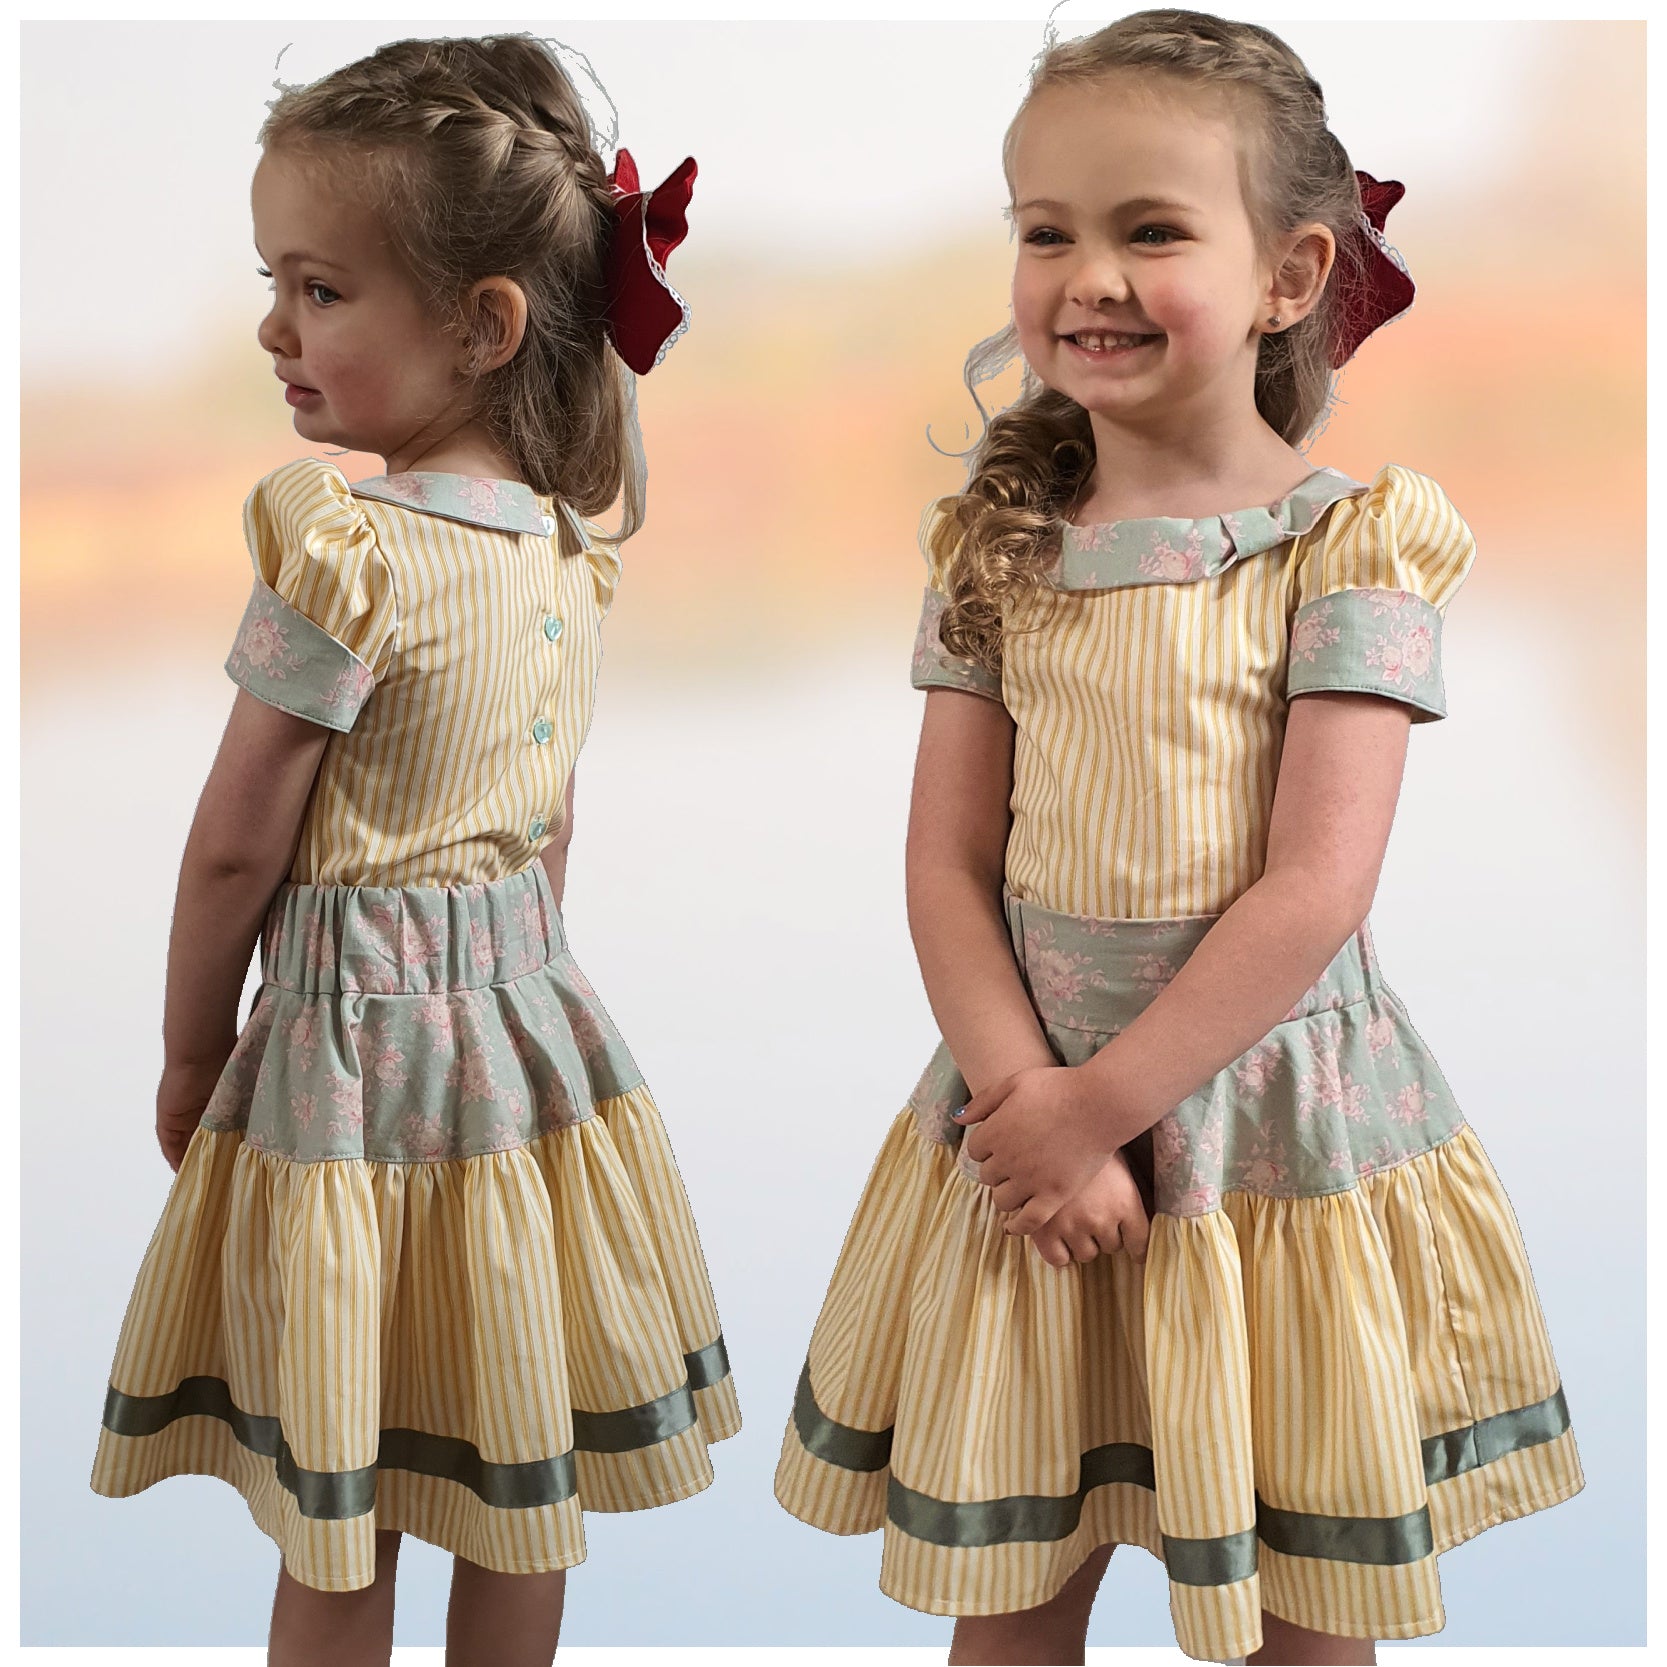
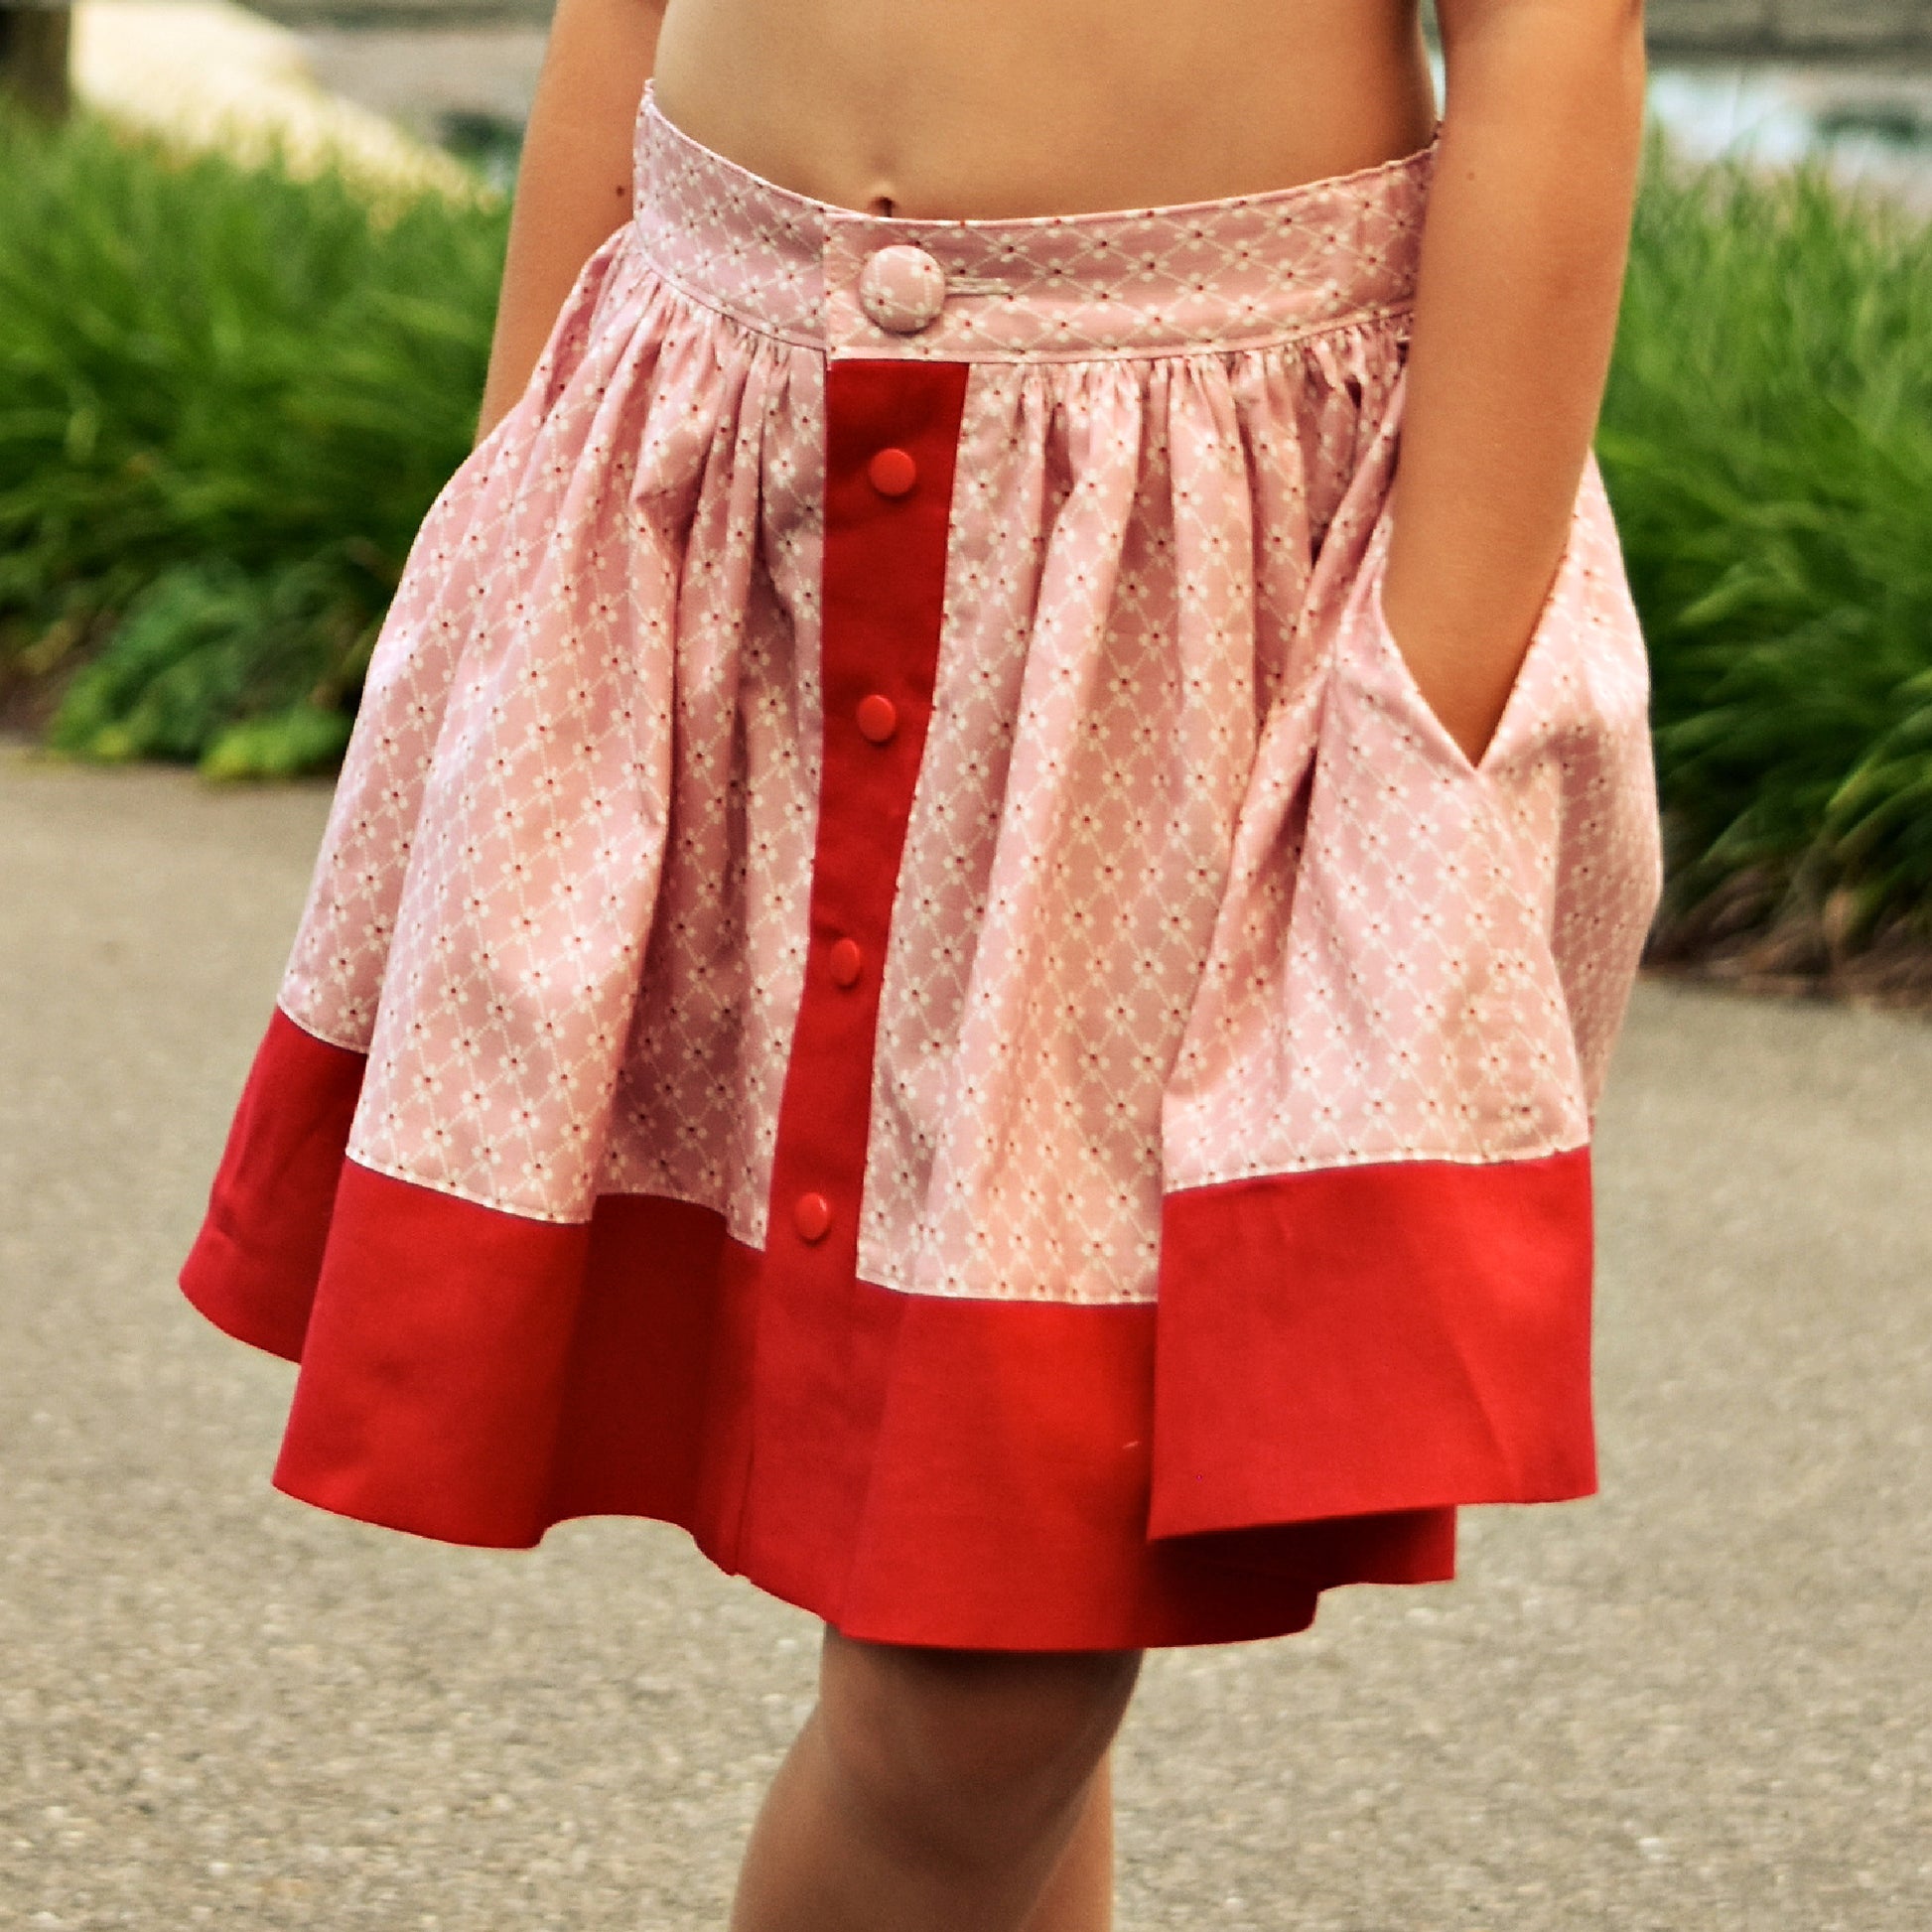
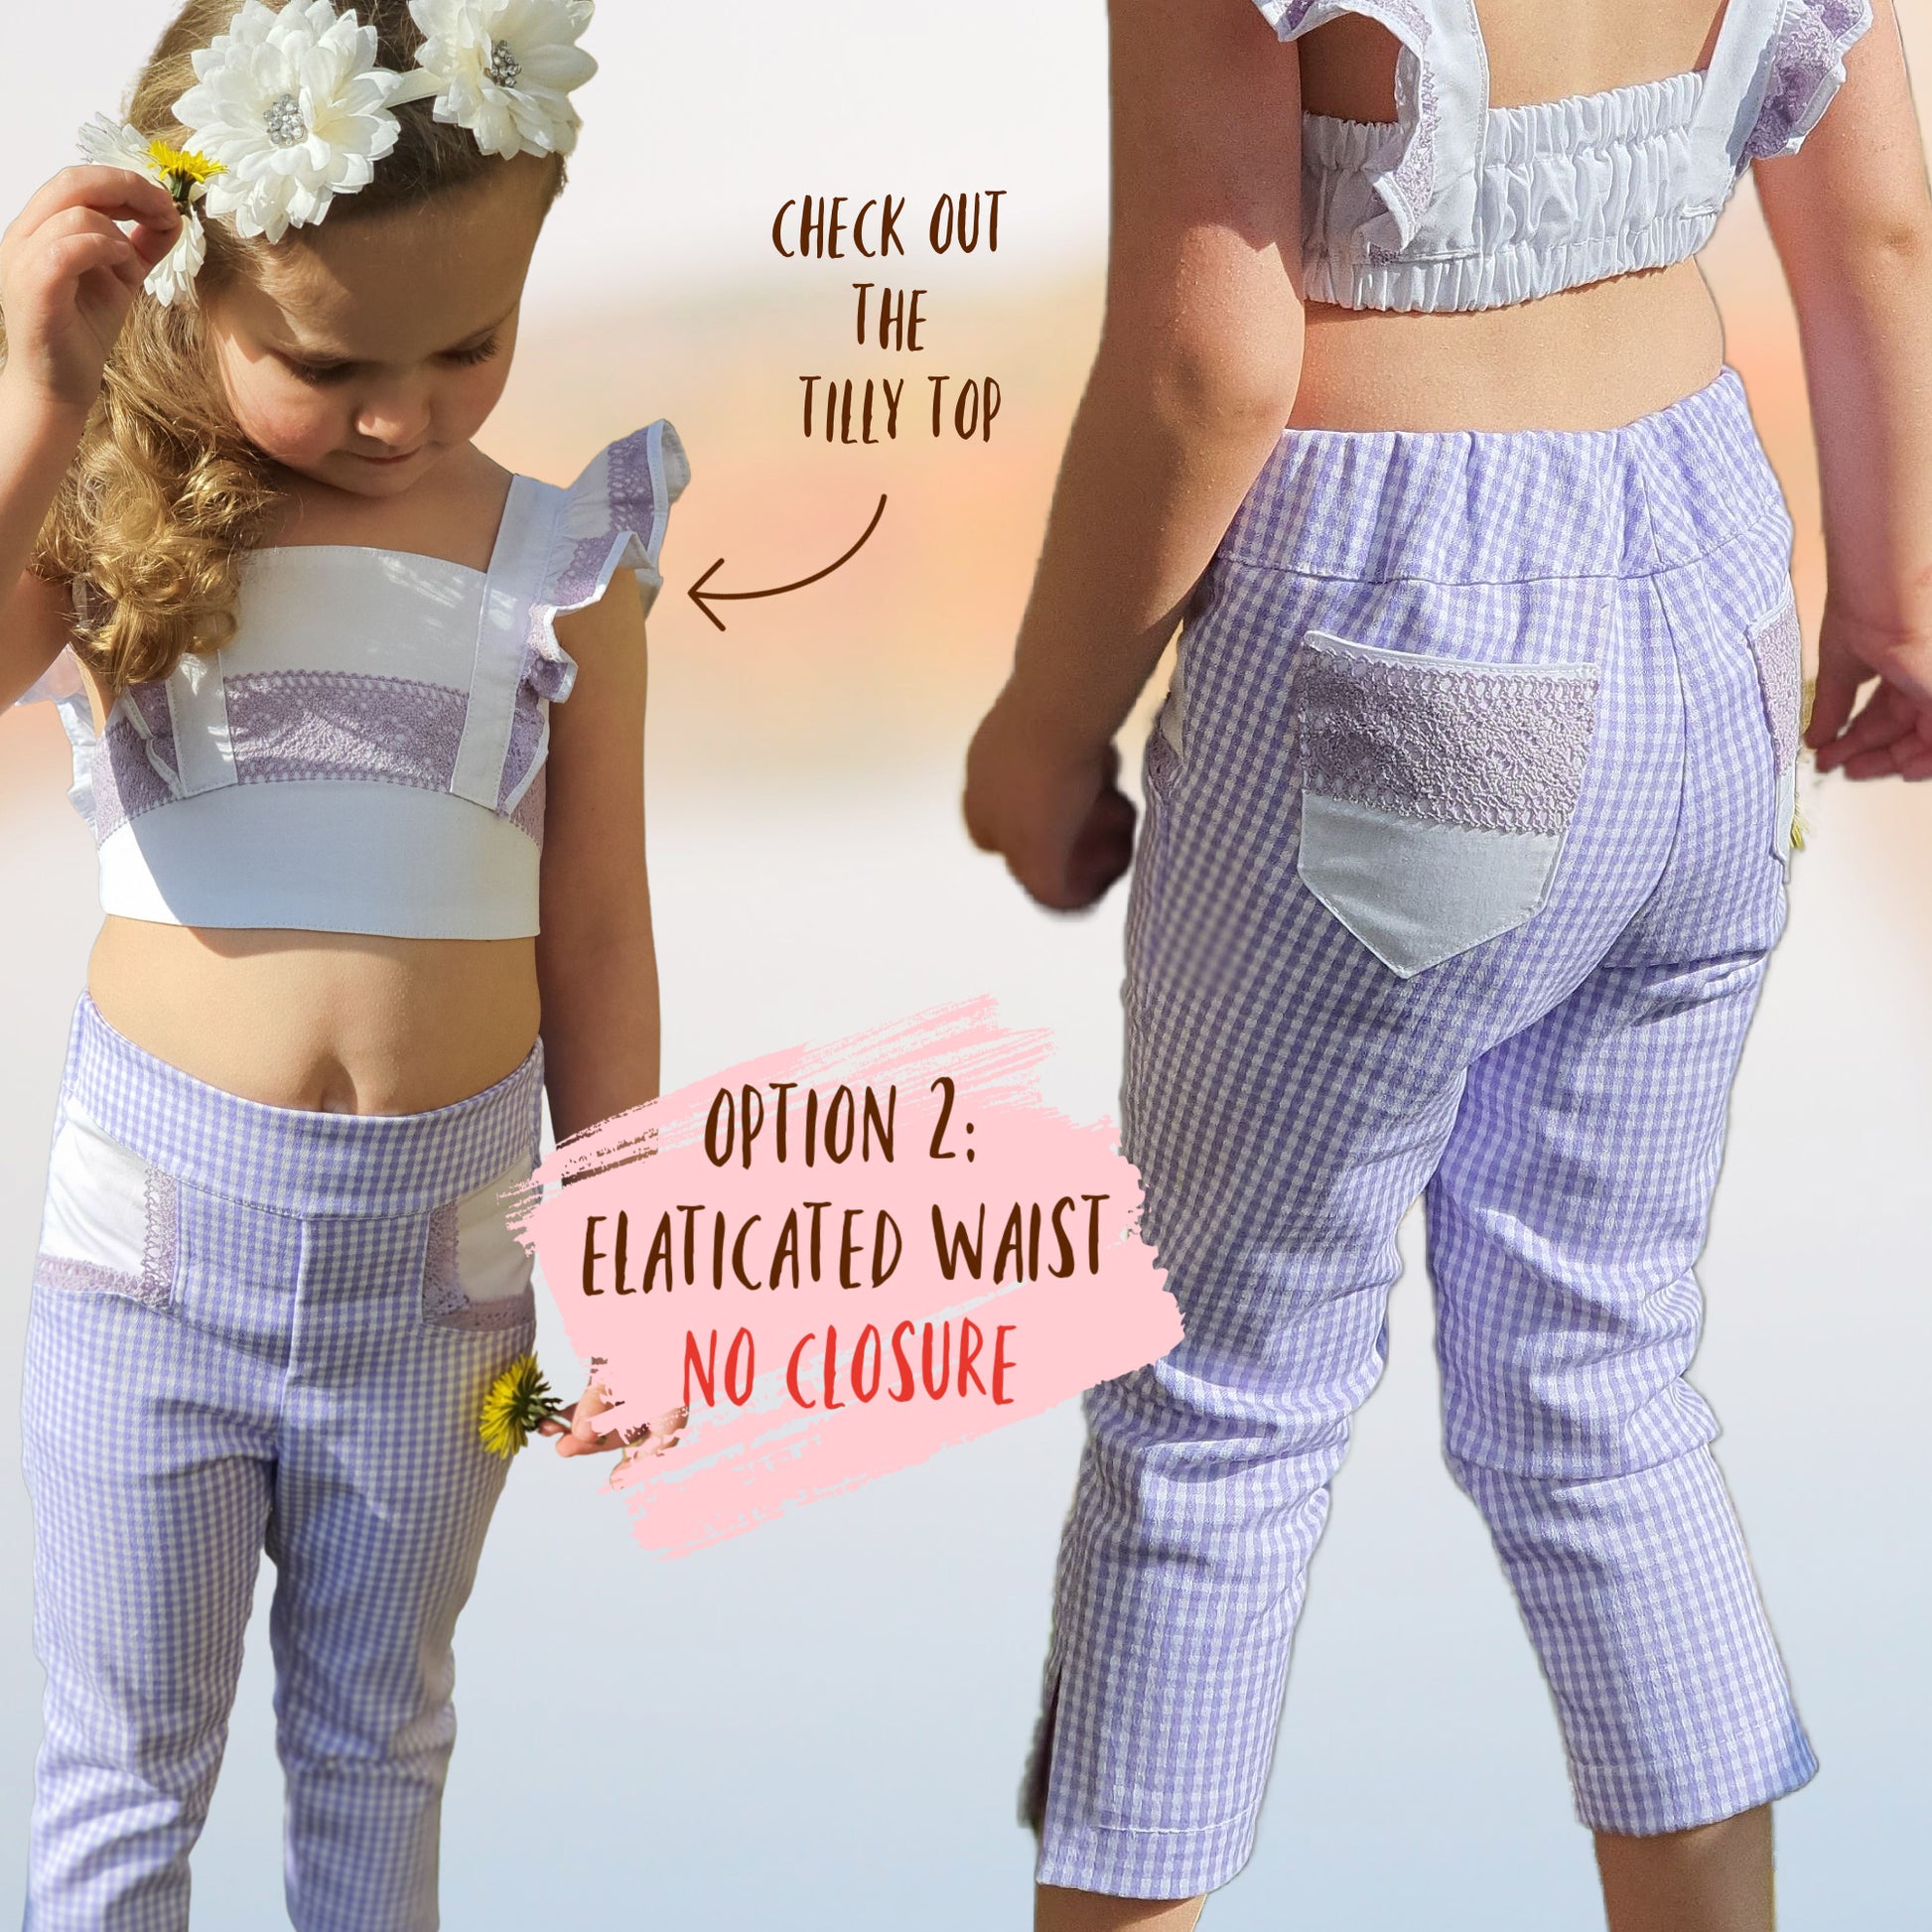
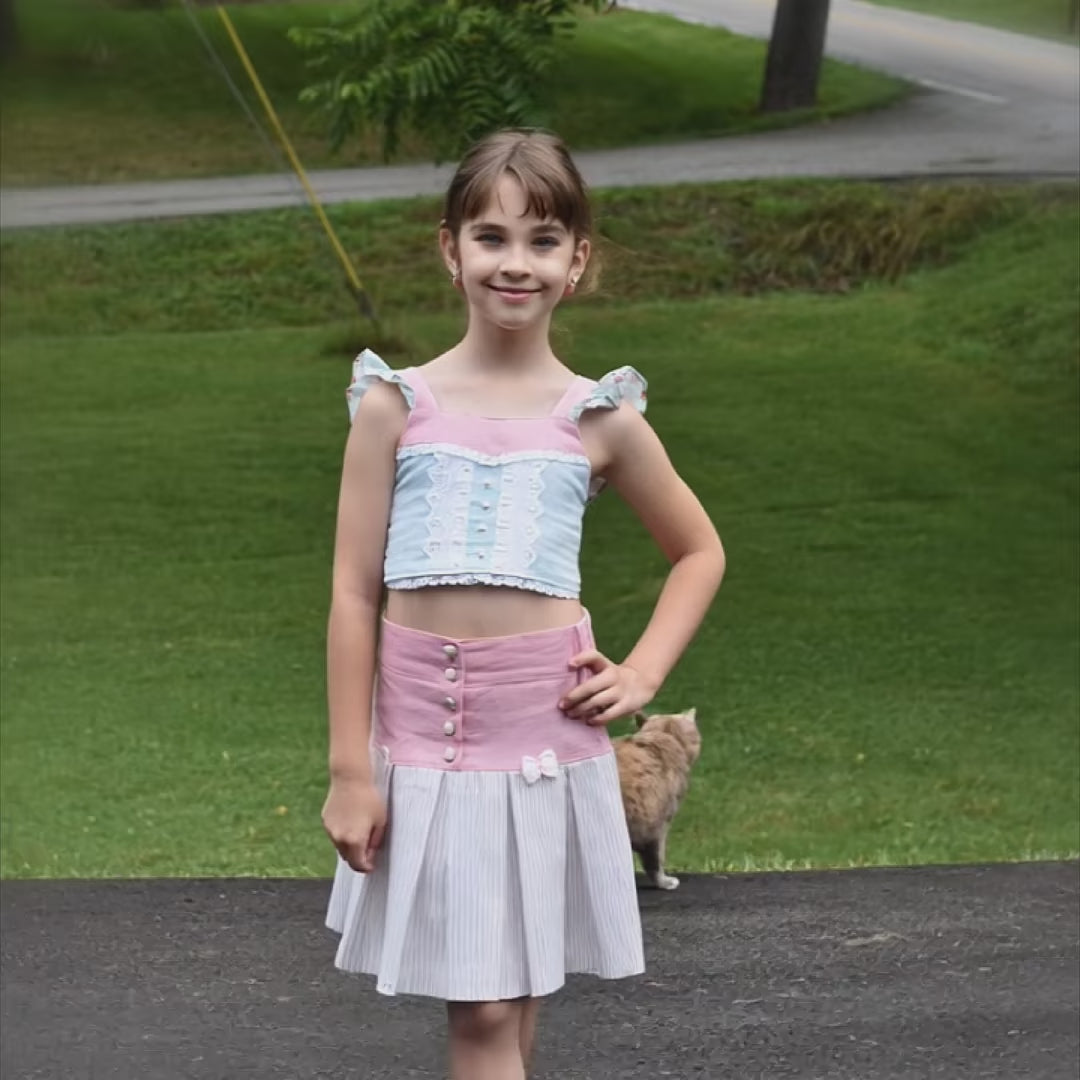
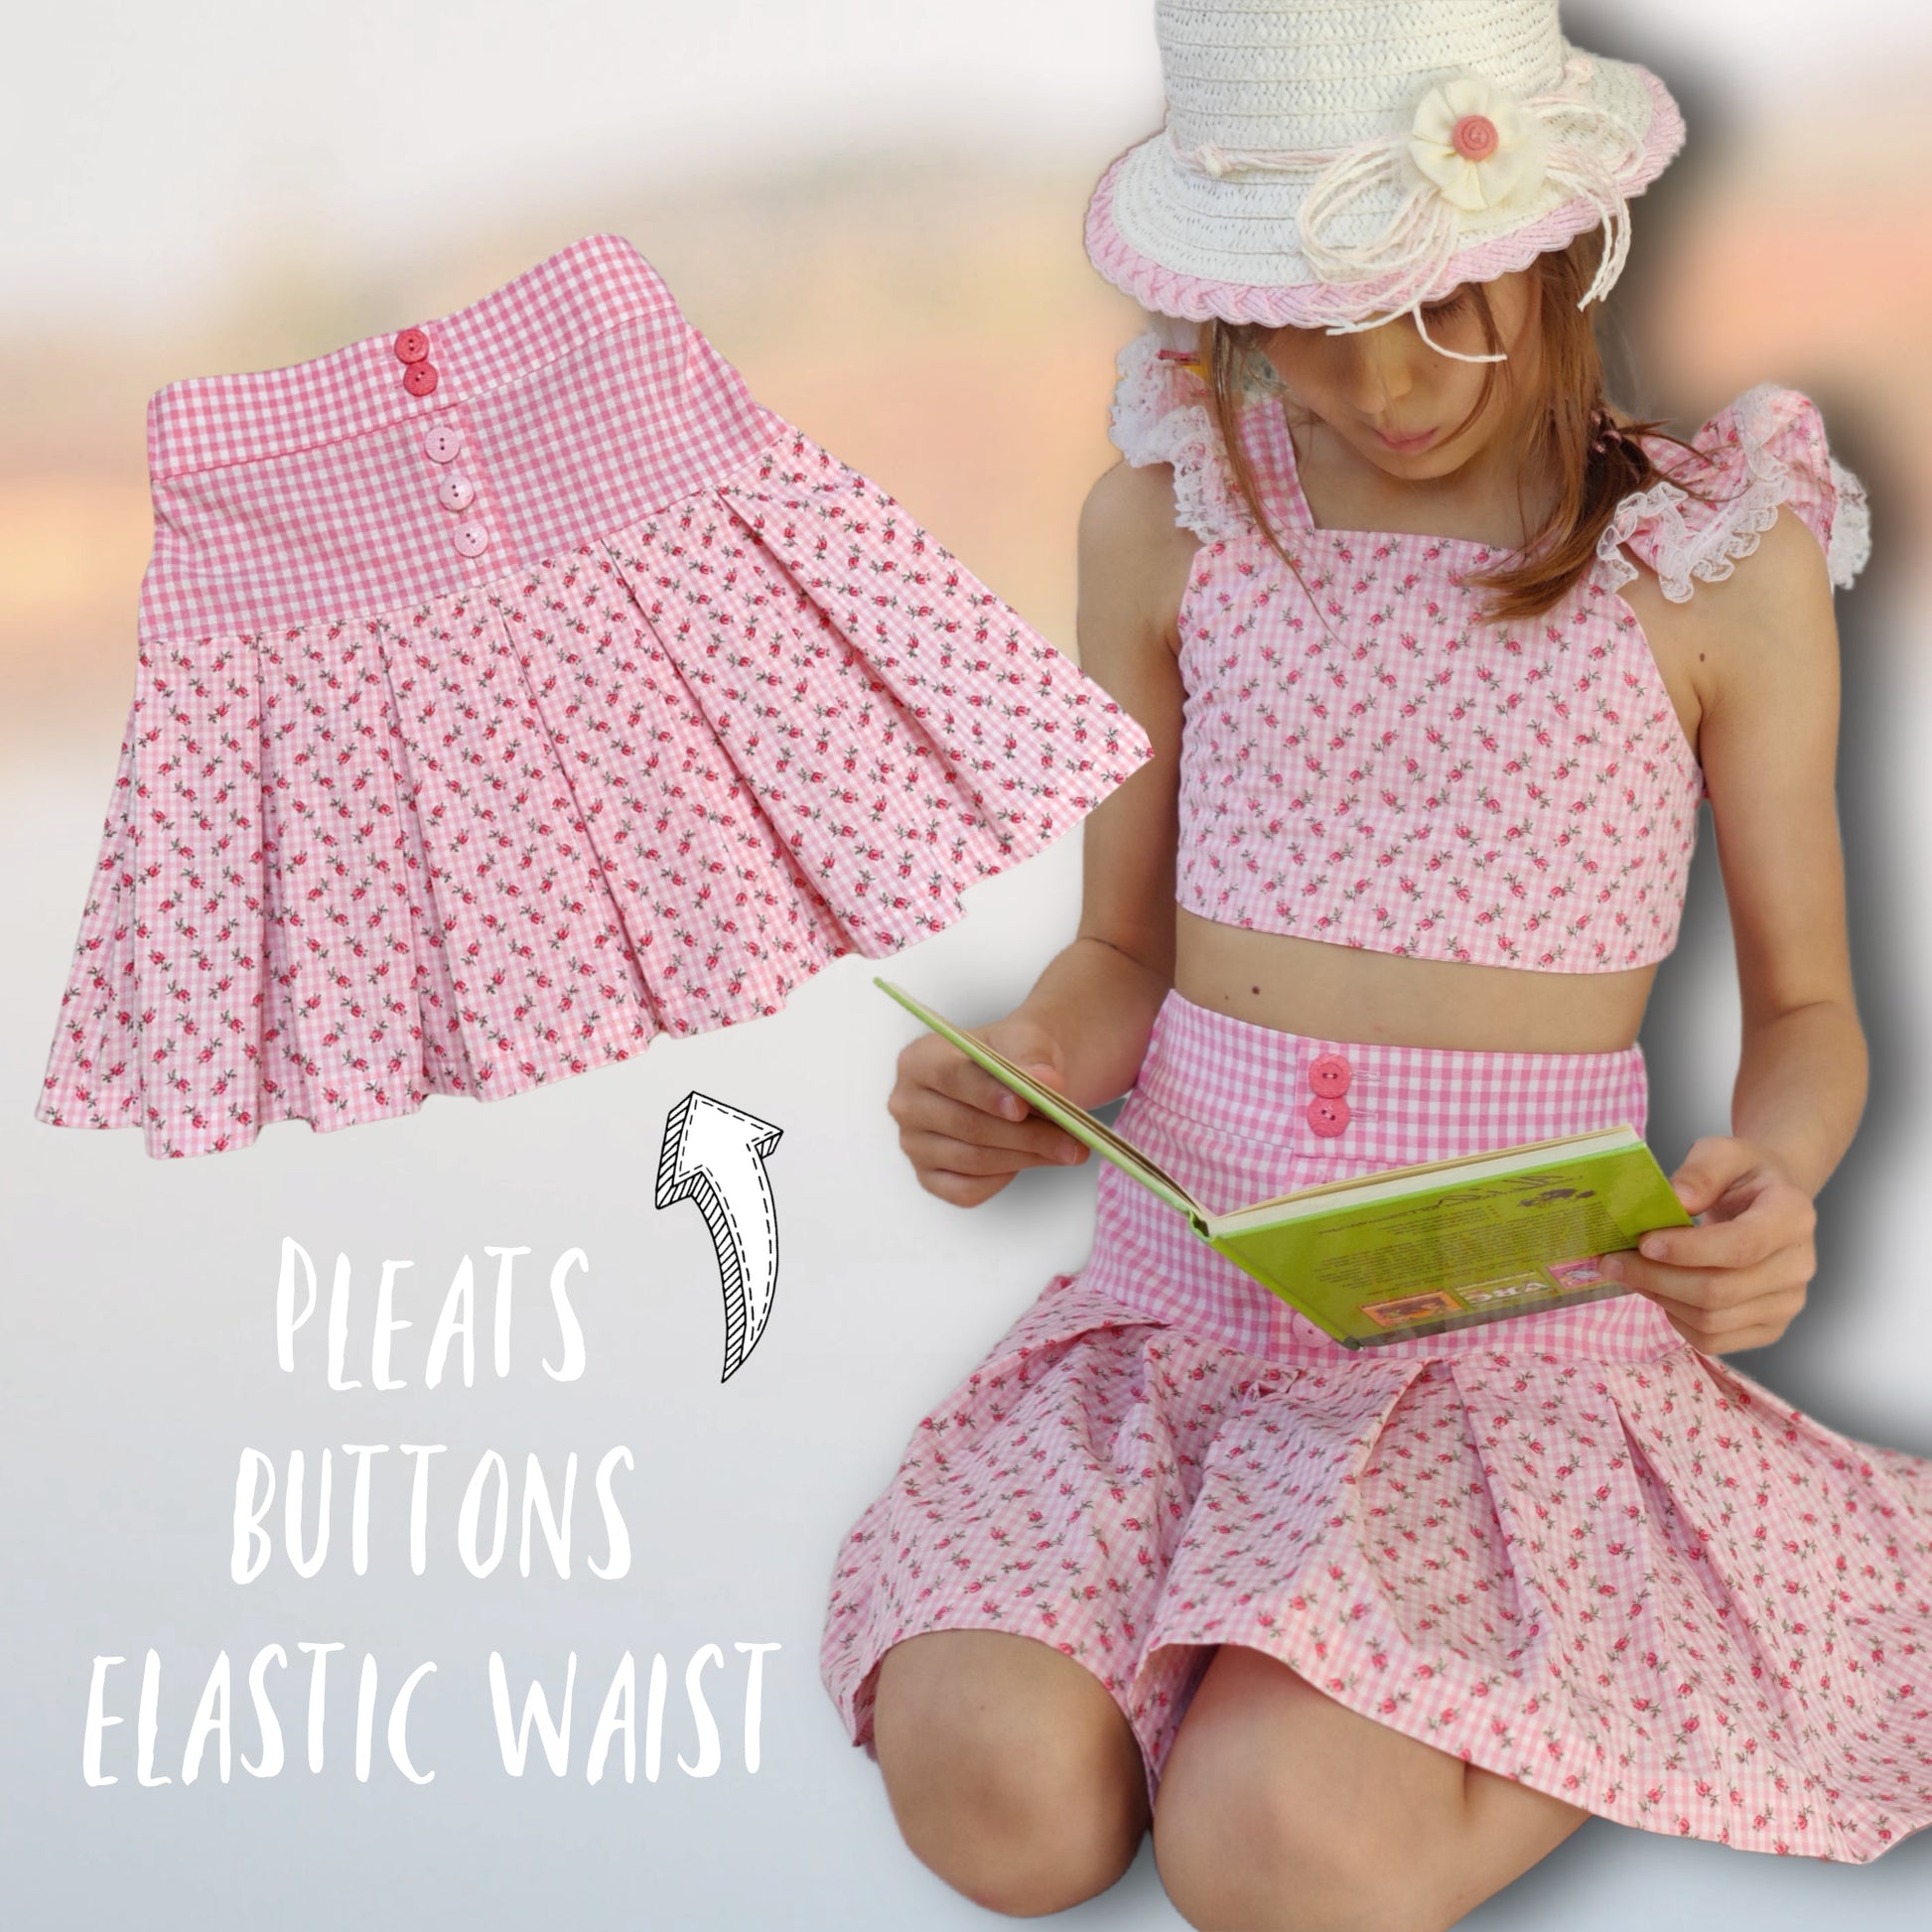
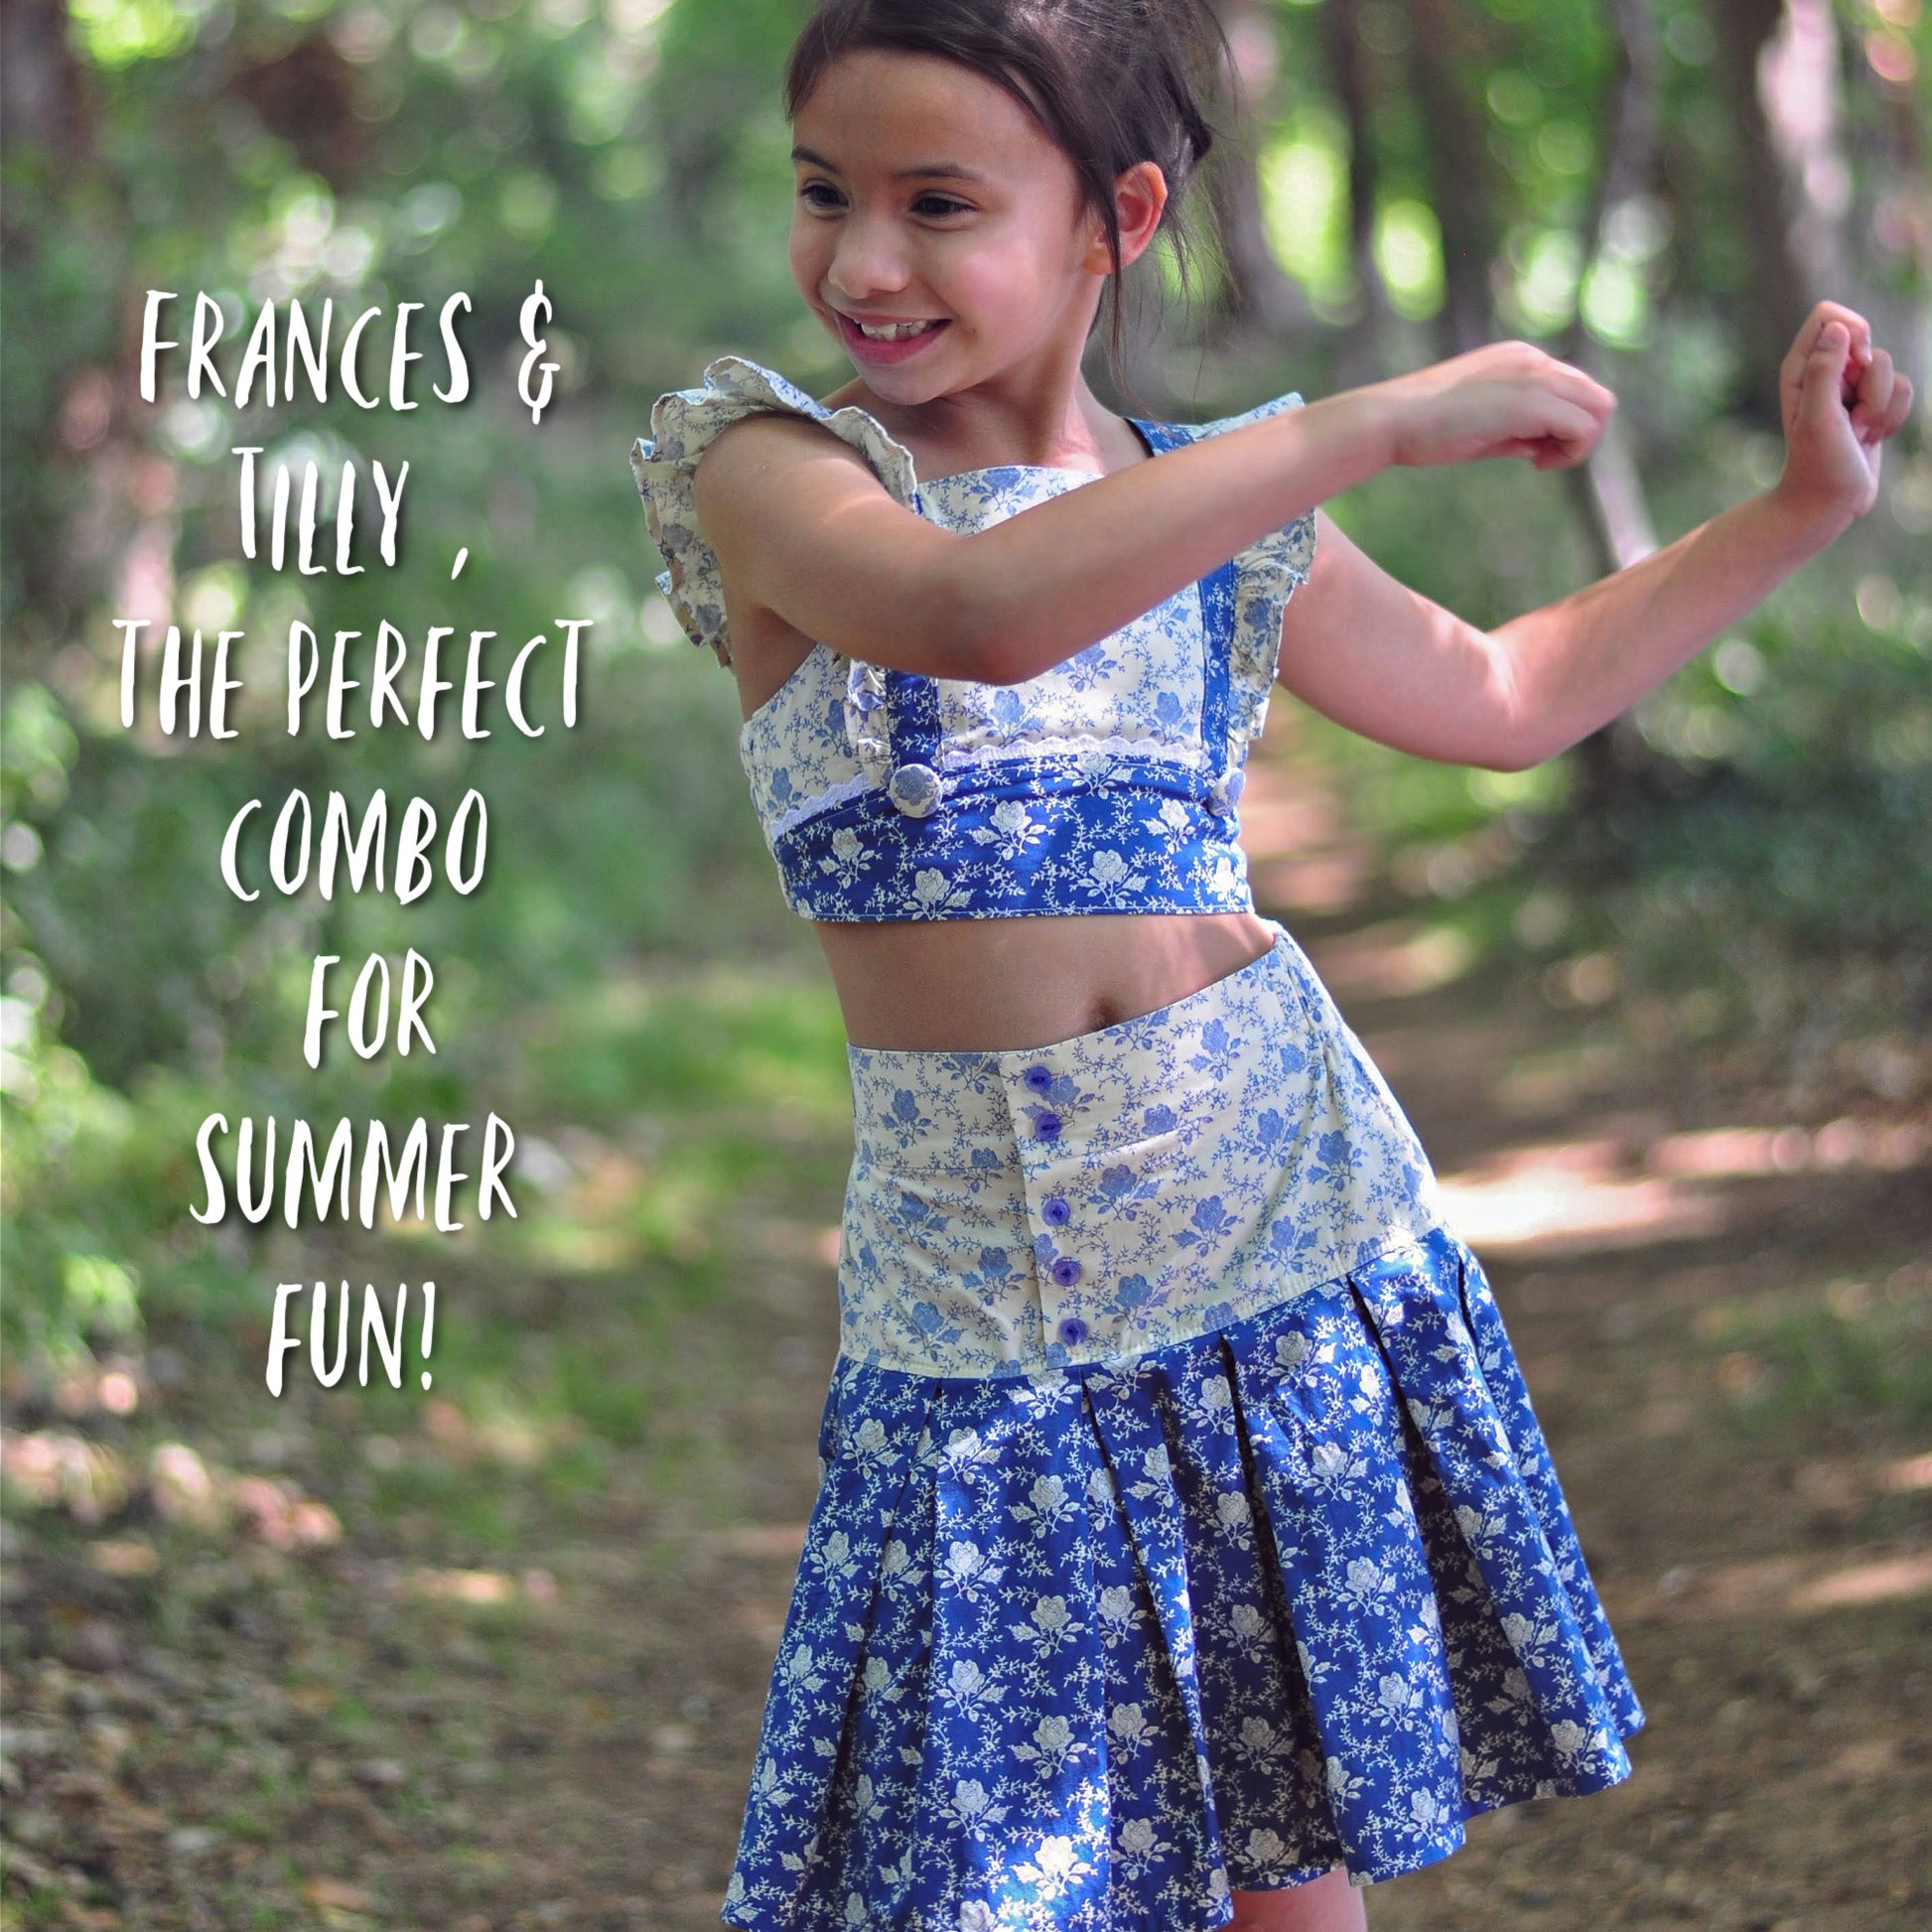
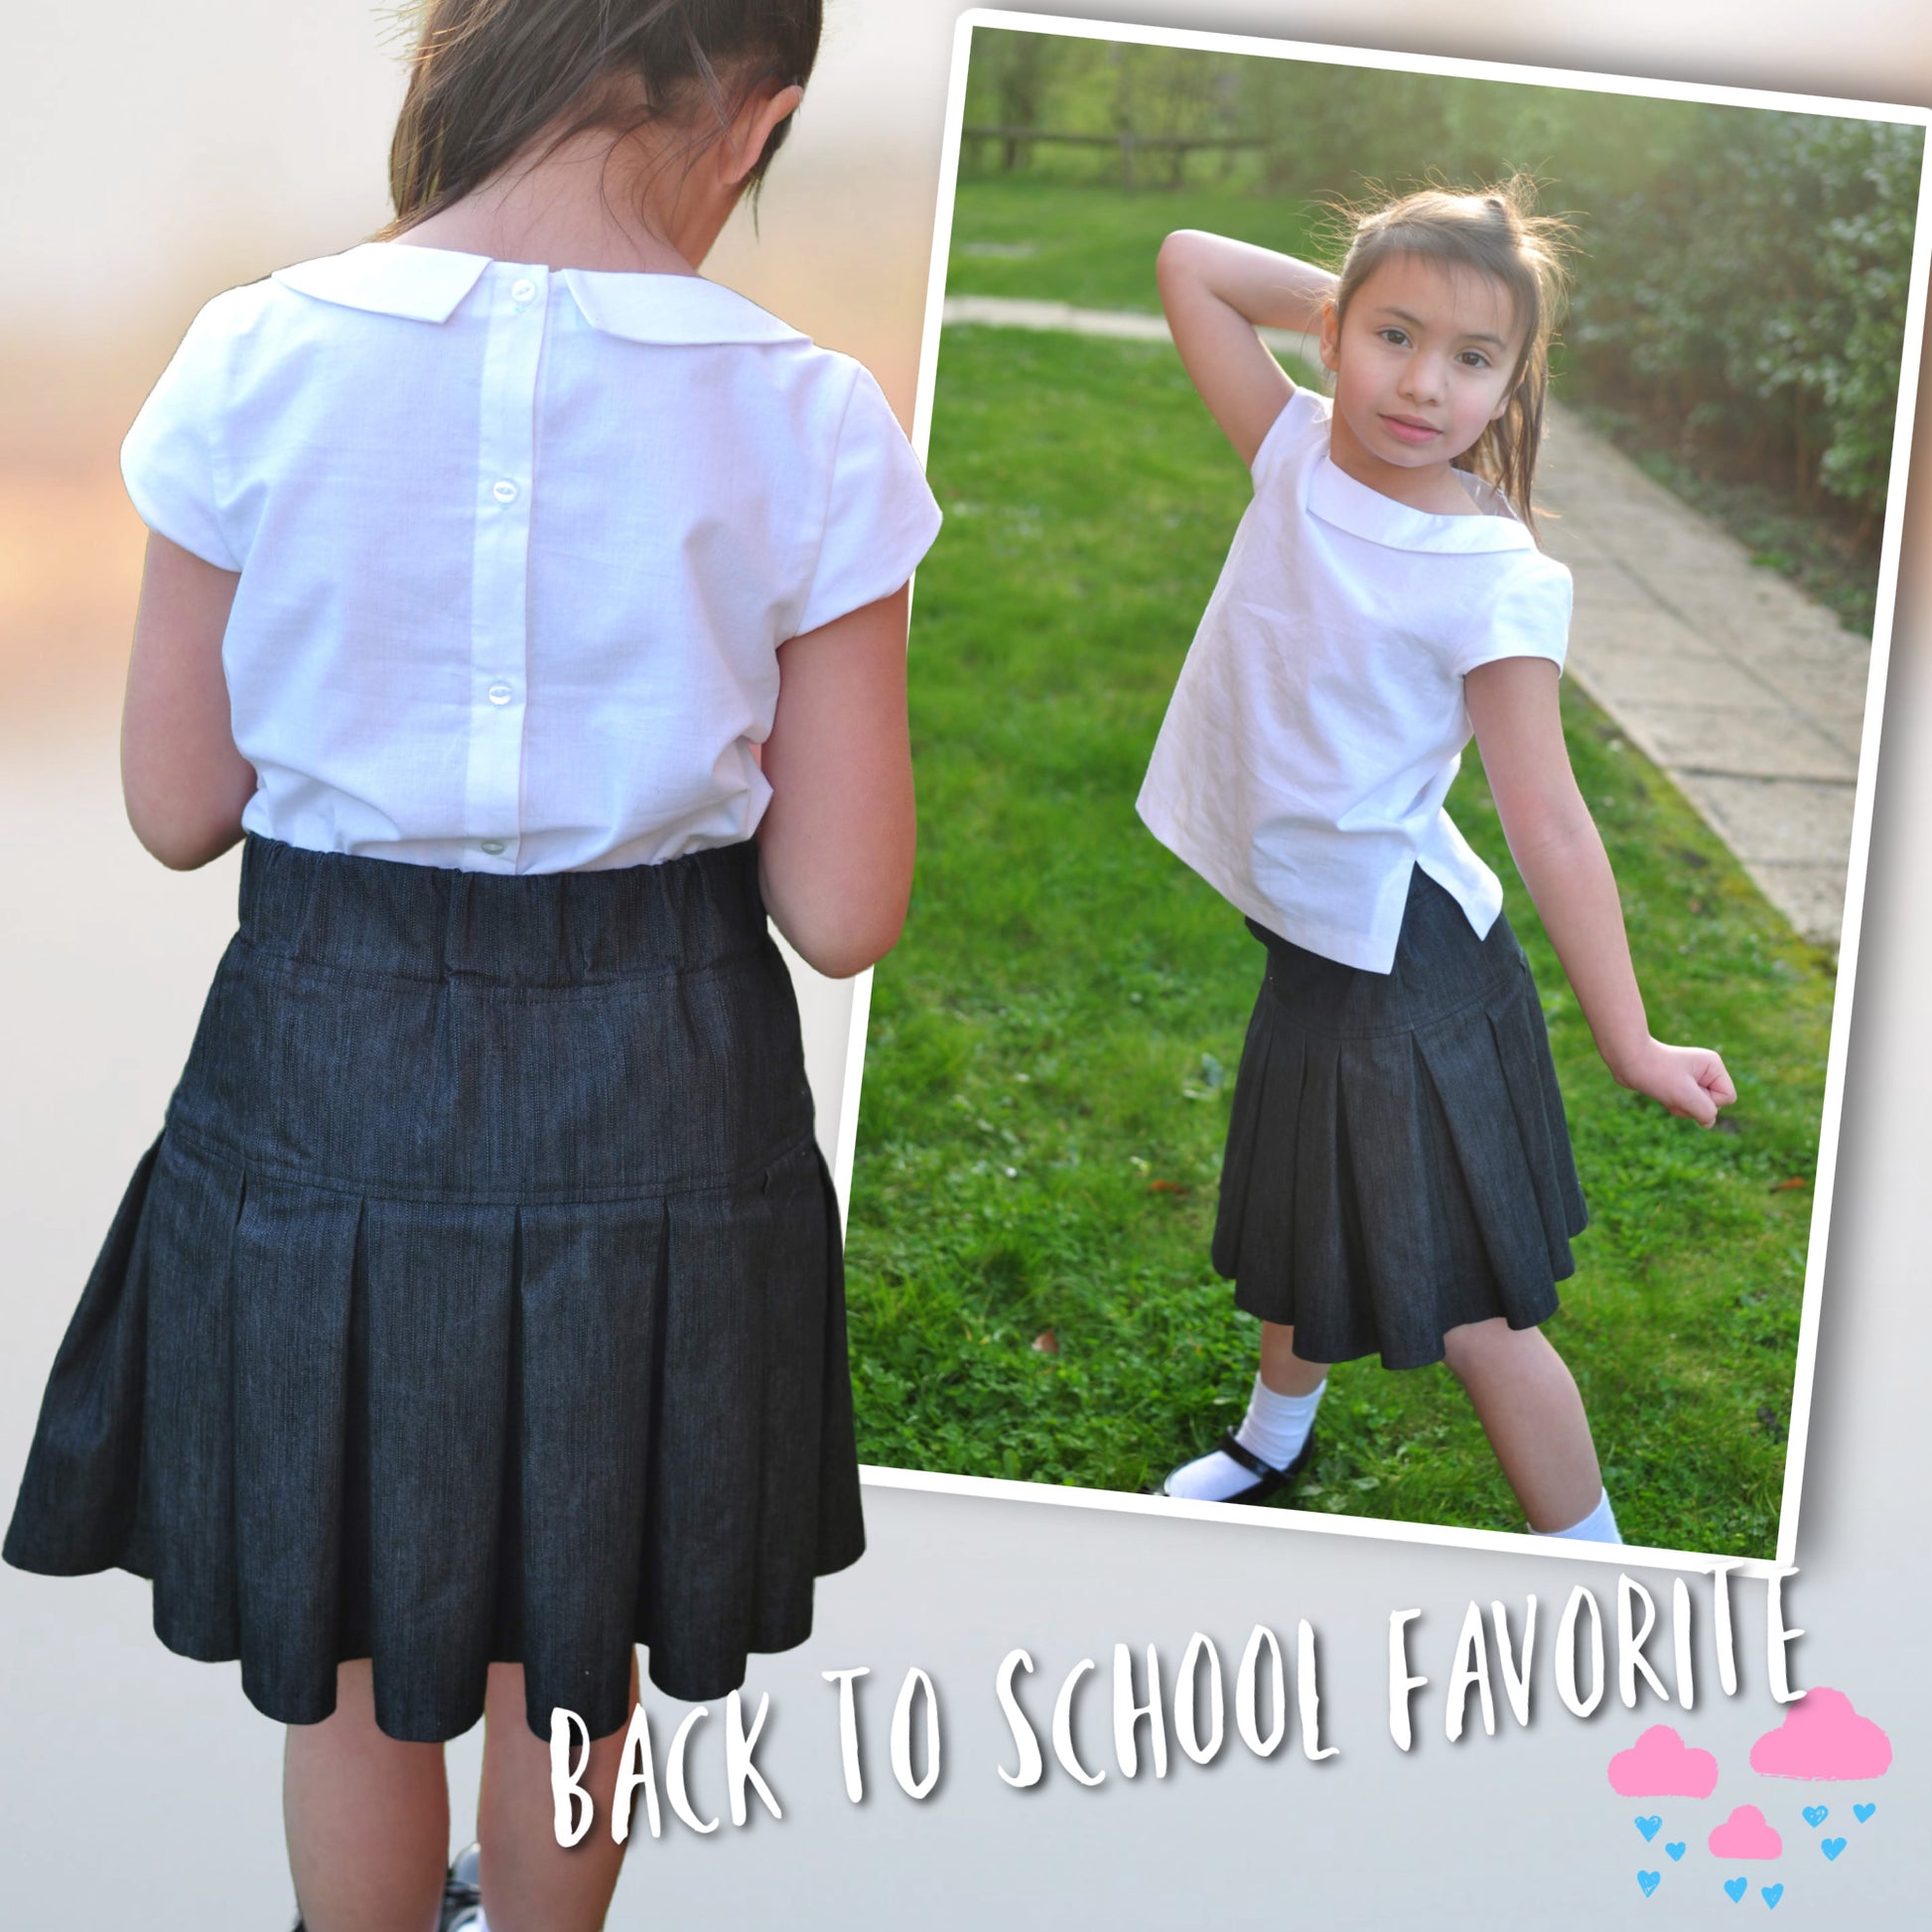
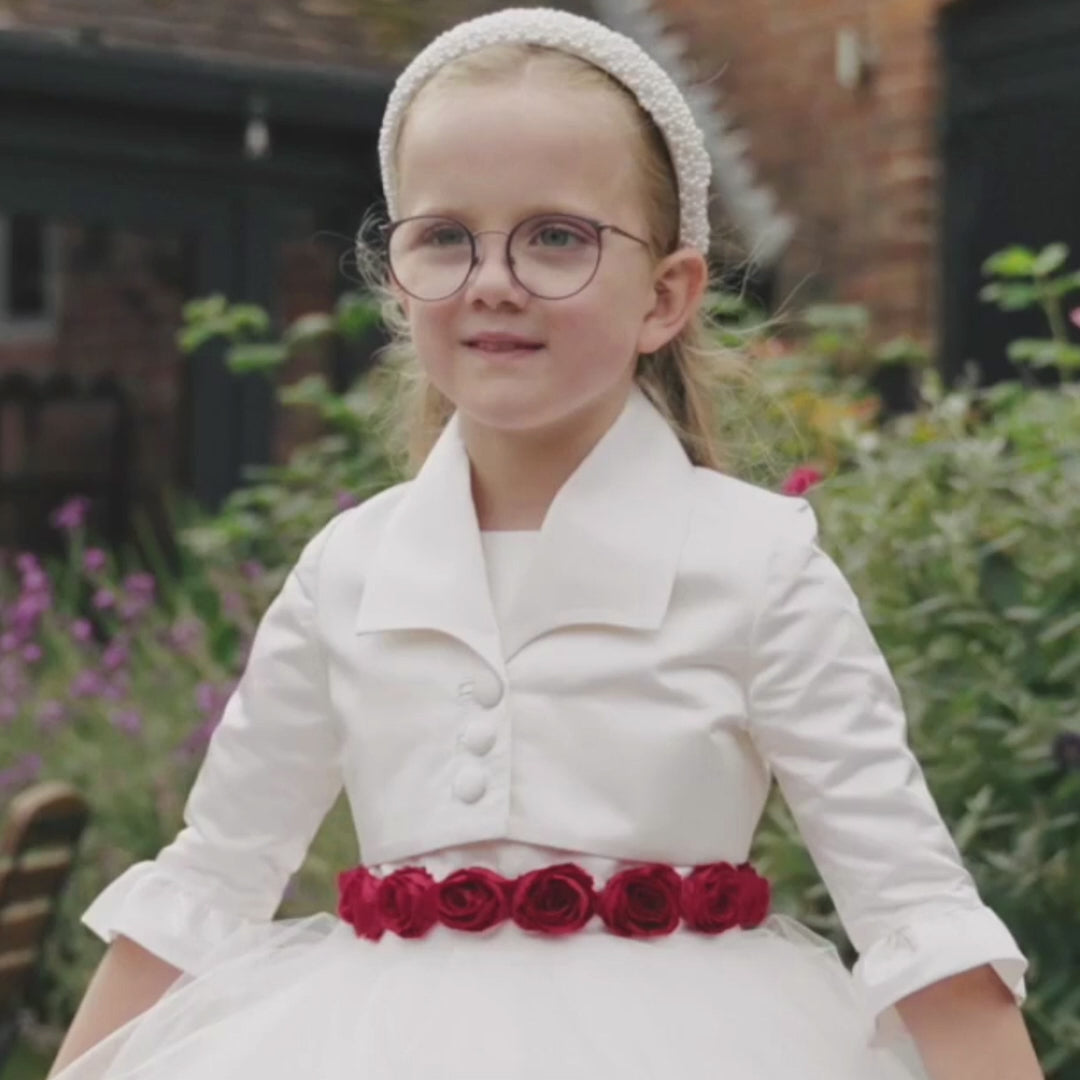
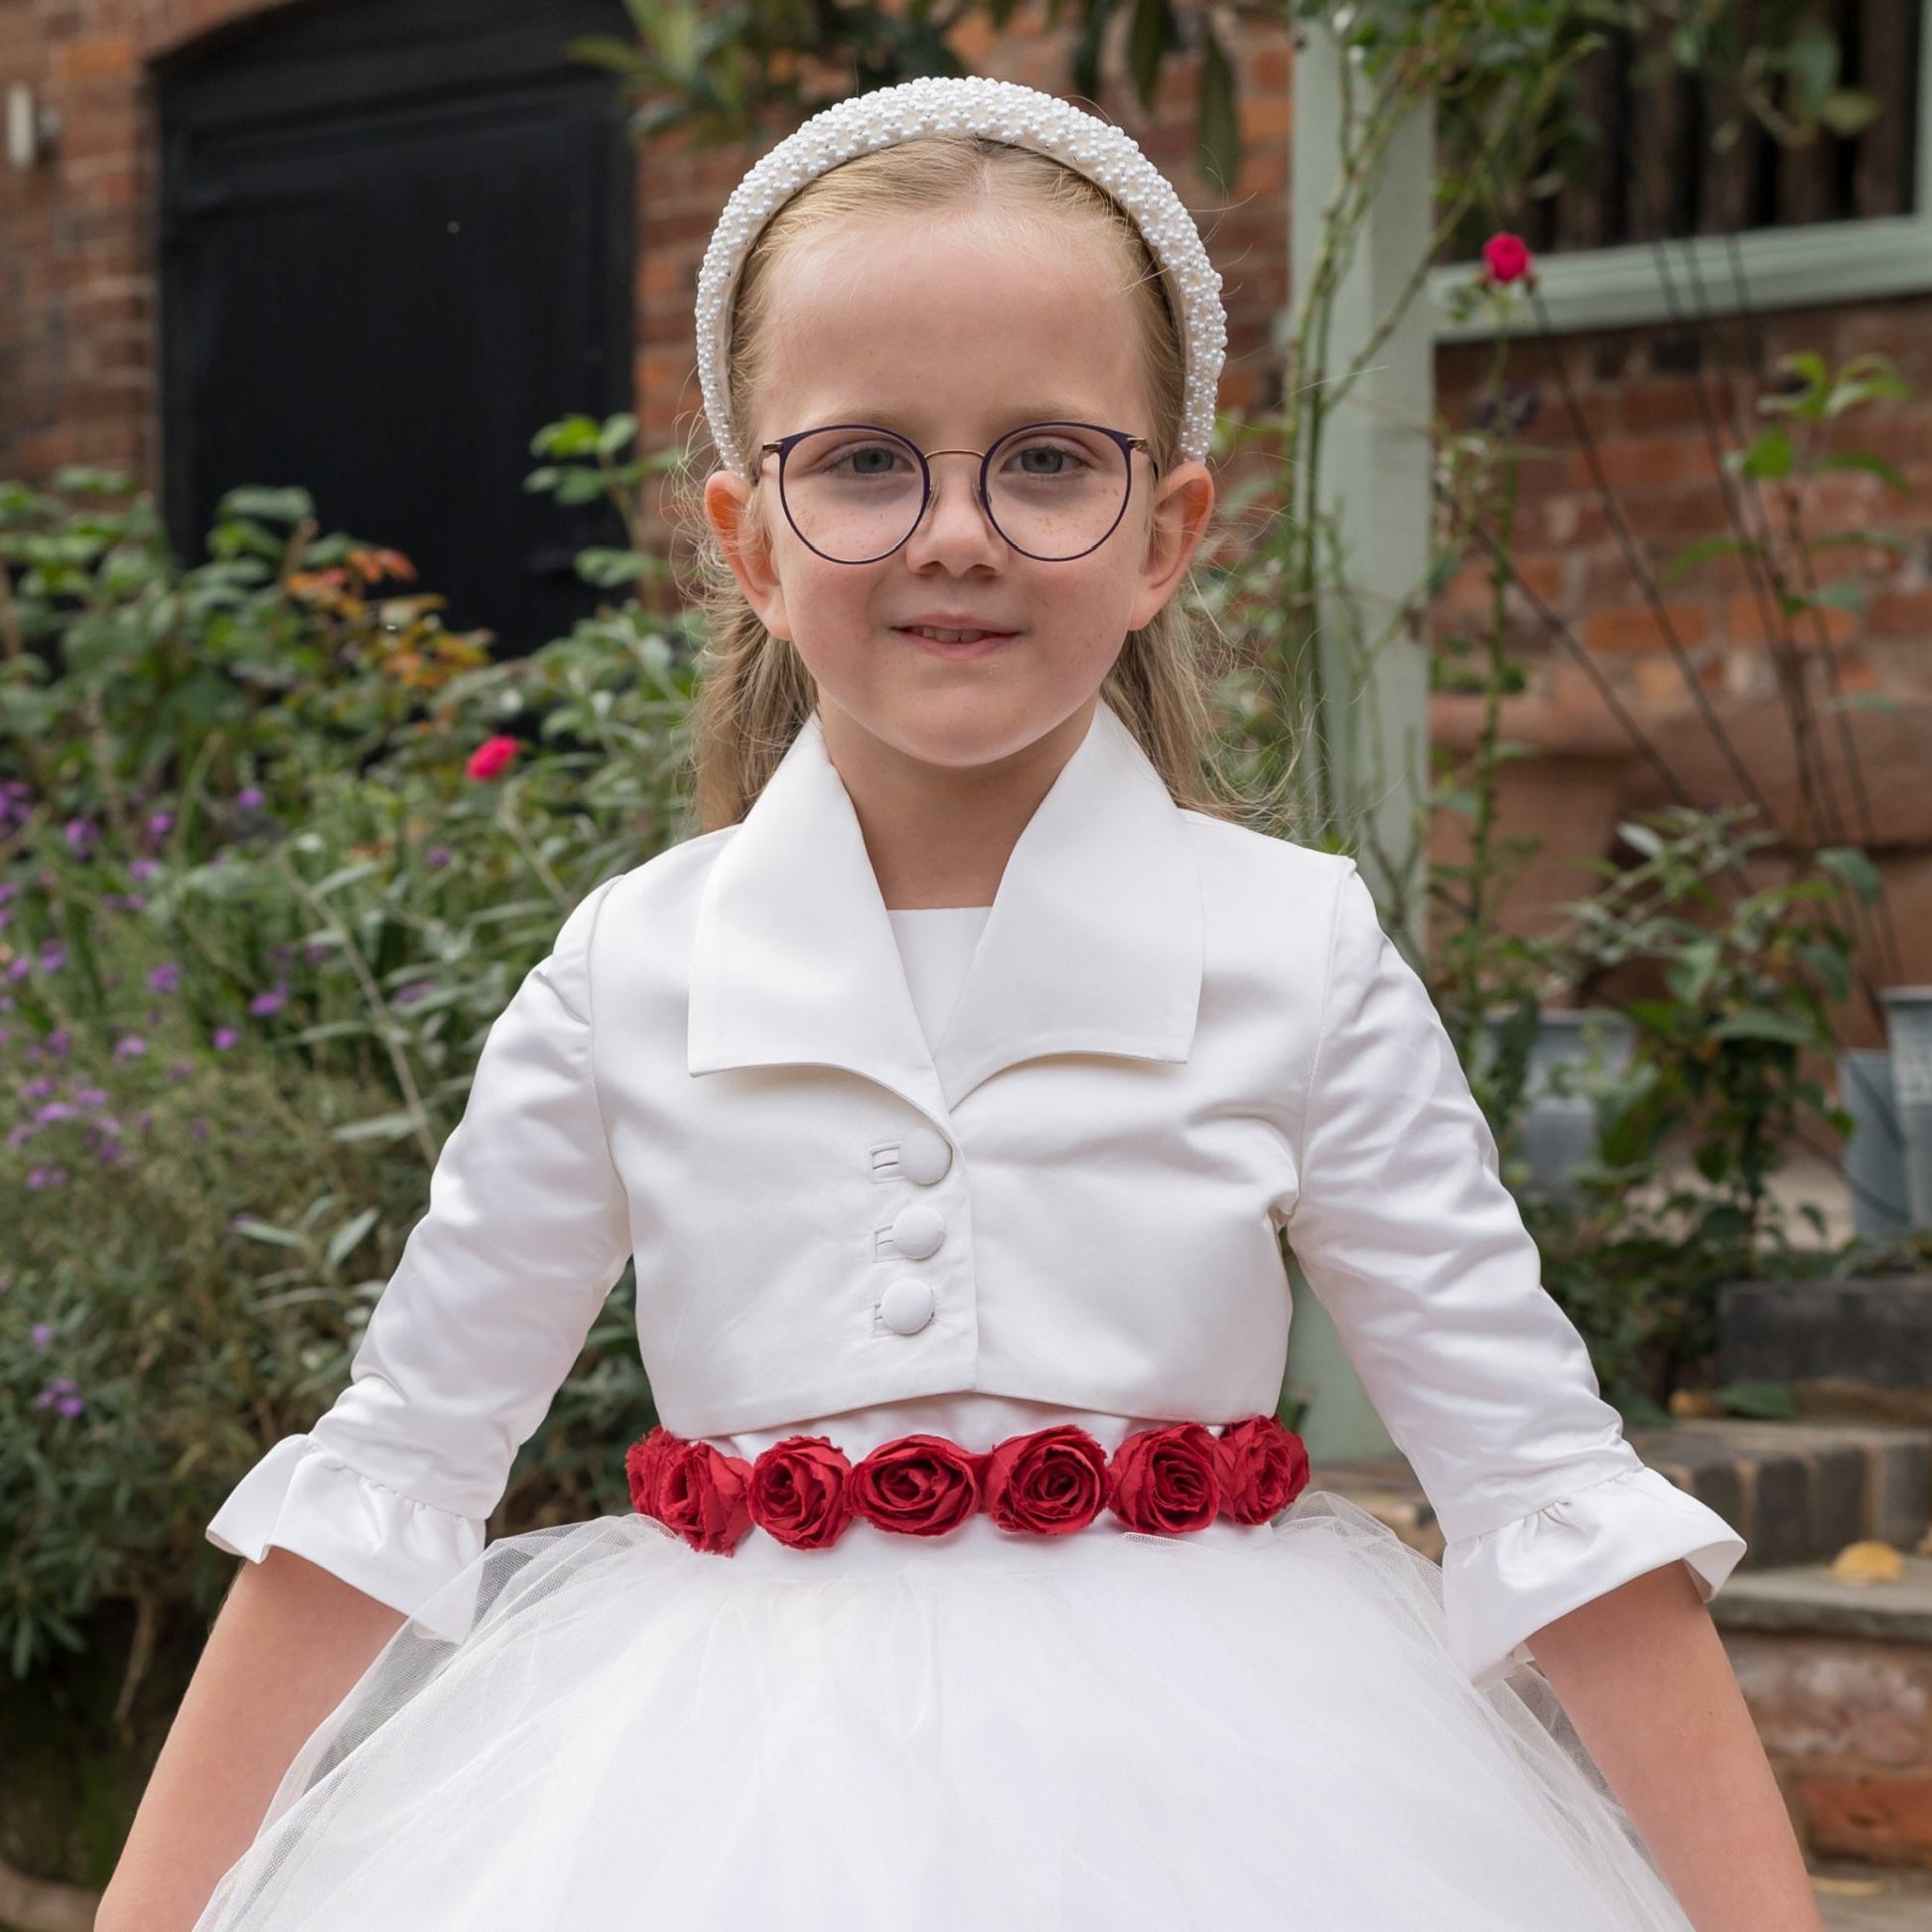
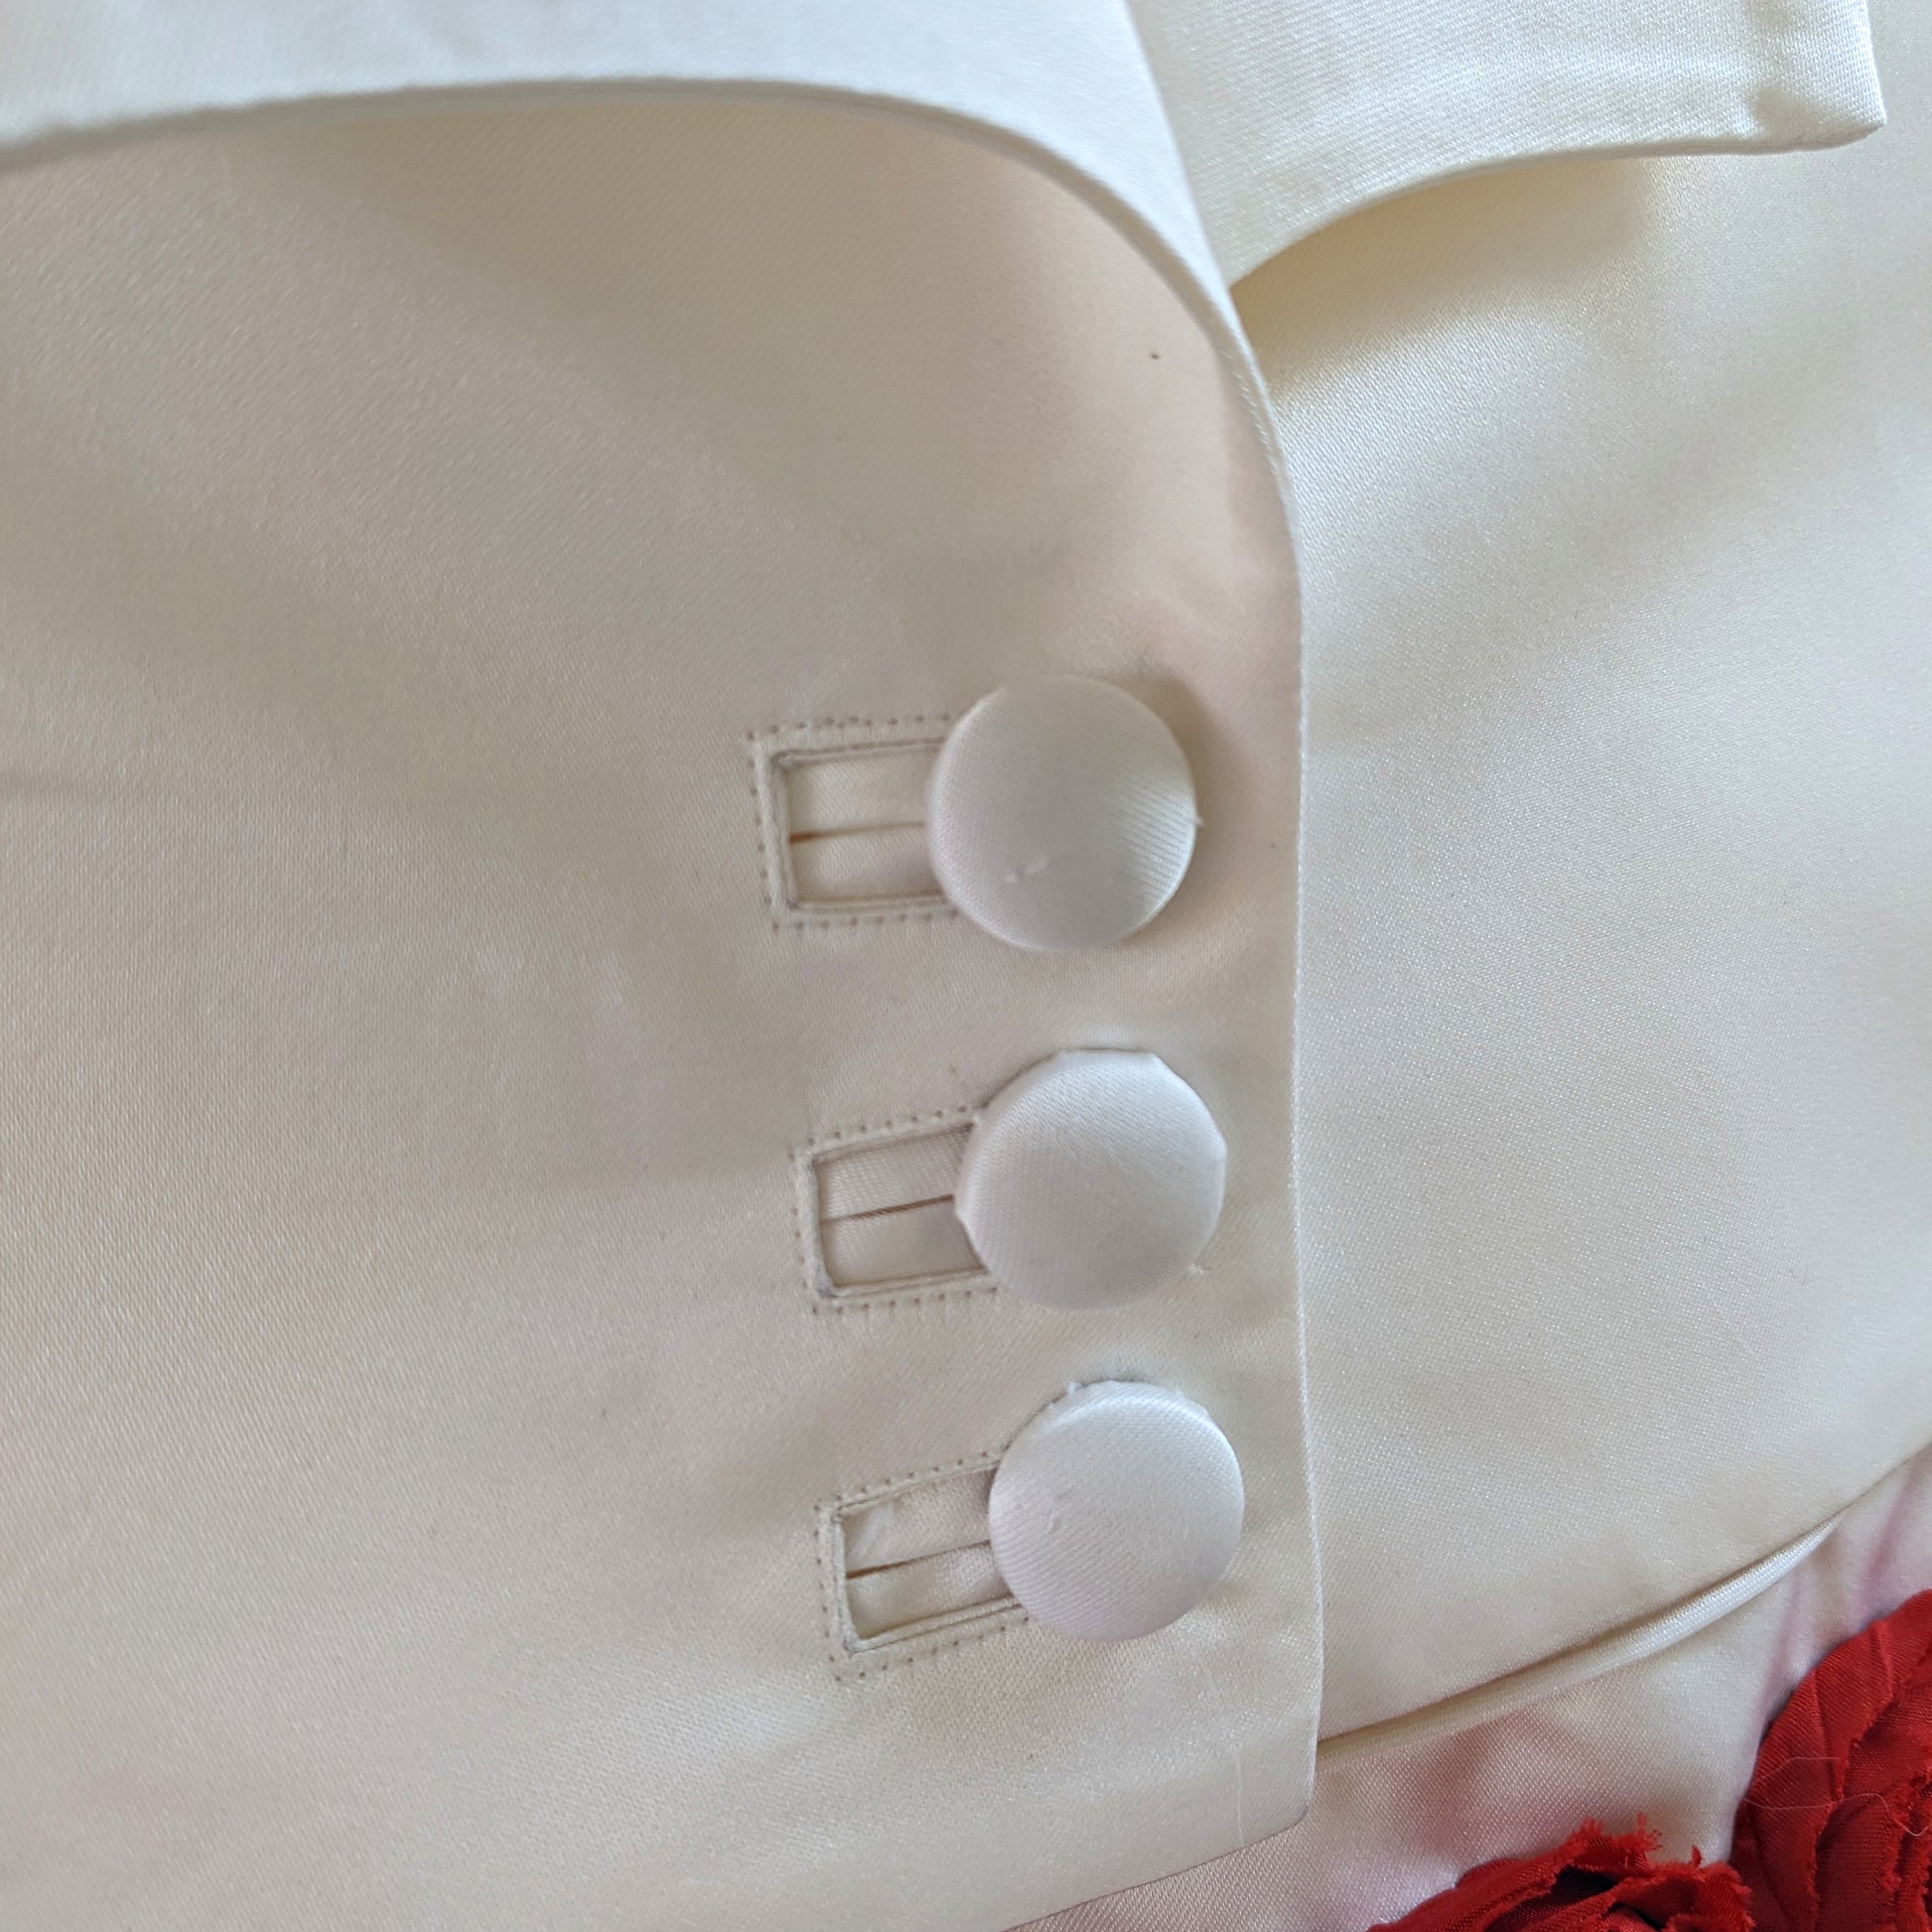
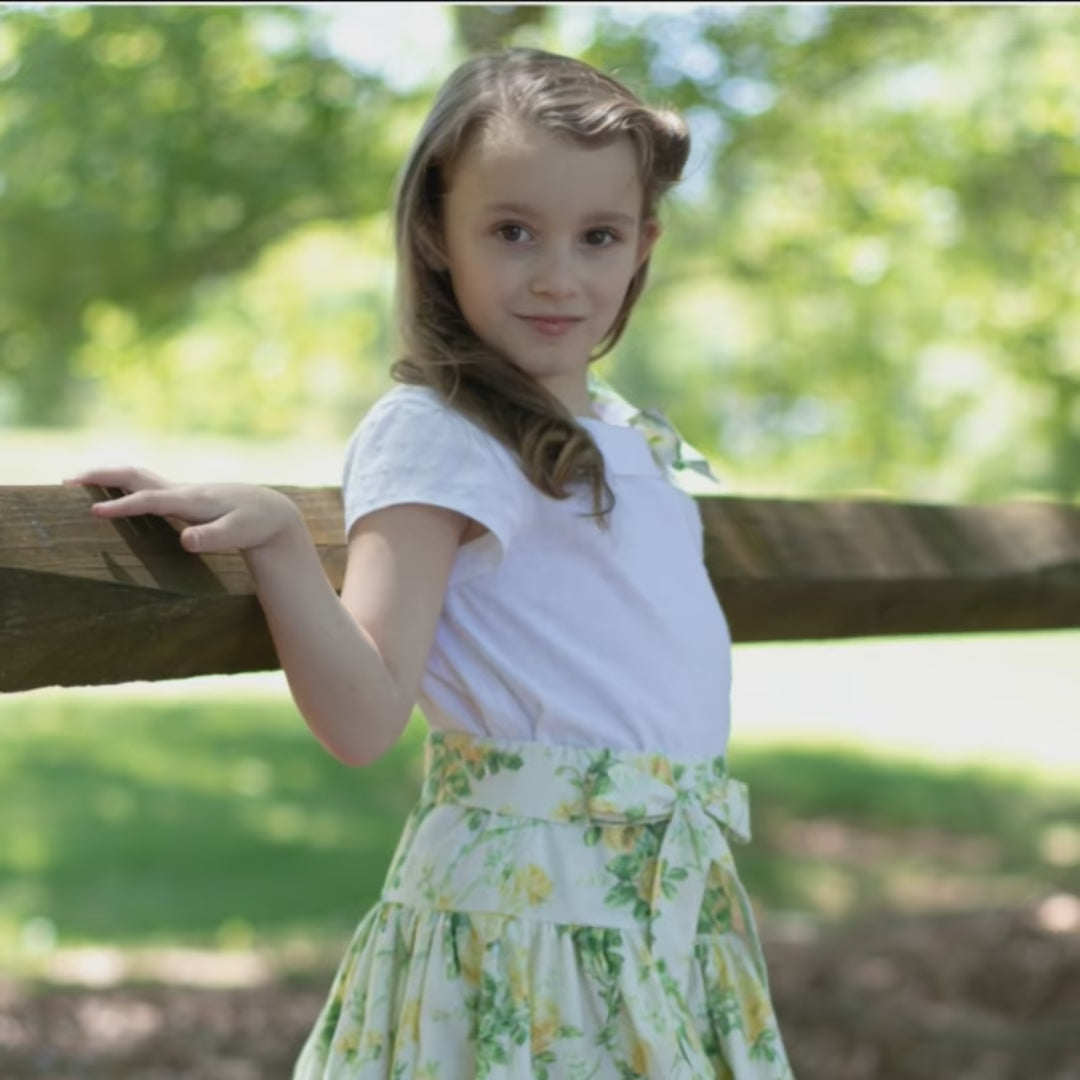
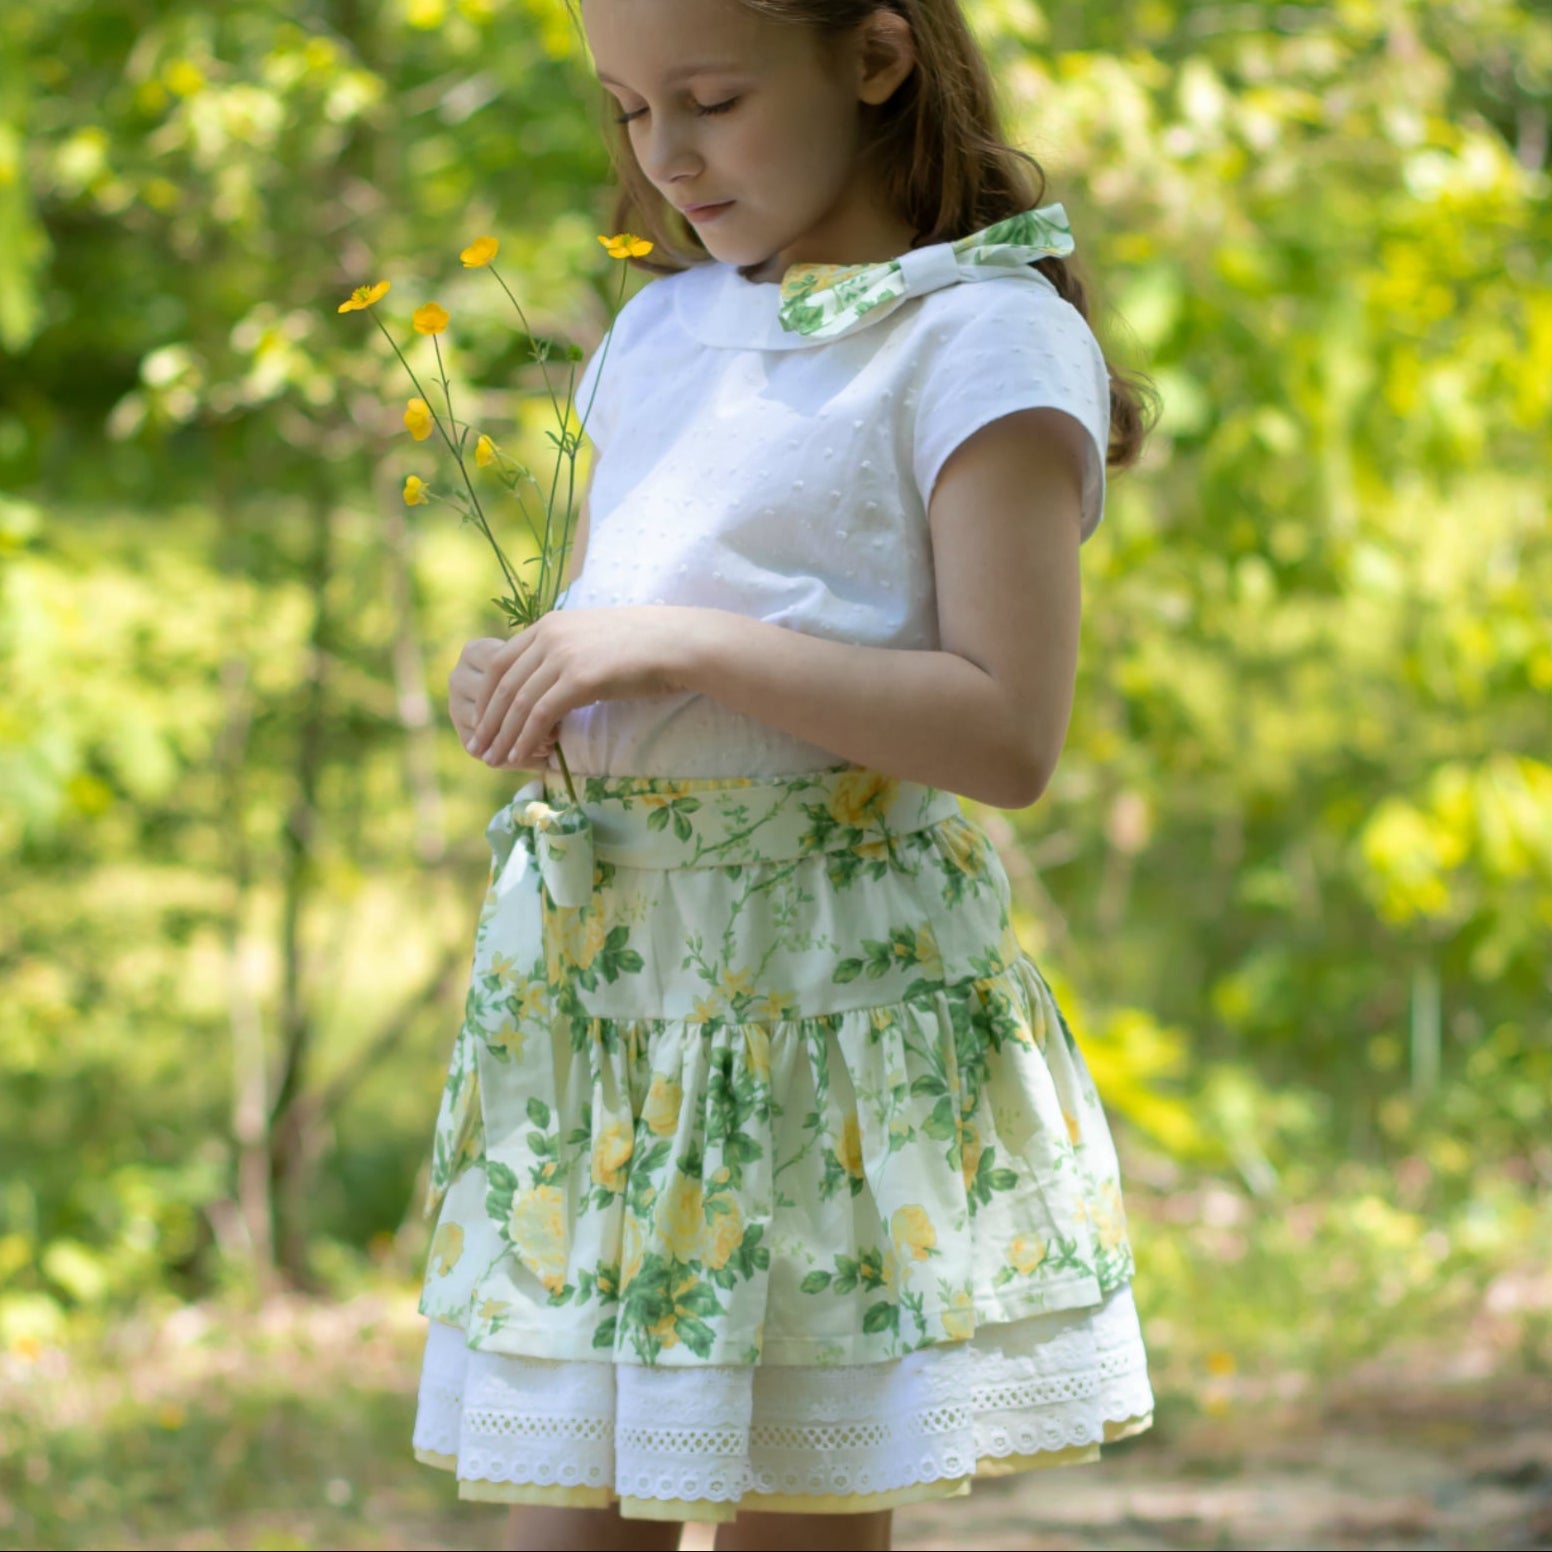
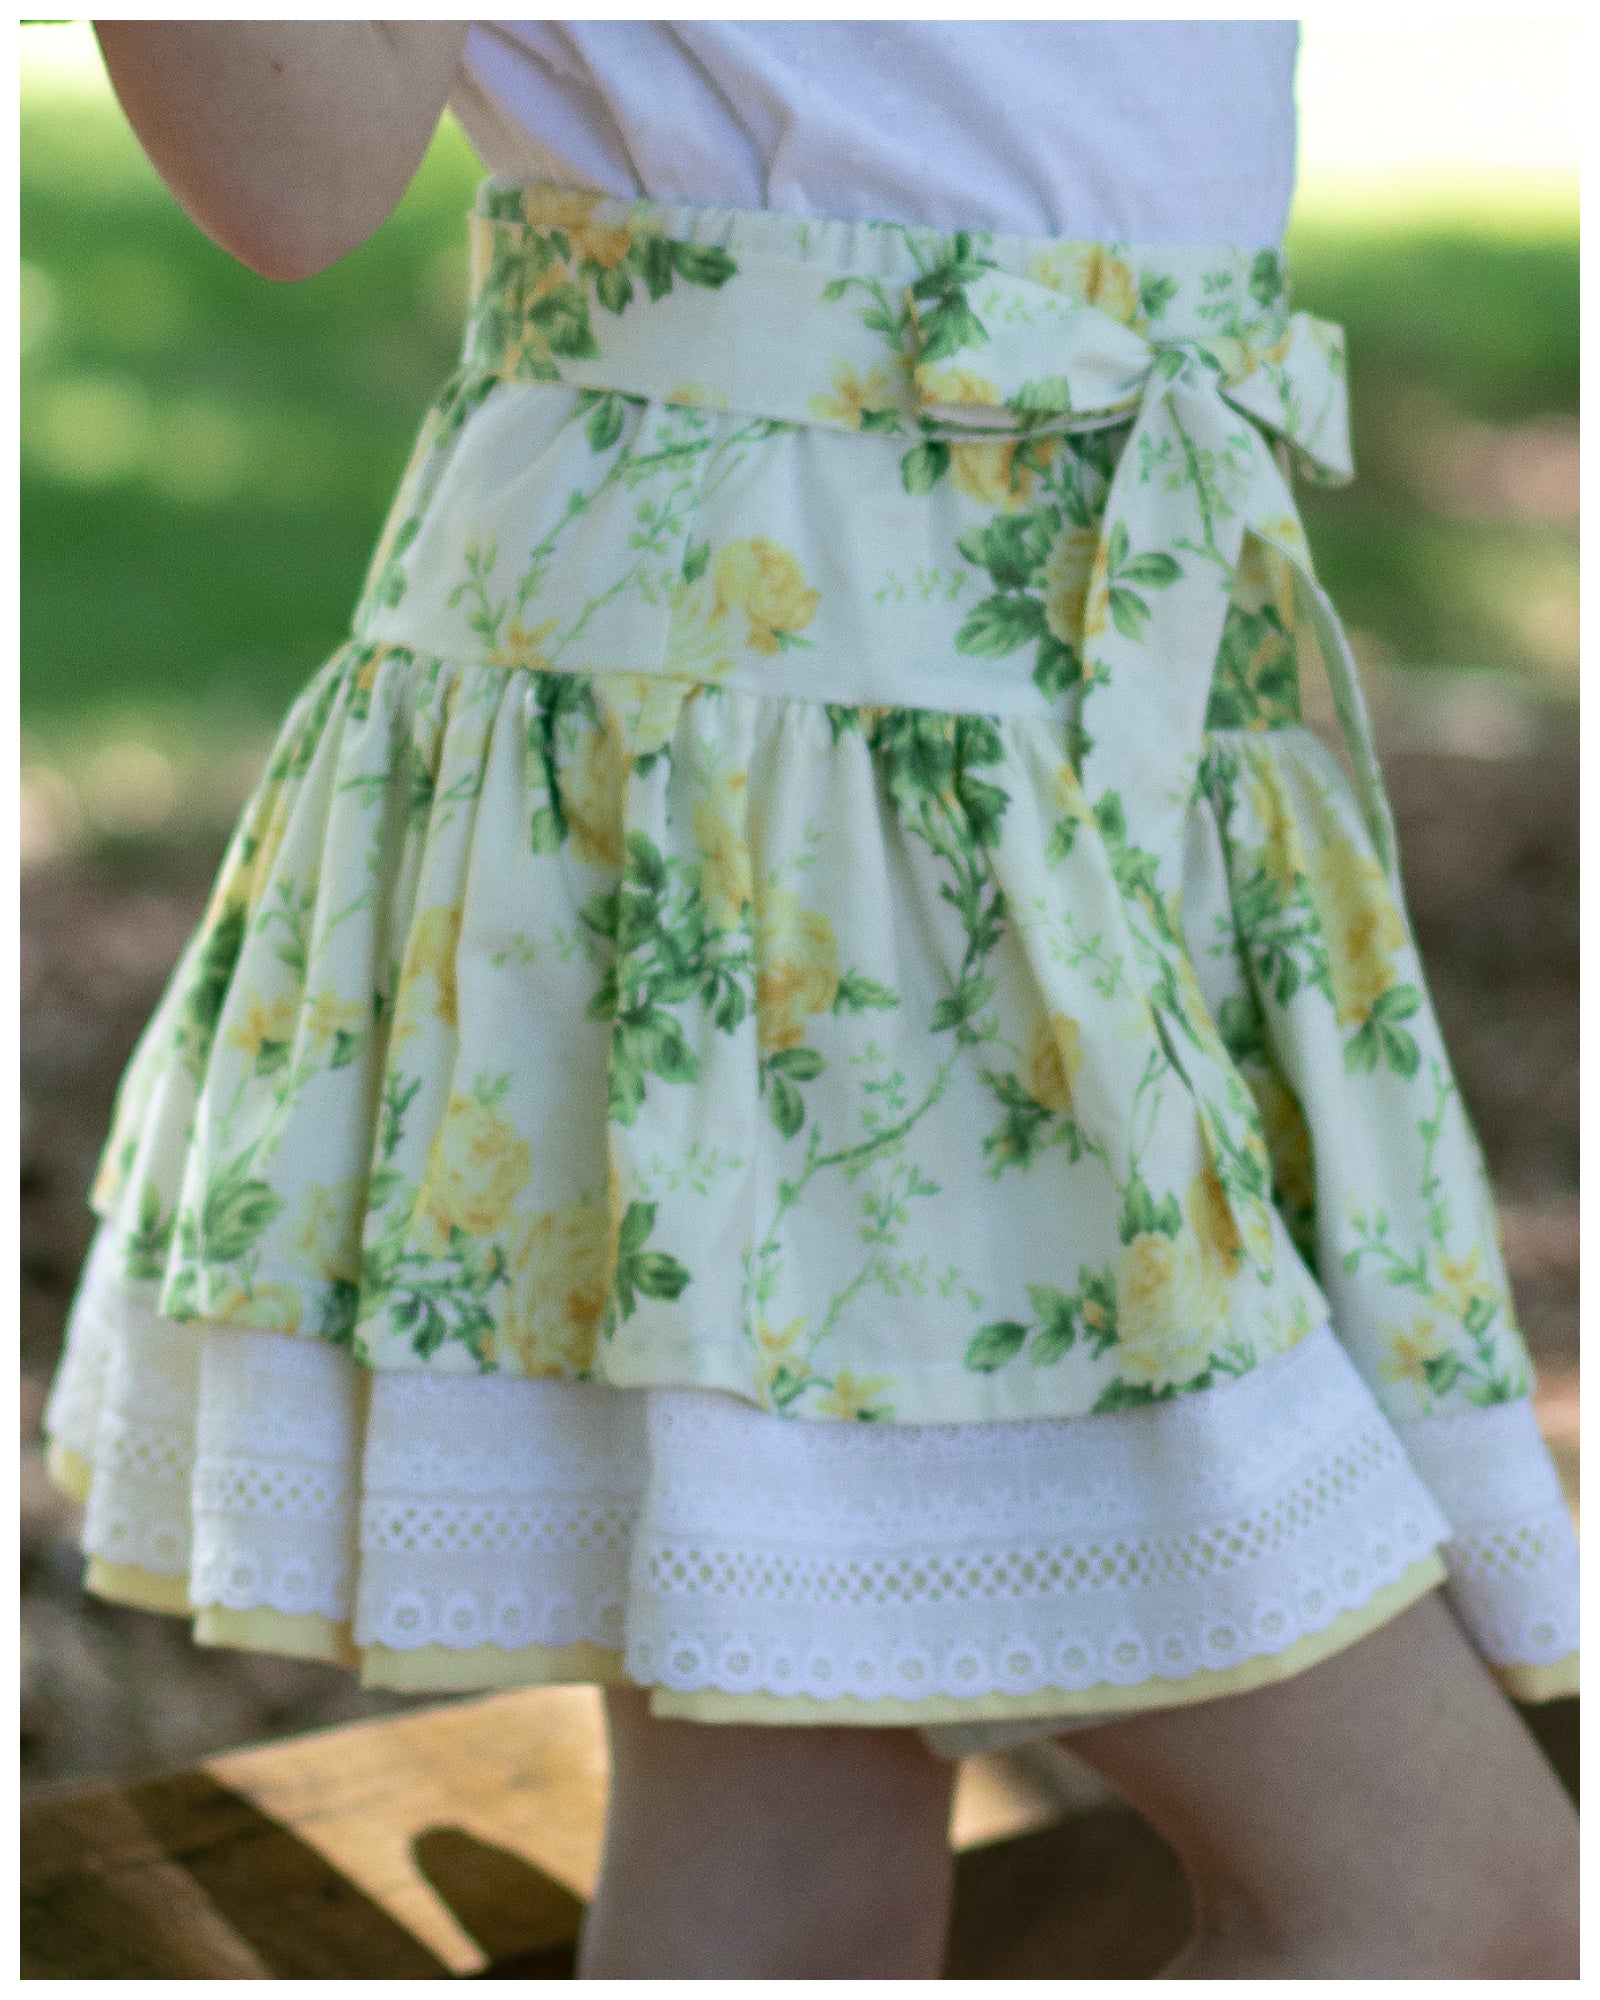
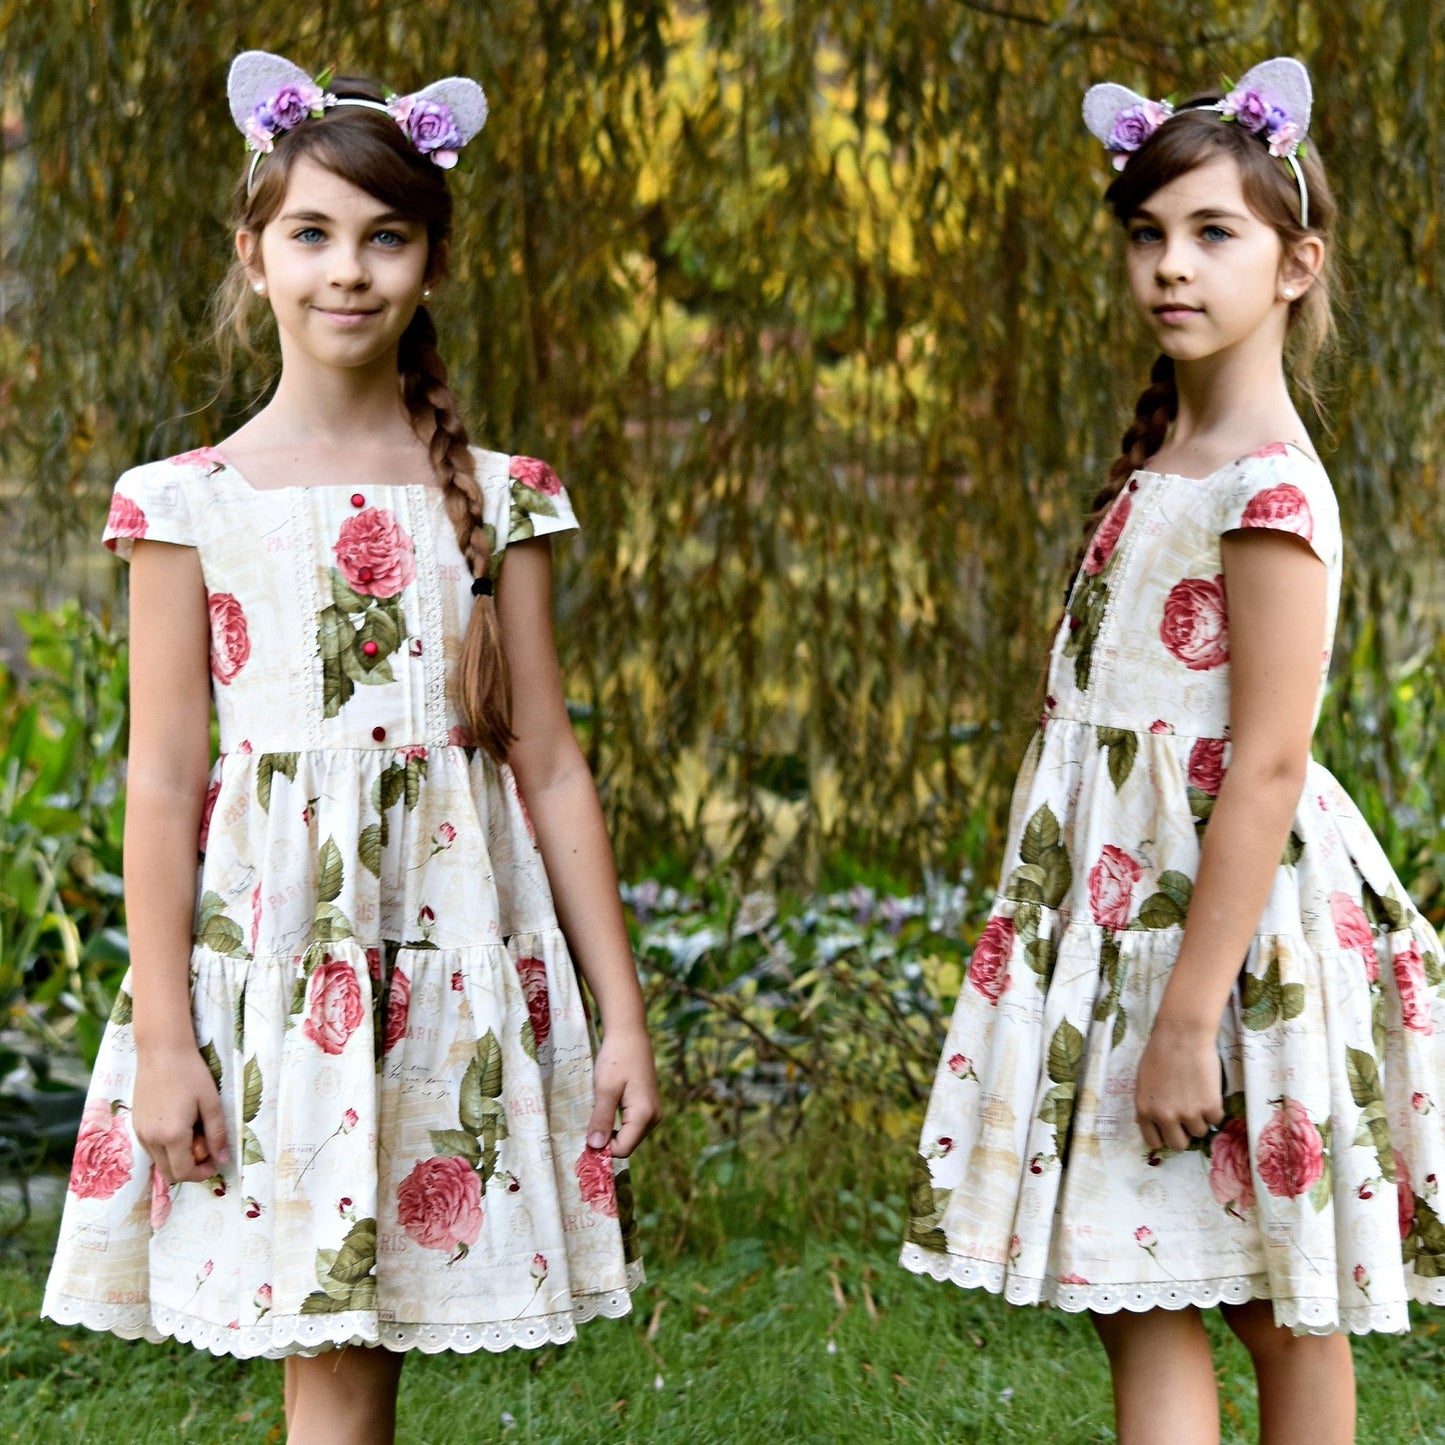
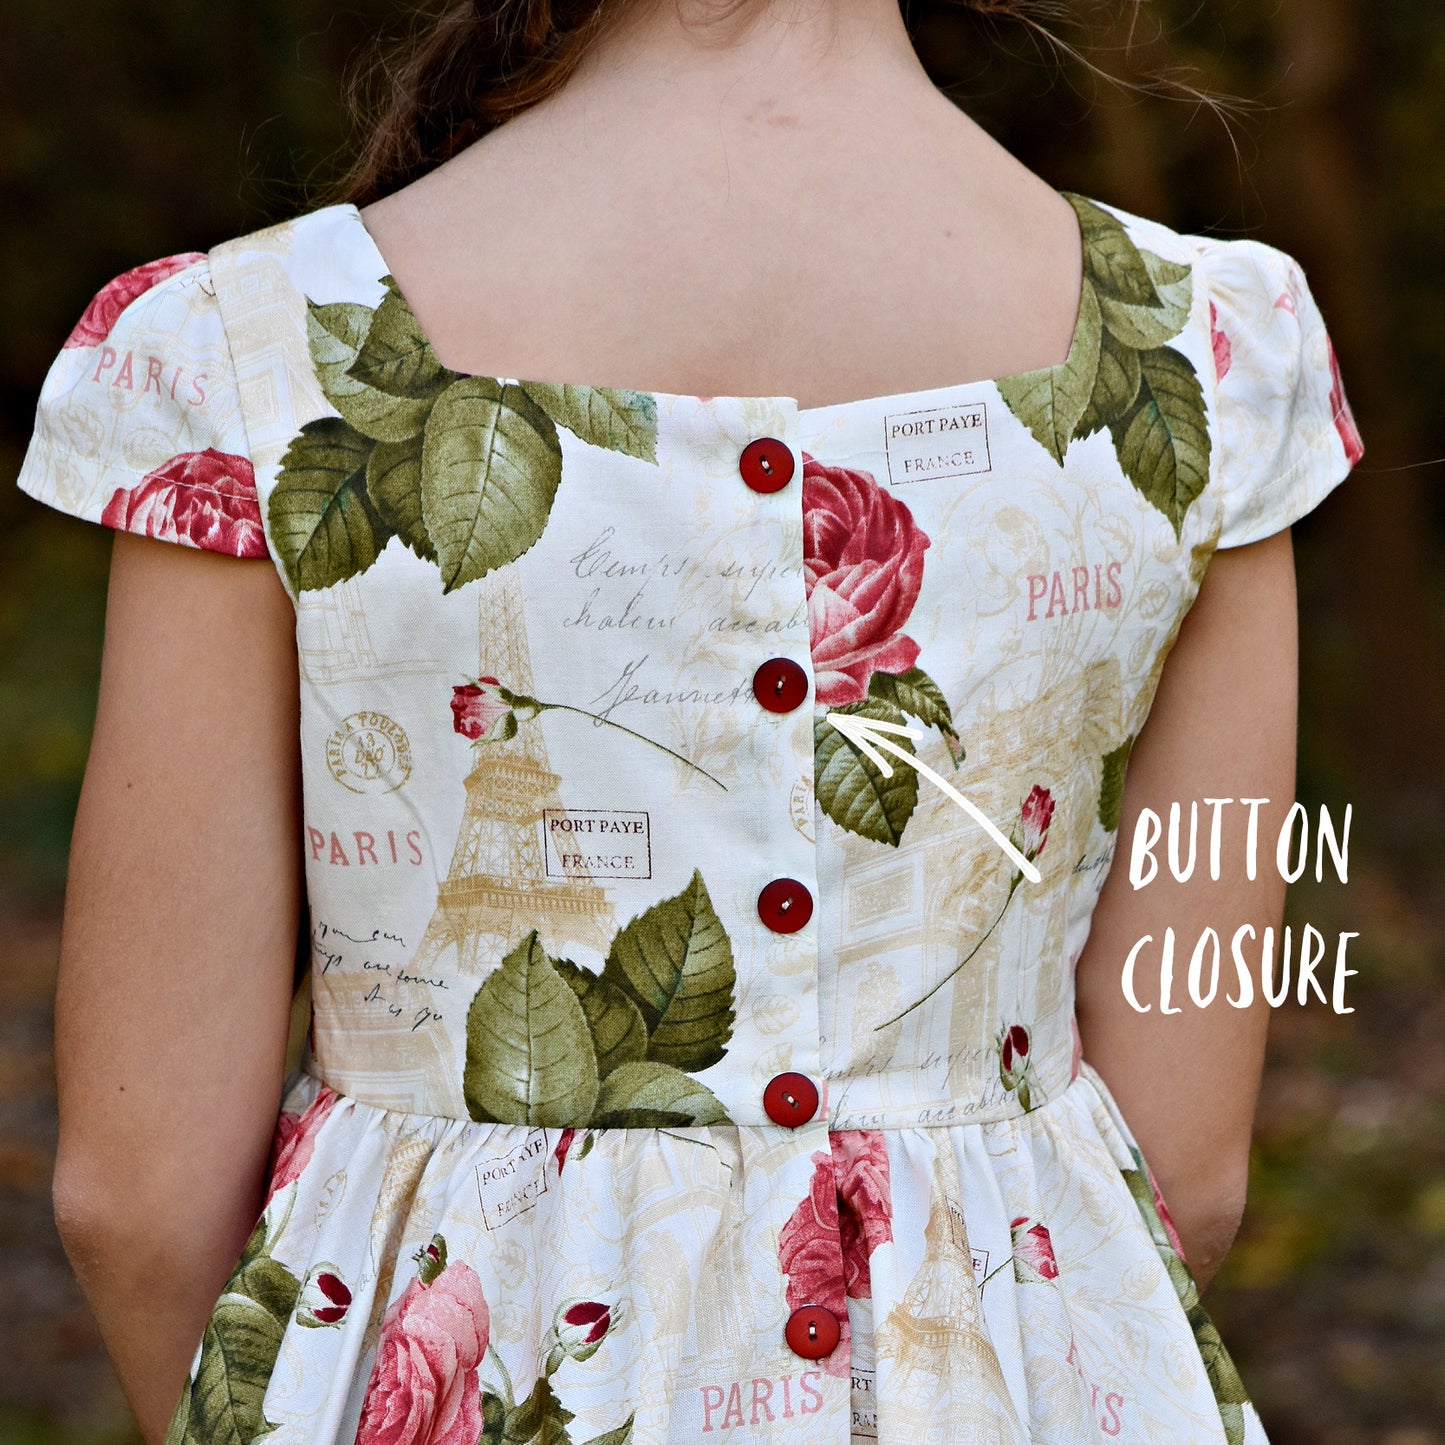
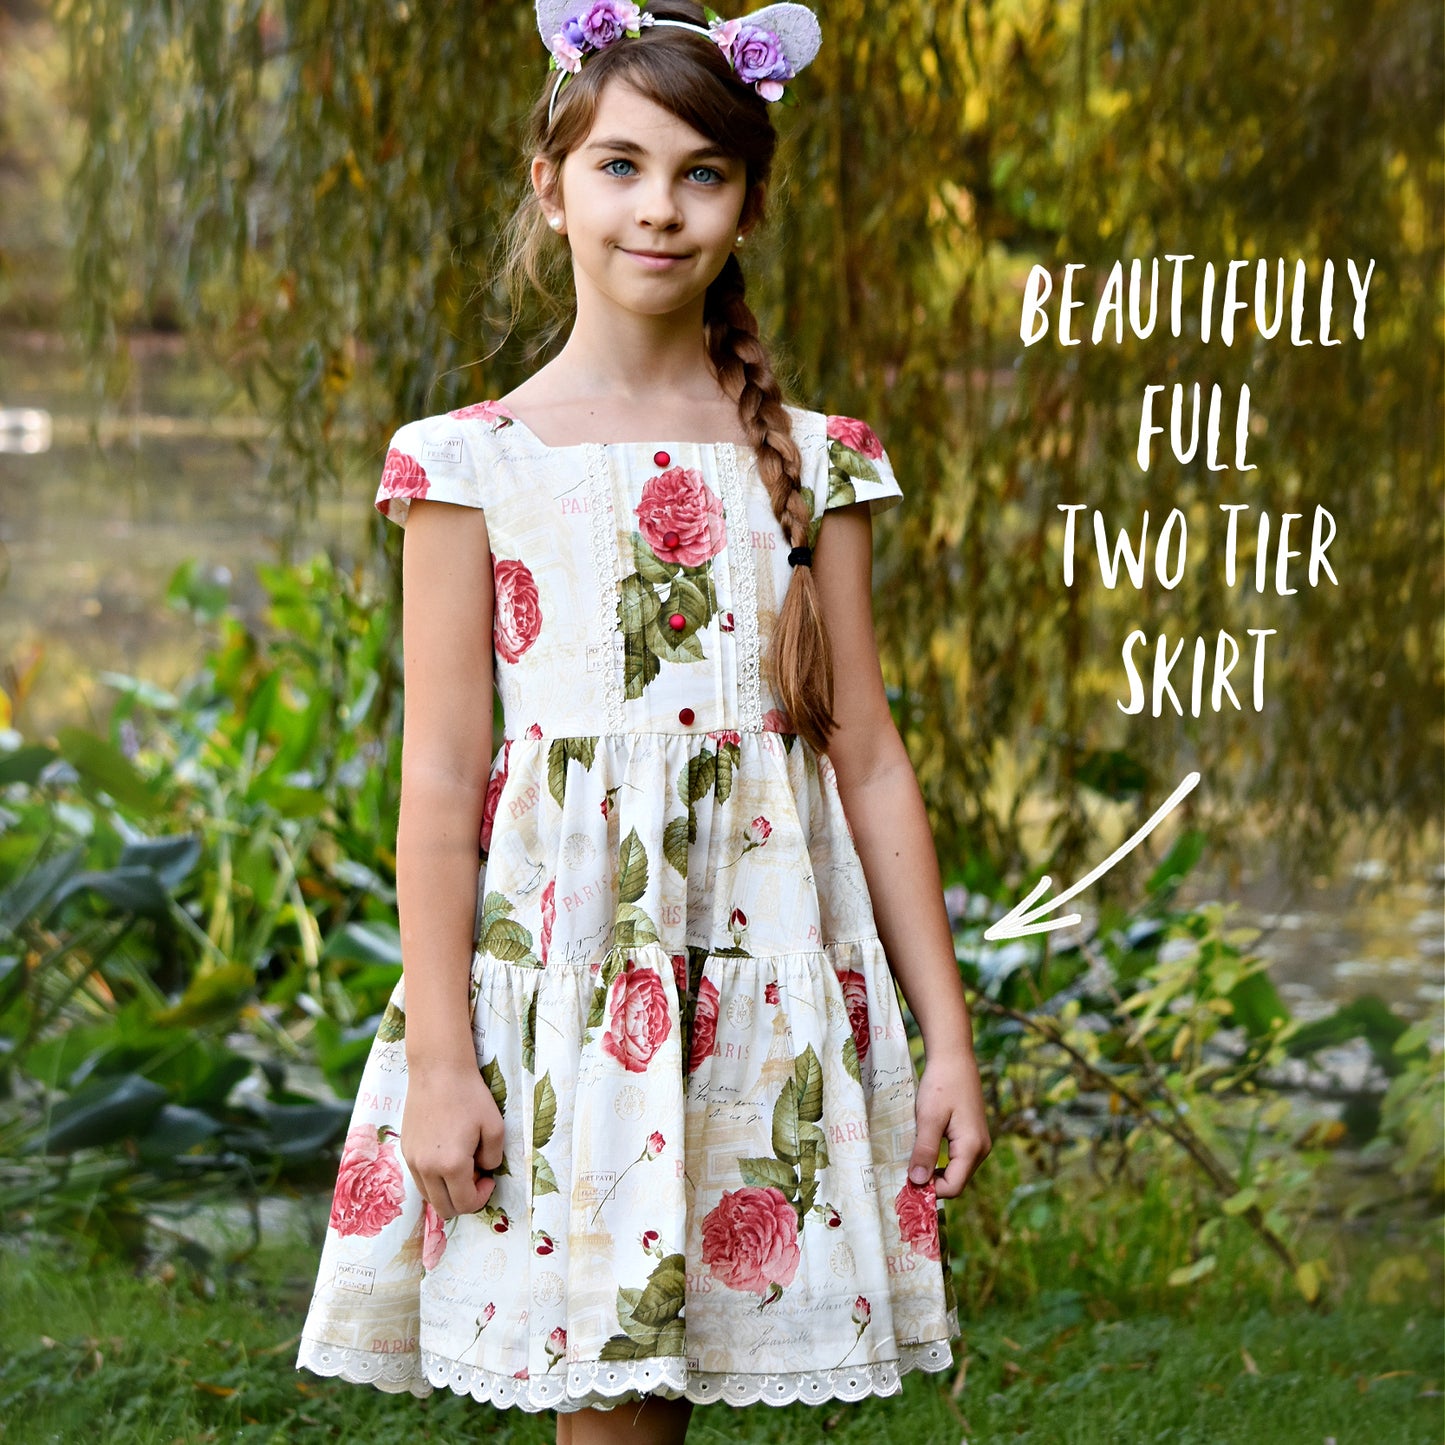
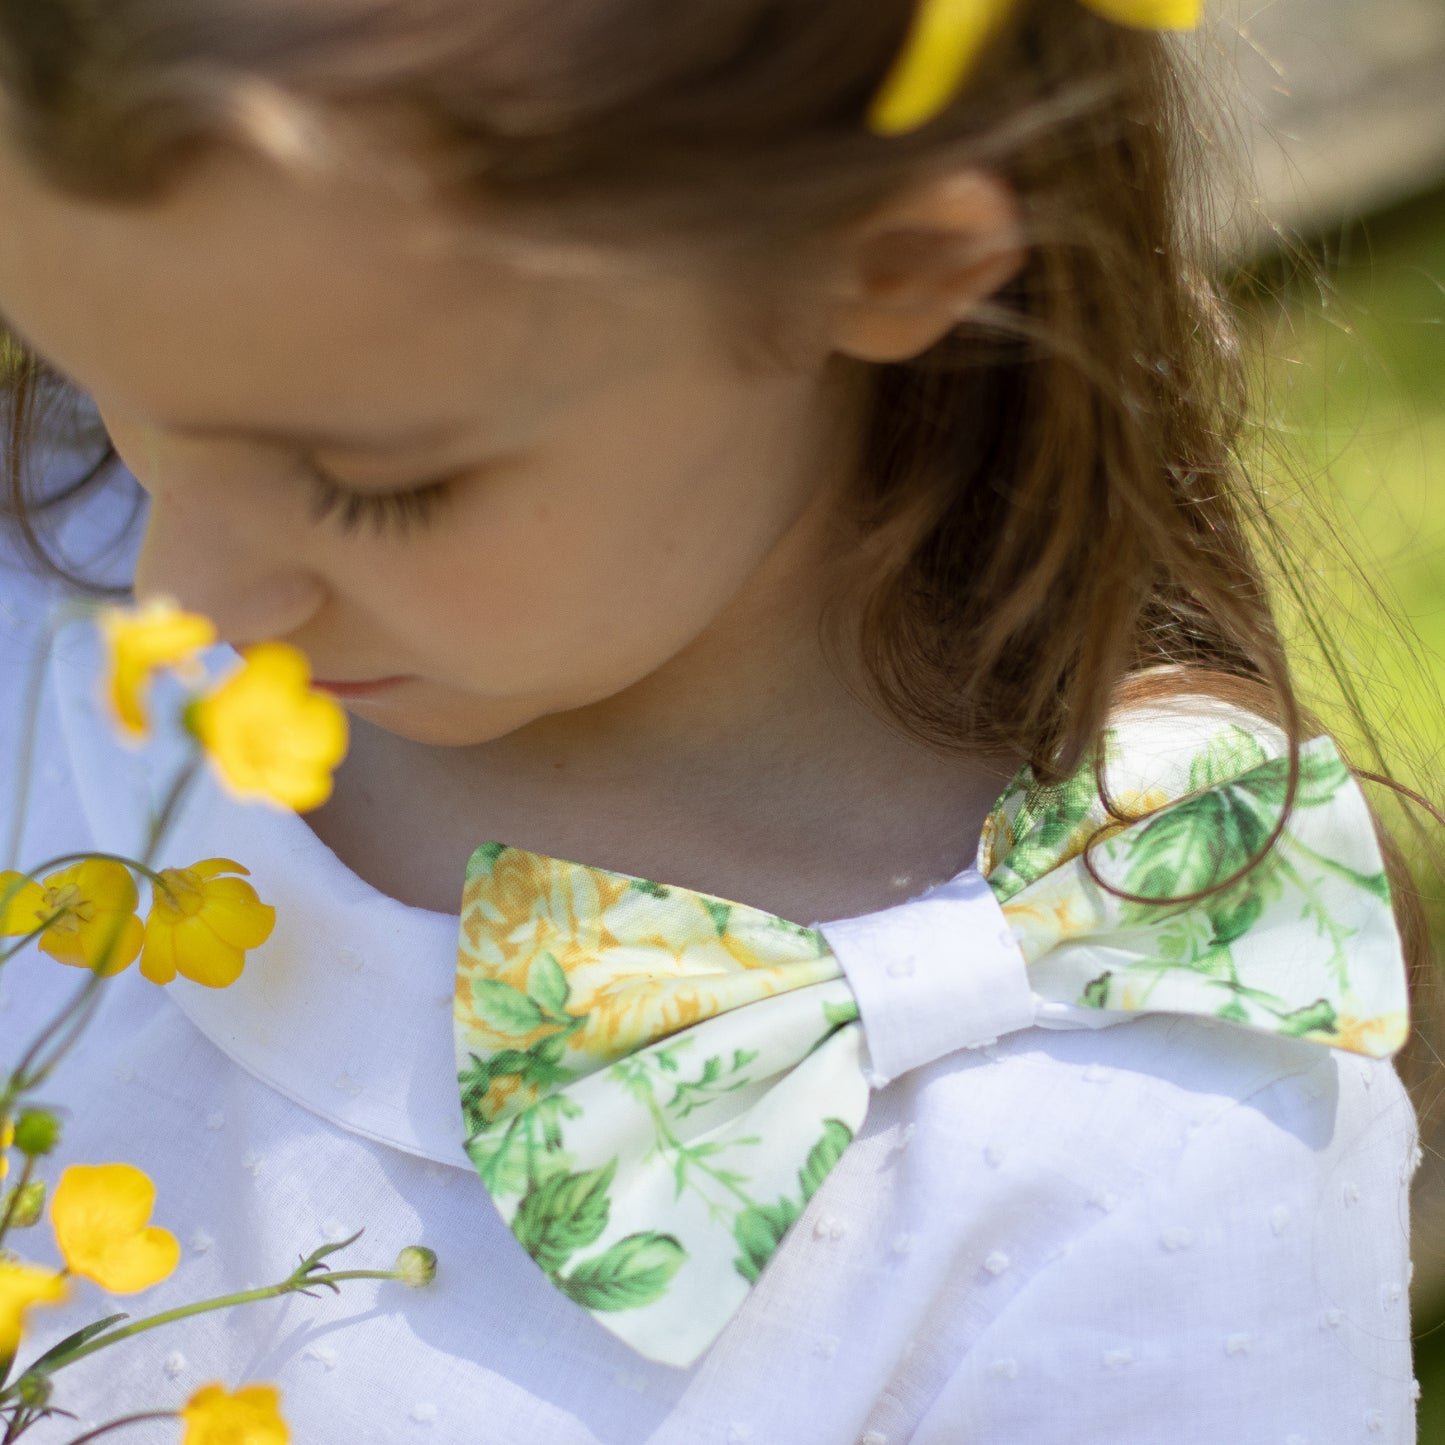
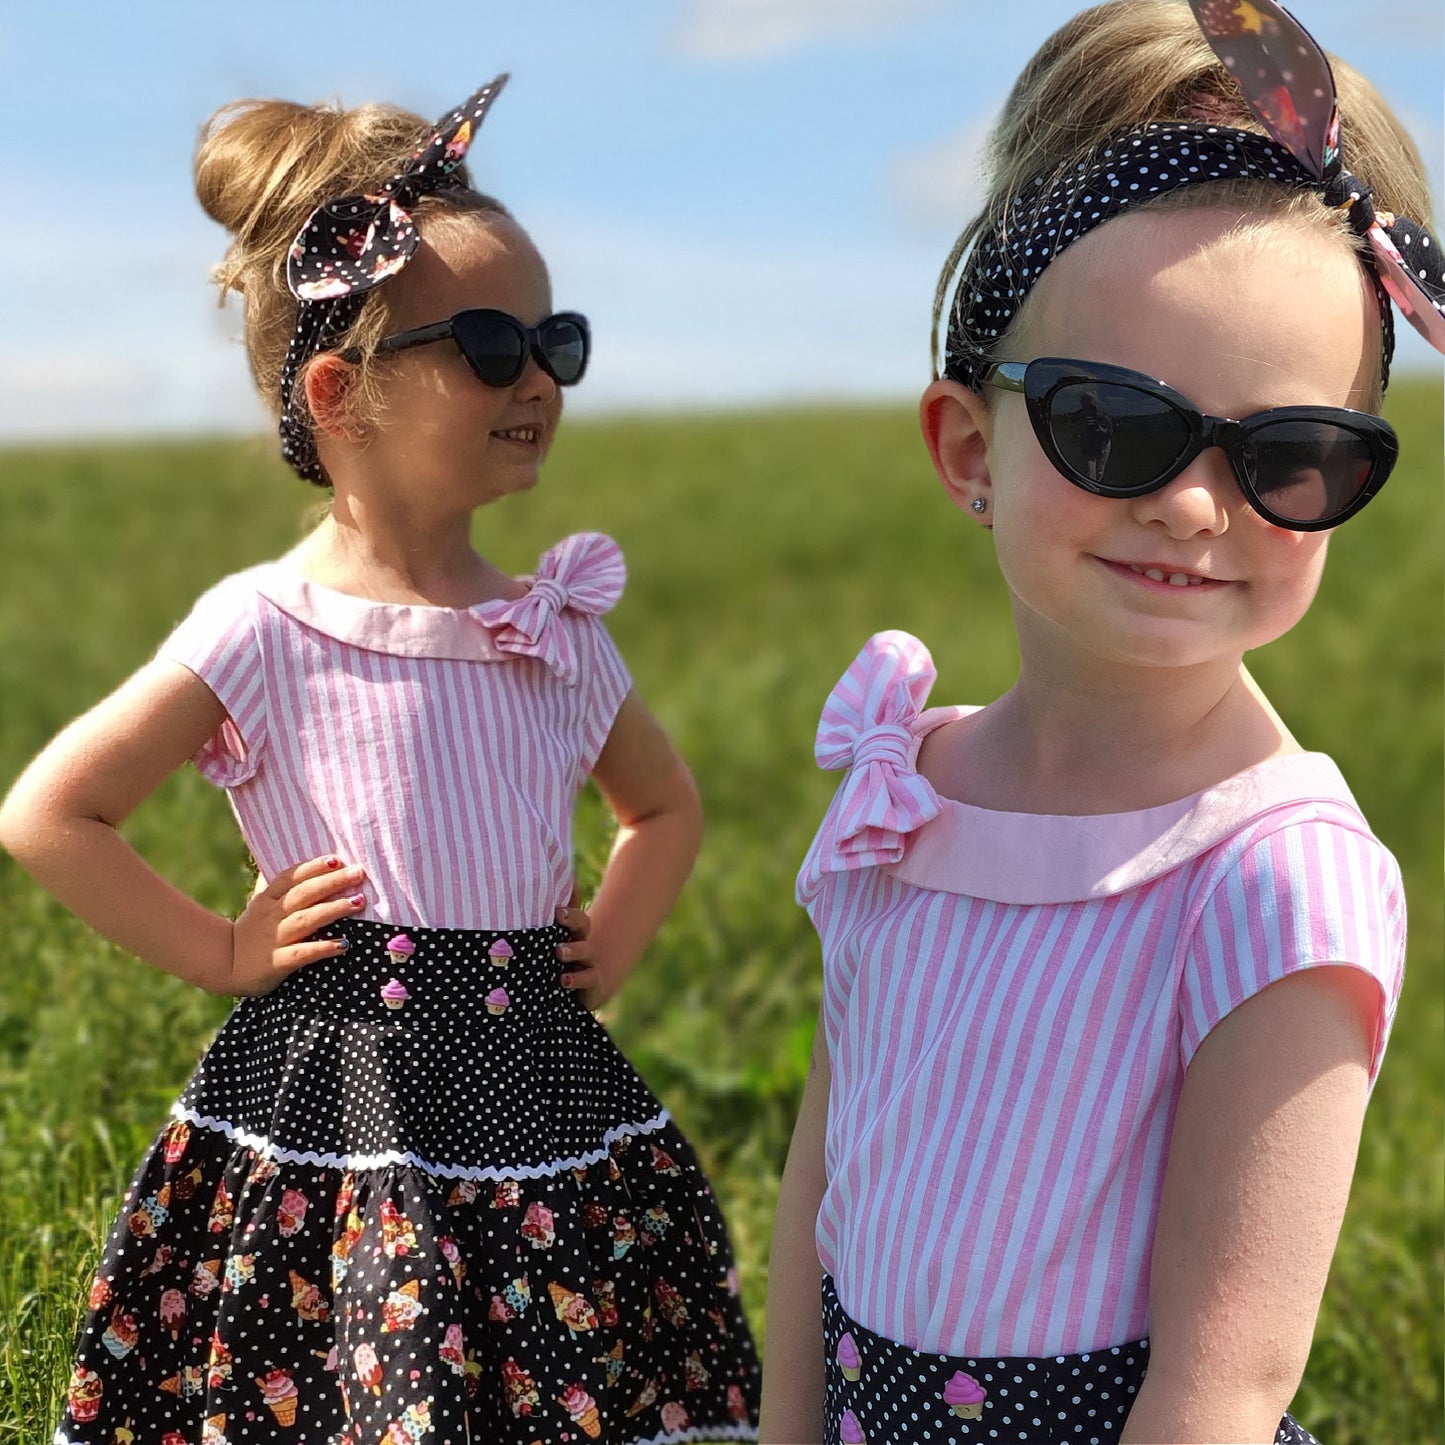
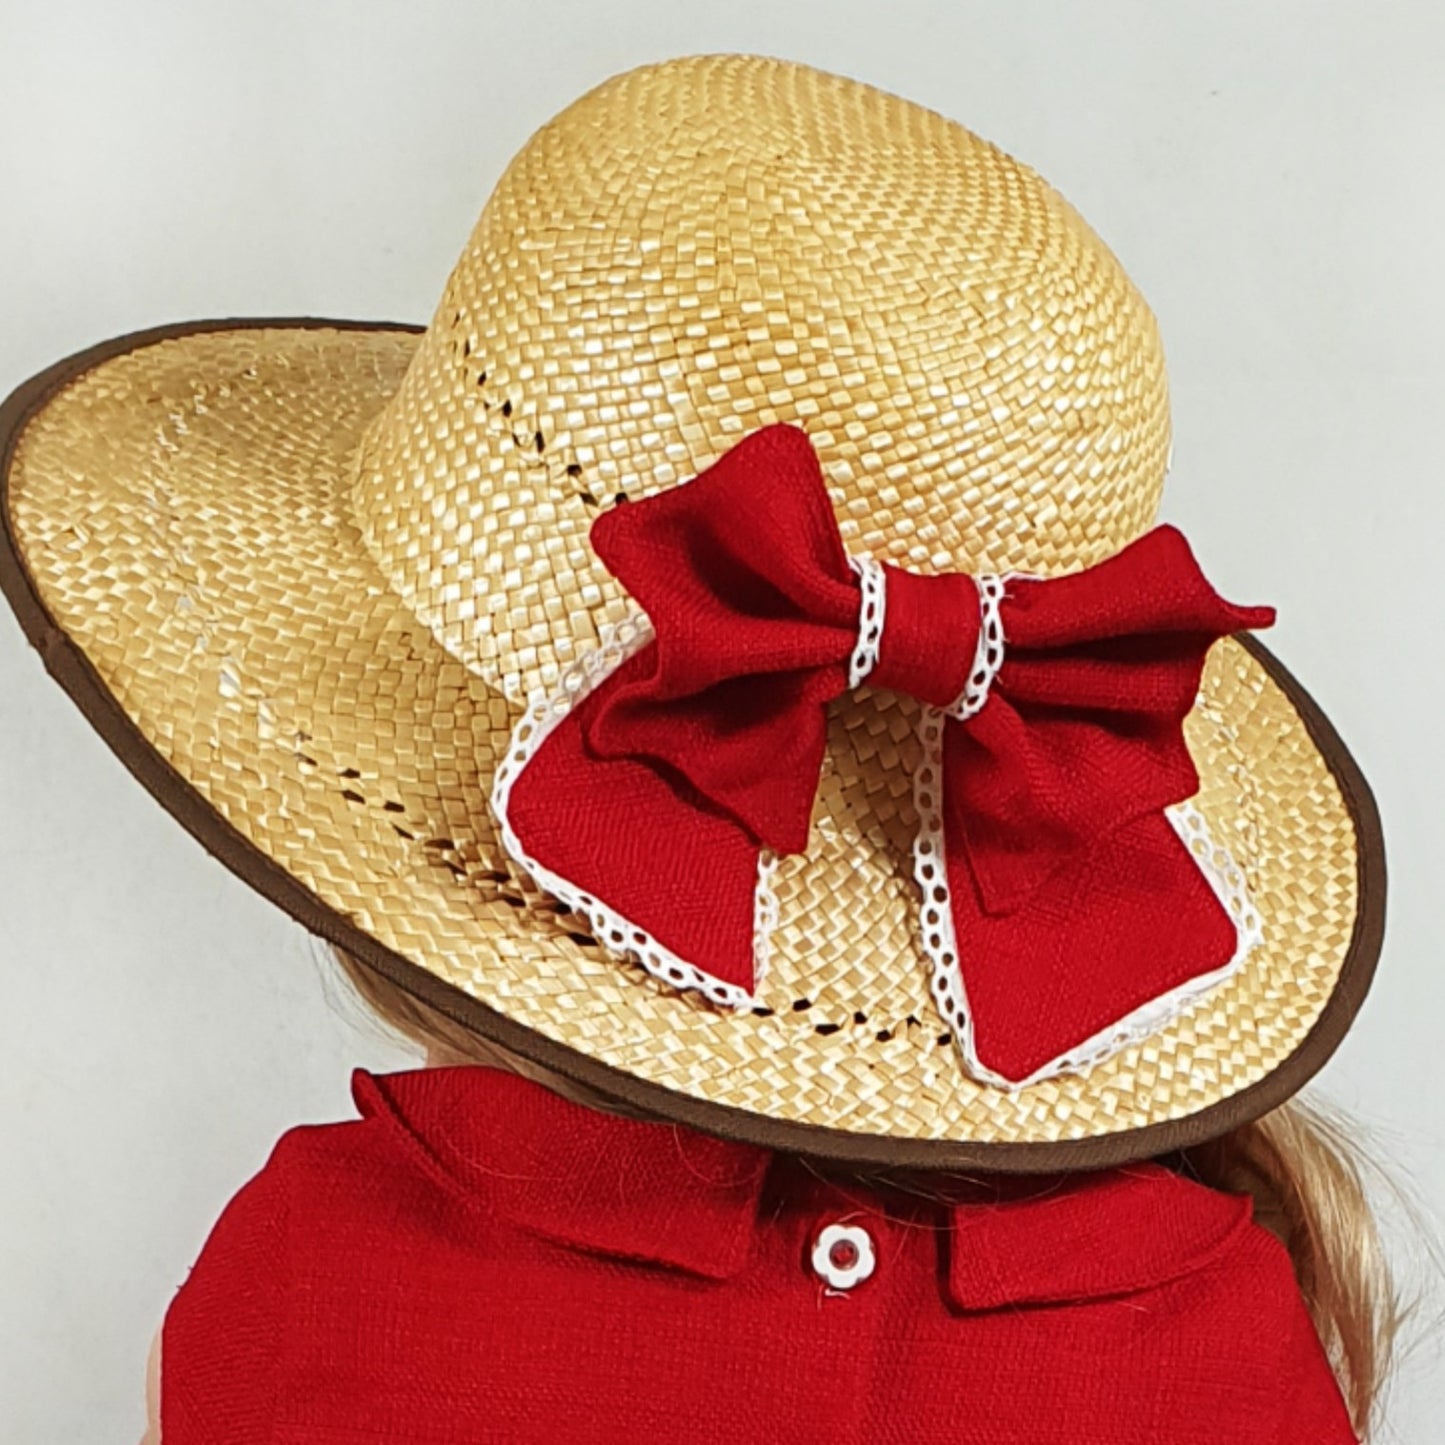
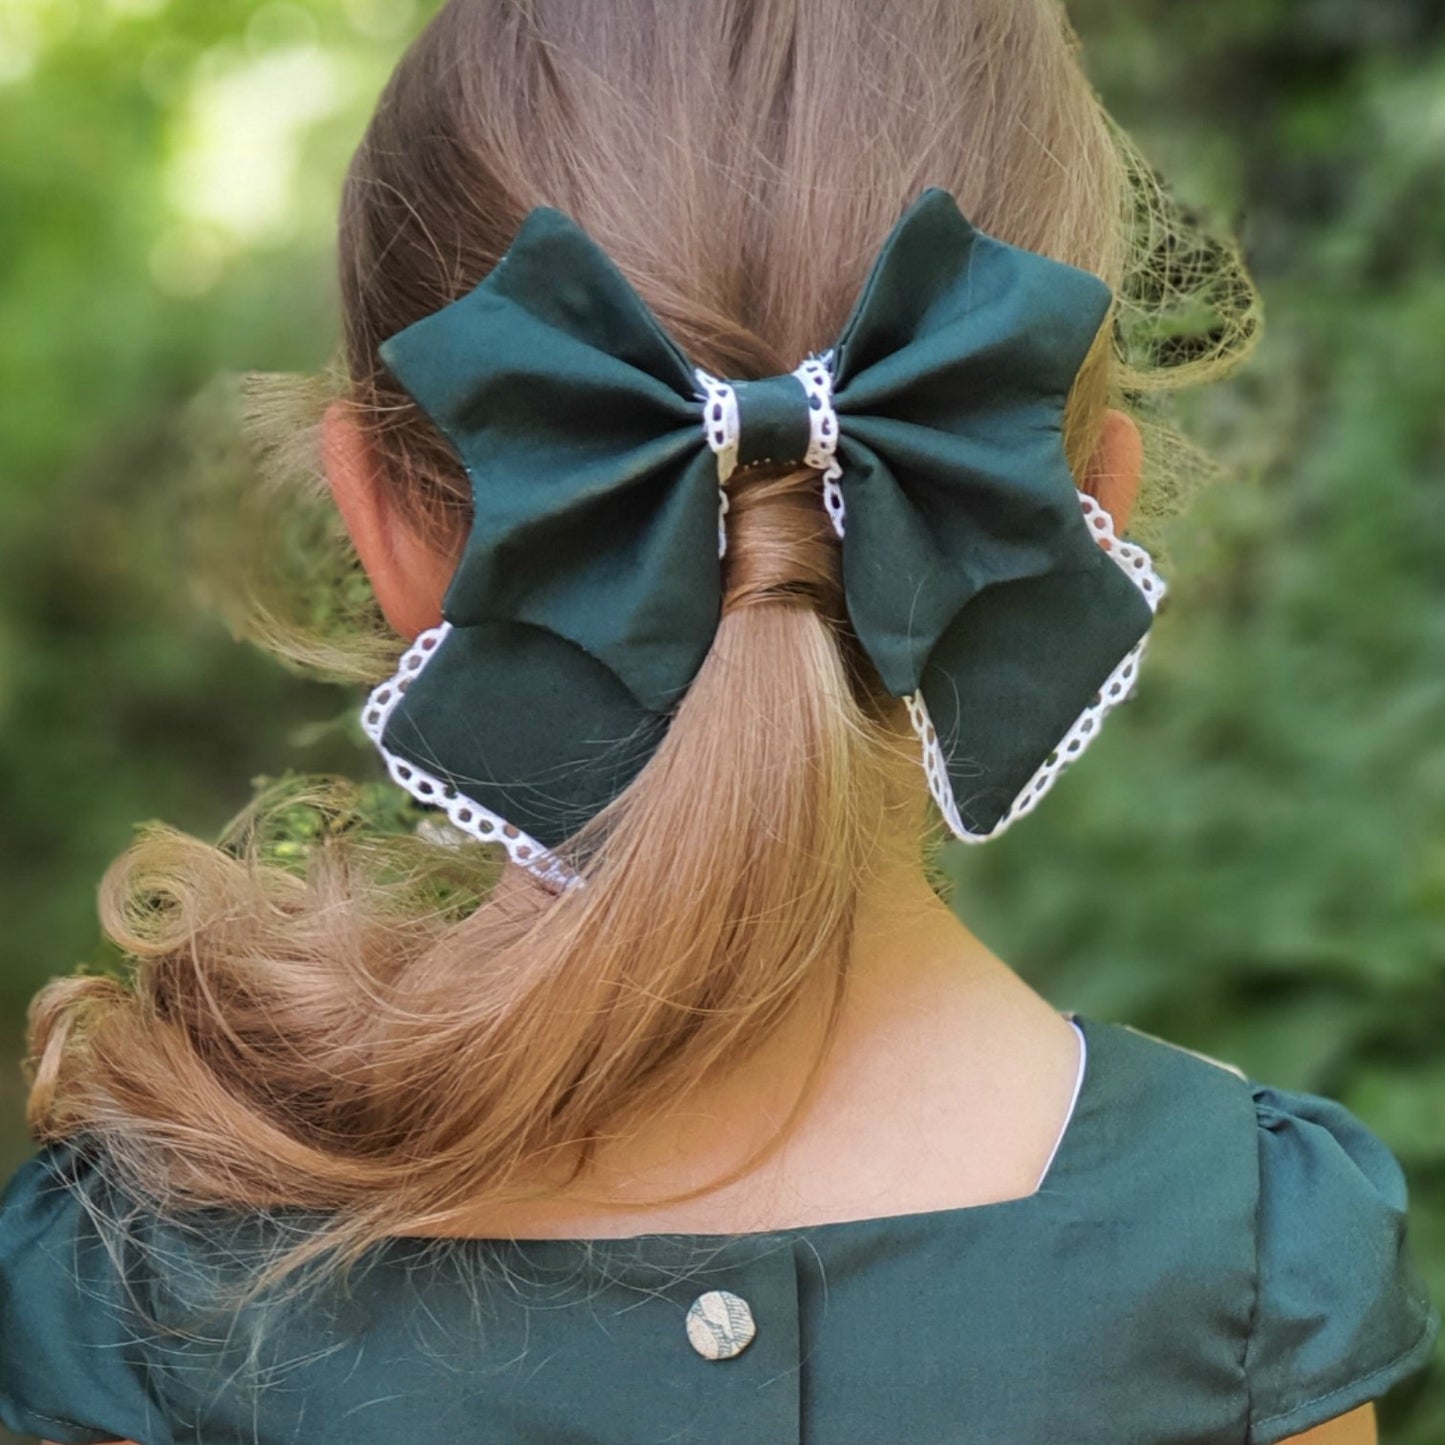
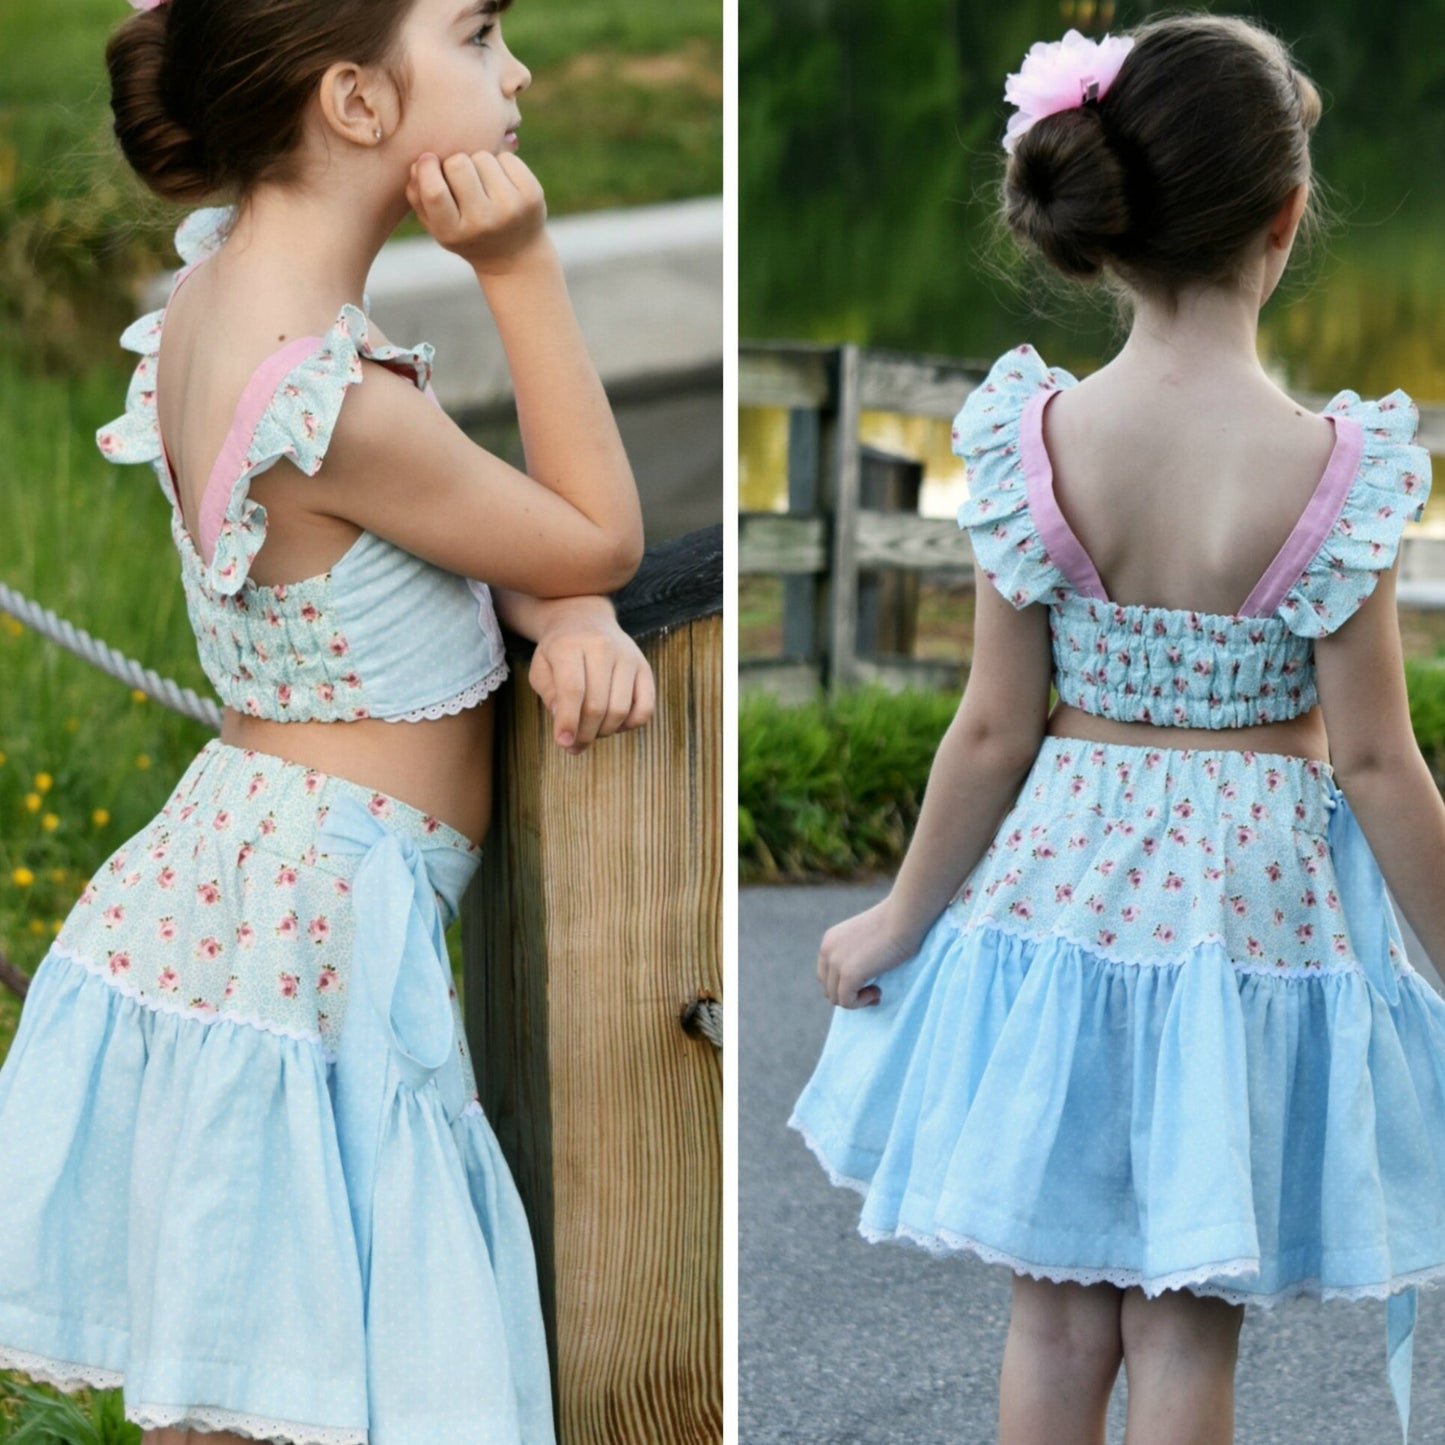
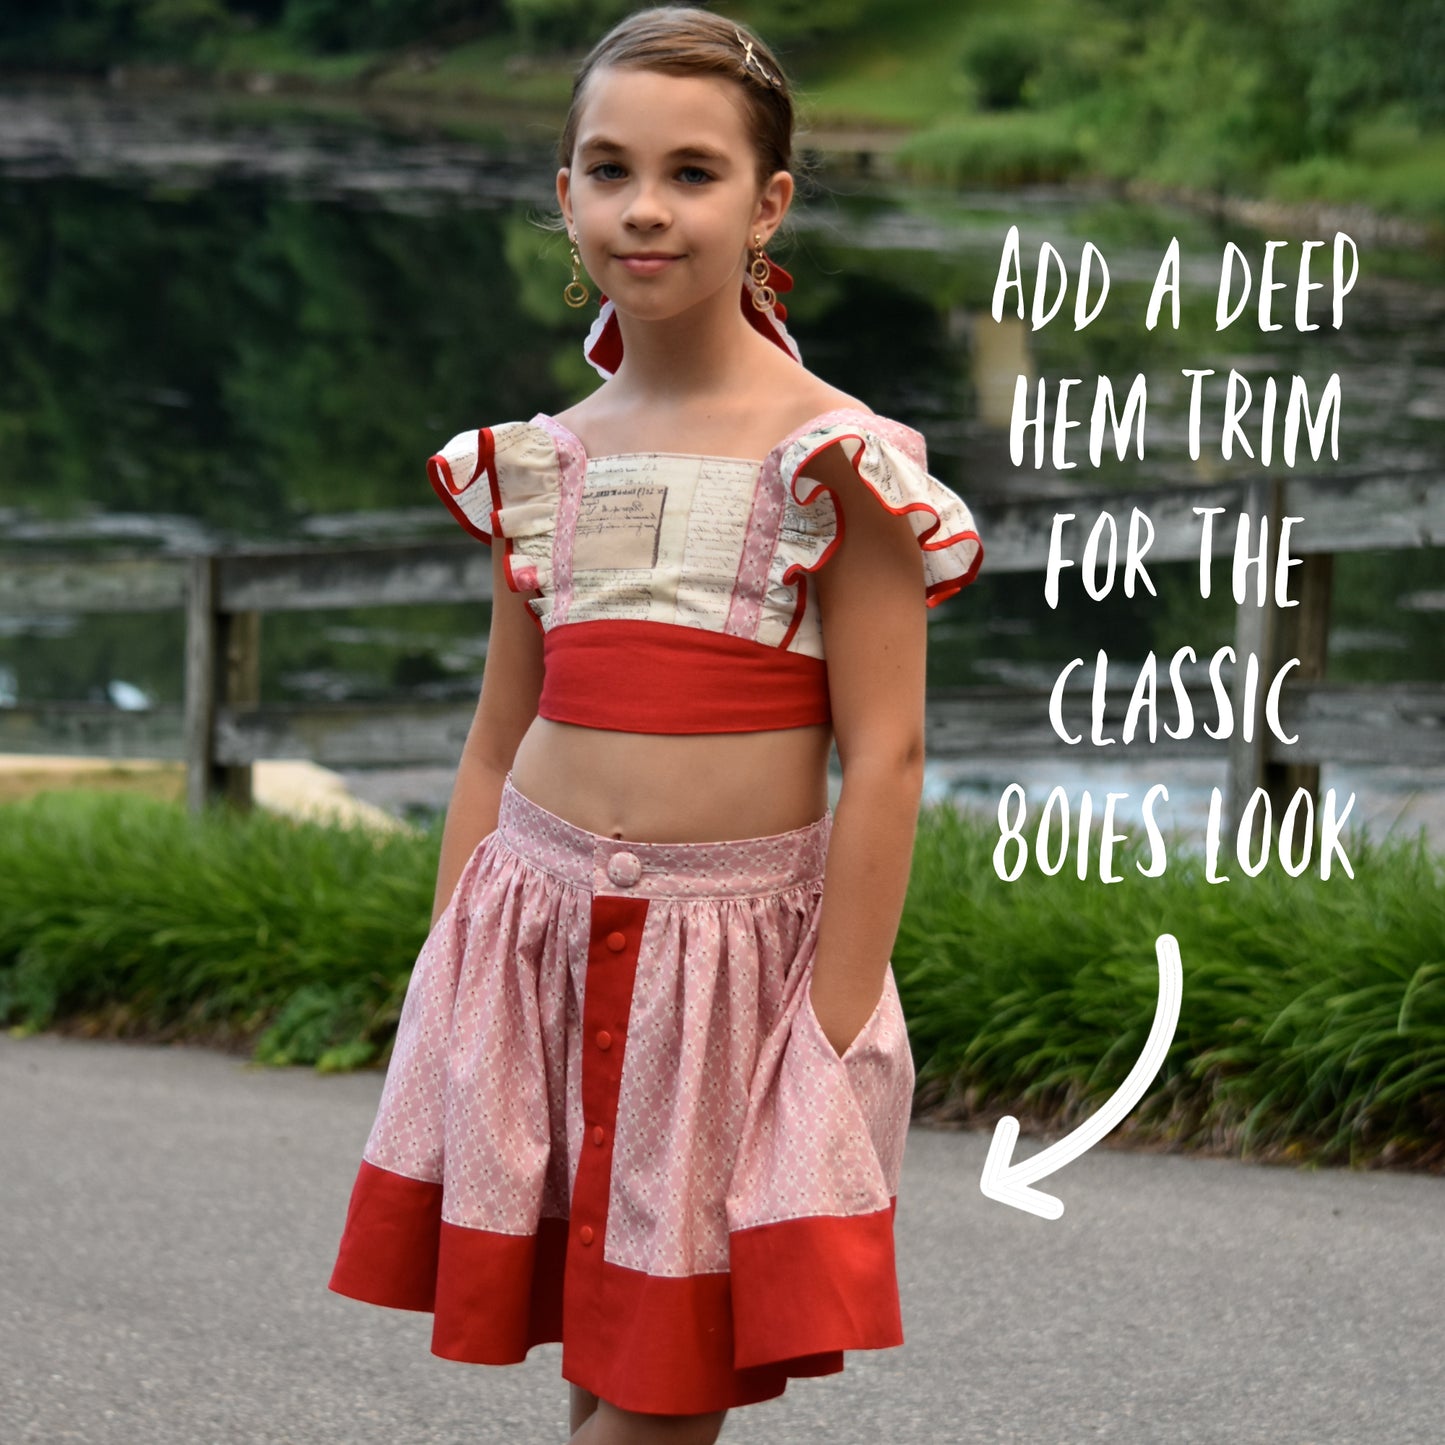
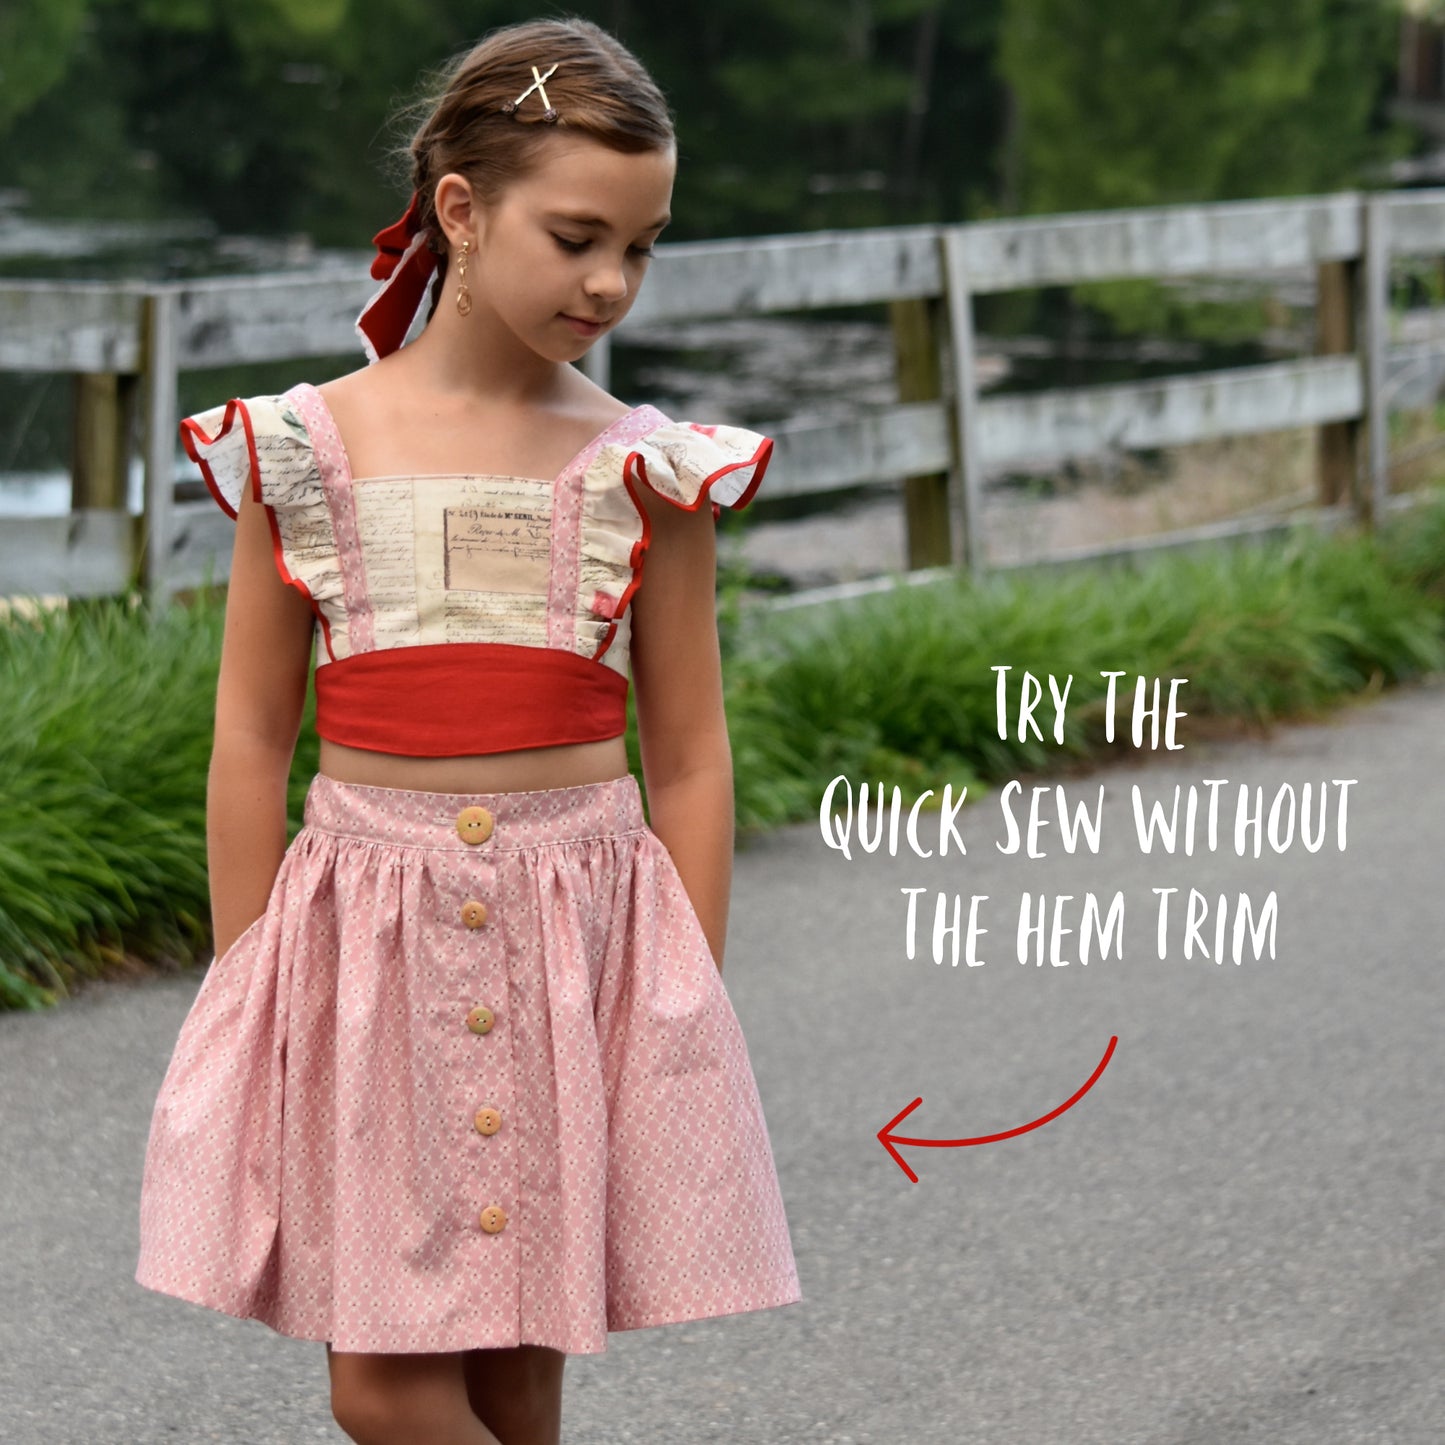
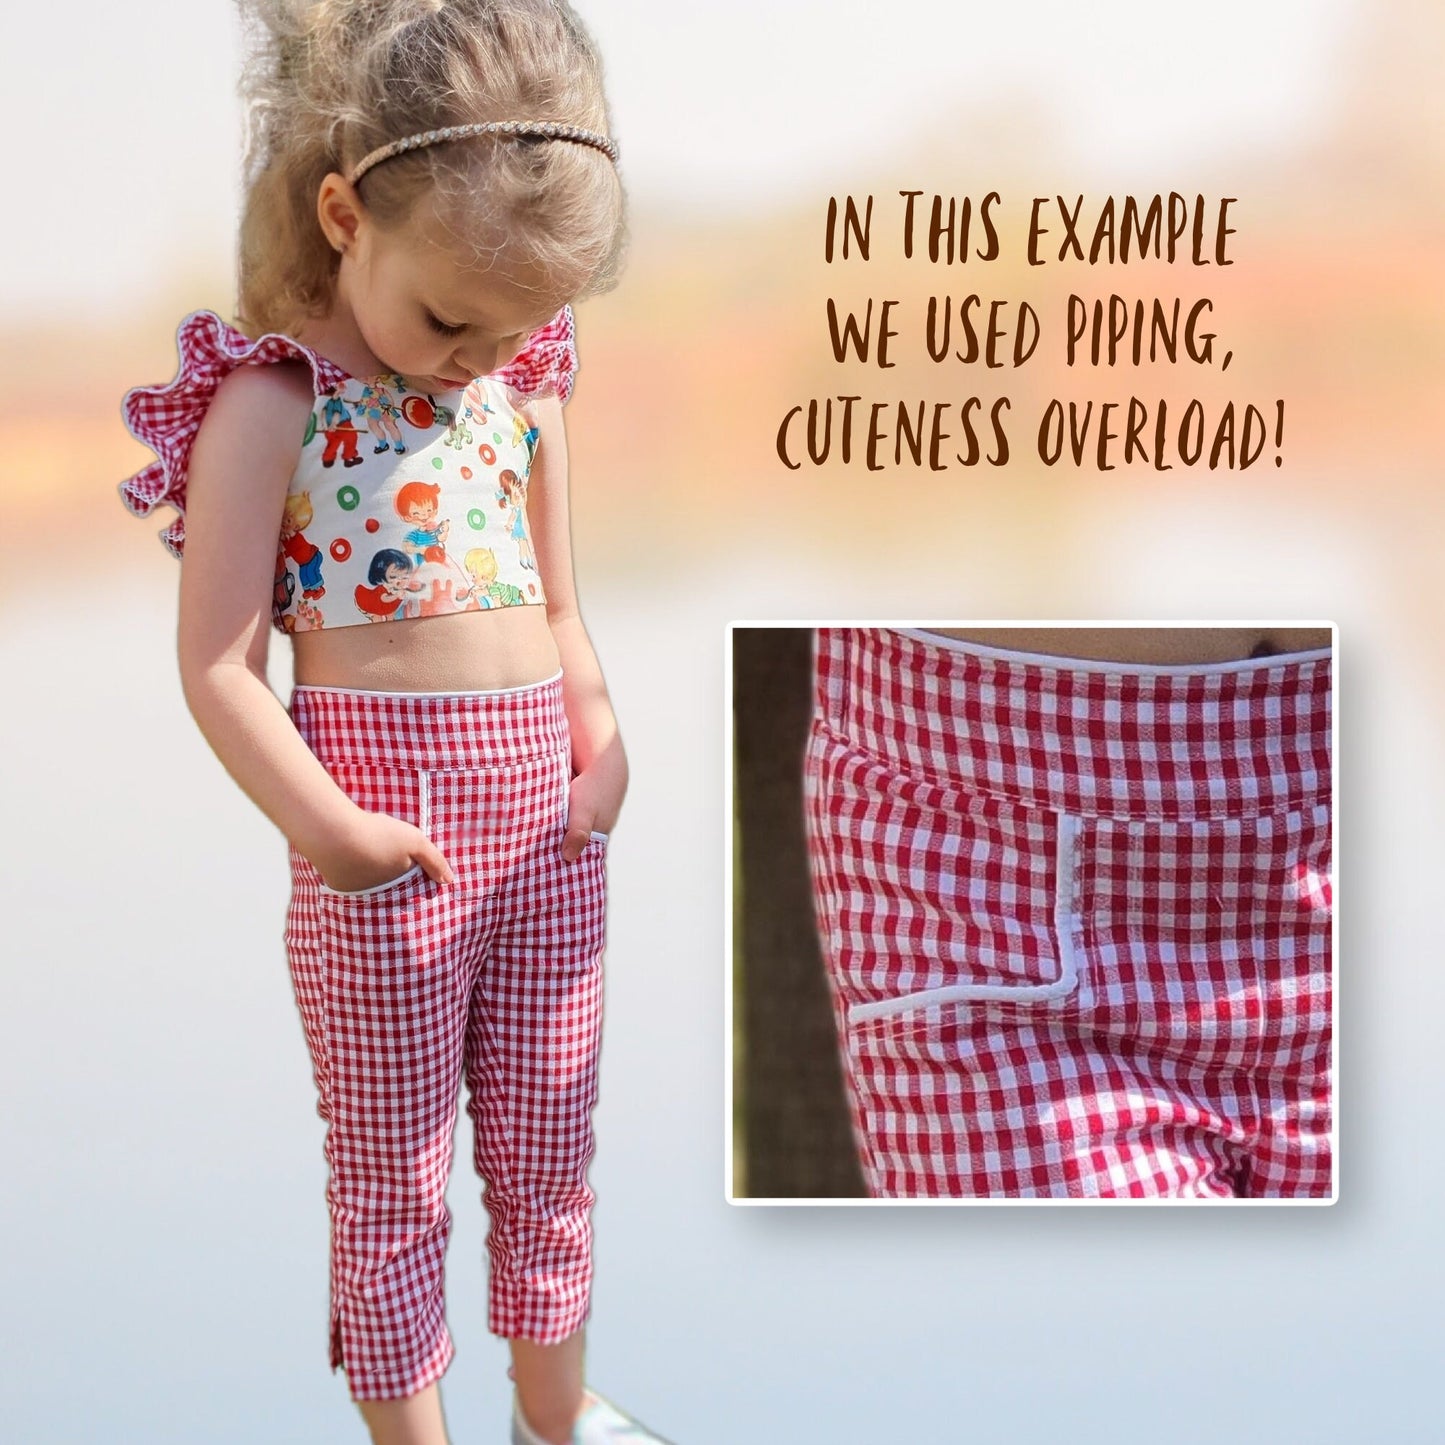
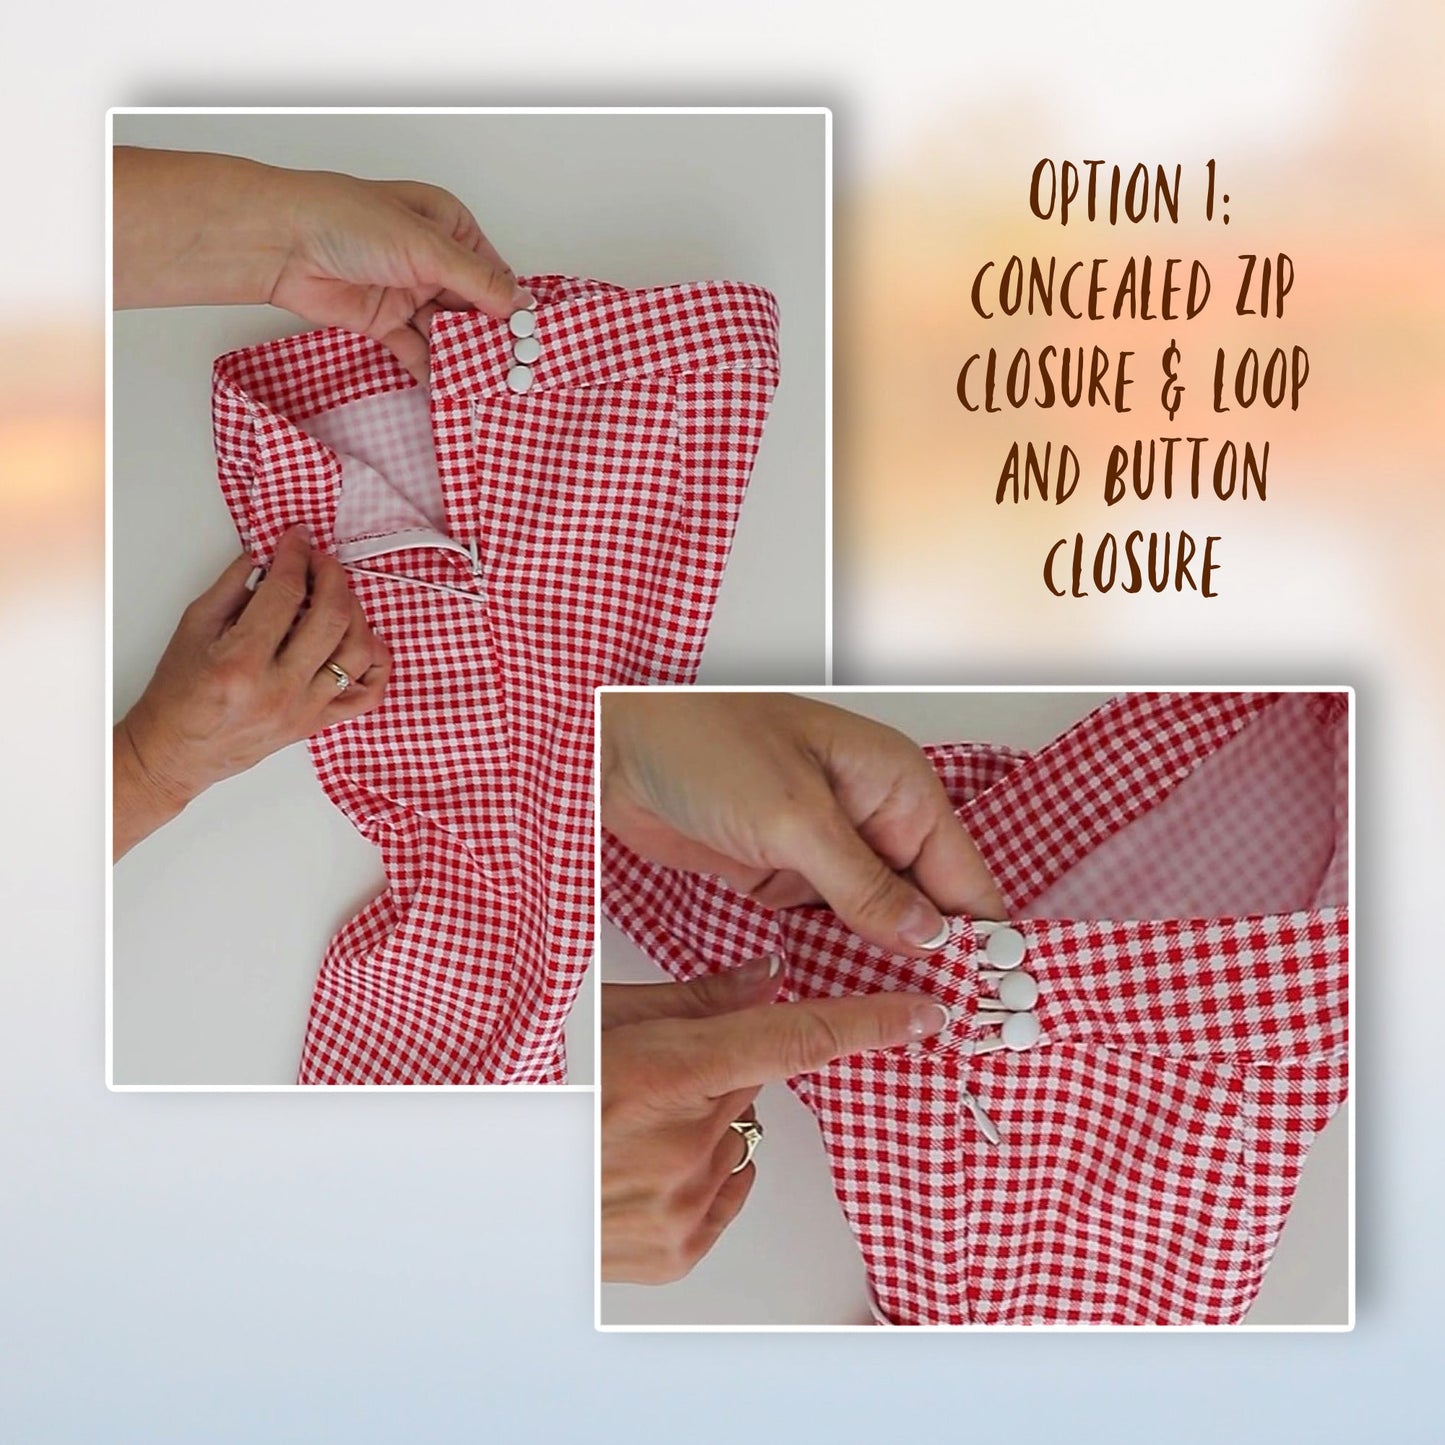
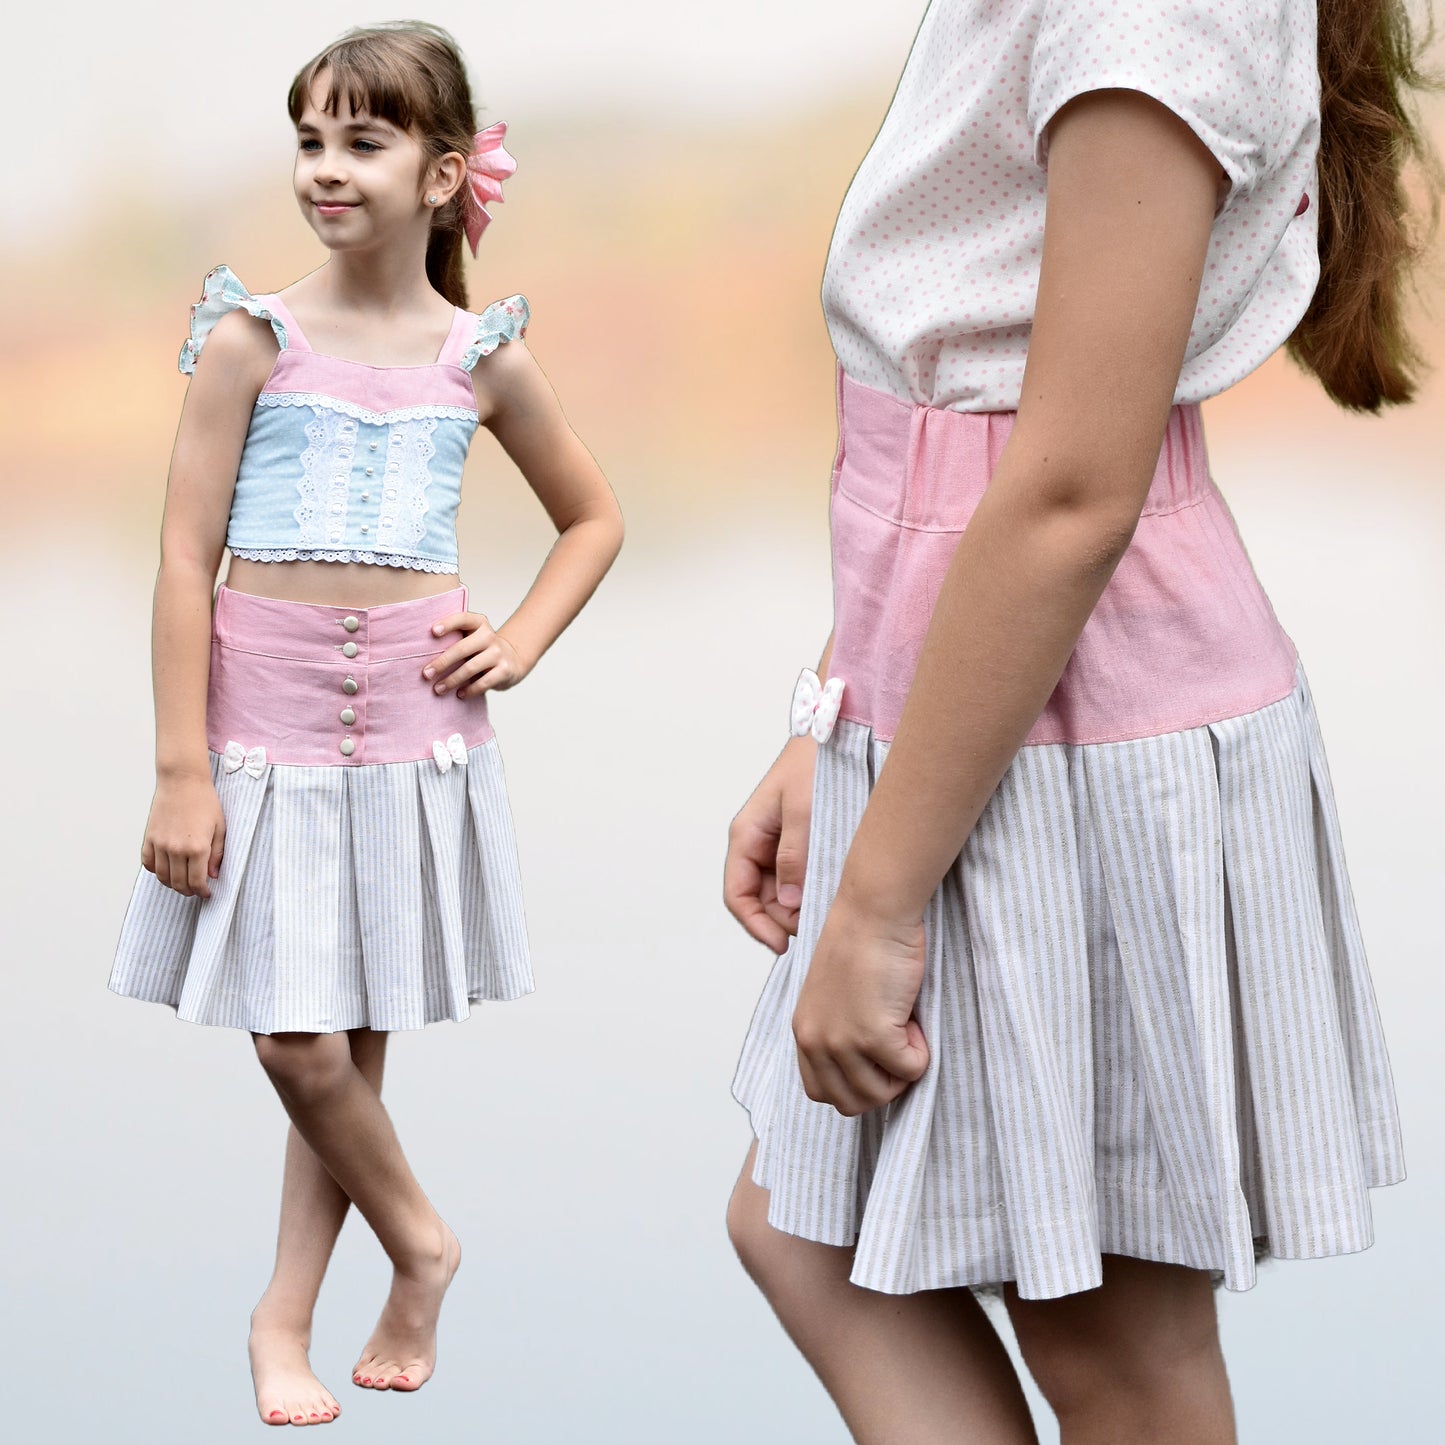
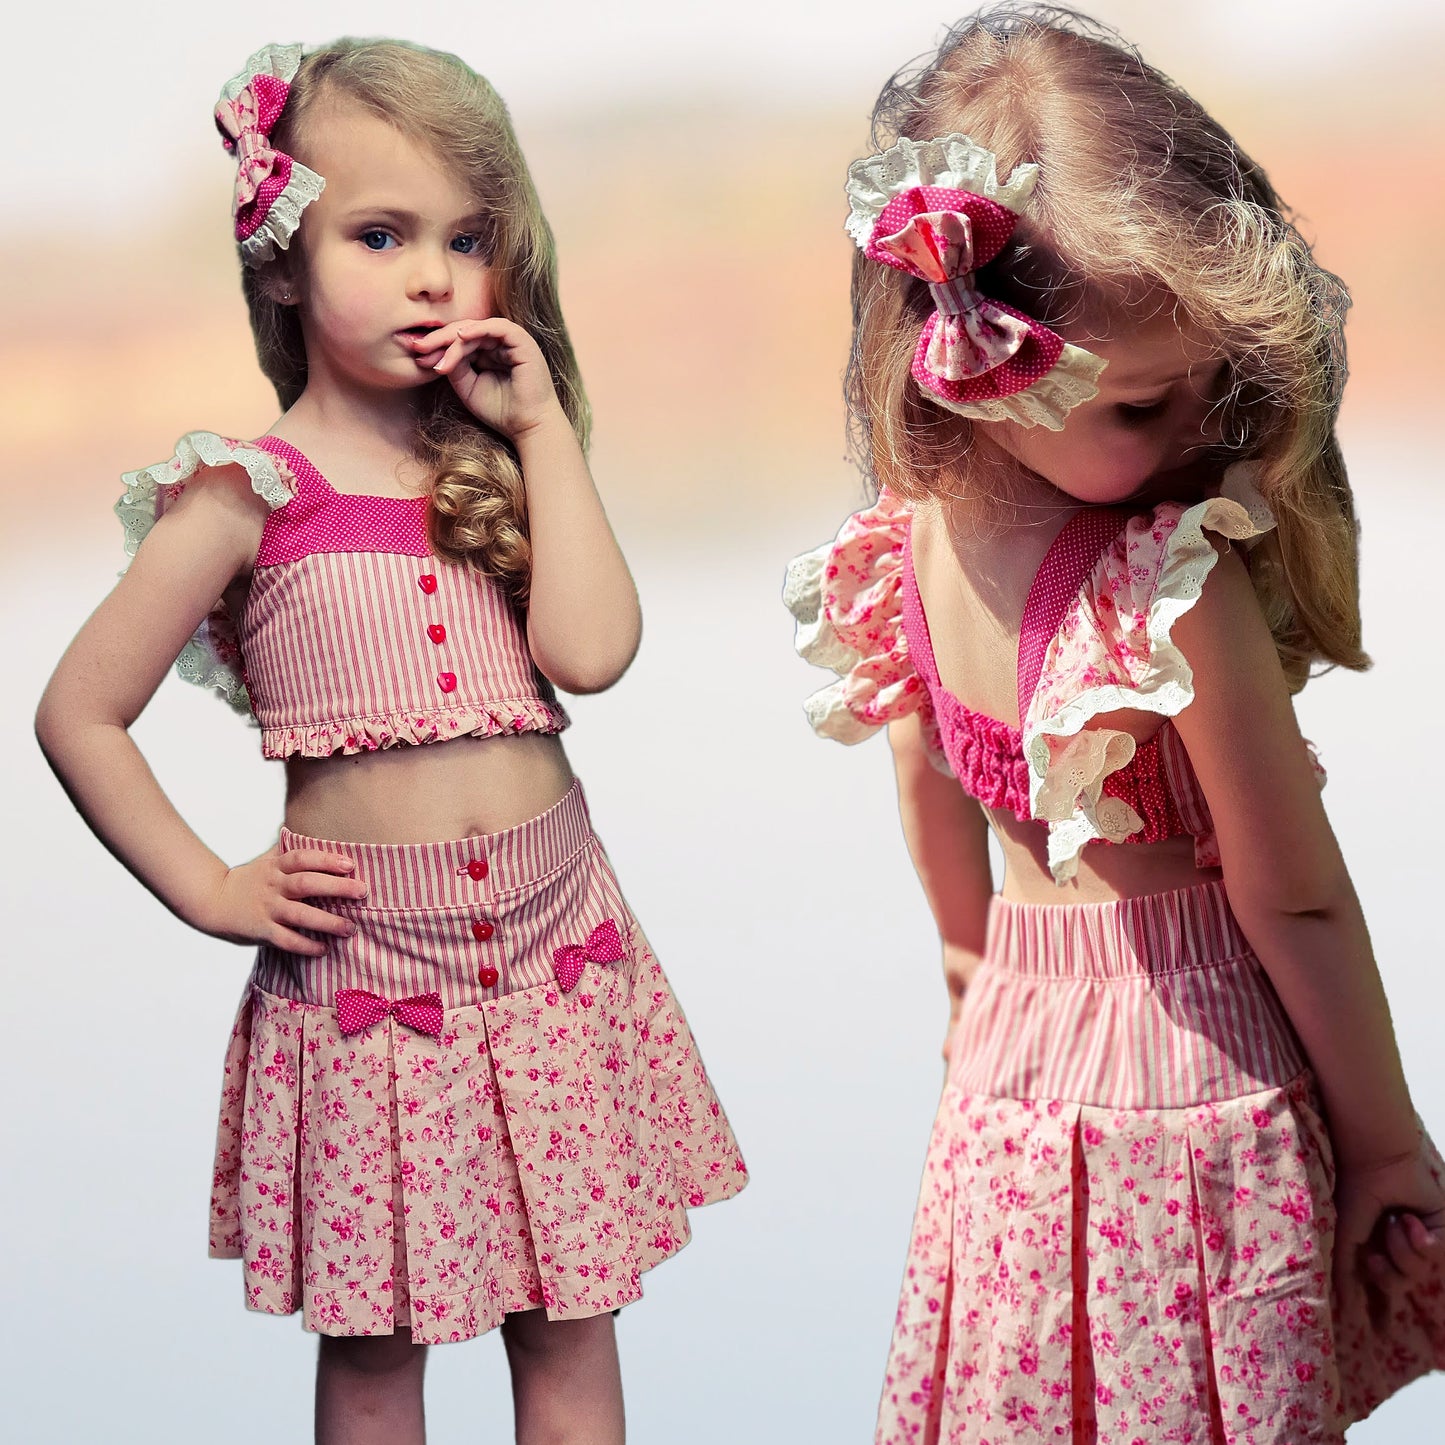
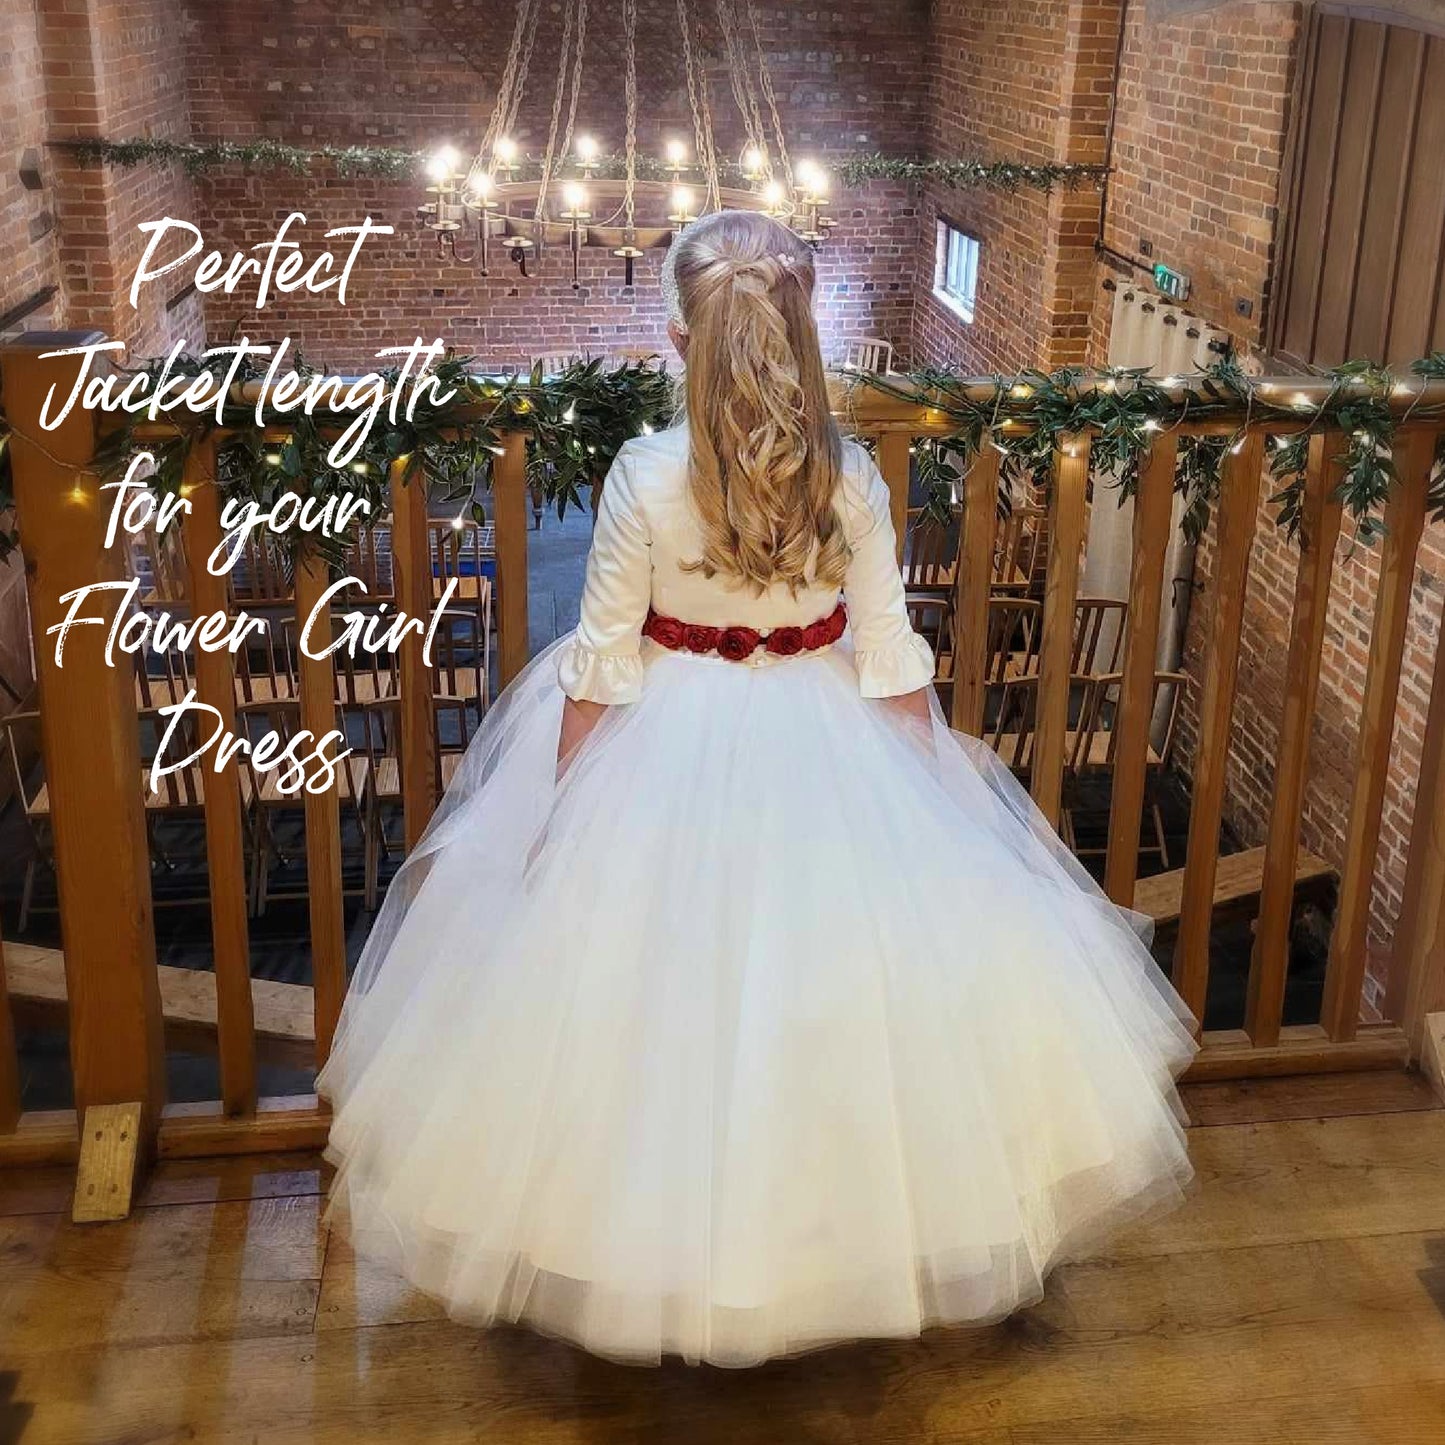
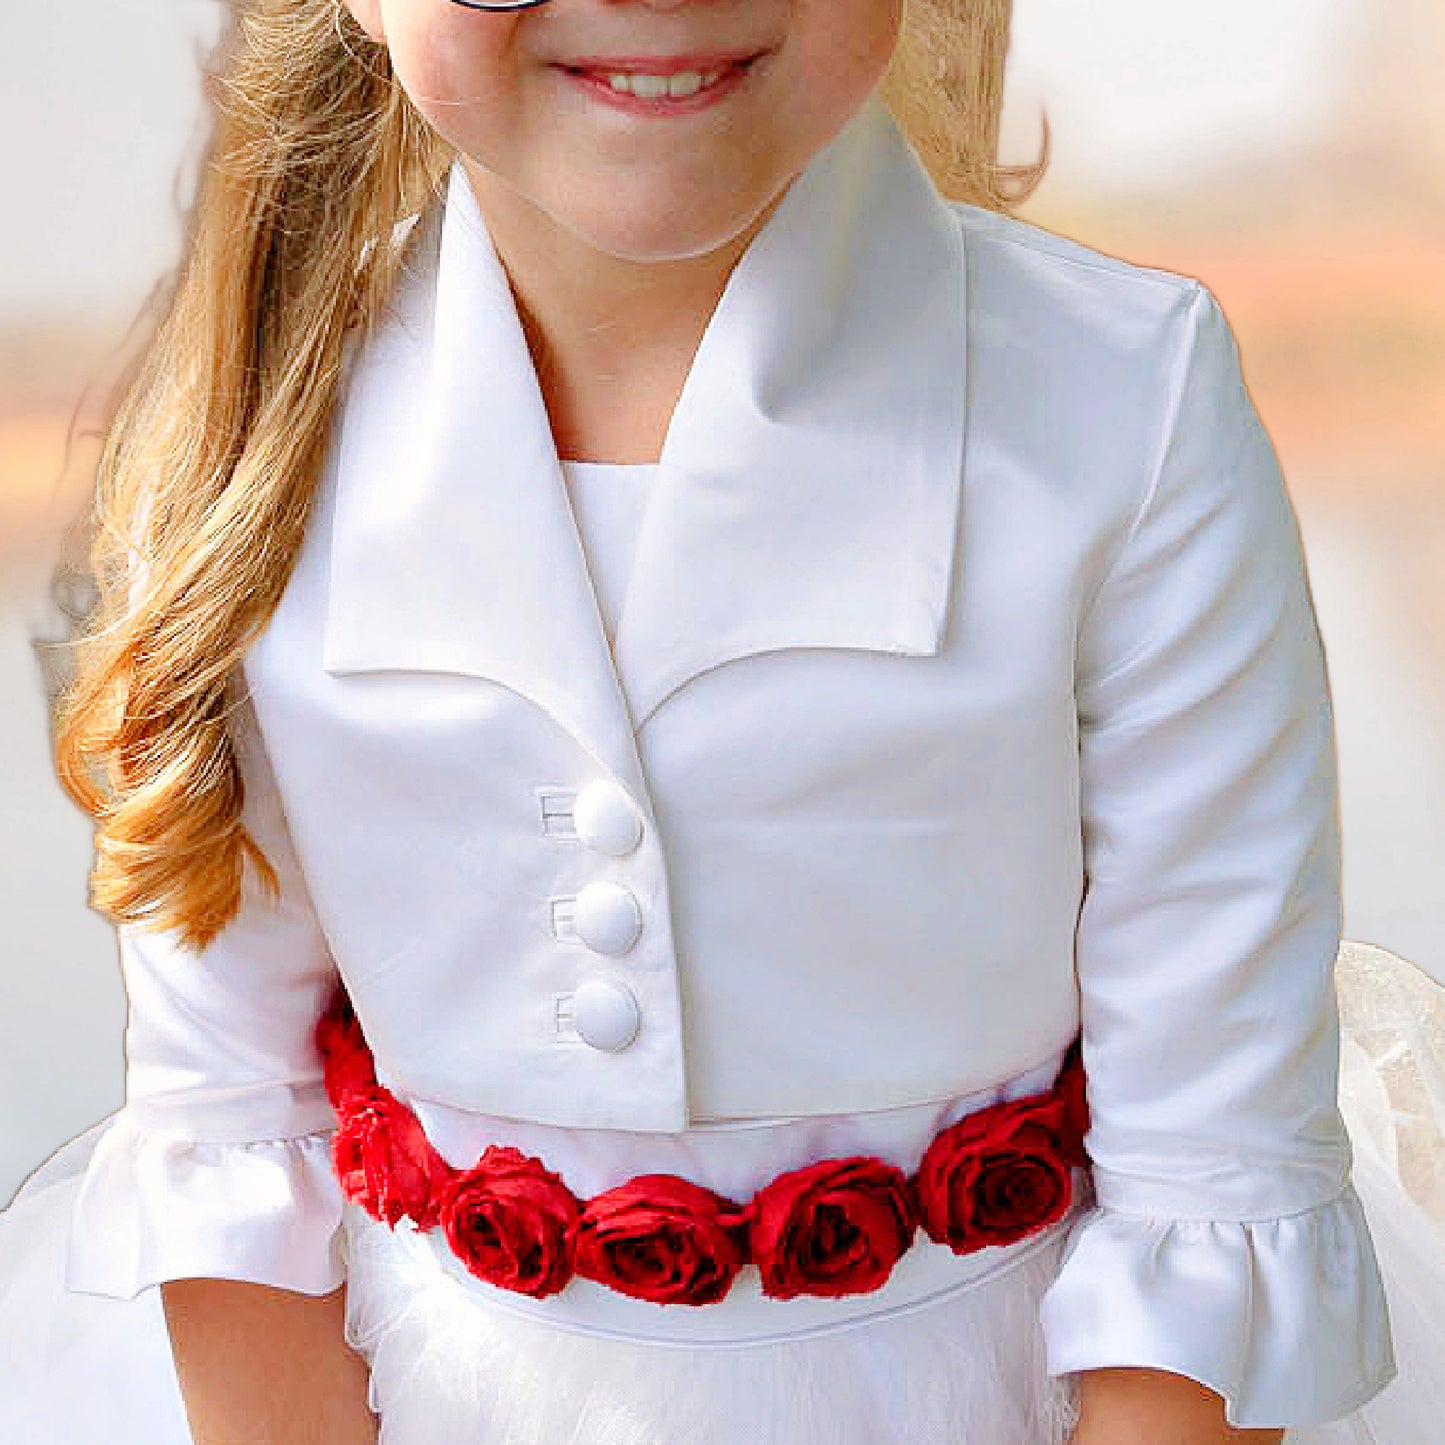
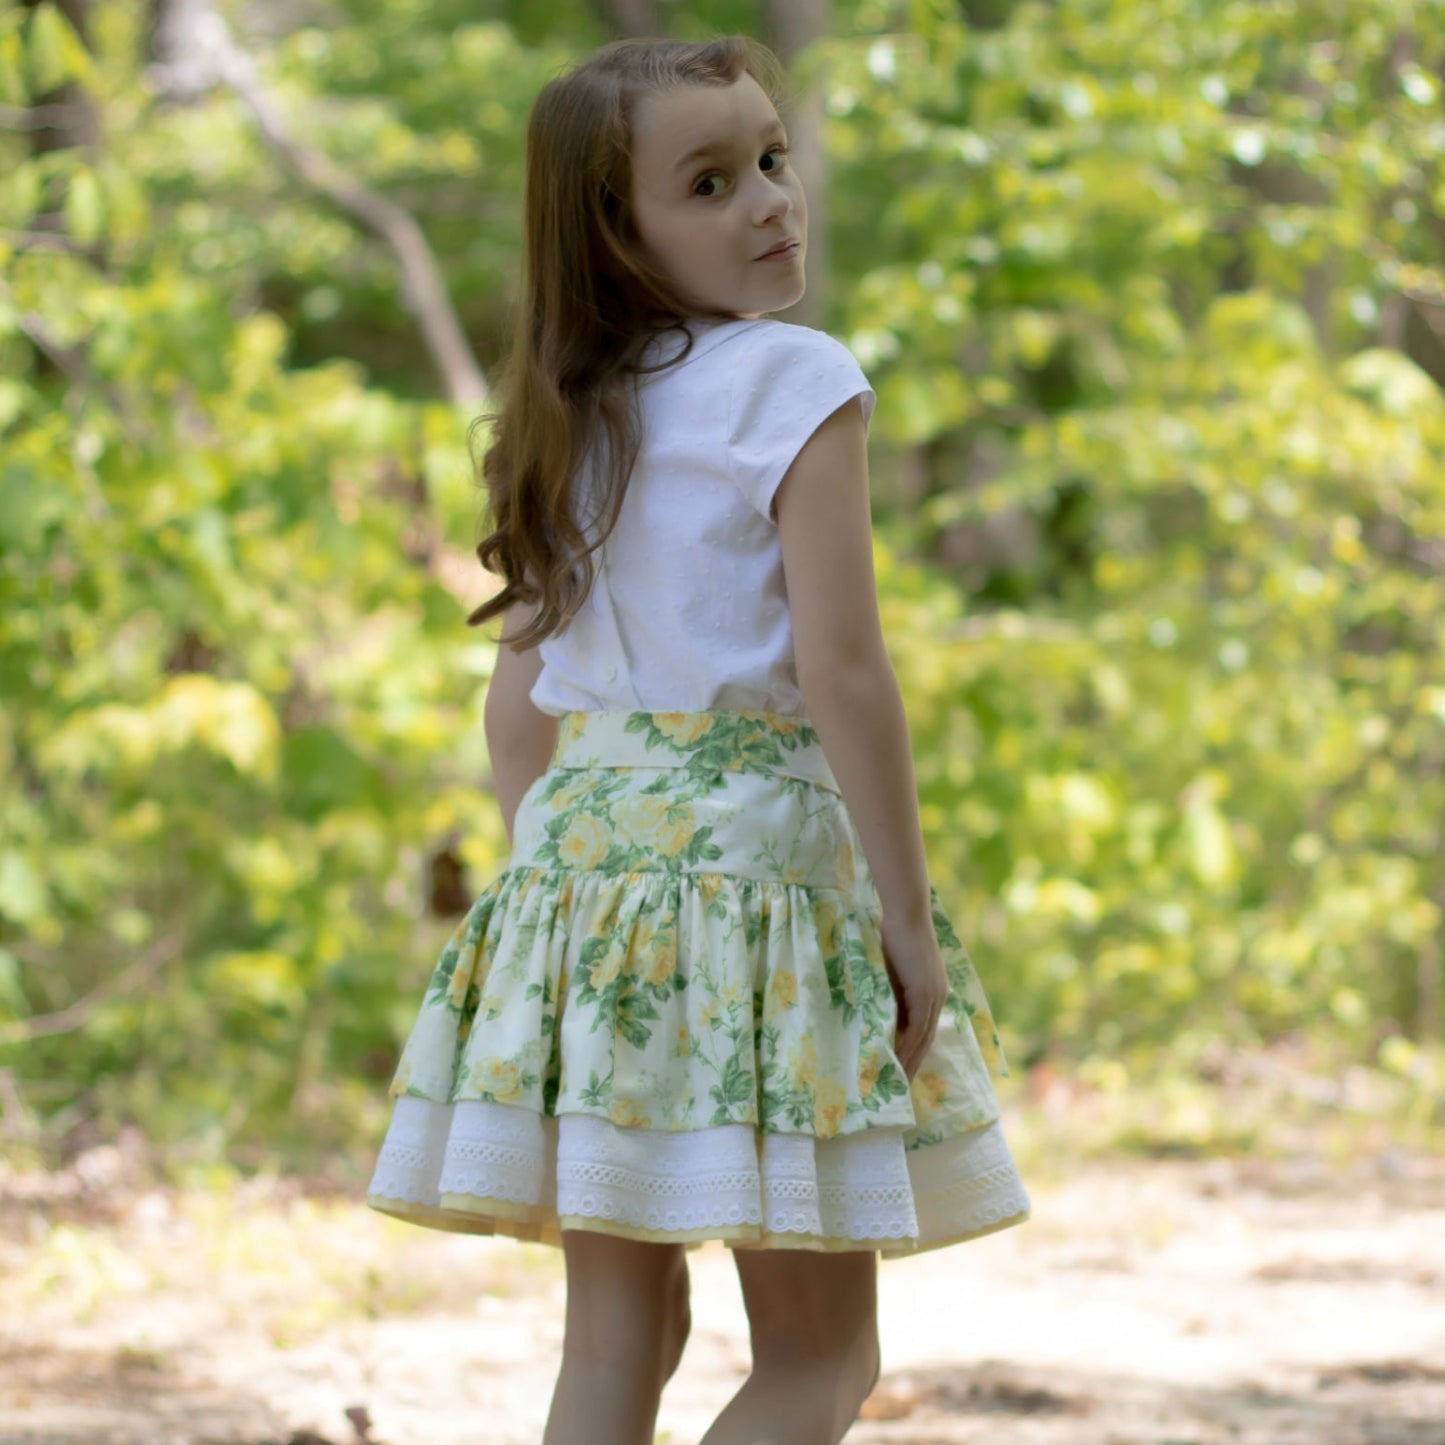
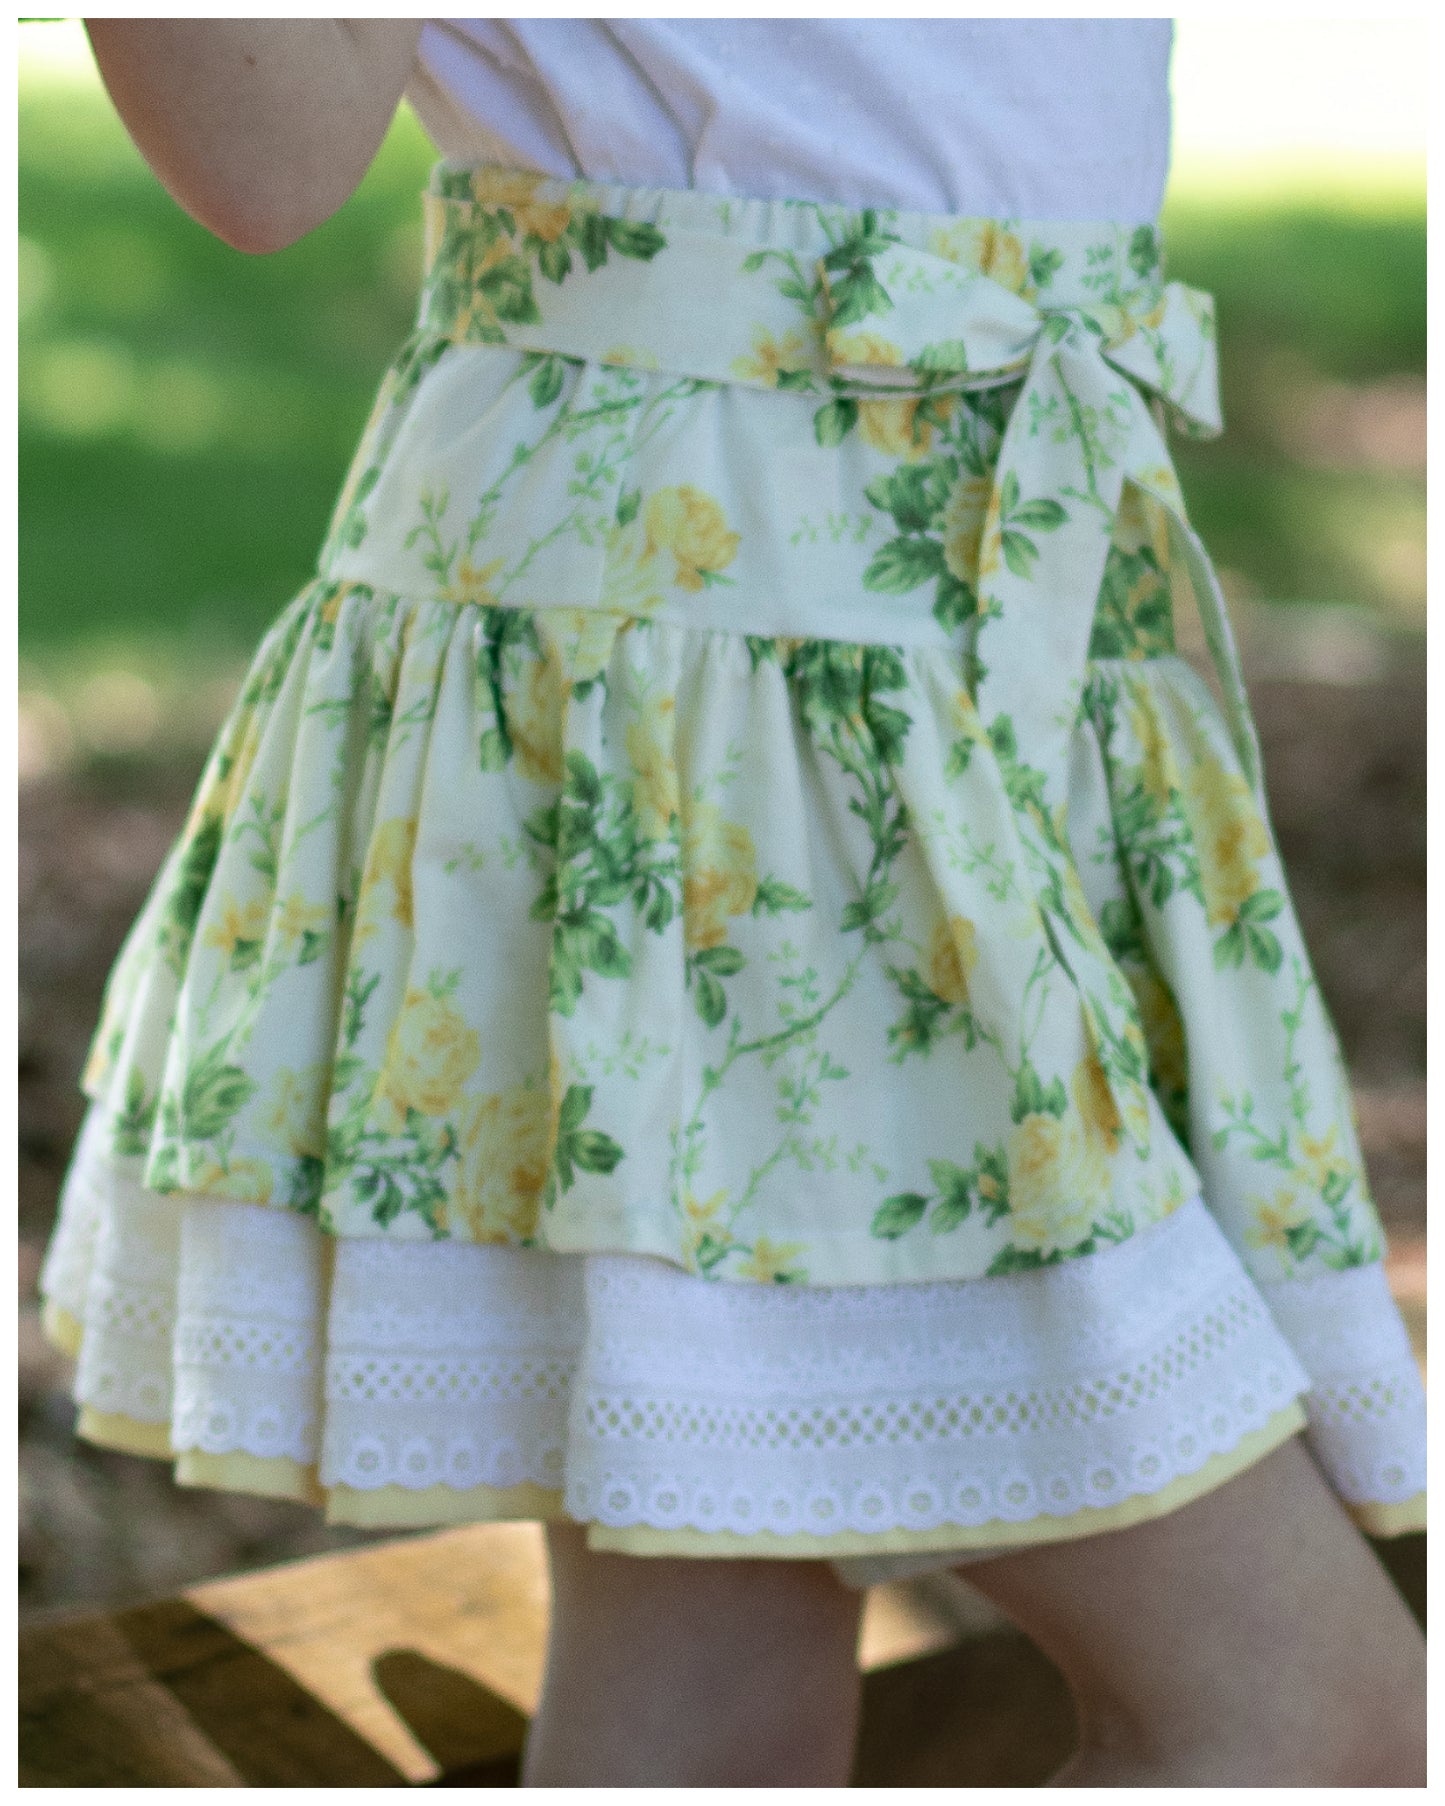
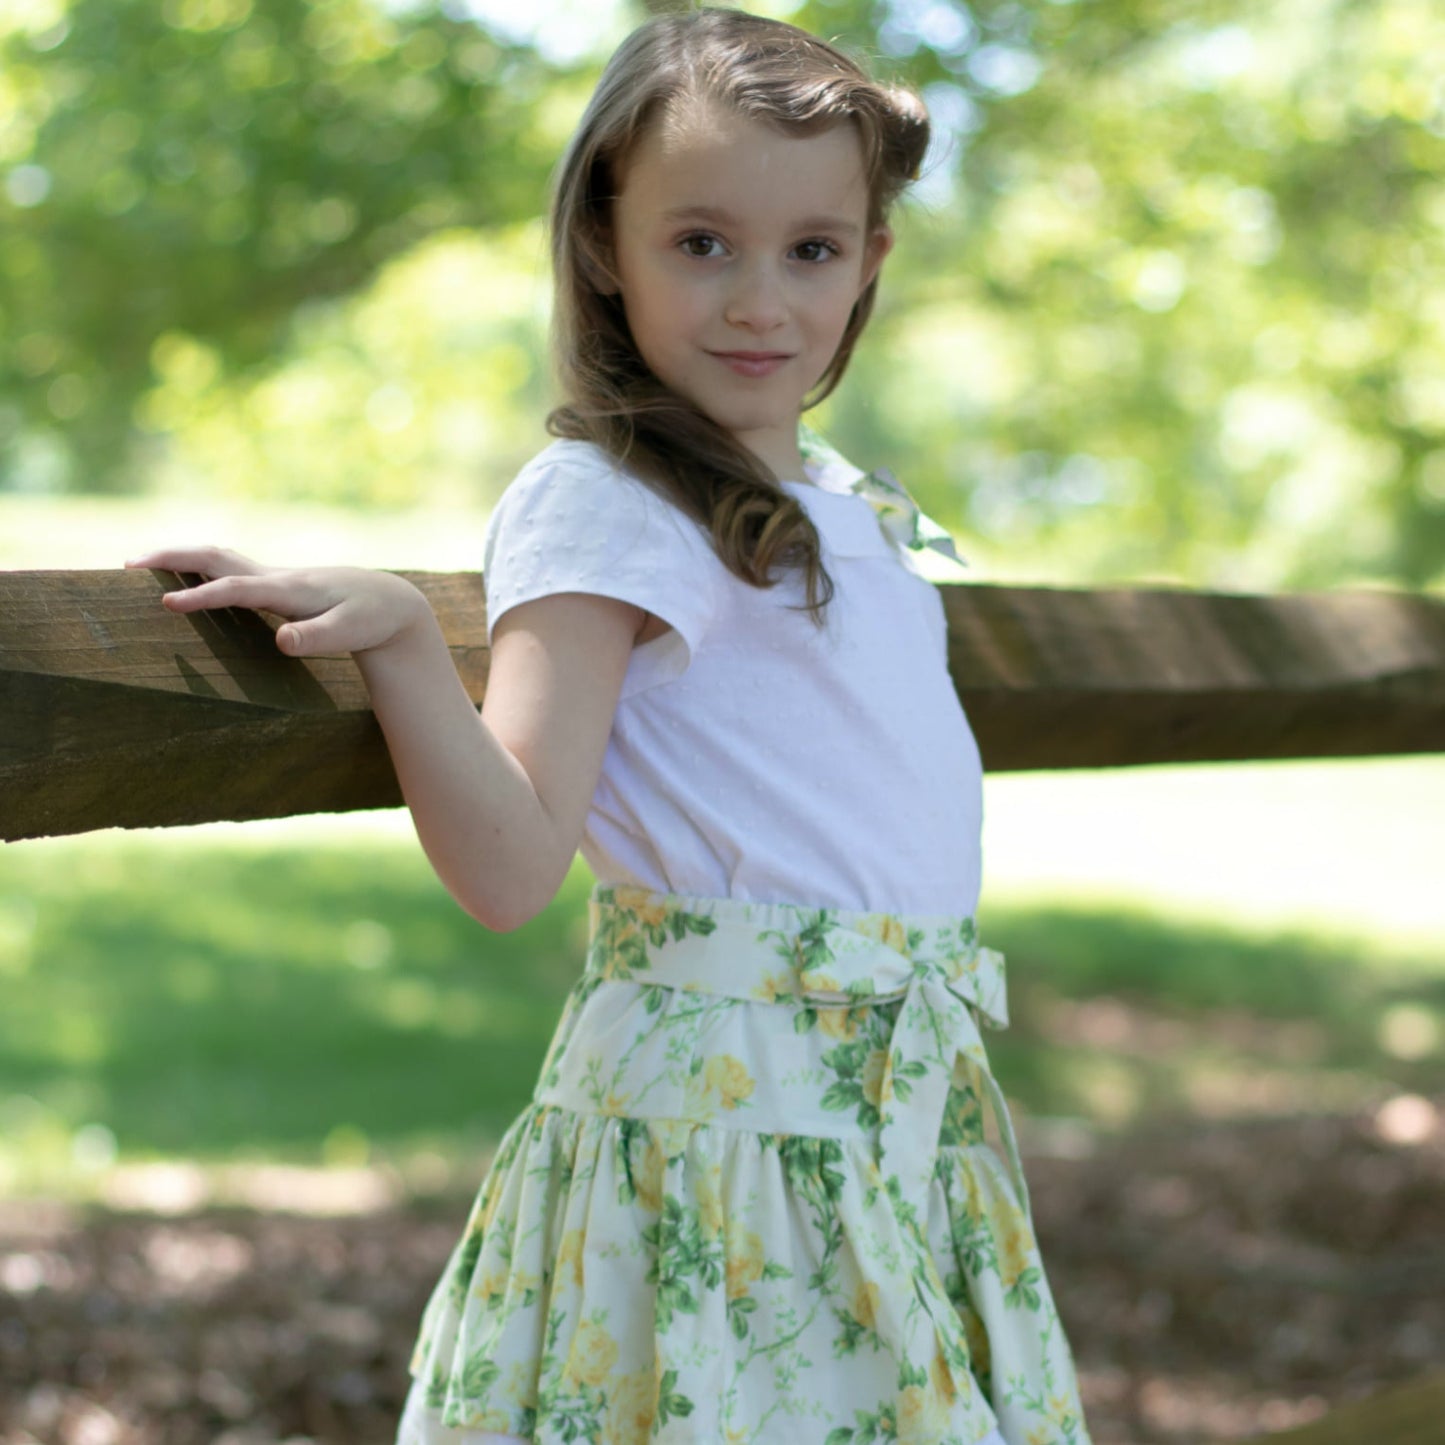
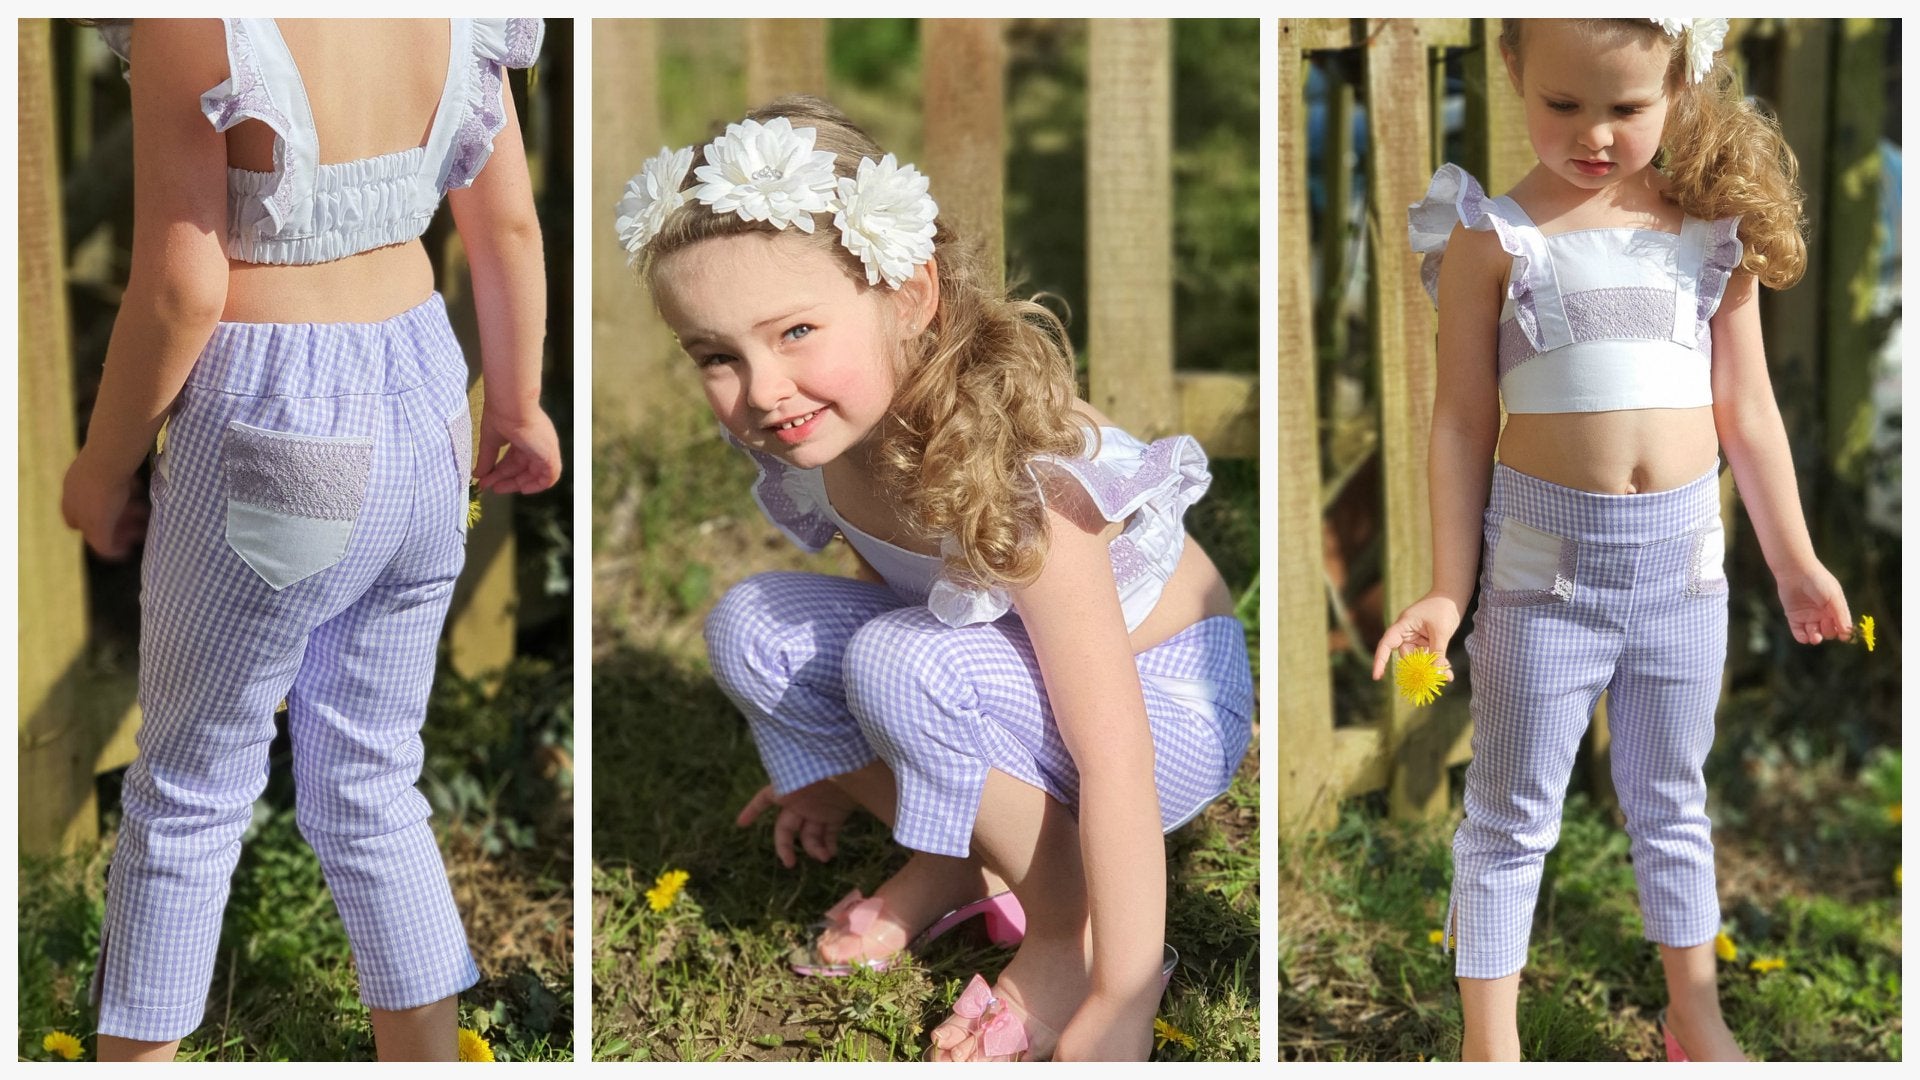
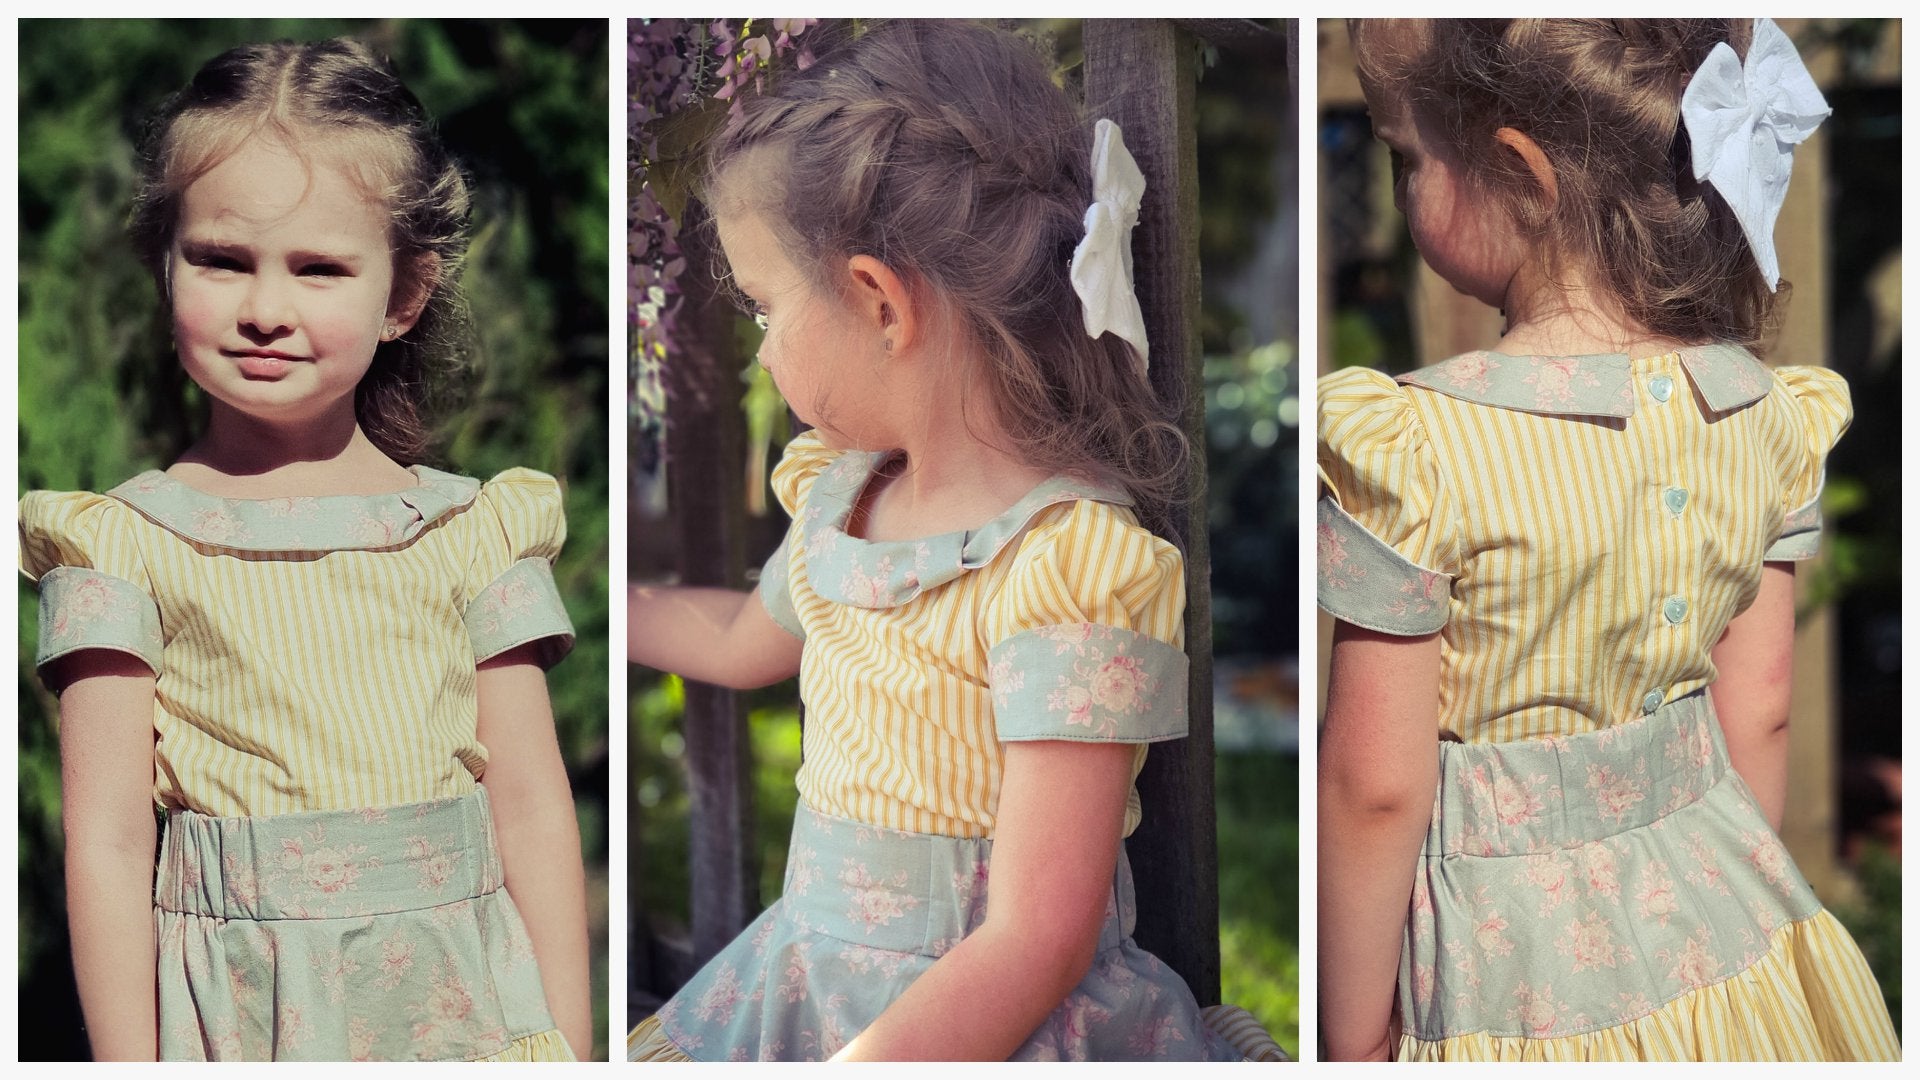
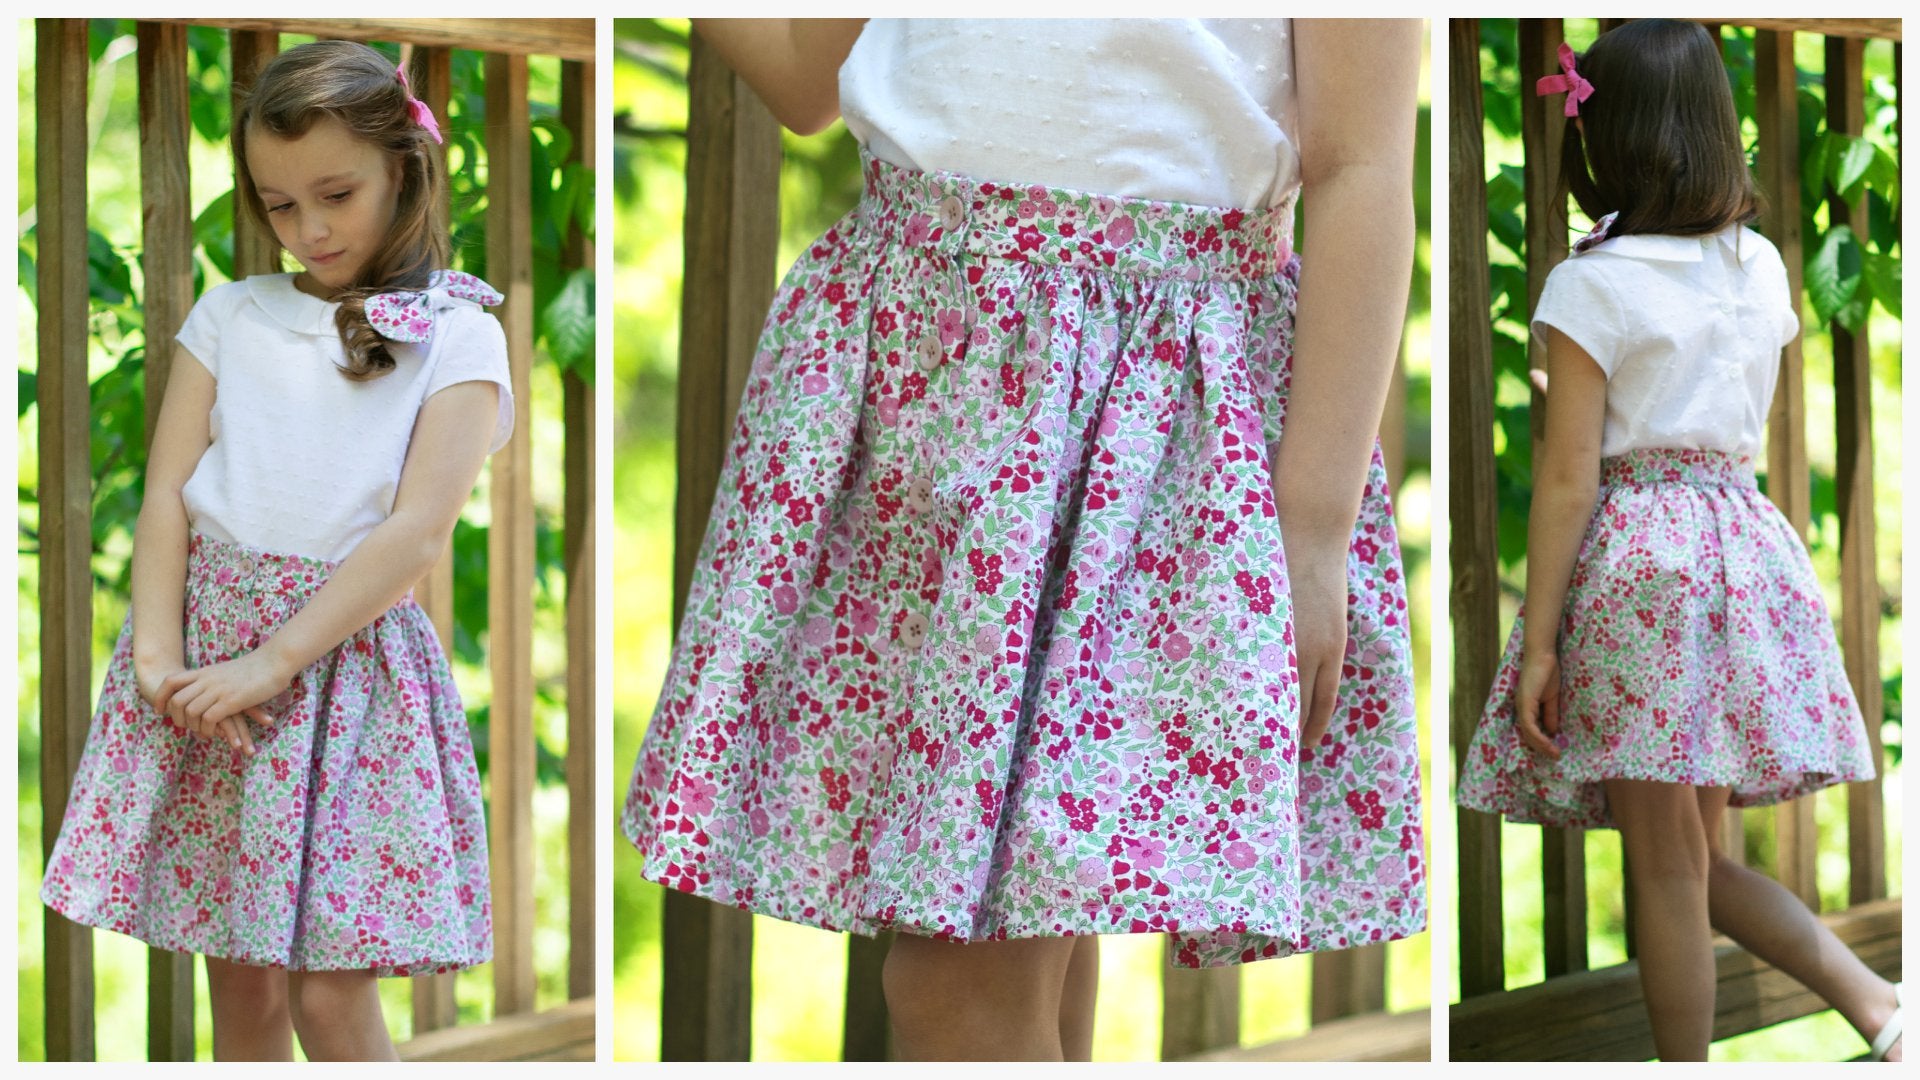
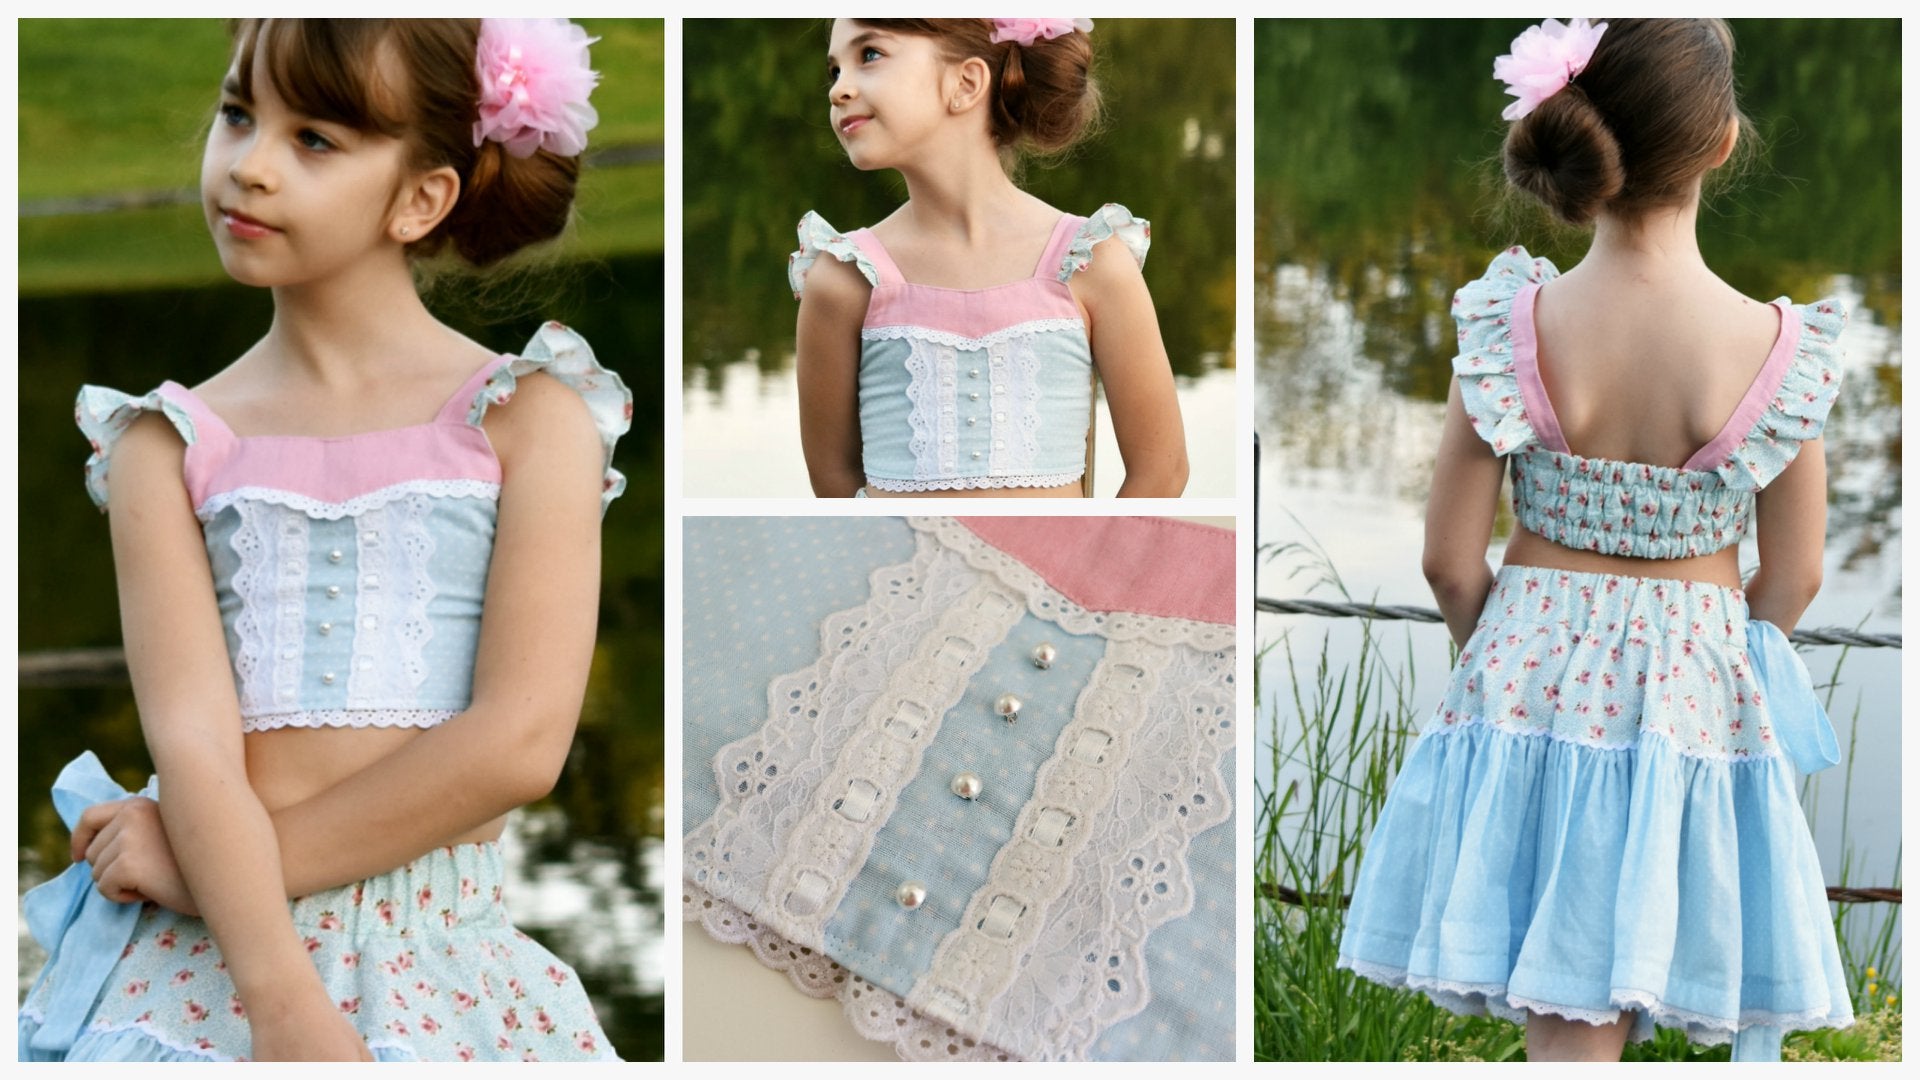
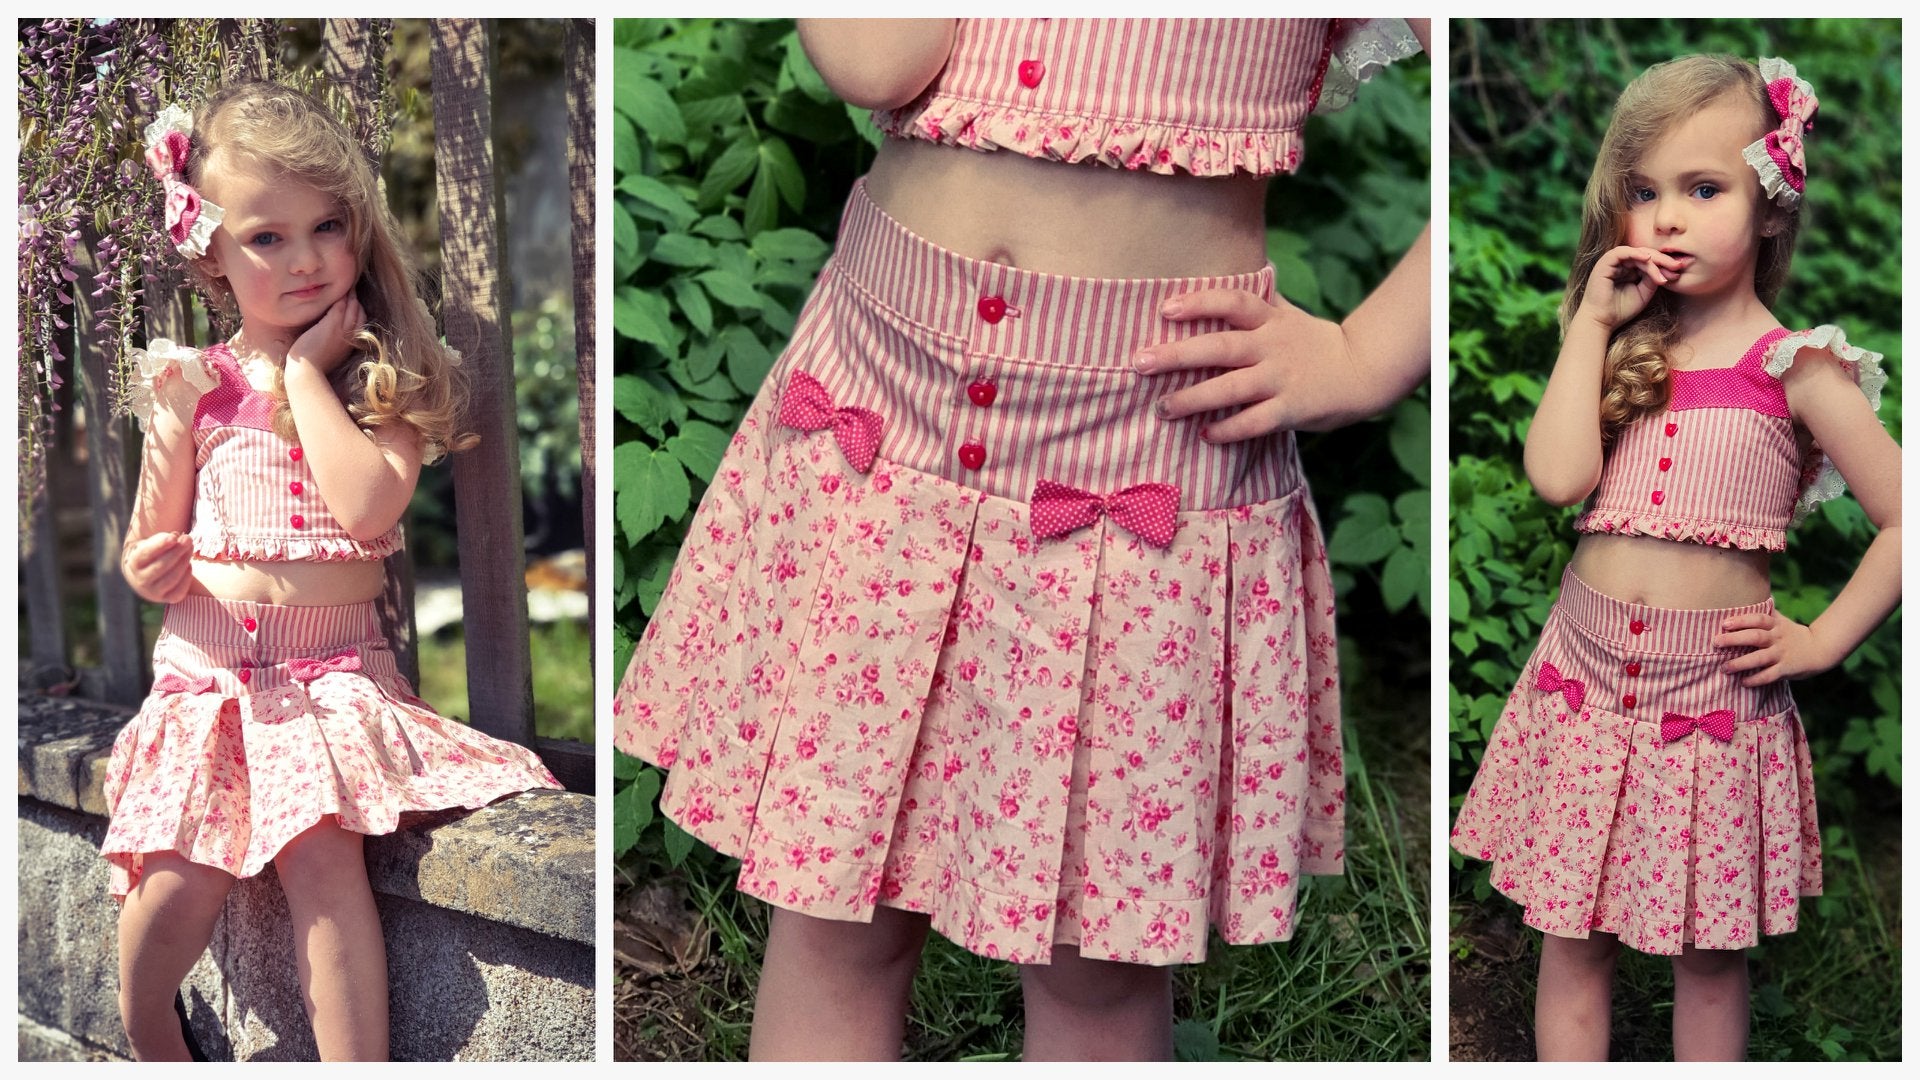
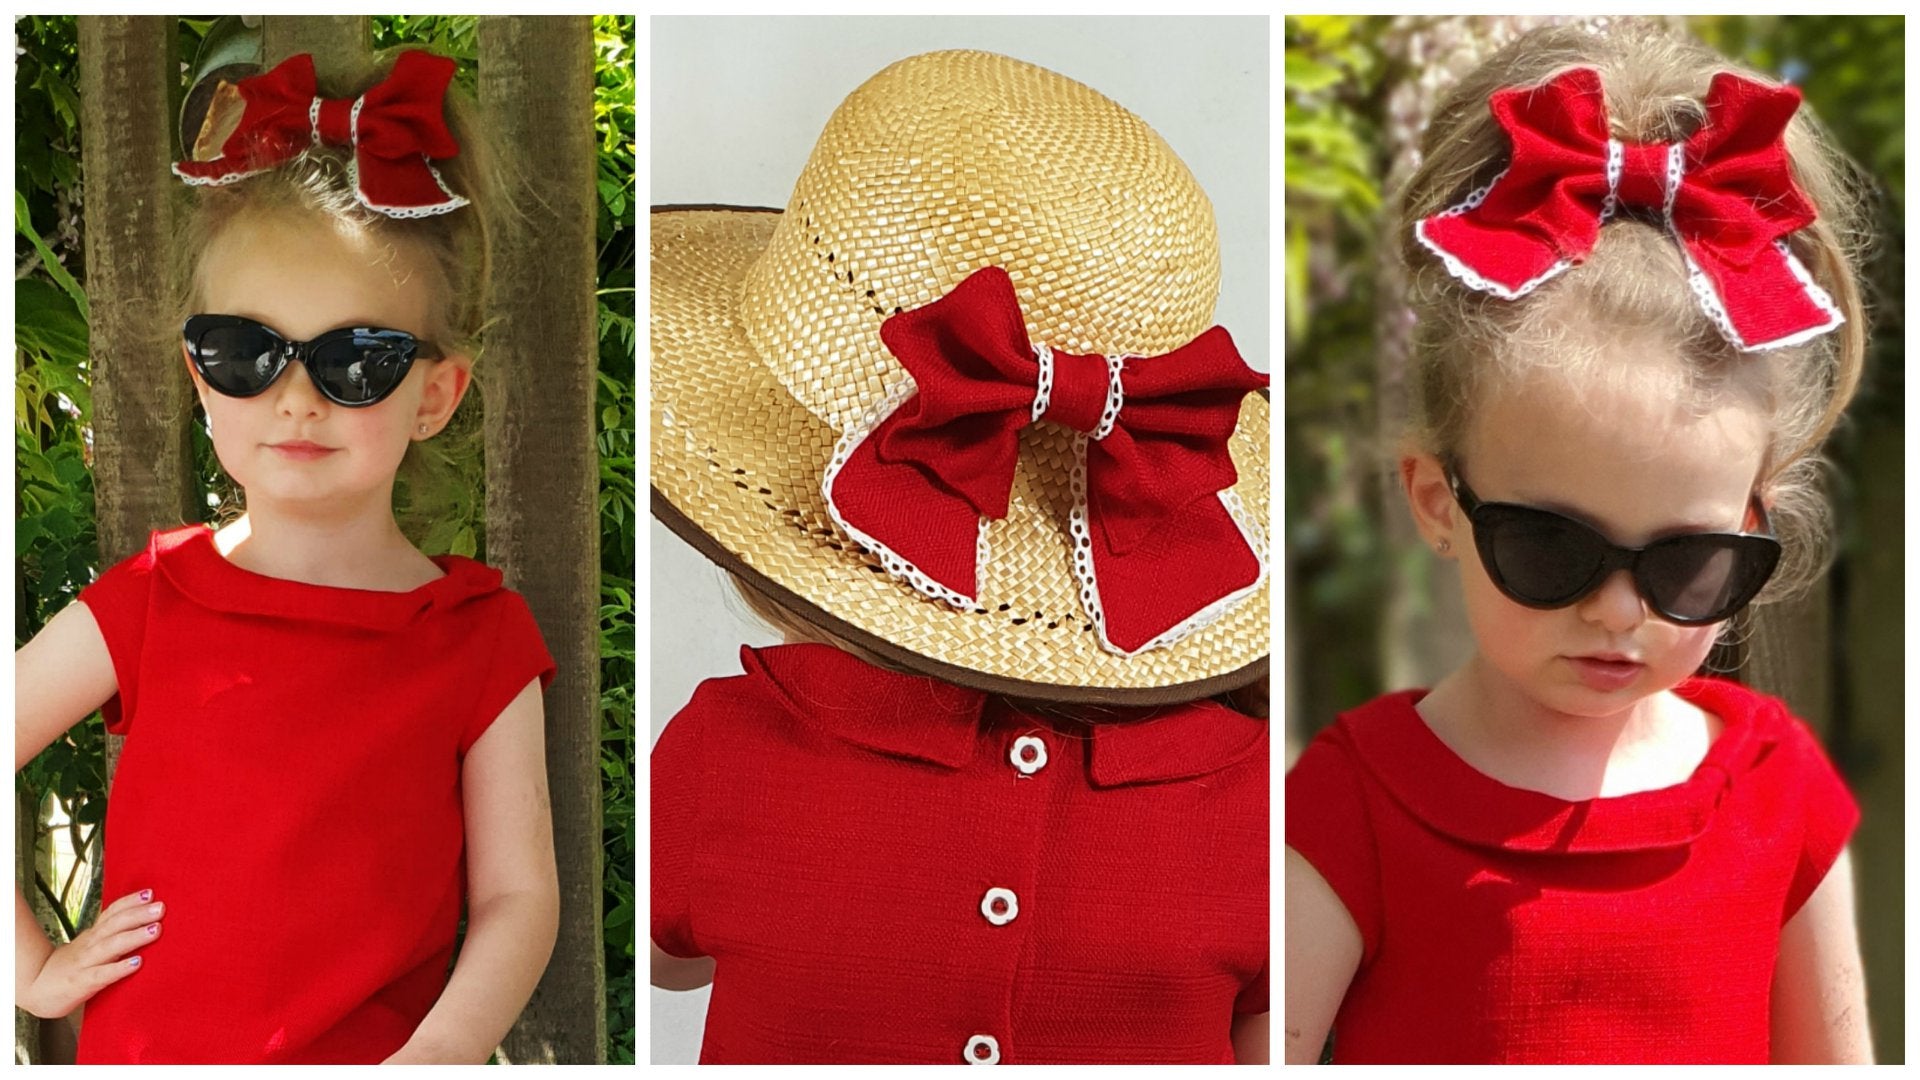
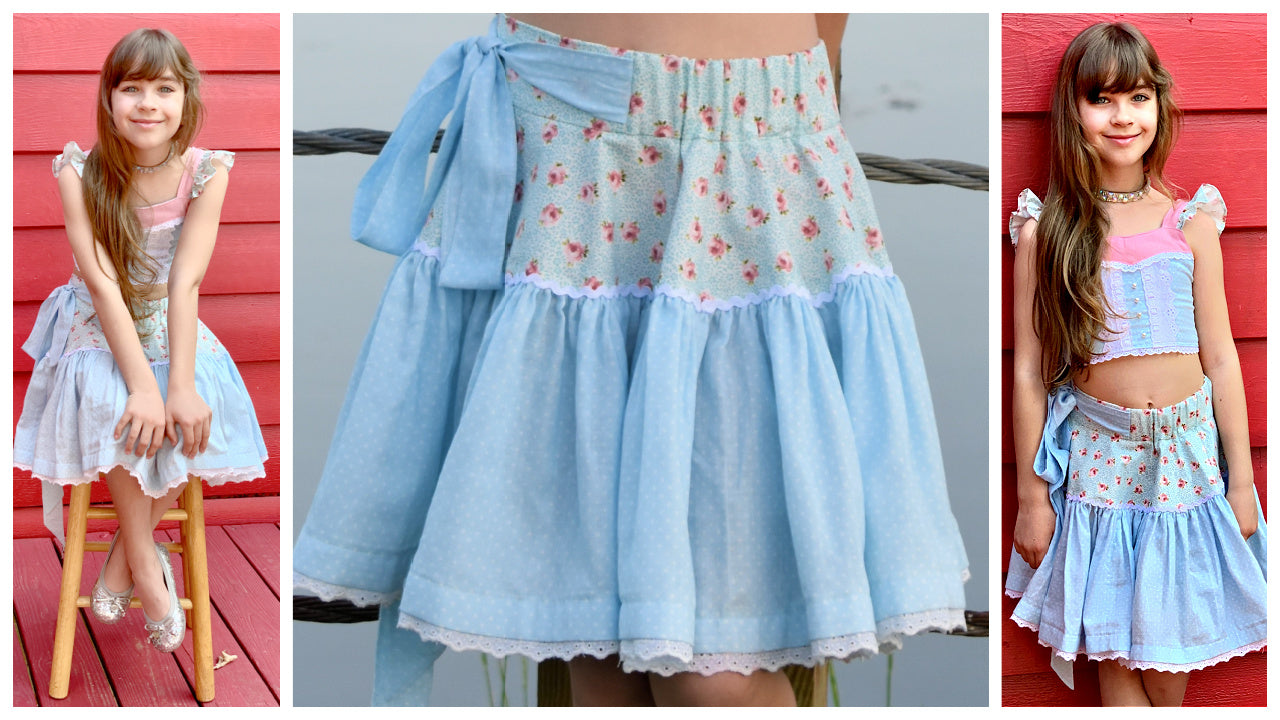
The Vintage Bundle is an absolute treasure trove of sweet, nostalgic makes — a whole collection of vintage‑inspired girls’ patterns just waiting to be sewn up into something adorable. Inside, you’ll find romantic dresses, cute blouses, twirly skirts, cropped tops with flutter sleeves, and the most charming little Capri pants. Every piece has that soft, old‑fashioned magic we all swoon over.

And you won’t be tackling this beauty on your own — the digital sewing pattern comes with clear instructions and helpful video tutorials. Just scroll down and sew right along with Marina as she guides you through every adorable detail.

Pattern Download Includes

  • Instant Download
  • DIN A4 & US Letter Size
  • Individual PDF files for every Size
  • All Sizes included
  • Detailed eBook
  • Video Tutorials

Design Options

Please refer to the original listings for detailed information:

Fabric Requirements

Please refer to the original listings for detailed information:

Available Sizes

Age 1-12

Please Read

  1. This is a digital pattern or PDF file, not a physical product. It will be delivered electronically via a download link delivered to the email used for the purchase.
  2. To ensure the pattern prints at its actual size, it's recommended that you use Adobe Acrobat Reader.
  3. The pattern creator, Frocks & Frolics, welcomes small-scale production using their patterns. 

Customers are encouraged to tag Frocks & Frolics when sharing projects made using their patterns on social media.

@frocksandfrolics #frocksandfrolics

View full details

STEP-BY-STEP VIDEO TUTORIALS

Thumbnail
AUDREY: INTRODUCTION TO THE PROJECT
Thumbnail
BEATRICE: INTRODUCTION TO THE PROJECT
Thumbnail
BETSY: INTRODUCTION TO THE PROJECT
Thumbnail
CONNIE: INTRODUCTION TO THE PROJECT
Thumbnail
FRANCES: INTRODUCTION TO THE PROJECT
Thumbnail
LILOU: INTRODUCTION TO THE PROJECT
Thumbnail
ISABELLA: INTRODUCTION TO THE PROJECT
Thumbnail
TILLY: INTRODUCTION TO THE PROJECT
Thumbnail
BONNIE: INTRODUCTION TO THE PROJECT

VIDEO TEXT

Transcript for the video: Vintage Bundle - Audrey Introduction

Now you’ve printed off your pattern and you’re raring to go.

The first thing to do is to check your test square. Is it 2.5 inches in both directions? Then you know it’s printed off correctly—and it has, so I can get started cutting my pattern pieces out.

Some pieces fit onto a page, like the Audrey pocket, but some pieces will not fit on a page. That’s why I have an attachment line, which connects to the other piece. It’s a very simple system.

Pattern Identification

The front always has a white flower on it, so you know that’s the front—you can’t get confused.

Then we have the back with a pink flower.

The same applies where pieces don’t fit on the paper. I have another piece on another sheet with attachment lines. I connect those, cover the attachment lines up, and I get a complete piece.

For the back, I have three pieces: A, B, and C. This is different for every size because as the sizes go up, this will change.

You always have a plan at the back of your pattern showing how to assemble it, so you can see at a glance how many pieces there are and how they go together.

Once you’ve done it once, you’ll realize—this is easy, I like this.

Waistband Assembly

We’ve got waistbands, and there are quite a few pieces because we have three waistband options.

You need to make sure you put the right ones together.

So:

  • Waistband B, option one
  • Option two
  • Option two again

The front is easy because there’s only one front piece.

Now all I have to do is cover the attachment lines, sellotape it together—voilà.

Next one, do exactly the same.

Why are there two different waistbands for the back? One is for the zip option, and the other is for elastic in the back.

Construction Advice (Zip vs Elastic)

I would really recommend that for small children, don’t use the zip. There’s no need—it’ll just be uncomfortable.

For younger children (around one to two years old), I would just use elastic.

As they get older—especially five, six, up to twelve—they don’t want to look like babies, so the zip version becomes better.

I’m going to show you the zip version here because elastic is very simple.

Back Piece Assembly

Now let’s put together the back piece.

Here you can see we’ve got three pieces: A, B, and C.

This is the part I don’t like about sellotape—it just lifts itself up.

It’s always a good idea to use a weight to hold it down while assembling.

So we’ve done that, and now I’m just going to attach the lower half as well. Sellotape it—job done.

Very simple, and it wastes very little paper.

Front Piece Construction

The front piece is even simpler because it’s only two pieces (at least for size 1–2).

If you go up a size, there will be more pieces.

These pieces are already together anyway.

Now, on the front piece:

  • You have a pocket lining, which will be sewn on and turned to the back.
  • Then the pocket sits underneath that.

If you don’t want pockets, you can simply cut along here and remove it.

This piece is cut on the fold, so it goes to the seam allowance line and gives you a complete pocket shape.

This also makes the front more stable.

Whatever fabric you use for the trousers must also be used for the pocket if it has stretch—so everything behaves the same.

The pocket lining itself can be cut in anything.

Vents and Hem Options

We’ve also got slits (vents) at the bottom, which people are sometimes afraid of, but they are very simple.

If you don’t want to do them, just cut along and turn up a normal hem.

If you are doing vents, you just fold the fabric and align it so the edges match perfectly, then sew it together and turn it.

That gives you a neat mitered corner.

Everything has been measured so you don’t need to worry about angles.

Back Details and Darts

Same applies for the back.

If you are doing vents, cut off the corner.

We also have a dart here, which is only necessary for the zip version if you want a really nice fit.

For small children, I would leave it out, but for older children it gives a more fitted look.

To mark it, simply notch your dart and transfer the marks onto the fabric.

Waistband Placement Overview

We also have the two back waistbands.

I’m just folding them in half at the center back. It’s slightly different because we also have a zip.

Now I’ll show you how this fits.

When the back is sewn together, I place the waistband on and move it around so it lines up with the dart and side seams.

There is also a section that goes with the zip placket.

When everything is assembled, it will sit neatly and the zip will go in here.

If you are doing the elastic version, it will fit on easily without this extra shaping.

Closing

And that’s your pattern ready to cut.

Transcript for the video: Vintage Bundle - Beatrice Introduction

Welcome to the Beatrice. The first thing we’re going to do is cut out our pattern. What you need to do is check your scale, it should be 5 centimeters long or 1 inch if that’s what you prefer. Then we’re going to put the pattern together.

Let’s have a look at the back page, which always has your assembly plan. You just need to check what you need, for example the front has A and B, the back has A, B, and C. It depends how much I can fit onto a page. I try not to waste paper but I can’t go too close to the edges because something might get cut off, printers are all different and sometimes they unfortunately do that.

Pattern Assembly System

You can see these attachment lines, that’s where we put the pattern pieces together. Here we’ve got A and B for the bow and I’m going to cut both sides just to demonstrate. The system for Frocks and Frolics is always put pattern pieces together in alphabetical order. Here we’ve got A and B and you can also see little notch marks so you know what belongs together. It makes it much easier and quicker and it doesn’t waste paper. It’s like I’m layering everything for you.

Color Coding Guide

For those not familiar with my patterns yet, the front always has a white flower, the back always has a pink flower, and the sleeve always has a yellow flower. So you can sort everything easily. Everything else has no marking.

Back Piece & Facing

The back has an integrated facing where the buttons will go. You’ll see CB which stands for center back and a fold line. You fold along the dashed line so the button placement sits correctly. The buttons are small and decorative and you can choose your own size. The back also includes a beautiful facing that wraps around to the front and back again. We sew this together with a 1 cm seam allowance then fold it over, giving a completely clean finish on the inside.

Construction Tip: Facing

The facing is important to sew correctly from the start. What I’ve seen people do is fold parts incorrectly or leave them loose, but that’s not what you want. Make sure you sew the facing together first then it will sit properly. It may look confusing at first because it feels like it doesn’t fit but it does. Once folded it works perfectly.

Collar Option

If you don’t want a collar you can simply topstitch around the edge for a clean simple blouse look. If you do want a collar which is really beautiful we continue with that construction. The collar sits here and if you want the bow detail you will also need a loop.

Bow Loop Construction

Take the loop piece and fold it in half along the grain line. Then fold it over and wrap it around the finished collar area. This creates a beautiful gathered effect at the neckline. Sew it in place so it holds the collar snugly.

Bow Assembly

The bow comes in separate pieces. It is folded and threaded through the loop at the center. You can use different fabrics for variation so each bow can look different. Very thick fabrics like heavy linen are not suitable for folded bows. Lightweight fabrics work best. If you want to use linen you can cut it differently, bind it, or finish it with an overlock edge. We’ll also explore different bow styles in the bonus section.

Sleeve Overview

Now let’s look at the sleeve. This pattern includes a short sleeve which is very cute and stylish. You can also use other sleeve options like puff sleeves from other patterns. For this version, cut 4 sleeve pieces total, 2 shell and 2 lining. Sew and turn them for a clean finish. You can also bind the sleeve edge if you prefer.

Vent / Slit Explanation

The final feature is the vent at the bottom. If you don’t want to do vents you can simply draw a straight line and finish as a normal hem. But I’m going to show the slit version which looks really nice. I worked these out carefully, it took trial and error, but now they fit perfectly. Once you’ve learned it you can reuse this method in other garments too.

Sewing the Vent

To sew the vent, place pieces exactly on top of each other. Do not offset or guess alignment. Stitch along the marked point. This creates a clean professional slit finish. You don’t have to include it but I highly recommend it.

Summary of Pattern Components

So far we have the front, back, sleeve, bow, loop for bow, collar, and facing. You don’t even need the collar, you can just use the facing. You also have multiple options depending on the style you want.

Closing

In the next chapter we will cut everything out and start construction.

Transcript for the video: Vintage Bundle - Betsy Introduction

This is the Betsy skirt with a hem trim which is very simple to put on. There’s nothing to it. We’ve also got a tiny bit of elastic in here just for a bit of comfort. This only holds about 2 to 3 centimeters, but you can pull it a bit tighter if you like.

On this skirt I’ve used a combination of one proper buttonhole and Kam Snaps down the front. I also show you how to get the button placement exactly right because it’s very easy to place them too far toward the edge. I go through all of that so you have all the options clearly explained.

Elastic Insertion

The way we insert the elastic is by sewing a stitch line here and there, then inserting the elastic and closing the front. We’ve done this on the other skirts as well, so there’s nothing new here.

Once the elastic is in, it can be very fiddly to change later.

Adjustable Elastic Option

The second option gives you adjustable elastic, which is very handy if you are sending this to grandchildren far away because it can still be changed later by pulling it through.

We still have a shortage here, so I couldn’t get the right elastic, but normally you would have a buttonhole here and a button sewn onto this part.

In this example I’ve used the same fabric throughout. Even so, using the placket in the same fabric still makes it look structural and nice.

Hem and Pockets

We have a standard hem that is turned in and turned up, which is easier if you don’t have an overlocker or serger.

In the side seam we have very important side pockets. They are very easy to make. This is what the pocket looks like from the inside, and it is very clean and neat.

Adjustable Elastic Method Notes

I want to talk a bit more about adjustable elastic because this is not the easiest method.

If you are sewing adjustable elastic before attaching it to the back, this is more of an intermediate to advanced method and is shown in the instructions and video.

However, you can make it easier. If you don’t mind a stitch line showing on the outside, you can simplify it.

You could even add a small bow over it if you like.

The easier method is to stitch the tunnel top and bottom first, then thread the elastic through and sew it in. This creates a visible stitch line, but it turns the process into a beginner-friendly method that anyone can do.

Closing

I hope you enjoy making these skirts. I enjoyed them tremendously. They are very cute and remind me of when I was younger. They are not strictly vintage, more like the 80s style, but I really love them.

Please share your makes in our Facebook group because it is so inspiring to see what you create. I often see ideas I would never have thought of myself.

Let’s get started on the Betsy skirt, and I’ll see you in the course.

Transcript for the video: Vintage Bundle - Connie Introduction

I want to introduce you to the Connie top. It is really super simple, perfect for beginners.

We’ve got some lace sewn into the front and I’ve added pearly buttons as an insert detail, again with a lace trim.

Of course, we also have the all-important flutter sleeves that everyone loves for summer, plus a little lace trim at the hem as well.

Back Design and Fit

The back is elasticated, which makes it very easy for fit.

We also have buttonholes inserted just for the length of the strap. If you have your child at home, you can simply try it on and then sew the flutter sleeves in at the correct length.

Styling and Collection

We have a whole collection called the Vintage Collection.

This is the Bonnie skirt I’m teaming it up with here, and it is just one of many combinations you can make with this pattern.

Closing

I hope to see you in the course soon and that you enjoy sewing our Vintage Collection this summer. Bye for now.

Pattern Overview and Preparation

Transcript for the video: Vintage Bundle - Frances Introduction

Let’s have a look at the pattern. You will need sellotape, scissors, and a tape measure to check your scale. It needs to be exactly 5 centimeters or 1 inch. Once you’ve checked that, you can get going.

The last page of your pattern pack will always show you how everything goes together. The pieces are put together in alphabetical order, so it is very simple. We also have attachment lines on the pieces that are not in one piece, and you can see them here. These need to be covered up when you are sellotaping everything together.

Sorting the Pattern Pieces

I’ve cut out all my pieces now and you can see how I assemble them. I’m going to take everything that is my skirt and put it in one pile, and everything that doesn’t need assembly goes into another pile.

So I have:

  • Front (front always has a pink flower for the back pieces and marking system applies throughout)
  • Back (always marked with a pink flower)
  • Interfacing pattern
  • Waistband pieces that need to be sellotaped together (A and B)

Again, it is very simple and everything follows alphabetical order. You can use the assembly plan, so we go A to B, then add C and so on. It really is like layers, just already done for you.

Waistband and Elastic Guidance

Let’s look at the pattern pieces.

We have the waistband and the interfacing pattern, which fits here but does not have seam allowance. It is slightly wider than the point where we will insert the elastic.

The elastic goes in here, so you need to make sure you have enough movement room. In my case, I needed to cut my 5 centimeter elastic down to 4 centimeters.

Front and Back Construction Notes

The back is cut on the fold. The front has a fold line where the button placket will go, sitting right in the center. The placket is 2.5 centimeters wide, so it is very simple to construct. You could also use Kam Snaps instead.

We also have a small pattern piece which is either a pocket or a bow for the skirt. You only have one pattern piece and it is used for both front and back.

At the top you will also see pleat markings. Make sure you mark these carefully when you cut them out.

Closing

Make sure you follow the markings and assembly plan, and I’ll see you in the next chapter.

Transcript for the video: Vintage Bundle - Lilou Introduction

Welcome to the New Bow. It is part of the Vintage Collection and this lovely bow was created by Emily Holland for Frocks and Frolics.

Look at that scalloped edge and the beautiful lace all around the tails. We also have a crocodile clip to finish it off, and I’m going to show you how to make this beautiful bow. Thank you very much to Emily for designing it.

Materials Needed

What you need:

  • A little bit of lace
  • A lightweight fabric
  • Some interfacing
  • A crocodile clip or headband
  • A glue gun (optional, to secure the clip)
  • The pattern

Pattern Preparation

First thing to do is check the scale. Make sure it is 2.5 centimeters on either side so you know it is printed correctly.

The pattern has only a few pieces:

  • Interfacing piece (slightly smaller than the bow pattern)
  • Center of the bow
  • Tail pieces

Everything is designed to fit together neatly.

Cutting the Fabric

Start by placing a fat quarter on the fold and position the bow pattern on the fold.

Make sure no fabric is sticking out over the edges. Pin it in place and cut carefully.

It is easier to cut when the pattern is on your right side and the scissors are in your left hand, as this allows your left hand to guide the fabric.

You will notice lines on the tail section of the pattern. These are for attaching lace later.

You do not need to cut the scalloped edge at this stage. I am showing it here, but there is a trick later that makes it unnecessary.

Interfacing

We will also cut the interfacing.

Once ironed on, it gives the tails structure so they do not collapse.

You can interface the entire piece, especially if you are using lightweight fabrics like taffeta. If your fabric already has structure, like linen, you can interface only part of it.

Since we are folding it over, one layer is often enough for thicker fabrics.

Cut the interfacing carefully because we will sew along the edge later.

Fabric Considerations

If you are using a denser fabric like linen, you may not need full interfacing. Just one layer can be enough.

For lightweight fabrics, full interfacing is recommended to maintain shape.

This was my first venture into making bows like this, and I was very impressed with the design. Simple patterns can sometimes be the trickiest because they need to be precise.

Assembly Preparation

Now I’m placing the interfacing onto the underside of the fabric.

Make sure it is aligned properly and secured.

There is seam allowance on both sides, so if your pattern piece does not include it, make sure you add it.

Closing

Now we are ready to start sewing everything together in the next chapter.

Transcript for the video: Vintage Bundle - Tilly Introduction

Welcome to our lovely Tilly top. I’m going to show you how to make it. We have flutter sleeves which are absolutely gorgeous, two separated fronts, a yoke and an upper front, and an elasticated back, which you may already know from the Connie top.

The straps are sewn onto the back. I use bias binding for the edges of the flutter straps, and I hope you will really enjoy learning about this top.

Pattern Preparation

Your first task is always to check your test scale. It should be 2.5 centimeters in either direction or 1 inch. Then you need to cut everything out.

You have an assembly plan on the last page, which shows exactly which pieces come as one and which need to be assembled into a full pattern piece.

Once you have sellotaped everything together, let’s look at the pattern.

The back is folded lengthways in half. The lining is used to show how everything is constructed. It is inserted into the front, and that is why it is about 1 centimeter shorter due to the fold.

The front pieces are then placed onto the lining, along with the yoke.

Flutter Sleeve Construction

The flutter sleeve goes between the upper and lower front layers. It has a slanted side which is slightly frilled so it tapers nicely toward the end.

Make sure you place the tapered end toward the front so it extends slightly over the edge of the top. It is always best to try it on before finishing.

The sleeve is slotted between the upper and lower front pieces.

Important Sleeve Notes

When attaching the flutter sleeve, make sure:

  • You attach the correct front piece to the slanted edge
  • You cut a pair, so everything is mirrored
  • The sleeves are not identical on both sides

They are sewn edge to edge.

On the back, leave a 1 centimeter seam allowance so everything sits flush when assembled.

Hem and Edge Finishes

The flutter sleeve has a straight edge and a curved edge.

The curved edge is harder to hem, which is why I mark it as the side where gathering stitches go. The curved side is longer due to the shape and can look very nice if you hem or bind it.

However, it is more difficult for beginners.

You need to decide:

  • If using bias binding or lace trim, apply it to the curved edge
  • If doing a narrow hem, use the straight edge instead

In my previous Connie top, I used the straight edge for hemming because it is easier, and gathered the curved side. In this version, I do the opposite because I am using bias binding, which works beautifully on curves.

Fabric and Materials

The fabrics used here are from my Camilla range, specifically the Rosalinda collection. One is called Lillian Rose, and another is from the same collection called Cursive.

My bias binding is from Joann Fabrics, and I use slimline bias binding. I also use fold-over elastic, which is very affordable and works well for this type of project.

You can find links in the instructions, including options from Amazon.

Cutting Notes

Cutting out is quite simple.

  • The back is cut on the fold
  • The lower front is also cut on the fold

You should mark which part attaches to the upper front with a small snip because they look similar but are not the same.

We also have a strap to cut out. You don’t need to mark the front of the strap because the shape already indicates direction.

Finally, cut the crop top front lining. You can use any fabric, but I am using the same fabric for consistency.

Closing

Now we are ready to start sewing the flutter sleeves together in the next chapter.

Transcript for the video: Vintage Bundle - Bonnie Introduction

The Bonnie skirt features a flat front and an elasticated back, so it is really comfortable to wear. We’ve got a yoke, which is effectively a circle, and it gives the skirt fantastic volume.

I’ve also added some rickrack, which I’m going to show you how to do. My skirt is very voluminous, and we also have a hem, which includes a lovely lace detail that I’ll demonstrate as well. It is very simple to do, suitable for beginners, and looks really nice.

Design Adjustments

My ties are a little longer than on the pattern, about 90 centimeters. On the pattern they are shorter, but I made them longer so I could wrap them around to the front for my model.

Fabrics Used

The fabrics I used are:

  • Sevenberry Baby Basics by Michael Miller (100% cotton double gauze) for the skirt with polka dots
  • Tilda collection by Michael Miller for the yoke and waistband

The fabric is beautiful, although it is only 106 centimeters wide (42 inches), so keep that in mind when planning your layout.

Closing

Let’s get started with our skirt.

YOU MAY ALSO LIKE