CUFFS
BASIC SLEEVE METHODS
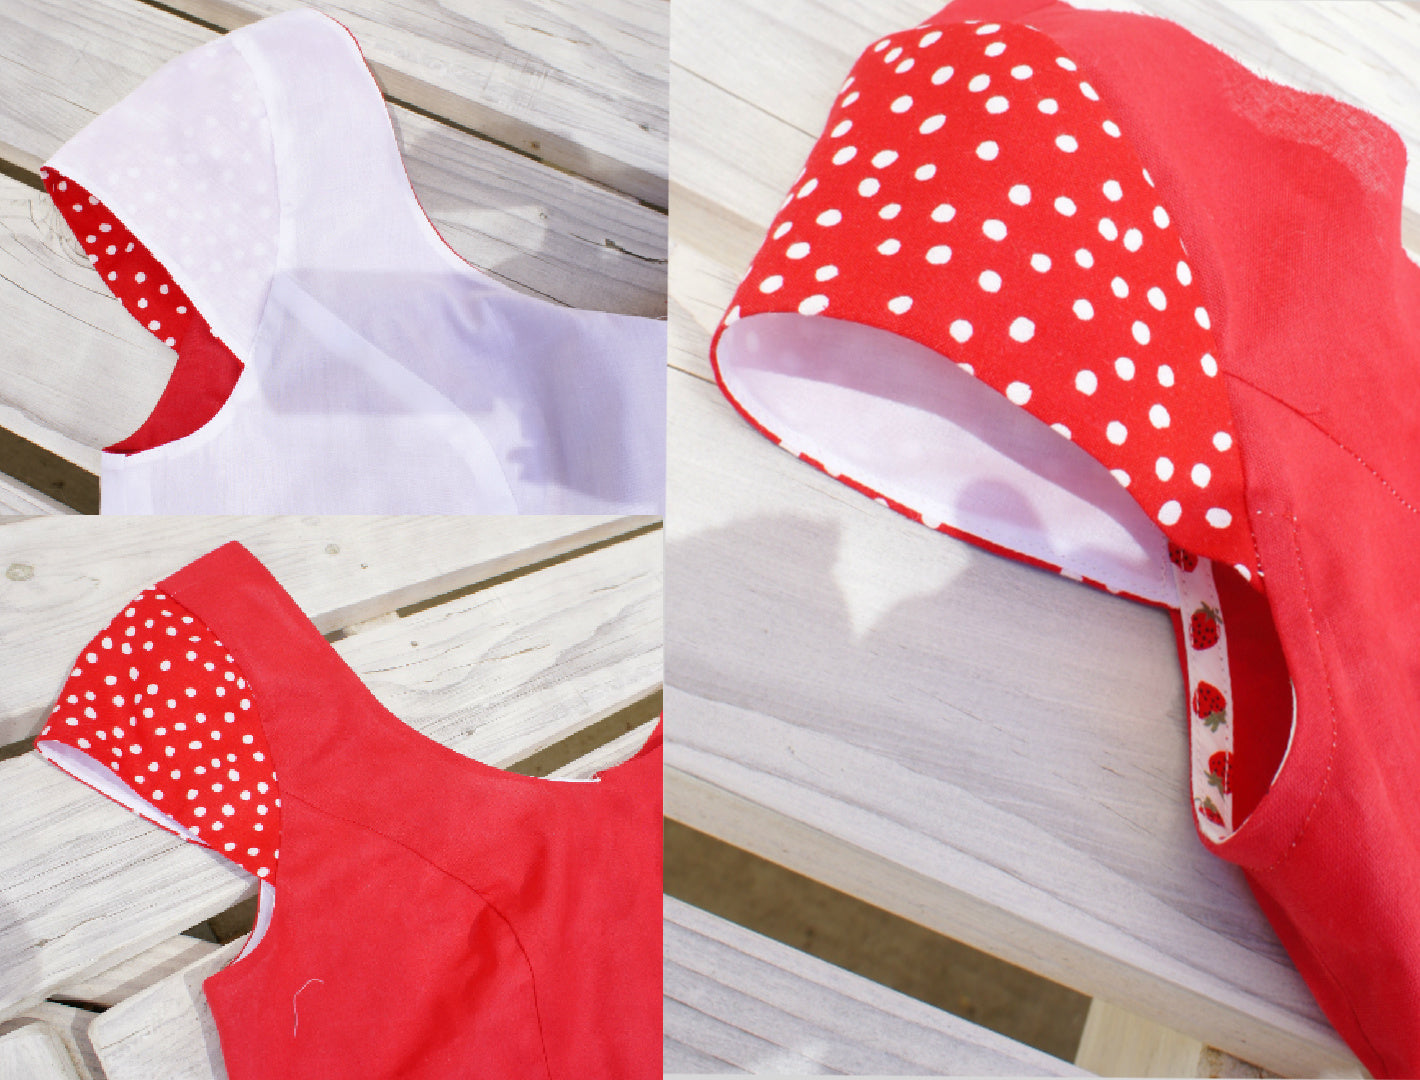
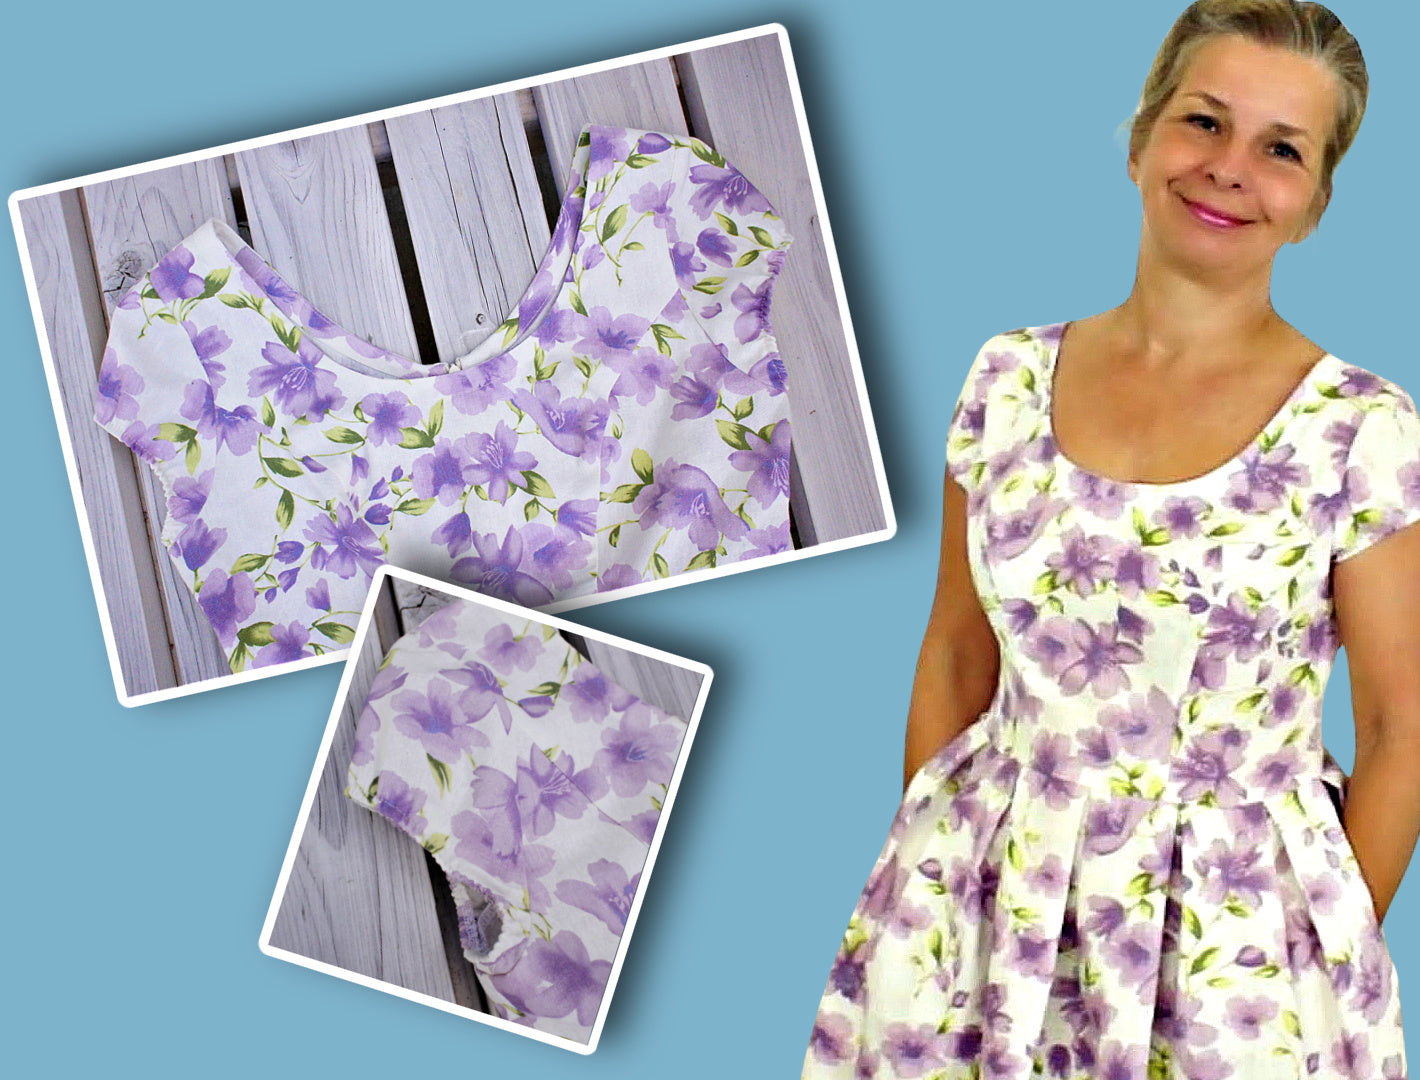
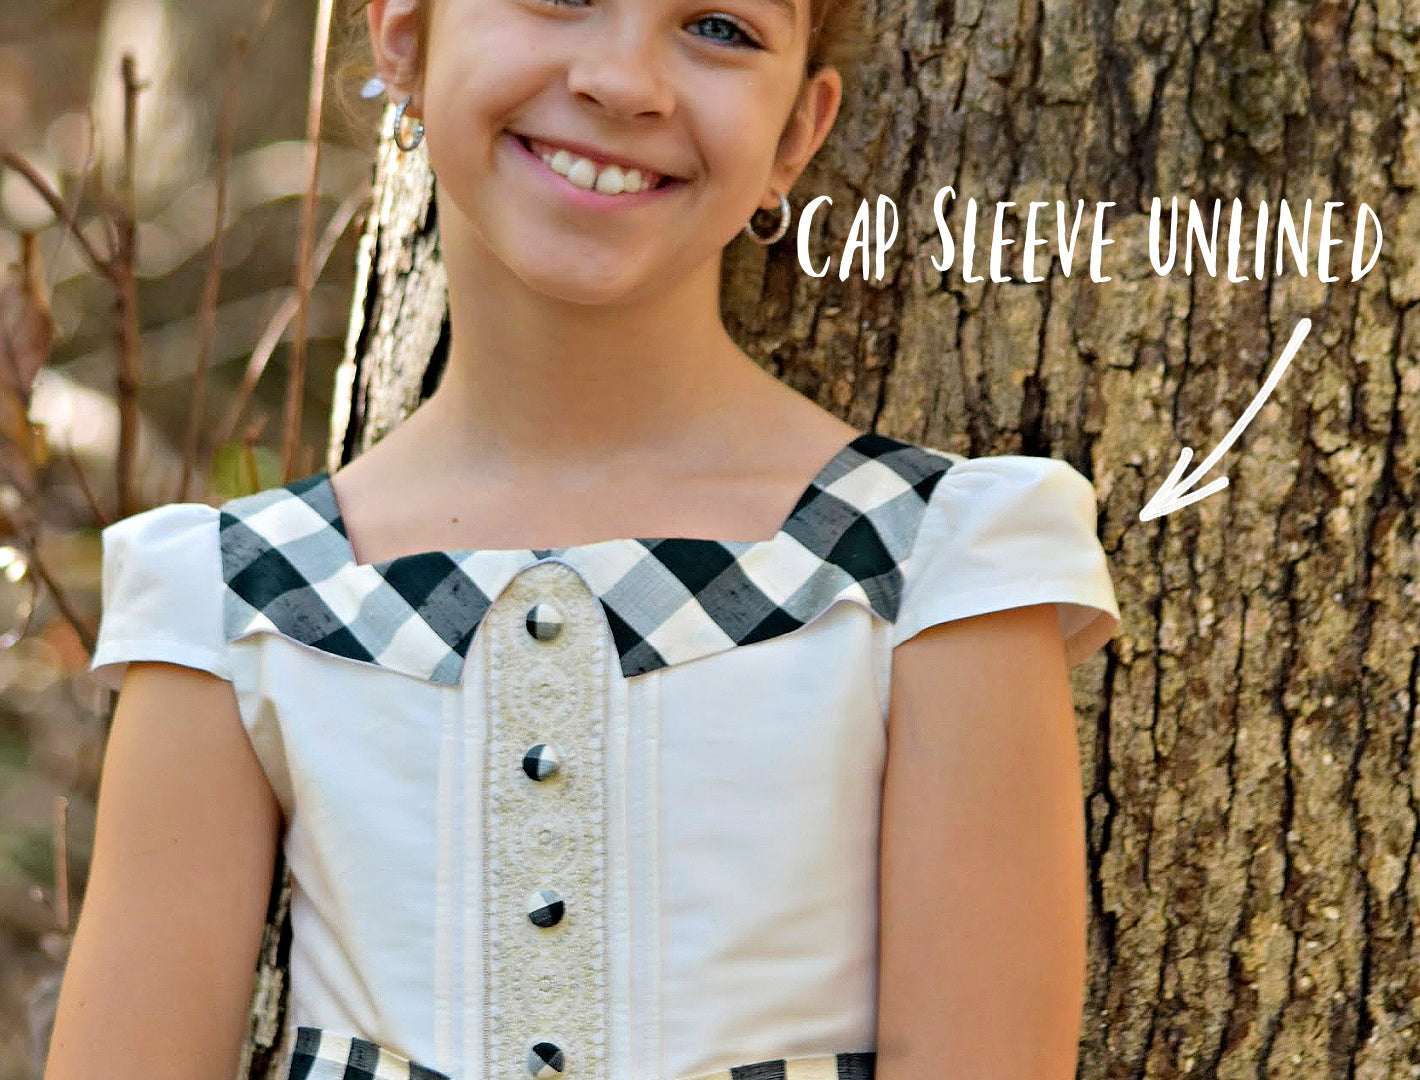
CAP SLEEVES
I'm going to walk you through the two main techniques for inserting a cap sleeve into a garment. First, we'll look at how to do it when your bodice has a lining, which creates a really clean interior finish. Then I'll show you how to tackle it when you're working with an unlined bodice, which requires bias binding around the armhole to achieve that professional-looking edge.
PUFF SLEEVE
The puff in the sleeve head is created by gathering the fabric in that area. This gathering technique actually makes sleeve insertion easier for beginners compared to a traditional set-in sleeve. The main challenge when working with this style is to ensure that the gathers are distributed evenly around the sleeve head.
PLAIN SET IN SLEEVE
The plain set-in sleeve is the most common sleeve style found in garments, but it's also considered the most challenging to insert properly. This traditional sleeve design typically includes up to 1.5 inches (3 cm) of ease built into the sleeve head, which means the sleeve cap is slightly larger than the armhole it will be fitted into.
SET-IN SLEEVE - LINED JACKET
The focus here is on creating a clean armhole with no visible seam. The lining hangs loose into the armhole. This method is excellent for any fine jacket or coat you want to put together. Special Bonus here is the recessed ruffle hem.
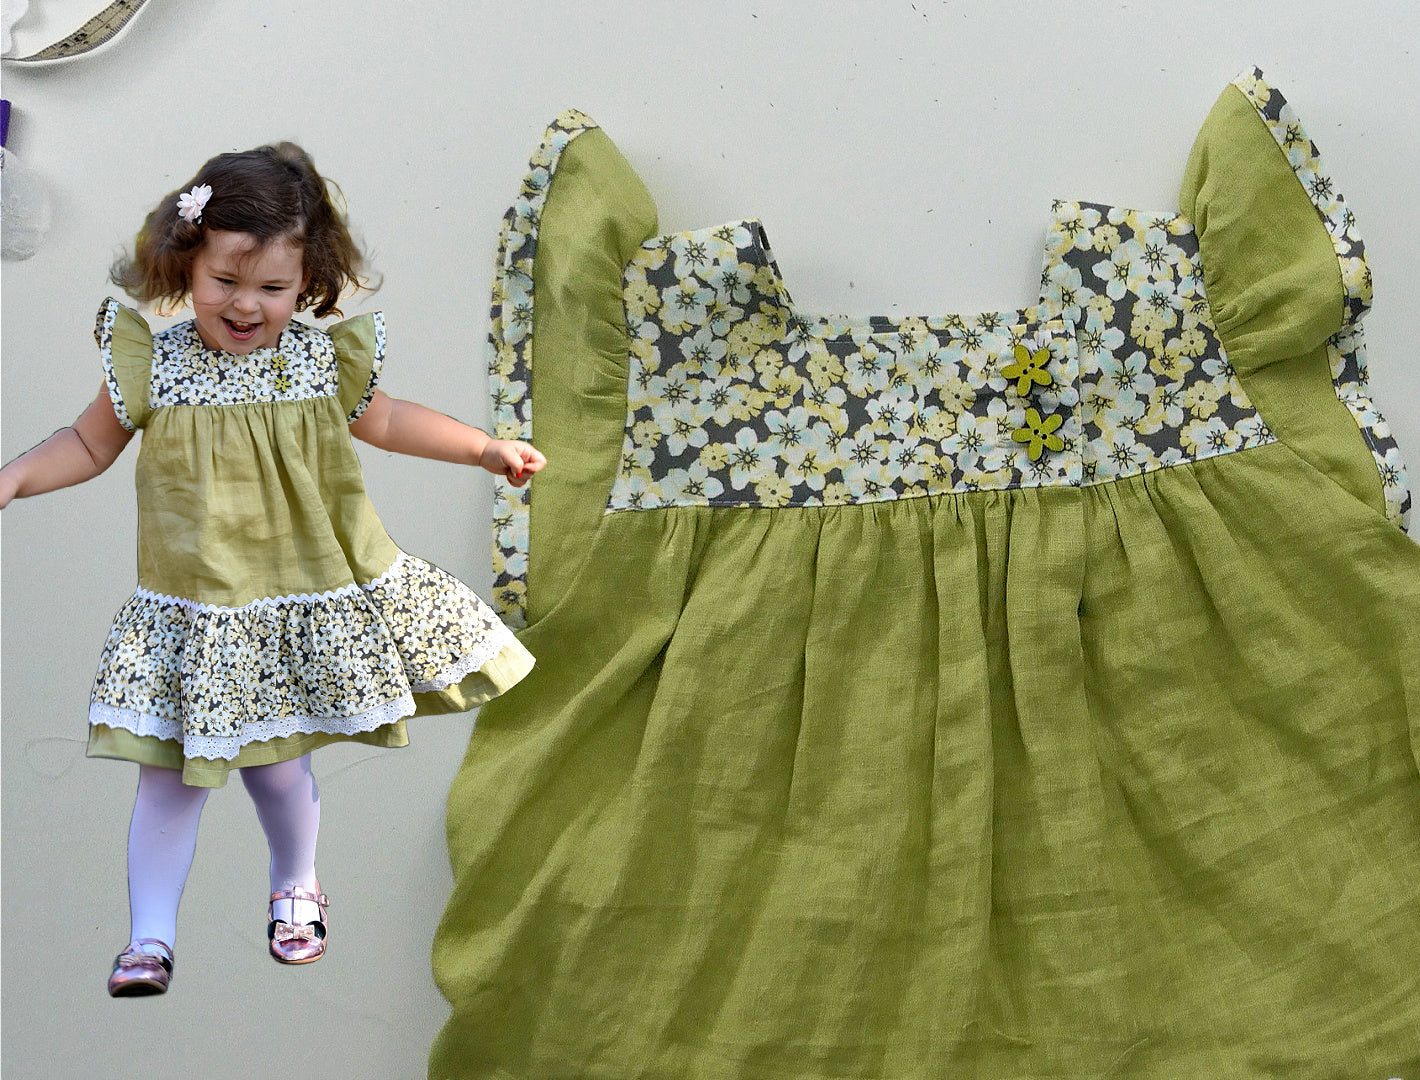
FLUTTER SLEEVES
The flutter sleeve is an absolutely adorable choice for toddlers' clothing!
Similar to the puff sleeve, the ruffle element makes this sleeve fairly straightforward to insert, even if you're relatively new to sewing.
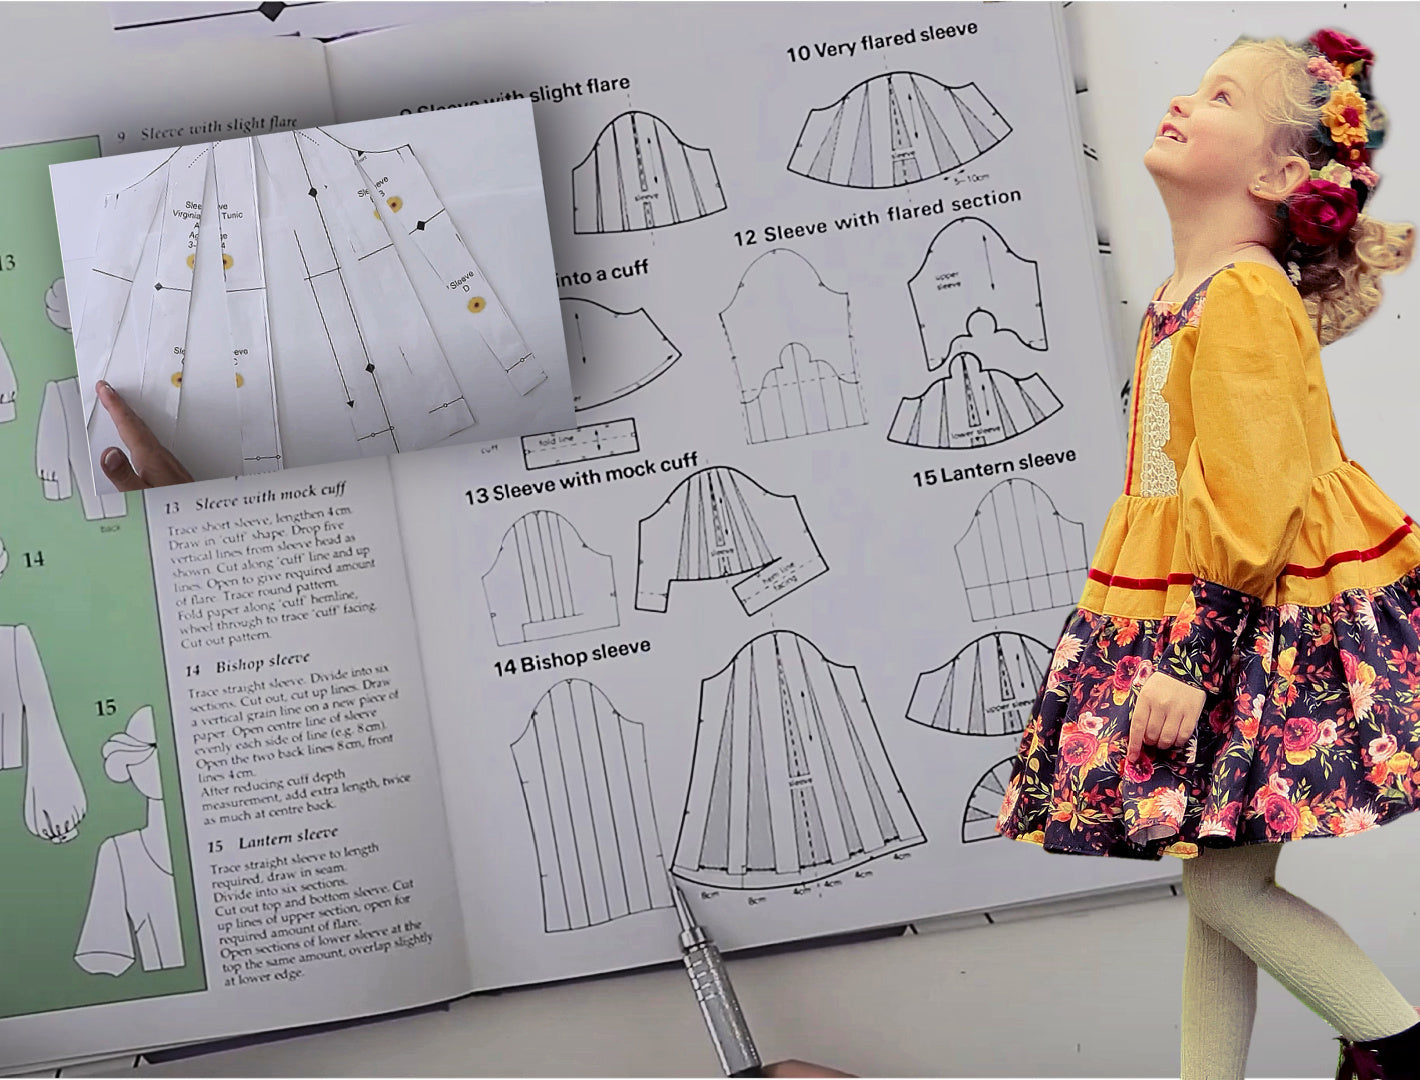
BISHOP SLEEVE - DRAFTING
The bishop sleeve is designed to be slimmer at the sleeve head than at the hem. This design creates a beautiful vintage finish with considerable volume gathered into a tall cuff.
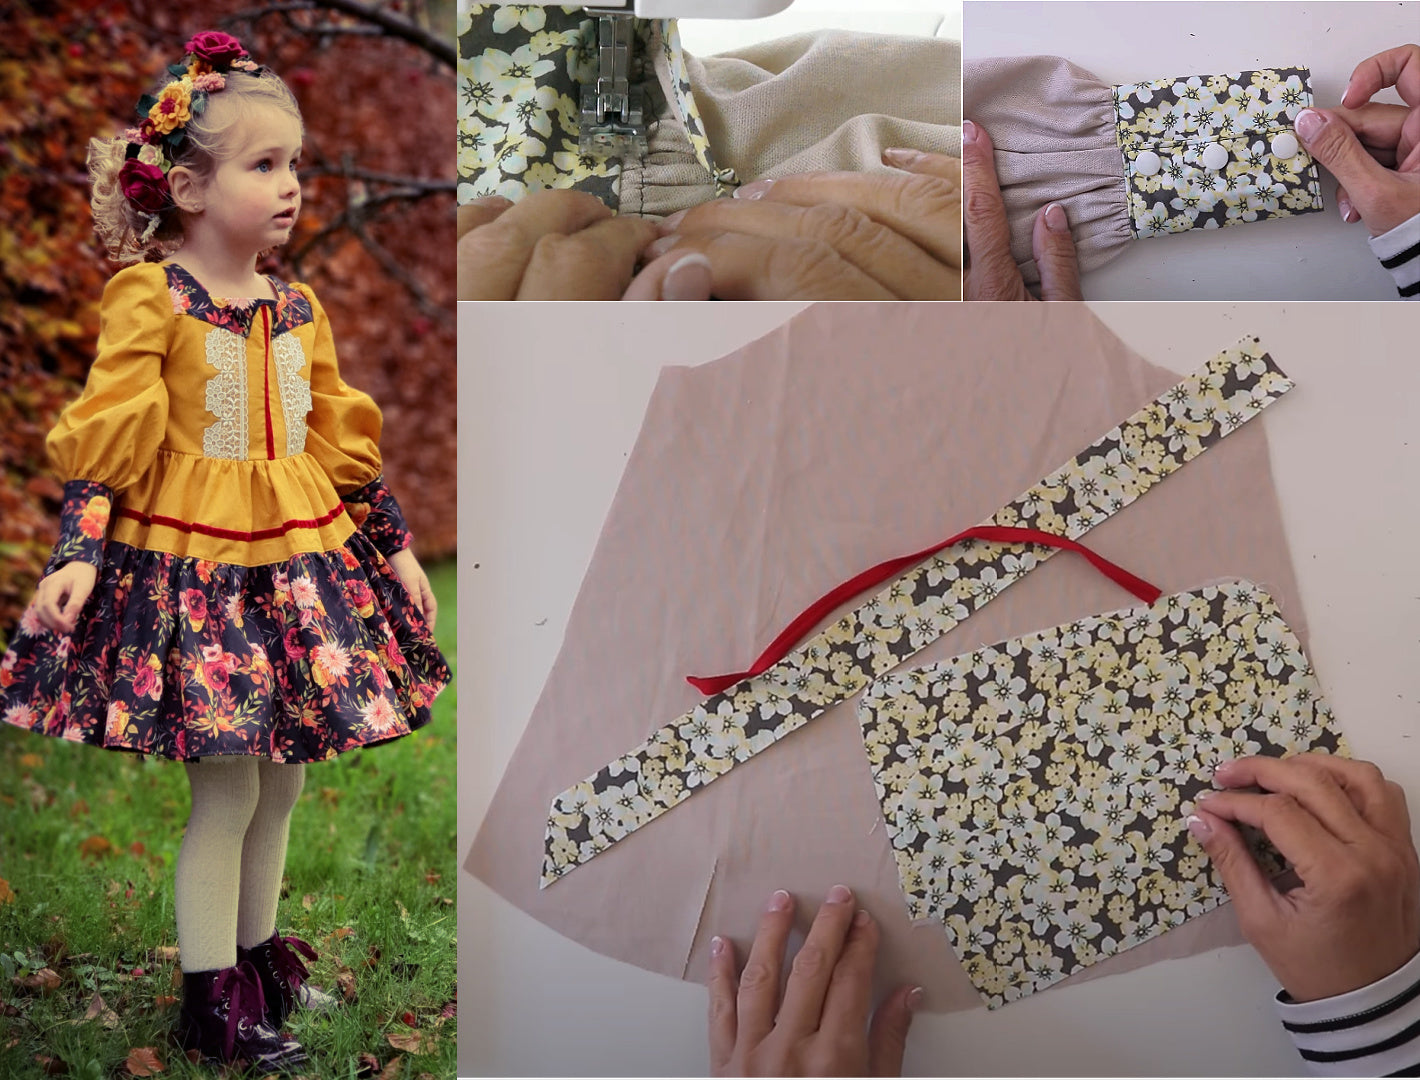
BISHOP-SLEEVE
SEWING
The bishop sleeve is designed to be slimmer at the sleeve head than at the hem. This design creates a beautiful vintage look with considerable volume gathered into a tall cuff.
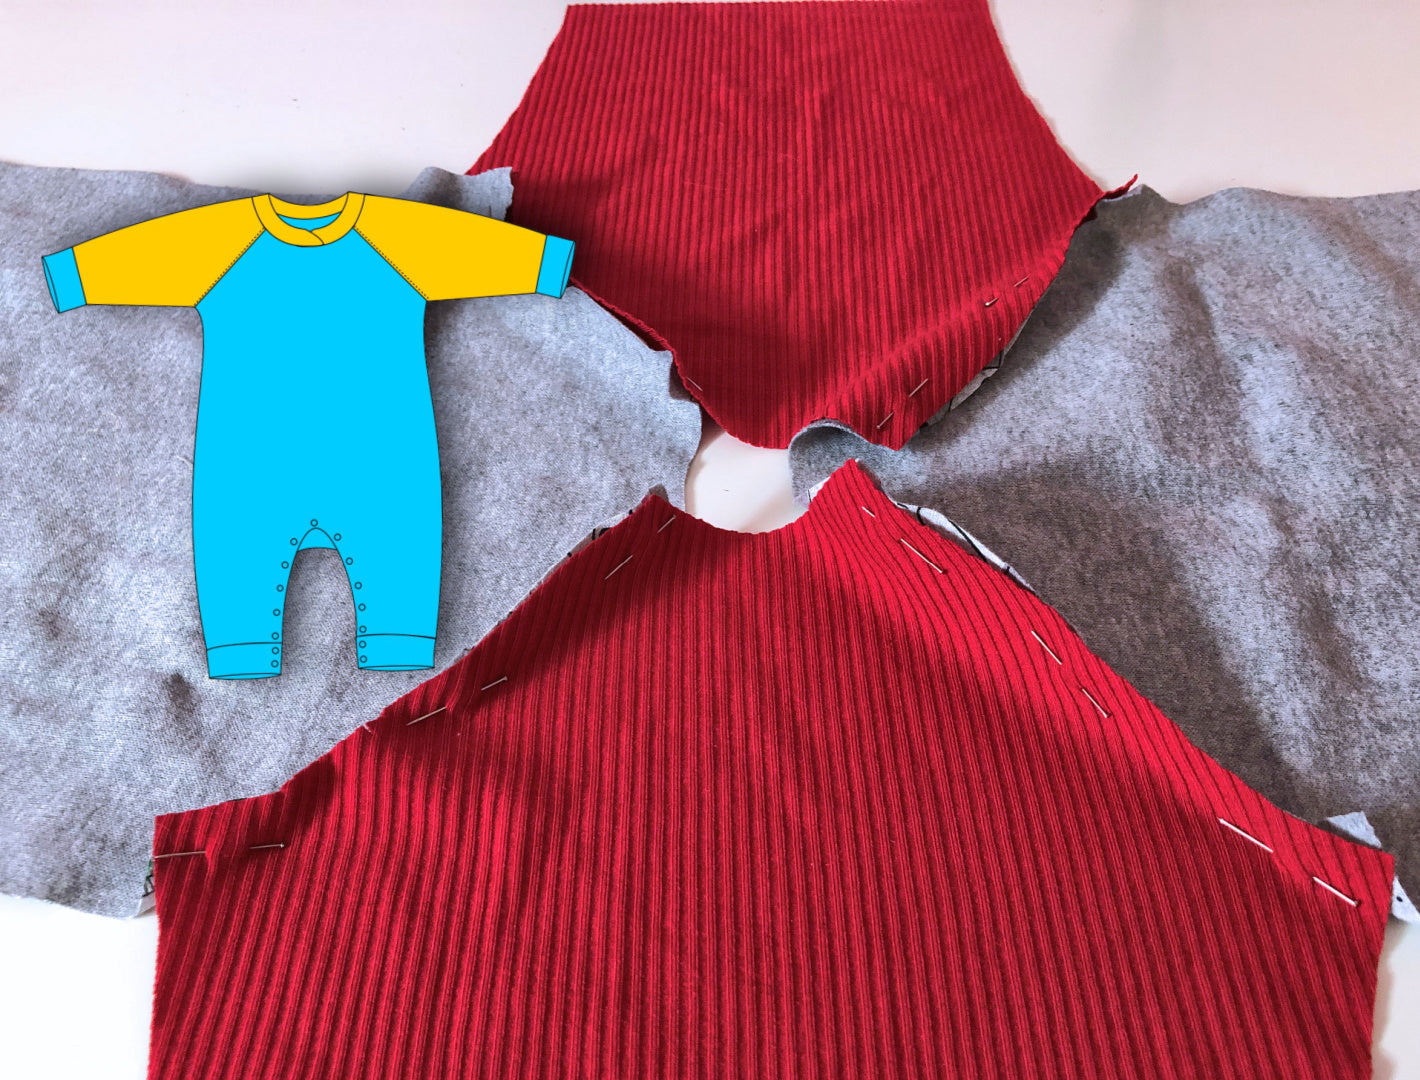
RAGLAN SLEEVES
Raglan sleeves are absolutely delightful for all beginners! They're wonderfully easy to put in since there's no tricky ease to worry about. I've showcased this charming sleeve style in my Lollipop baby romper pattern - a perfect starting point for your sewing journey with little ones!
CAP SLEEVES
I'm going to walk you through the two main techniques for inserting a cap sleeve into a garment. First, we'll look at how to do it when your bodice has a lining, which creates a really clean interior finish. Then I'll show you how to tackle it when you're working with an unlined bodice, which requires bias binding around the armhole to achieve that professional-looking edge.
PUFF SLEEVE
The puff in the sleeve head is created by gathering the fabric in that area. This gathering technique actually makes sleeve insertion easier for beginners compared to a traditional set-in sleeve. The main challenge when working with this style is to ensure that the gathers are distributed evenly around the sleeve head.
PLAIN SET IN SLEEVE
The plain set-in sleeve is the most common sleeve style found in garments, but it's also considered the most challenging to insert properly. This traditional sleeve design typically includes up to 1.5 inches (3 cm) of ease built into the sleeve head, which means the sleeve cap is slightly larger than the armhole it will be fitted into.
SET-IN SLEEVE - LINED JACKET
The focus here is on creating a clean armhole with no visible seam. The lining hangs loose into the armhole. This method is excellent for any fine jacket or coat you want to put together. Special Bonus here is the recessed ruffle hem.
FLUTTER SLEEVES
The flutter sleeve is an absolutely adorable choice for toddlers' clothing!
Similar to the puff sleeve, the ruffle element makes this sleeve fairly straightforward to insert, even if you're relatively new to sewing.
BISHOP SLEEVE - DRAFTING
The bishop sleeve is designed to be slimmer at the sleeve head than at the hem. This design creates a beautiful vintage finish with considerable volume gathered into a tall cuff.
BISHOP-SLEEVE
SEWING
The bishop sleeve is designed to be slimmer at the sleeve head than at the hem. This design creates a beautiful vintage look with considerable volume gathered into a tall cuff.
RAGLAN SLEEVES
Raglan sleeves are absolutely delightful for all beginners! They're wonderfully easy to put in since there's no tricky ease to worry about. I've showcased this charming sleeve style in my Lollipop baby romper pattern - a perfect starting point for your sewing journey with little ones!
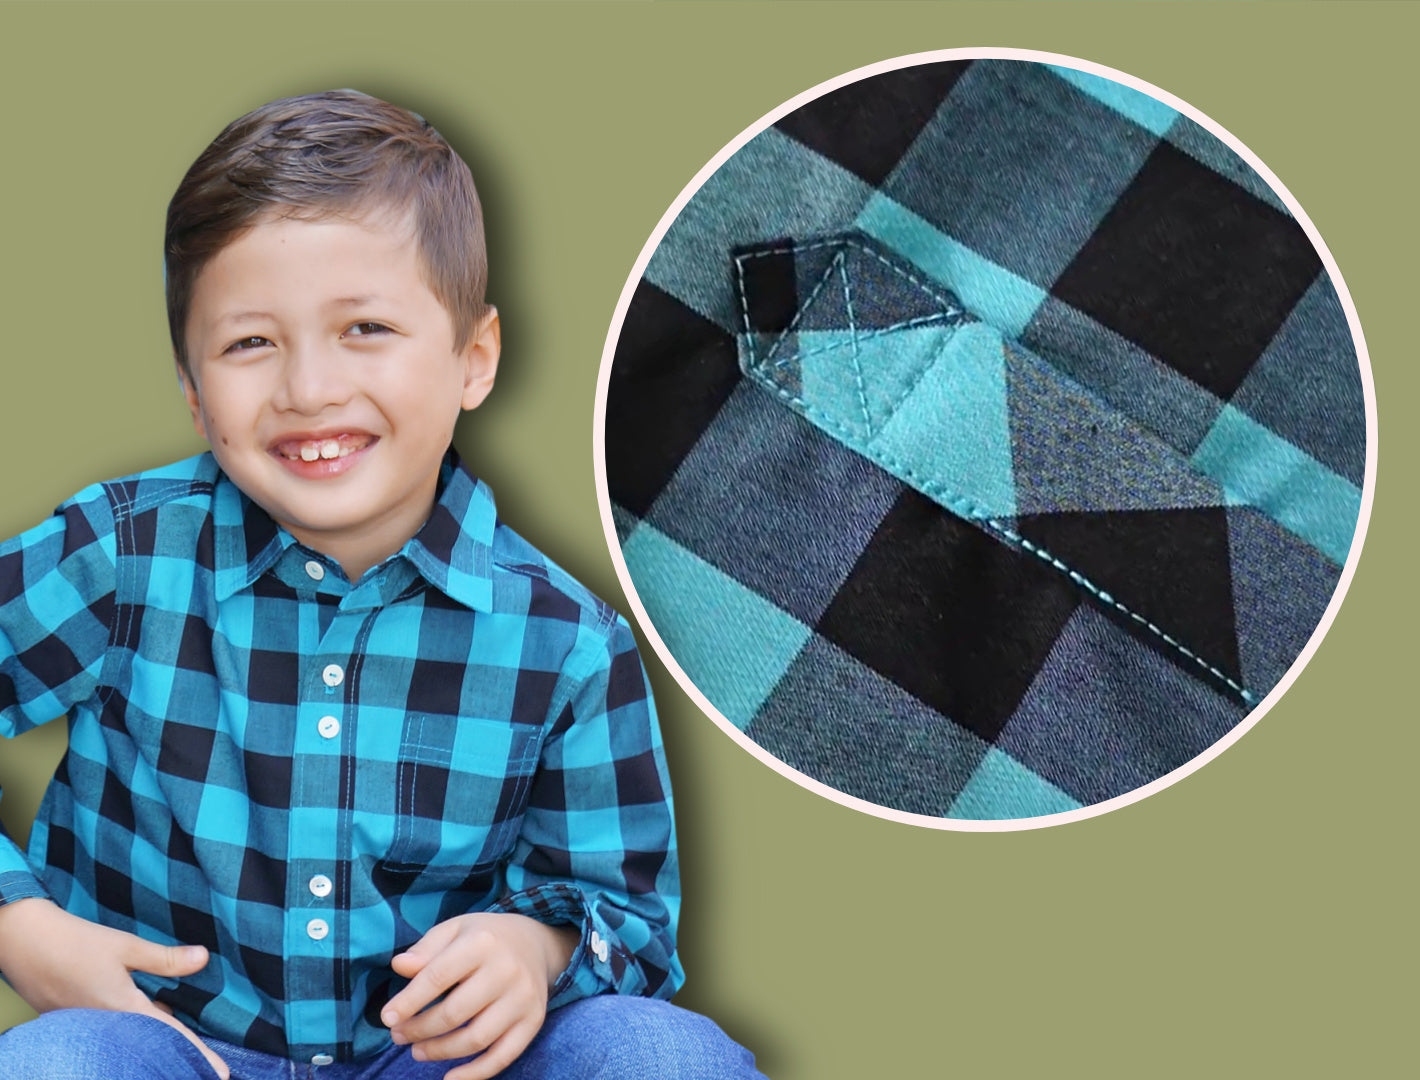
CLASSIC SHIRT SLEEVES
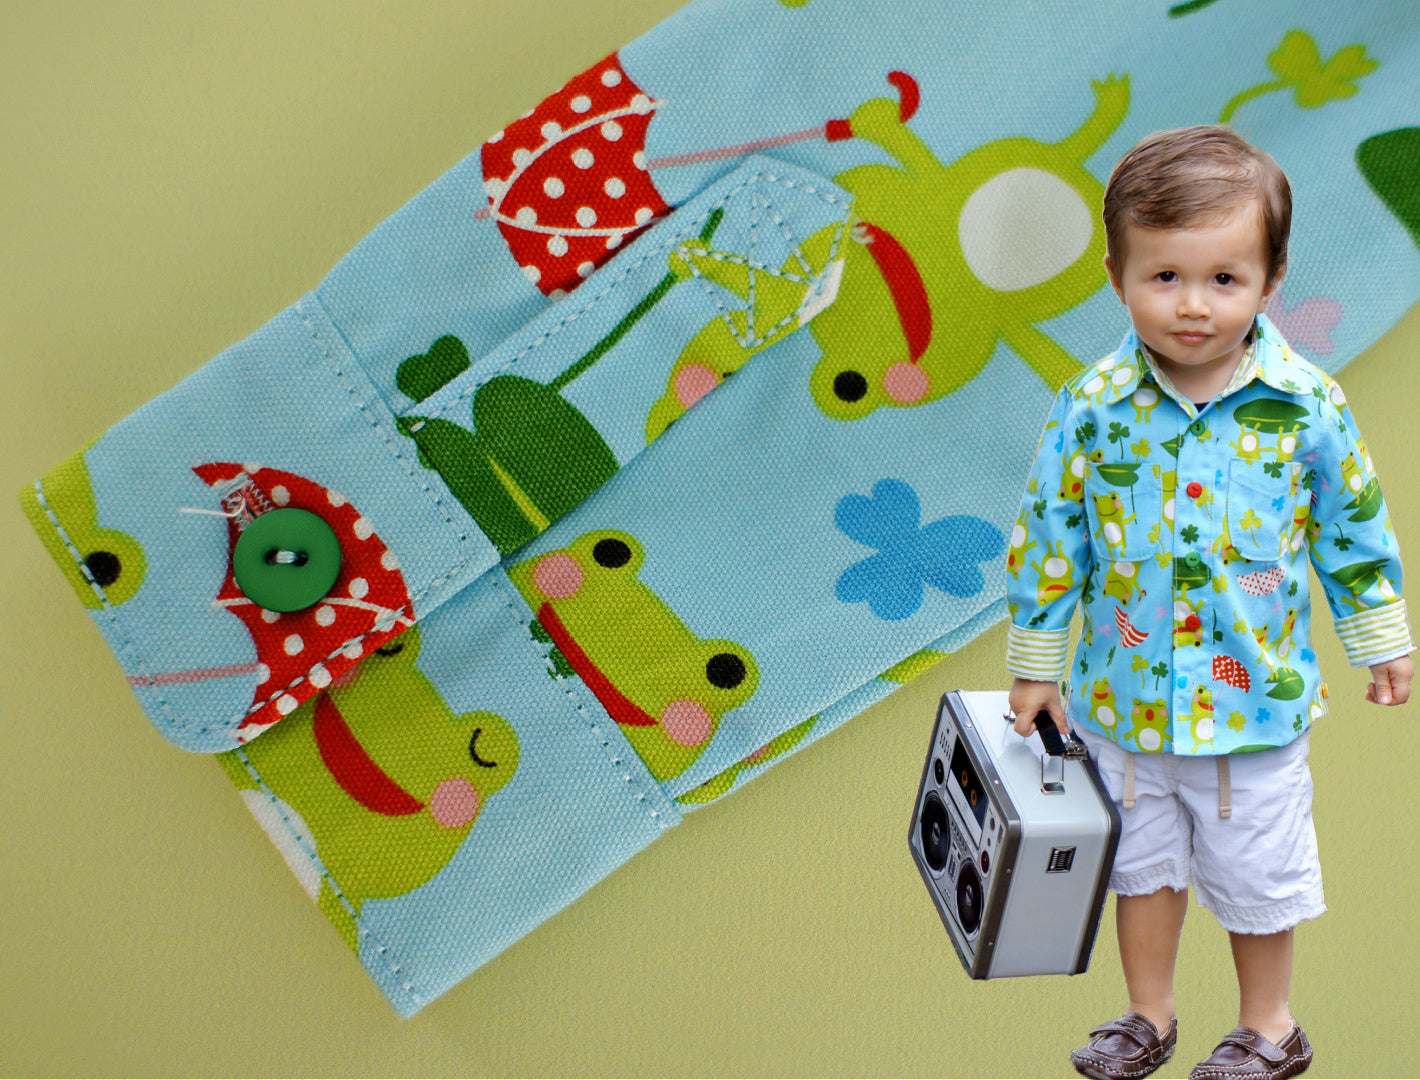
COOL SHIRT SLEEVE
This video demonstrates the complete process, including how to make the placket and cuffs. For this particular shirt, I fitted the sleeve by pinning it directly into the armhole. If you'd like to see how to attach sleeves without pinning first, please check out the short-sleeve version.
PLACKET
If you're sewing a shirt, knowing how to insert a placket is an essential skill. The good news is that once you master this technique, you can apply it to many other projects as well! From back closures to skirts and much more, this versatile skill will serve you well in your sewing journey
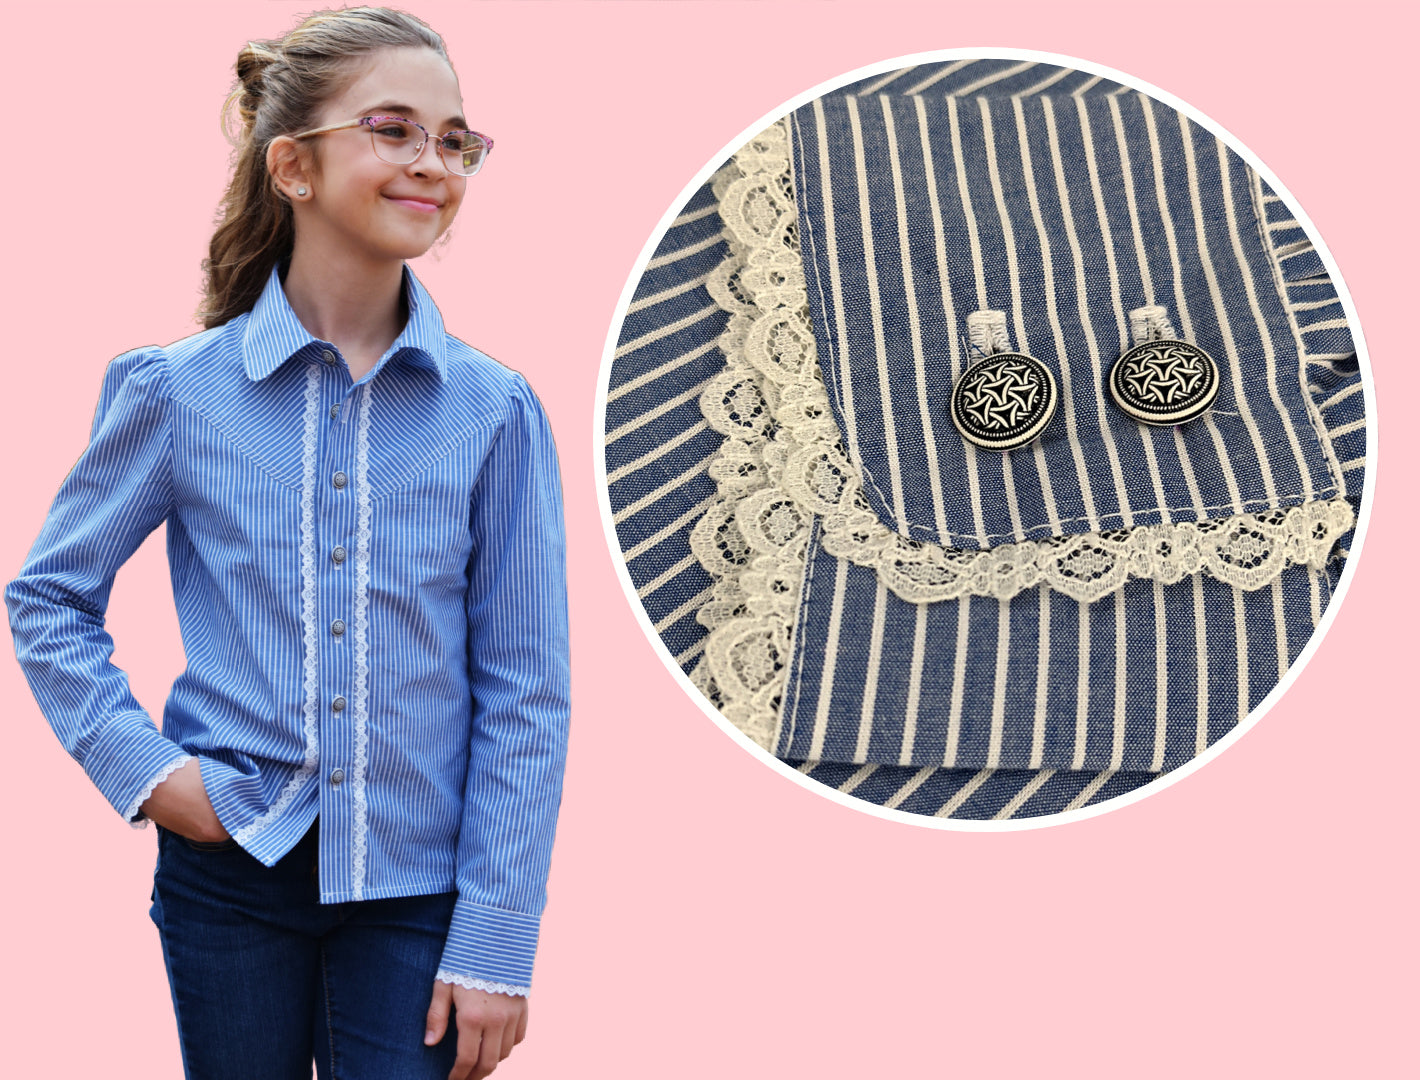
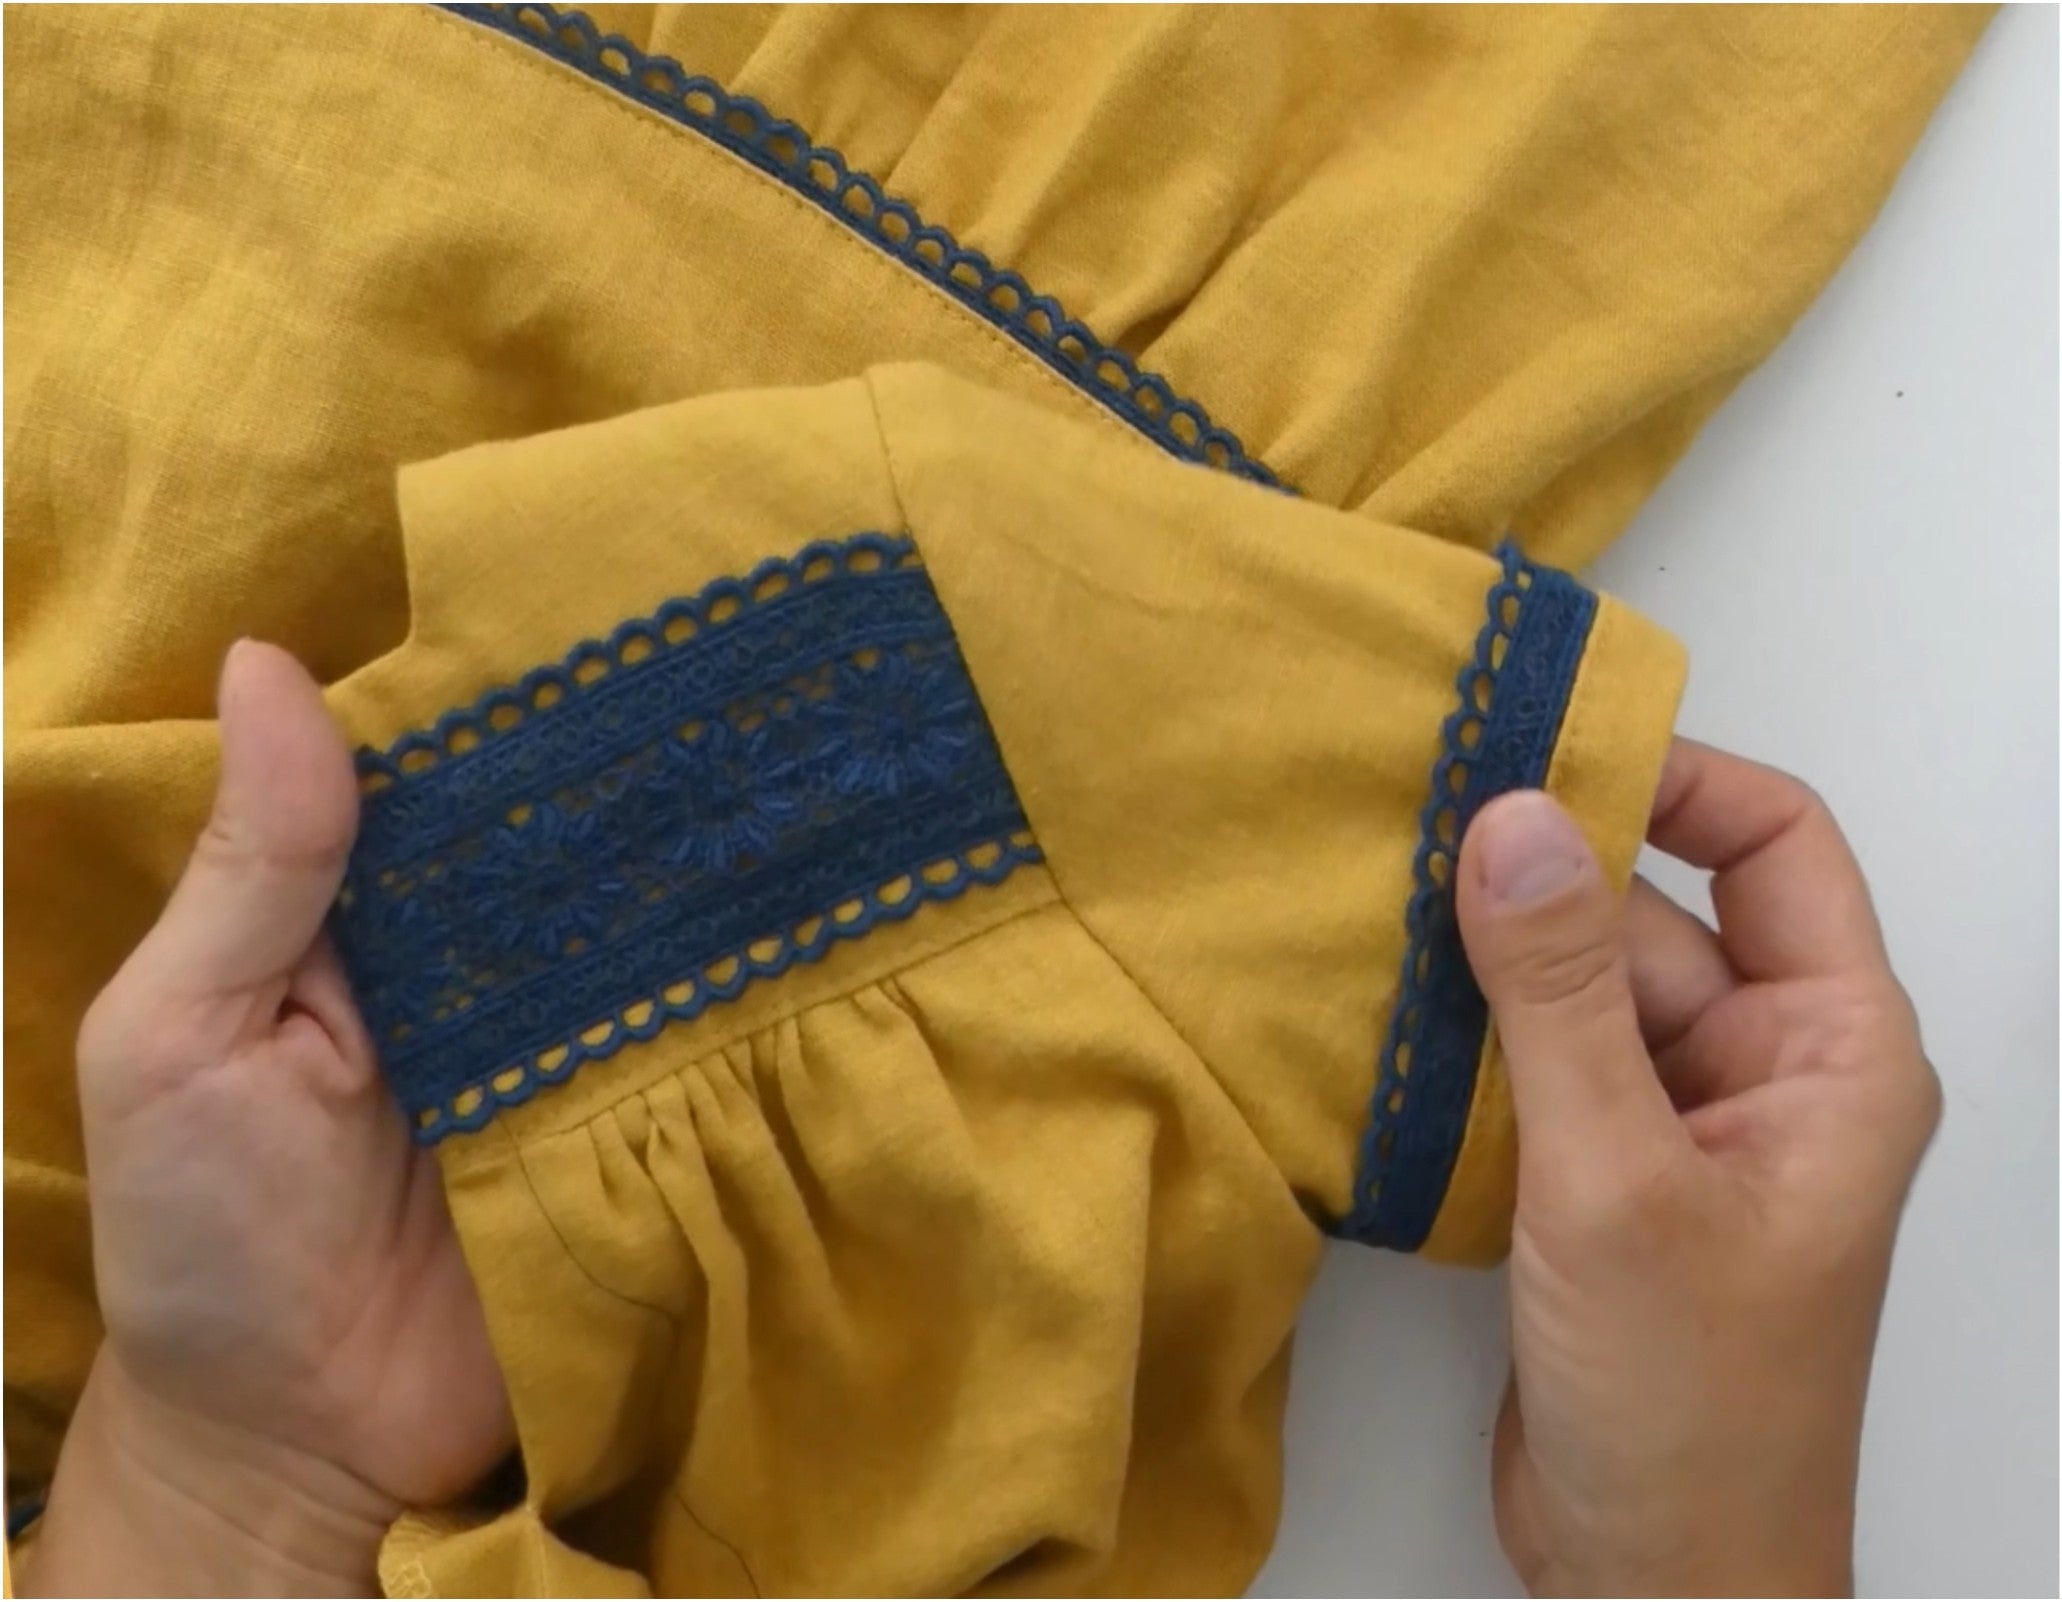
CUFF
This design features a refined binding technique instead of a traditional placket for the sleeve opening. This elegant approach, often called a "ladies finish," creates a clean look at the cuff slit. I also added a delicate lace trim, to the Country Blouse.
SHORT - TURN UP
This pattern is perfect for summer! A short-sleeved shirt with a classic vintage turn-up that you'll absolutely adore making for your kids.
It captures that nostalgic 50s movie style, reminiscent of the legendary James Dean look.
COOL SHIRT SLEEVE
This video demonstrates the complete process, including how to make the placket and cuffs. For this particular shirt, I fitted the sleeve by pinning it directly into the armhole. If you'd like to see how to attach sleeves without pinning first, please check out the short-sleeve version.
PLACKET
If you're sewing a shirt, knowing how to insert a placket is an essential skill. The good news is that once you master this technique, you can apply it to many other projects as well! From back closures to skirts and much more, this versatile skill will serve you well in your sewing journey
CUFF
This design features a refined binding technique instead of a traditional placket for the sleeve opening. This elegant approach, often called a "ladies finish," creates a clean look at the cuff slit. I also added a delicate lace trim, to the Country Blouse.
SHORT - TURN UP
This pattern is perfect for summer! A short-sleeved shirt with a classic vintage turn-up that you'll absolutely adore making for your kids.
It captures that nostalgic 50s movie style, reminiscent of the legendary James Dean look.
MORE SLEEVE EXAMPLES
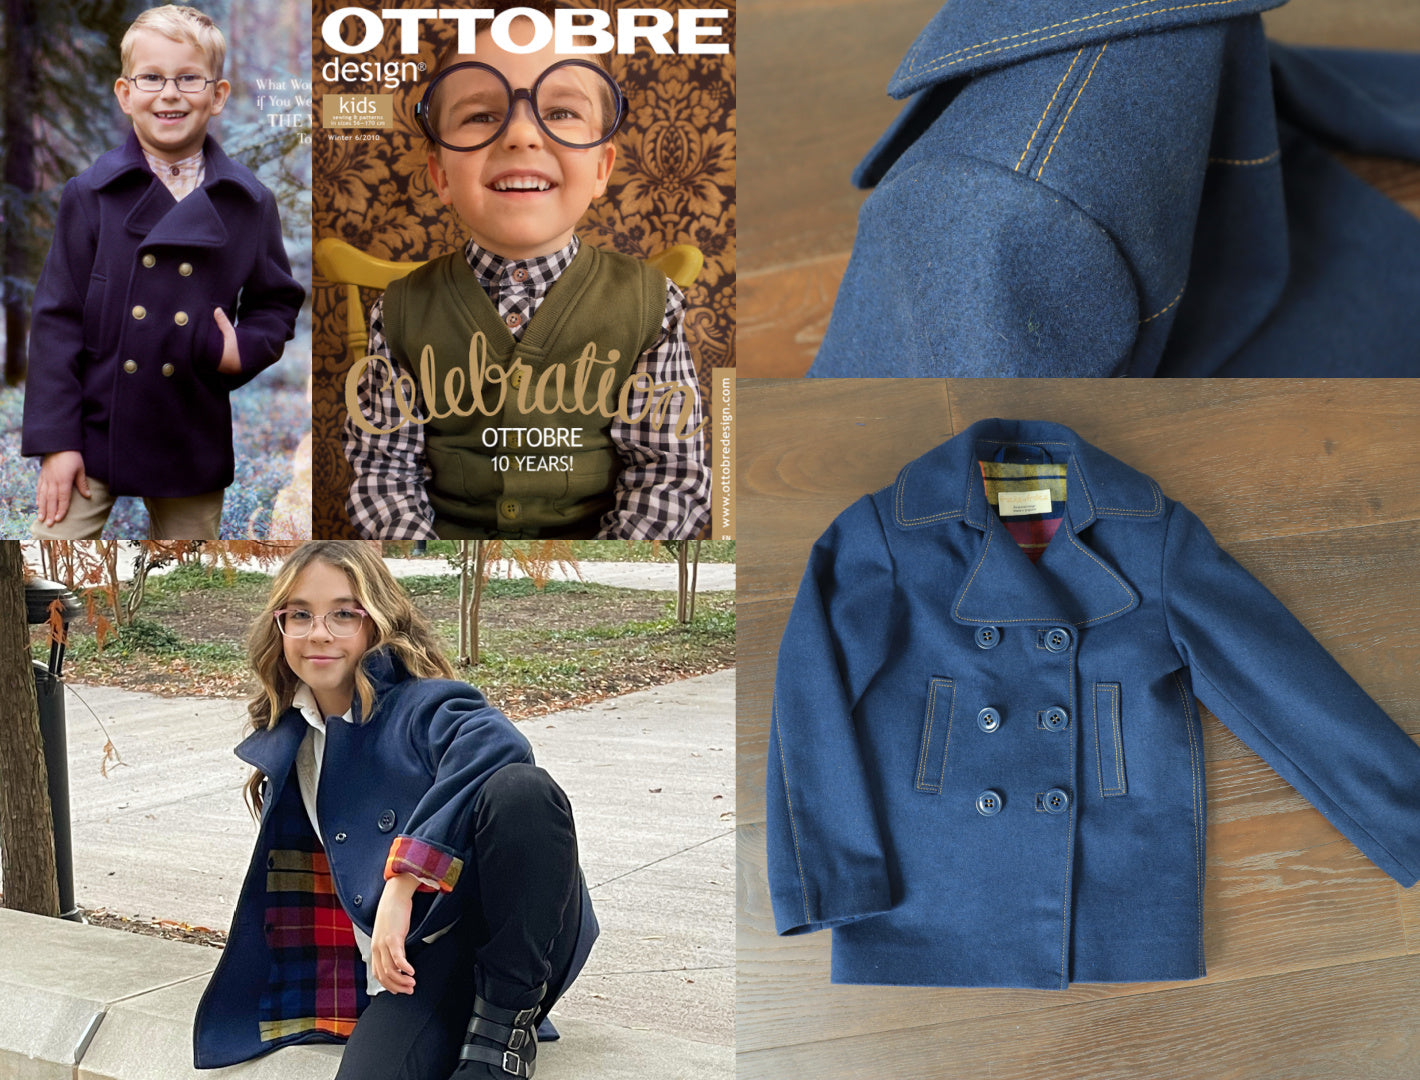
SET - IN COAT SLEEVE
This sleeve is inserted into a winter coat. Therefore it needs a few extra steps to make sure that the sleeve sits nice and round. This video clip belongs to the Pea Coat sew-Along I created for OTTOBRE.
SET-IN SHORT SLEEVES
This little blouse is darling. You can see the binding and action and pick up some tips on the way. There is a gorgeous rouleaux loop fastening inserted into the binding, I am sure that will come invery handy for all sorts of blouse projects.
CAP SLEEVE
LINED BODICE
Here we borrow from the Isabella sewing course. This sleeve is gathered at the sleeve head. The bodice is lined and the sleeve seam is completely hidden in the armhole seam.
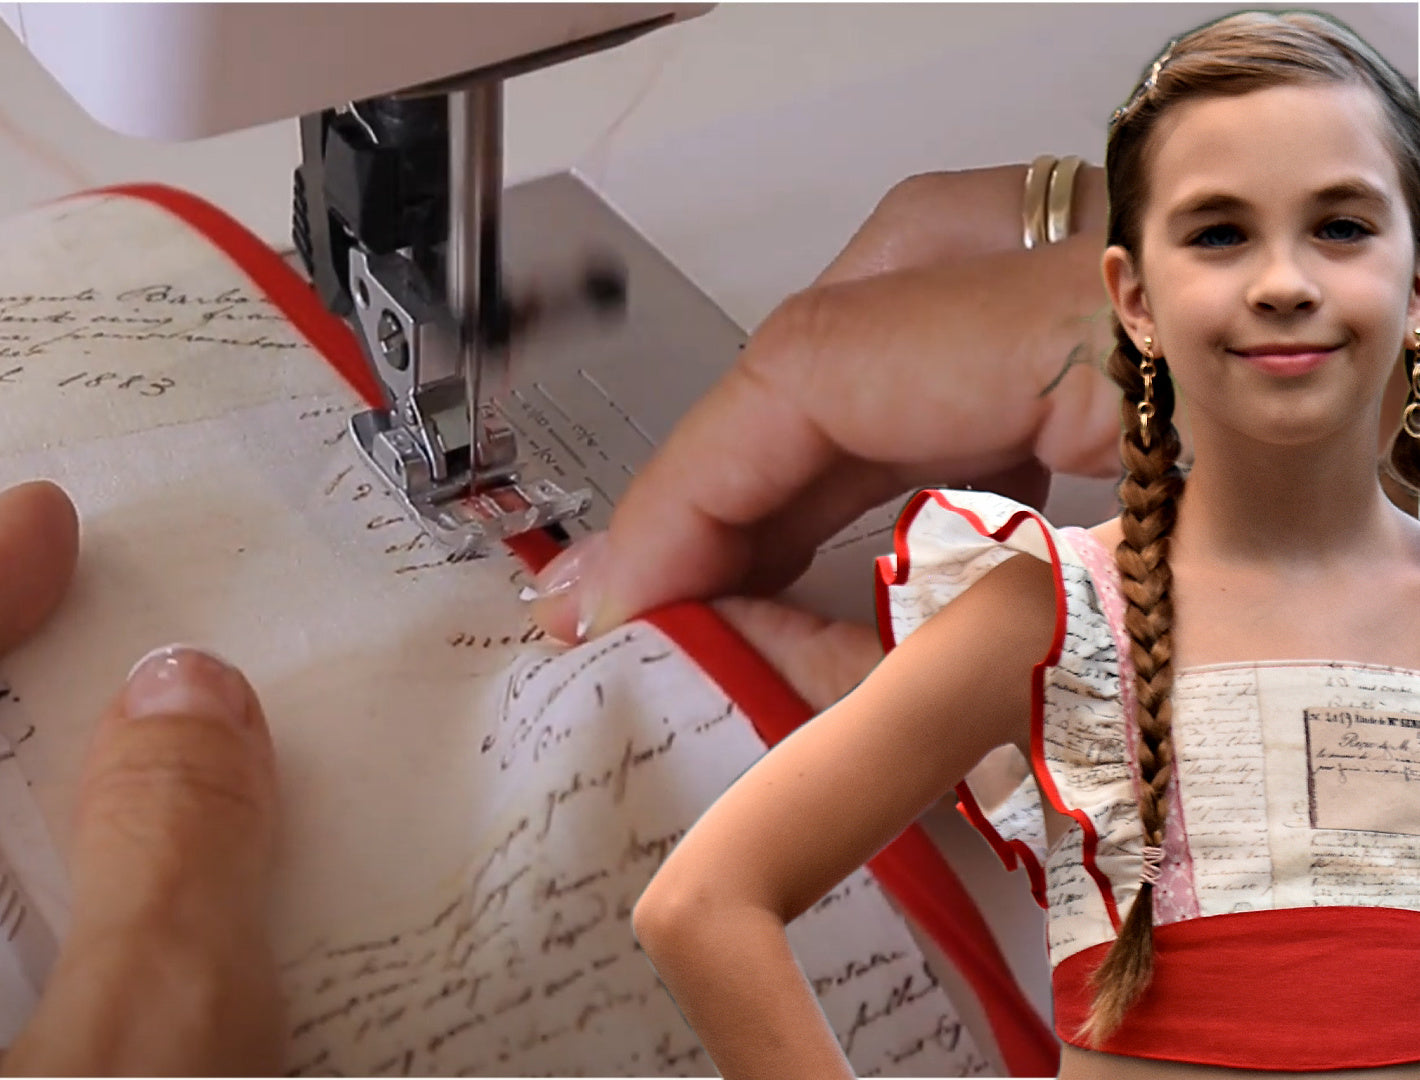
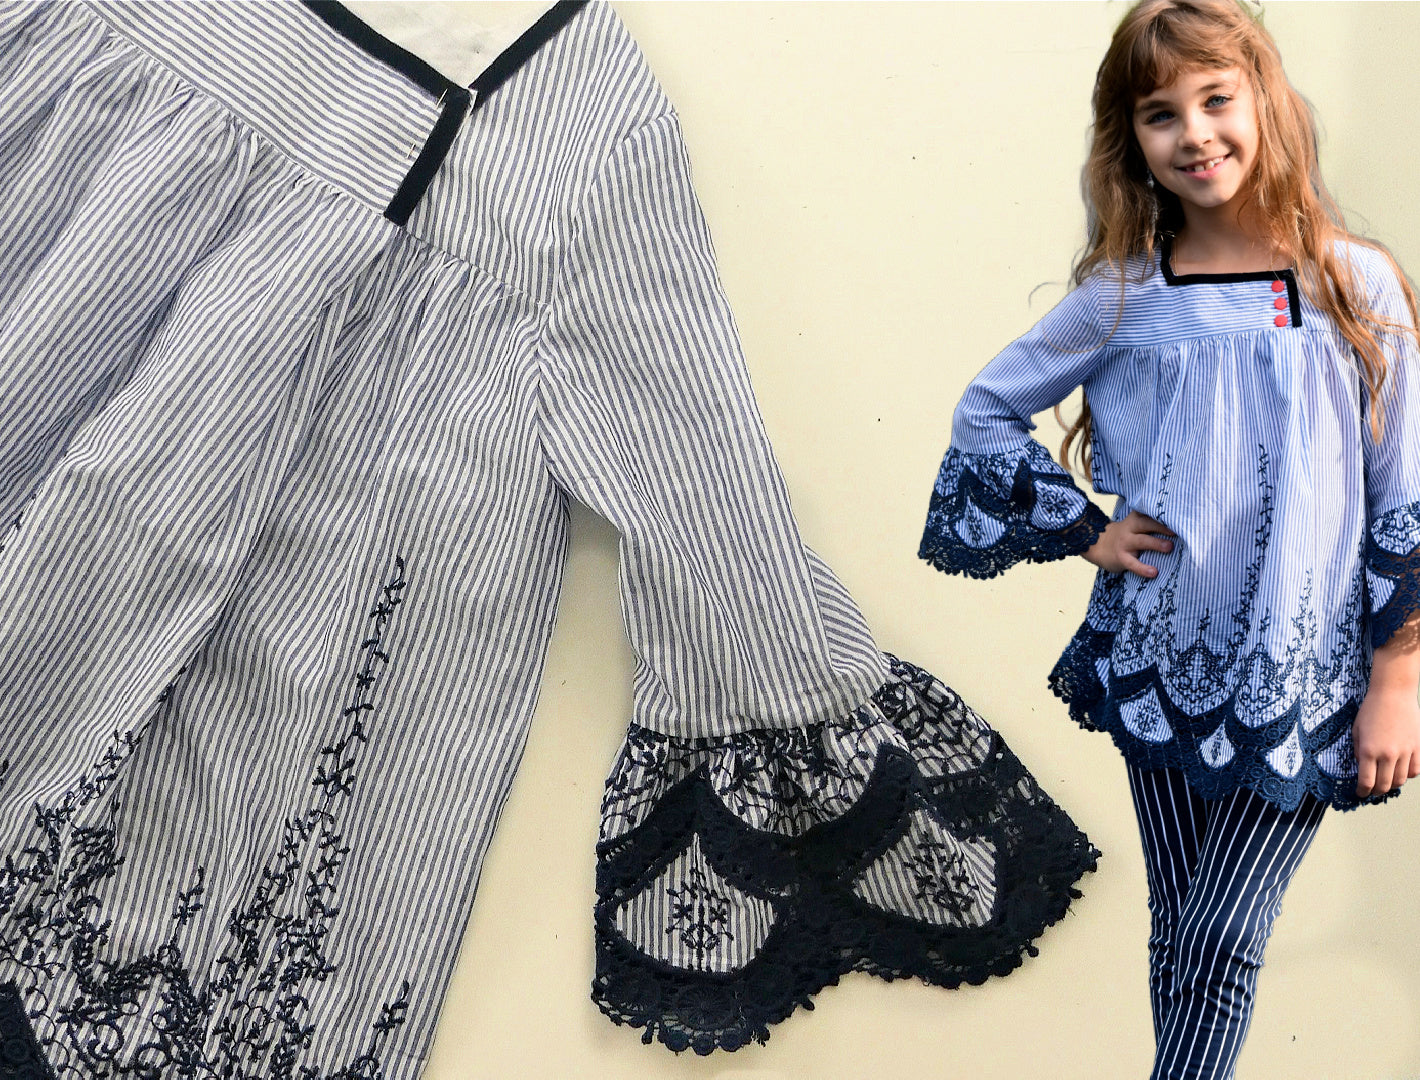
FLUTTER SLEEVE
TILLY
using a store-bought bias tape works perfectly for this long length of fabric. The advantage of this particular tape is that it provides more structure to the flutter due to its firmer quality.
SET-IN SLEEVE
BOUND ARMHOLE
For everyone still struggling with sleeve insertion, this is a great method to get a great-looking sleeve. The thicker seam and the binding give this armhole the ability to sit just right.
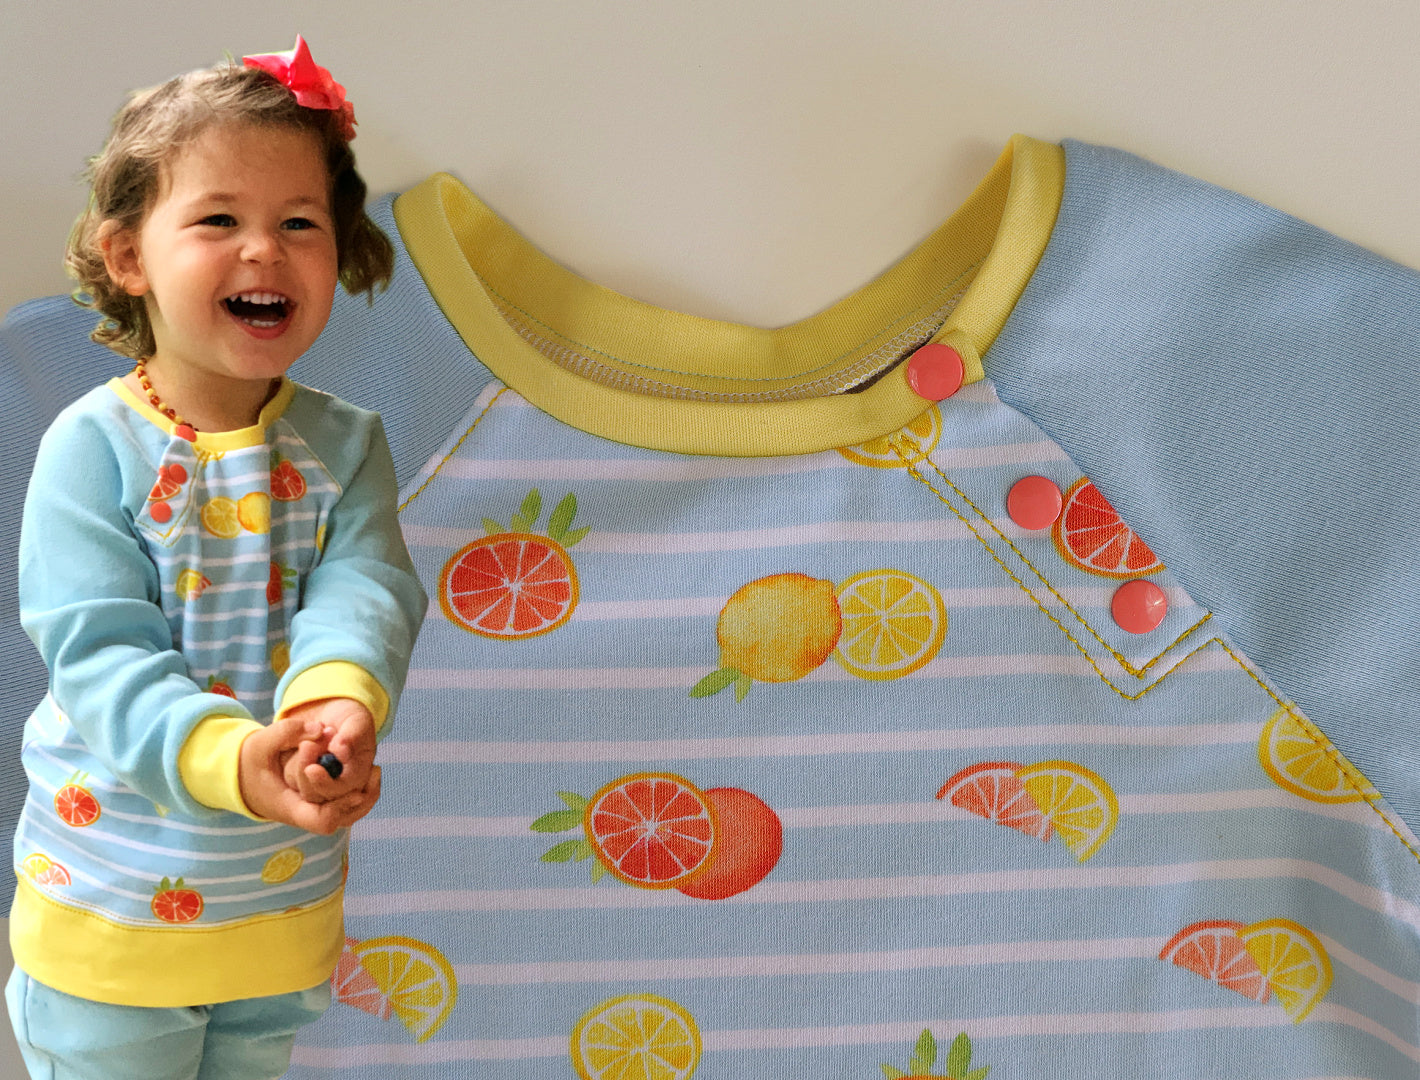
RAGLAN SLEEVE
KAMSNAP FASTENING
Another raglan sleeve you can get under your belt. Here I added a snap placket which you can use your trusty KamSnaps with. This is a more advanced method, so do take your time.
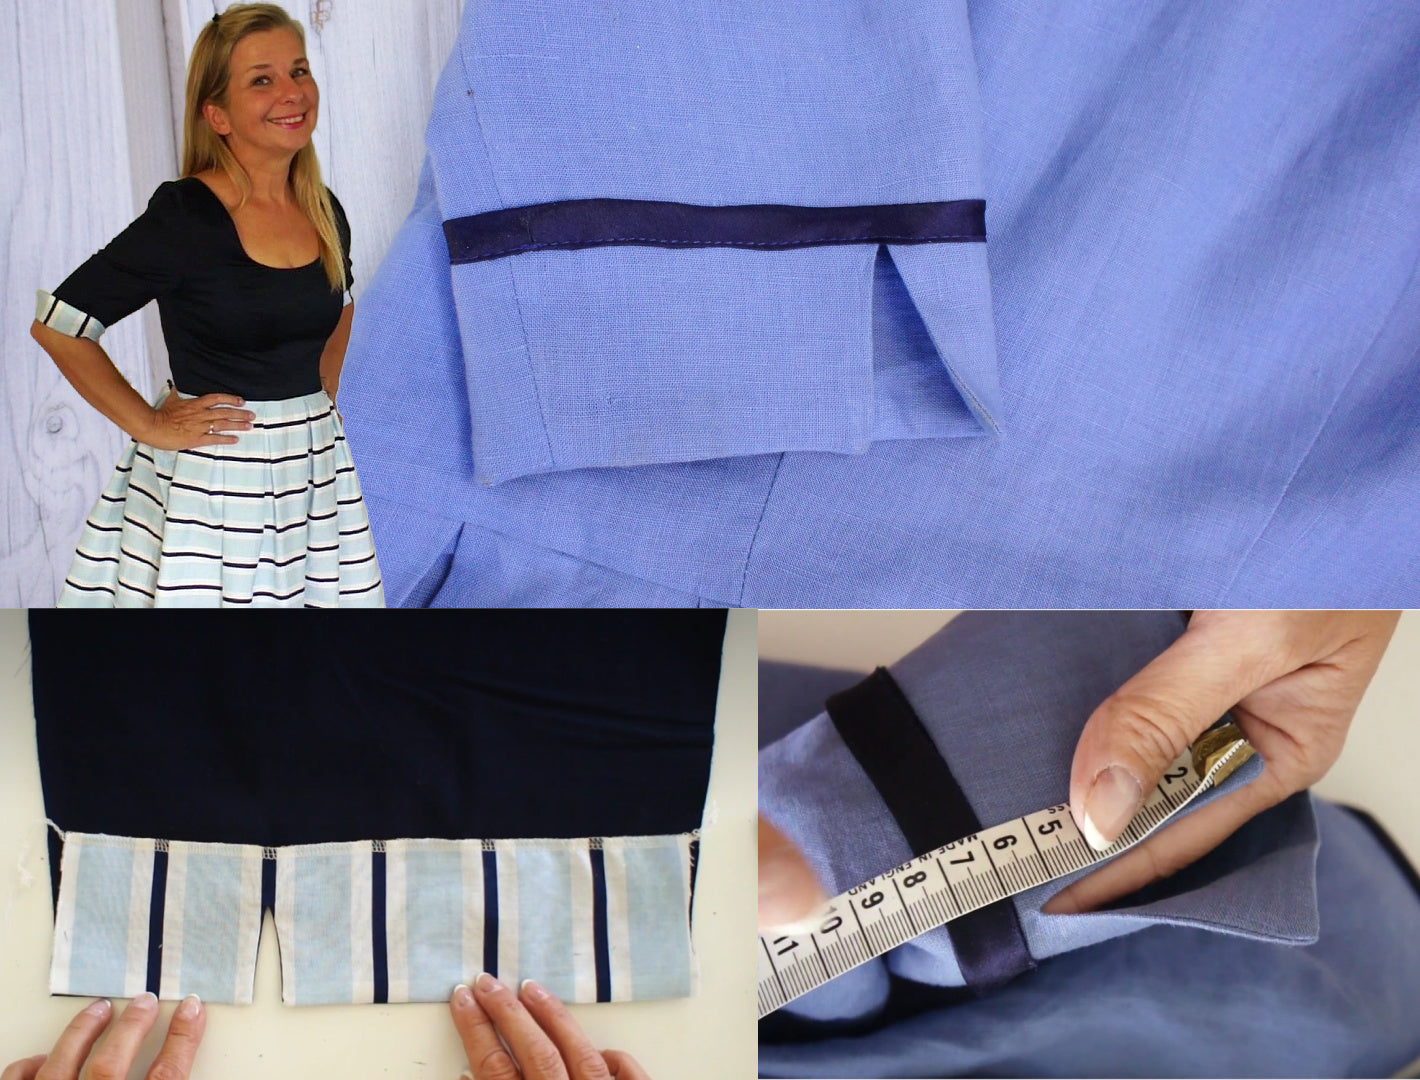
INTEGRATED CUFF
WITH SLIT OPENING
In this video I guide you through the process of creating a facing with a slit and show you my technique for sewing a lovely velvet band to the sleeve using an invisible hand-stitch.
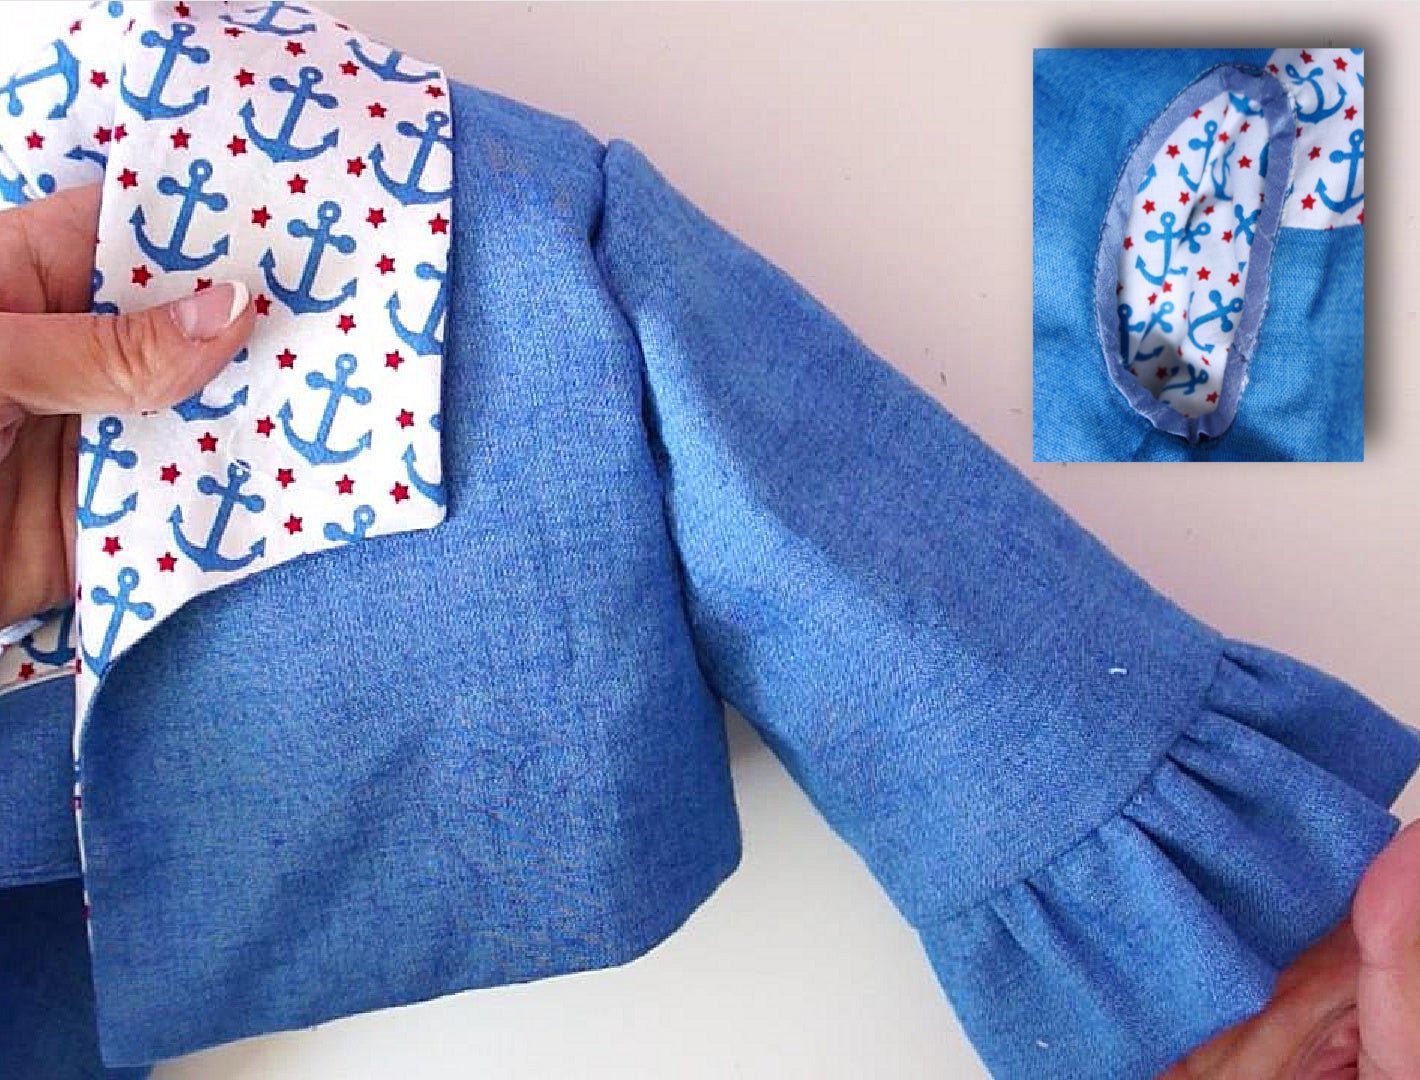
SET-IN
BOHO RUFFLE
You can see the binding and action, and pick up some tips on the way. There is a gorgeous rouleaux loop fastening inserted into the binding, I am sure that will come in very handy for all sorts of blouse projects.
SET - IN COAT SLEEVE
This sleeve is inserted into a winter coat. Therefore it needs a few extra steps to make sure that the sleeve sits nice and round. This video clip belongs to the Pea Coat sew-Along I created for OTTOBRE.
SET-IN SHORT SLEEVES
This little blouse is darling. You can see the binding and action and pick up some tips on the way. There is a gorgeous rouleaux loop fastening inserted into the binding, I am sure that will come invery handy for all sorts of blouse projects.
CAP SLEEVE
LINED BODICE
Here we borrow from the Isabella sewing course. This sleeve is gathered at the sleeve head. The bodice is lined and the sleeve seam is completely hidden in the armhole seam.
FLUTTER SLEEVE
TILLY
using a store-bought bias tape works perfectly for this long length of fabric. The advantage of this particular tape is that it provides more structure to the flutter due to its firmer quality.
SET-IN SLEEVE
BOUND ARMHOLE
For everyone still struggling with sleeve insertion, this is a great method to get a great-looking sleeve. The thicker seam and the binding give this armhole the ability to sit just right.
RAGLAN SLEEVE
KAMSNAP FASTENING
Another raglan sleeve you can get under your belt. Here I added a snap placket which you can use your trusty KamSnaps with. This is a more advanced method, so do take your time.
INTEGRATED CUFF
WITH SLIT OPENING
In this video I guide you through the process of creating a facing with a slit and show you my technique for sewing a lovely velvet band to the sleeve using an invisible hand-stitch.
SET-IN
BOHO RUFFLE
You can see the binding and action, and pick up some tips on the way. There is a gorgeous rouleaux loop fastening inserted into the binding, I am sure that will come in very handy for all sorts of blouse projects.

Marina
Office hours: 8-5pm weekdays (UCT-7)