


OSCAR SHORTS
OSCAR SHORTS


Regular price
€6,95 EUR
Regular price
Sale price
€6,95 EUR
Unit price
per
Couldn't load pickup availability
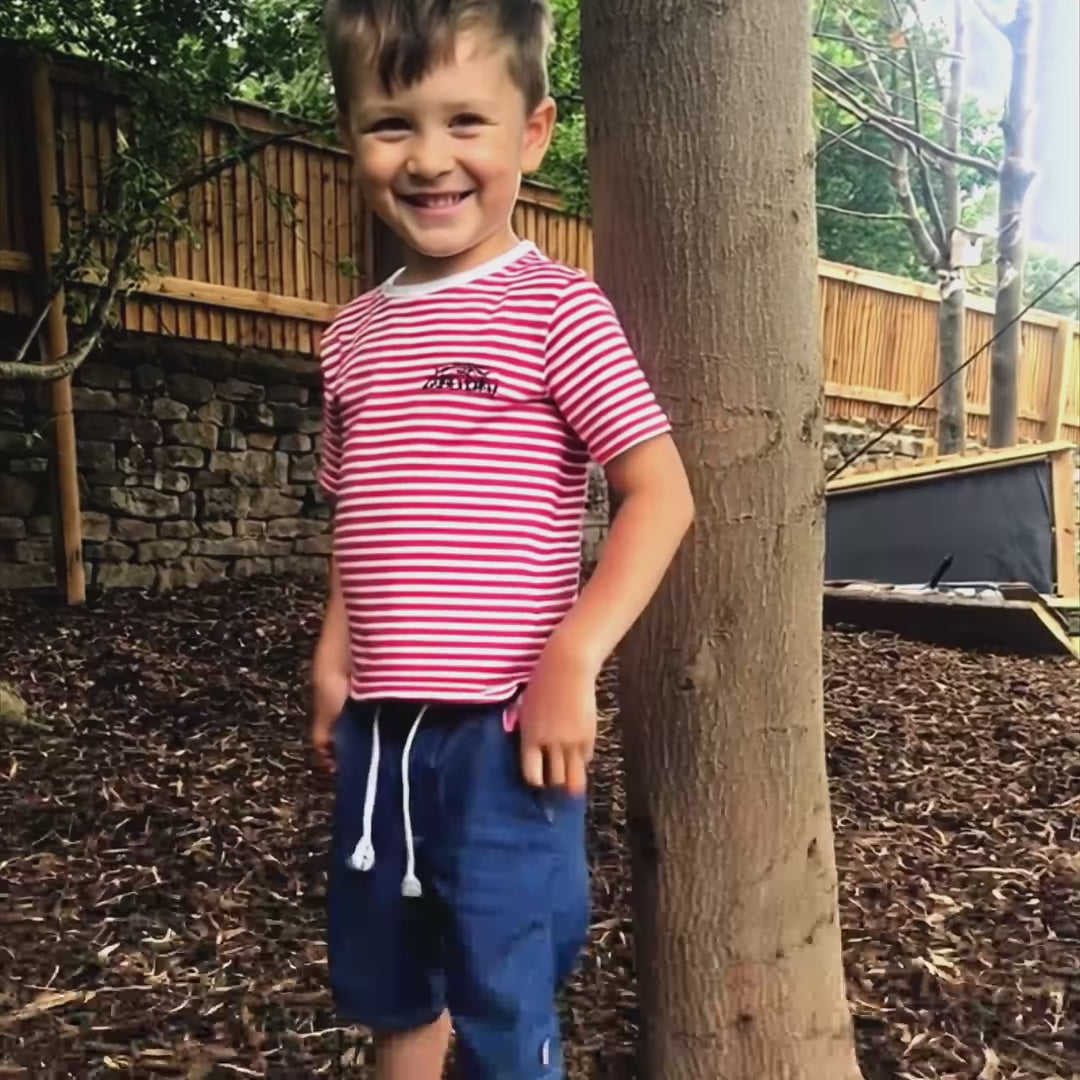
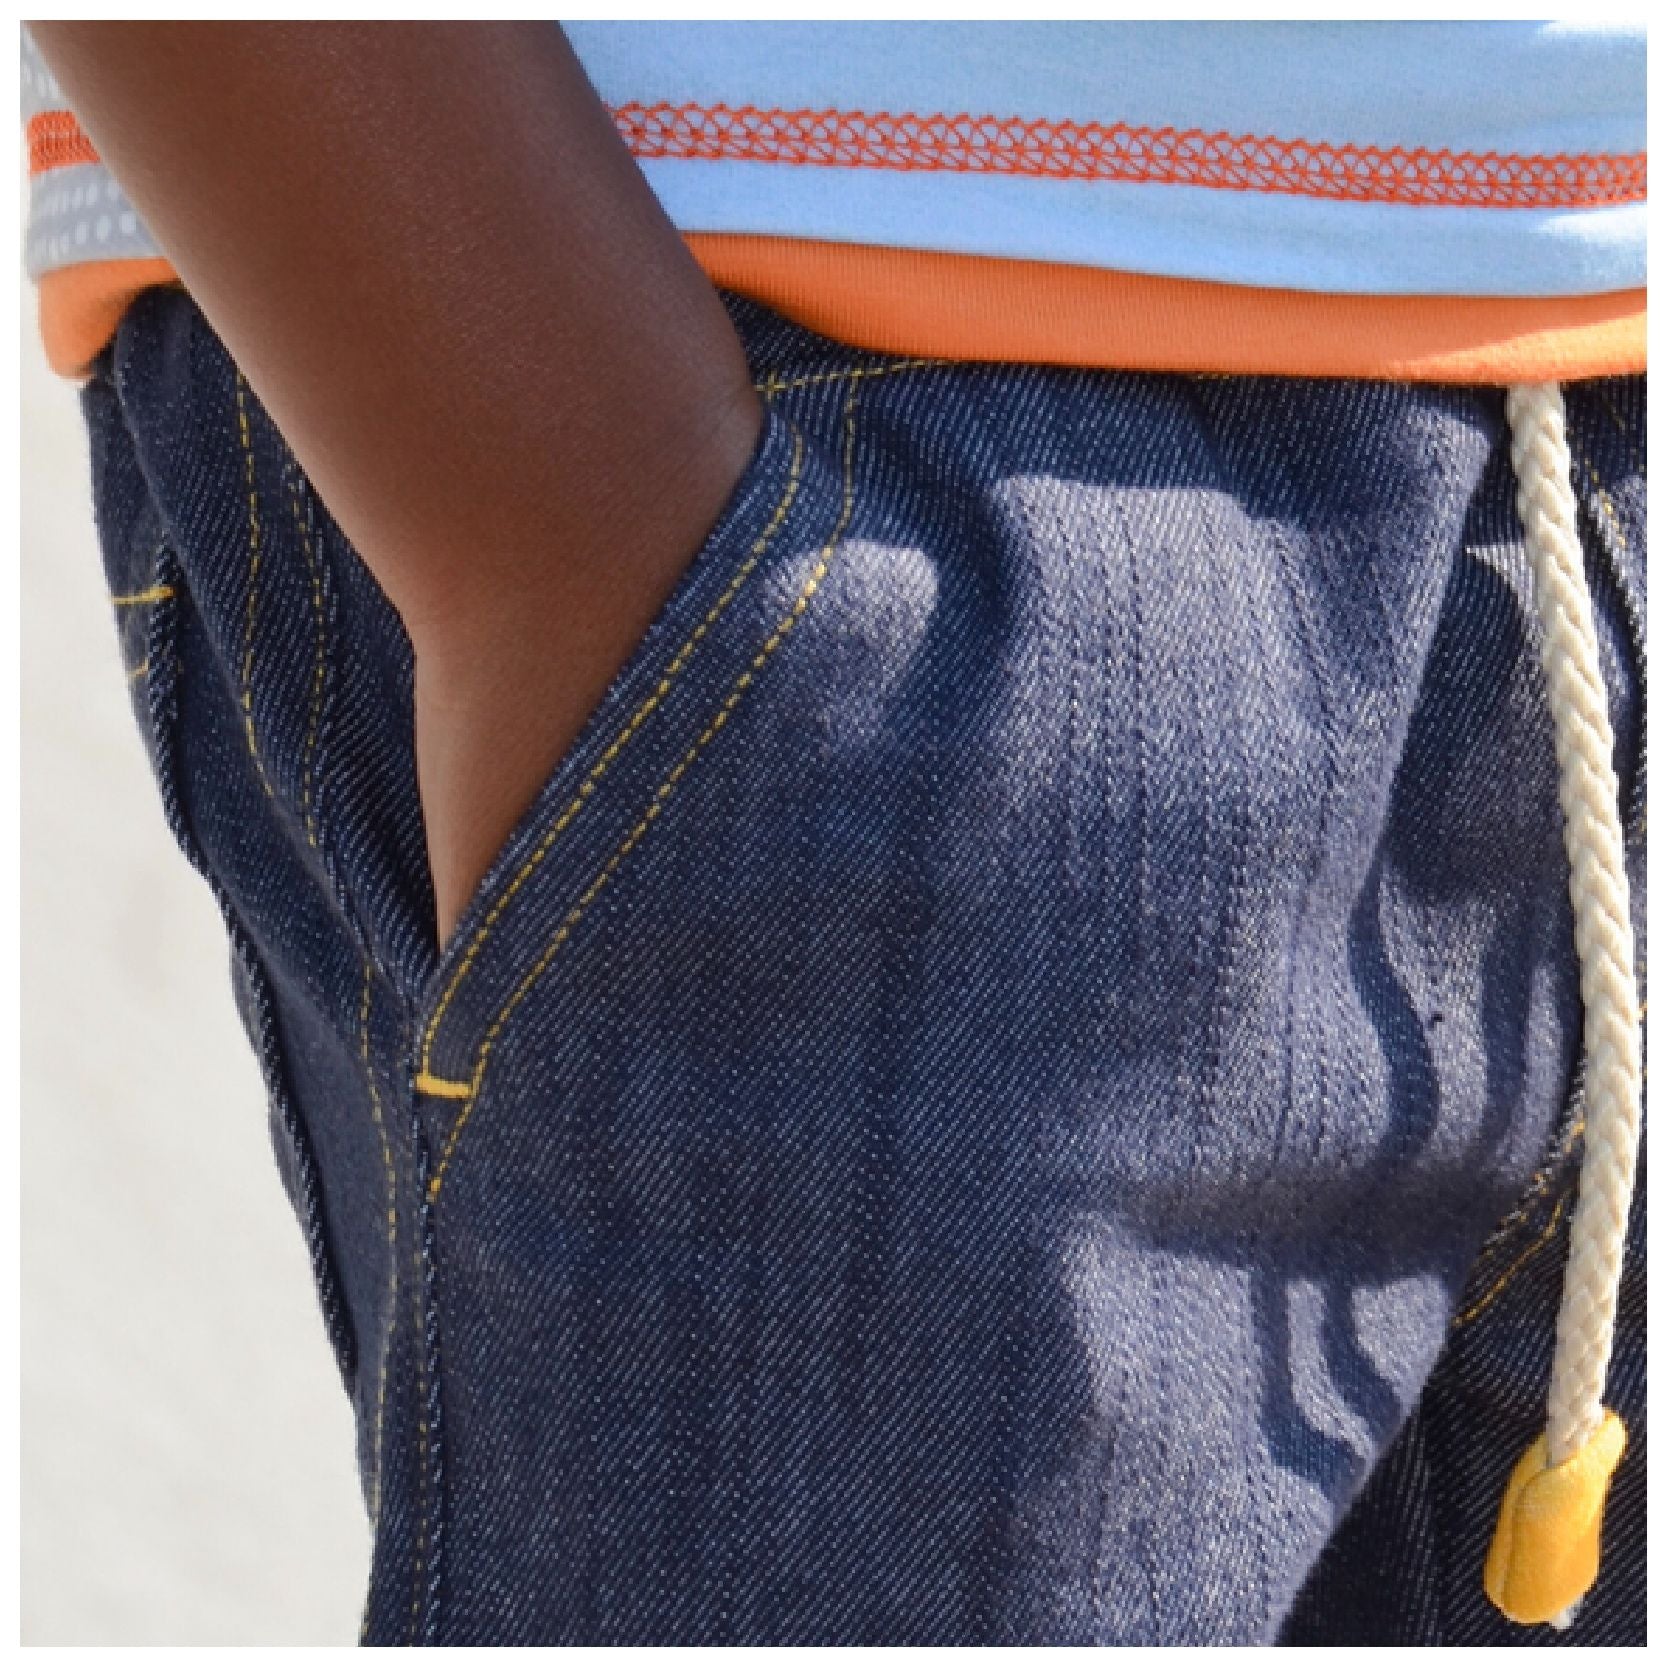
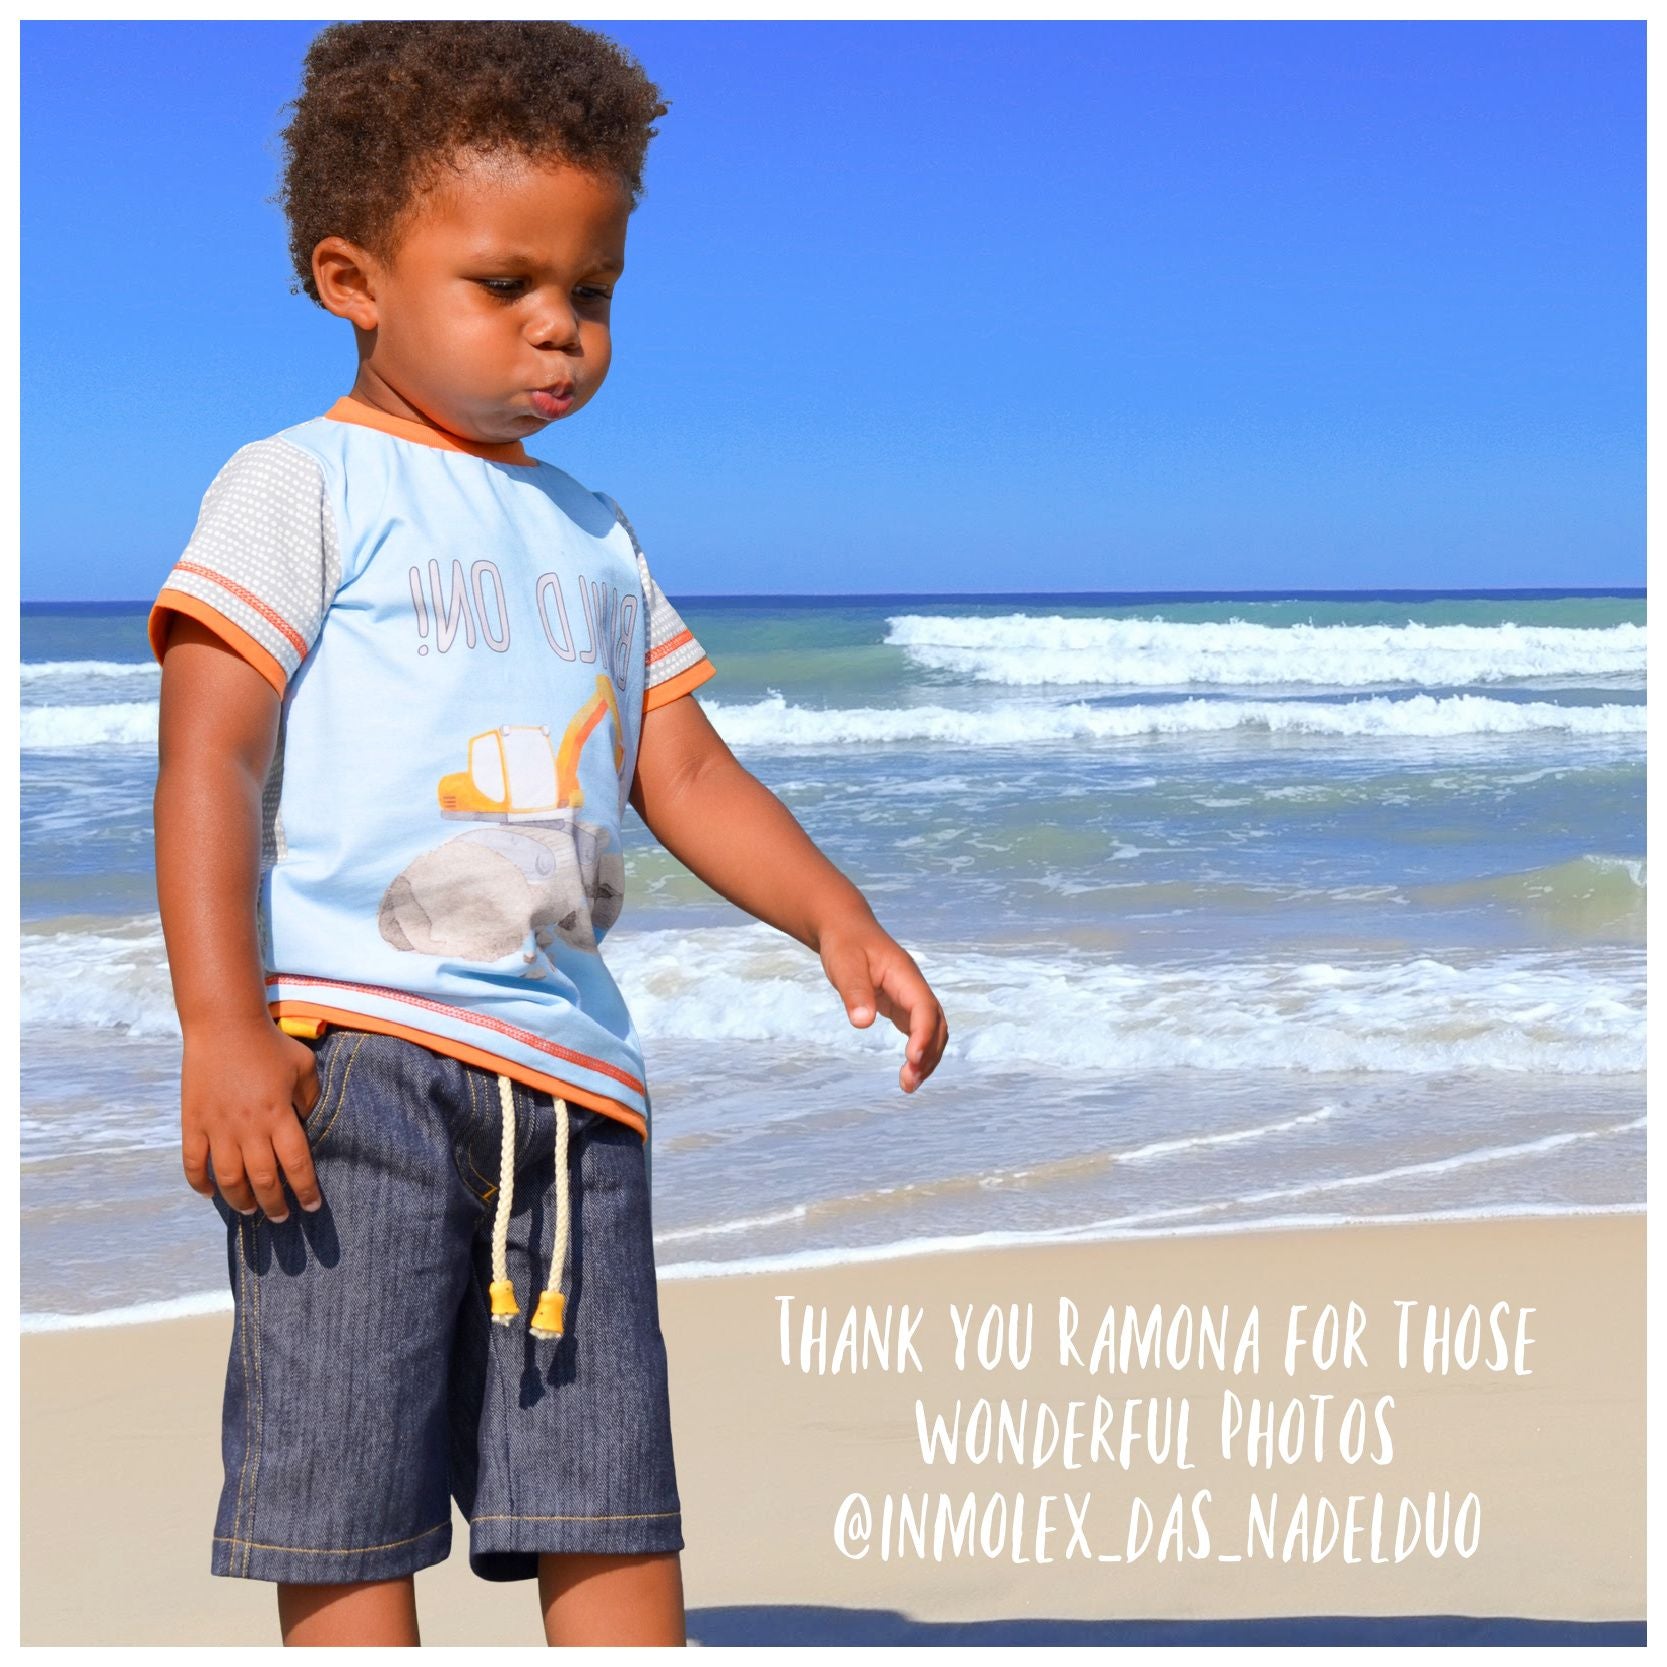
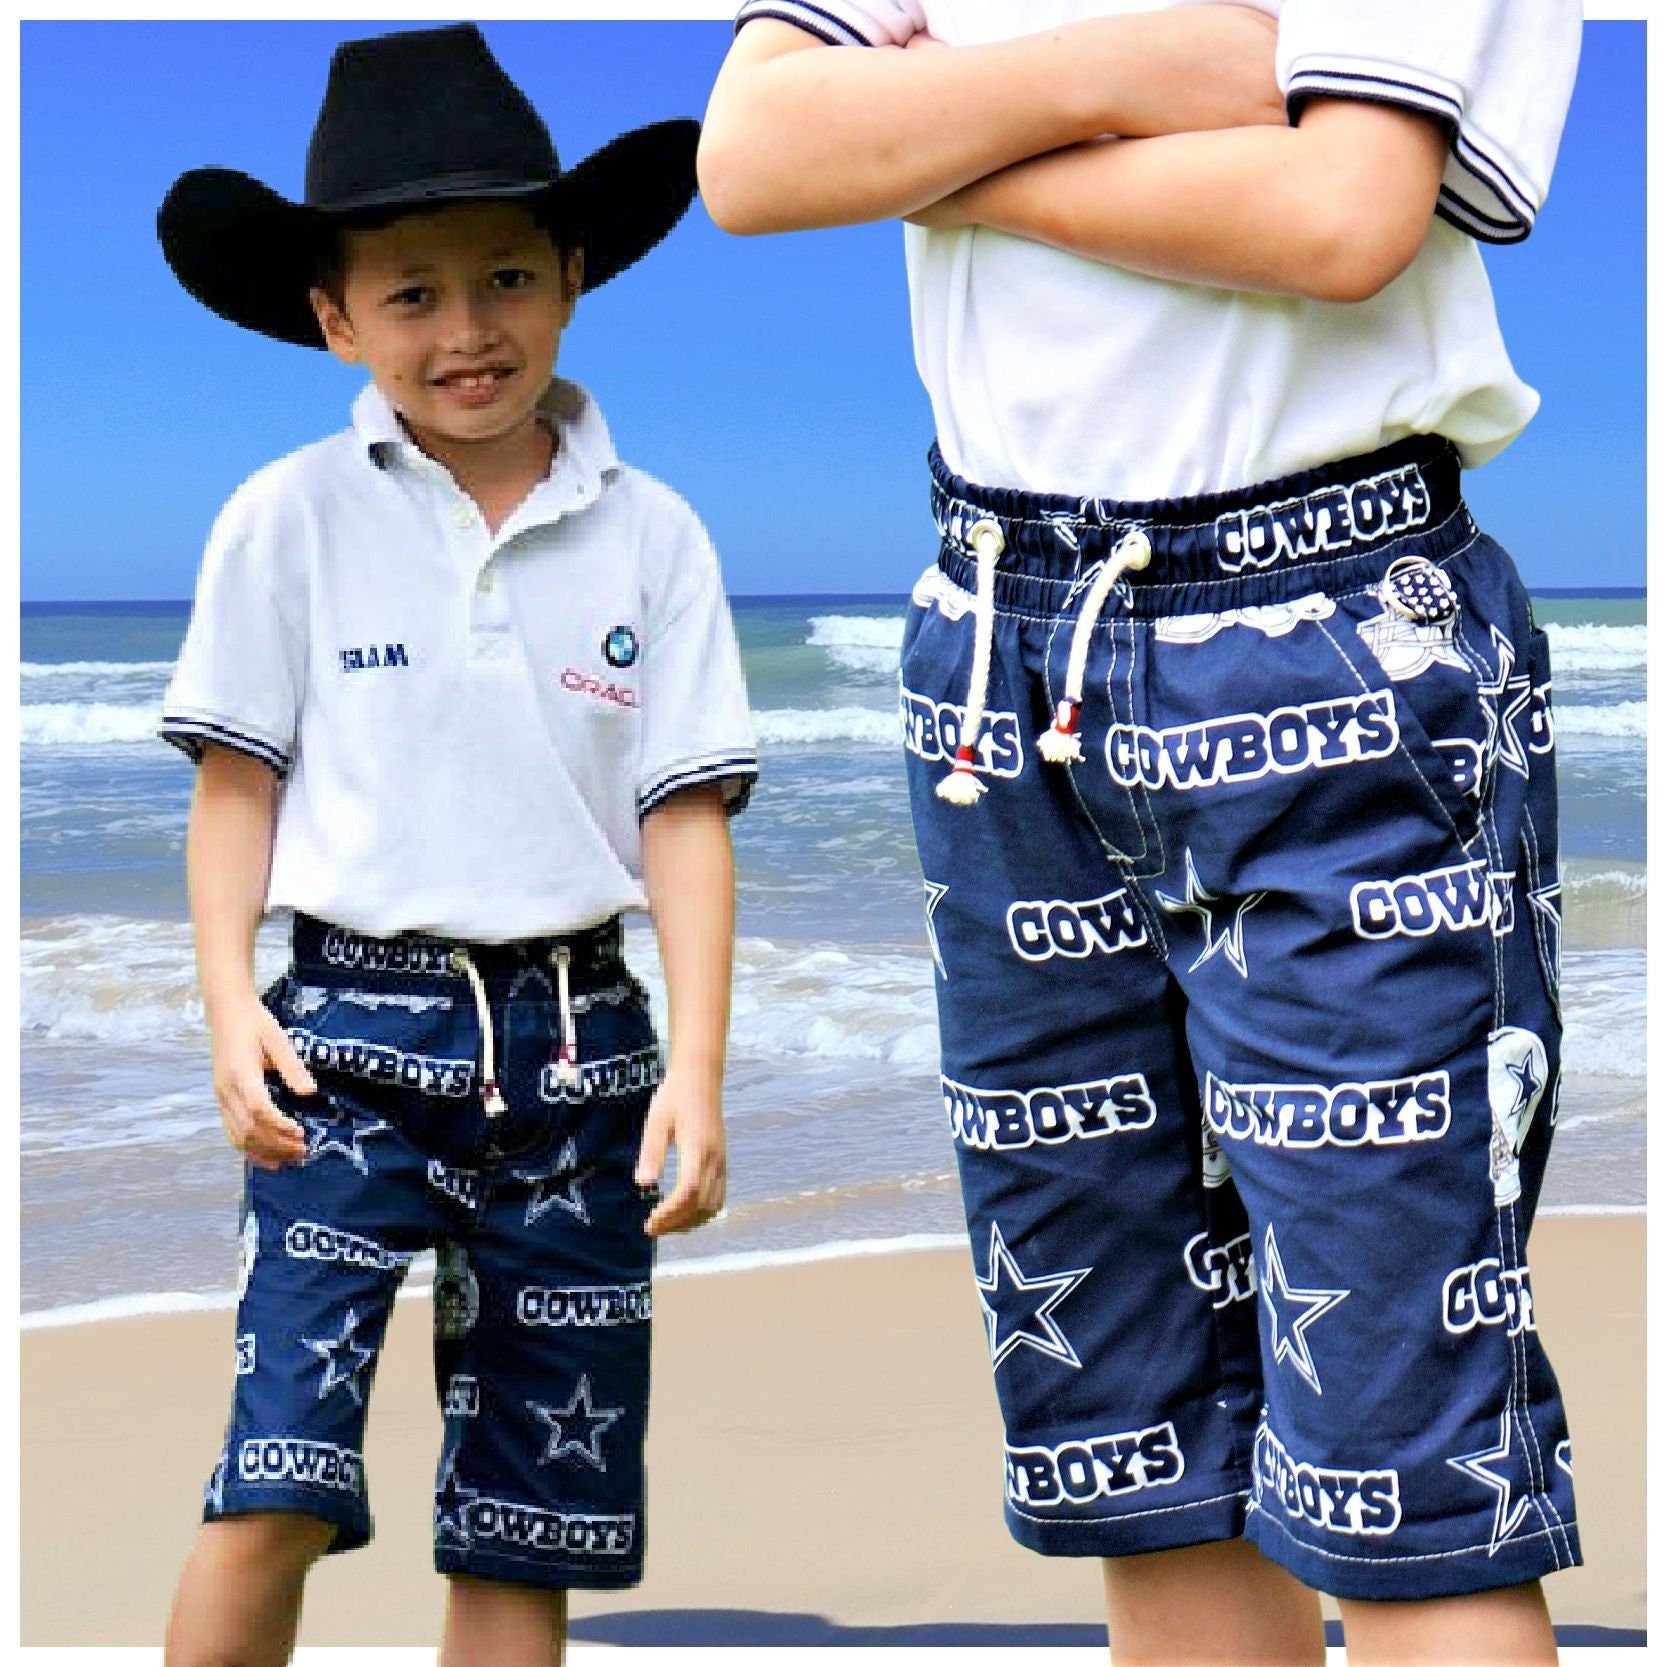
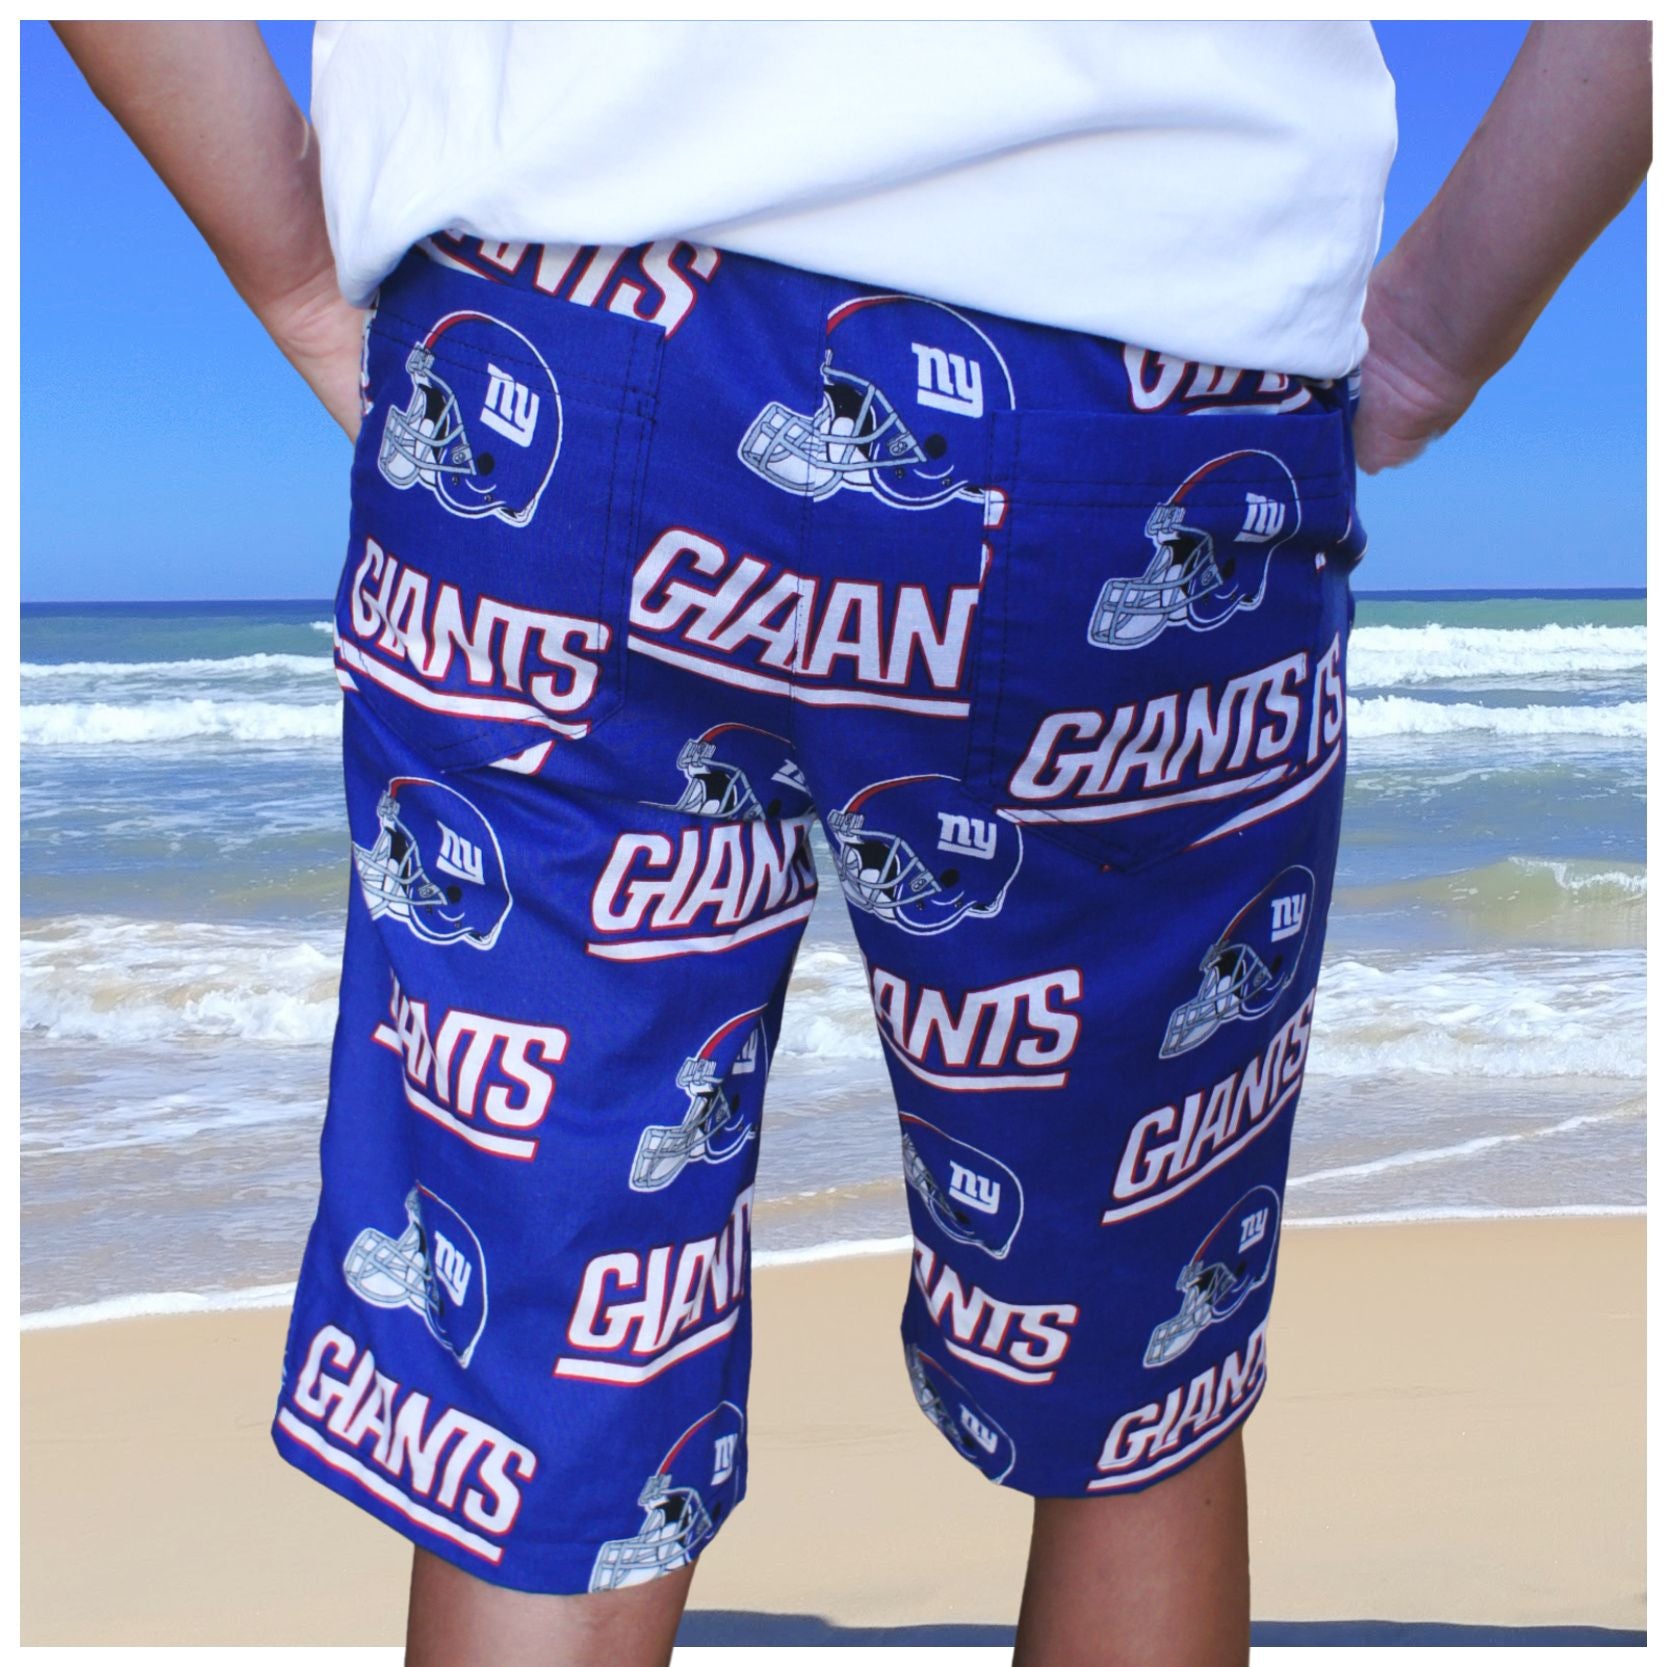
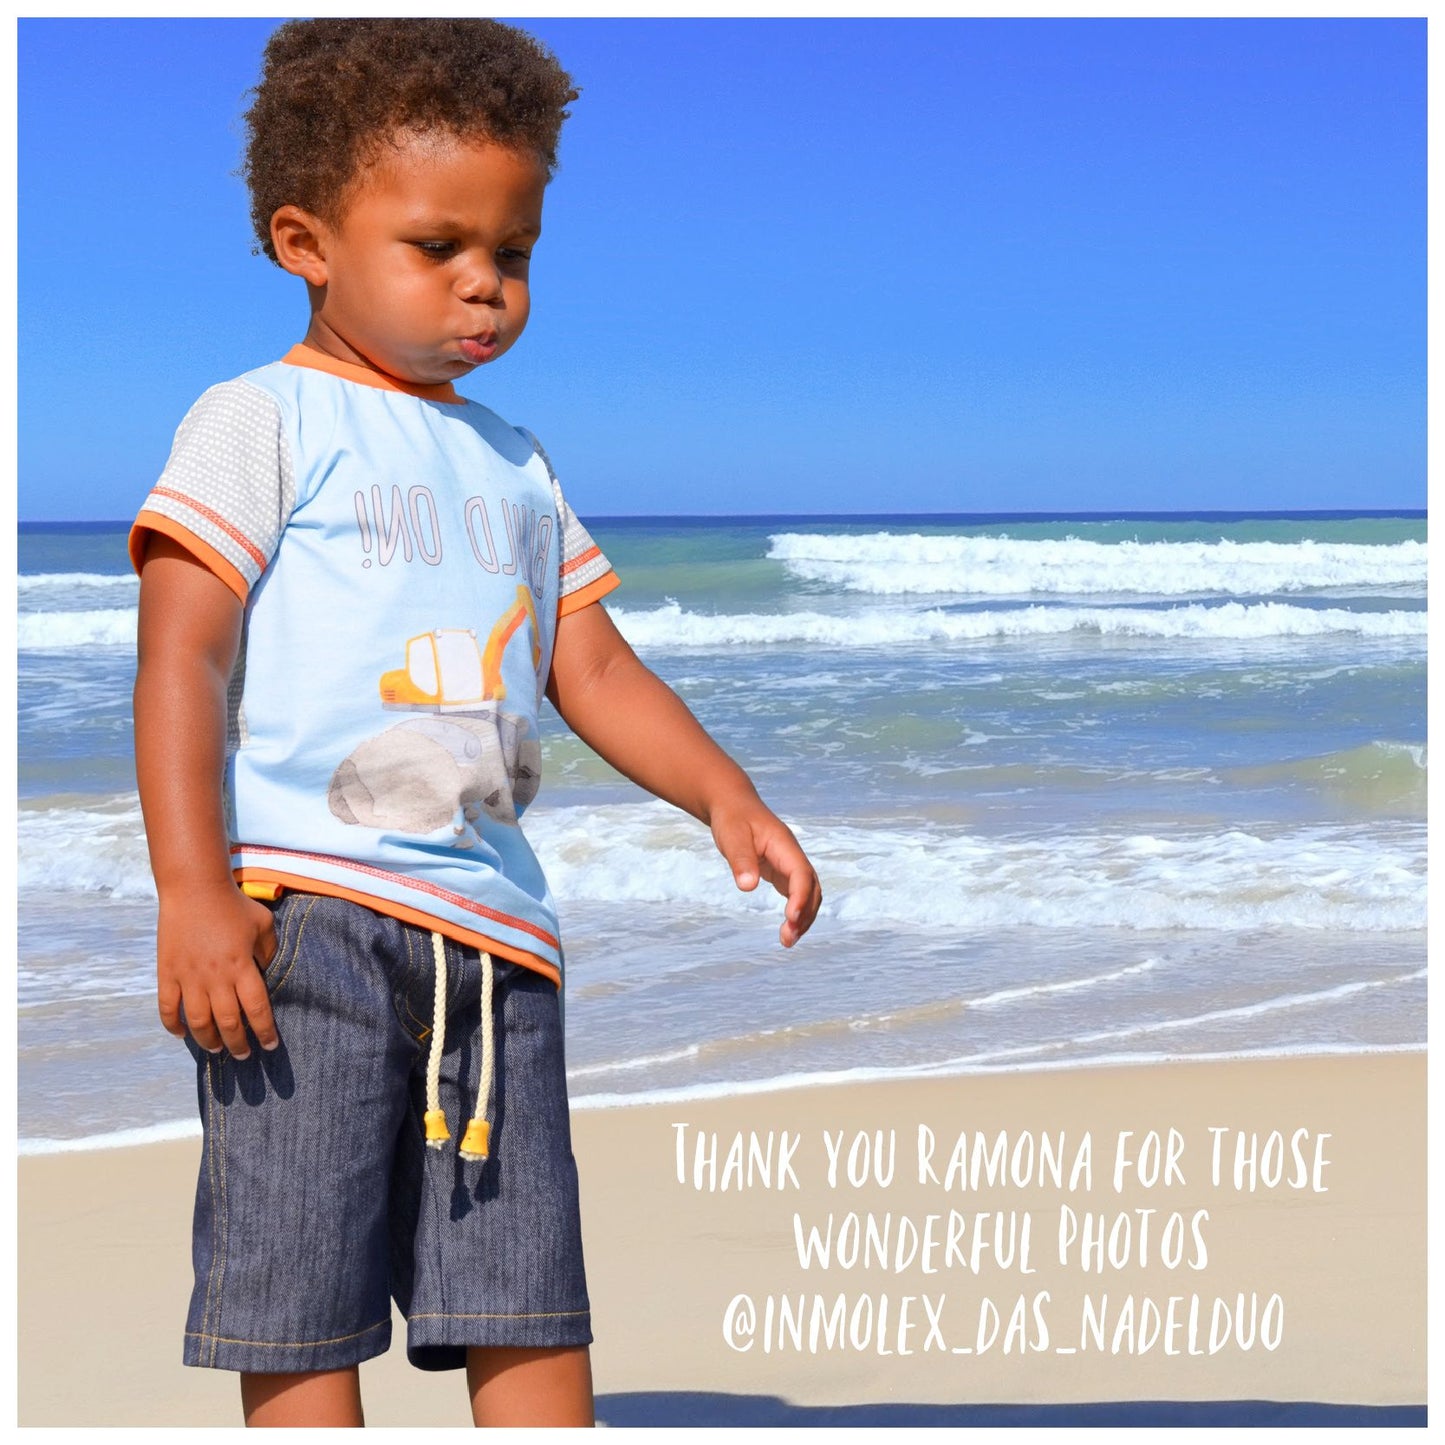
Oscar has been Marina’s best‑selling boys shorts sewing pattern for years — and it’s easy to see why. One customer said it best: “They don’t fit like pyjamas!”
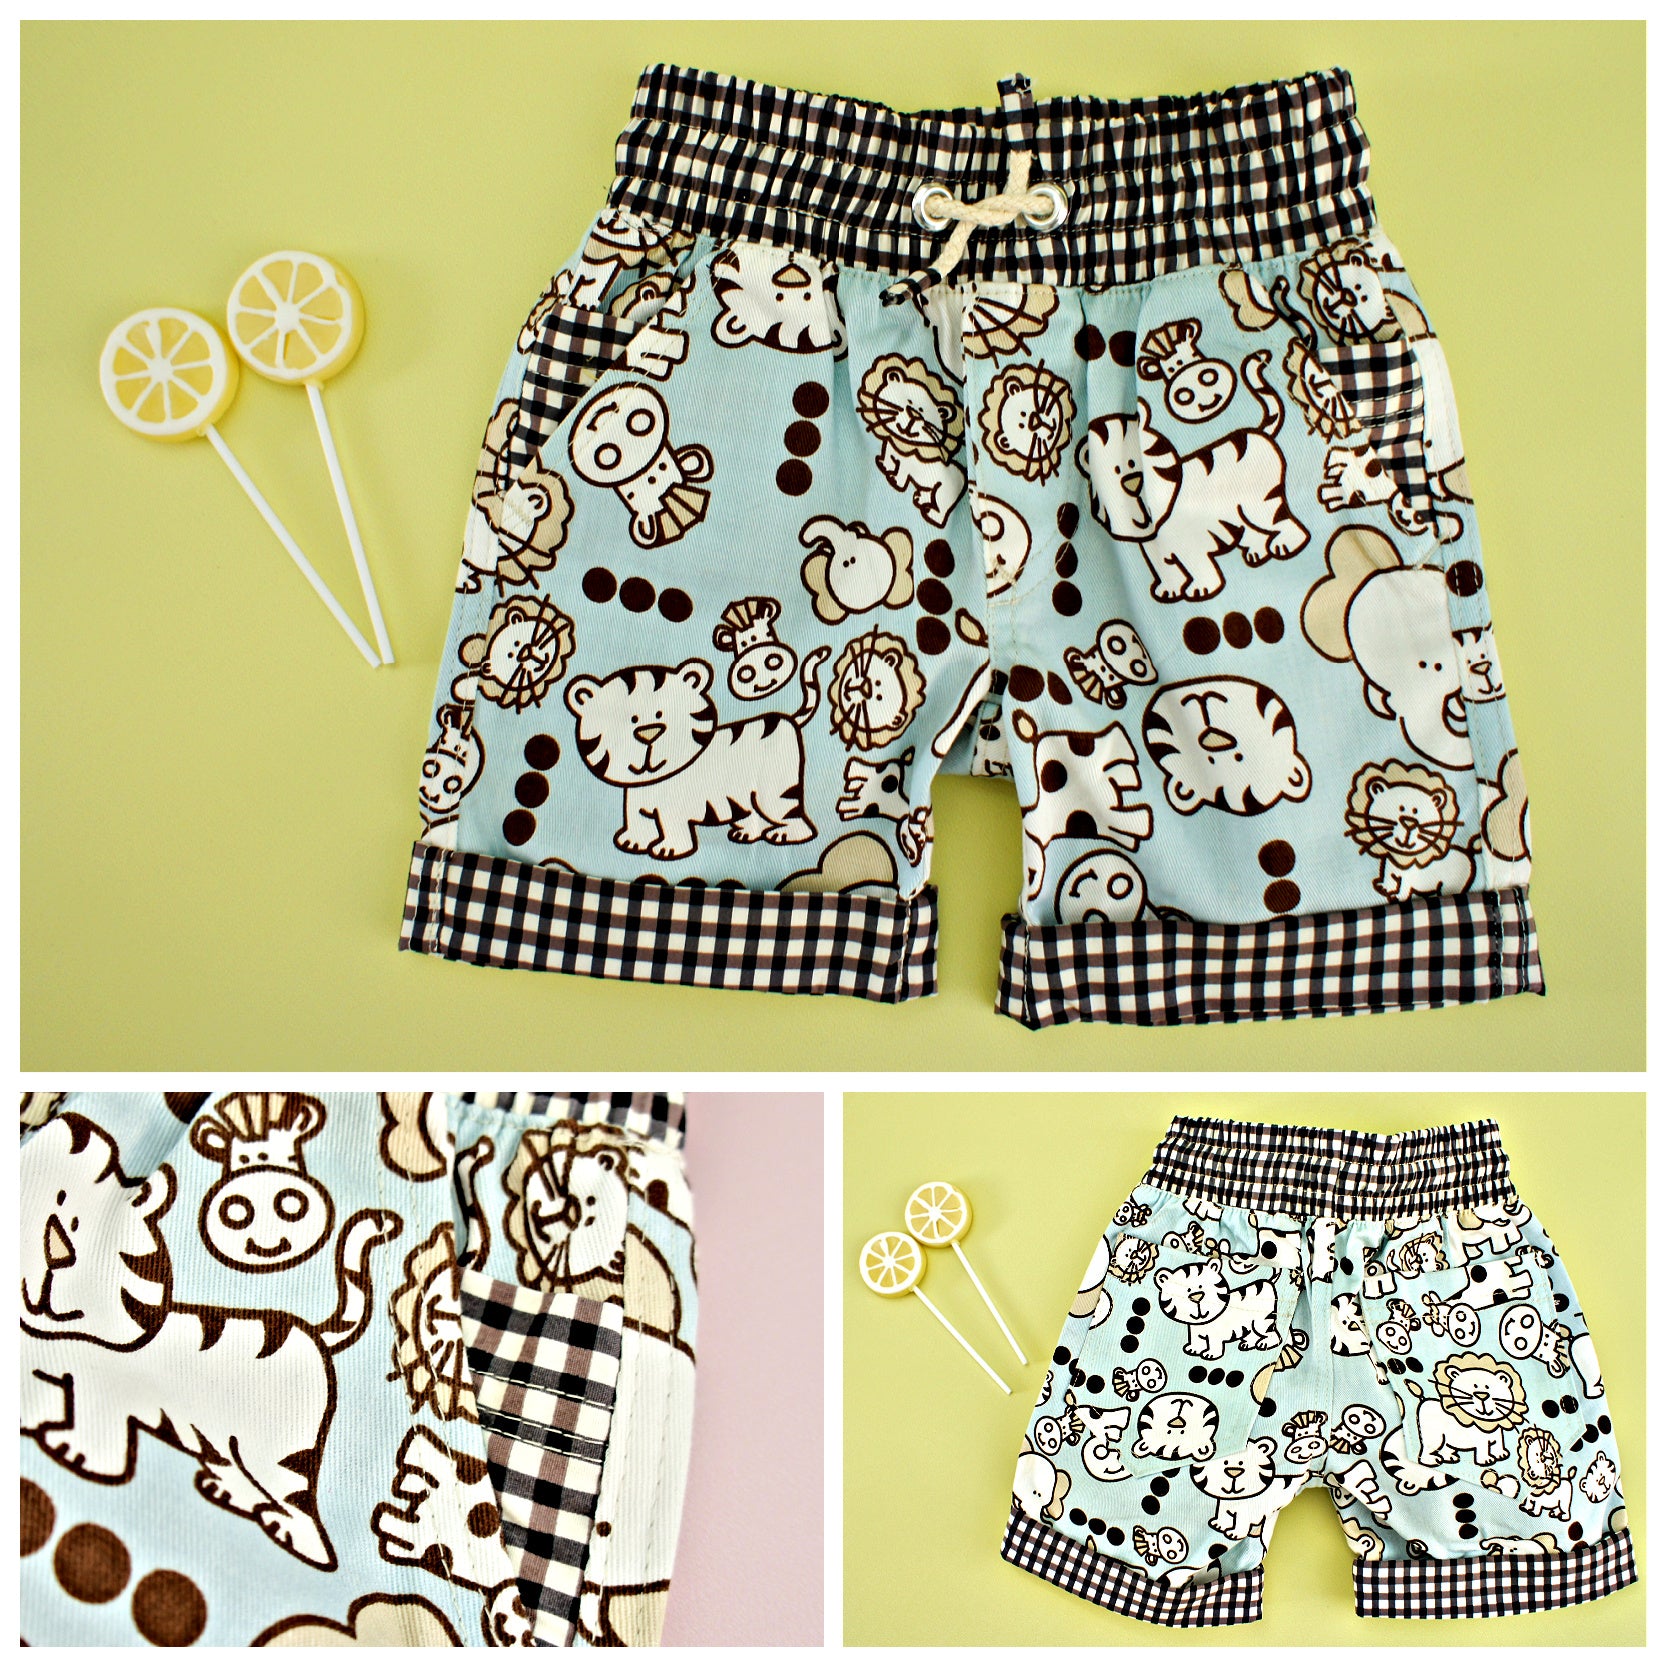
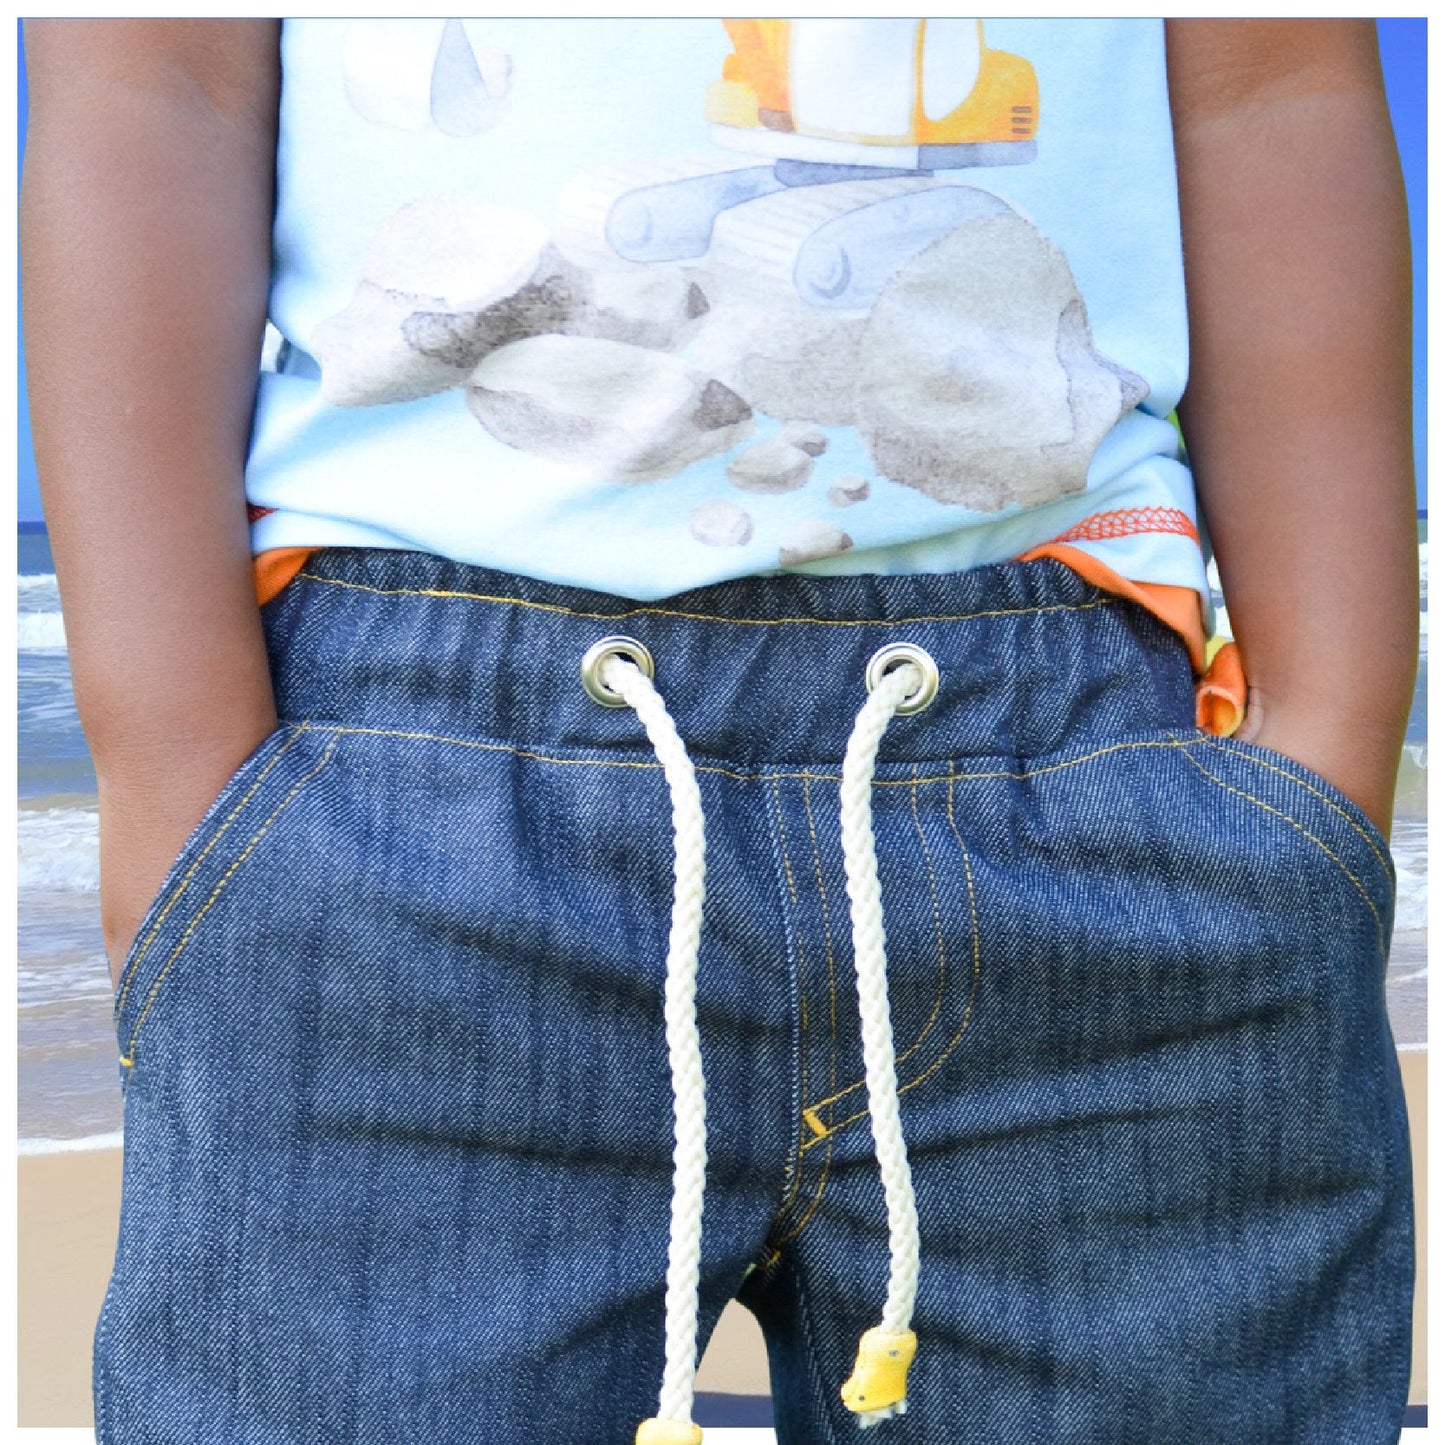
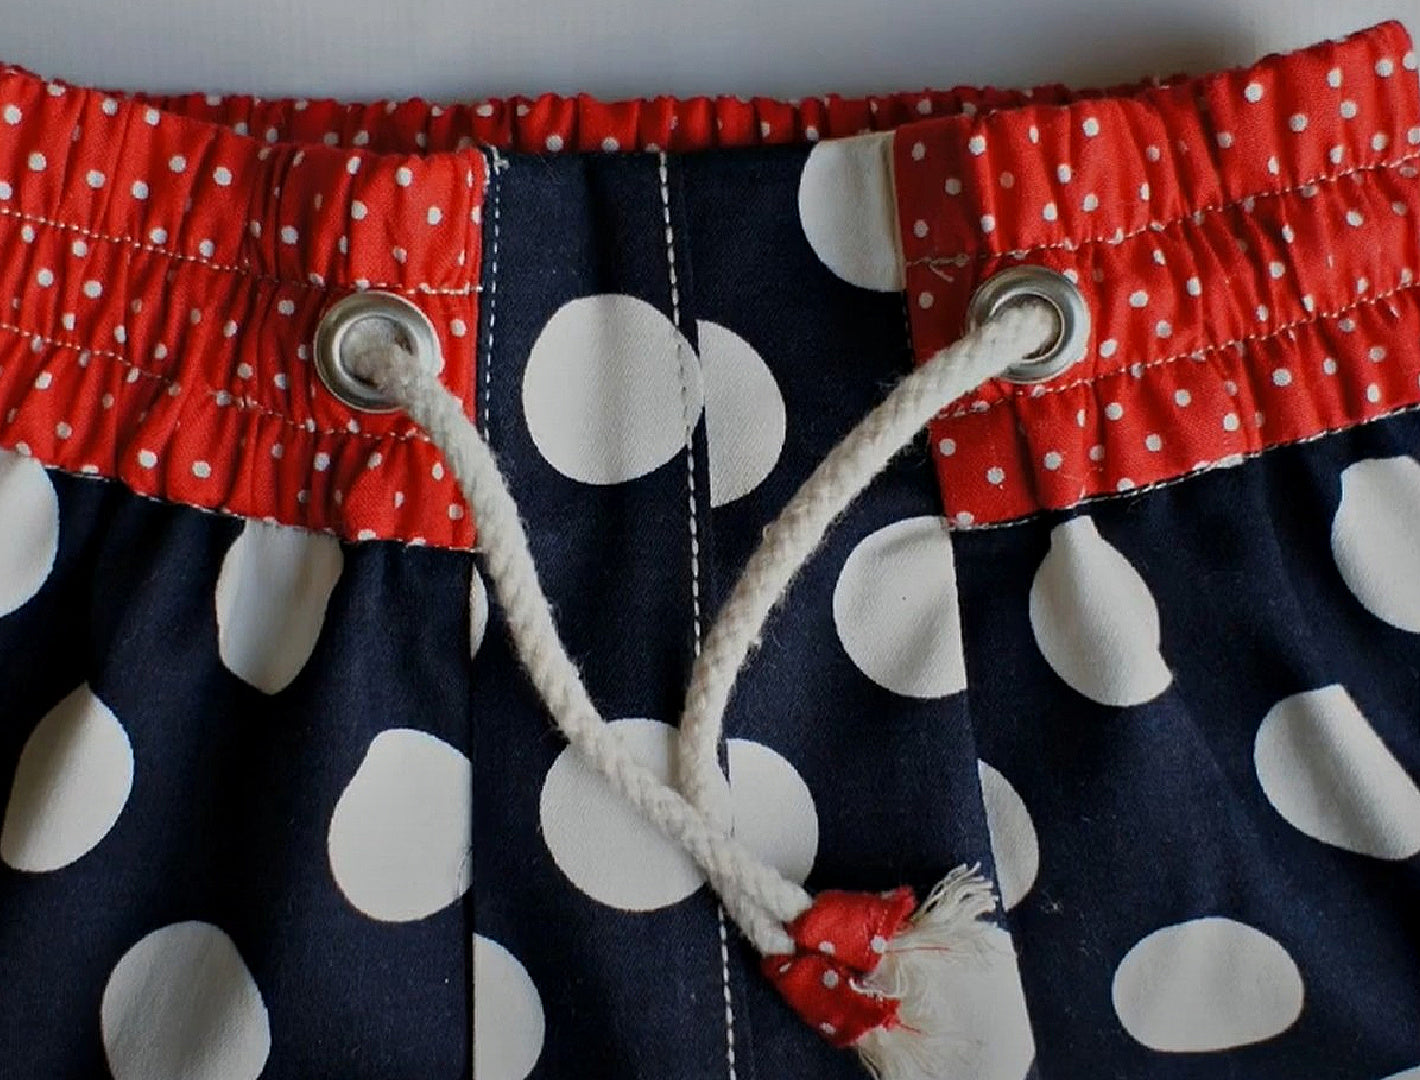
He slips on easily with his comfy elastic waist, features an adjustable waistband with eyelets and a pull cord, and keeps treasures safe with deep side pockets and sturdy back patch pockets.
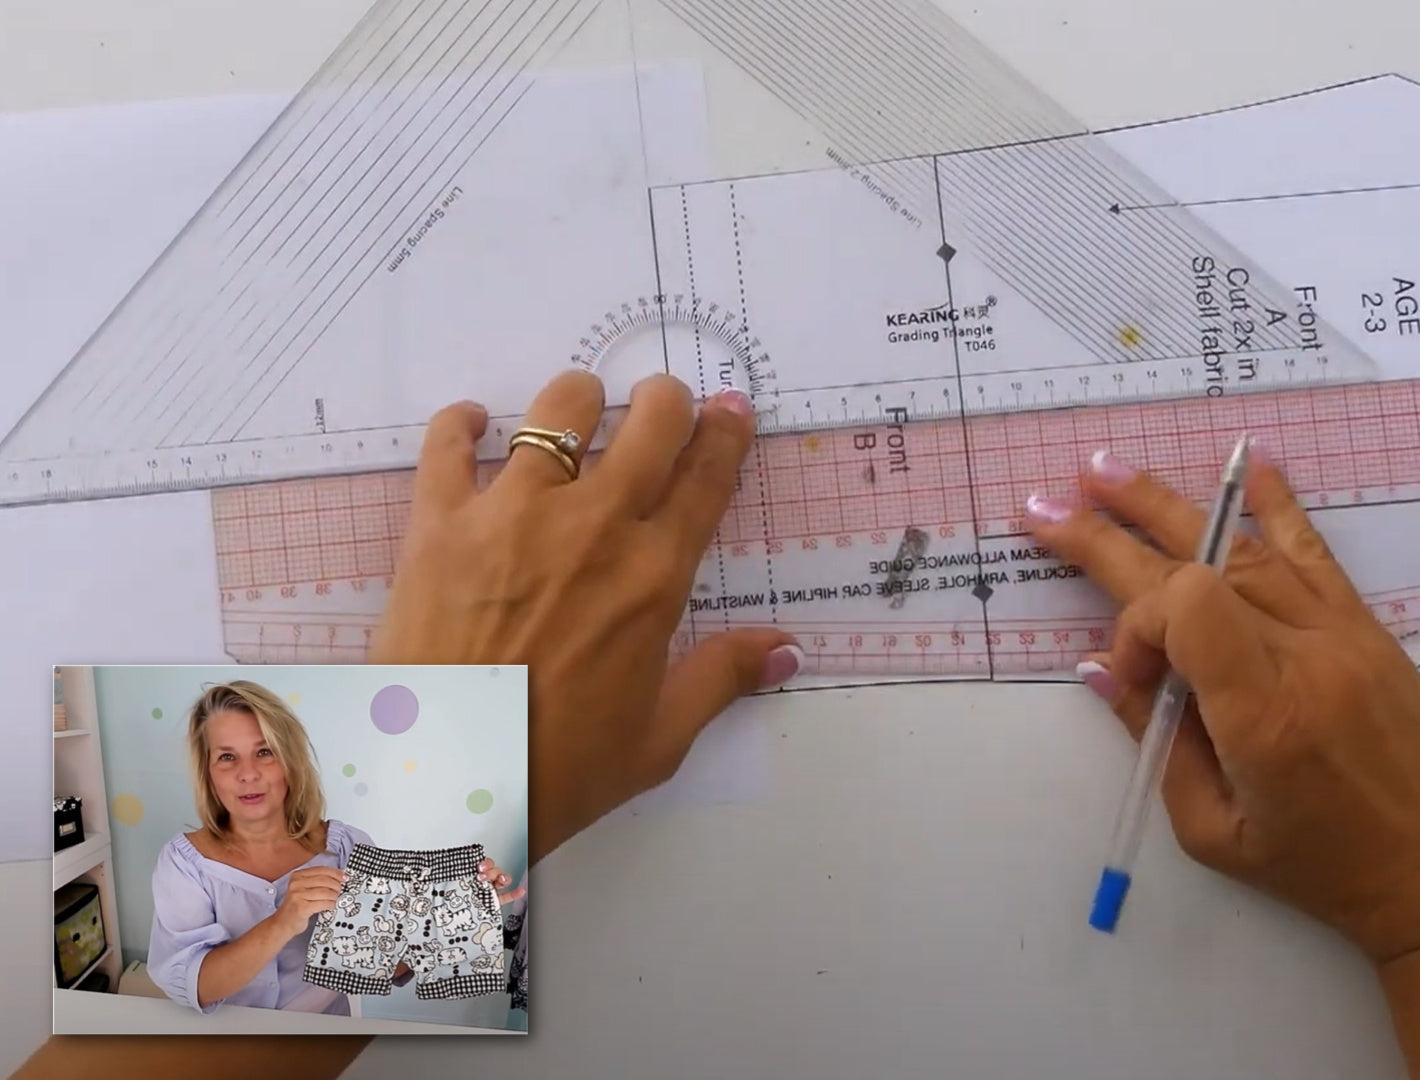
These Bermuda‑length shorts aren’t a quick sew — there are lots of lovely details — but they’re absolutely worth the effort. Oscar also comes with free video tutorials right on this page, including one showing how to lengthen shorts… so pyjama bottoms might just become your next favourite project.
Pattern Download Includes
Pattern Download Includes
Design Options
Design Options
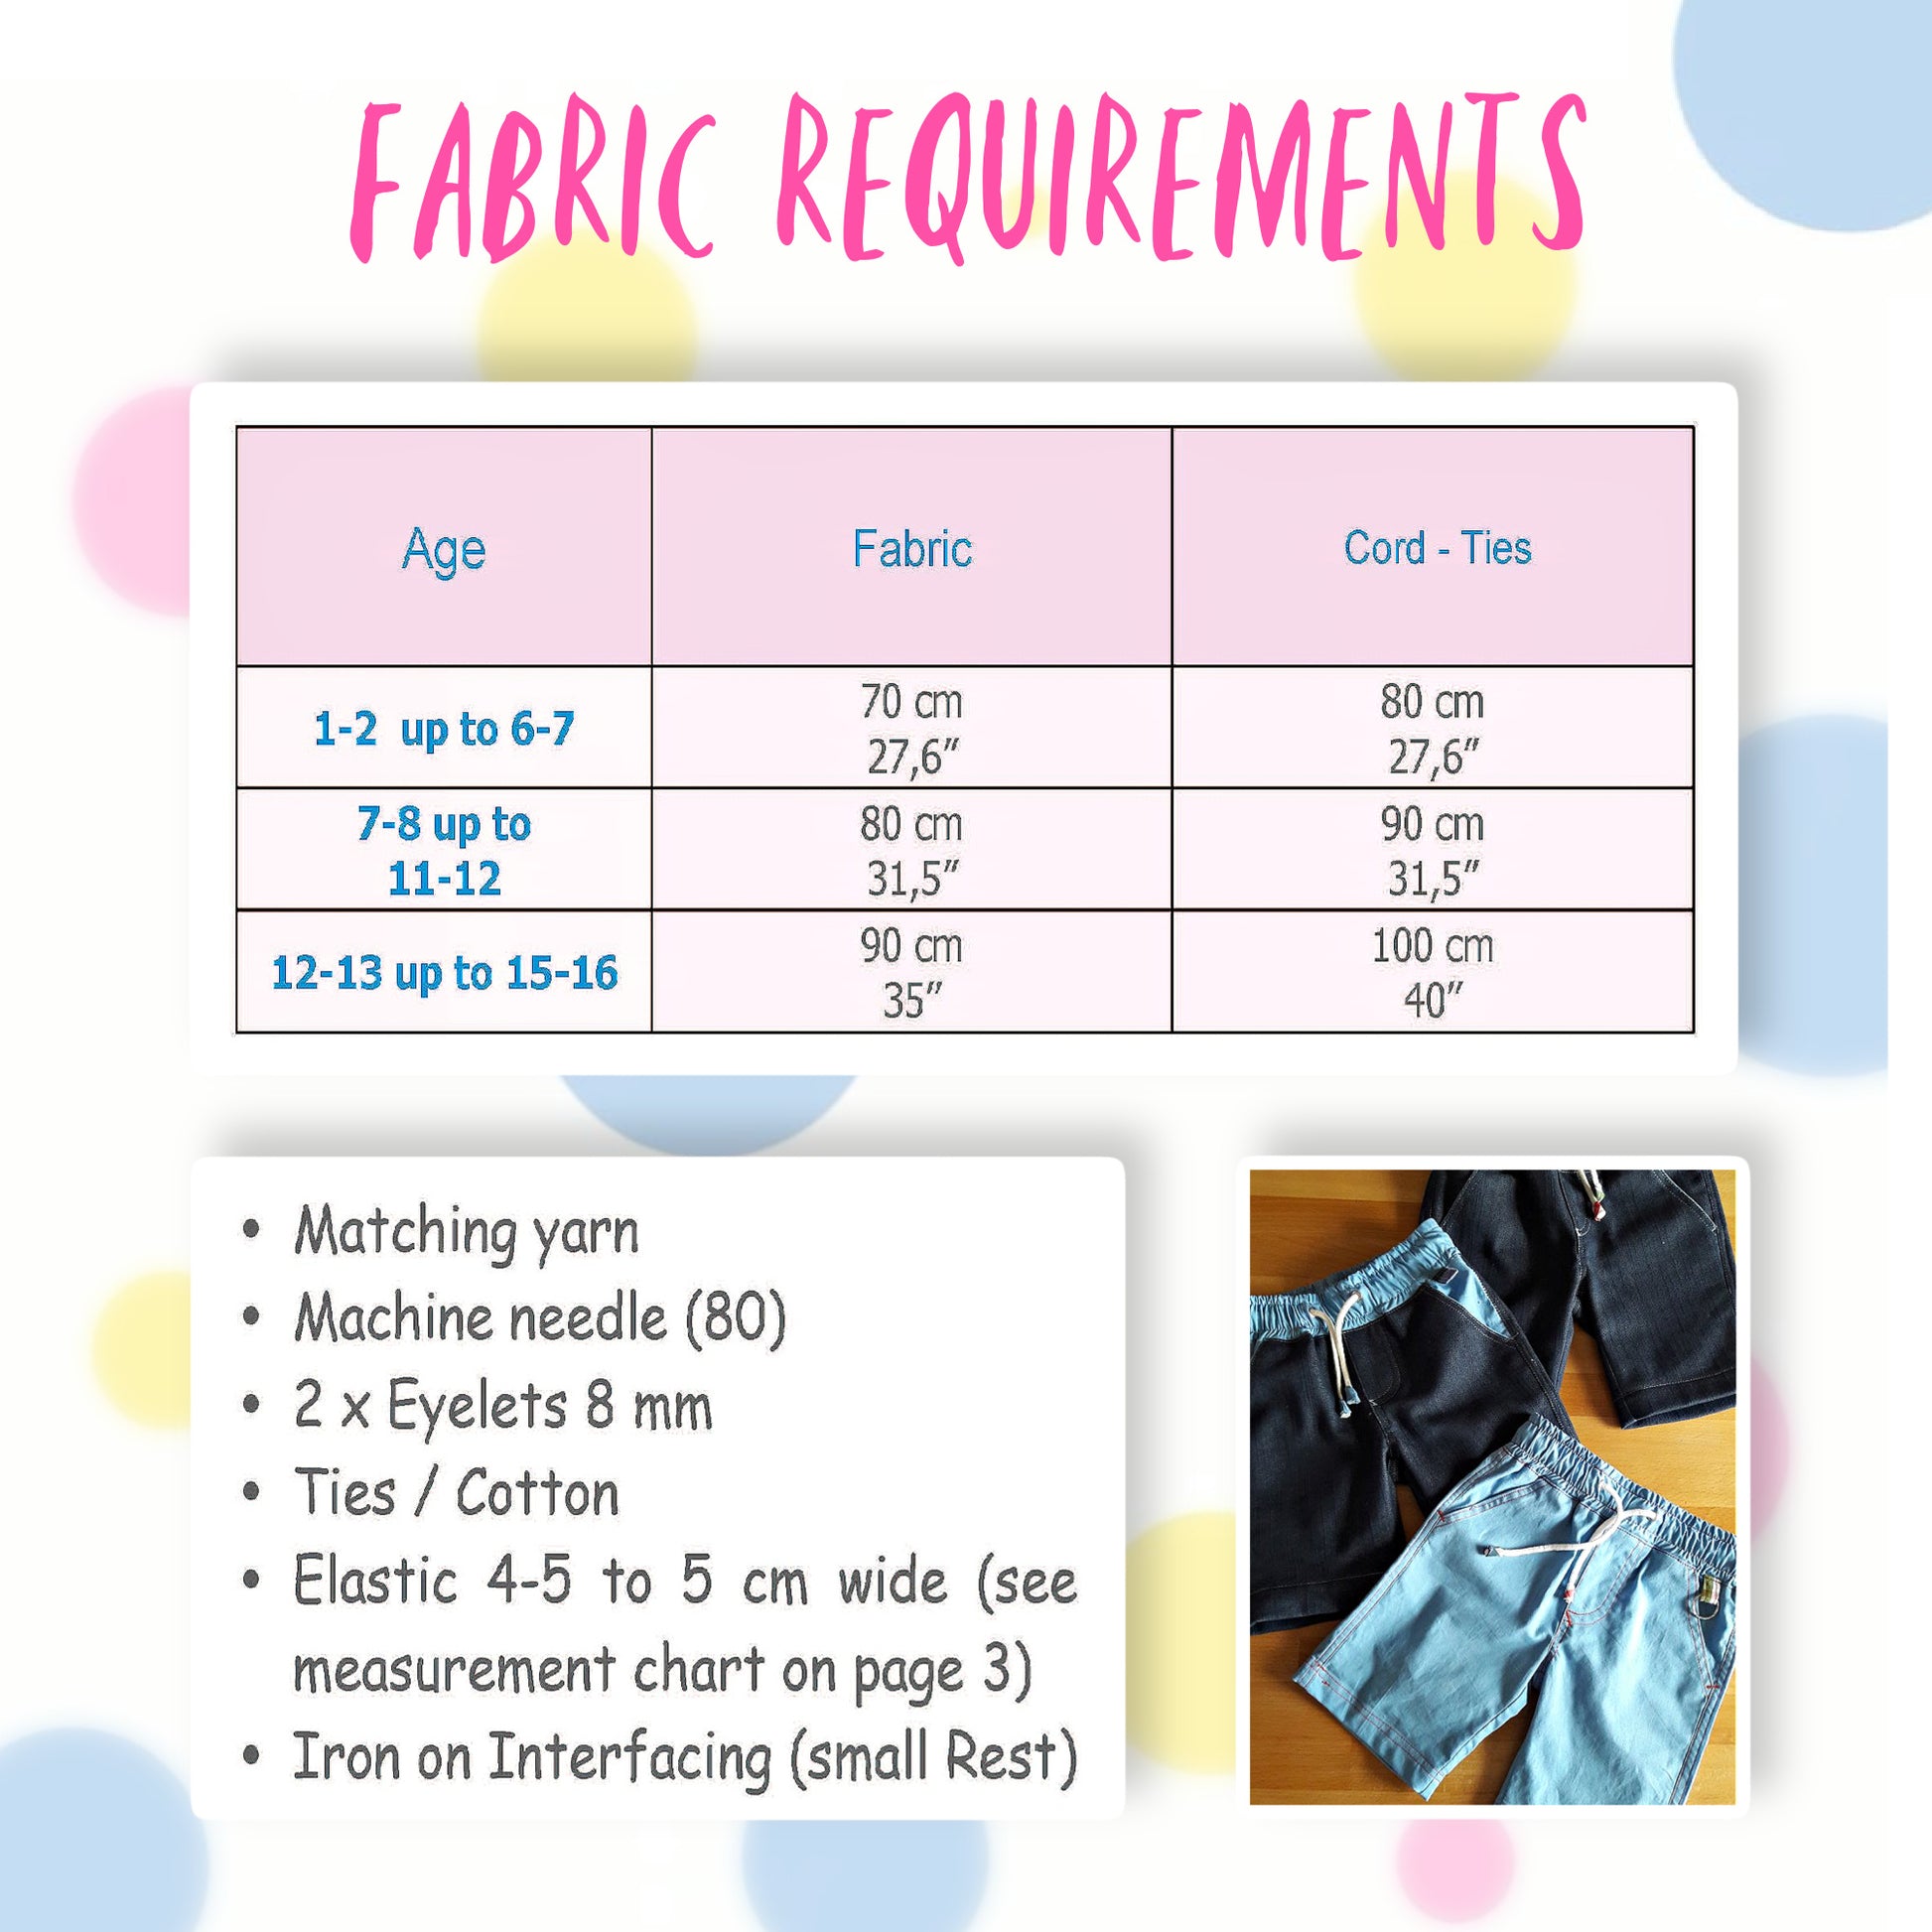
Fabric Requirements
Fabric Requirements
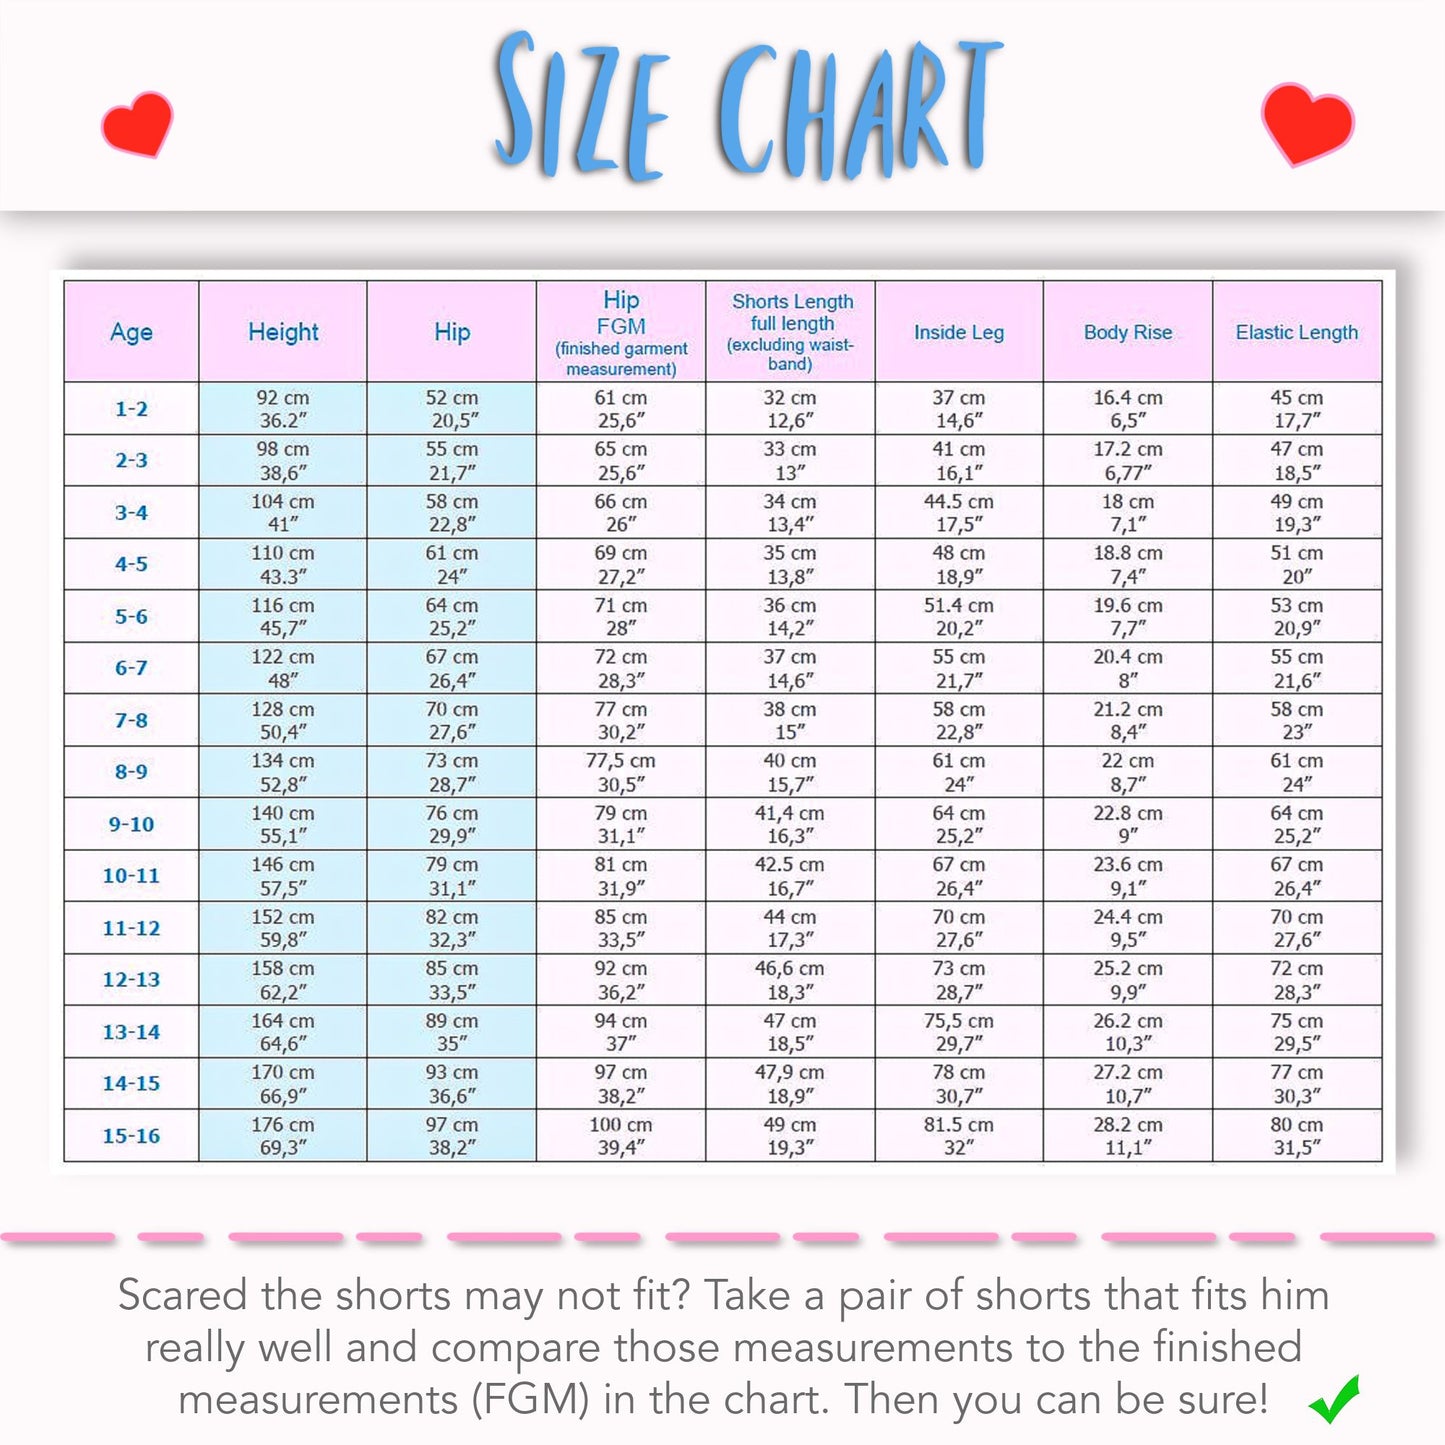
Available Sizes
Available Sizes
Please Read
Please Read


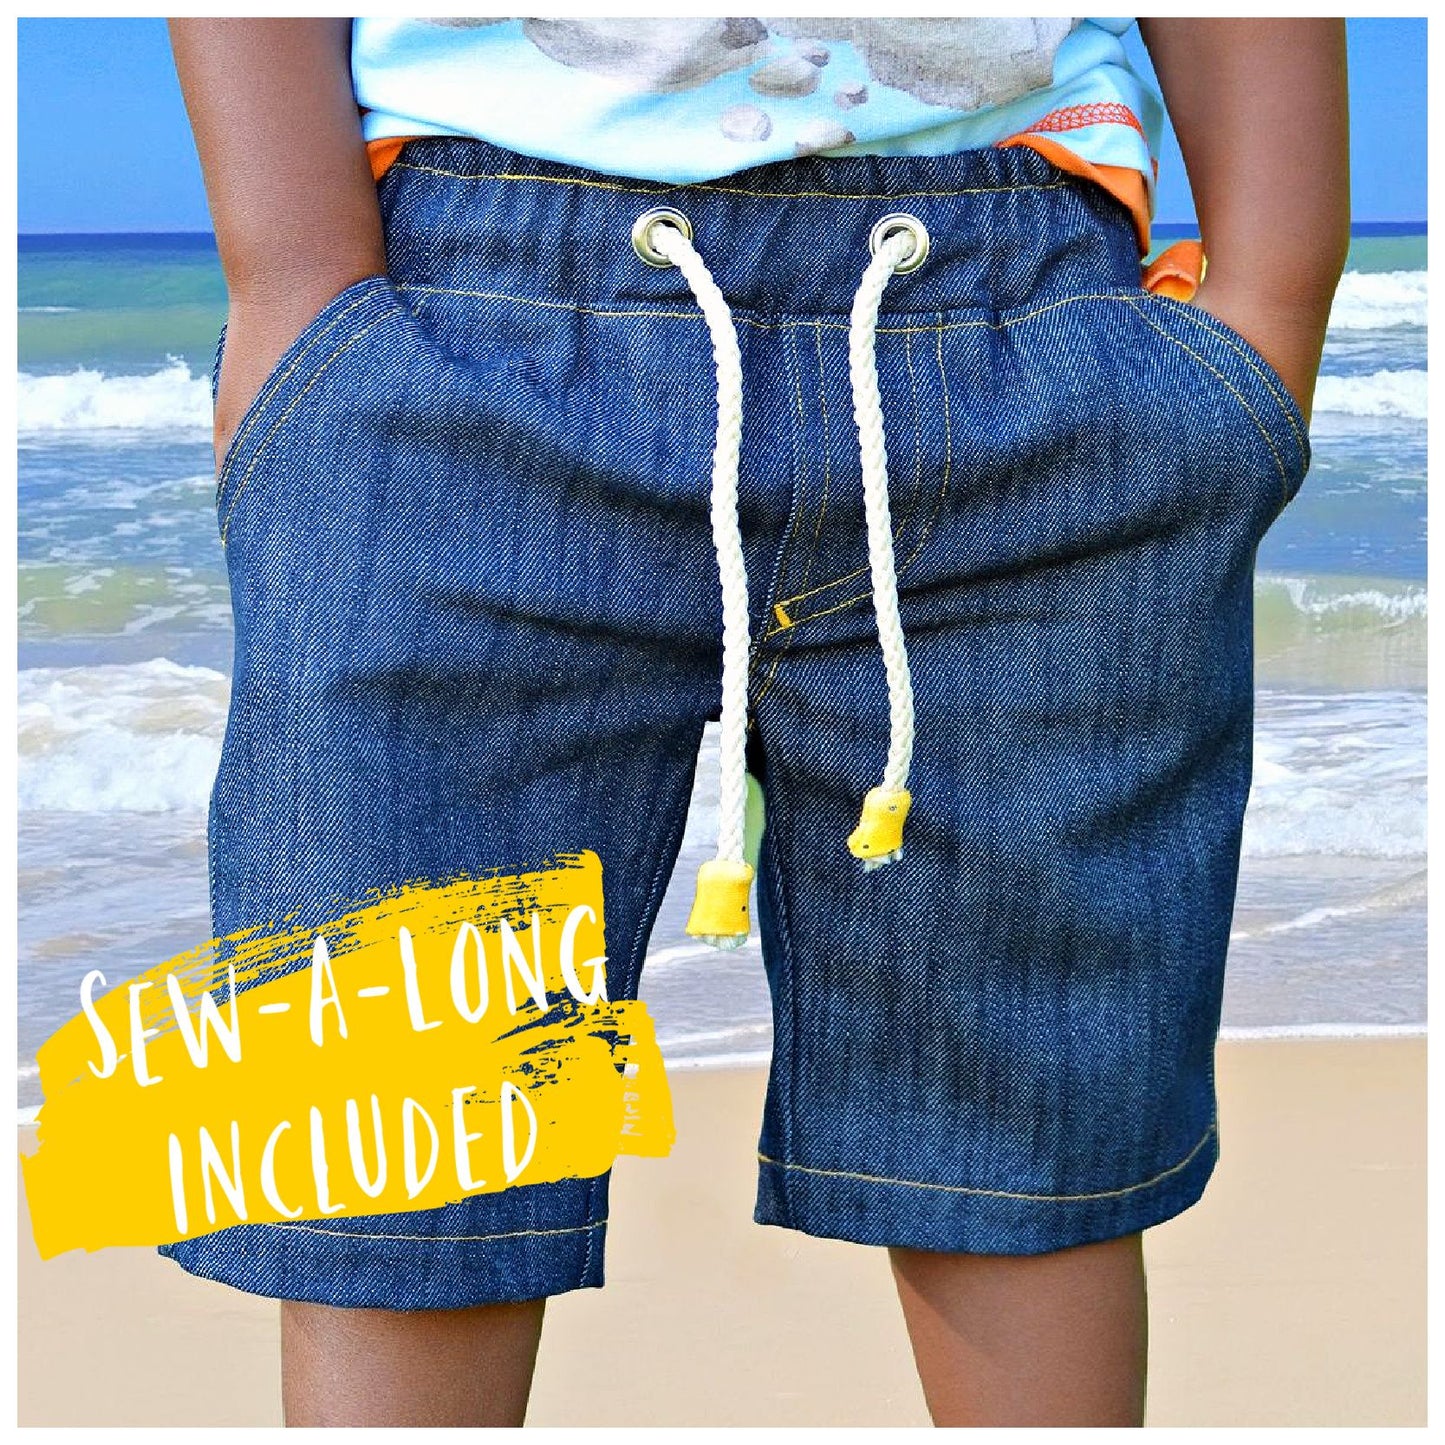


STEP-BY-STEP VIDEO TUTORIALS

INTRODUCTION TO THE PROJECT
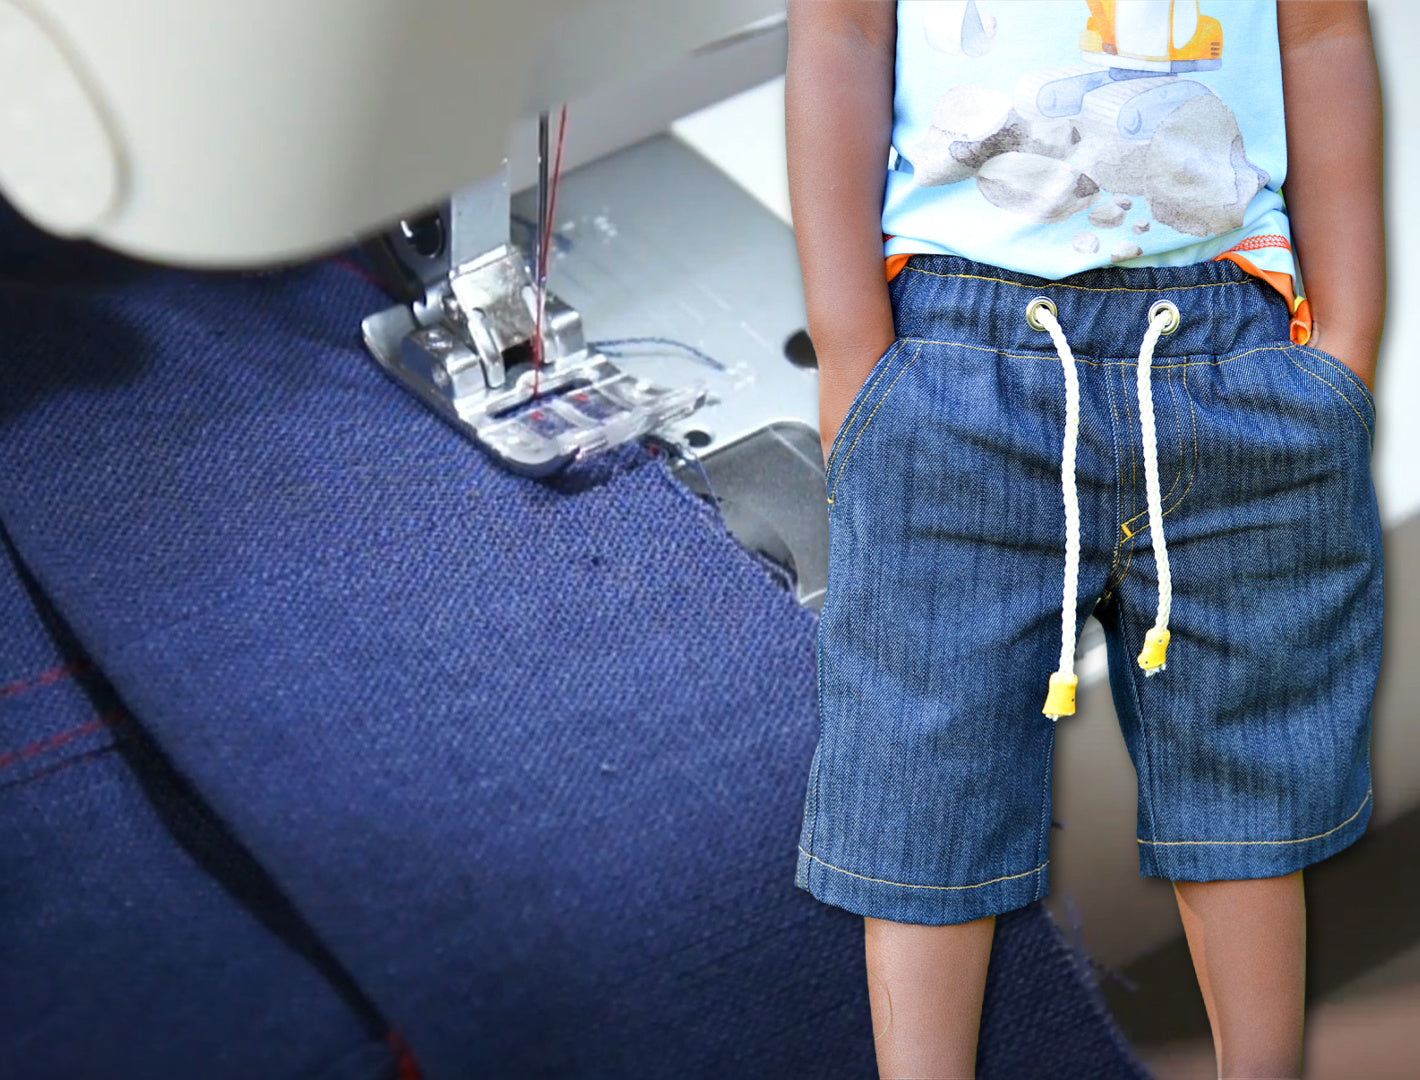
OSCAR SEWING TUTORIAL
HOW TO INSERT EYELETS
HOW TO LENGTHEN SHORTS

PATTERN TESTING SNEAK PEAK