BONNIE & CONNIE DOLL
Couldn't load pickup availability
Create enchanting doll fashion with our Connie & Bonnie pattern set - a delightful tiered skirt and crop top ensemble designed for 18-inch dolls.
Perfect for beginners and experienced sewists alike, with the girl's version for both also available in our shop.
Pattern Download Includes
- Instant Download
- DIN A4 & US Letter Size
- Detailed eBook
- Video Tutorials
Design Options
Design Options
CONNIE DOLL
- Flutter sleeves
- Contrast front bodice insert
- Elasticated back
BONNIE DOLL
- Waistband with decorative ties
- Full circle upper tier + gathered lower tier
Fabric Requirements
Fabric Requirements
BEST MATERIAL CHOICES
Light to medium-weight cotton, quilting cotton, chiffon (for ties).
FABRIC REQUIREMENTS & NOTIONS
CONNIE
- Fabric: Strap, yoke, back: 10 inches (25cm)
- Flutter Sleeve and front: 8 inches (20cm)
- Slim elastic for the back
BONNIE
- Fabric: Length: 12 inches (30cm)
- Elastic: Length: 7 inches (17cm)
- Width: 0.8 inches (2cm)
Available Sizes
Available Sizes
FITS 18" DOLLS PERFECTLY
Professionally designed to fit American Girl®, Truly Me, and My Generation dolls
• Chest: 11 inches (28 cm)
• Waist: 10.6 inches (27 cm)
• Shoulder to waist: 4 inches (10 cm)
Please Read
Please Read
- This is a digital pattern or PDF file, not a physical product. It will be delivered electronically via a download link delivered to the email used for the purchase.
- To ensure the pattern prints at its actual size, it's recommended that you use Adobe Acrobat Reader.
- The pattern creator, Frocks & Frolics, welcomes small-scale production using their patterns.
Customers are encouraged to tag Frocks & Frolics when sharing projects made using their patterns on social media.
@frocksandfrolics #frocksandfrolics
Share

STEP-BY-STEP VIDEO TUTORIALS
VIDEO TEXT
Bonnie Doll Video
Transcript for the Video: Bonnie Skirt – Doll Elasticated Skirt Construction Tutorial
In this chapter we’re going to make the Bonnie skirt for dolls. This is a gathered elasticated skirt with a flat front, an elasticated back, and a tie detail. The construction is simple in principle but requires accuracy when handling gathers, circular fabric, and waistband alignment. The design allows variation depending on fabric thickness, where you can reduce or increase gathering to suit the material.
Preparing the Pattern Pieces
Start by preparing all the cut pieces. The main components include the circular skirt tier, waistband, elastic, and tie pieces.
The waistband is folded and later attached as a clean finish. The elastic runs through the back portion of the waistband to create stretch, while the front remains flat for structure and decoration options such as lace or embroidery.
The tie pieces are cut as pairs, sewn right sides together, then turned right side out. These will later be inserted into the waistband seam at the front center marking.
The circular skirt tier must be marked carefully. You identify the inner and outer circle, then quarter the shape to maintain even distribution when gathering. The skirt length is extended to approximately 43 inches.
All raw edges are finished before assembly begins.
Marking and Layout Preparation
Start by marking the placement for the ties at the center front of the skirt. A small snip indicates where the tie will be inserted into the waistband seam.
Next, quarter the circular skirt to establish reference points. Identify the side seams by locating the most stable sections of the fabric and marking them clearly.
Repeat the marking process for the outer edge so alignment remains consistent during gathering and attachment.
Constructing the Ties and Side Seams
Sew the tie pieces together with right sides facing. When stitching the pointed end, leave the needle down, pivot carefully, and secure the tip before turning.
After turning the ties right side out, press them flat and topstitch using a longer stitch length for a clean finish.
Close the side seams of the skirt and press them open to reduce bulk and improve structure.
Adding Gathering Stitches
To prepare the skirt for attachment to the waistband, sew two rows of long gathering stitches along the top edge.
The first row is sewn close to the edge, and the second is sewn parallel at a foot-width distance. Use the longest stitch setting available and leave long thread tails to allow controlled gathering.
Once complete, gently pull the threads to distribute fullness evenly across the skirt edge.
Hem Preparation
Fold the hem upward by approximately one centimeter and stitch it down using the sewing machine as a guide.
After stitching, press the hem to set the fold and improve the finish.
Attaching the Skirt to the Circular Tier
Mark the center front, center back, and side seams on both the skirt and the circular tier for accurate alignment.
Pin all matching points together first, then distribute the gathered fabric evenly between them.
Because the fabric is circular, the waistband and skirt edge will not naturally match in length, so careful adjustment of gathers is necessary to avoid puckering.
Sew the skirt to the tier from the gathered side while controlling fullness. After stitching, remove pins and check for even distribution.
Finish the seam and optionally topstitch to secure it in place.
Preparing and Attaching the Waistband
Mark quarters on both the waistband and the skirt to ensure symmetrical attachment.
Align the center front, center back, and side seams carefully before pinning.
The circular edge may appear slightly larger than the waistband due to its shape, so small notches can be made near the inner curve to help it flex and match more easily.
Sew the waistband from the straight side for better control.
Inserting the Elastic
Stitch the waistband casing while leaving an opening for elastic insertion.
Attach a safety pin to one end of the elastic and thread it through the waistband channel.
Ensure both ends are visible before securing them together. Once fixed, close the opening securely.
This keeps the elastic enclosed neatly inside the waistband.
Final Finishing
Distribute the gathers evenly around the waistband.
Add the back tie detail and adjust length depending on style preference.
Press the entire garment to set seams and smooth out gathers.
Final Notes
At this stage, the Bonnie skirt is complete. The construction combines a structured front with a gathered elastic back, making it functional and balanced. Accuracy in marking and patience during assembly are what determine the final quality.
Connie Blouse
Transcript for the Video: Connie Top – Doll Flutter Sleeve Top Construction Tutorial
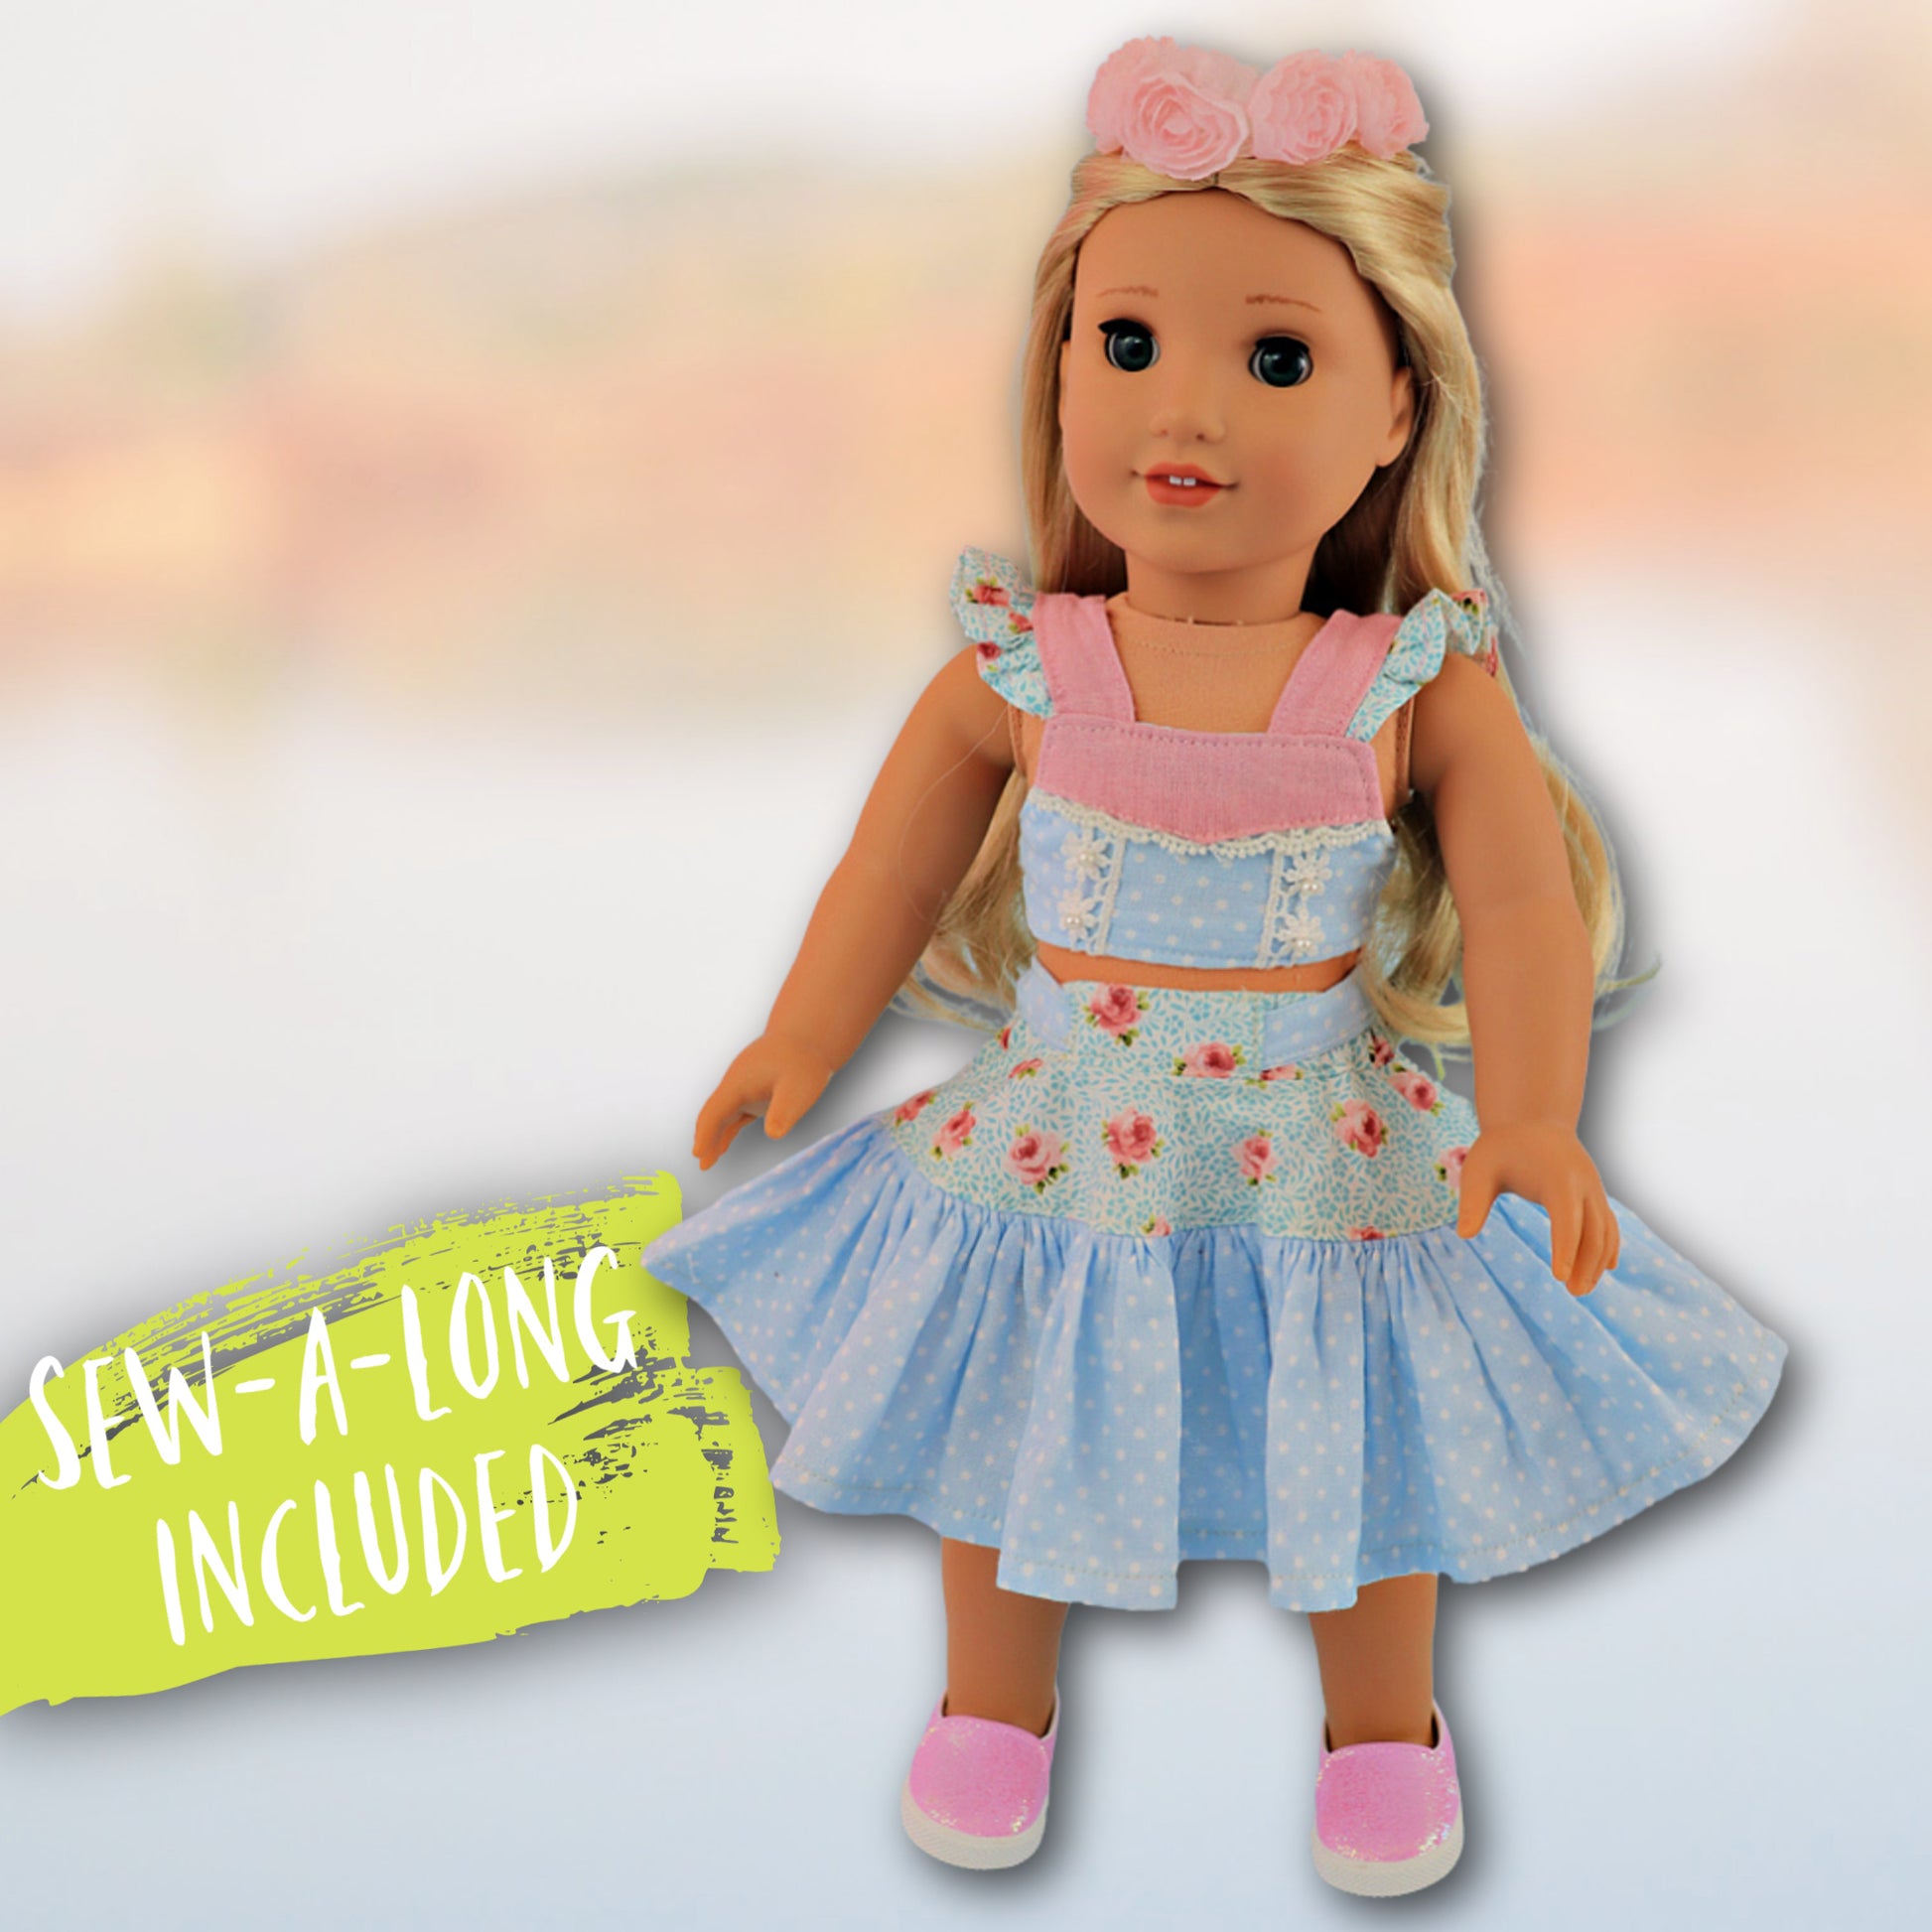
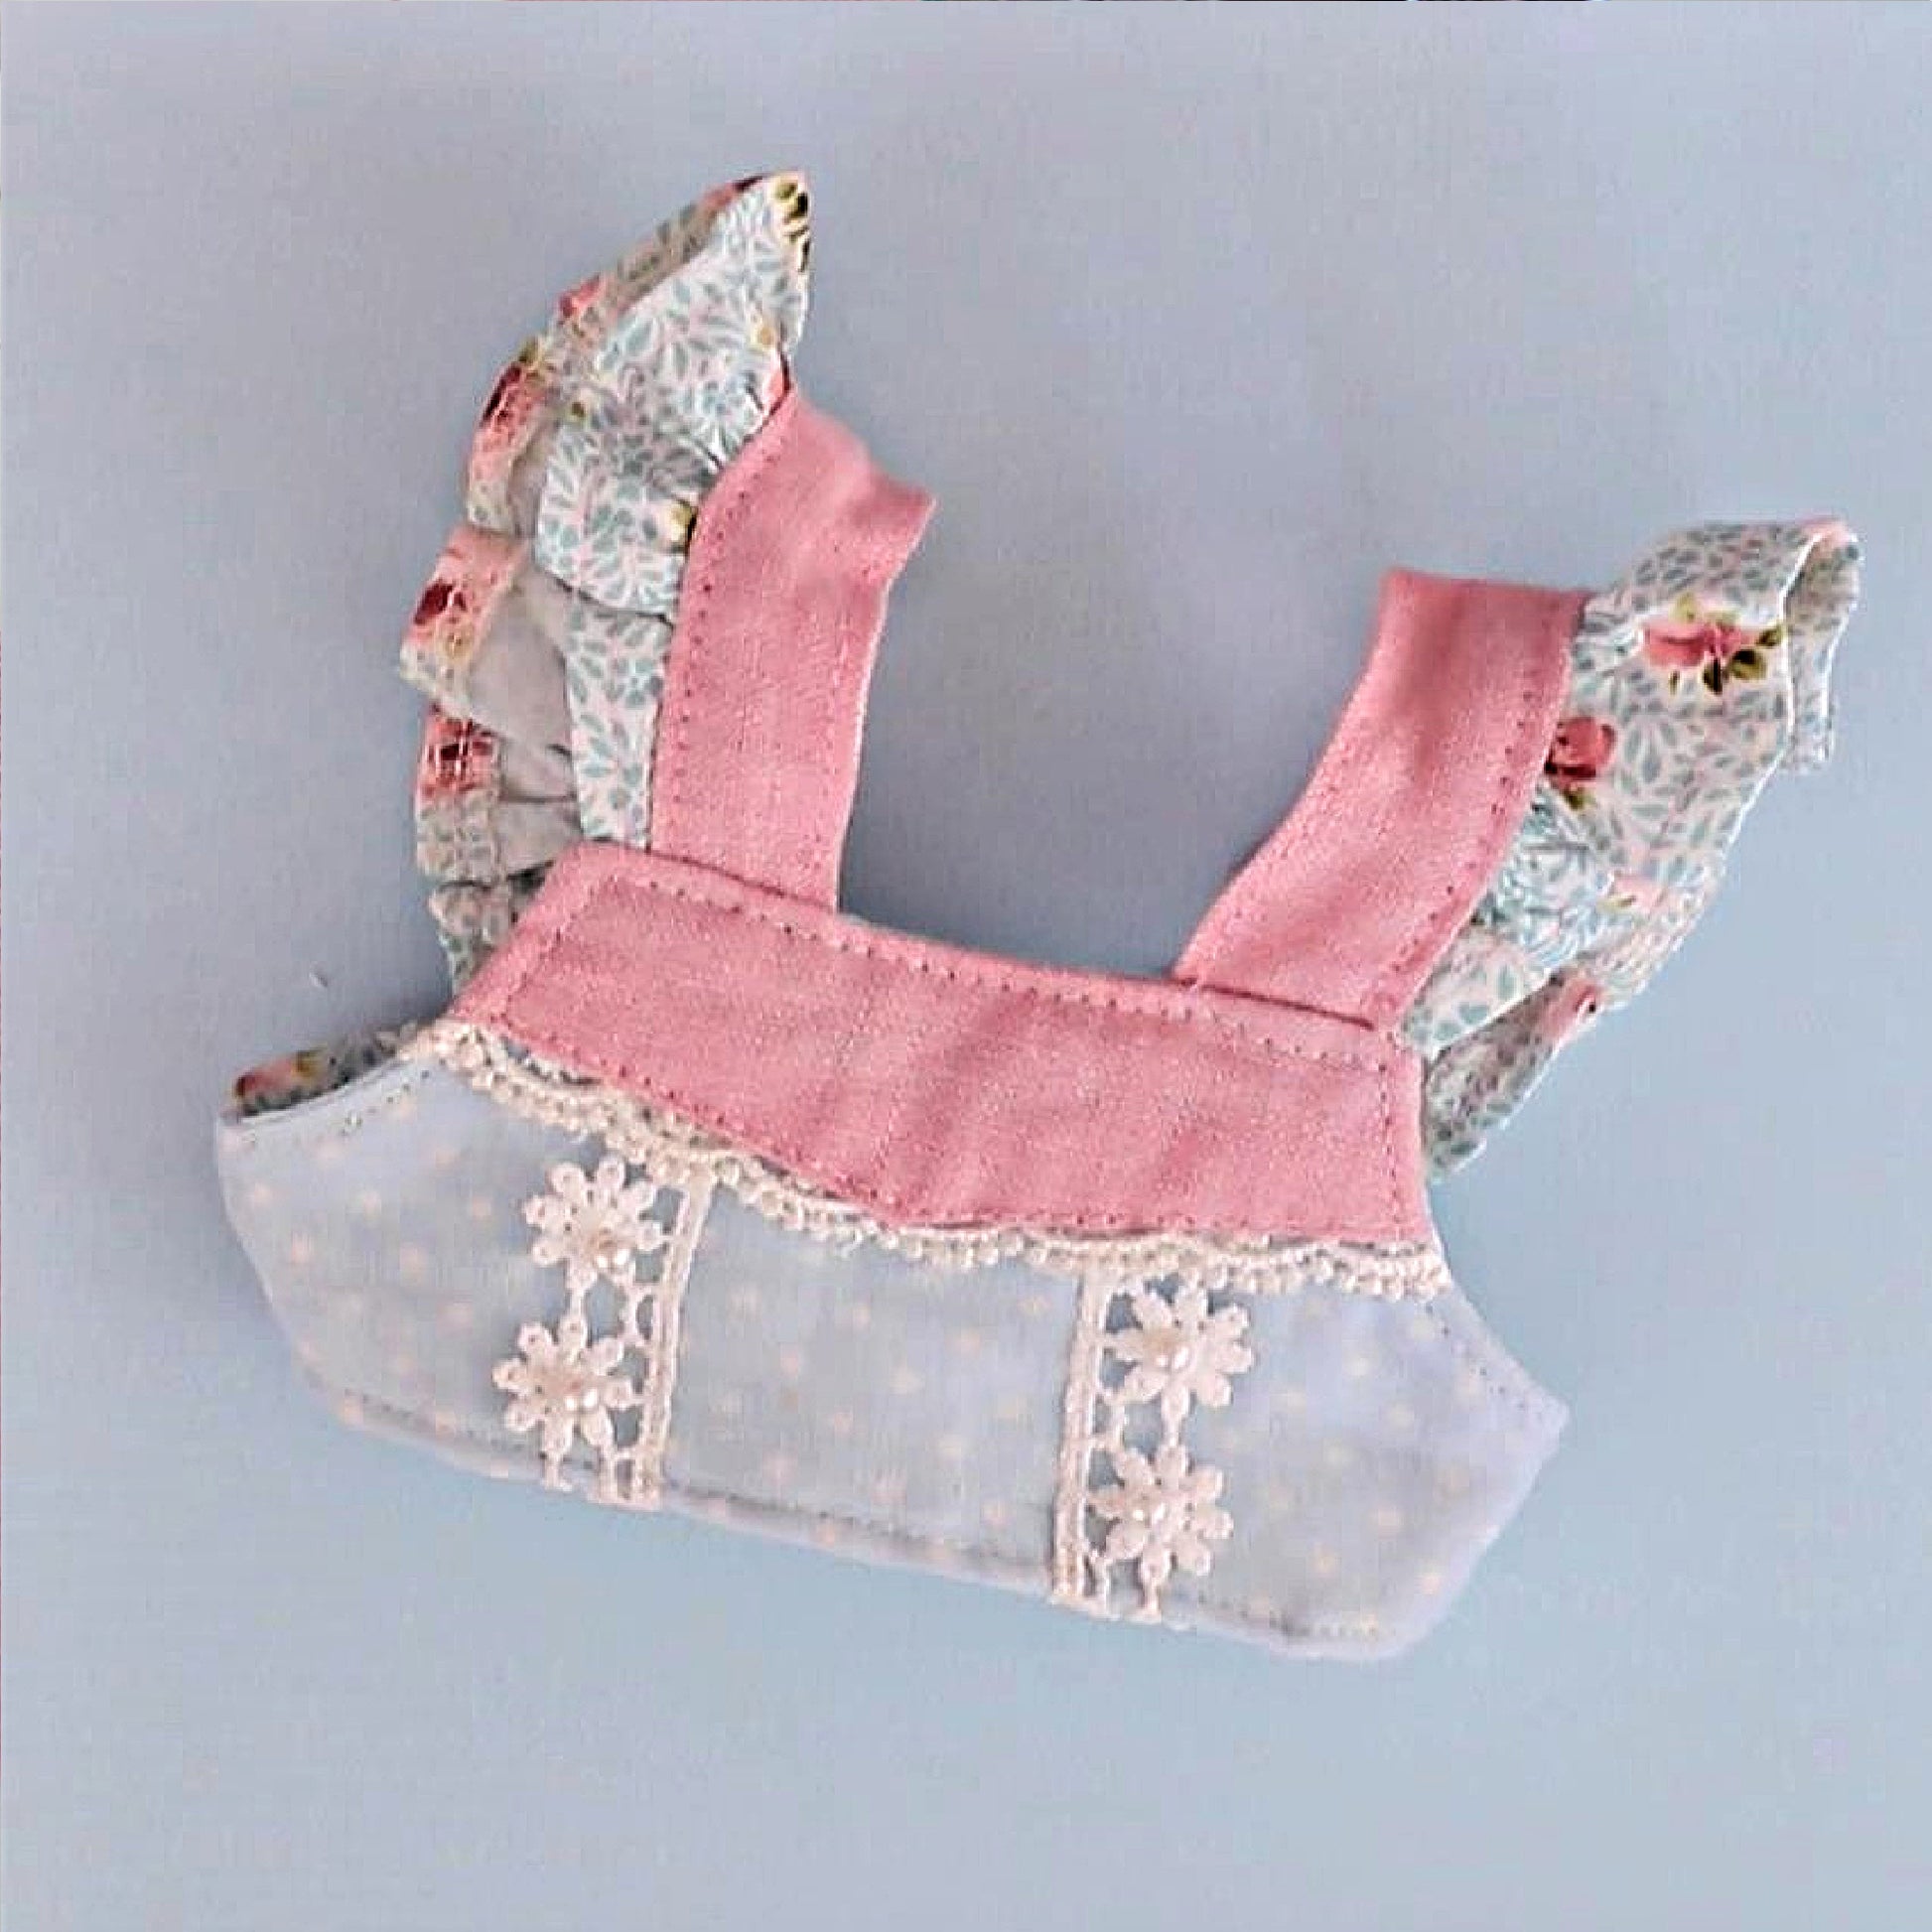
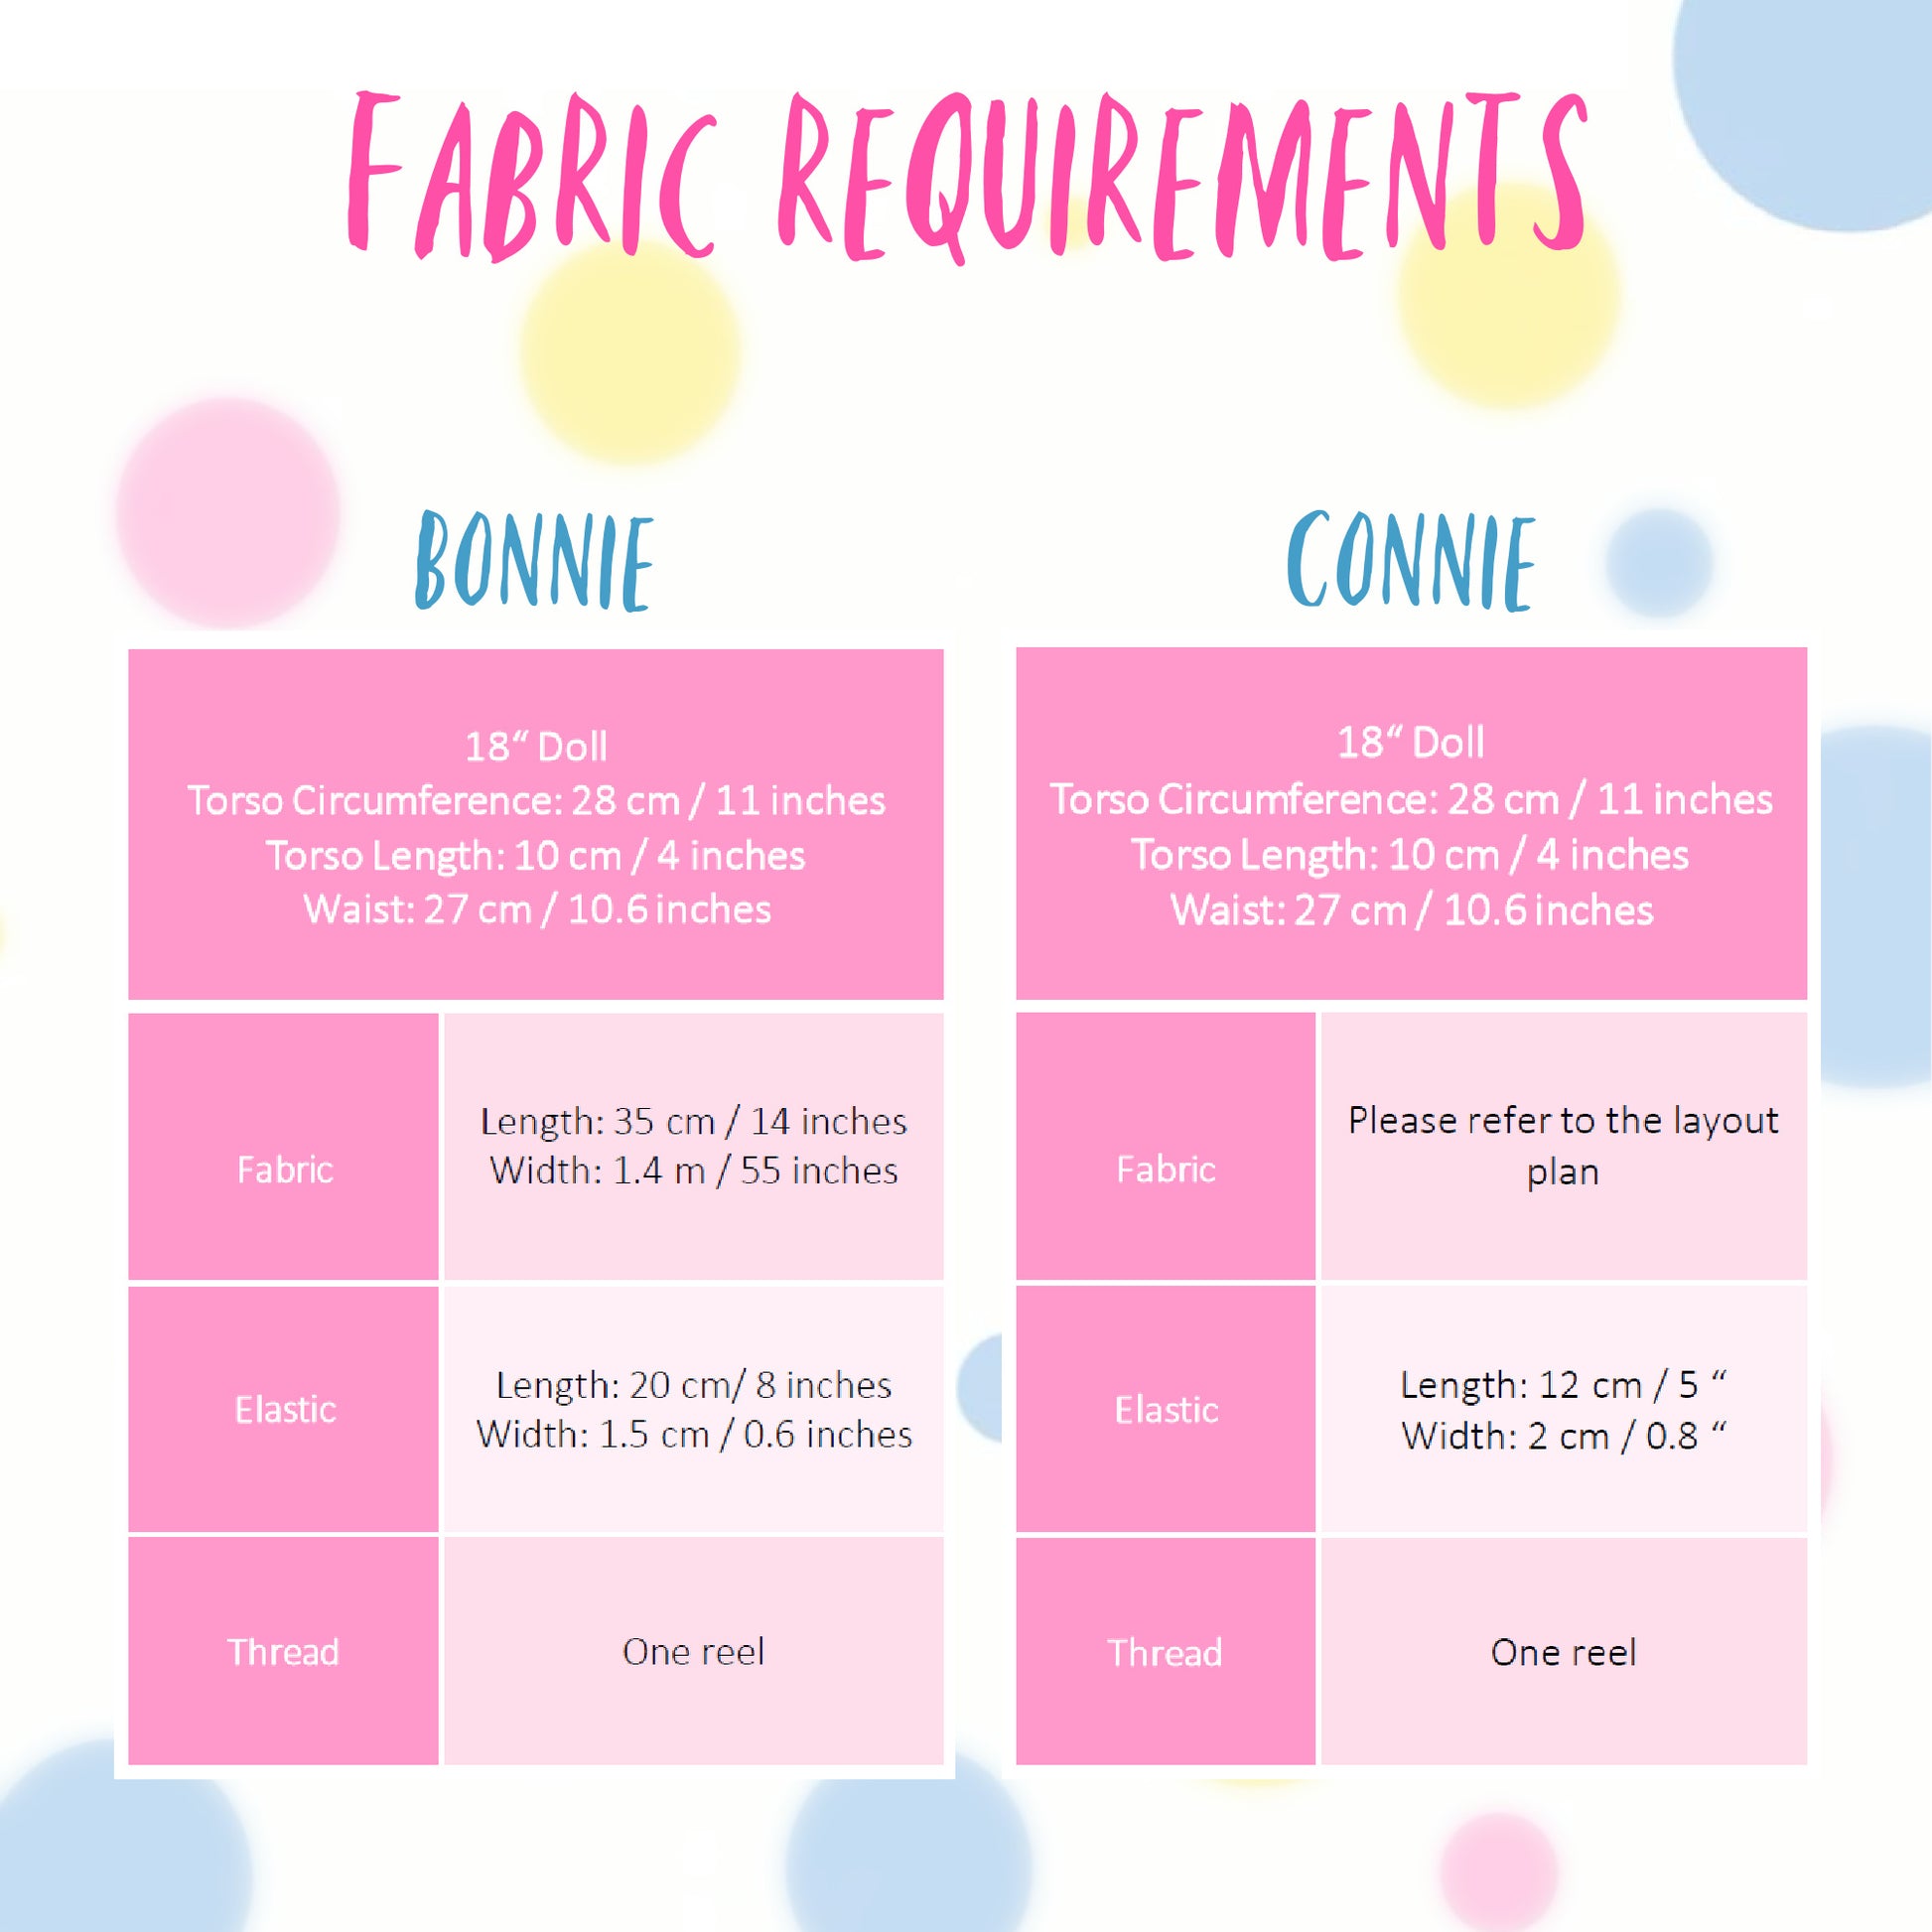
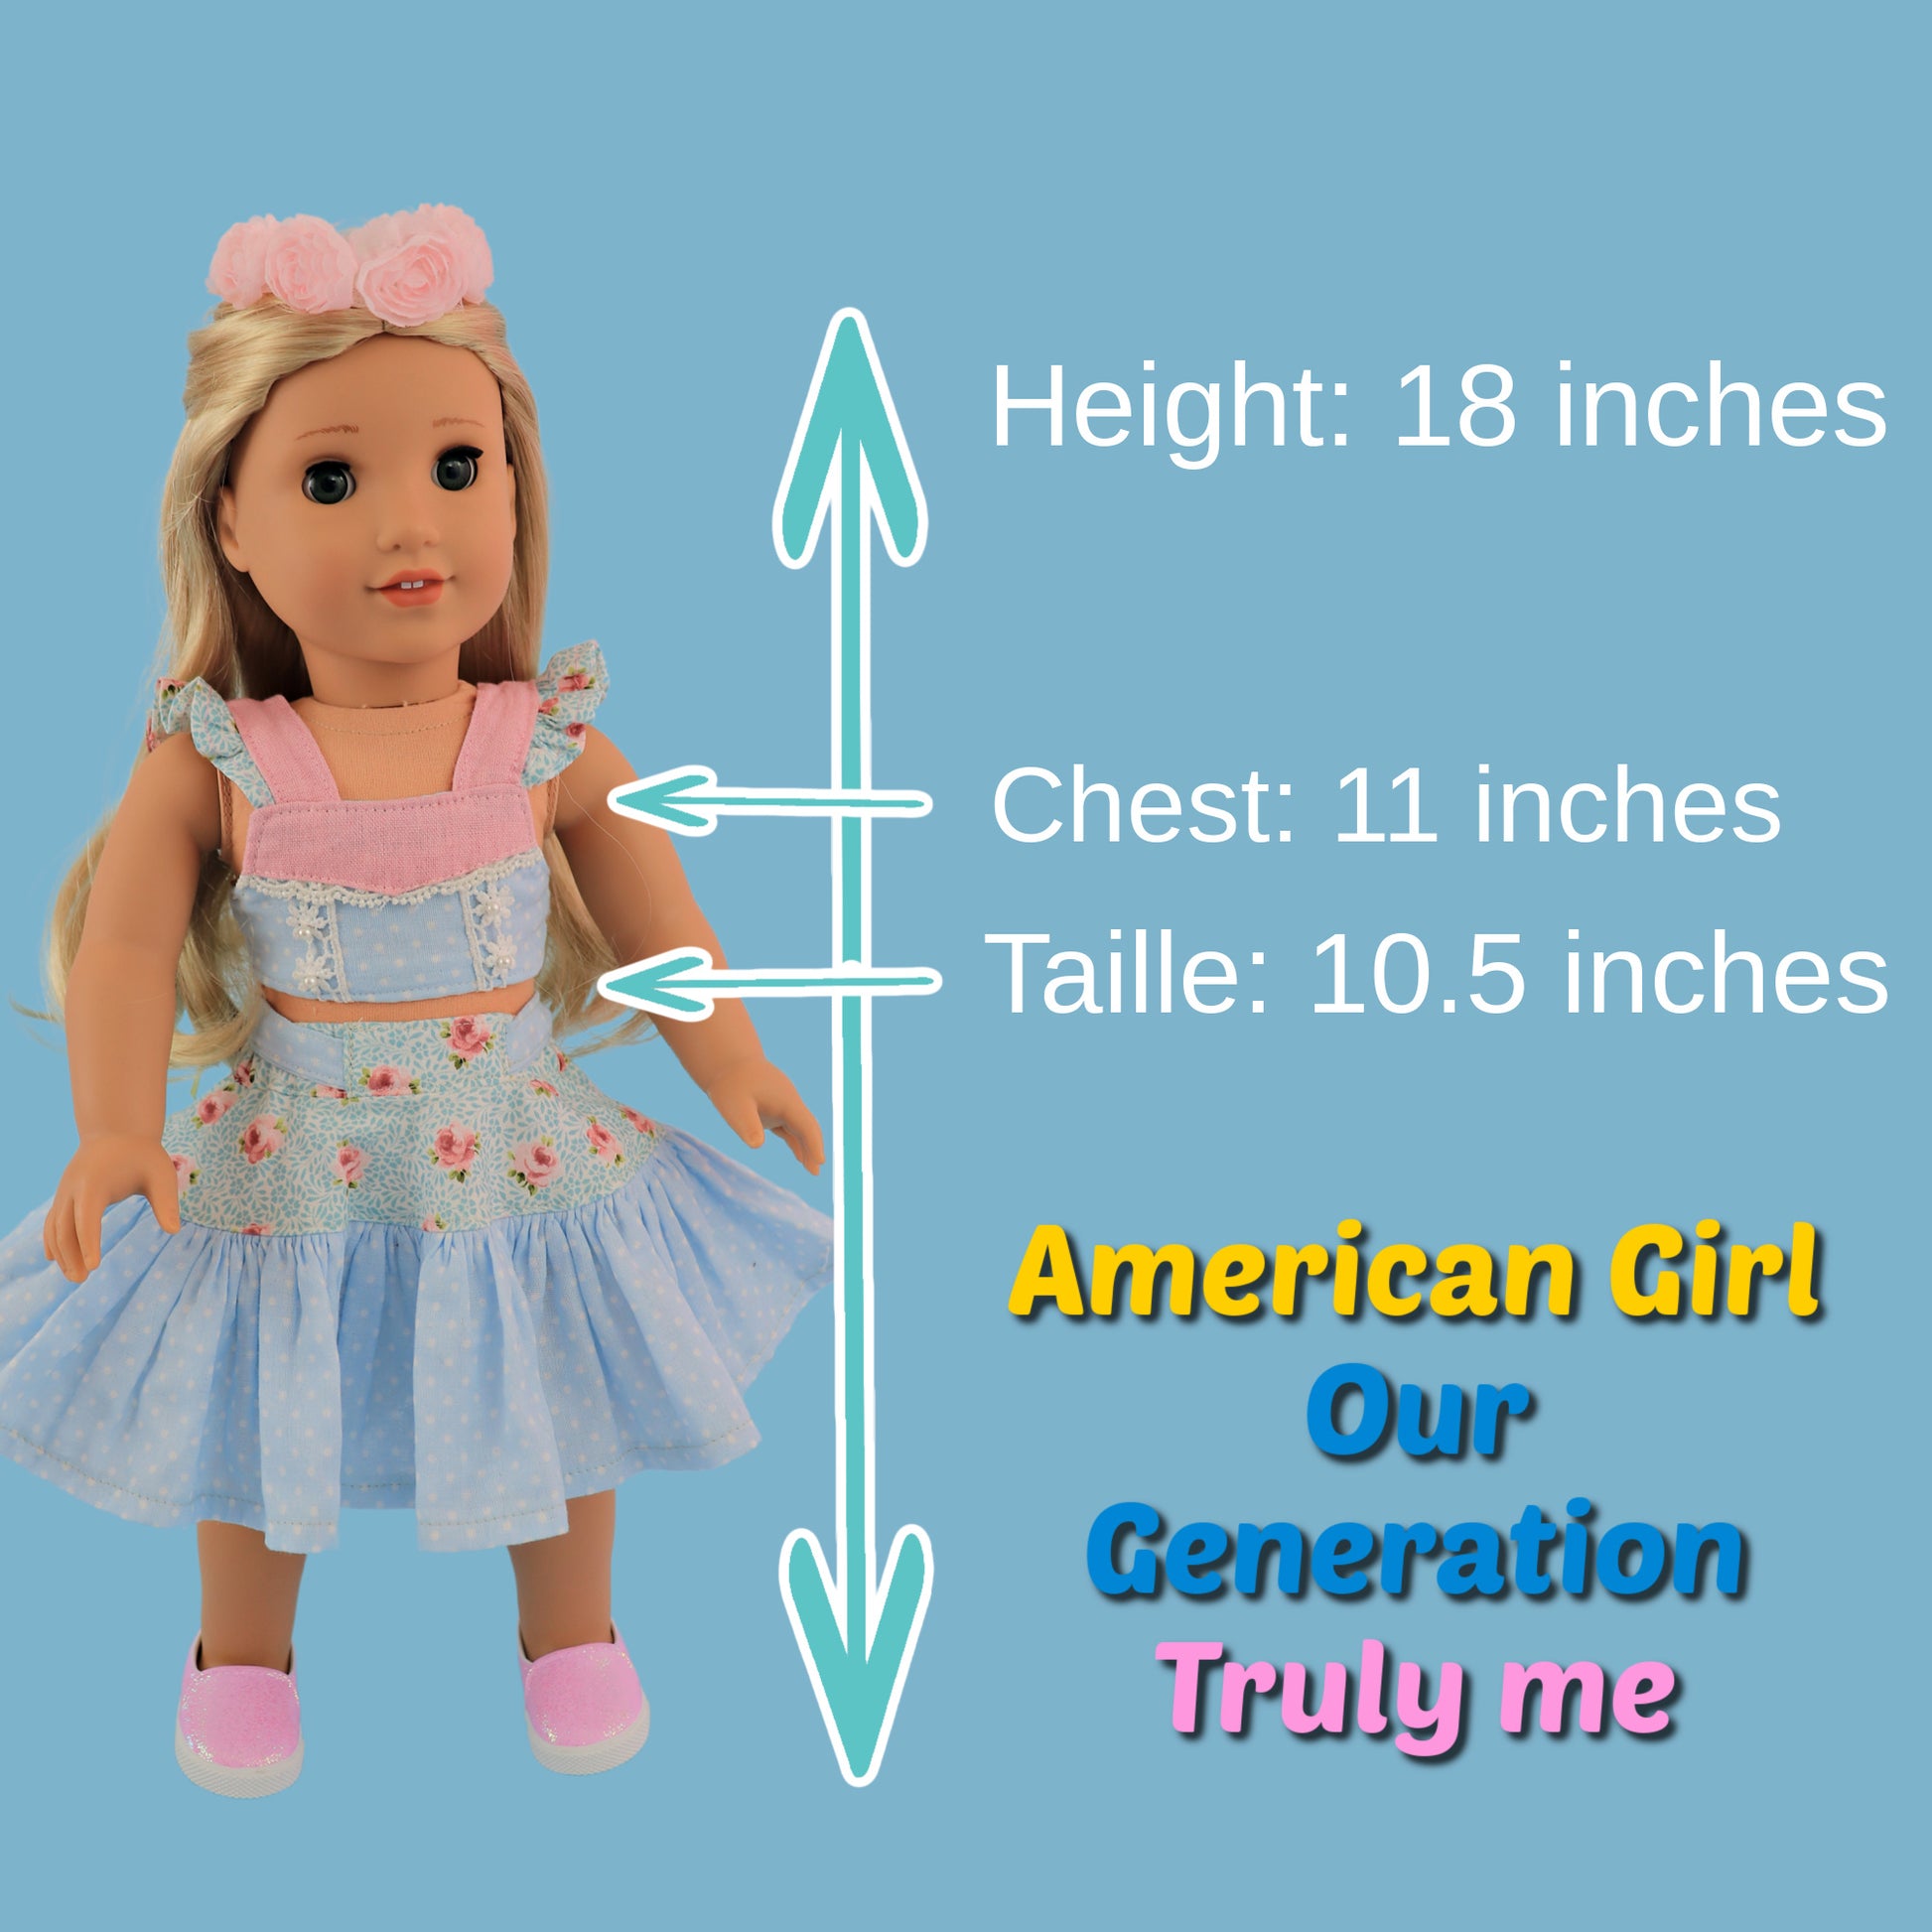
The Connie top is designed to pair with the Bonnie skirt as a matching set, but it can also be made on its own. Both patterns are also available in girl sizes so you can create a coordinated outfit set.
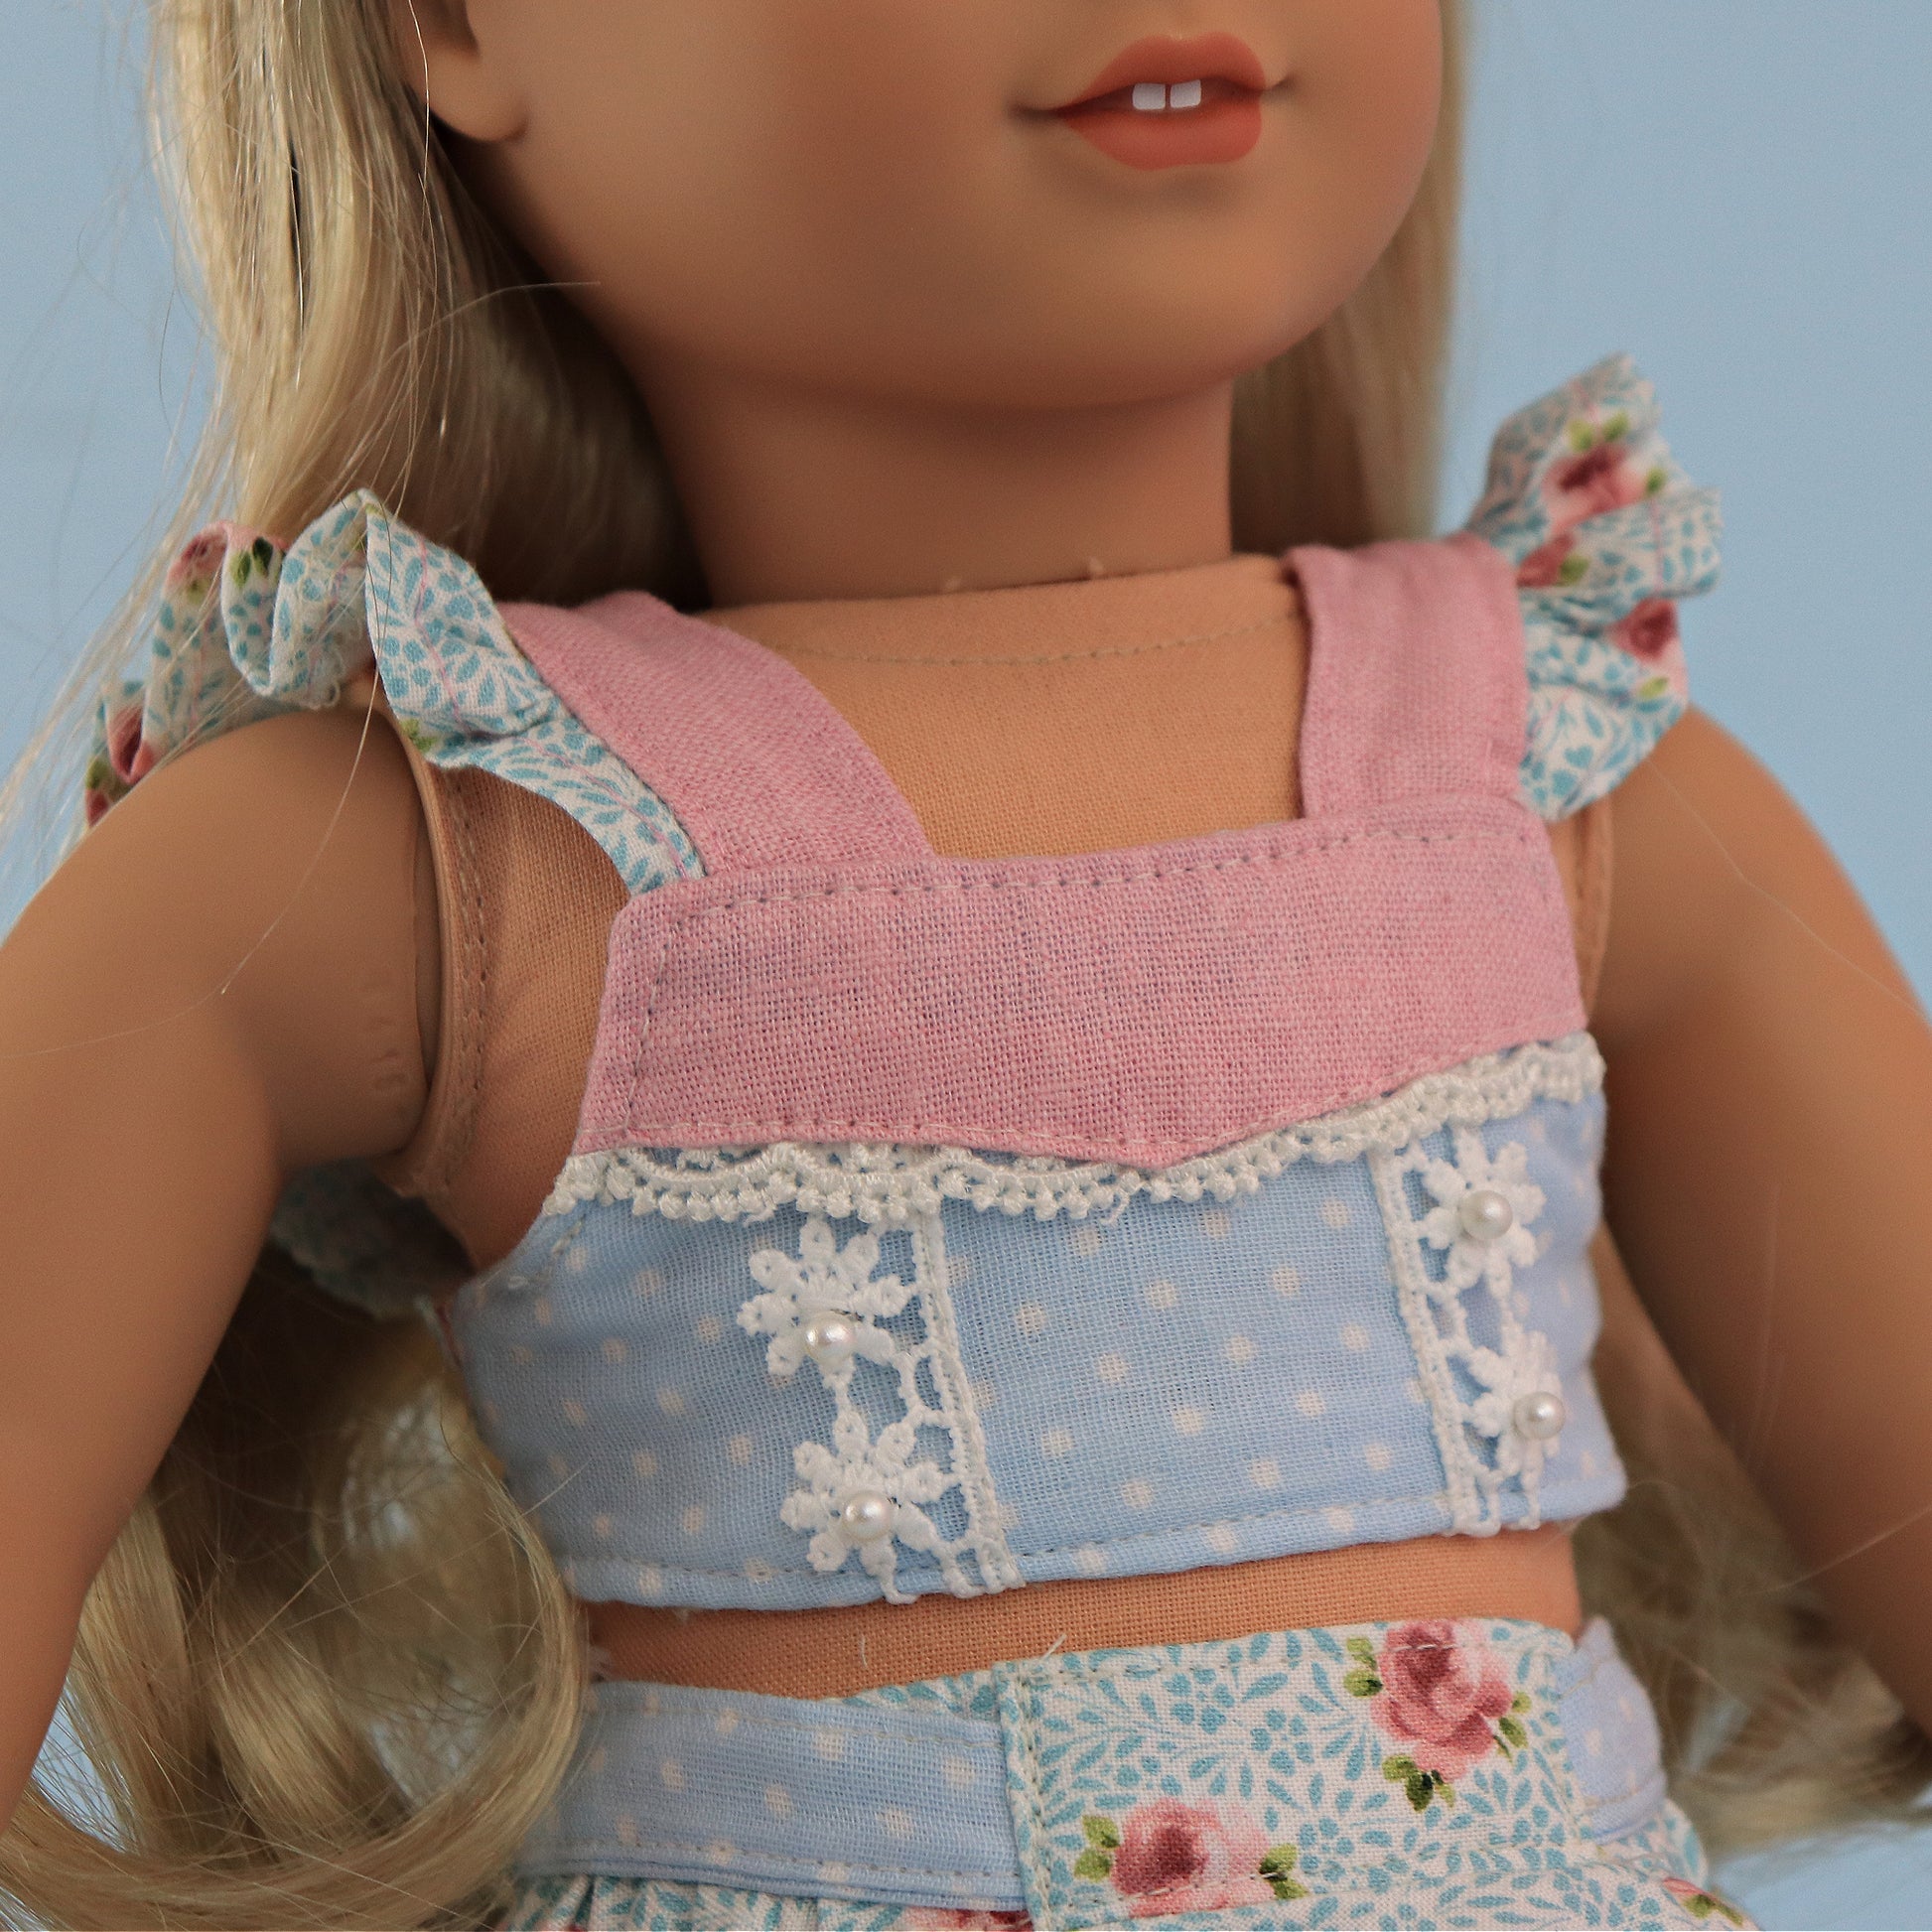
This version of the top is a simplified doll construction. It slips on easily, does not require buttonholes, and uses an elasticated back for fit. The front includes an optional insert section that can be styled straight or with a dip, and you can add lace, trim, or embellishment depending on your design preference.
Preparing the Front Pieces
Start with the front pieces. You will cut two layers, one for the outer fabric and one for lining. In this version, both are made from the same fabric for simplicity.
The front can be constructed with either a straight neckline or a dipped insert section. Choose your style before assembling.
Next, add lace to the front panels if desired. This is applied before attaching the trim. Position the lace on either side of the front panel and secure it in place.
Once the lace is attached, add the decorative trim over the top edge. The trim should sit neatly along the upper section of the front piece, covering raw edges and completing the decorative panel.
Preparing the Flutter Sleeves and Straps
Identify the flutter sleeve pieces. The wider edge indicates the front orientation. If hemming conventionally, you would turn and press the edge, but in this version the edge is overlocked and then turned under.
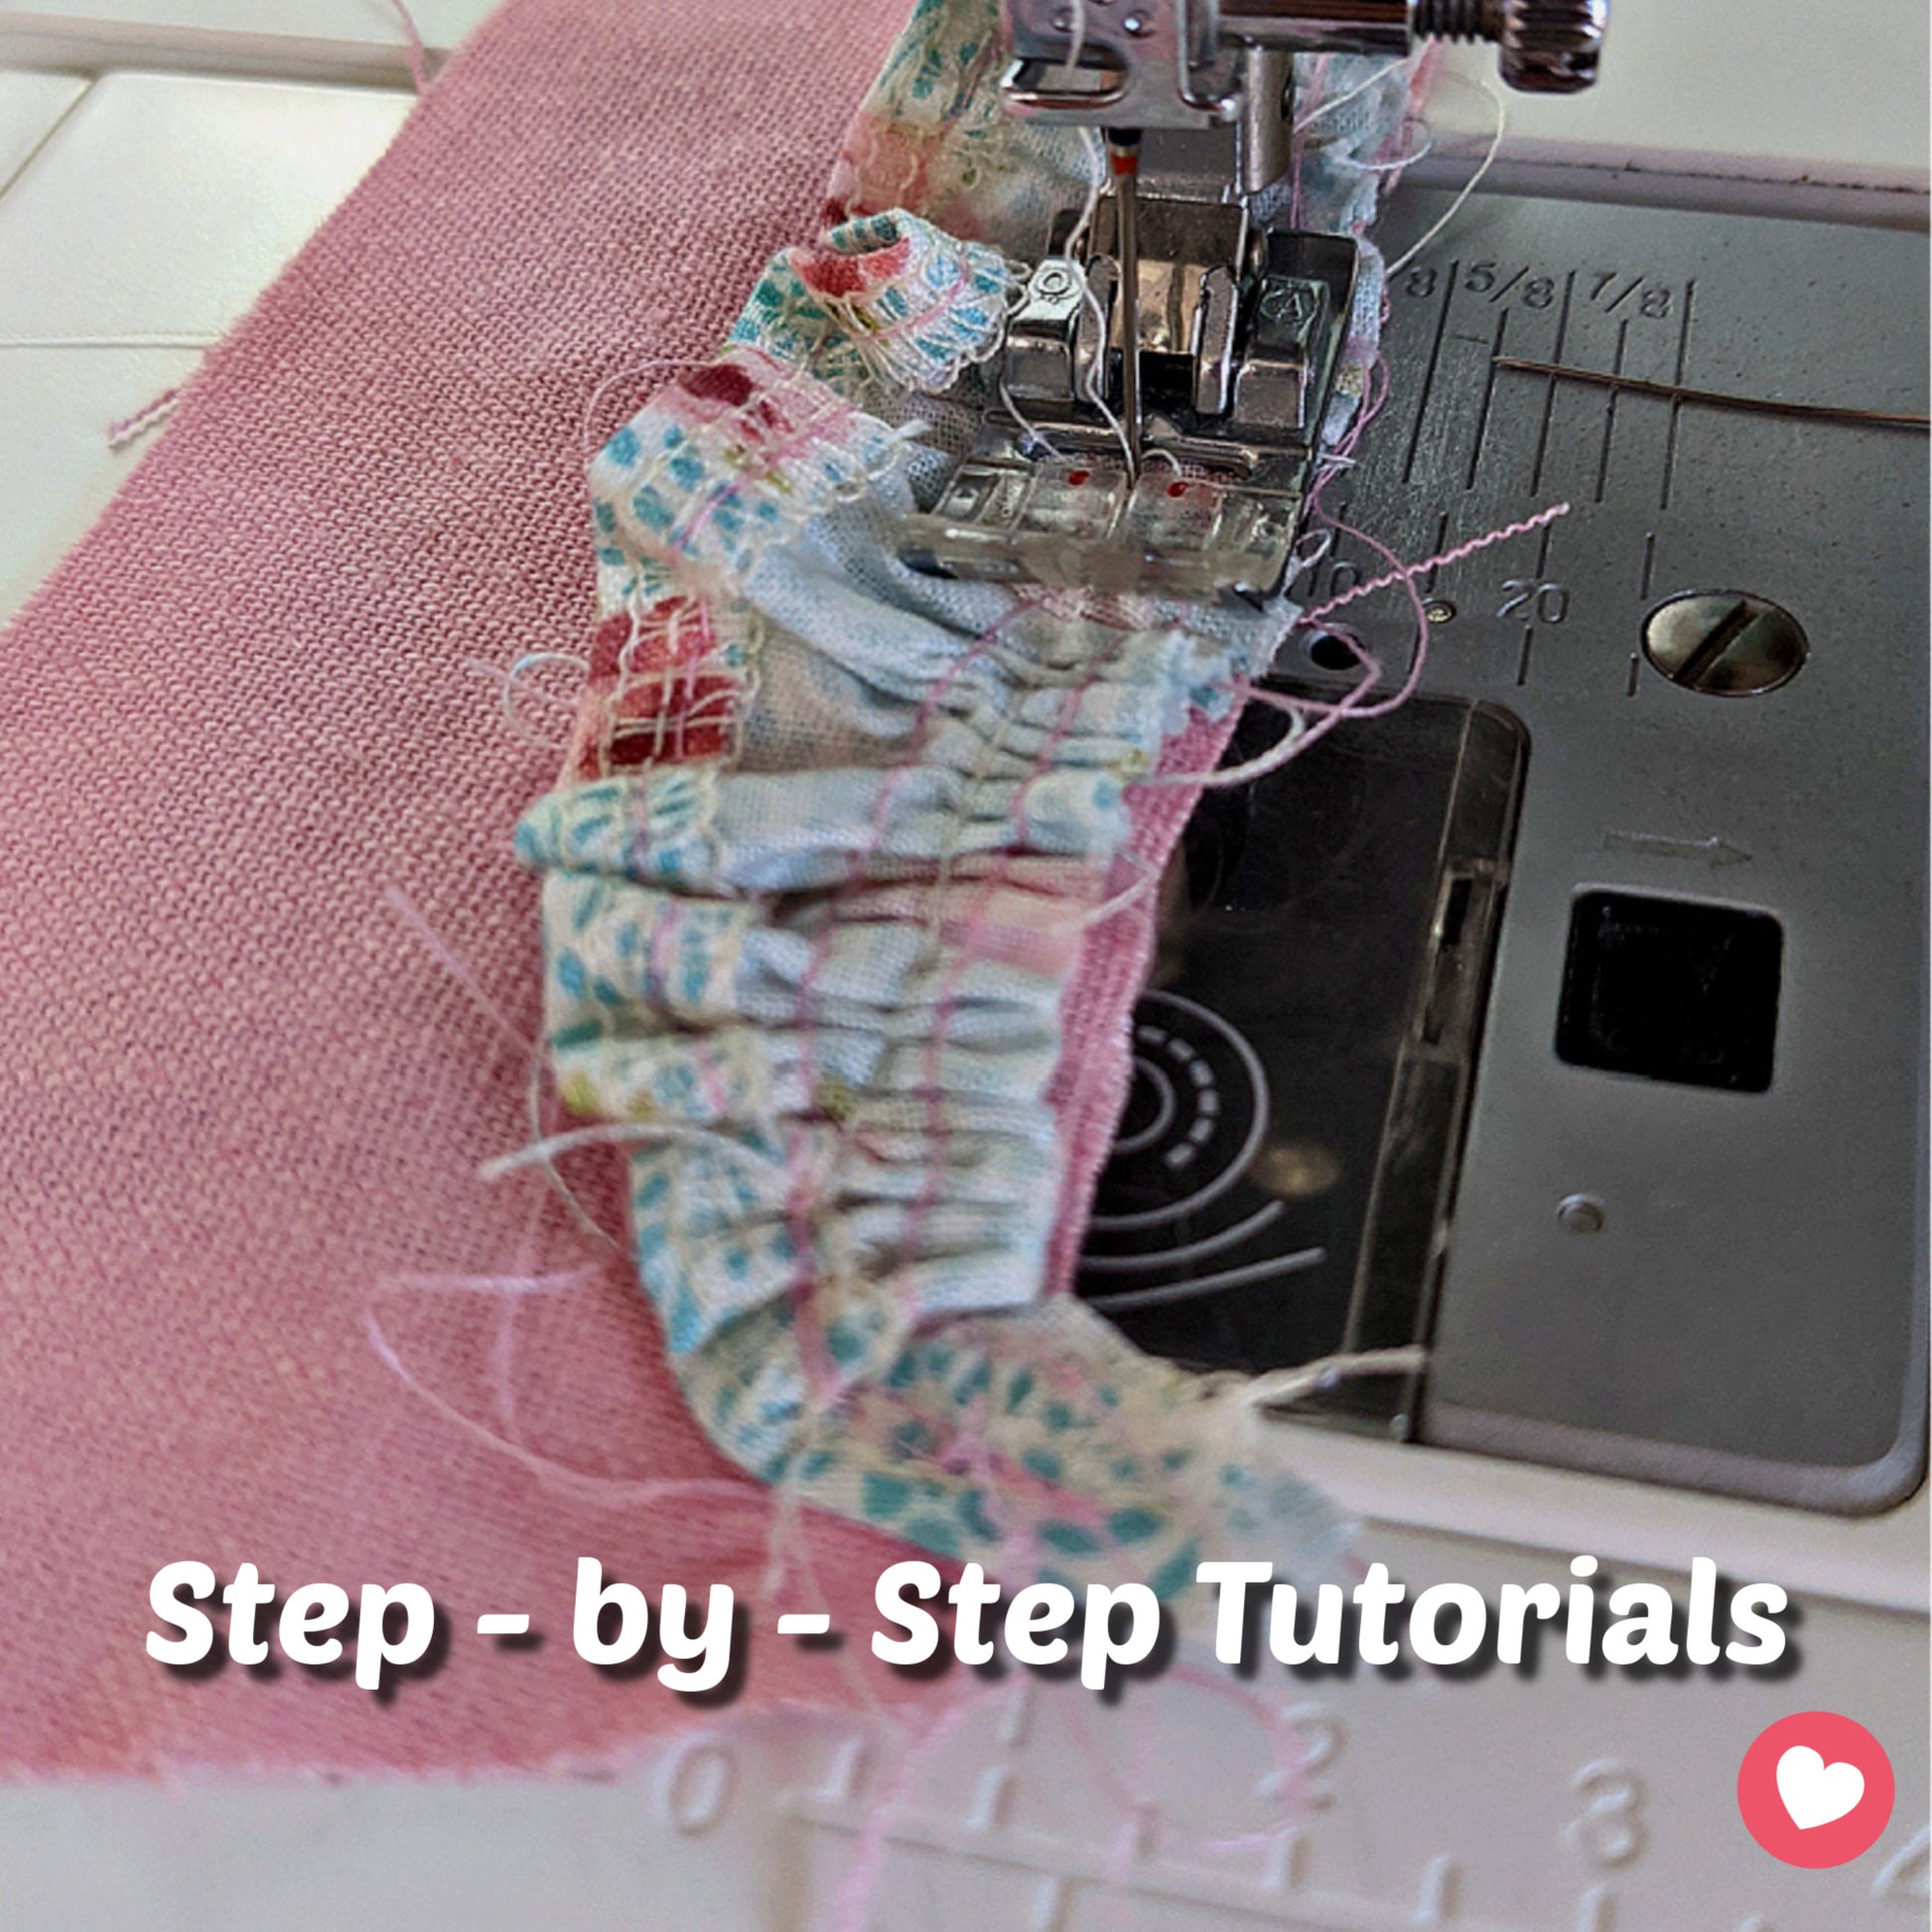
Gathering is applied on the straight edge of the flutter sleeve, while the curved edge is finished with overlocking and topstitching.
Next, prepare the shoulder straps. Each strap has a front and back orientation, so mark them before sewing. The straps will later attach to the flutter sleeve section, forming the shoulder structure of the top.
Ensure that the straps face outward correctly when assembled. Incorrect orientation will reverse the sleeve direction.
Attaching Lace, Trim, and Front Detail
Before assembling, lightly press the center front to create a reference line.
Position lace on both sides of the front panel and secure with pins. Topstitch the lace in place, ensuring the stitching does not interfere with decorative elements such as beads or pearls if used.
Attach the trim along the top edge of the front panel. Align raw edges and stitch in place using a standard seam allowance. A longer stitch length can be used for topstitching for a cleaner finish.
Constructing the Flutter Sleeves
Finish the curved edge of the flutter sleeves using overlocking, then topstitch it down.
If using a hemmed version instead, you would work from the straight edge and create a folded hem, but in this version the curved edge finish is preferred for easier construction.
Prepare gathering stitches on the flutter sleeves. Thread should be secured at one end, preferably the back edge, while the front edge is gathered more heavily for shaping.
Attaching Flutter Sleeves to Straps
Fold the straps lengthwise to find the center and align the flutter sleeves along the edge.
Gather the sleeve to match the strap length. Distribute fullness more heavily toward the back to avoid bulk near button placement areas.
Pin the flutter sleeves to the straps, ensuring both sides are mirror images of each other.
Sew along the attachment line carefully, adjusting gathers as needed while stitching.
Once attached, remove one gathering thread and allow the remaining thread to release naturally for a cleaner finish.
Press the seam lightly to set the shape.
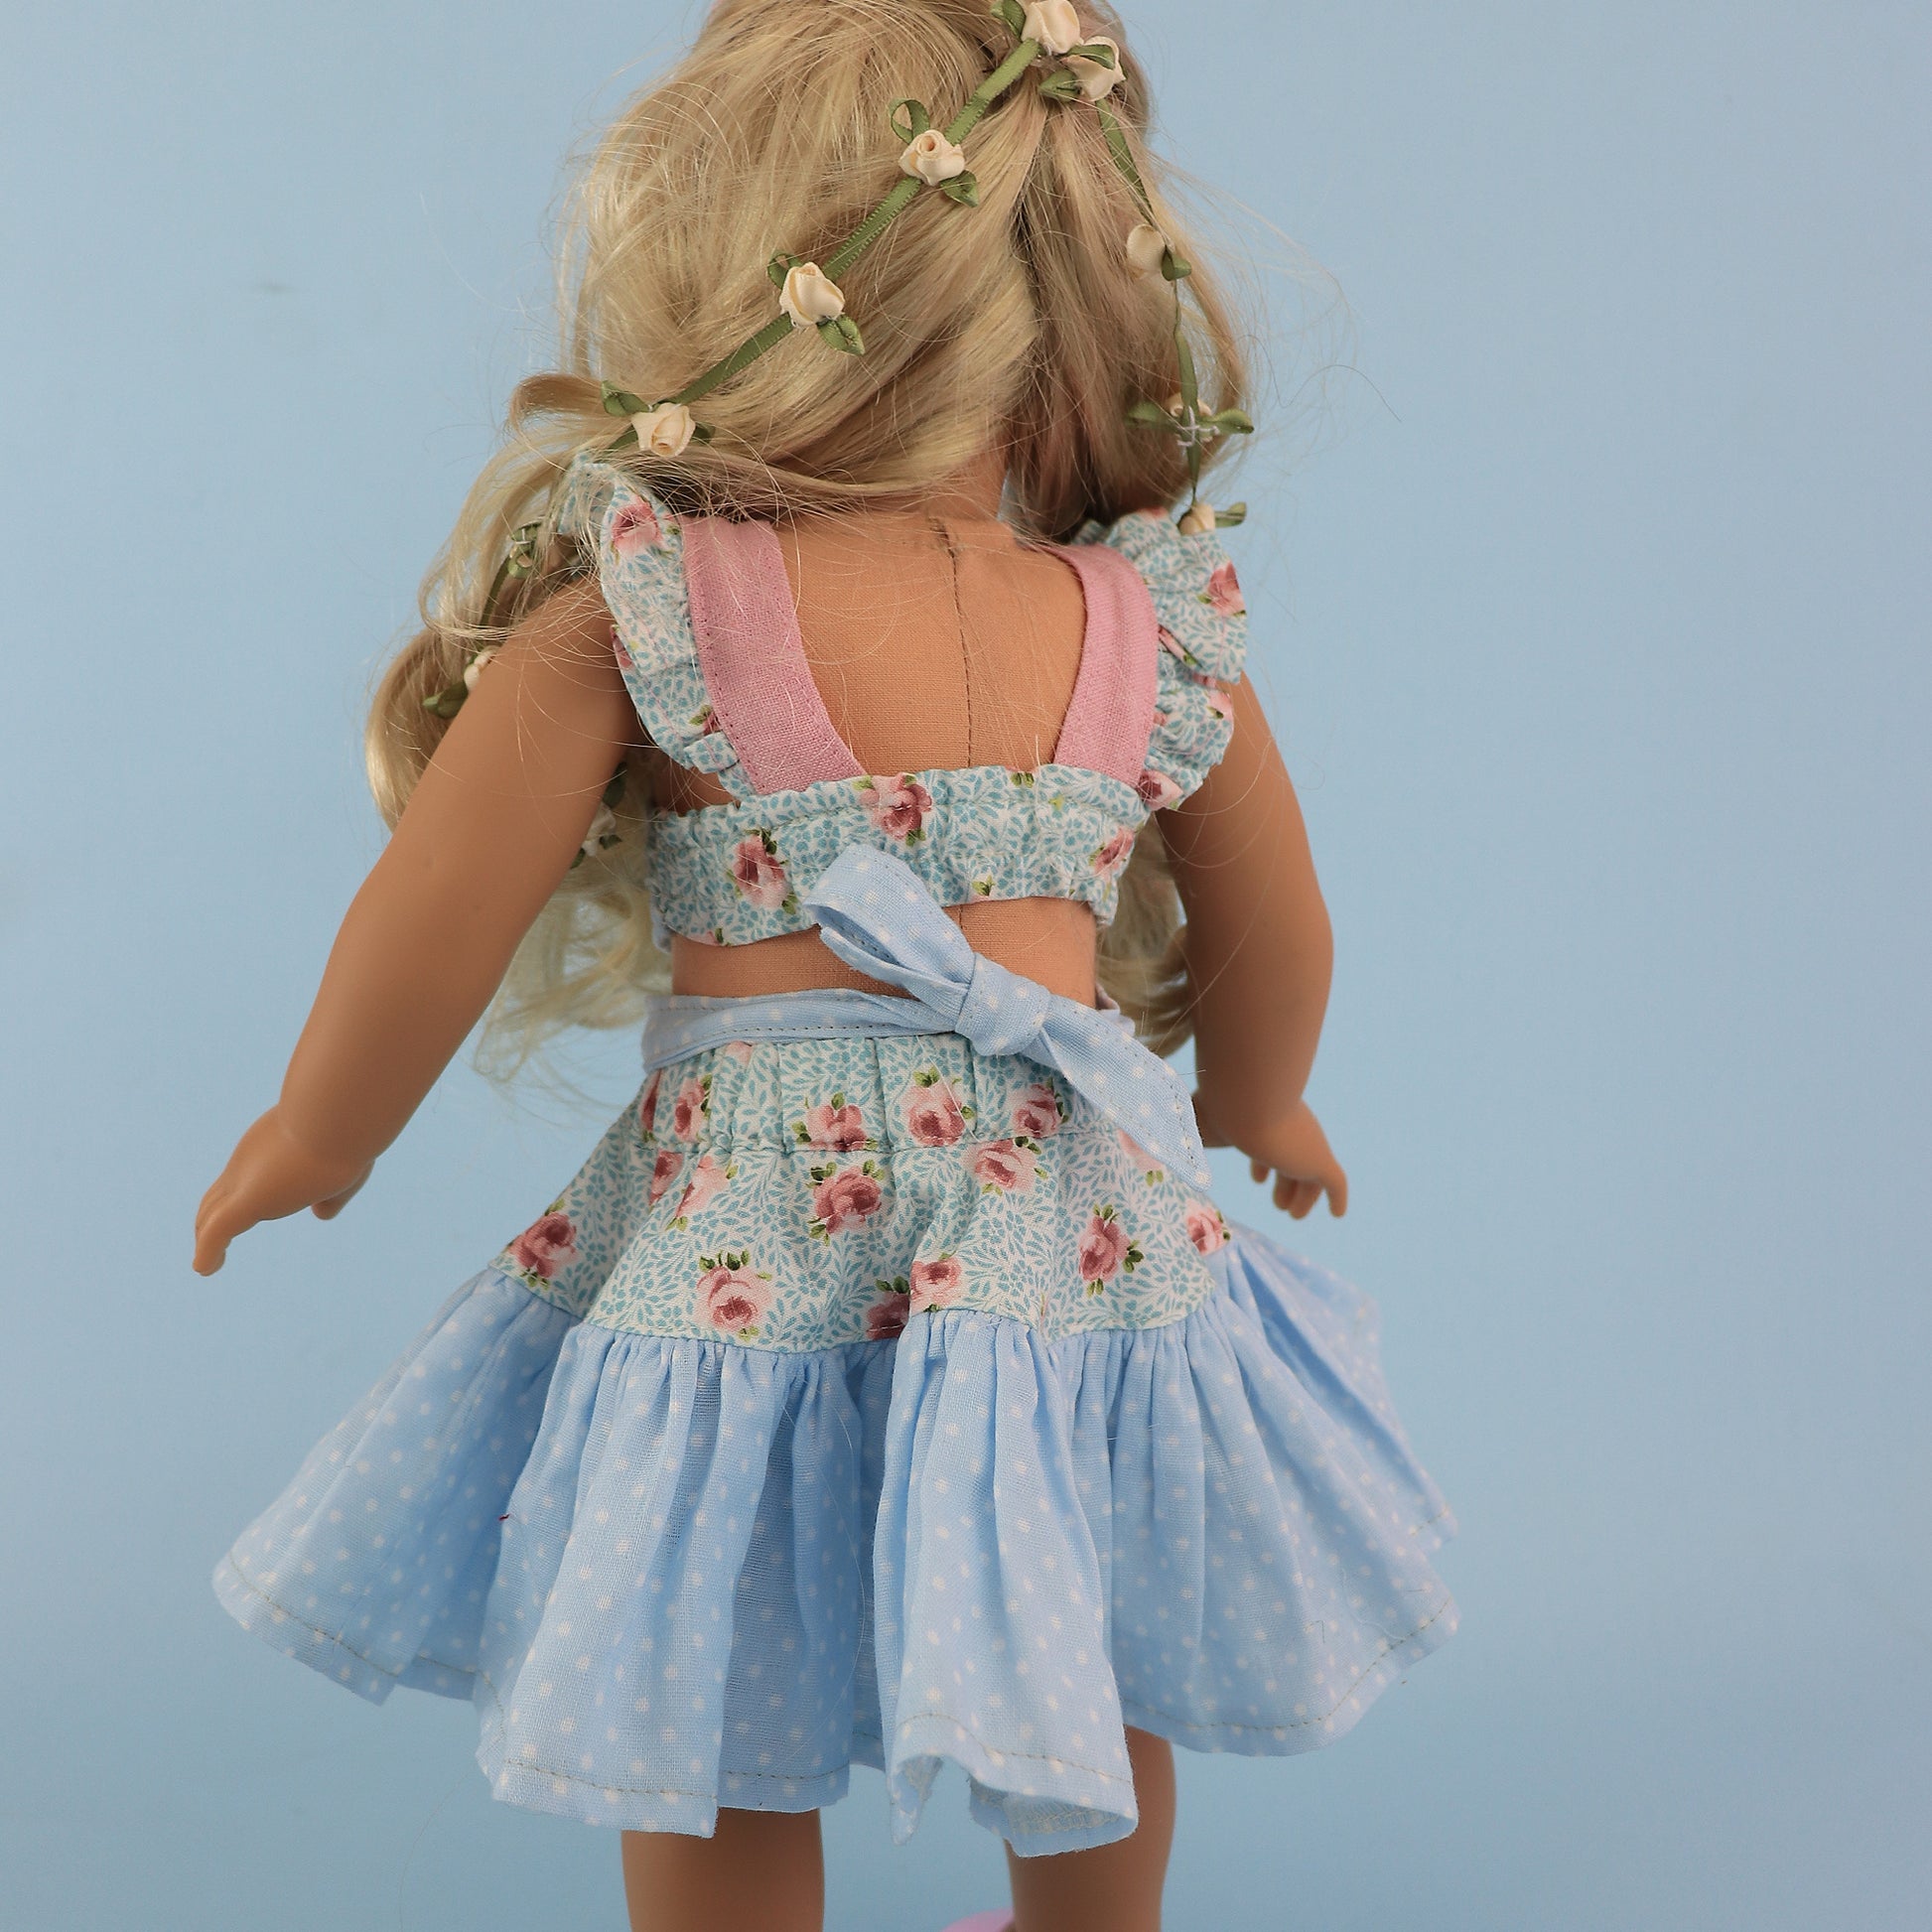
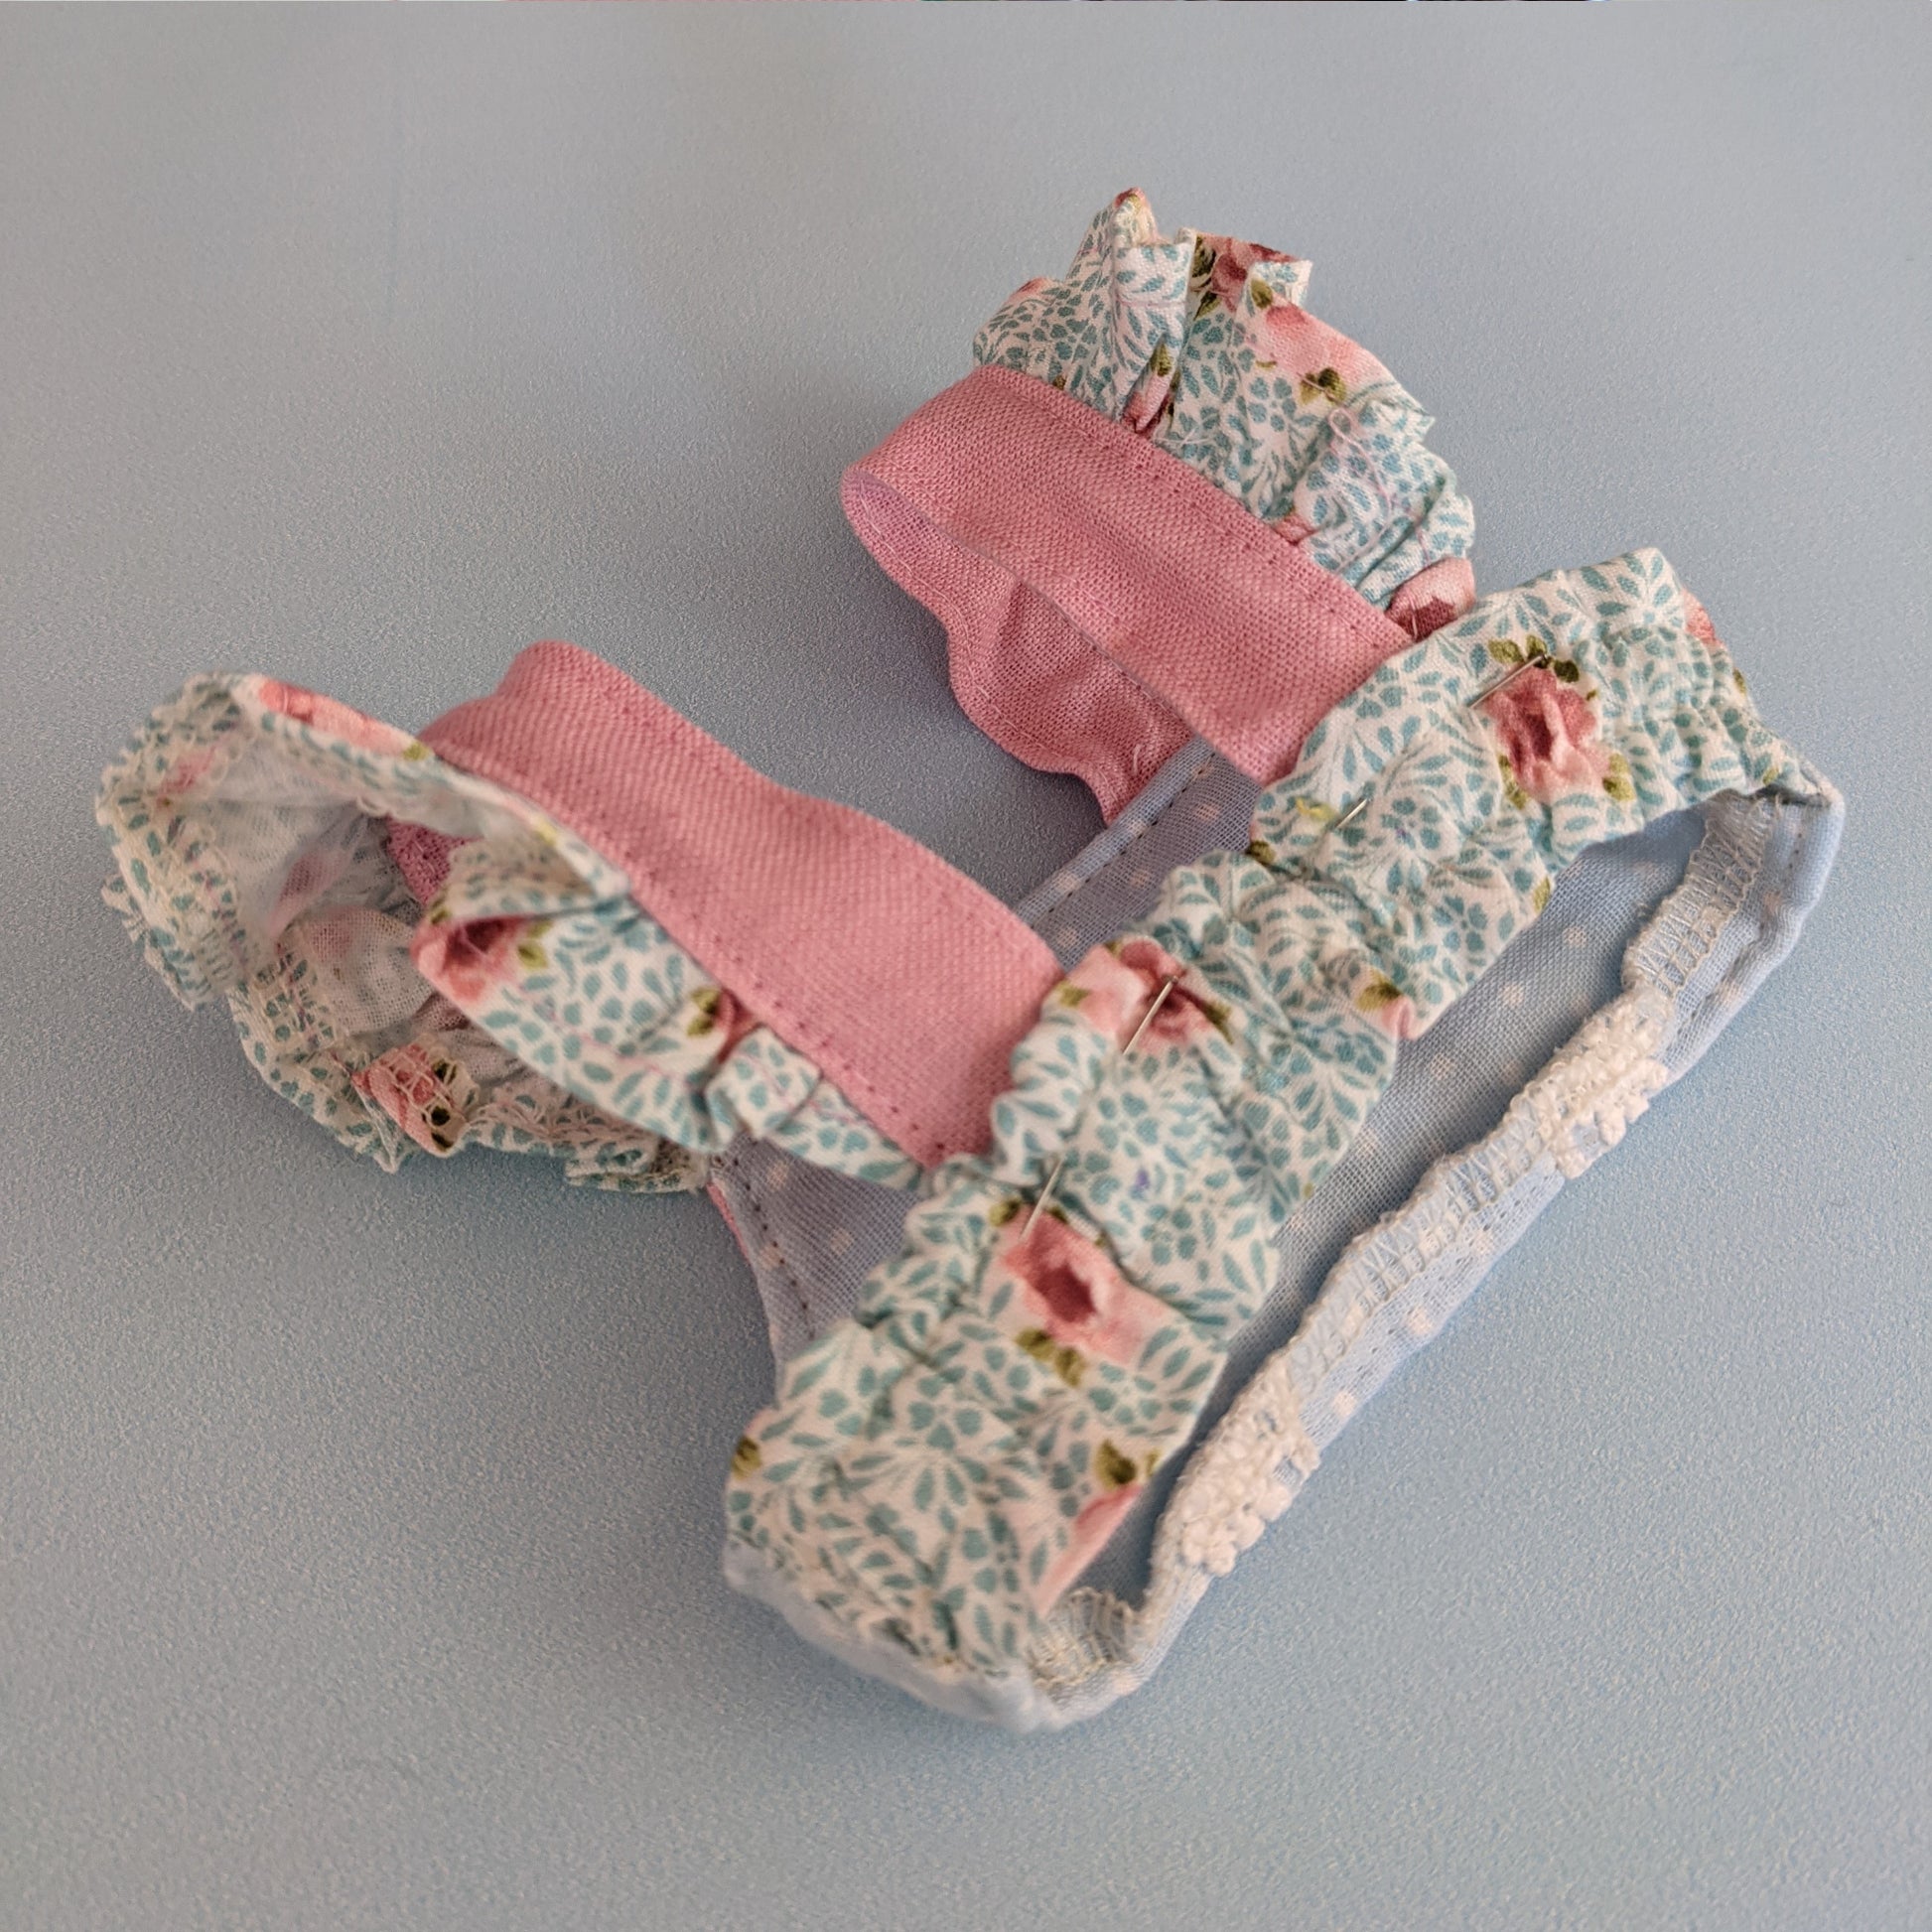
Closing the Back Section
Fold the back panel and stitch it closed with a one centimeter seam allowance. Press the seam open so it sits centrally and smoothly.
Insert elastic into the back casing. Use a safety pin to guide it through, ensuring equal length remains on both sides.
Secure both ends of the elastic before continuing to prevent it from pulling through.
Assembling the Bodice
Close the underarm seams first. Leave the hem open at this stage to make sleeve insertion easier.
Insert the flutter sleeves into the armholes, aligning seams carefully. Pin in place before sewing.
Once attached, stitch across the top and secure the sleeve insertion.
Trim seam allowances at the underarm if needed, but avoid cutting into side seams.
Turn the bodice right side out and press to shape.
Finishing the Hem
Finish the lower edge by overlocking and then topstitching it in place.
Alternatively, a lace trim can be added before closing the hem for a decorative finish.
Attaching Front and Final Construction
Place the back panel between the front lining and outer front pieces, aligning all edges carefully.
Pin and sew the side seams, ensuring the back is sandwiched securely between layers.
Trim only the underarm seam allowances if necessary. Avoid trimming side seams.
Turn the top right side out and press all edges.
Final Assembly and Straps
Position the straps on the bodice and adjust for correct fit on the doll. Ensure symmetry on both sides before securing.
Sew straps in place. Buttons can be added as an optional closure, but are not required since the top is designed to slip on.
Final Notes
At this stage, the Connie top is complete. The design combines a structured front, elasticated back, and soft flutter sleeves for a balanced silhouette.
Although the construction has multiple components, the key to accuracy is correct orientation of straps, even gathering on sleeves, and careful alignment of layers during assembly.
This is a really cute pattern; I am especially fond of the option having the plain (non-gathered) skirt yoke. It's pretty easy to make, the only problem I had (and thus the 4-star rating) is the wordiness of the instructions. The total download ran to a total of 31 pages! While a portion of those pages were dedicated to the pattern pieces, about 2/3 were instructions. In order to print the instructions I needed, I cherry-picked the most important ones and ended up with 5 pages of instructions. Sometimes less is more. Overall though, a very cute pattern, and I do recommend it.
super fácil de seguir y los videos ayudan muchísimo me encantó
very cute, can't wait to make
Very cute outfit.. Reasonable prices.