


MIMI PINAFORE
MIMI PINAFORE


Regular price
$4.50 USD
Regular price
$7.50 USD
Sale price
$4.50 USD
Unit price
per
Couldn't load pickup availability
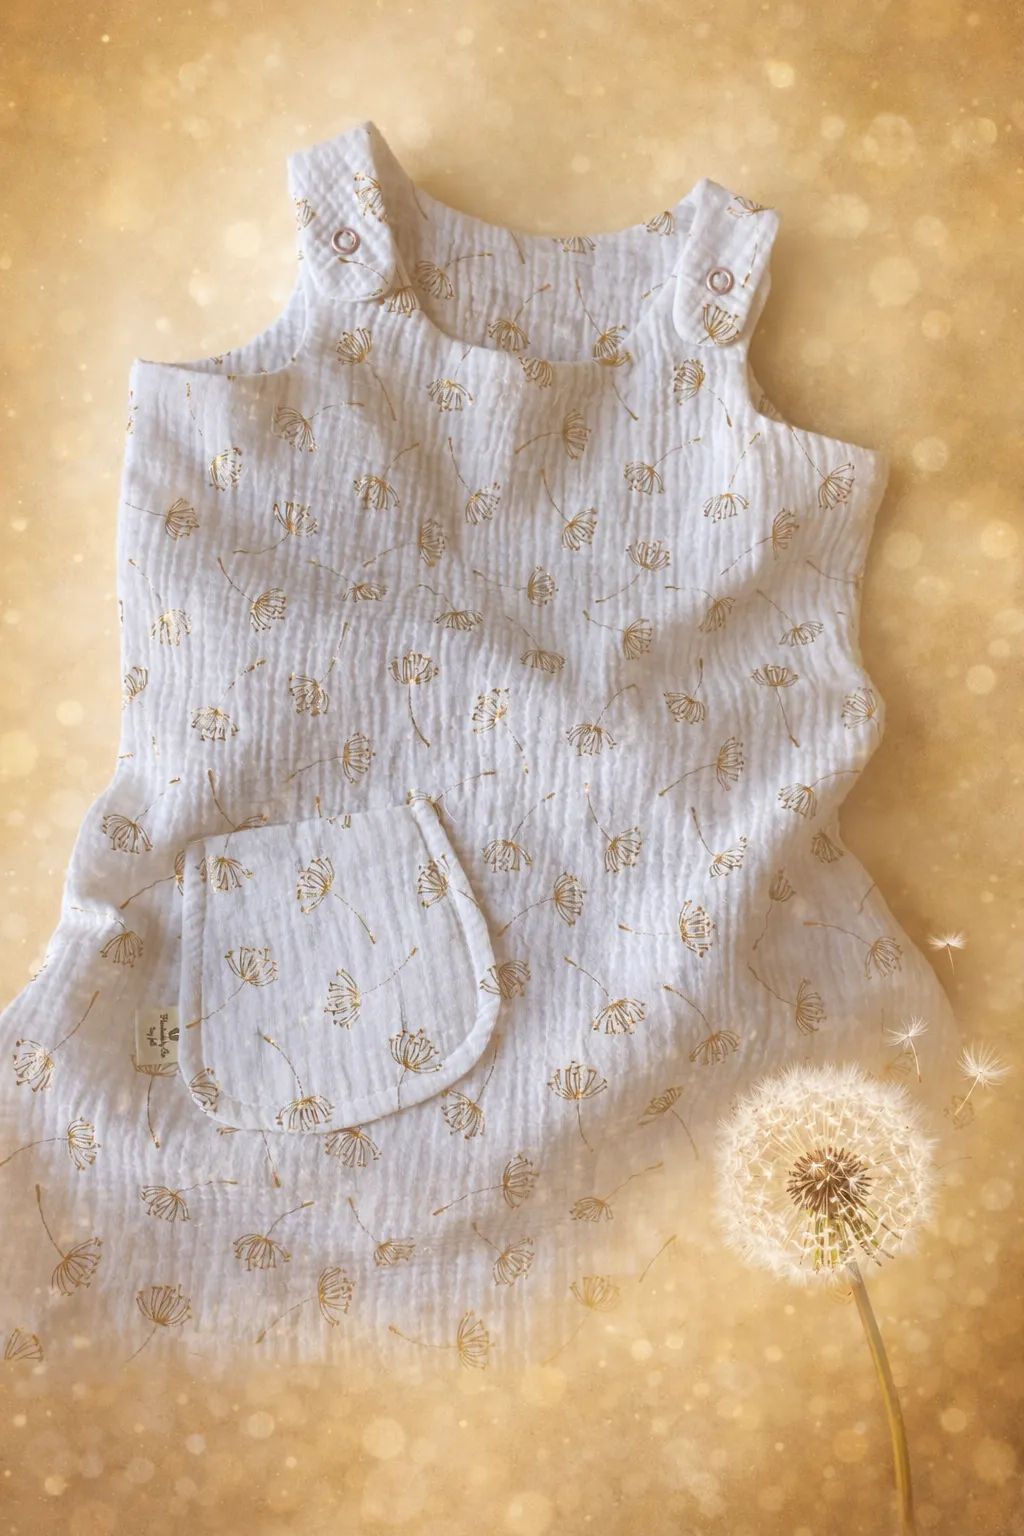
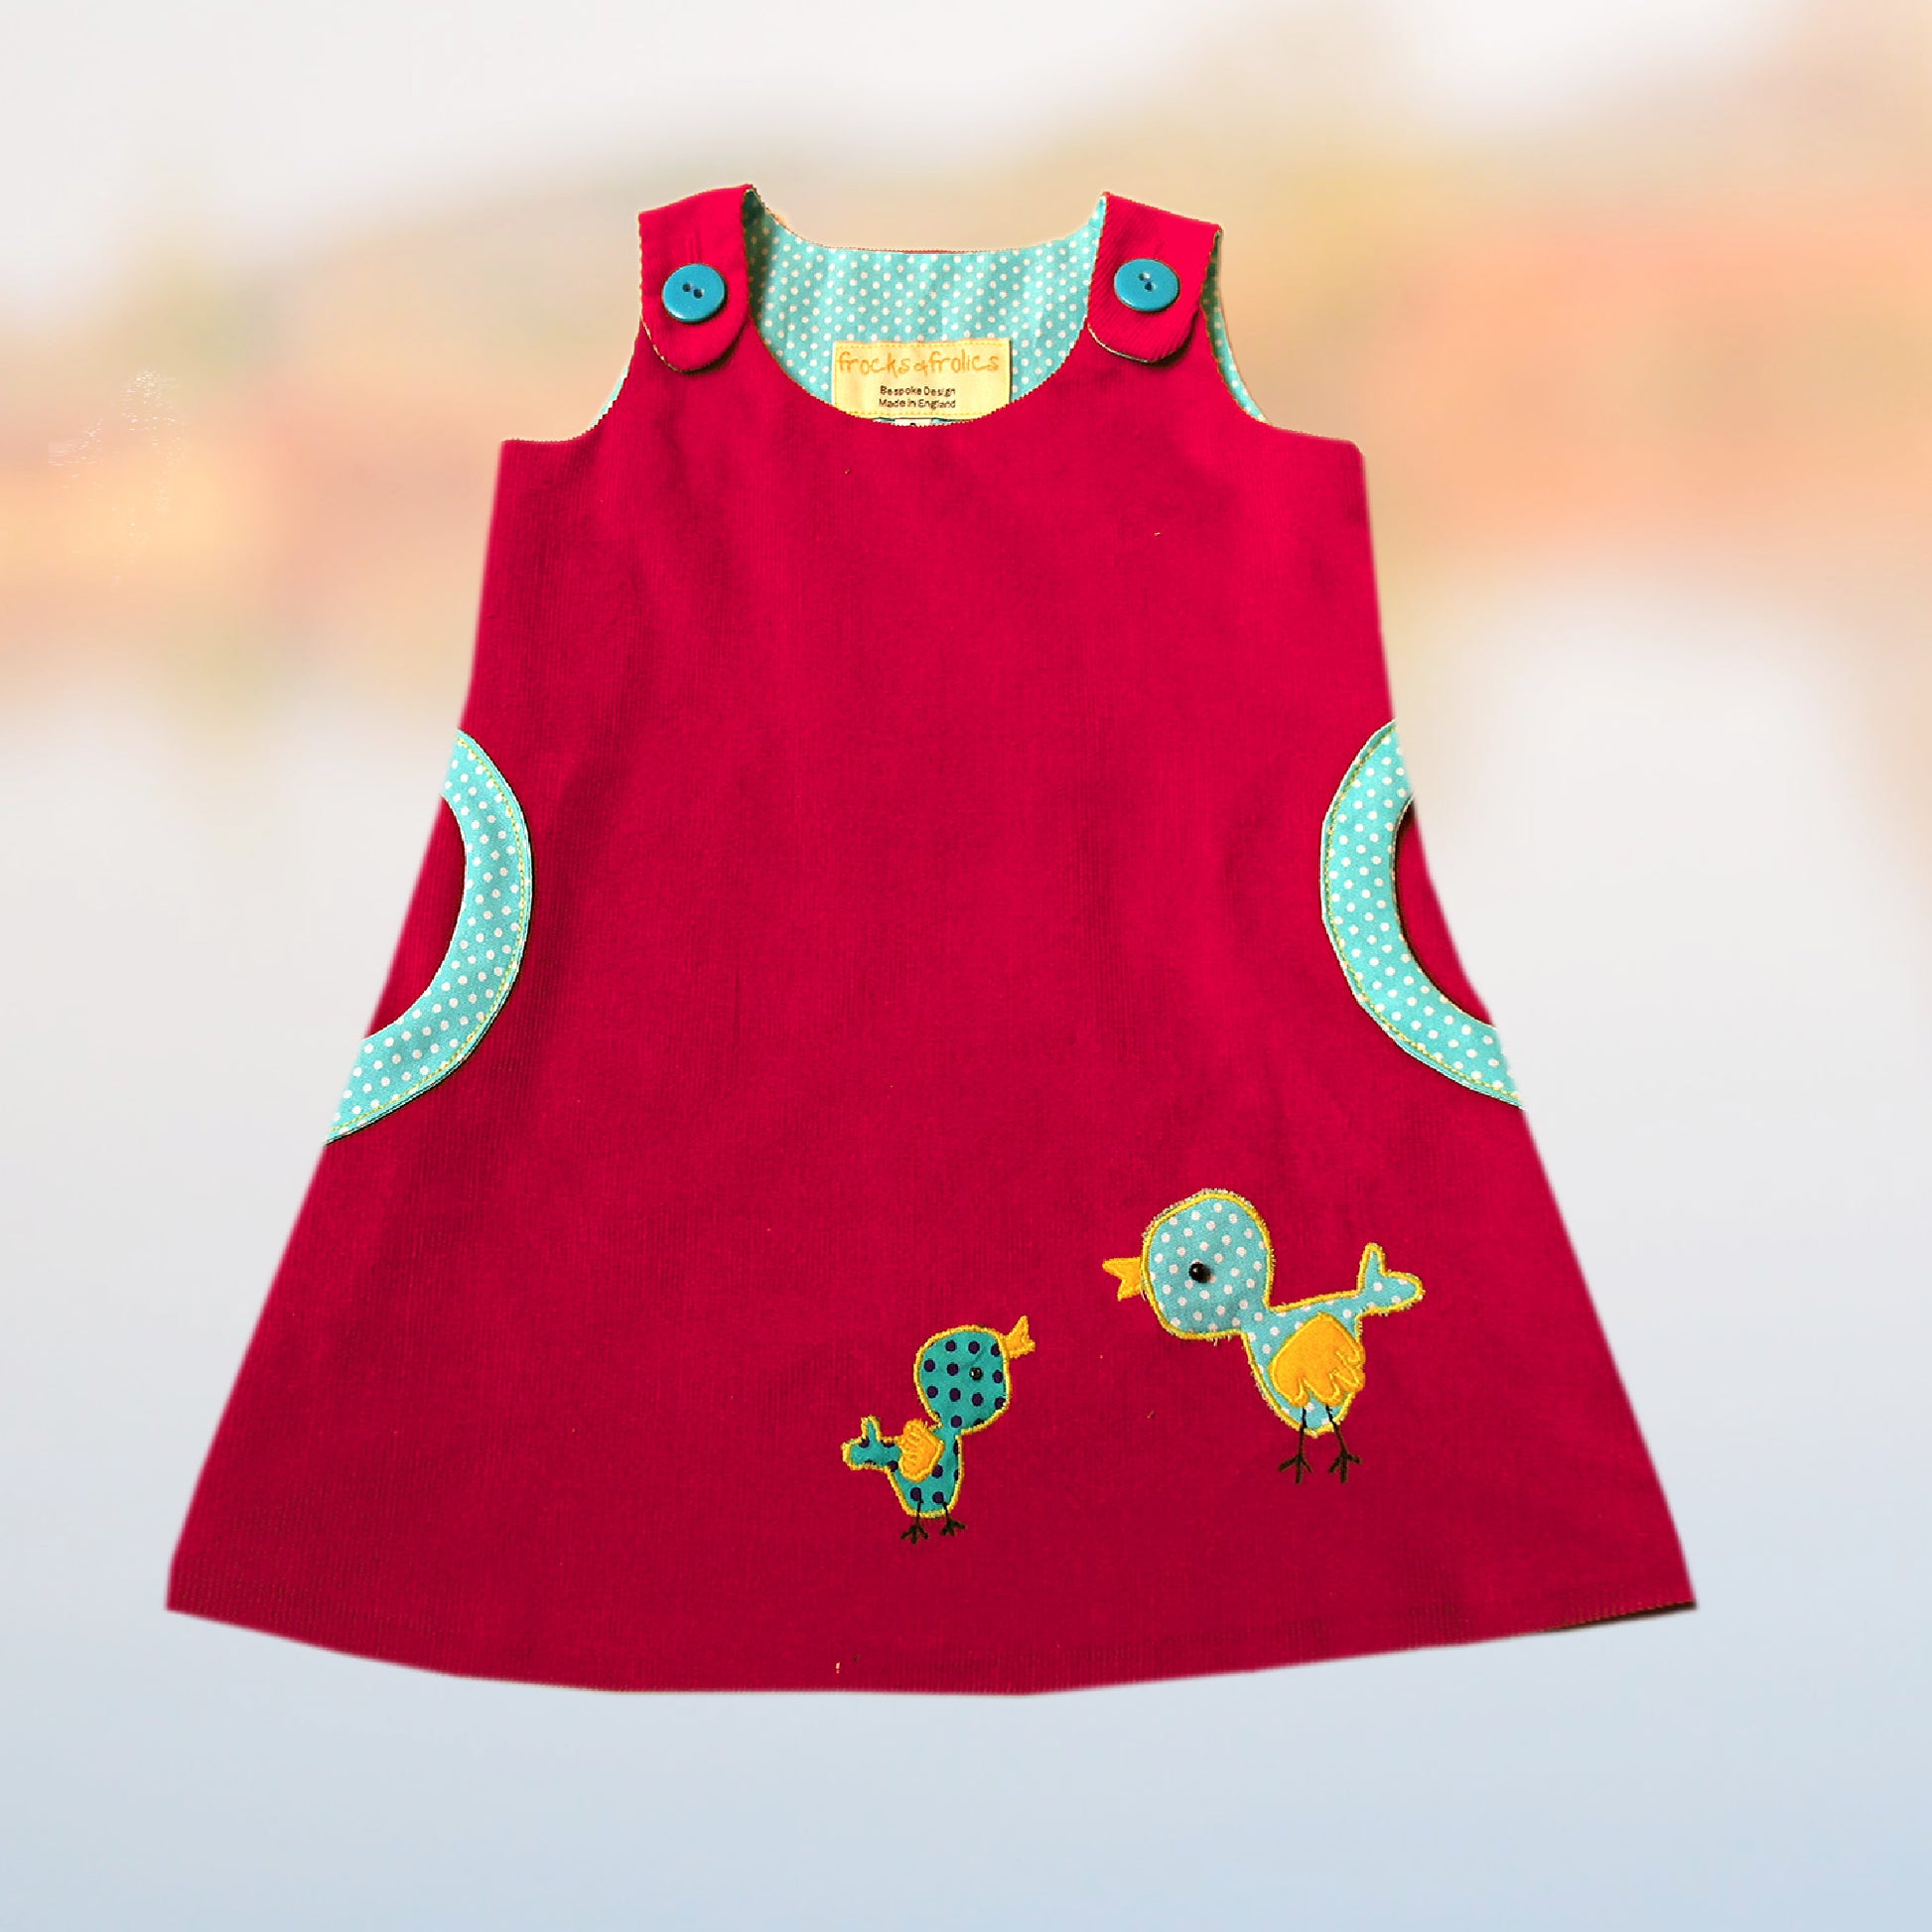
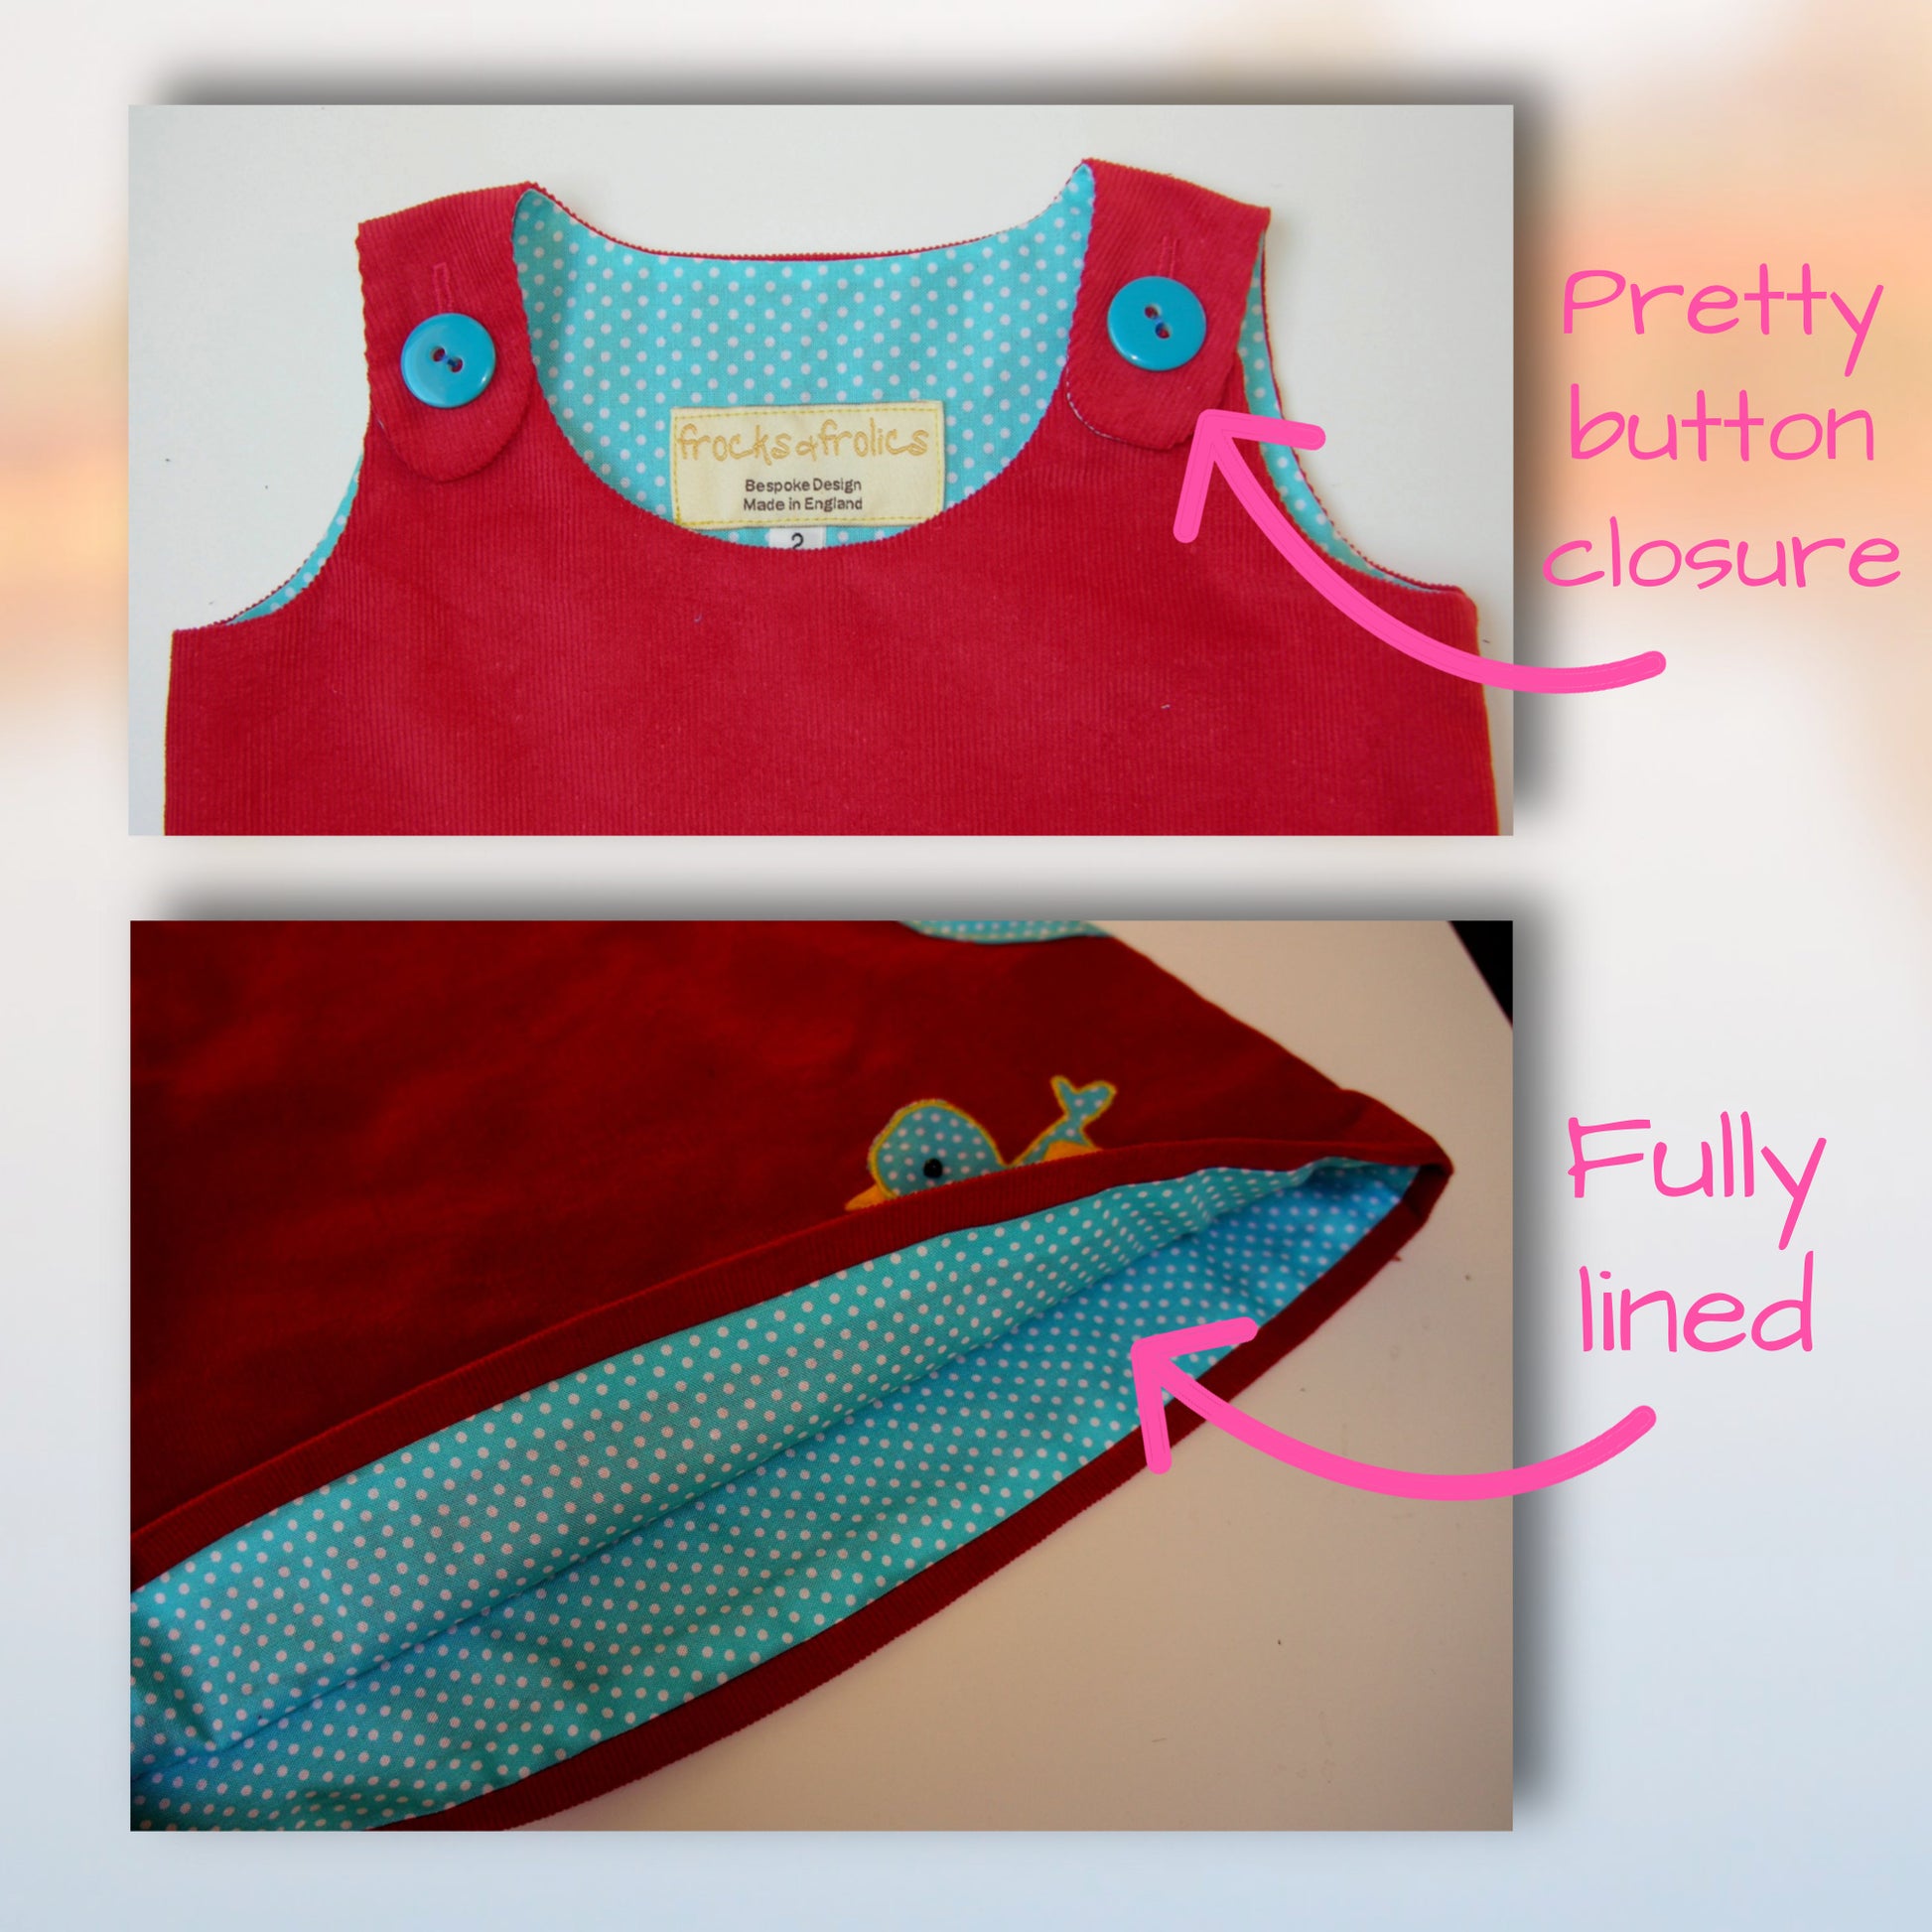
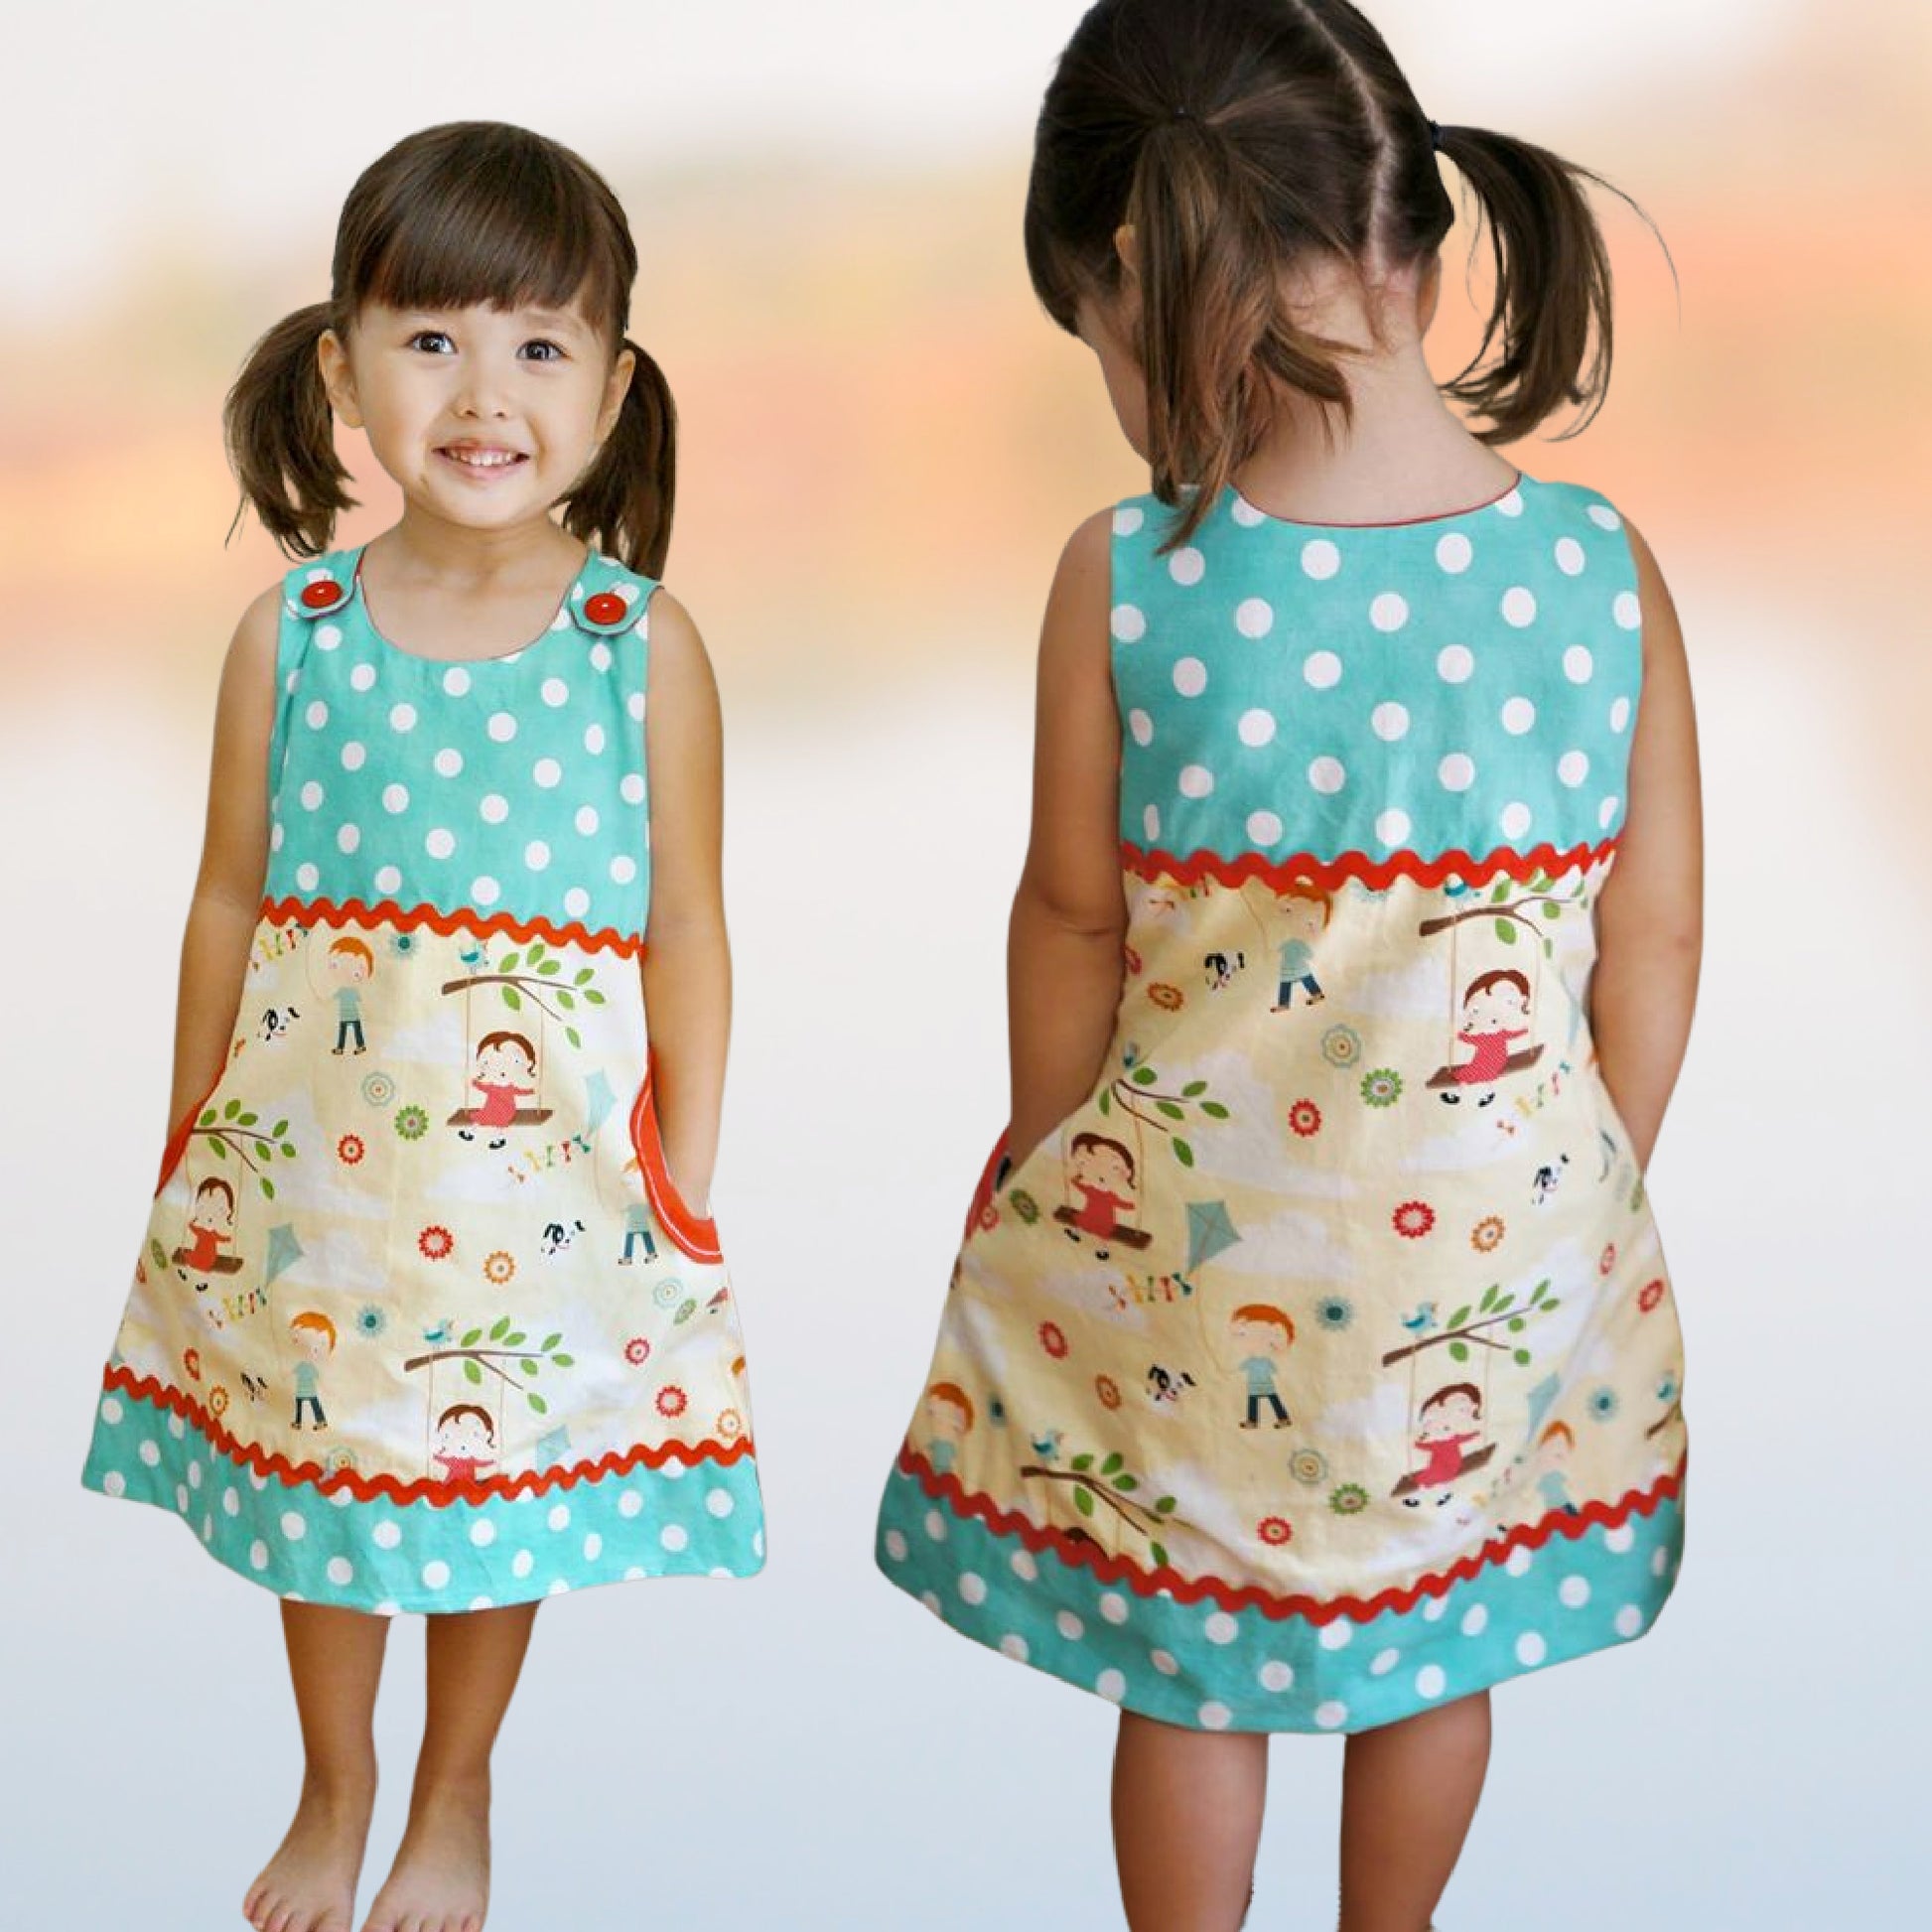
Mimi is a charmingly drafted, fully lined dungaree dress with a practical shoulder closure that makes dressing quick and easy. The beautifully rounded side pockets add a playful touch and can be customized to create adorable sunflower or apple side pockets, giving your make a fun, handmade twist.
Perfect for beginners, this easy pattern features a gentle A‑line silhouette and requires no serger. To watch Marina’s step‑by‑step video tutorials, simply scroll down and follow along to enjoy a smooth, confidence‑boosting sewing experience.
Pattern Download Includes
Pattern Download Includes
Design Options
Design Options
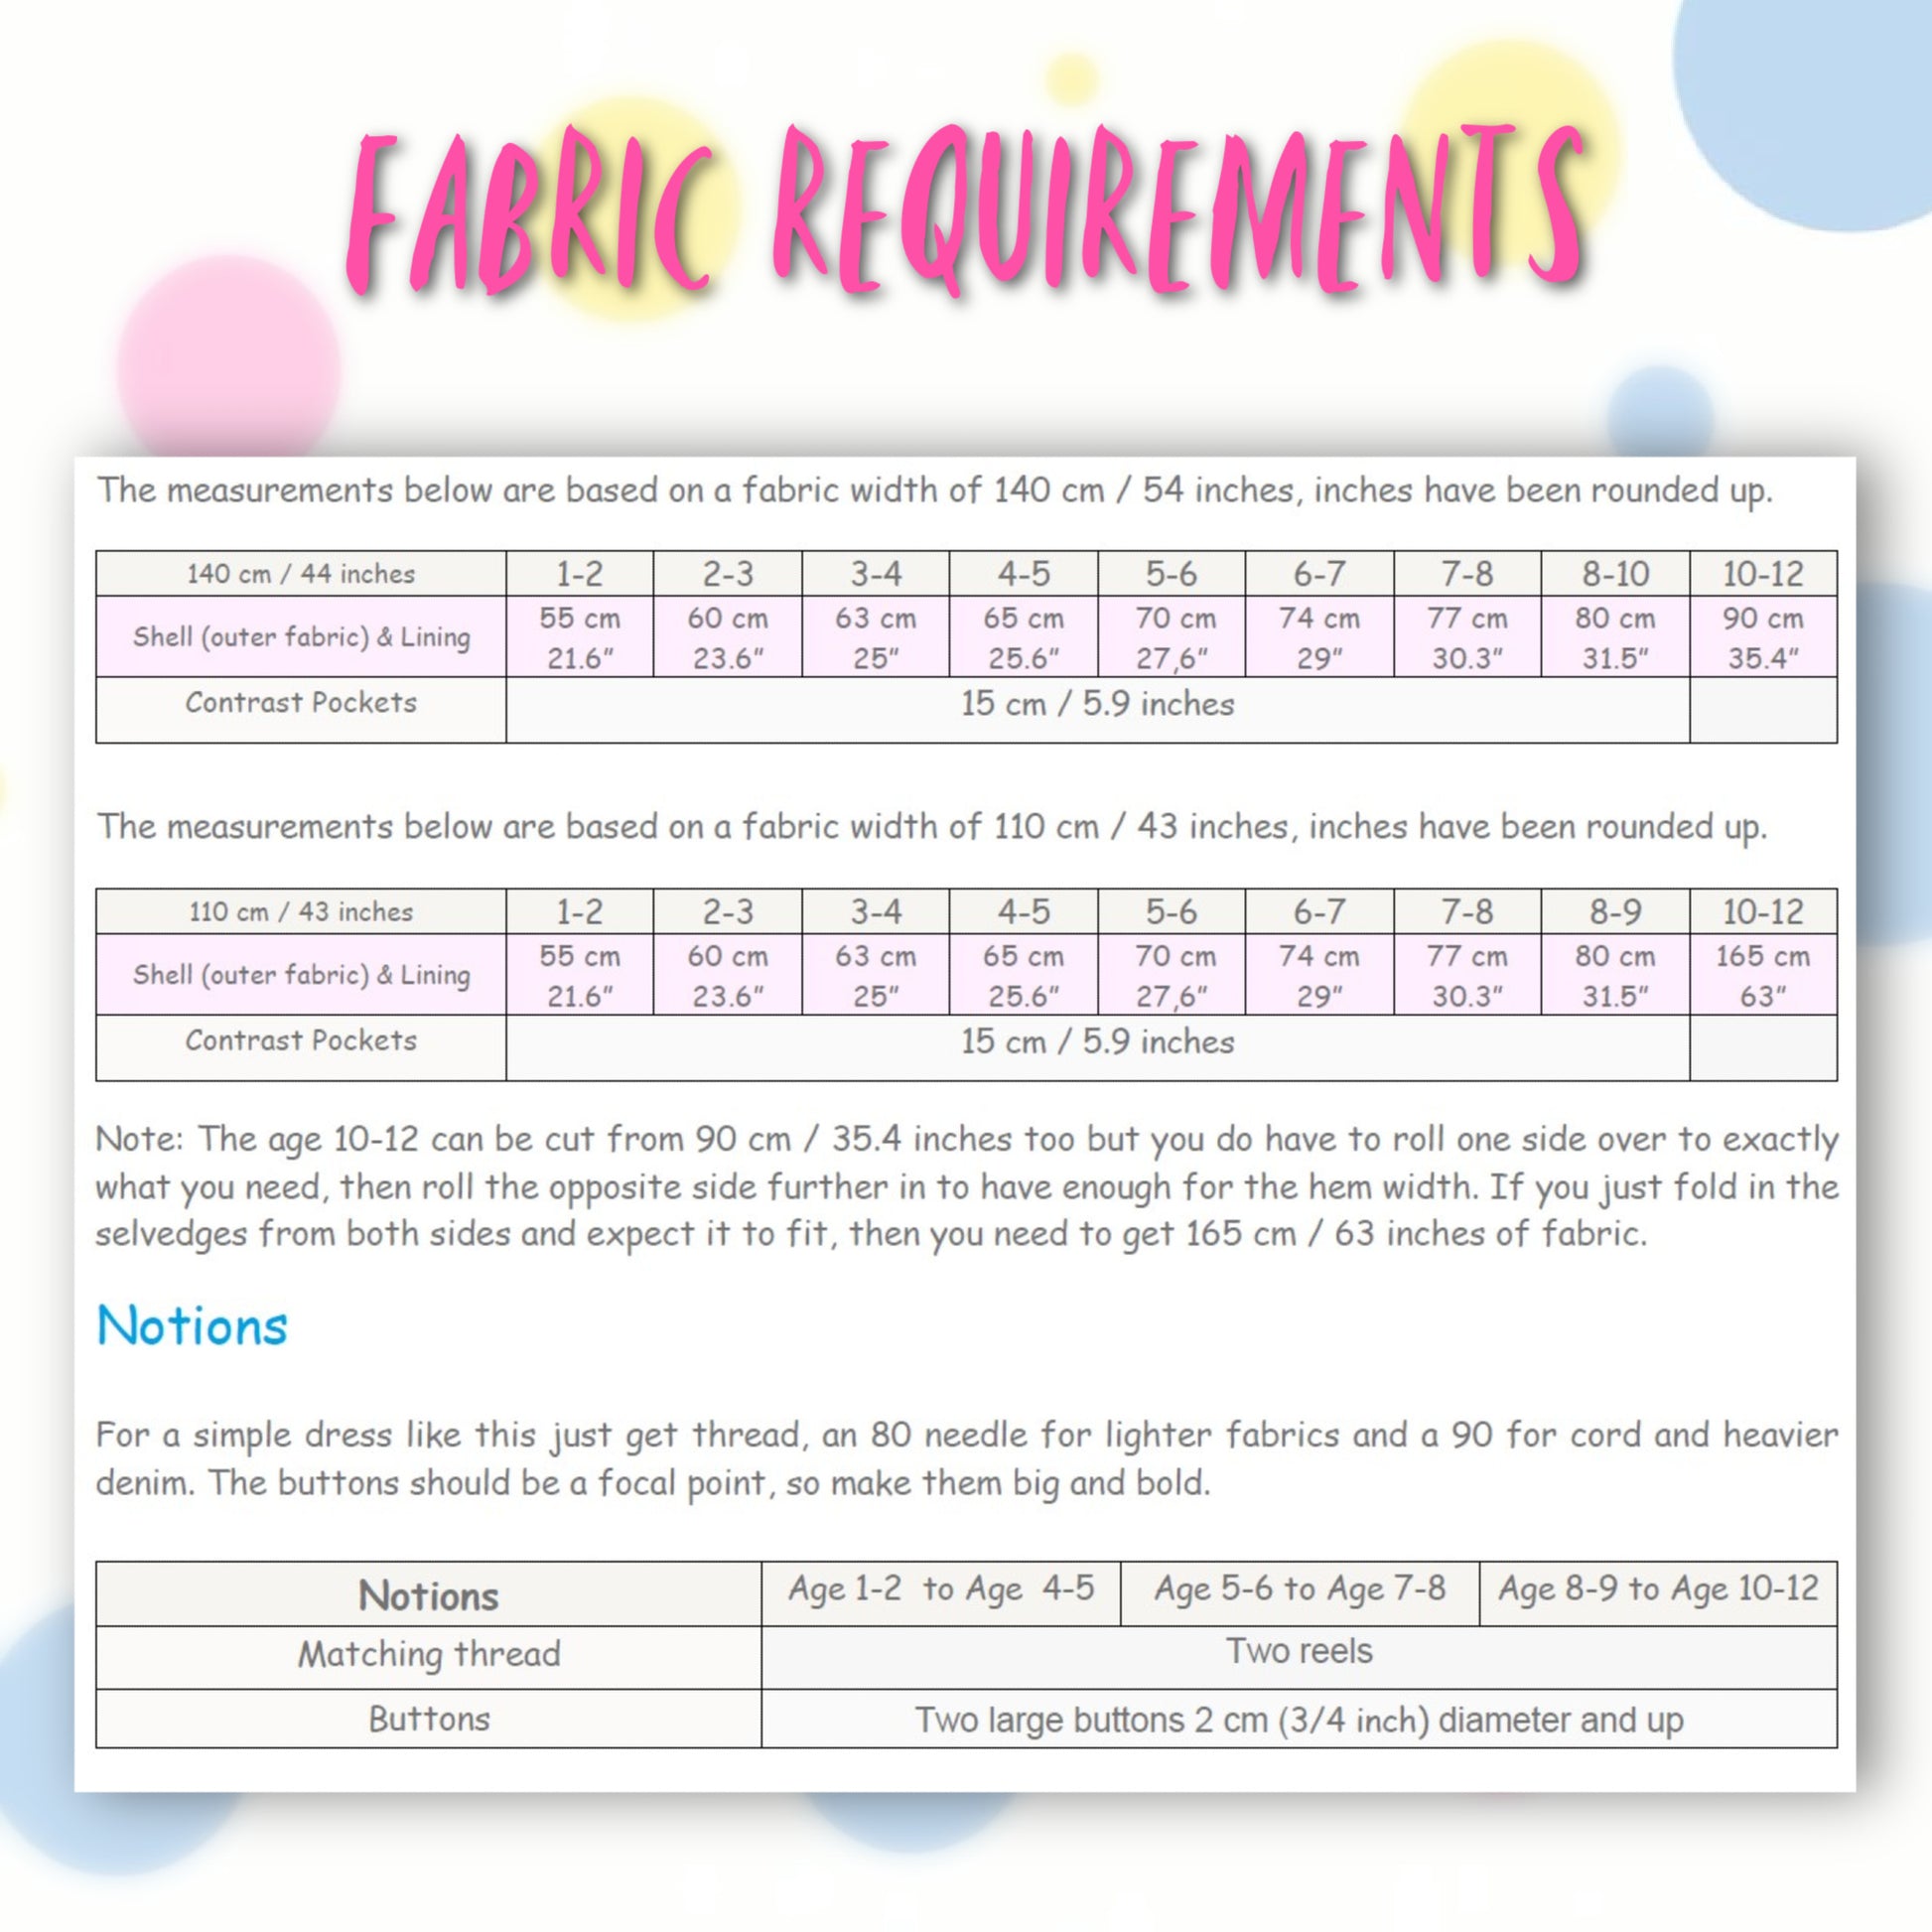
Fabric Requirements
Fabric Requirements
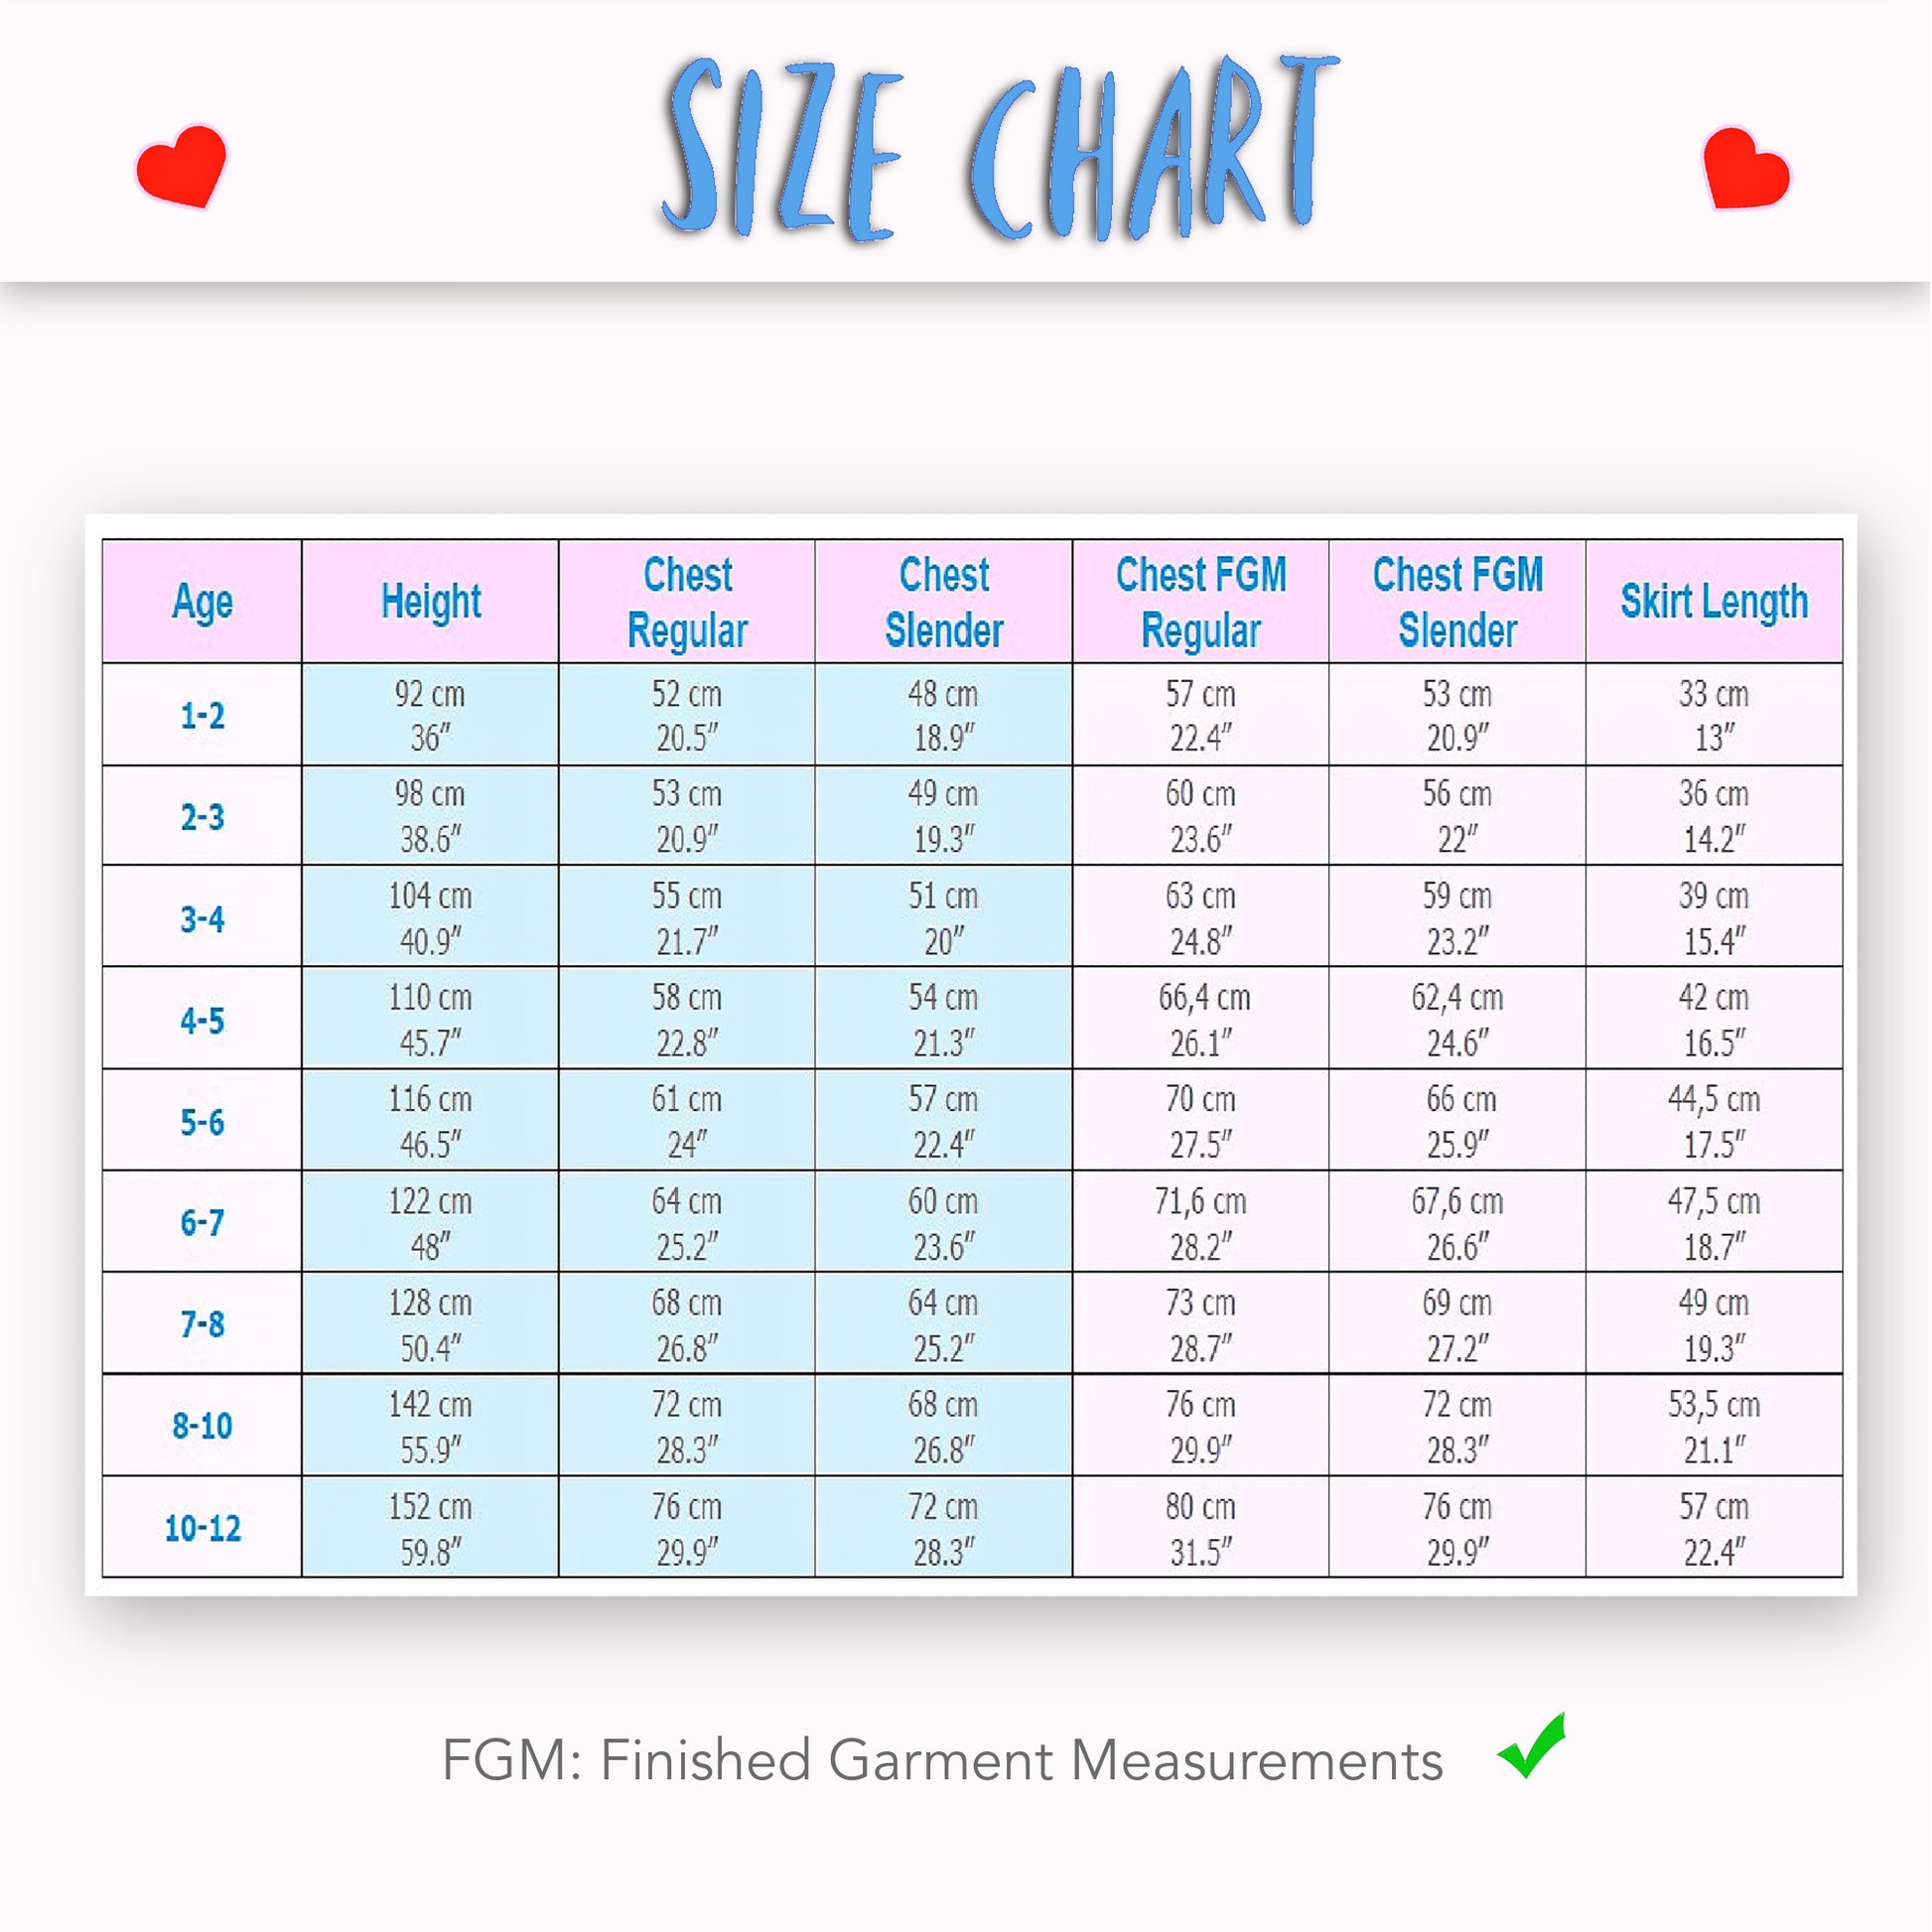
Available Sizes
Available Sizes
Please Read
Please Read


STEP-BY-STEP VIDEO TUTORIALS

THE PATTERN

MIMI TUTORIAL

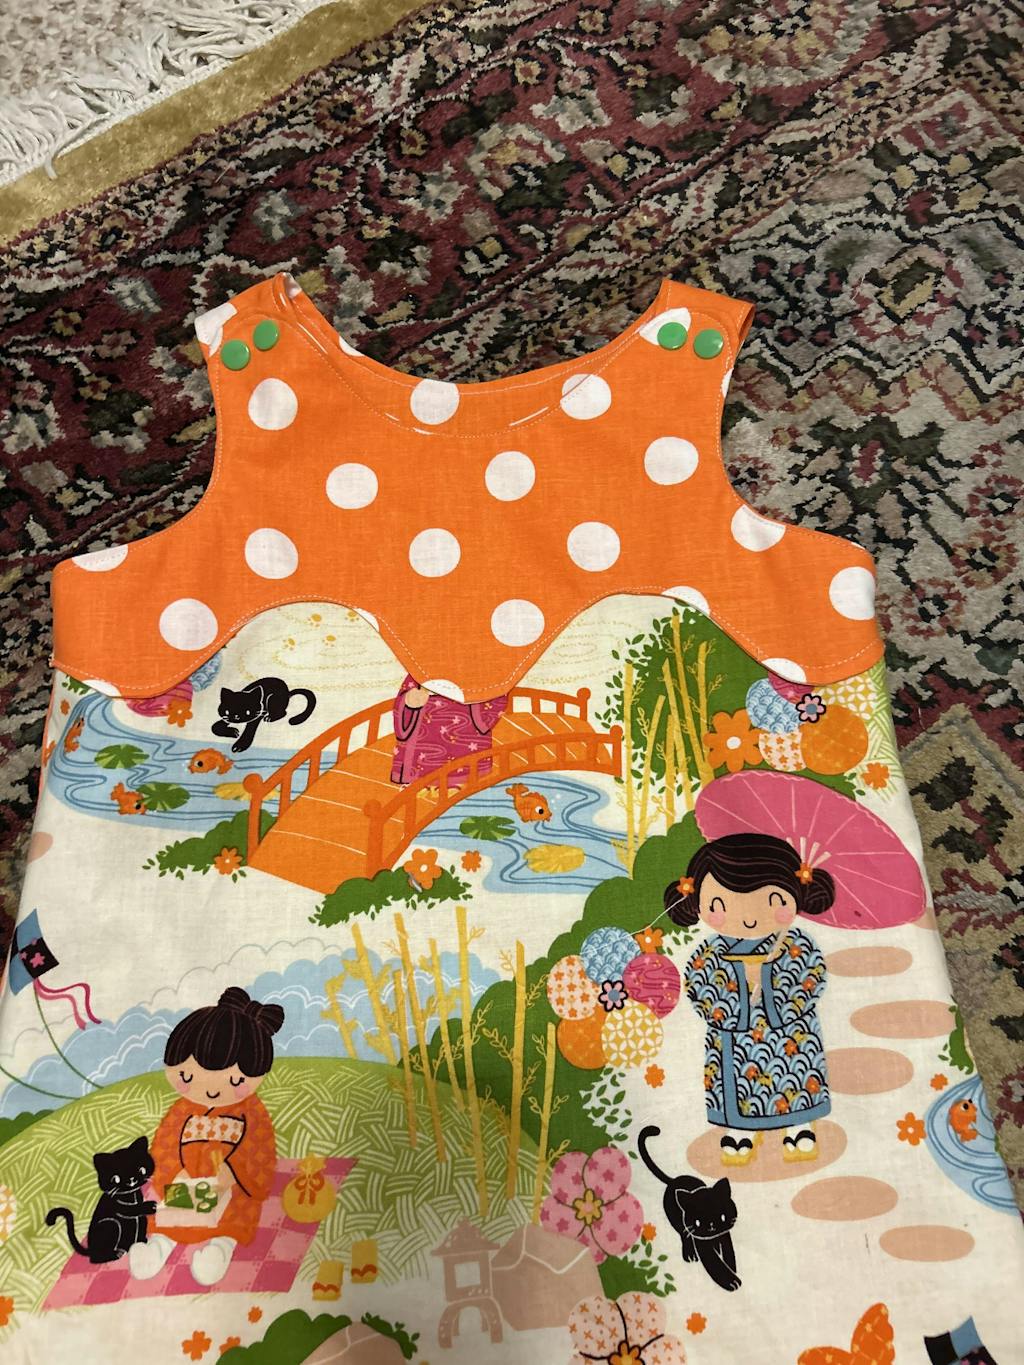
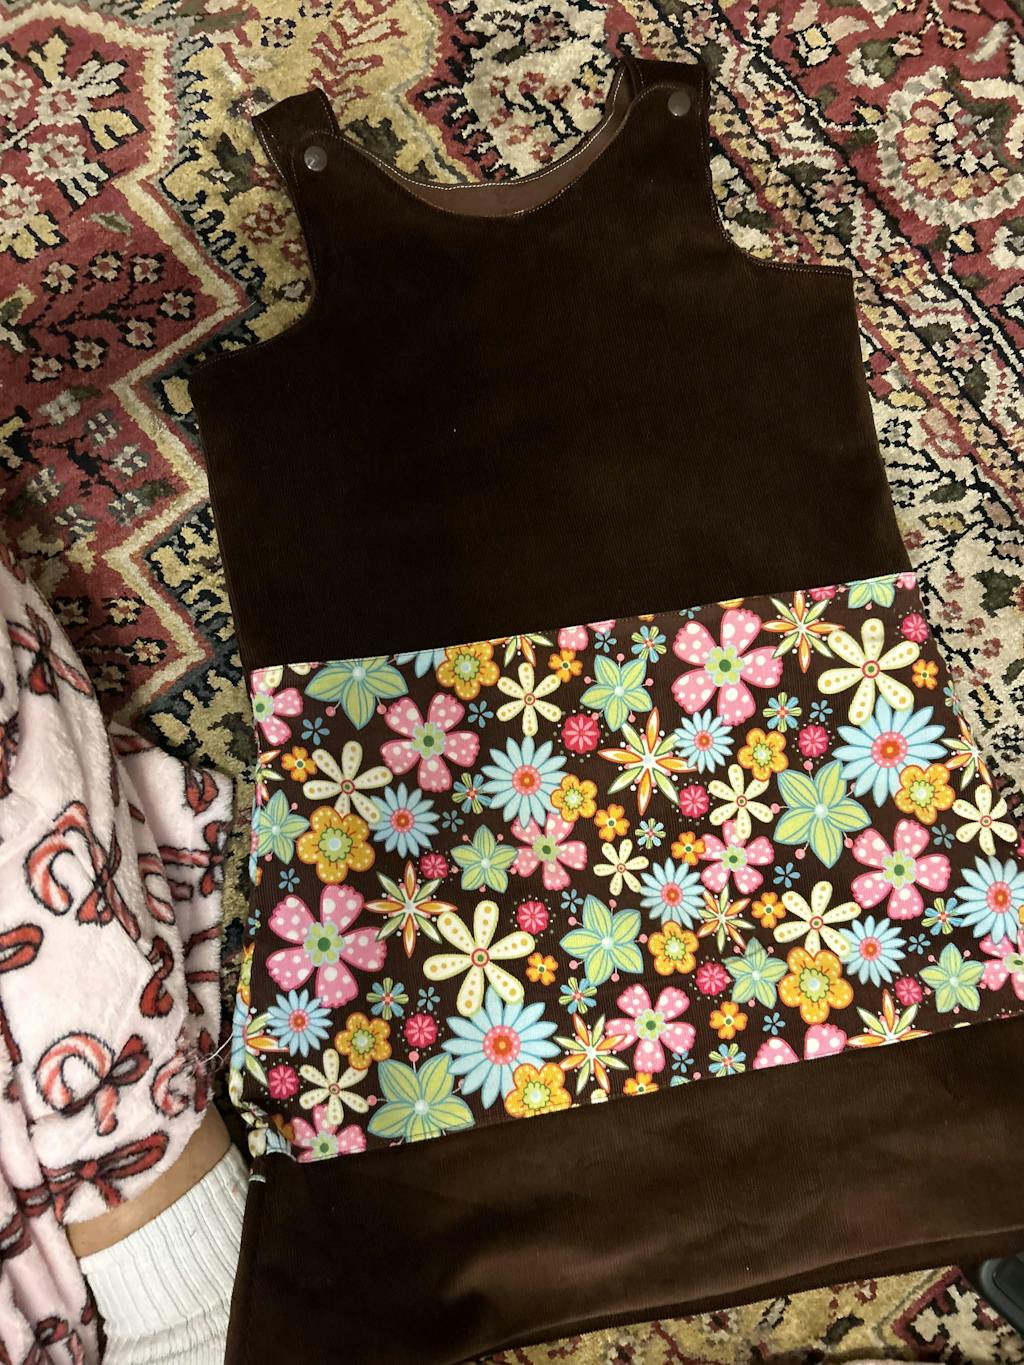
COLOUR BLOCKING

SCALLOPED COLOUR BLOCKING

MIMI ORIGINAL VIDEO WITH BIRD APPLIQUE