All-in-One Tutorial!
Transcript for the video: Halloween Treat Basket All-In-One Tutorial
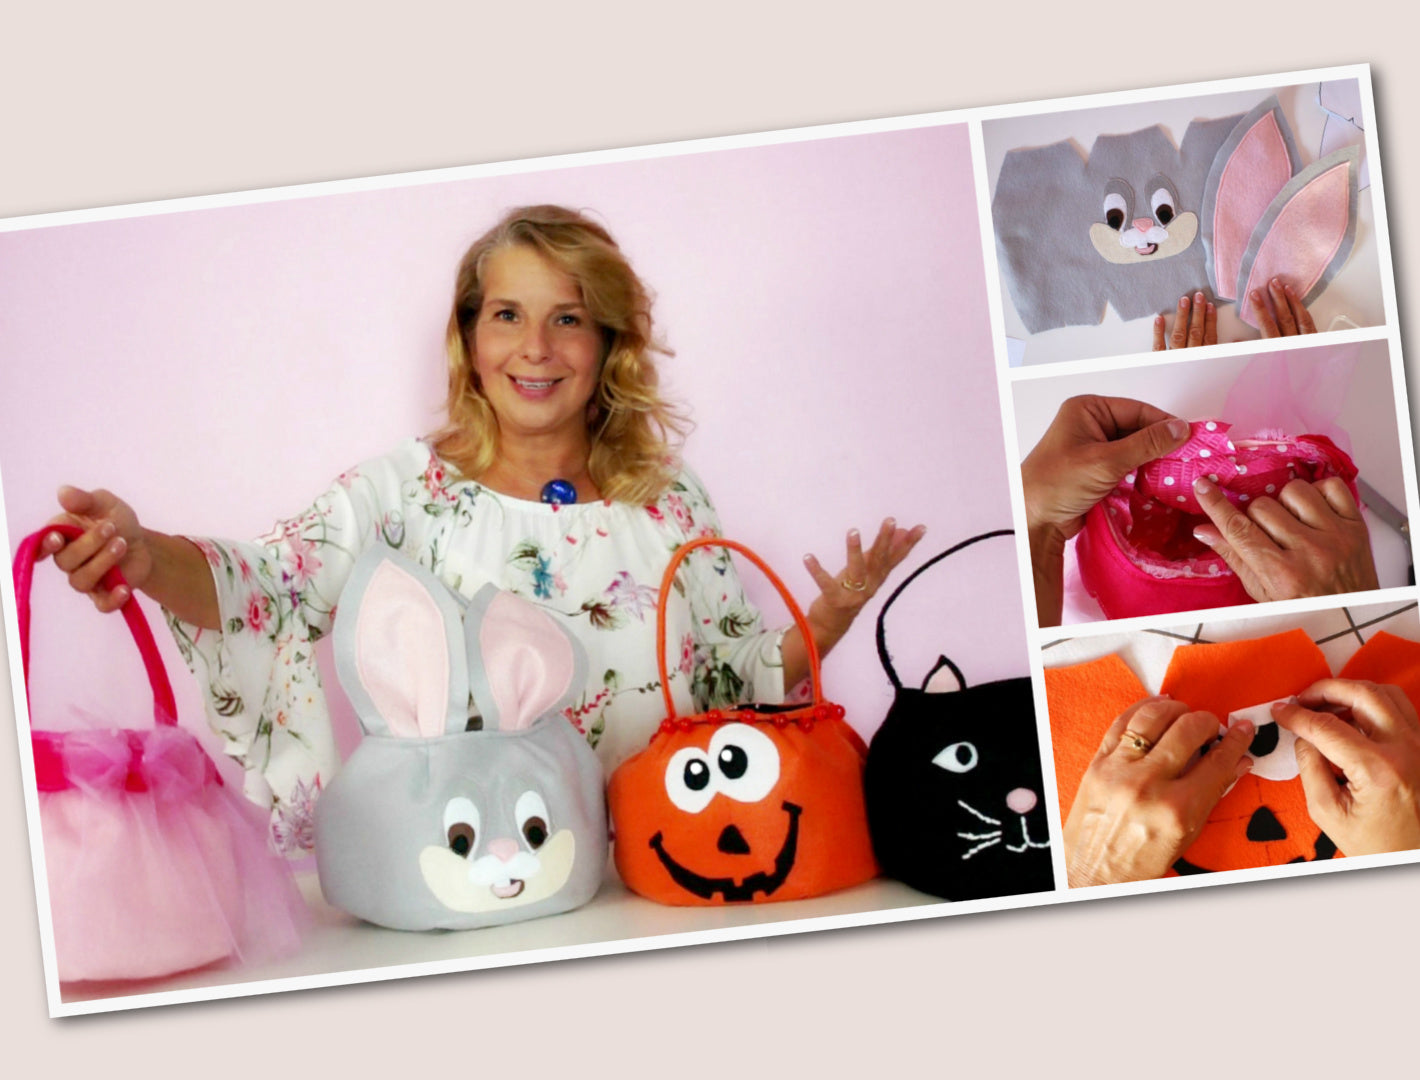
Hi, this is Marina from Frocks and Frolics, and today I'm going to show you how to make these beautiful trick-or-treat bags.
There are four variations, but they're all made from the same basic bag pattern, so don't worry—it's actually very easy.
You can make:
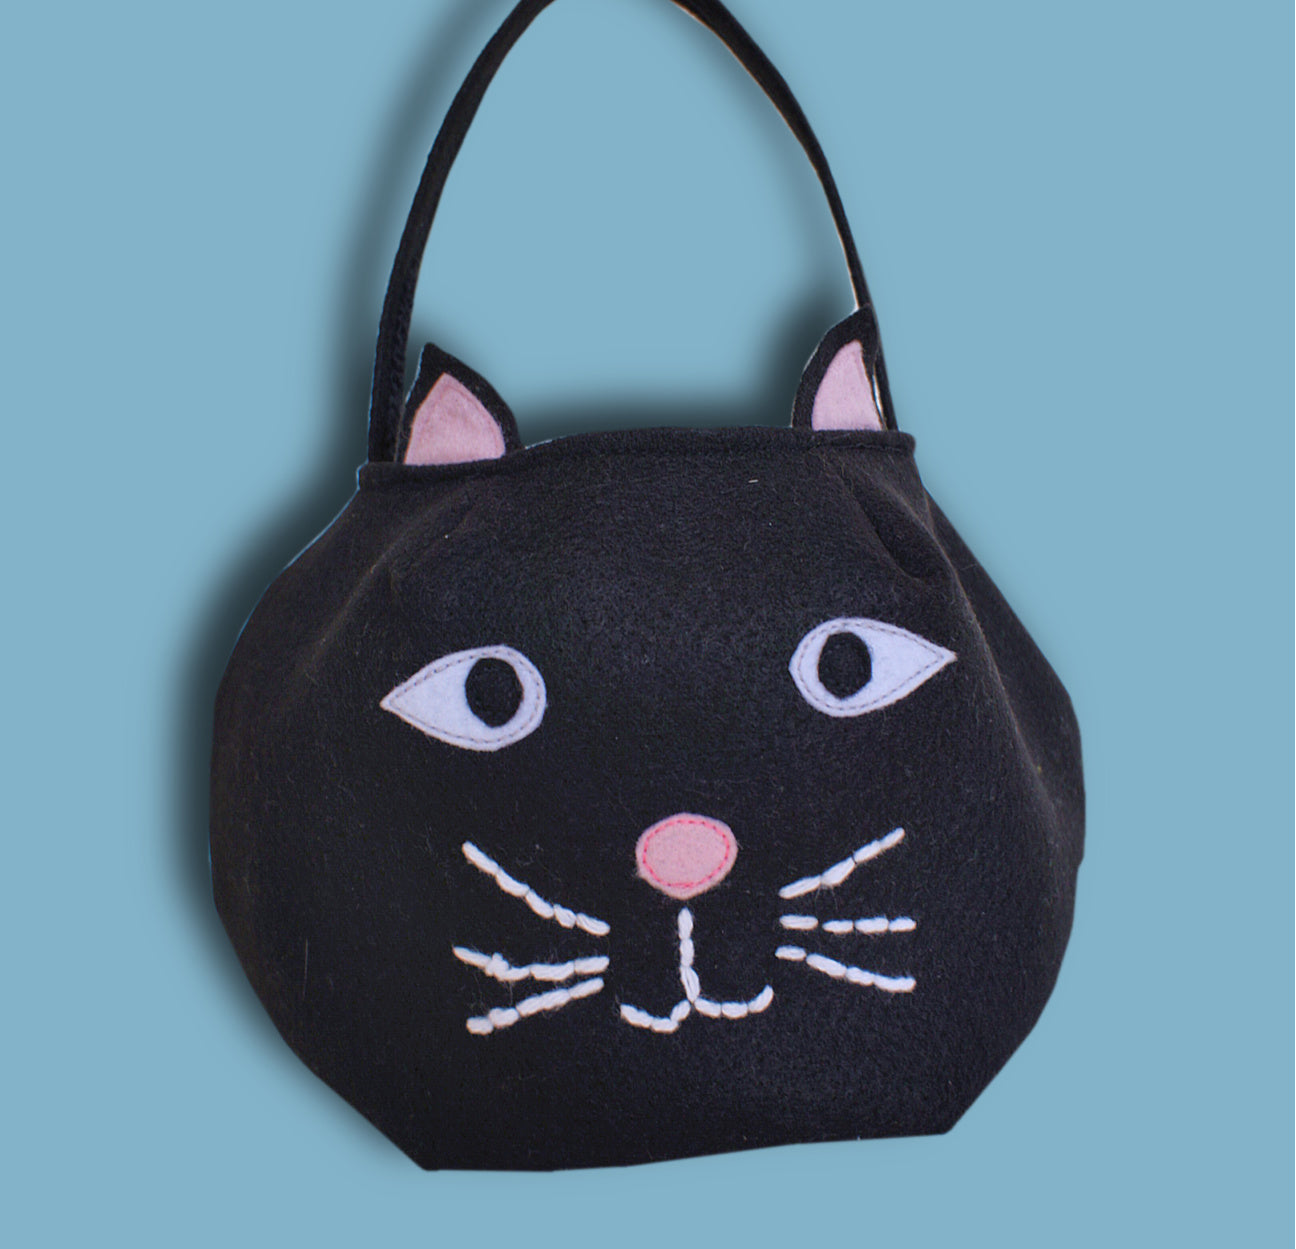
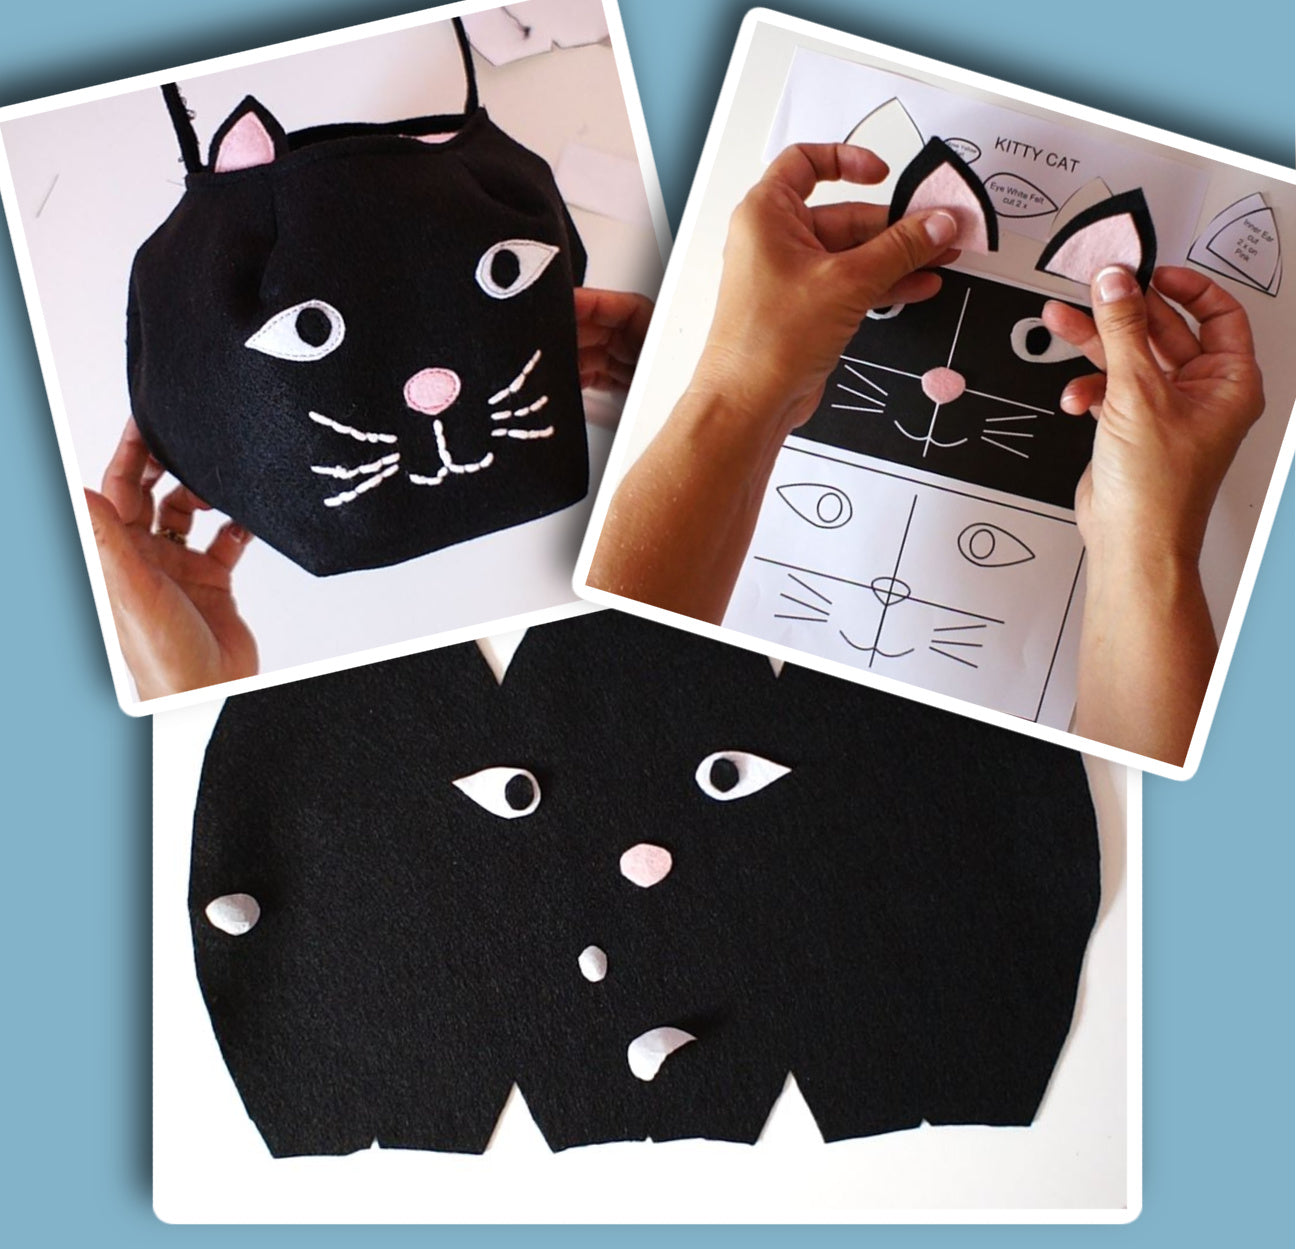
- A cat bag
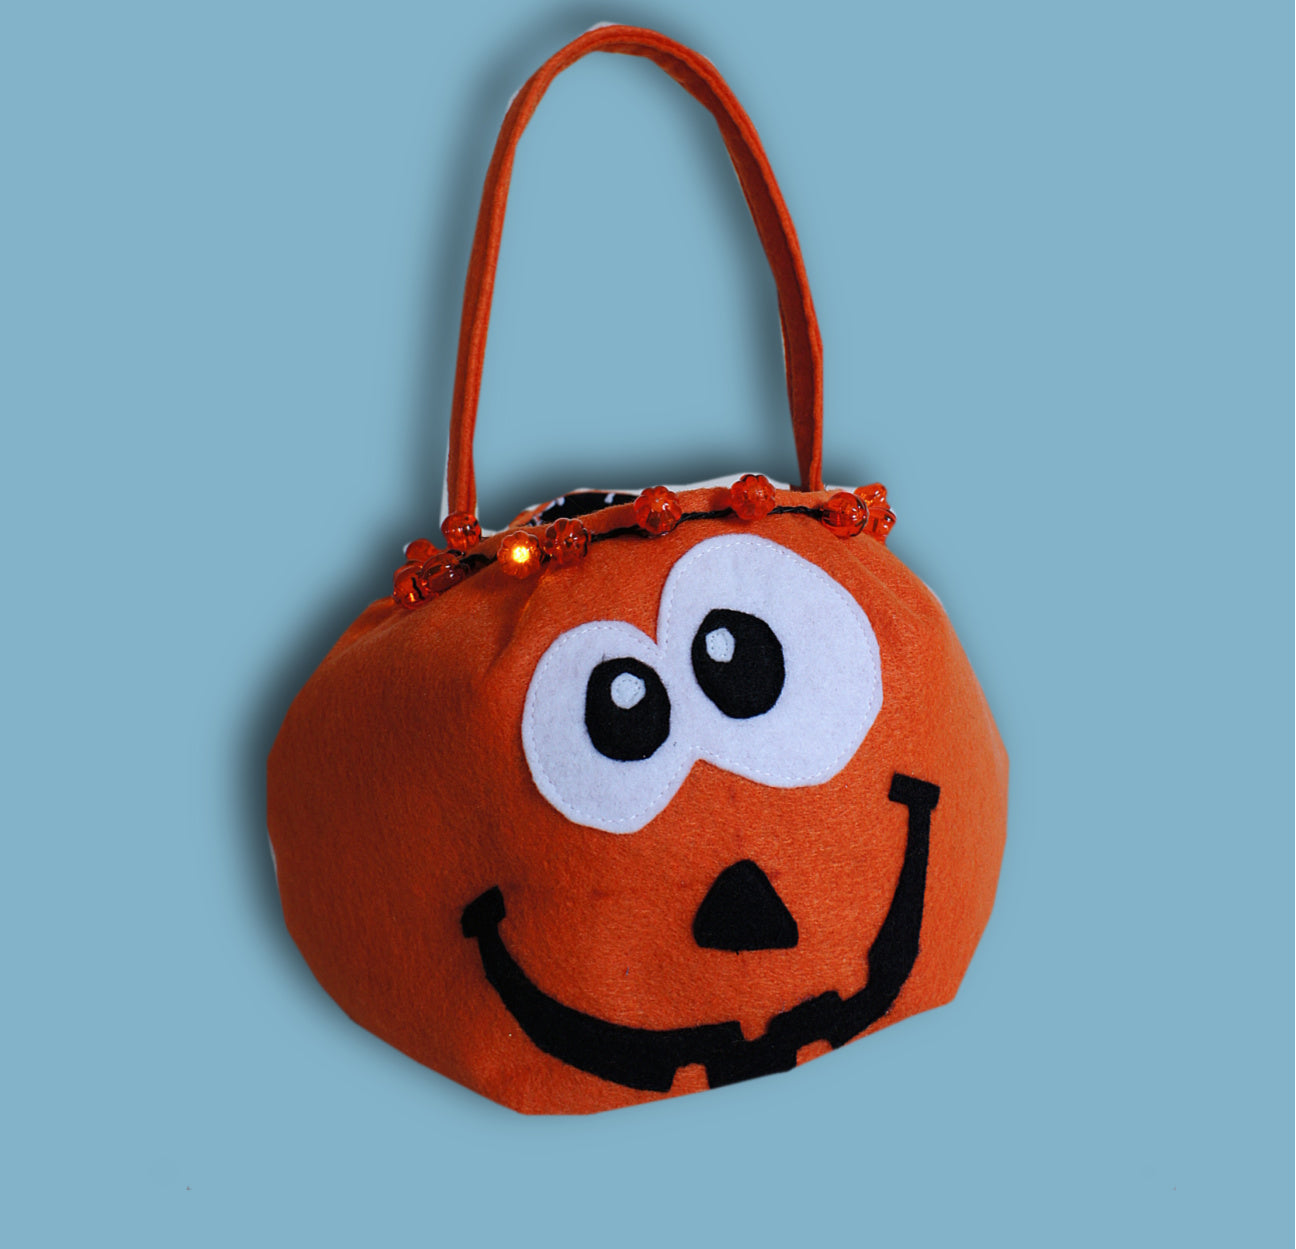
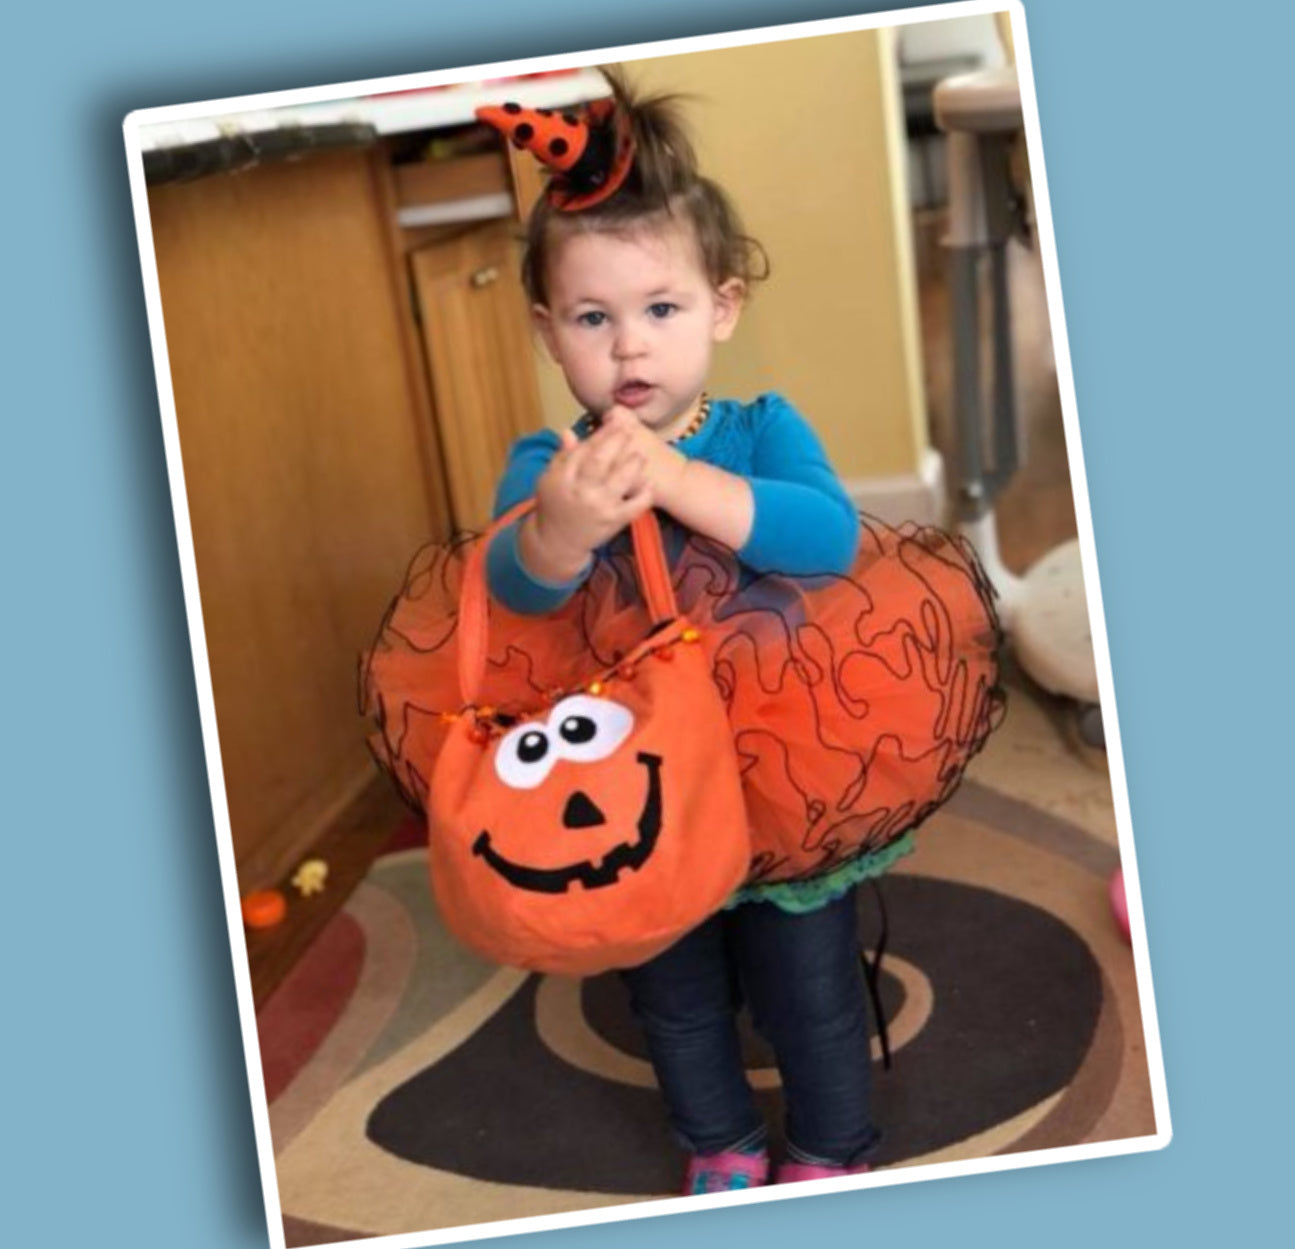
- A pumpkin bag
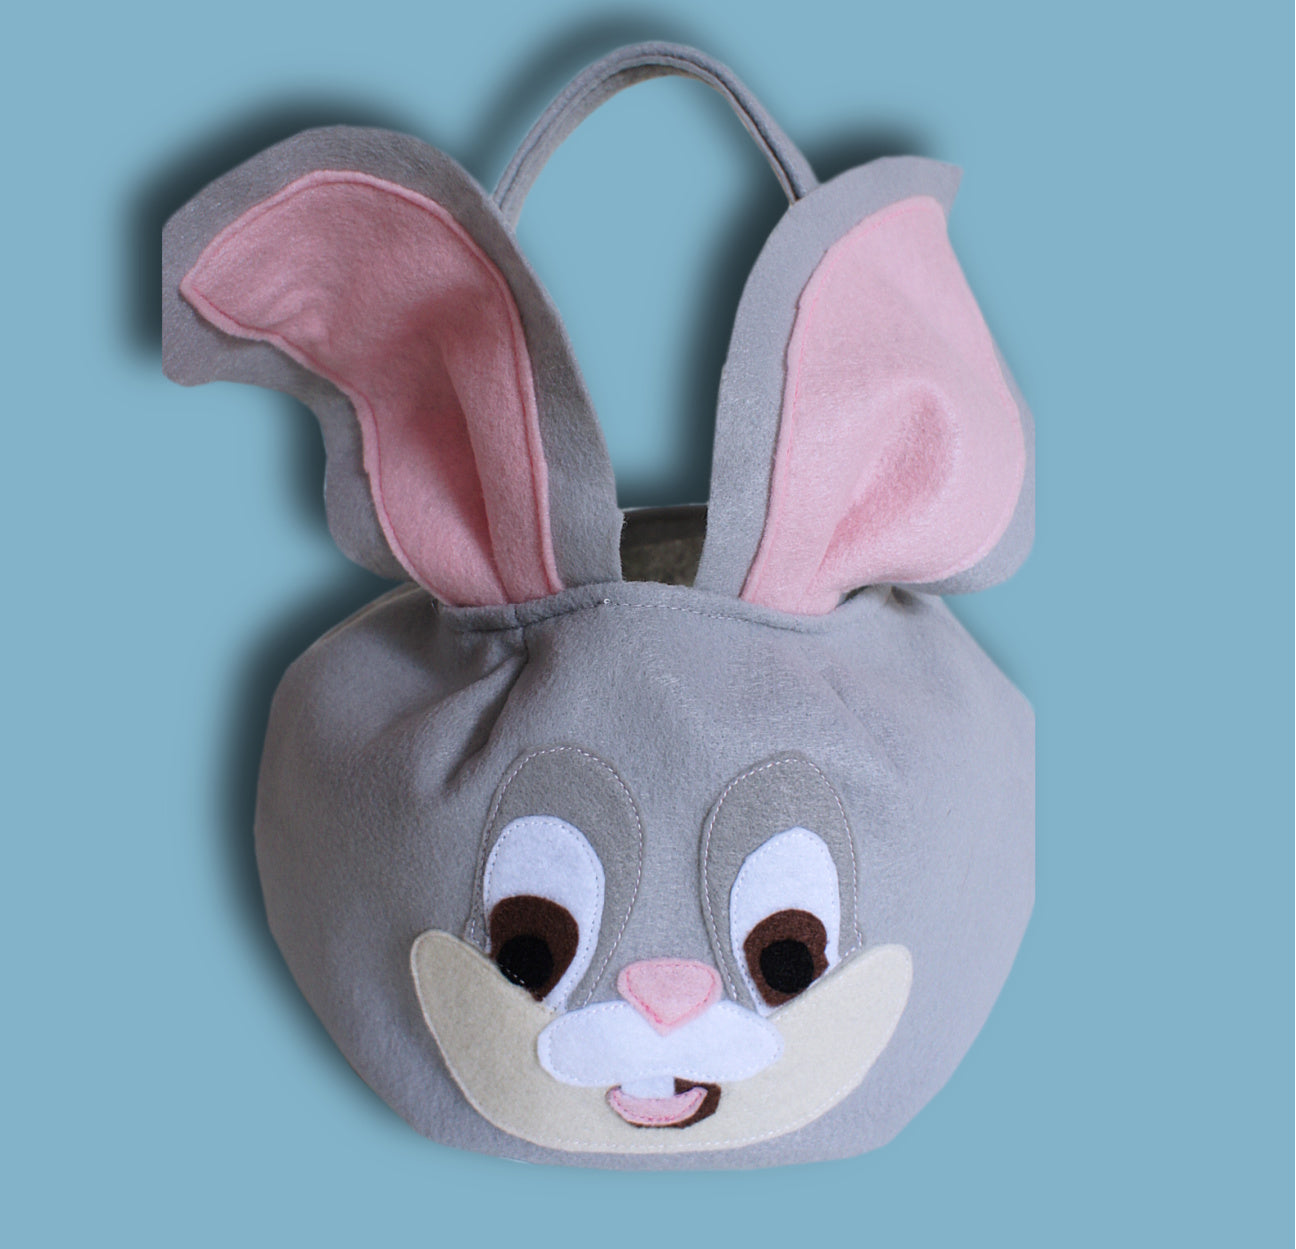
- A bunny bag
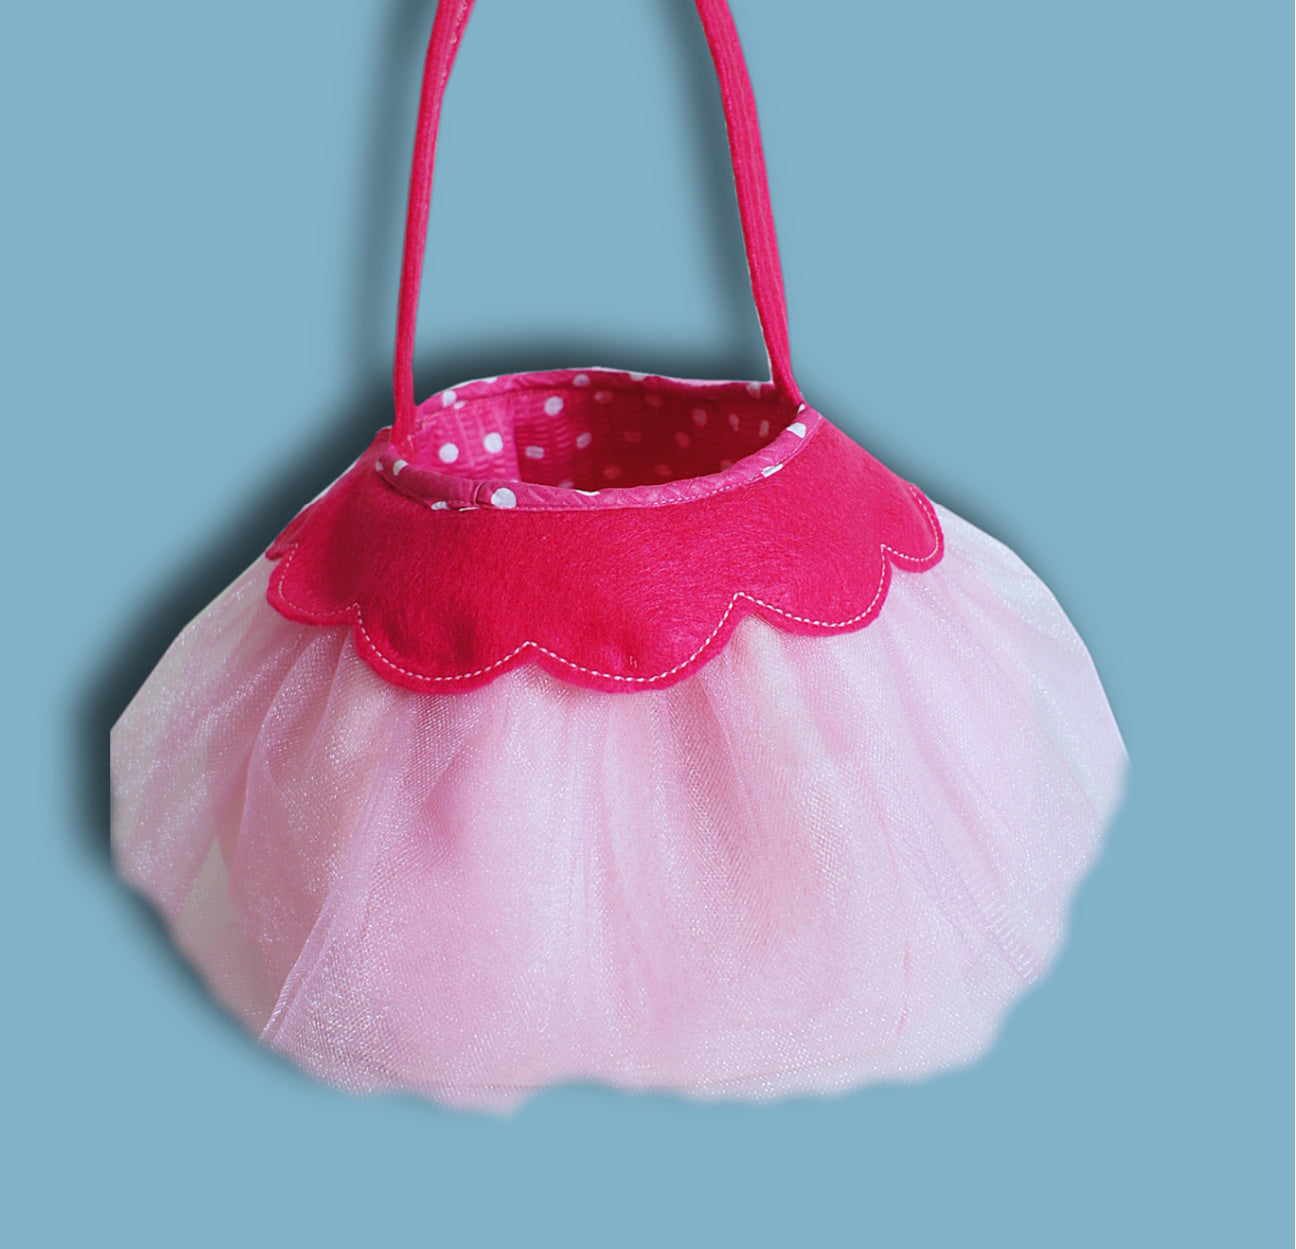
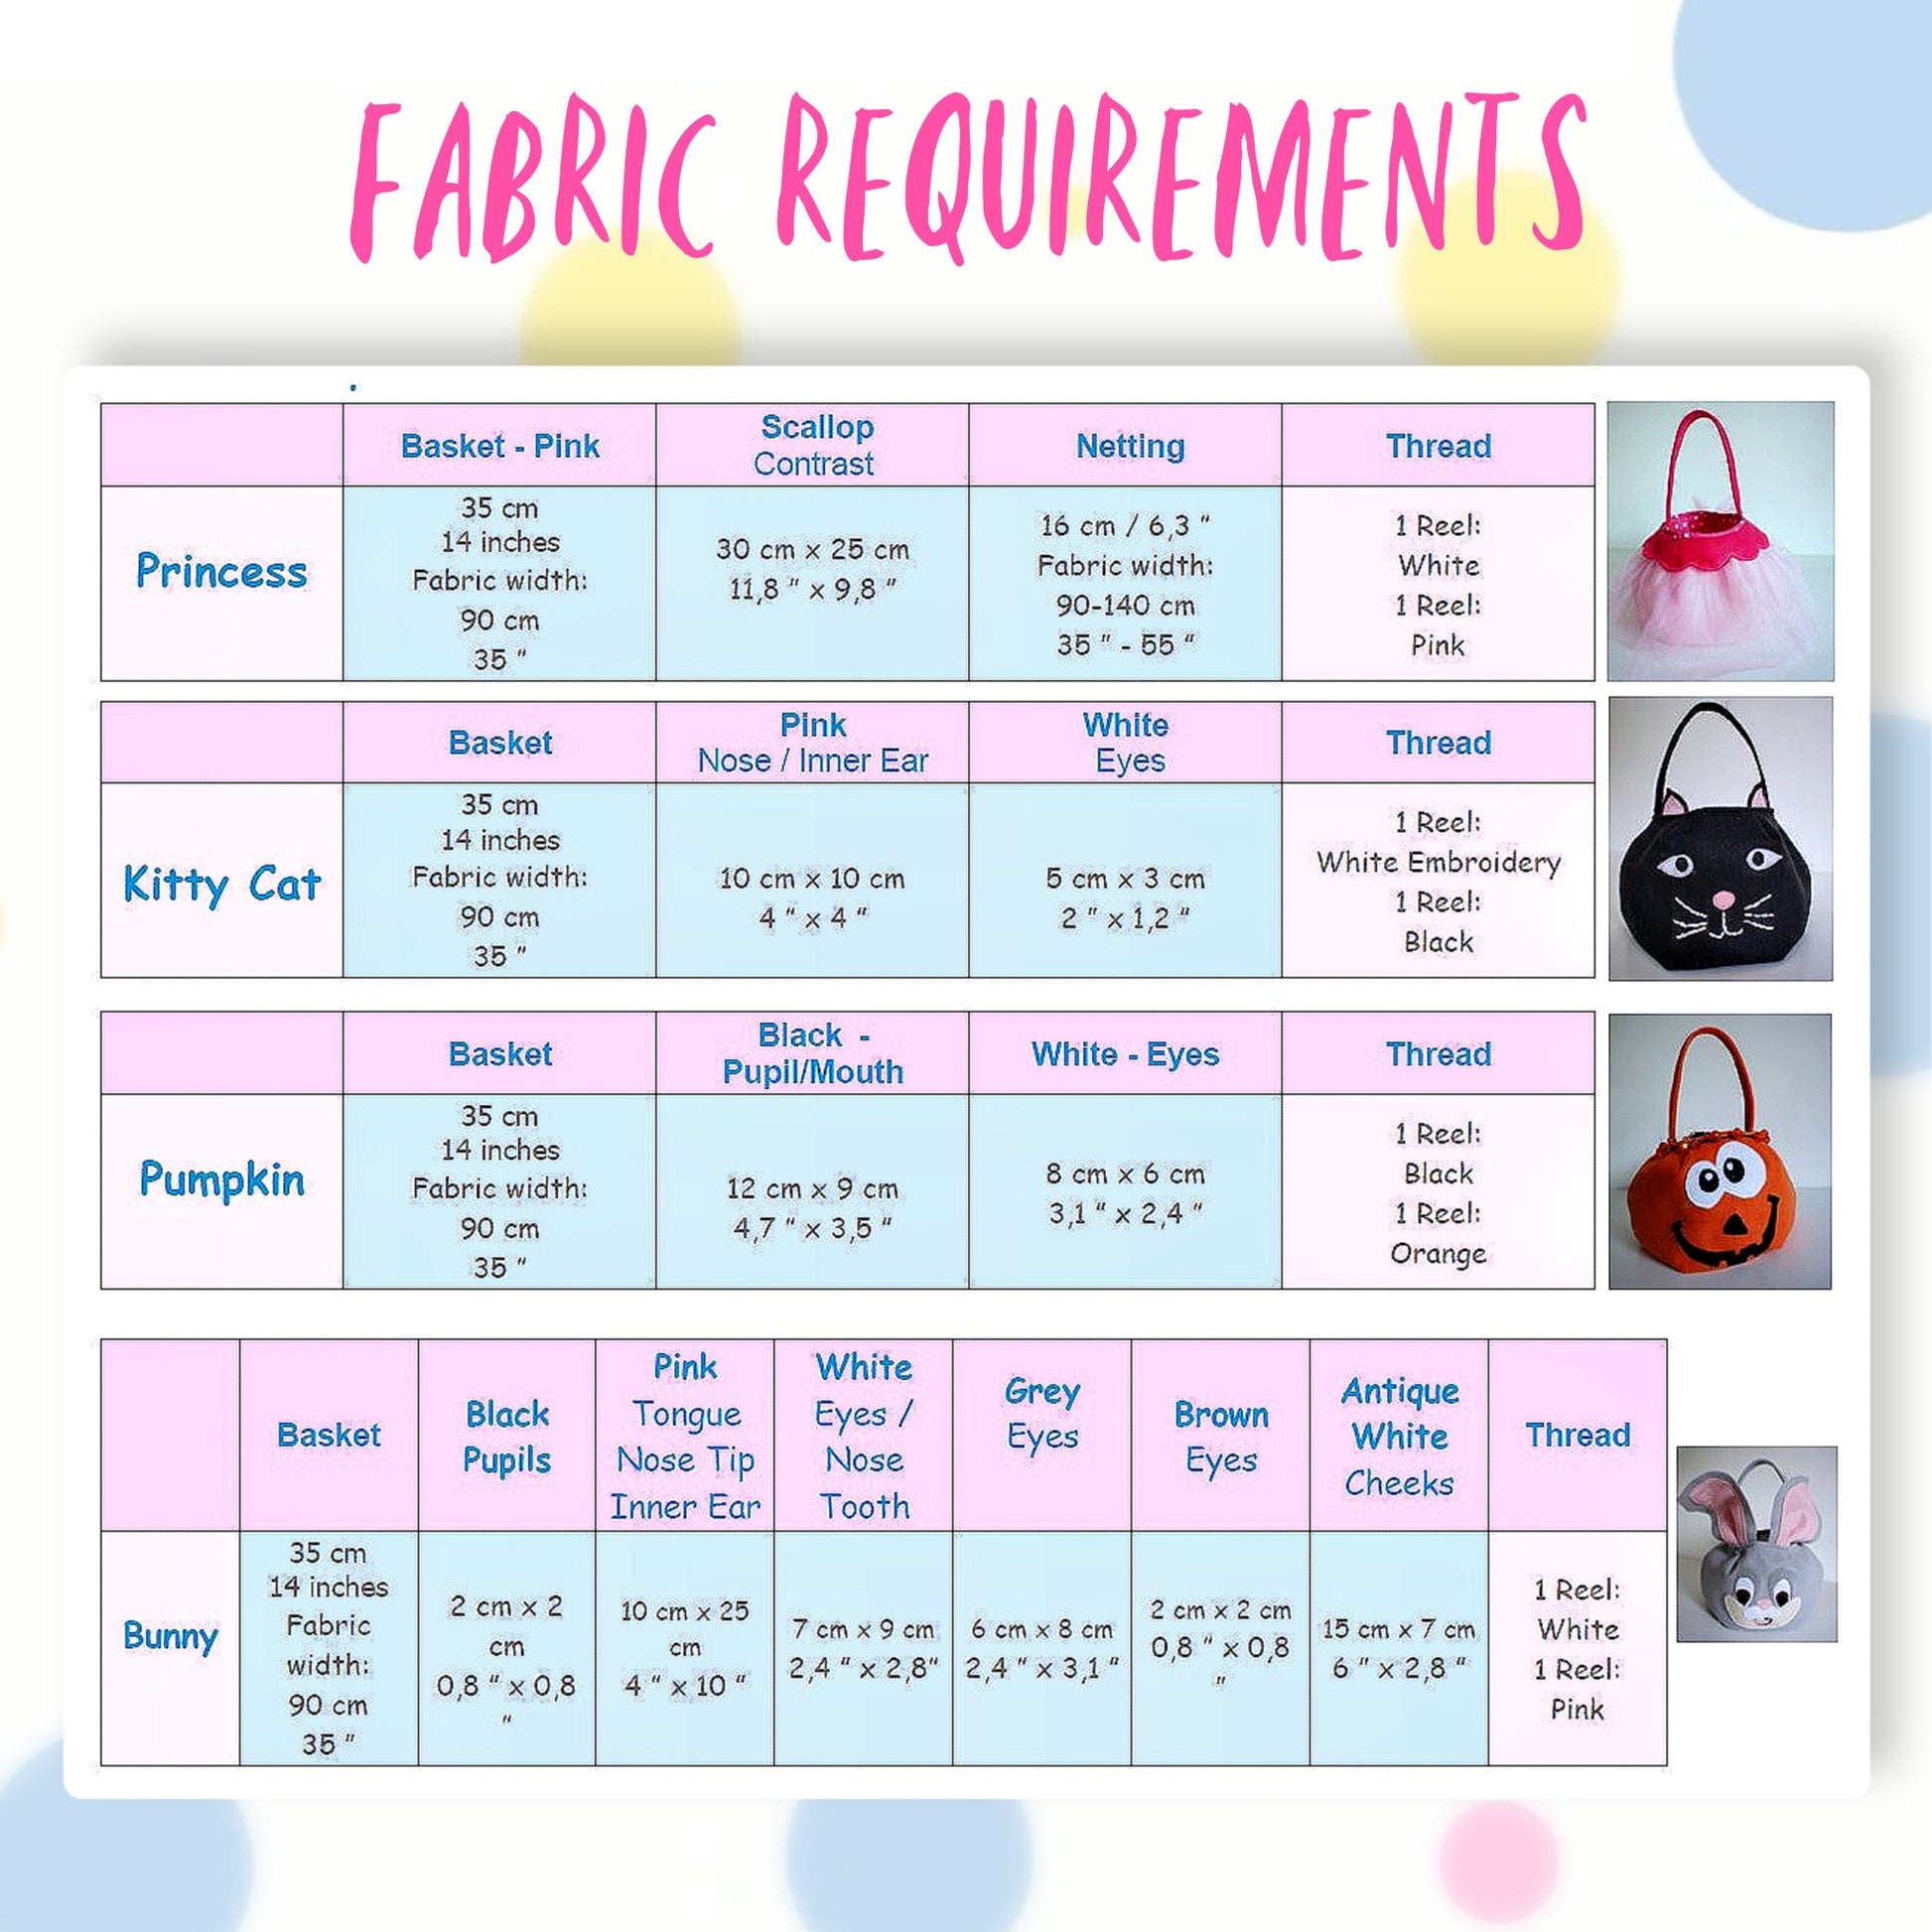
- A princess basket
For all of these, you have the option of adding a lining or leaving them unlined.
Lined vs. Unlined Bags
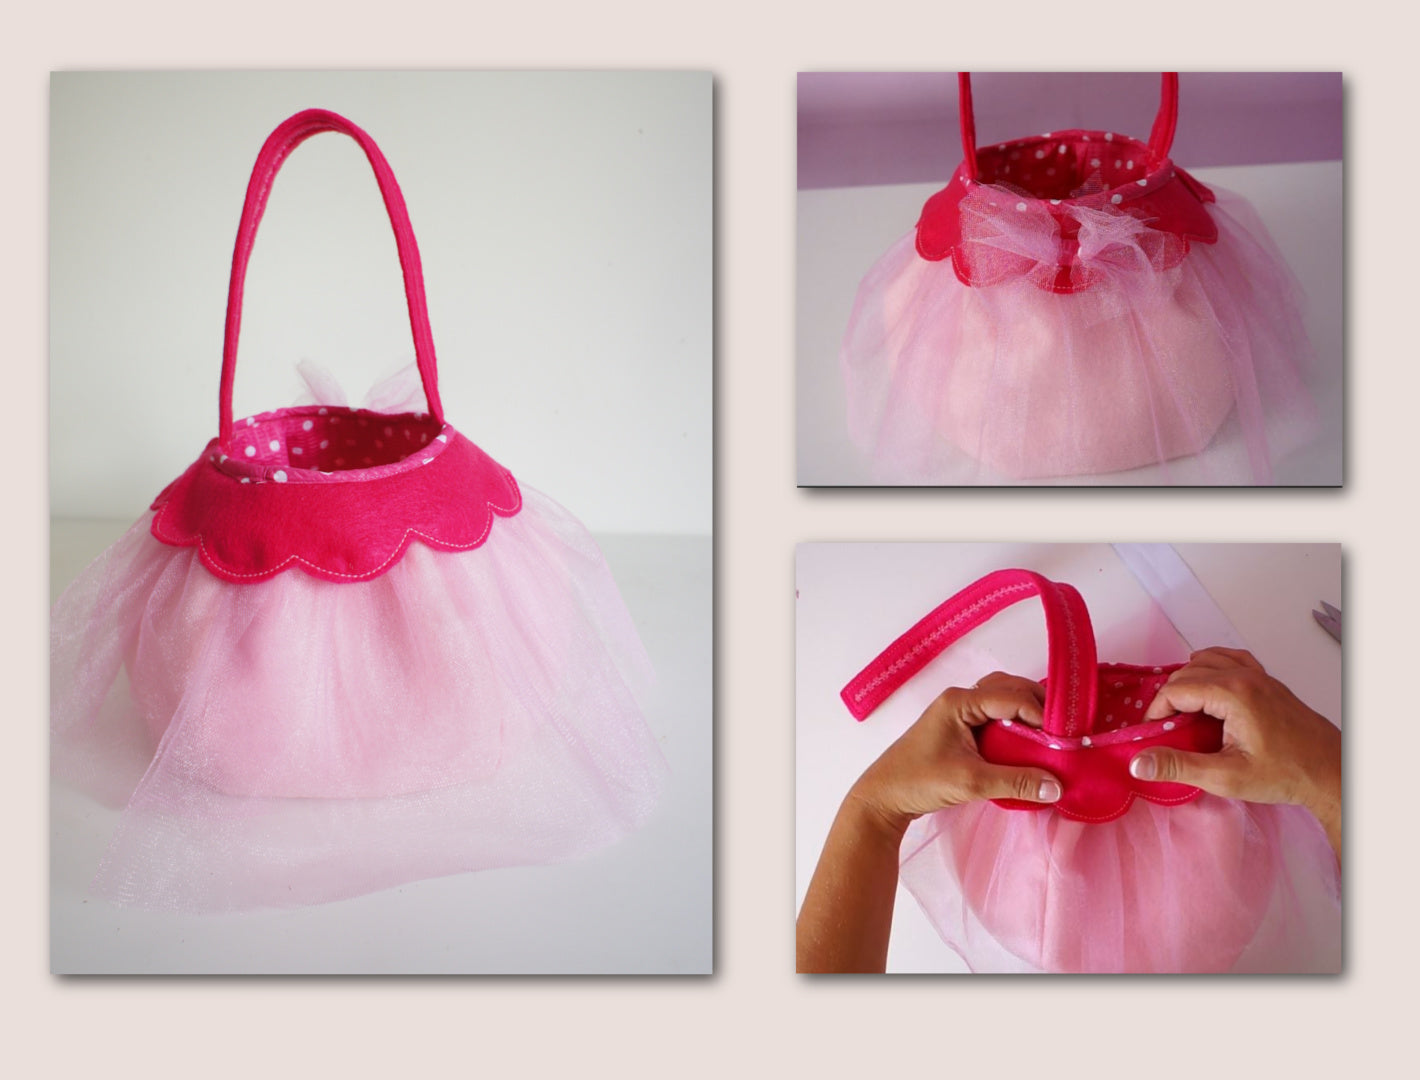
In this example, I've added a lining, which gives the bag more structure and body.
If you decide not to line your bag, I would recommend adding an extra base layer to provide additional stability.
For this version, I've even added twinkling lights. They have different flashing settings and create a wonderful effect. As a bonus, you can easily see what has been collected inside the bag.
Materials
You'll need:
- Felt
- Lining fabric (optional)
- Pellon Wonder-Under 805 fusible web
- Sewing supplies
- Optional decorative lights
The Pellon Wonder-Under acts as an adhesive film for the appliqué pieces.
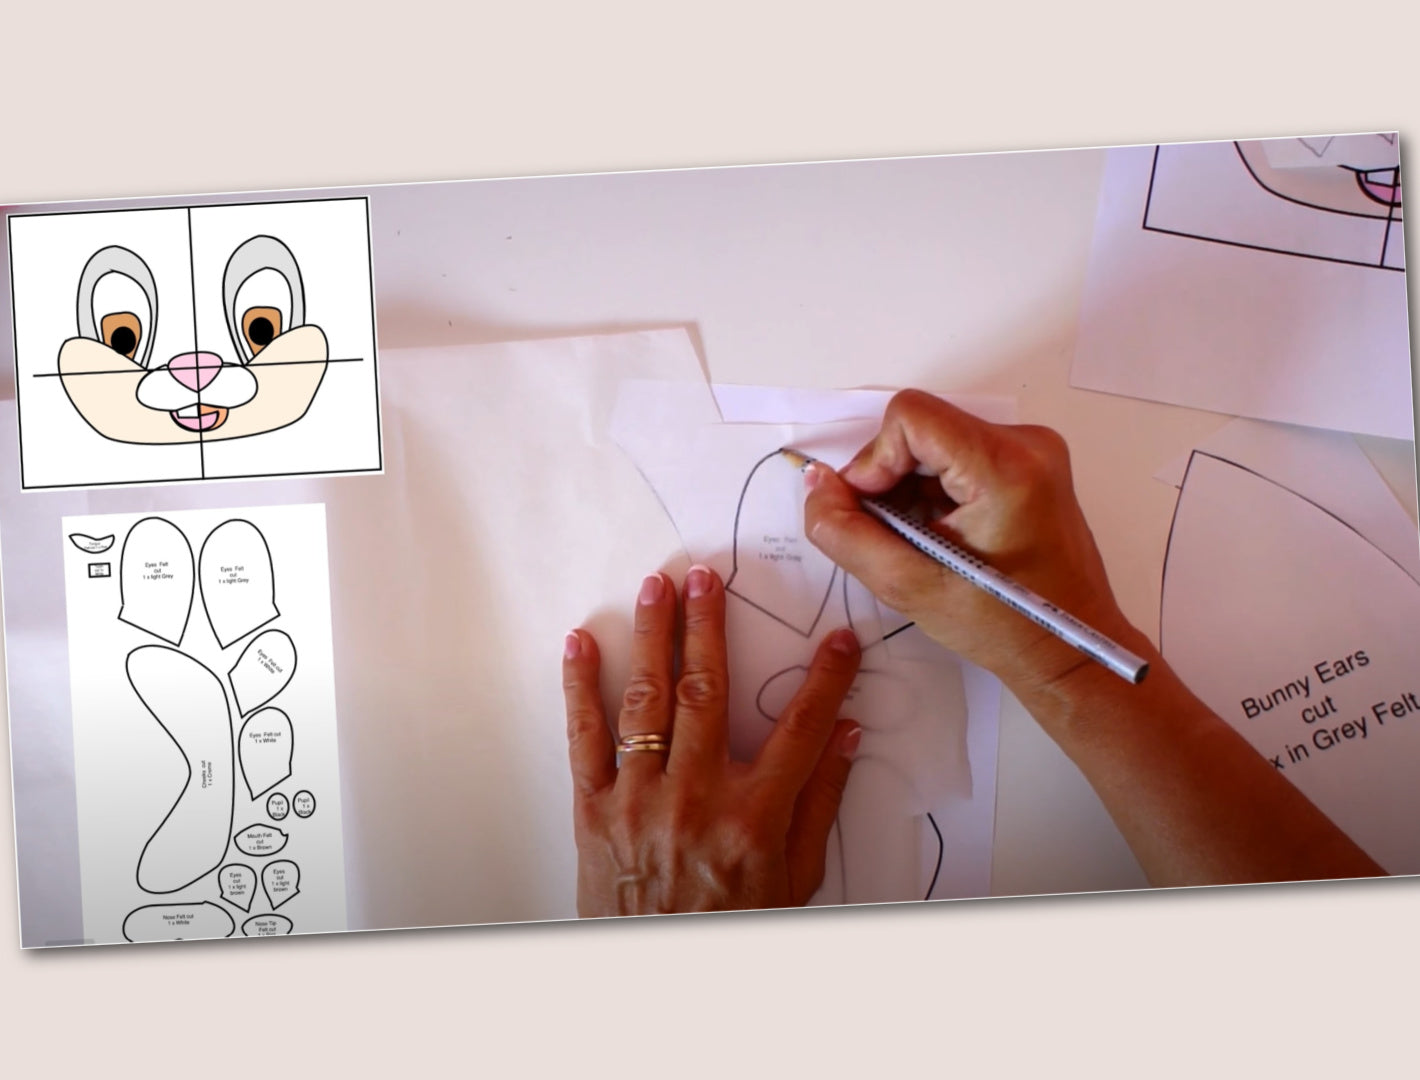
Printing and Assembling the Pattern
Print your pattern and check the scale. It should measure 5 cm or 1 inch as indicated.
Only a few pieces need to be assembled:
The front piece is assembled from sections A, B, and C. The handle also needs to be assembled.
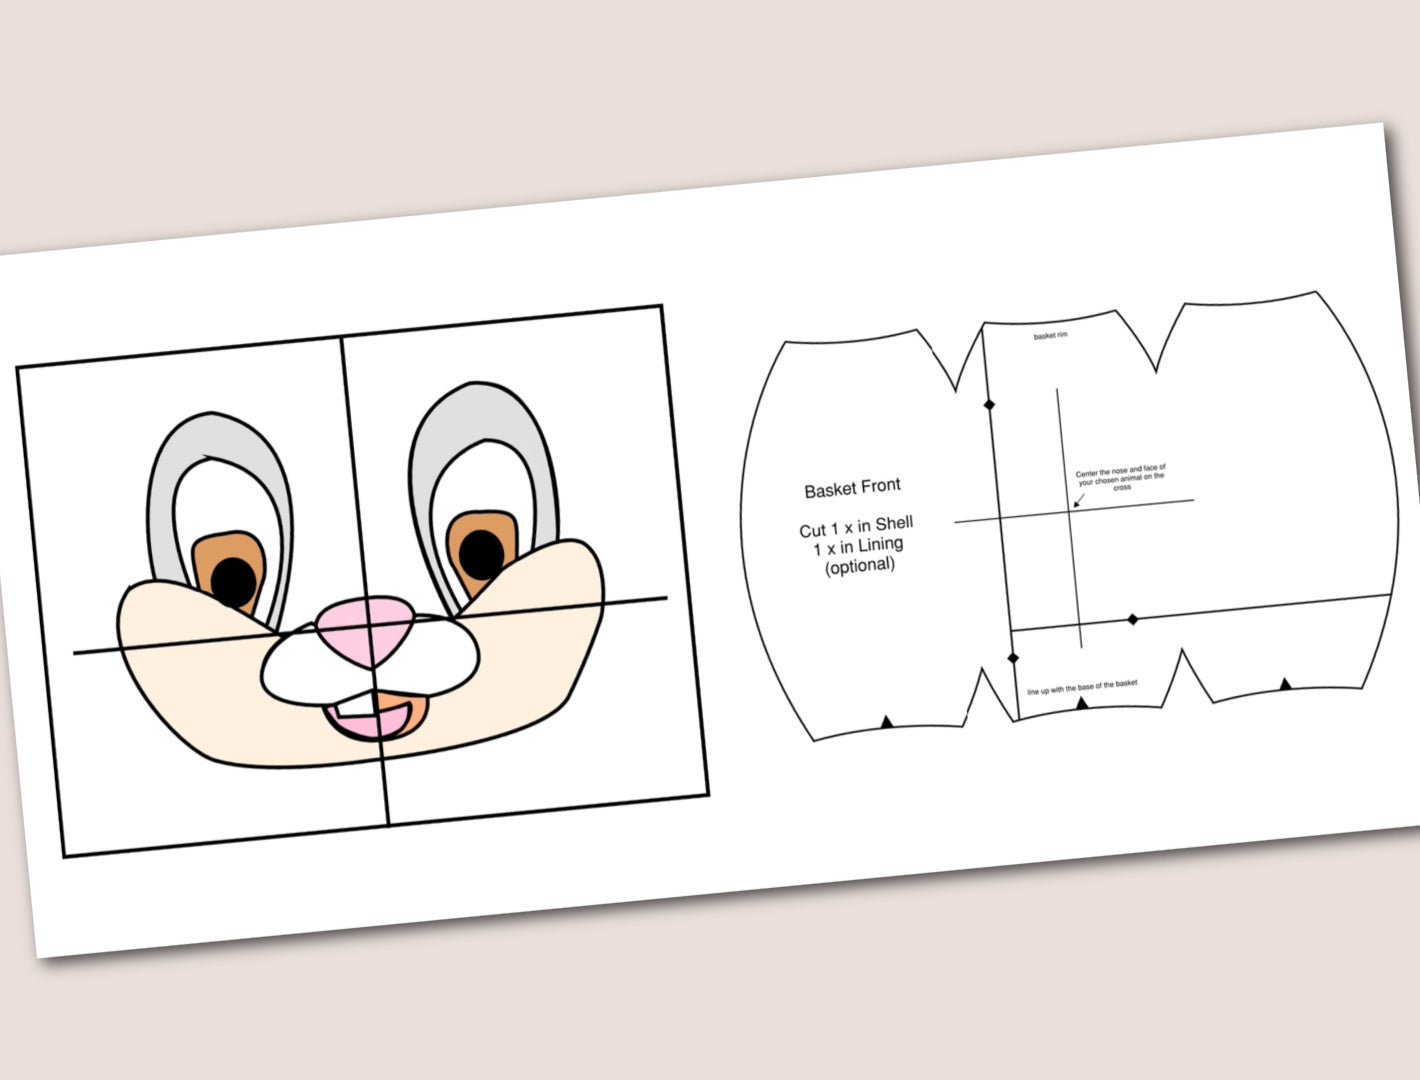
Each appliqué design has its own page, so you only need to print the design you're planning to use.
Cutting the Felt
You can cut all of the bag pieces from approximately 30 cm (12 inches) of felt. I'm using a half yard, which leaves enough material for additional bags.
Cut:
- Three main body pieces
- One handle
- Base pieces
- Lining pieces if desired
I cut my handle slightly wider because my felt was fairly soft. This allows me to fold under one edge for extra strength.
Marking the Pieces
Place the pattern over the front piece and mark the base position using the small triangle notches.
Repeat the process for the back piece.
The circular base should also be clipped all the way around the edge. These clips help ease the circle into the bag body later.
If your felt feels flimsy, consider cutting a second base layer for reinforcement.
Don't forget to transfer all markings to the lining pieces as well.
Creating the Appliqué
Place the Pellon Wonder-Under over the appliqué design and trace the shapes onto the smooth paper side.
Cut the traced pieces roughly apart and fuse them to the wrong side of your felt. Felt doesn't have a true right or wrong side, so placement is easy.
Press each piece for approximately eight seconds.
Mark the center nose position on the front of the bag. The nose serves as your placement guide for the rest of the appliqué.
Peel away the paper backing, position the pieces using the reference image, and fuse them into place.
Once secured, stitch around the appliqué pieces on your sewing machine.
Sewing the Darts
Next, sew all of the darts.
The important thing is not to sew them into a sharp point. Instead, gradually curve the stitching into the seam so the dart blends smoothly into the fabric.
You can use the pattern piece as a guide if needed.
This creates a much nicer rounded shape.
Sewing the Bag Body
Sew the darts in both the front and back pieces.
Then sew the side seams using a 1 cm seam allowance.
If you're making the pumpkin version, you could topstitch the seams before closing the side seams. This creates more defined pumpkin sections.
You could even add batting behind the sections for additional dimension.
Pressing the Seams
Press the seams if desired.
For a quick project, you can simply press them all to one side rather than pressing them open.
The same process is repeated for the lining bag.
The only difference is that you must leave a turning gap in one of the lining side seams.
Attaching the Base
Match the clips on the circular base to the clips on the bag body.
Pin generously around the circle.
If the base seems slightly large because you didn't follow the seam allowance perfectly, don't worry. You can ease it in or even sew a tiny pleat. Since it's a basket, small adjustments won't be noticeable.
Sew the base in place.
I like to use a pin to help guide the fabric under the needle and prevent unwanted folds.
Repeat the process for the lining.
Constructing the Handle
Prepare the handle by folding the edges under and topstitching both sides.
Use a longer stitch length, around 3.5 to 4.
Attach one end first, then carefully position and attach the other end, making sure the handle isn't twisted.
If your sewing machine struggles with bulky layers, you may prefer to attach the handle later.
Joining the Lining and Outer Bag
Place the outer bag inside the lining with right sides together.
Match seams if desired and pin around the top edge.
Any slight excess can be eased in.
Sew around the entire top edge using a 1 cm seam allowance.
After sewing, clip around the edge to release tension and help the bag turn smoothly.
Turning the Bag
Turn the bag through the opening left in the lining.
Start from the point furthest away from the opening for easier turning.
Push the lining inside the bag and smooth the top edge.
You can press the edge or simply pin it into position.
Topstitching the Top Edge
Place the bag over the free arm of your sewing machine.
Topstitch around the entire upper edge using a long stitch length, approximately 3.5 to 4.
This secures the lining and creates a clean finished edge.
At this point, the bag is essentially complete.
Adding Decorative Lights
For extra Halloween fun, I added battery-powered lights around the top edge.
Simply secure the wire between the lights with a few hand stitches through the lining and outer layer.
Work your way around the bag until the lights are evenly distributed.
The finished effect is especially beautiful in the dark and gives the bag a magical trick-or-treat glow.
Finished Bag
And that's it—the trick-or-treat bag is finished.
I hope you enjoyed this project. Don't forget to watch the separate appliqué tutorials and the princess basket tutorial if you'd like additional details on those variations.
Thank you very much for watching, and bye for now.