


STEP-BY-STEP VIDEO TUTORIALS

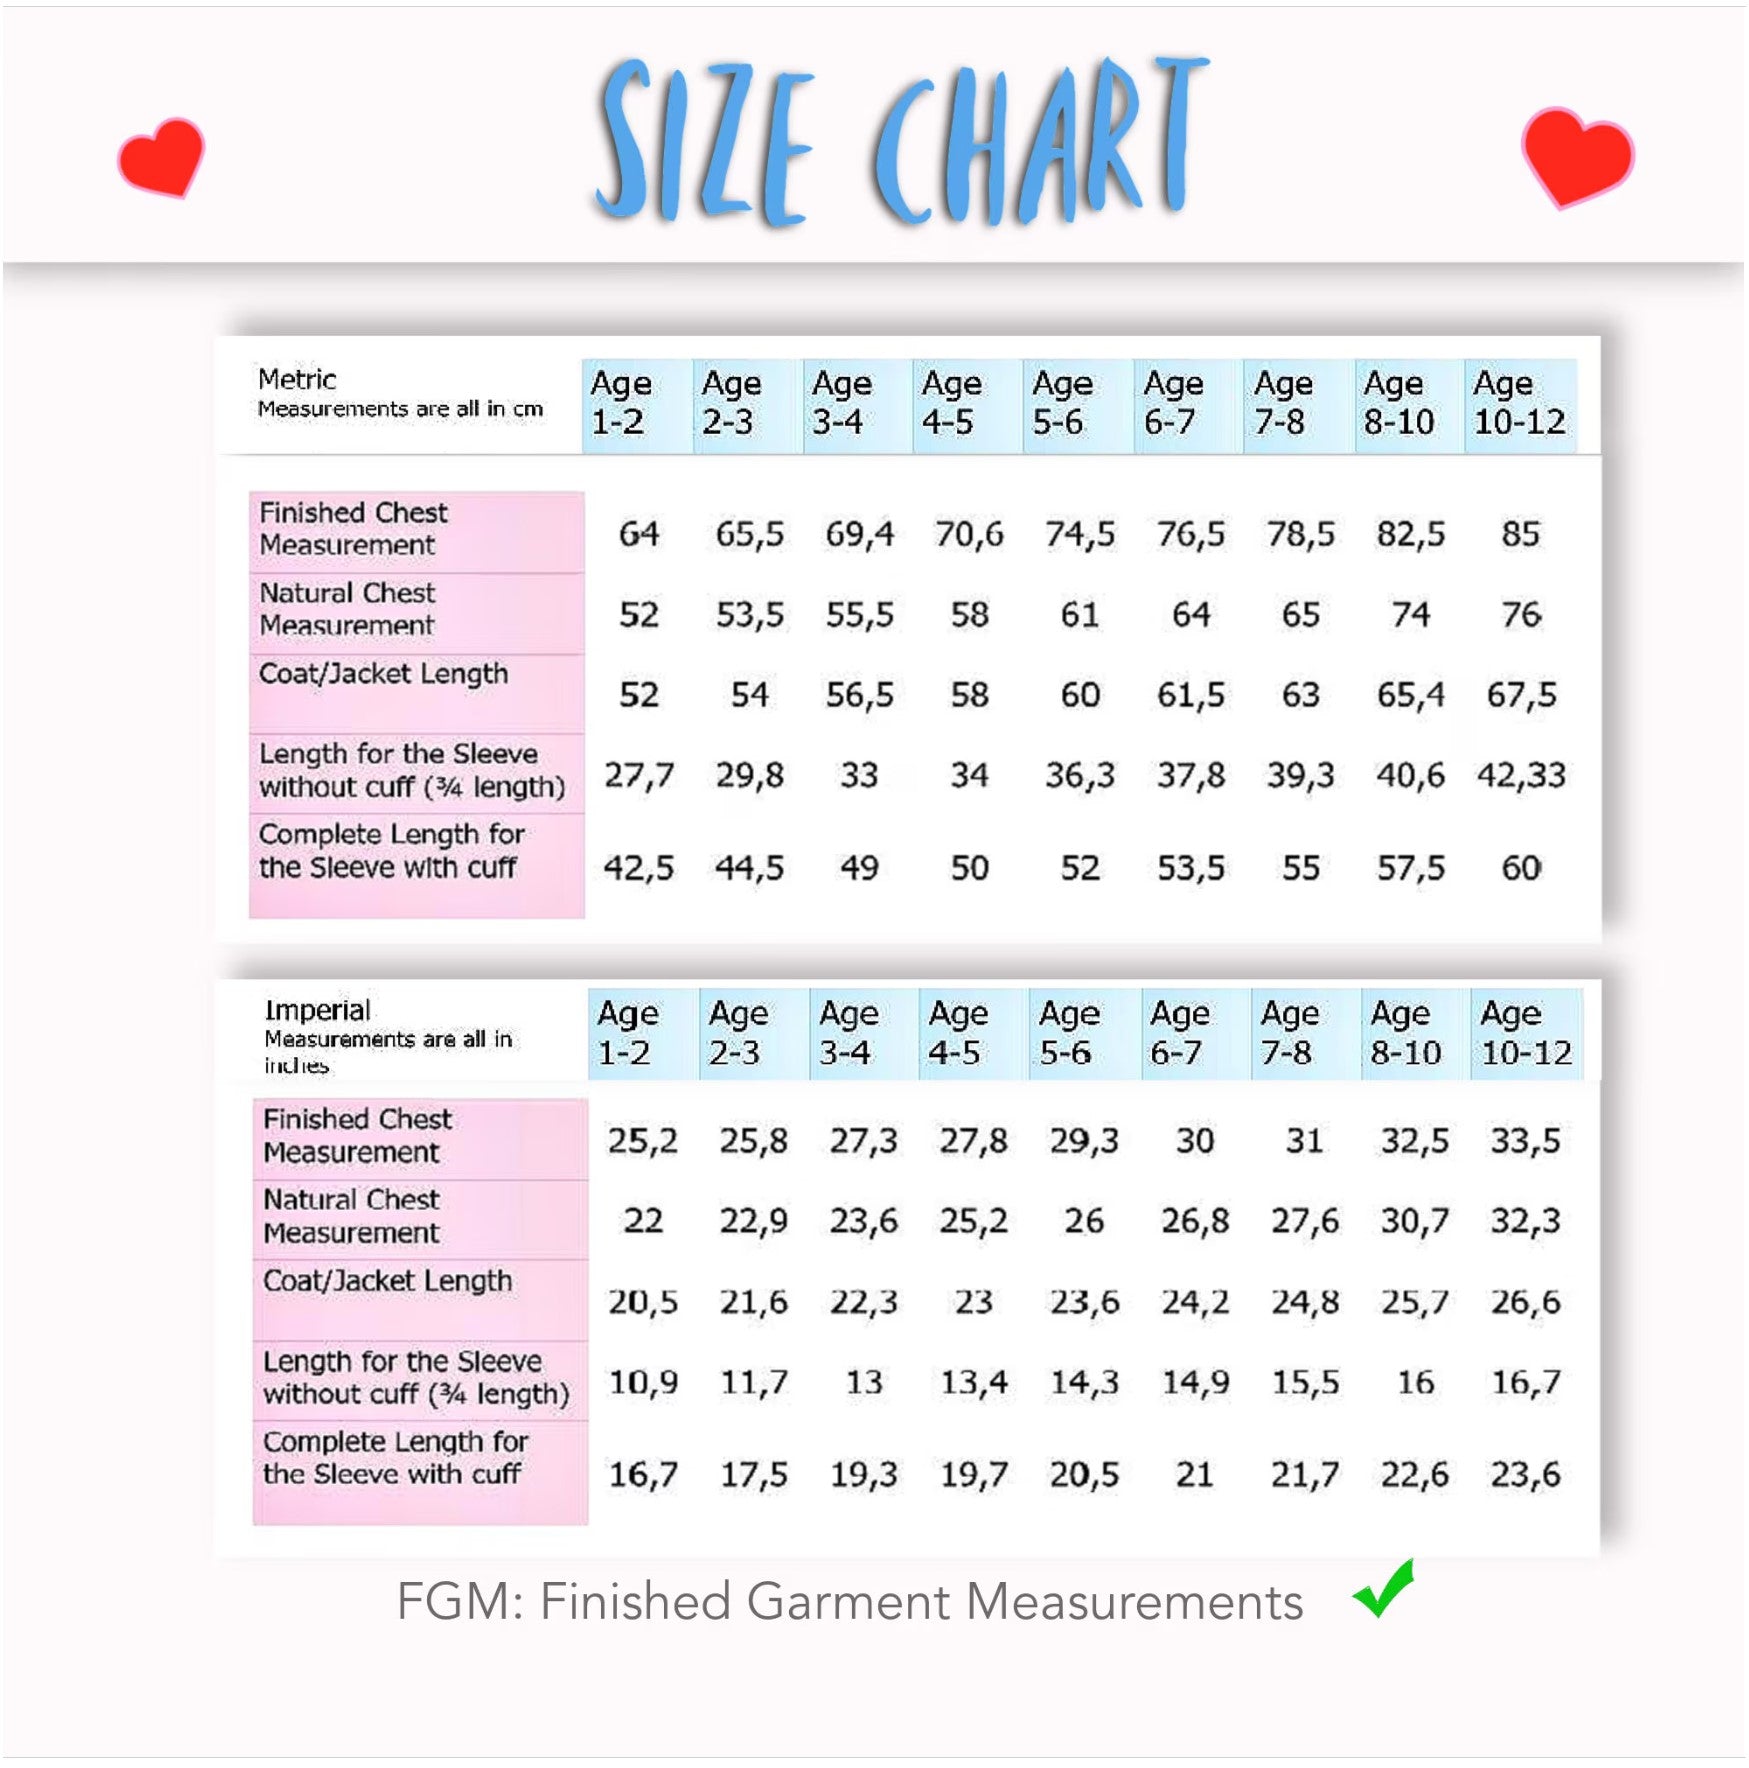
THE PATTERN

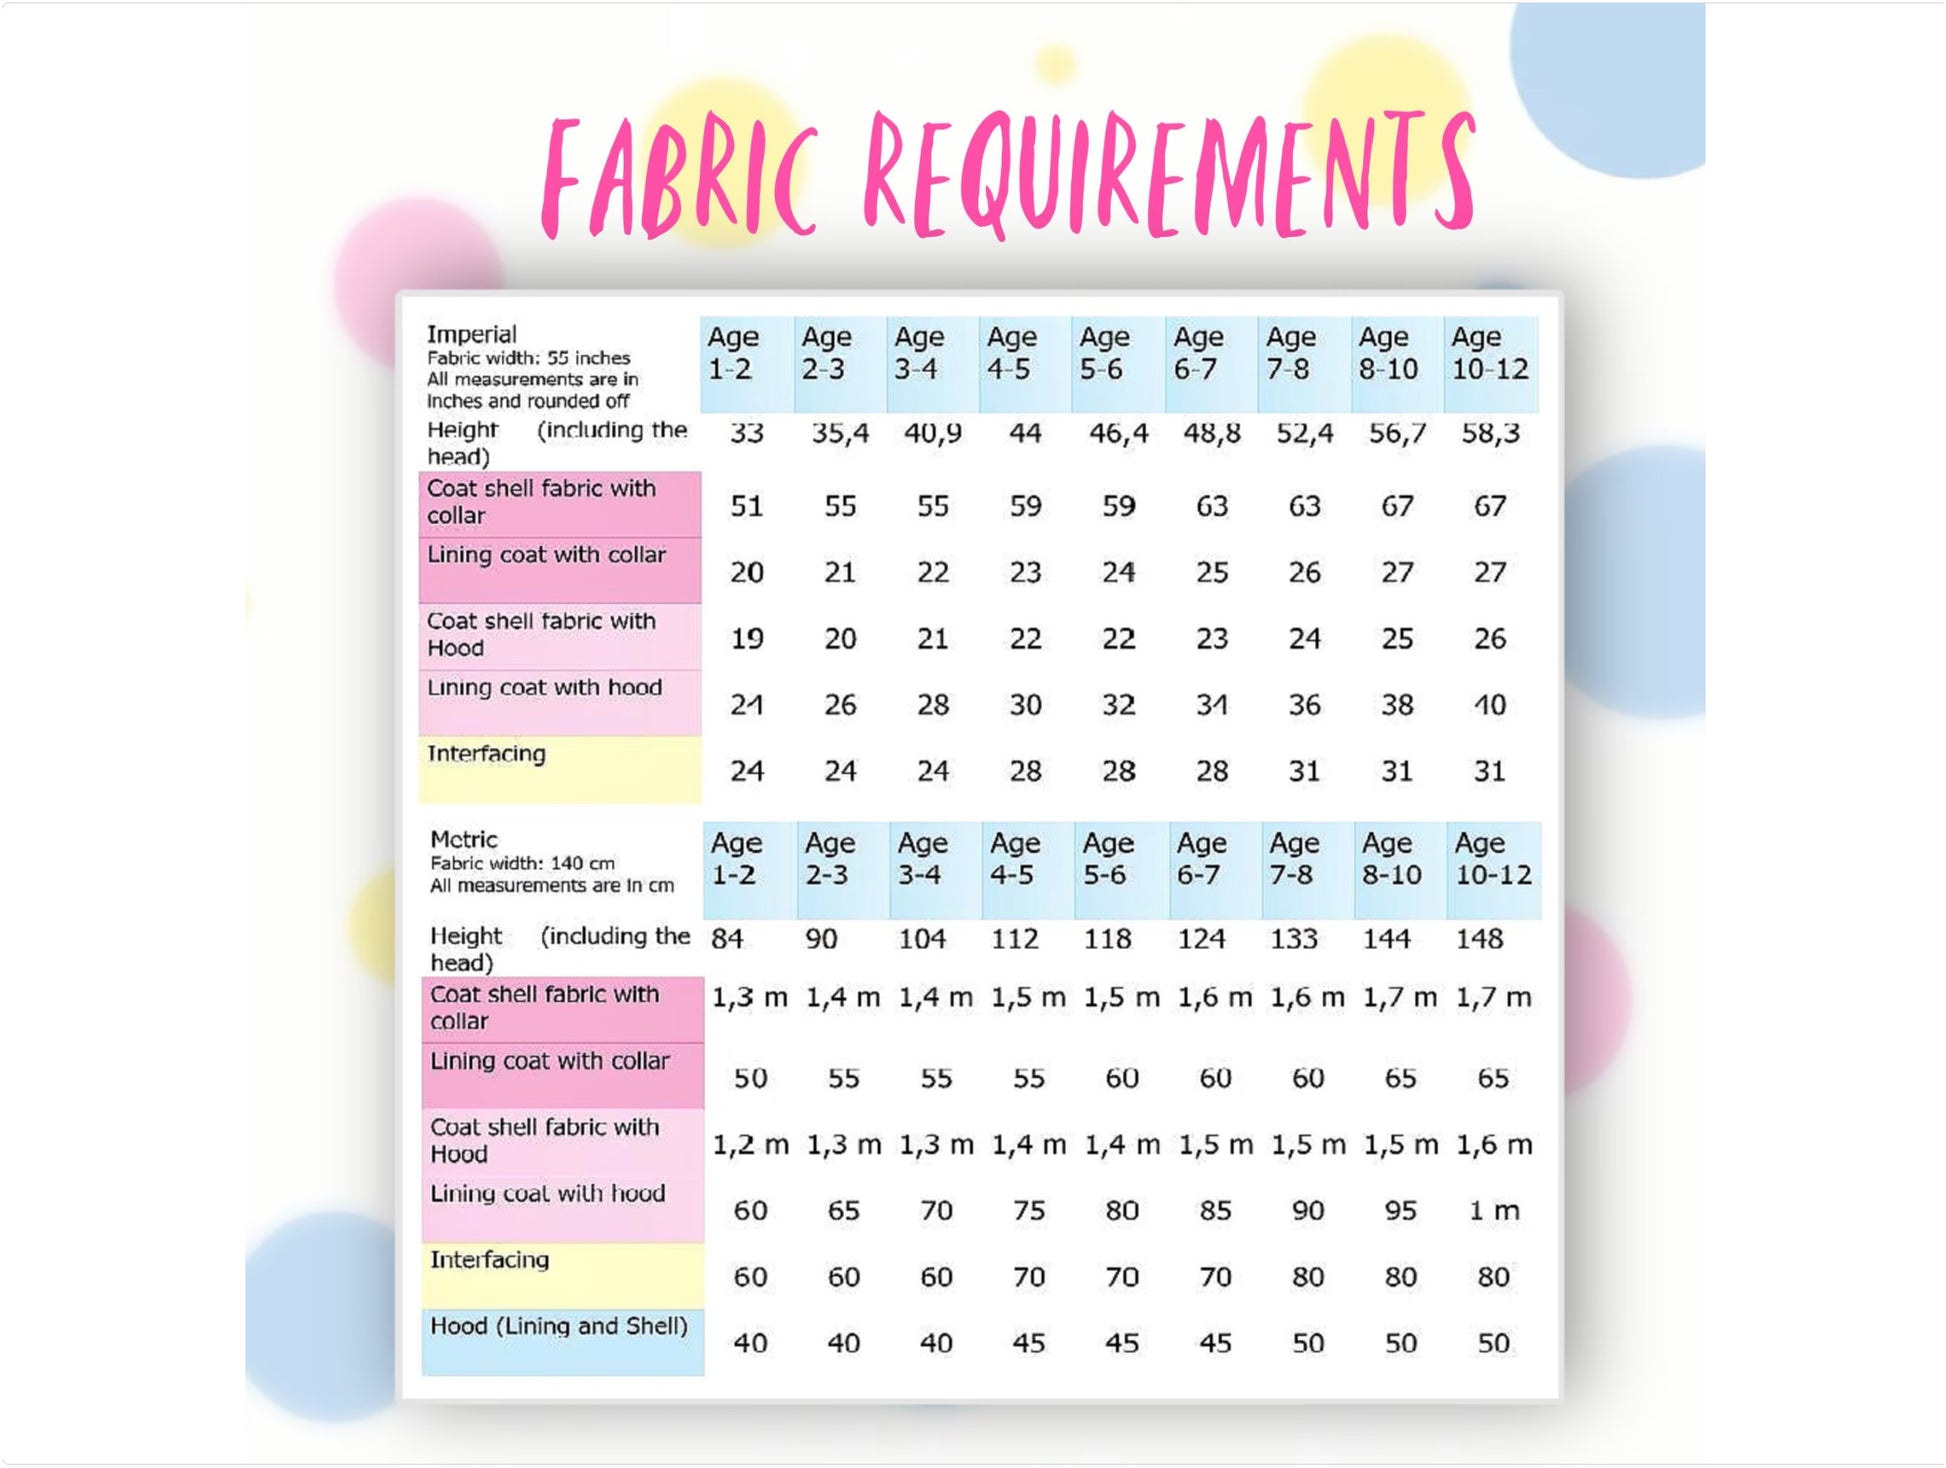
CUTTING OUT

PREPARATION: PINNING

PREPARATION: IRONING

SEWING THE COAT

TOPSTITCHING

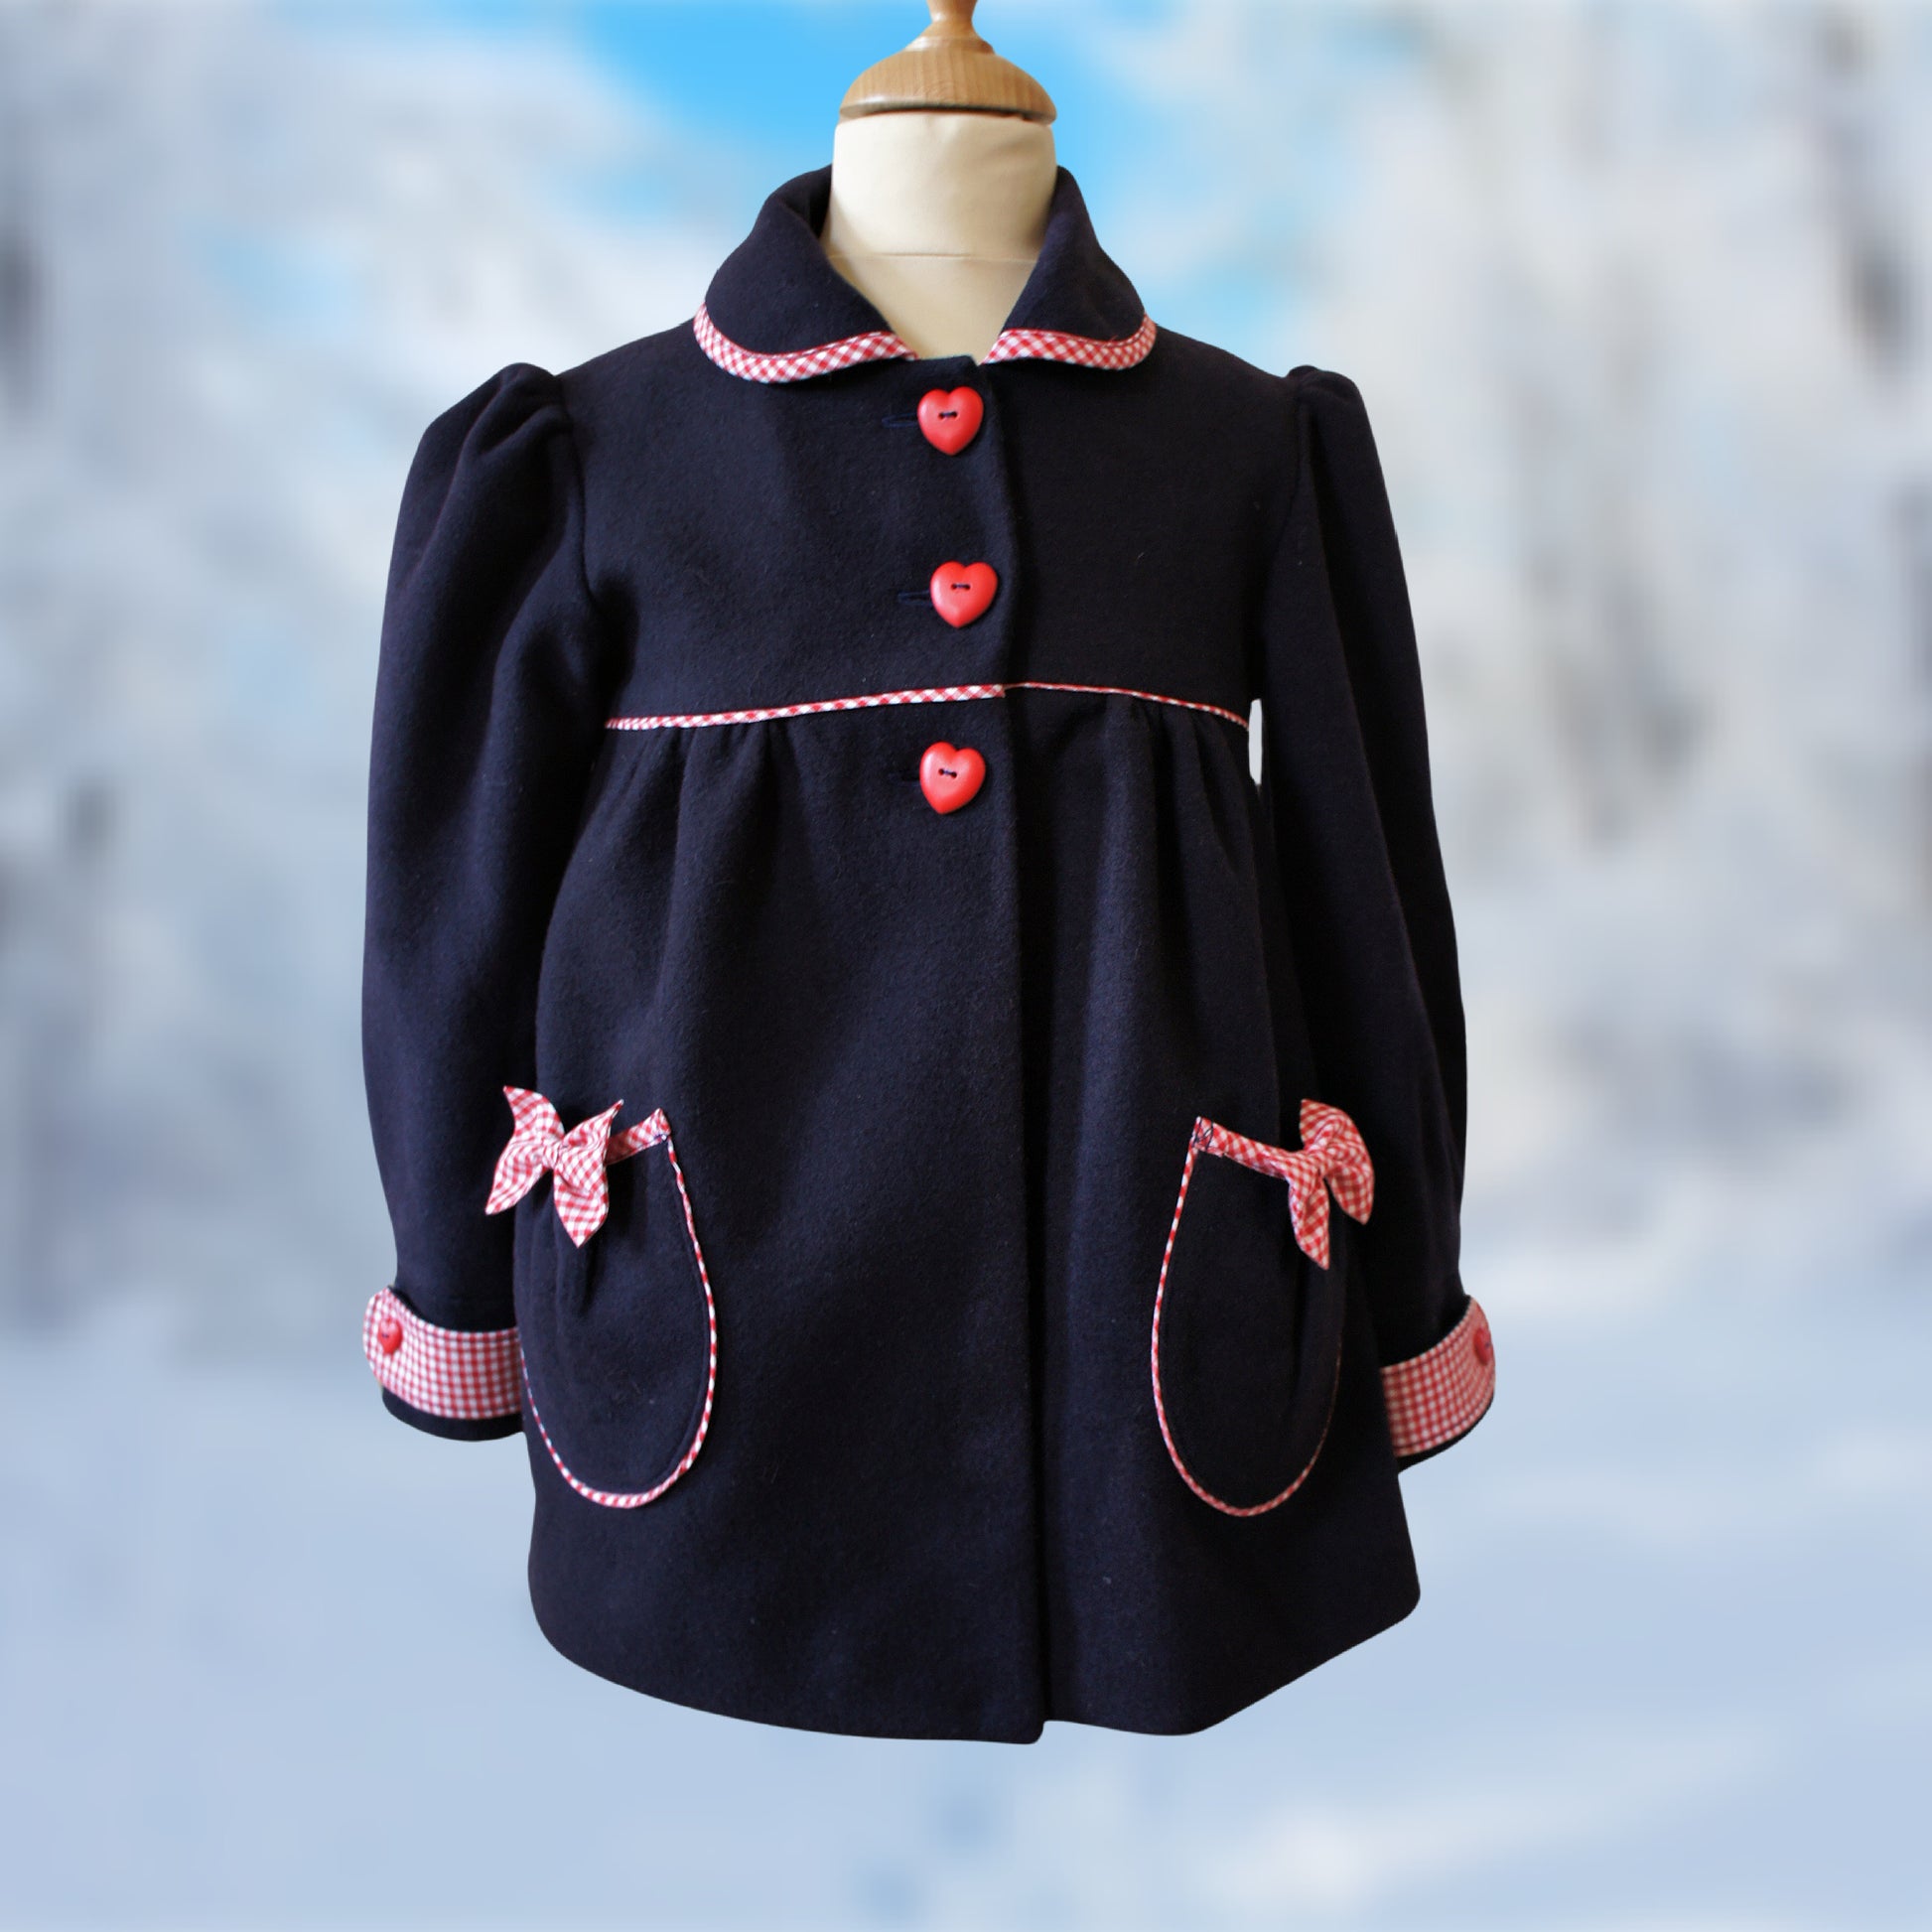
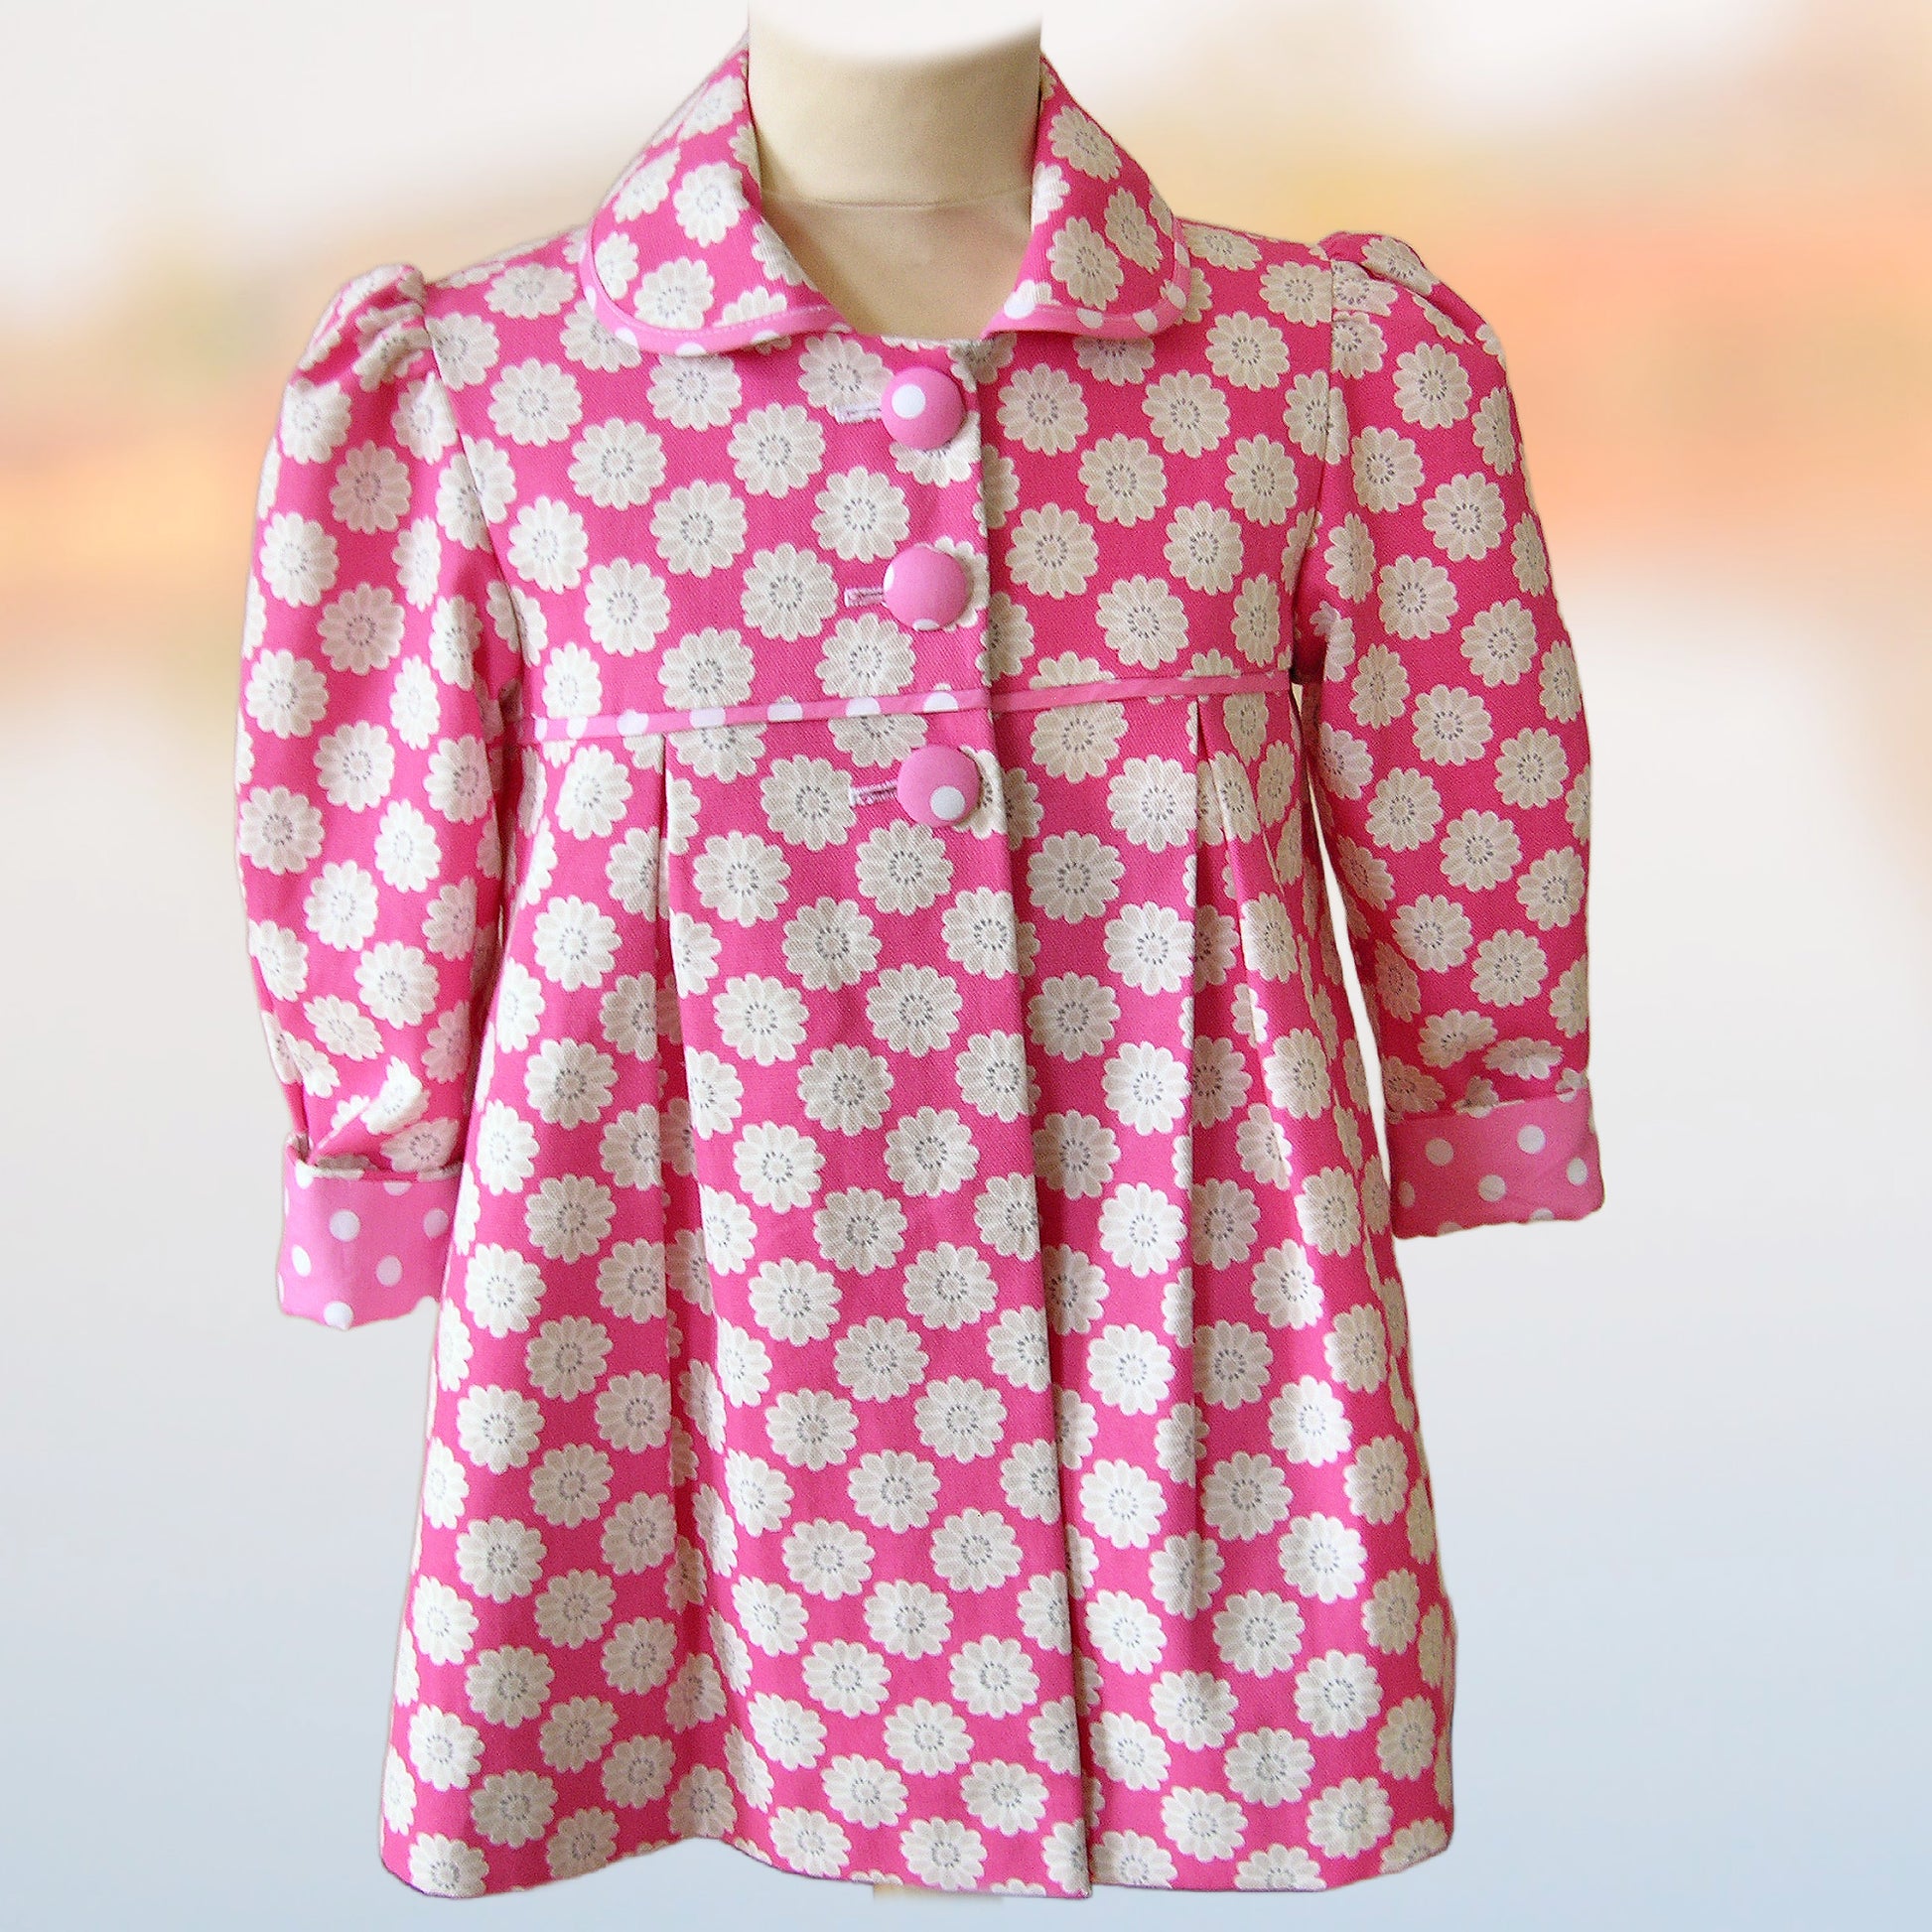
THE PATCH POCKET

SEWING THE UPPER COAT

SEWING THE LOWER COAT

JOINING THE UPPER AND LOWER COAT

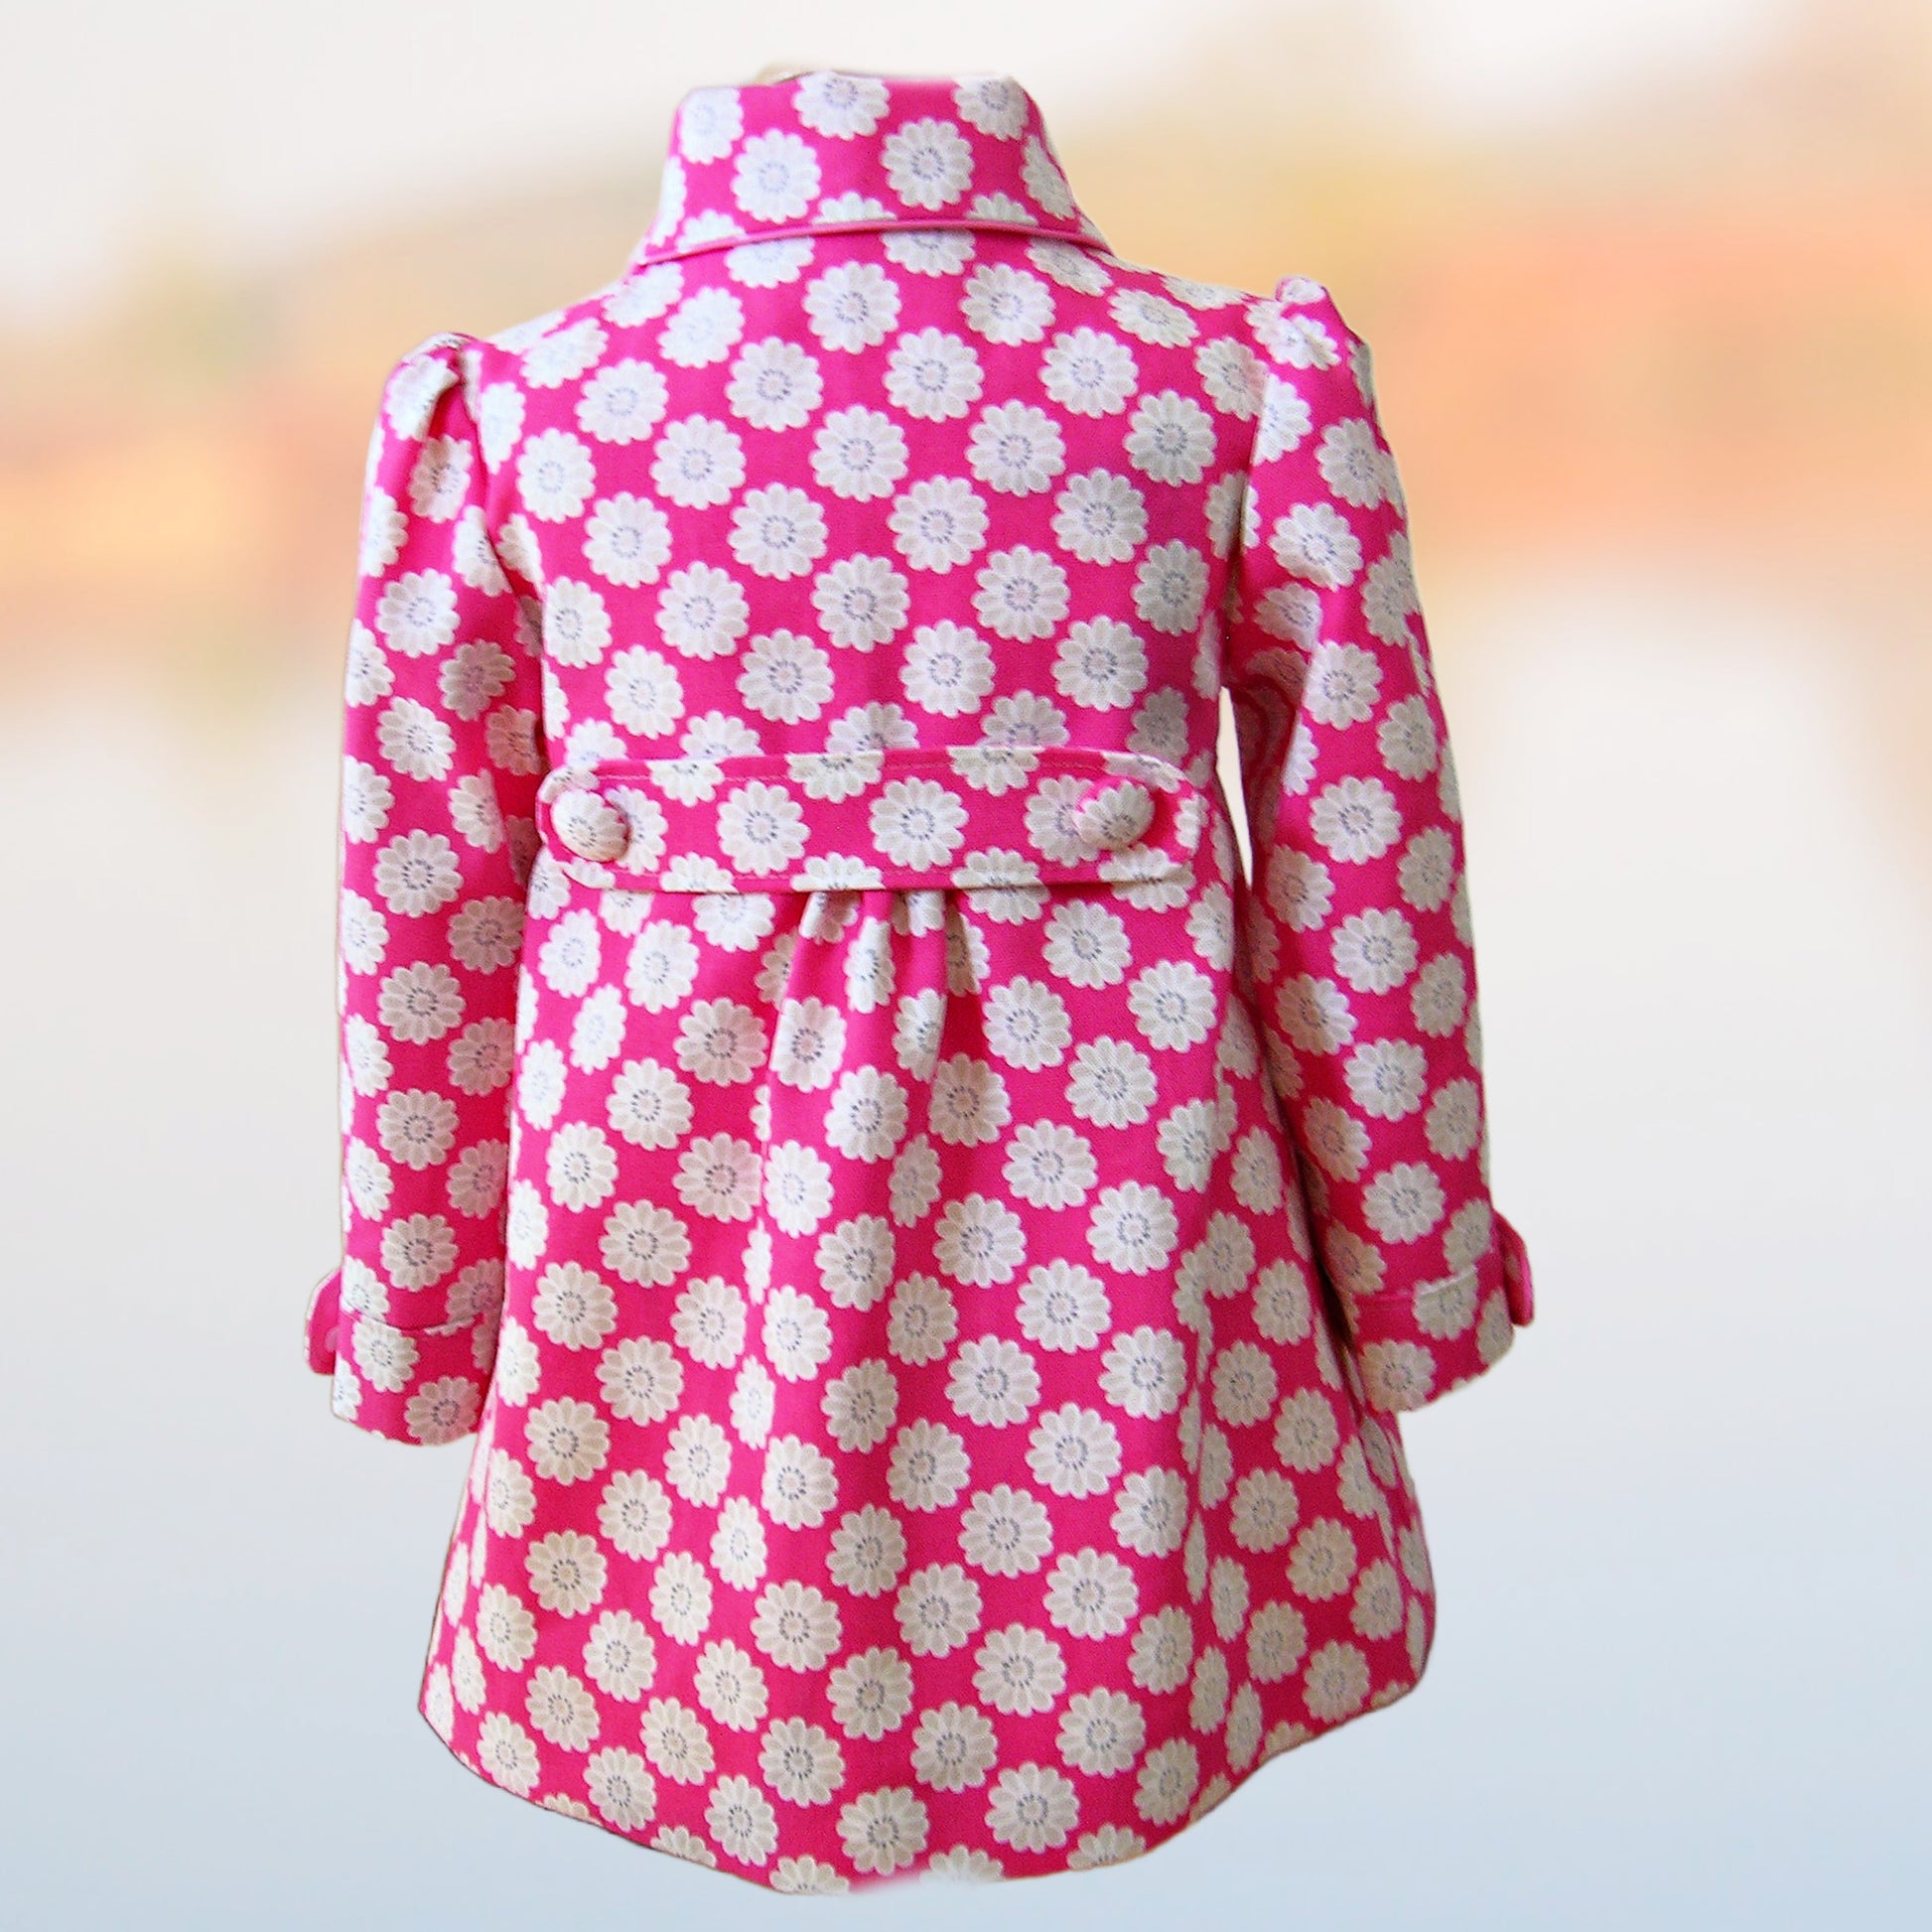
PIPING THE COLLAR

BINDING THE COLLAR

JOINING THE SHELL AND THE COLLAR

SEWING THE LINING TO THE SHELL

SEWING THE SLEEVES

HOW TO INSERT THE SLEEVES

ADDING A CUFF TO THE SLEEVES

HEMMING THE COAT

INSERTING THE BUTTONHOLES