


MELINDA SKIRT
MELINDA SKIRT


Regular price
$5.50 USD
Regular price
Sale price
$5.50 USD
Unit price
per
Couldn't load pickup availability
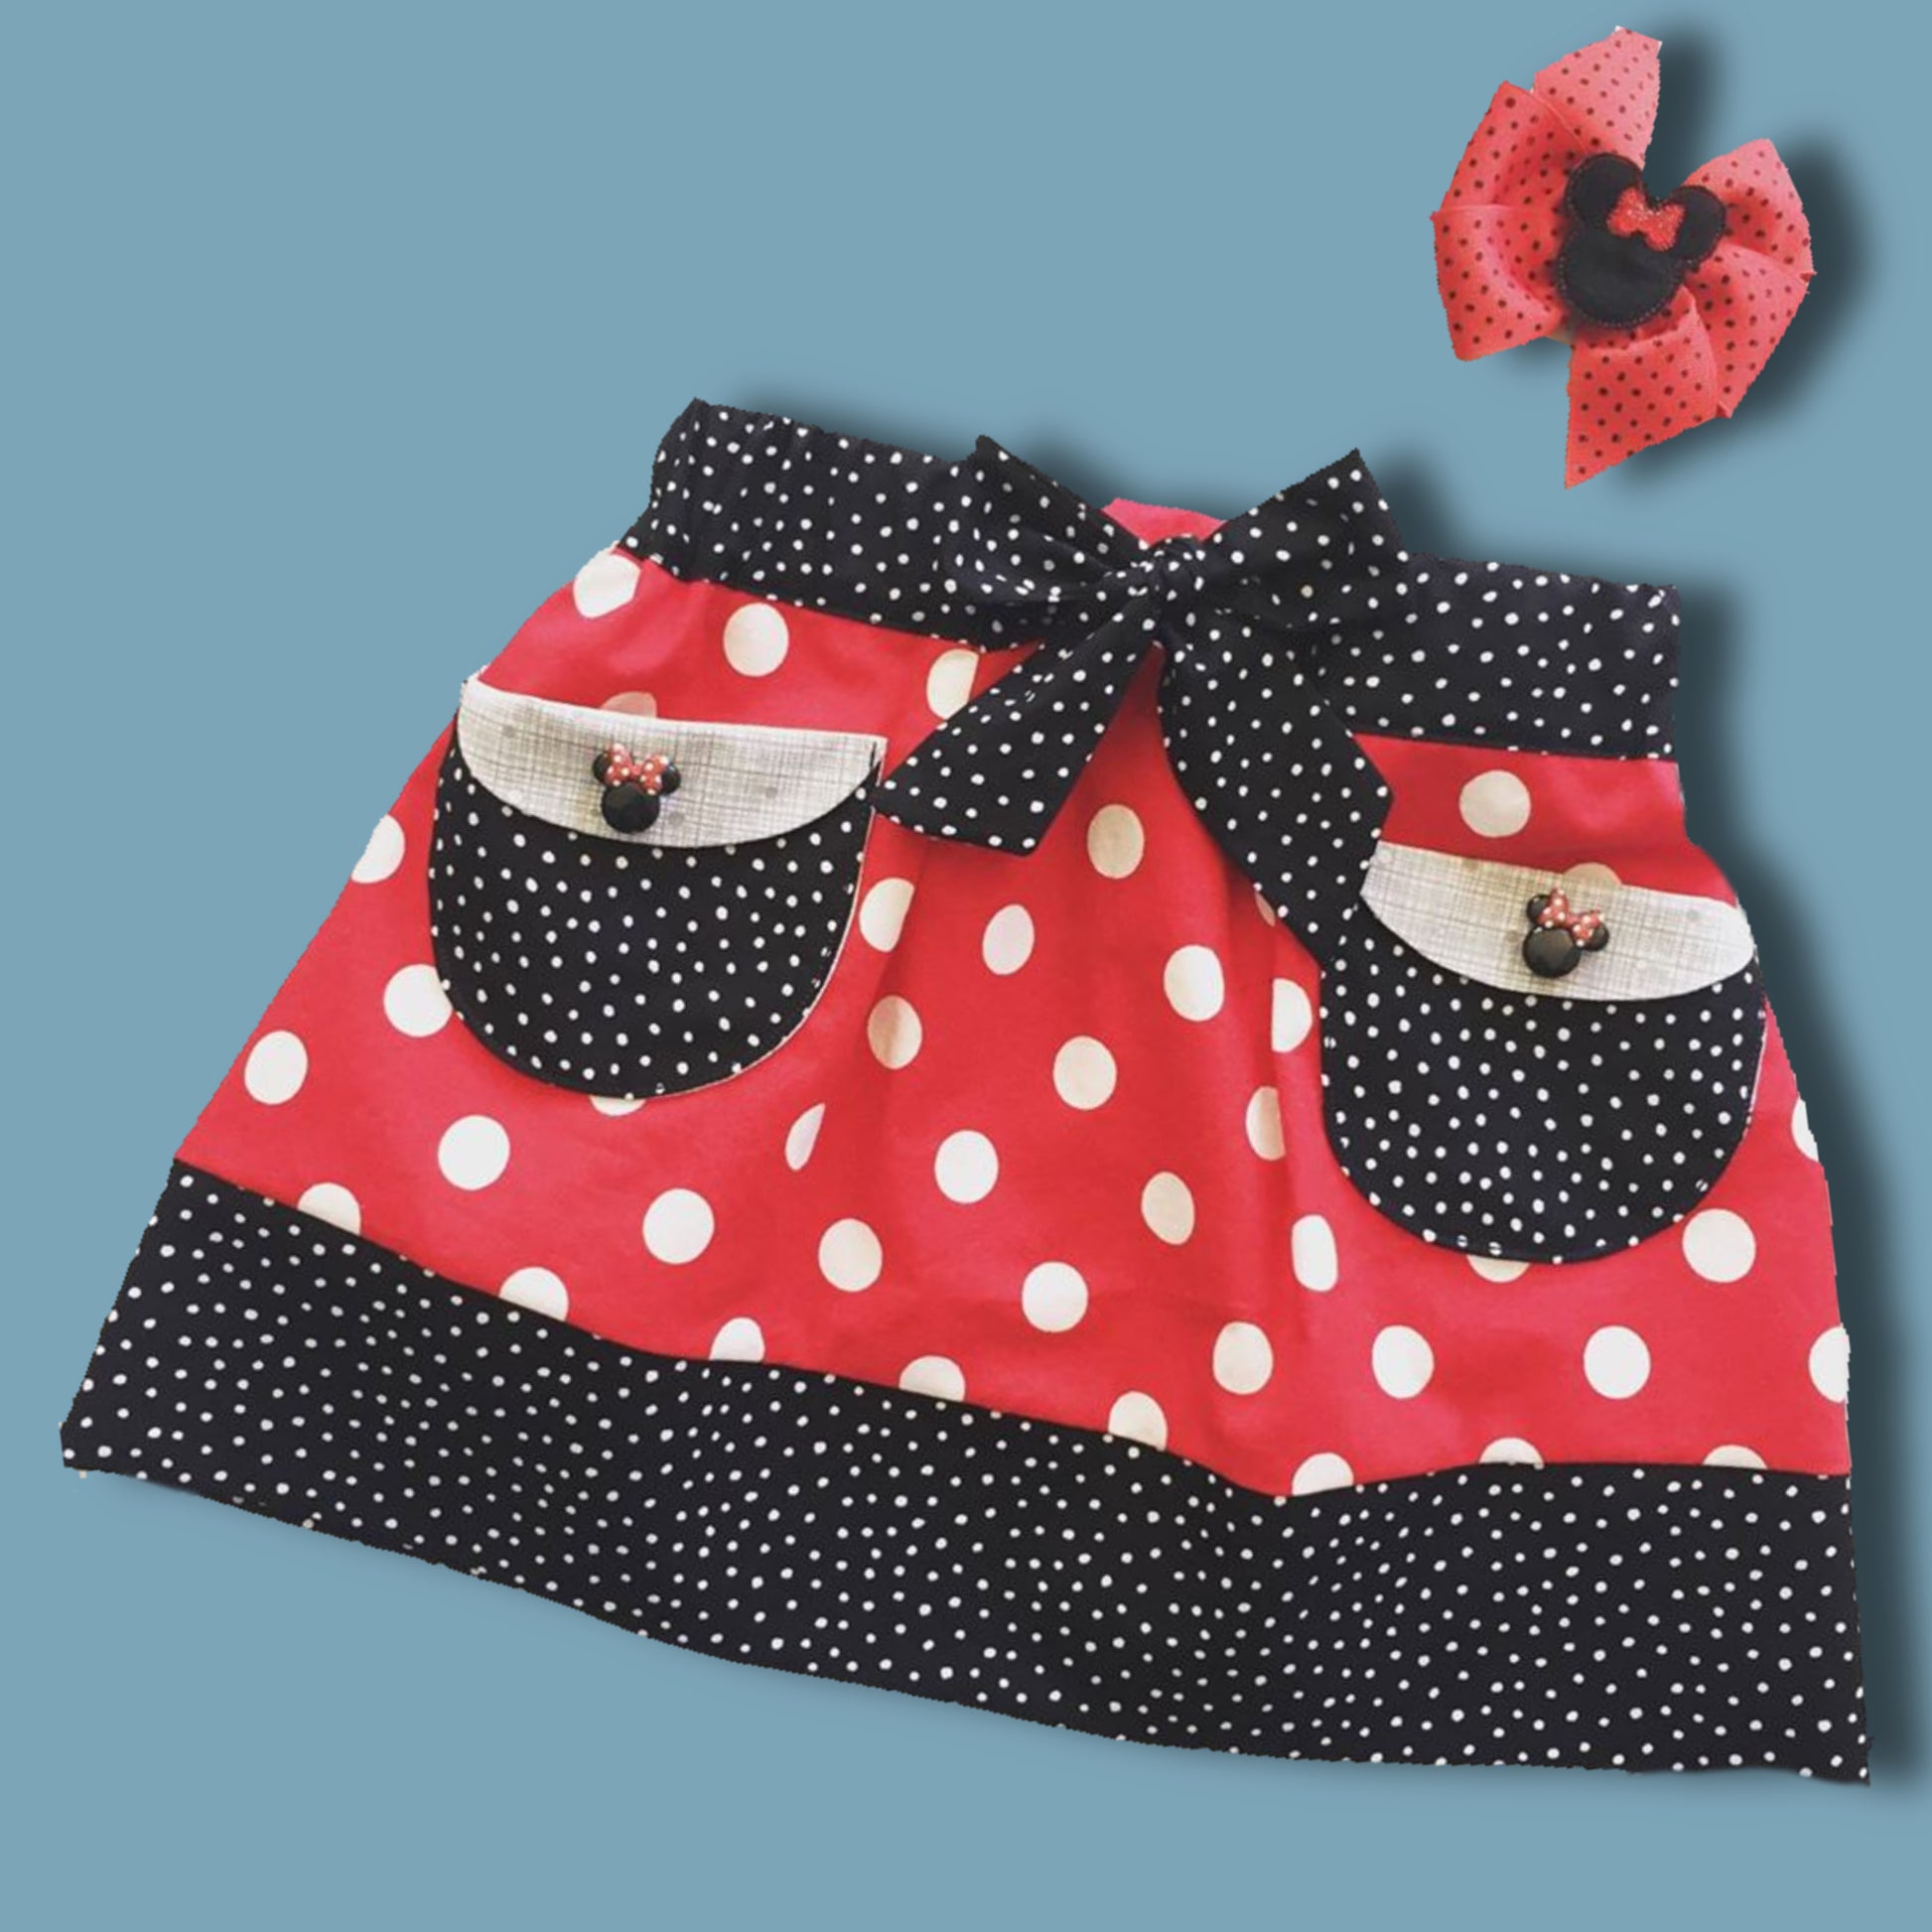
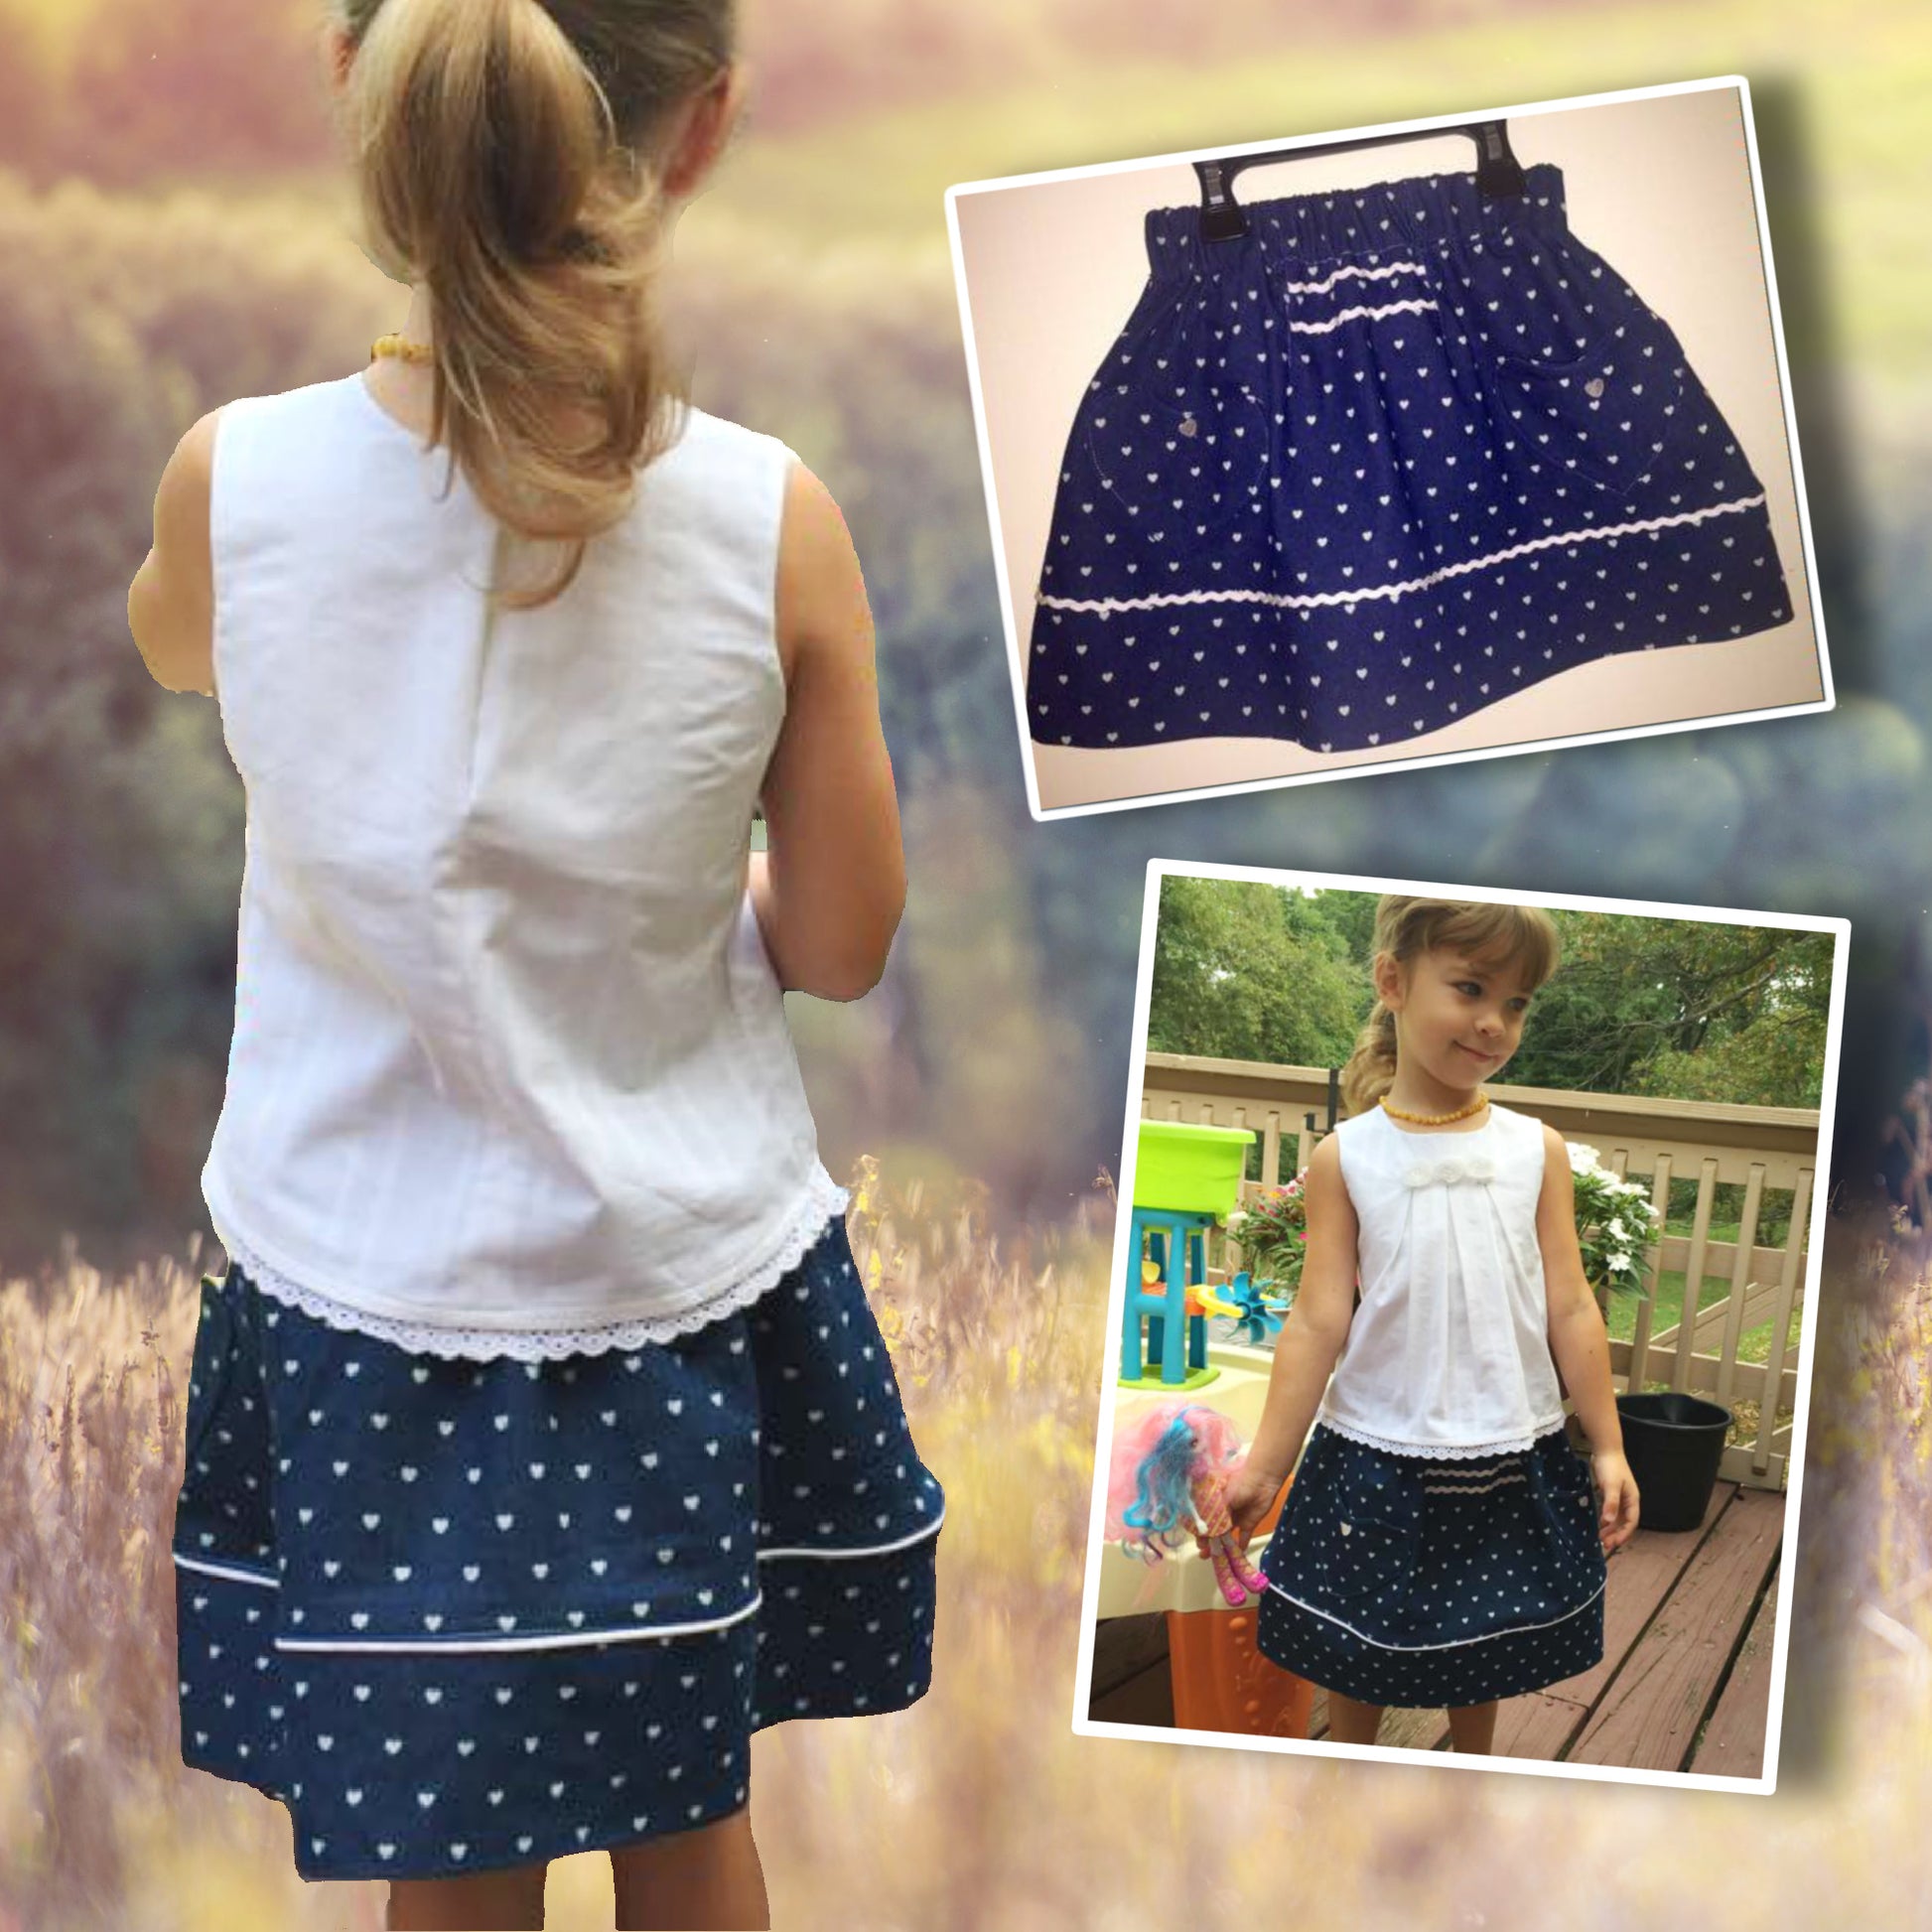
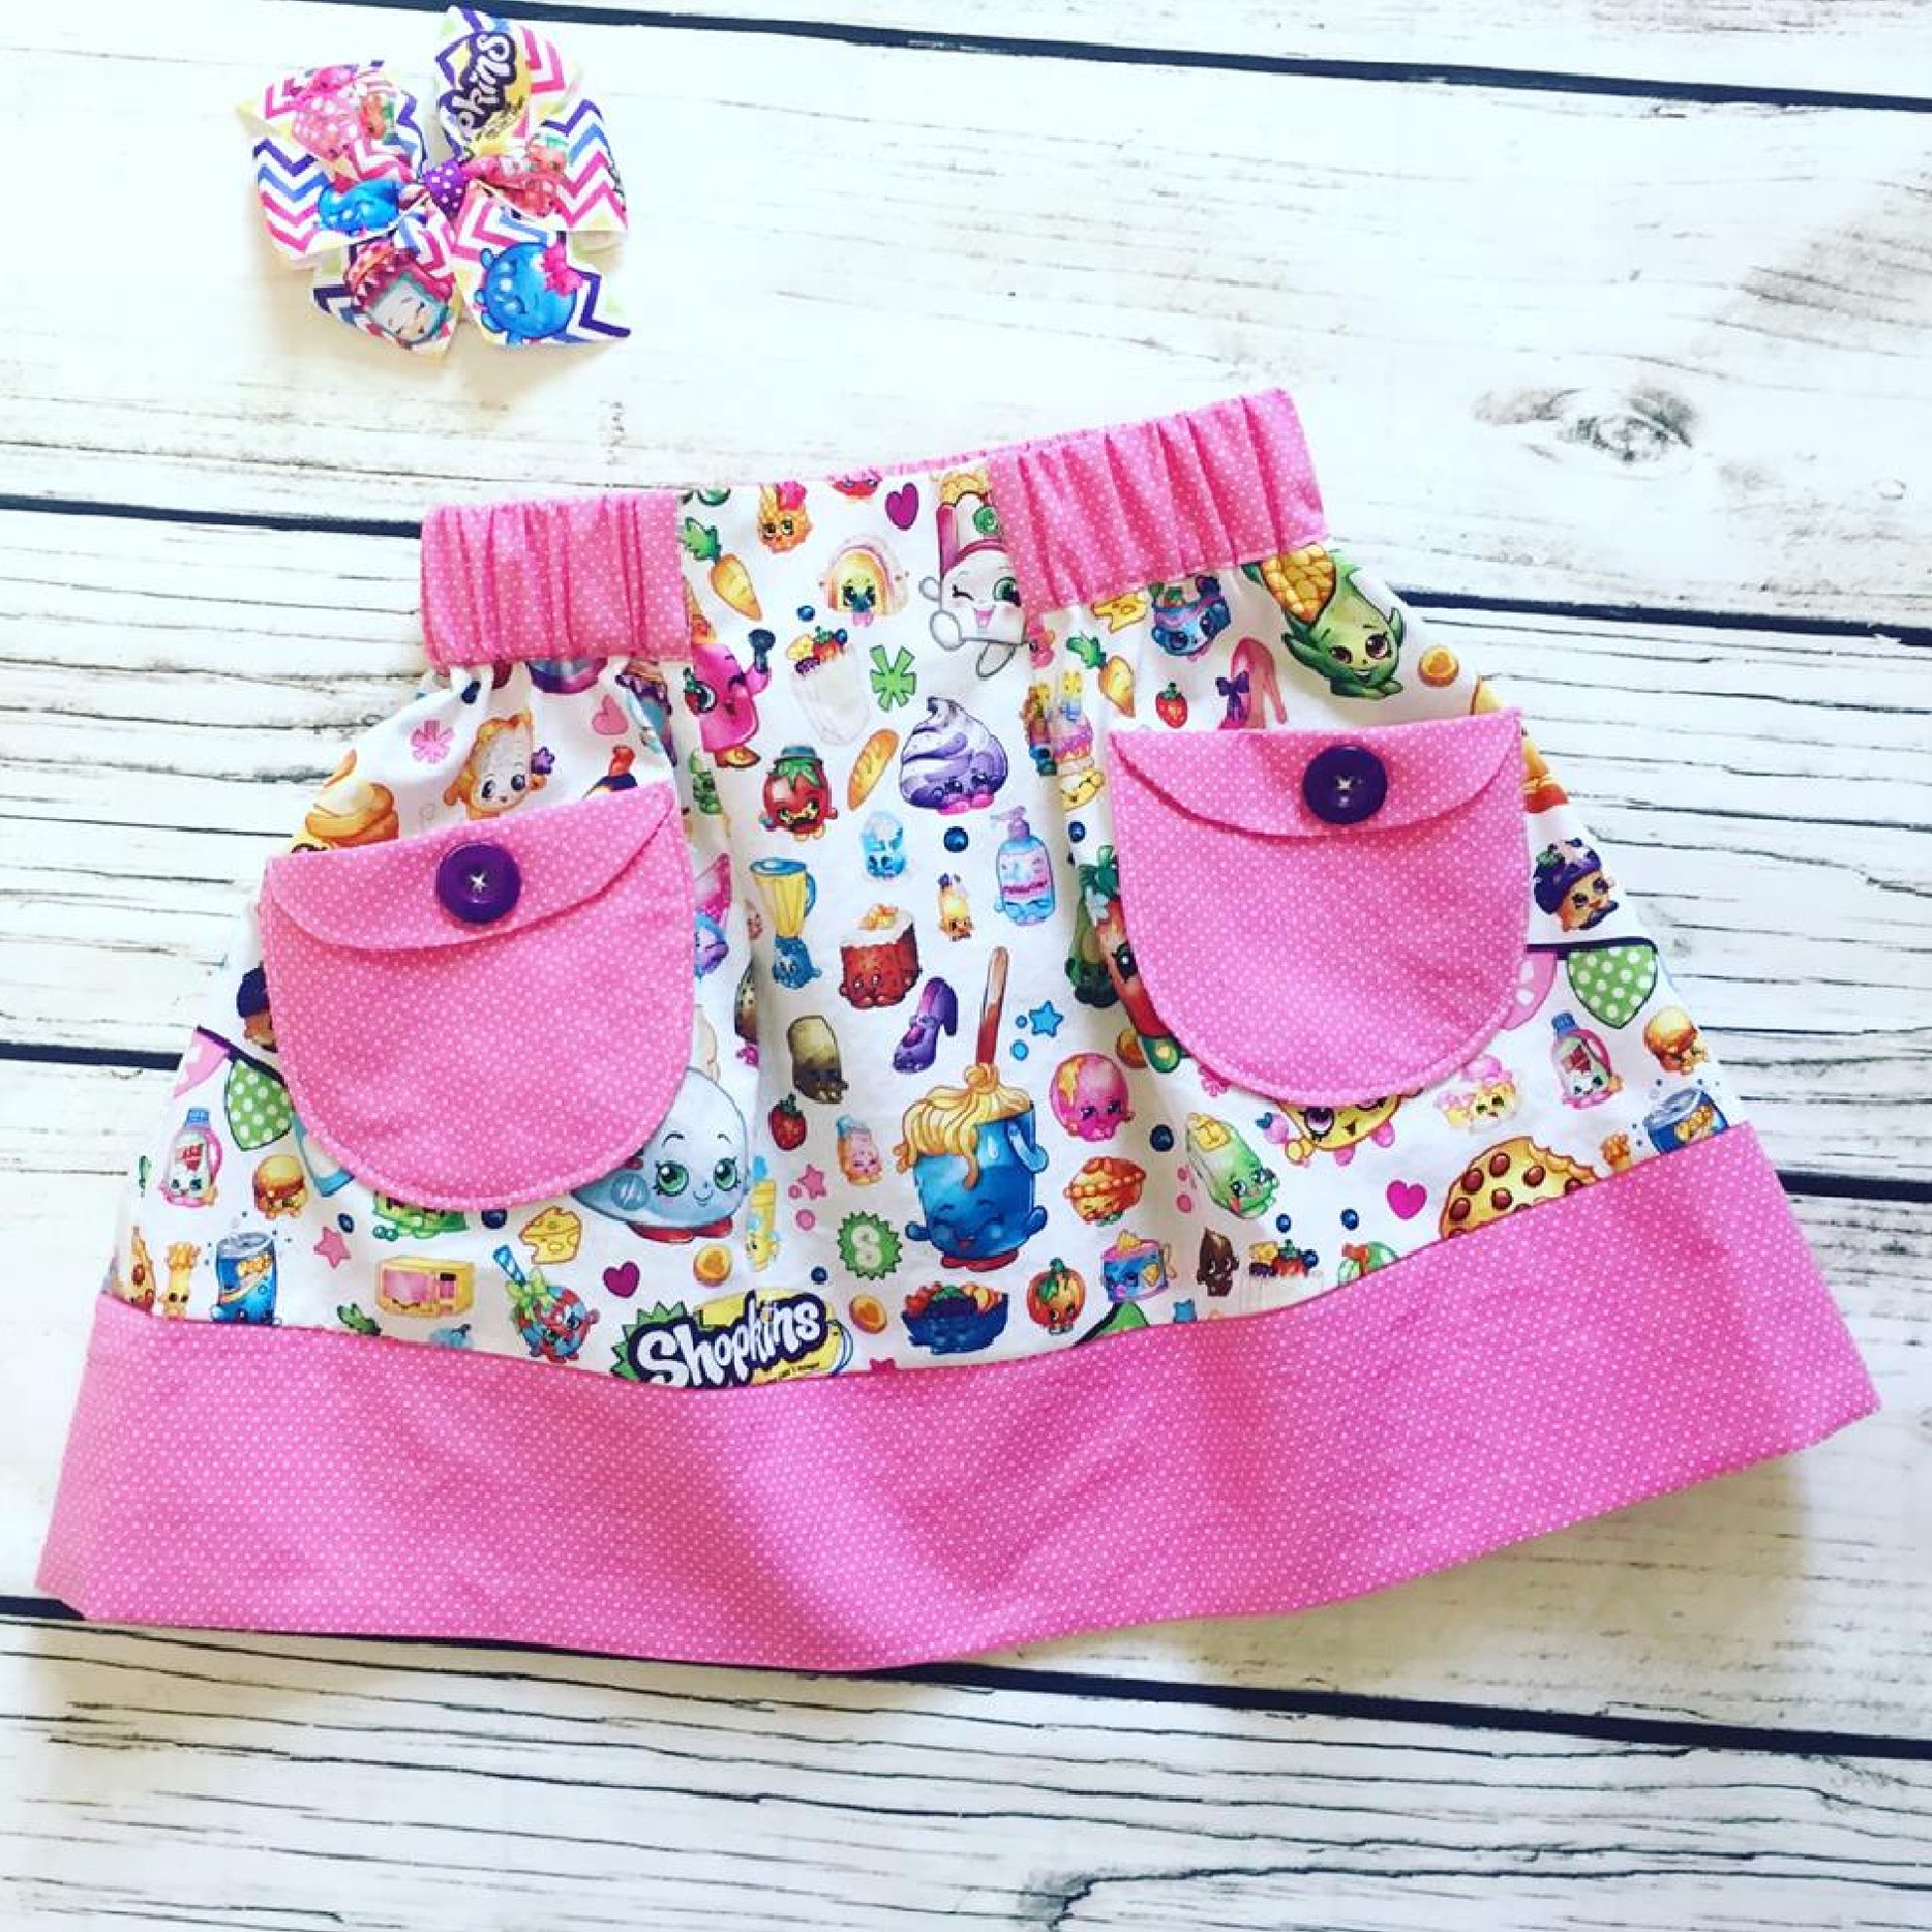
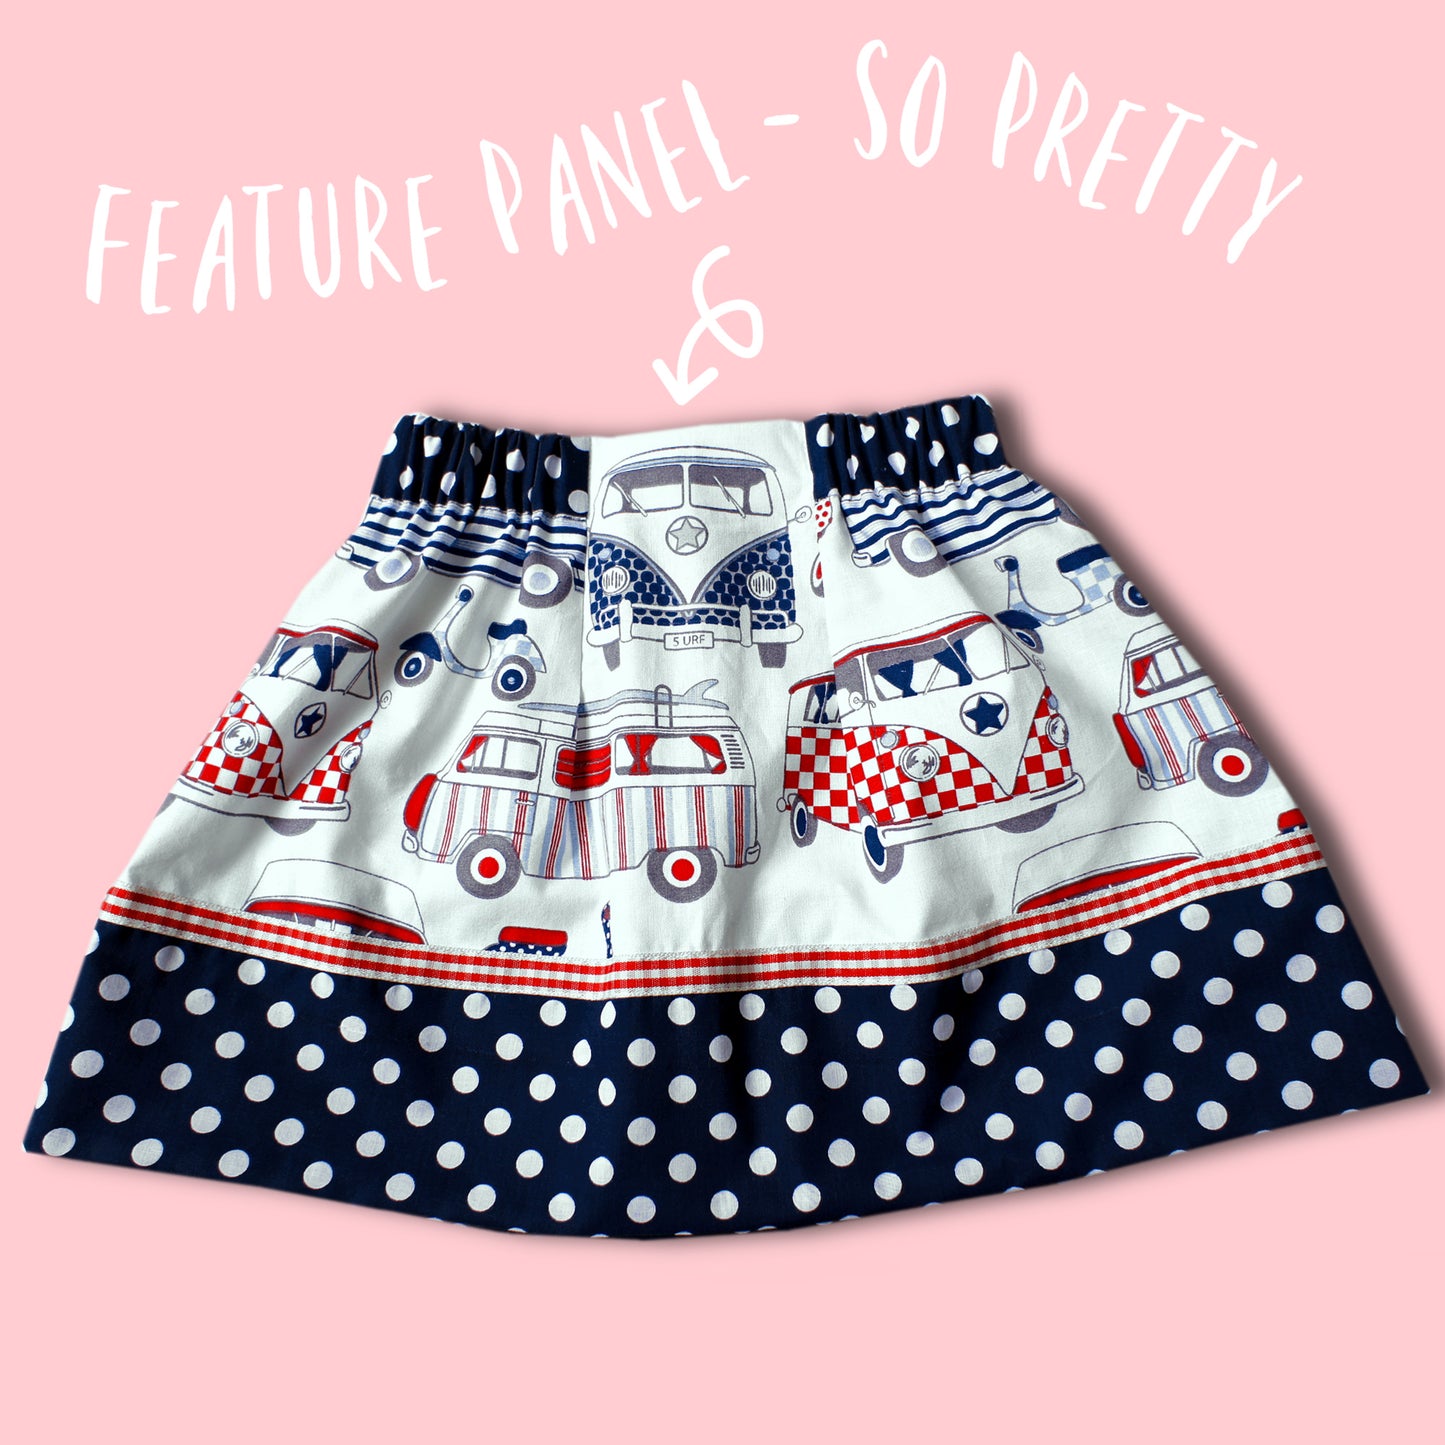
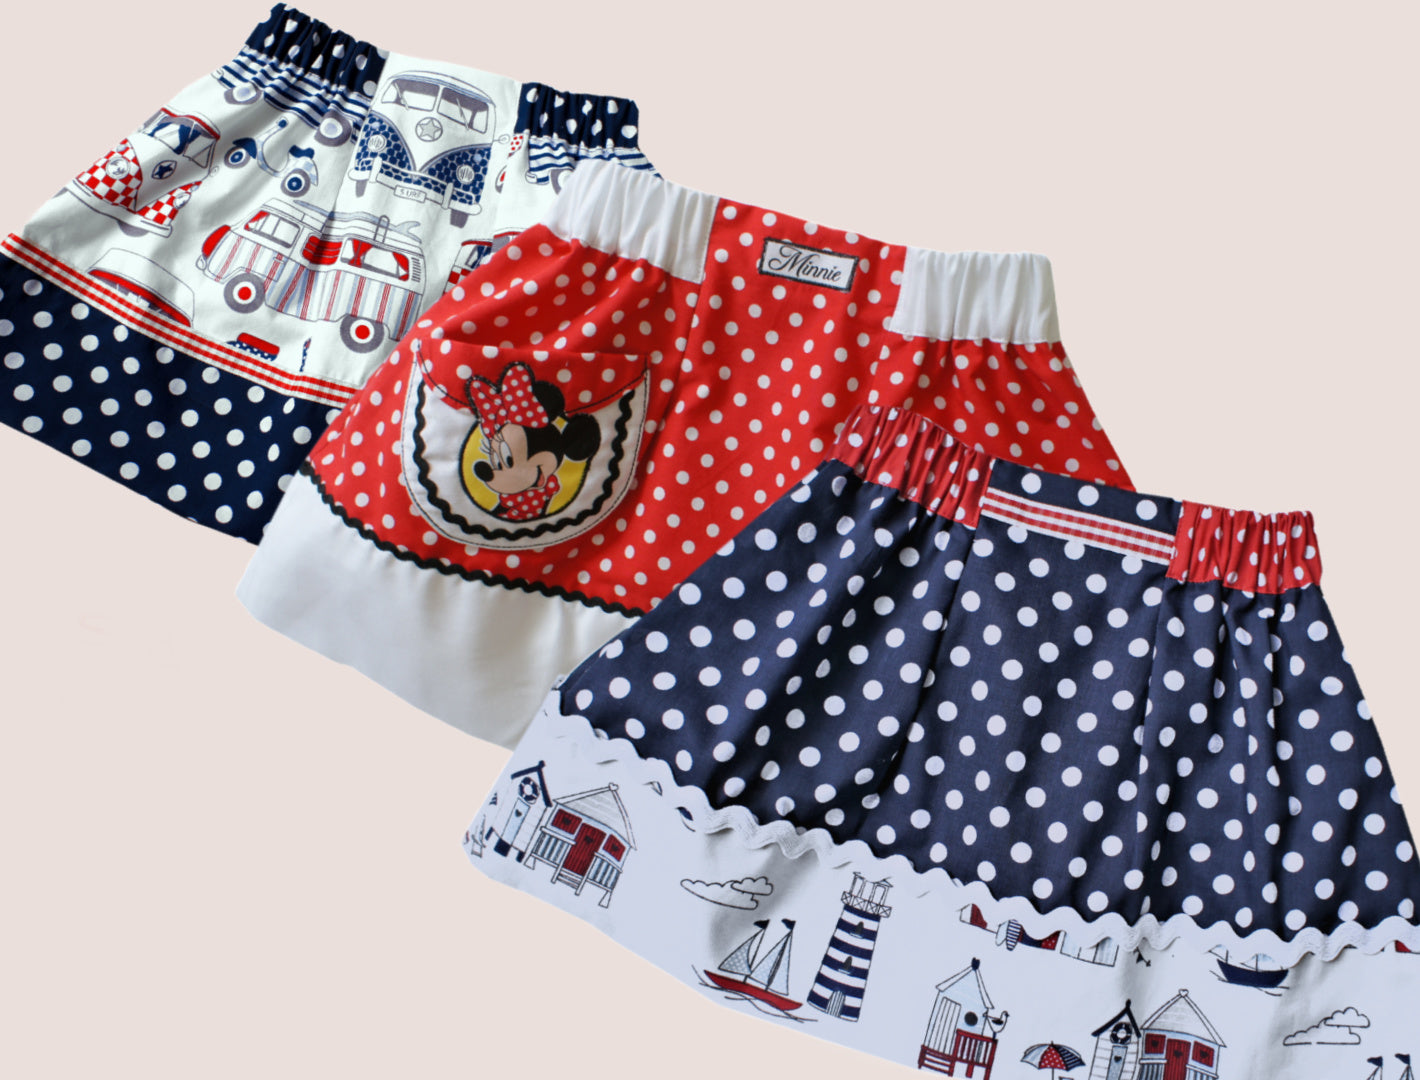
Melinda is our favorite little summer skirt pattern. She is an adorable beginner‑friendly design your little one will love.
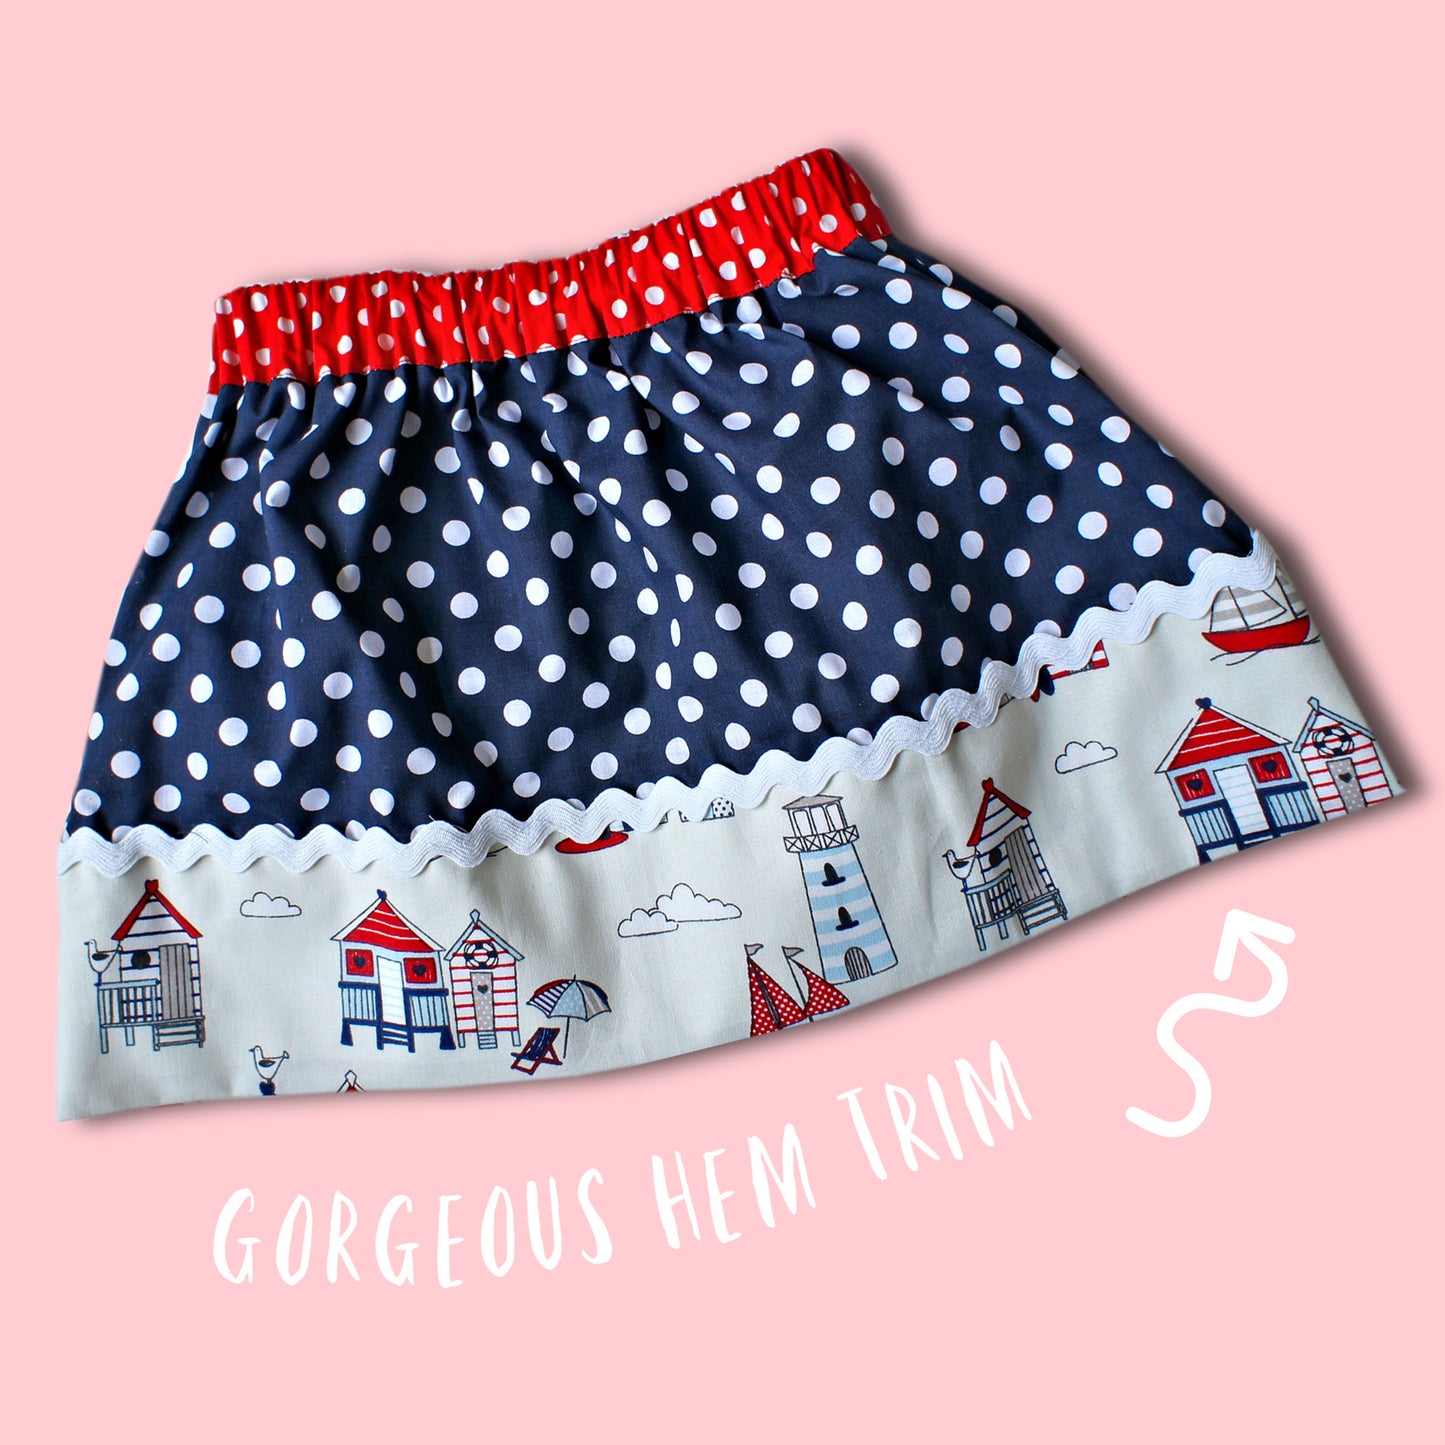
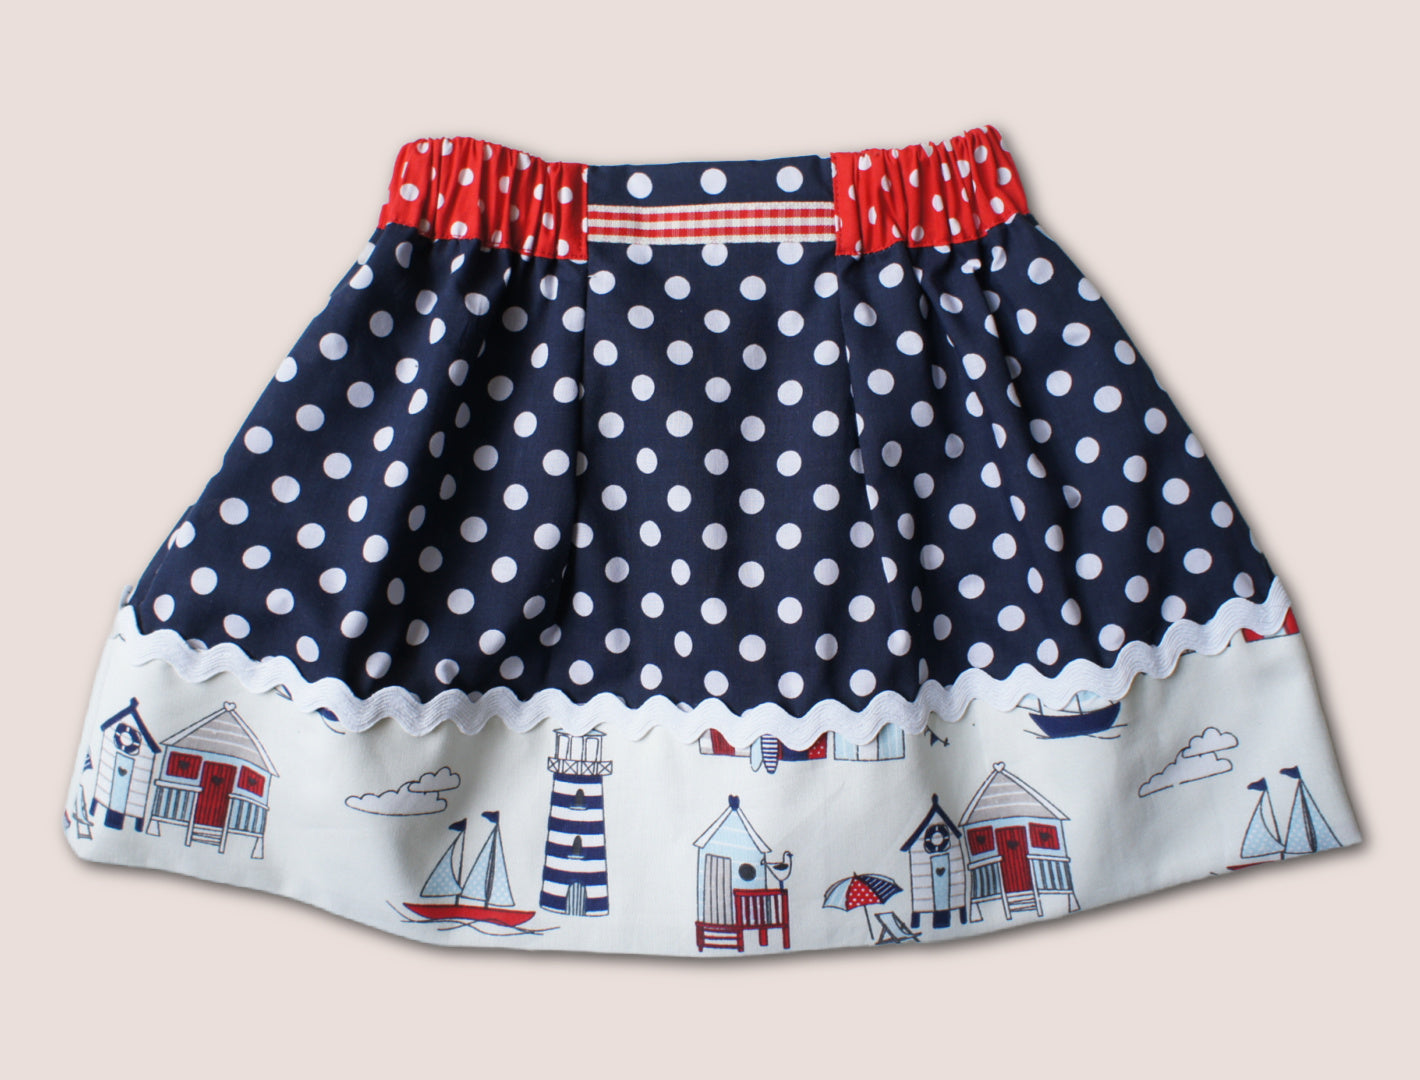
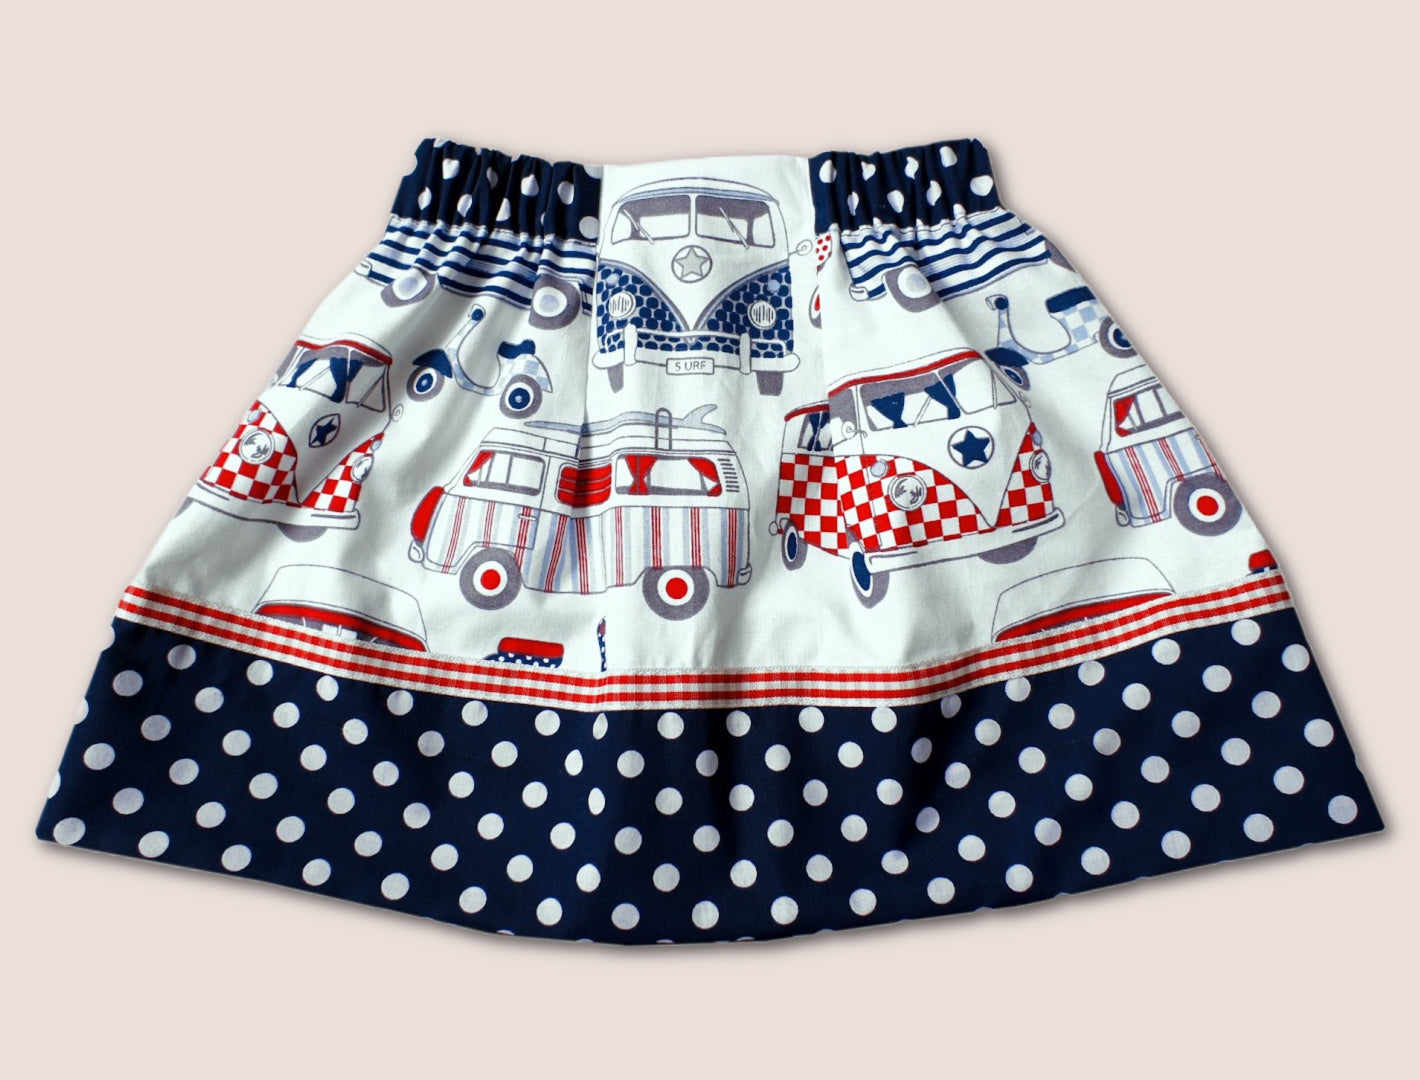
Featuring oversized pockets, a decorative hem trim, and a flat‑front waist with an easy elastic back, she is perfect for summer as well as back-to-school sewing projects. Just change out the printed cottons for warm and cuddly wool and you are set.
To make things even easier, the video sewing course is just below this listing, so you can get started right away.
Pattern Download Includes
Pattern Download Includes
Design Options
Design Options
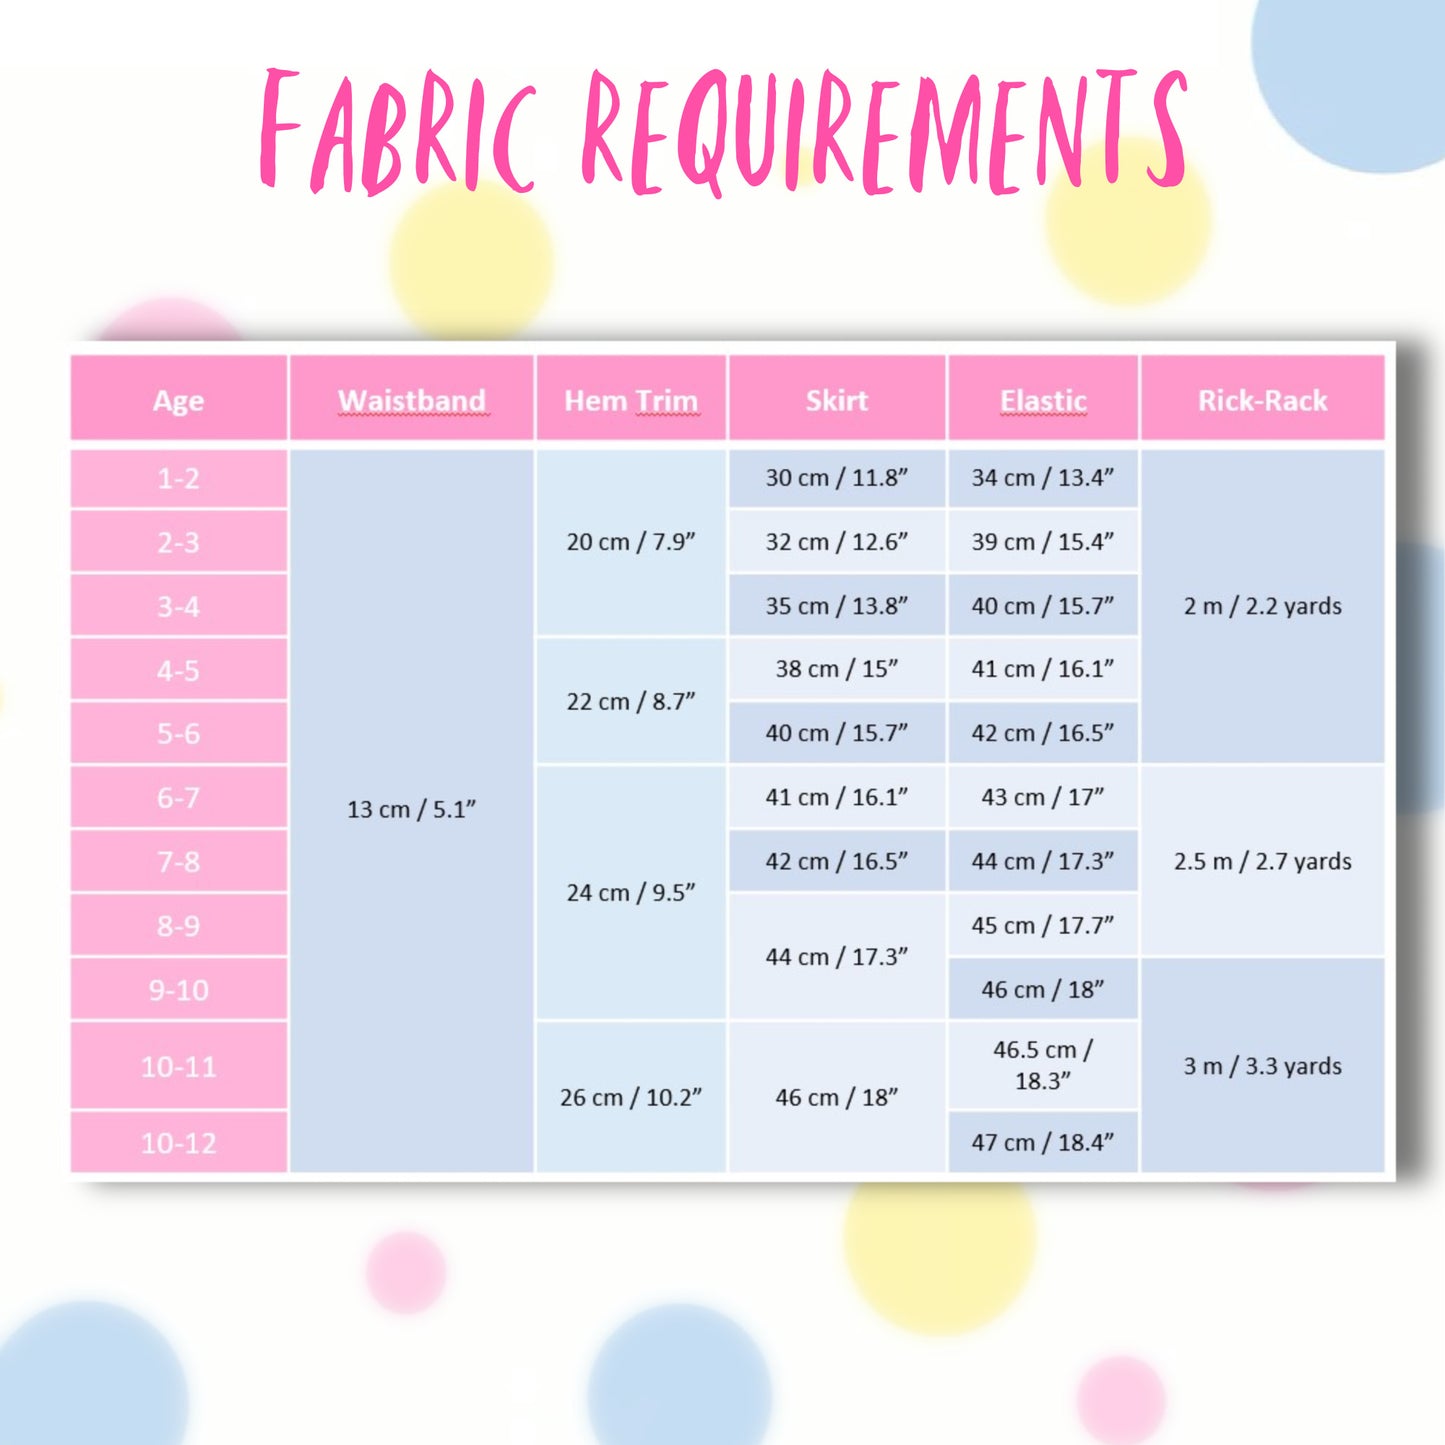
Fabric Requirements
Fabric Requirements
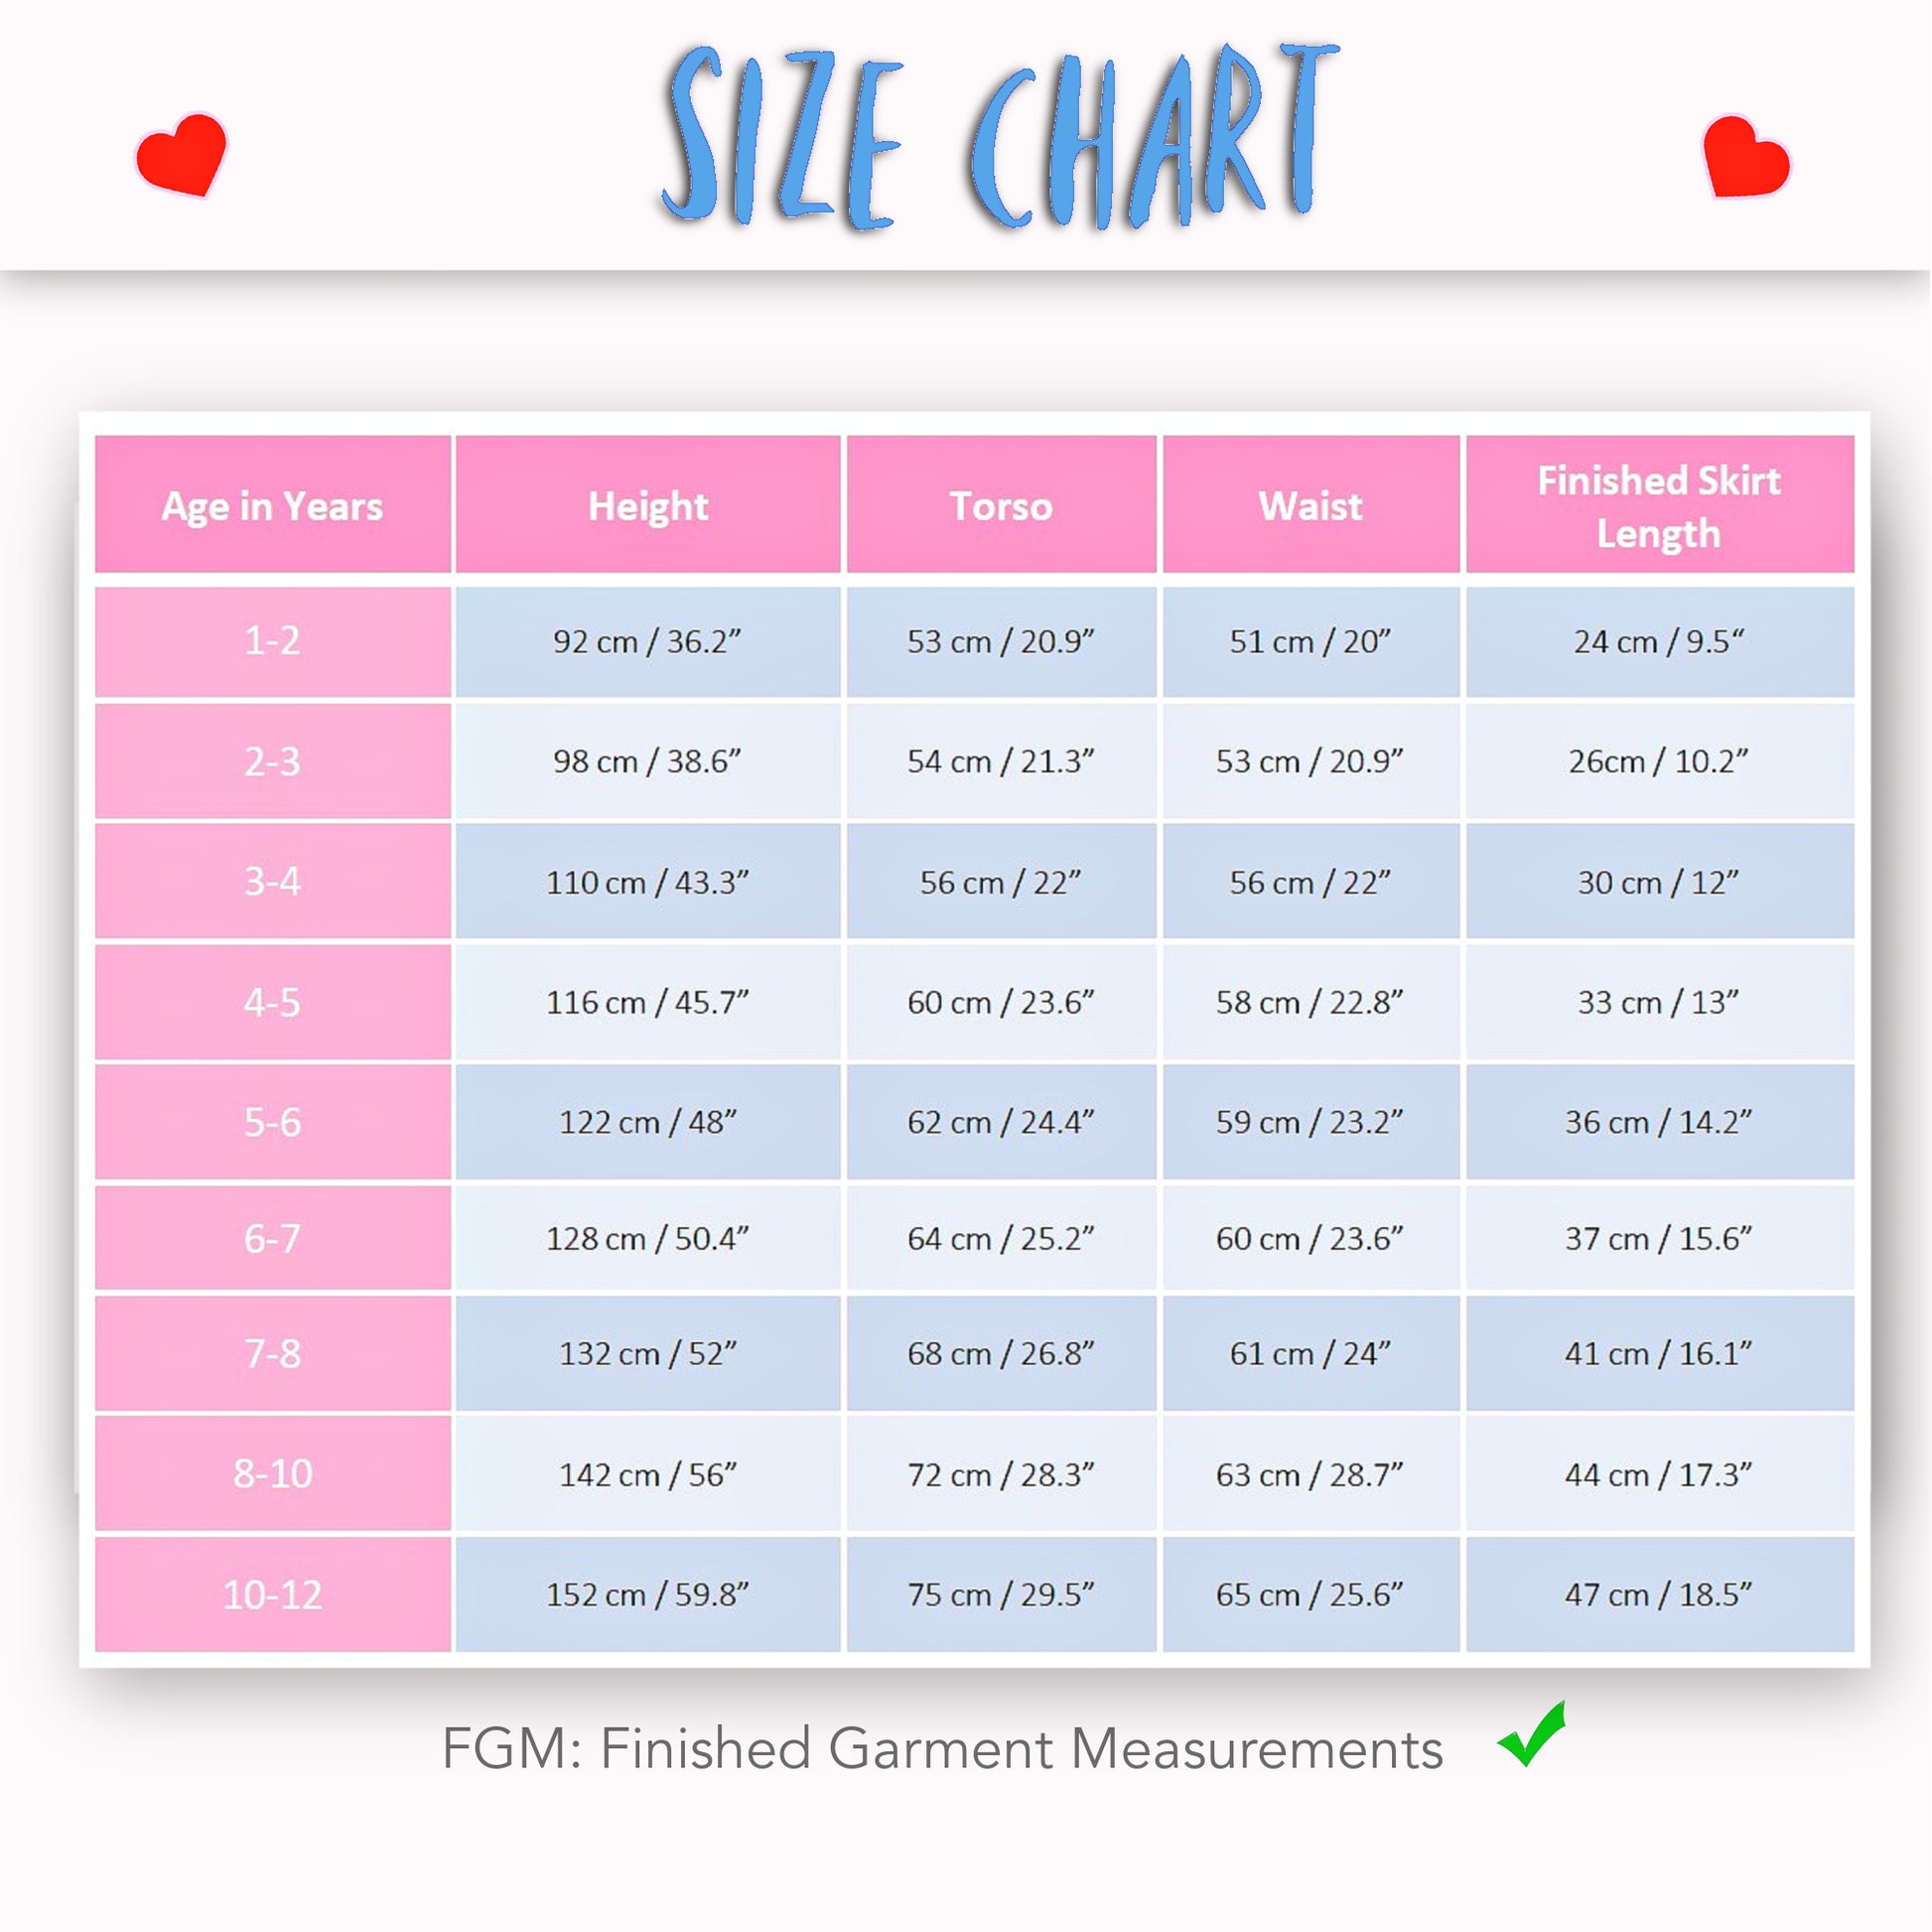
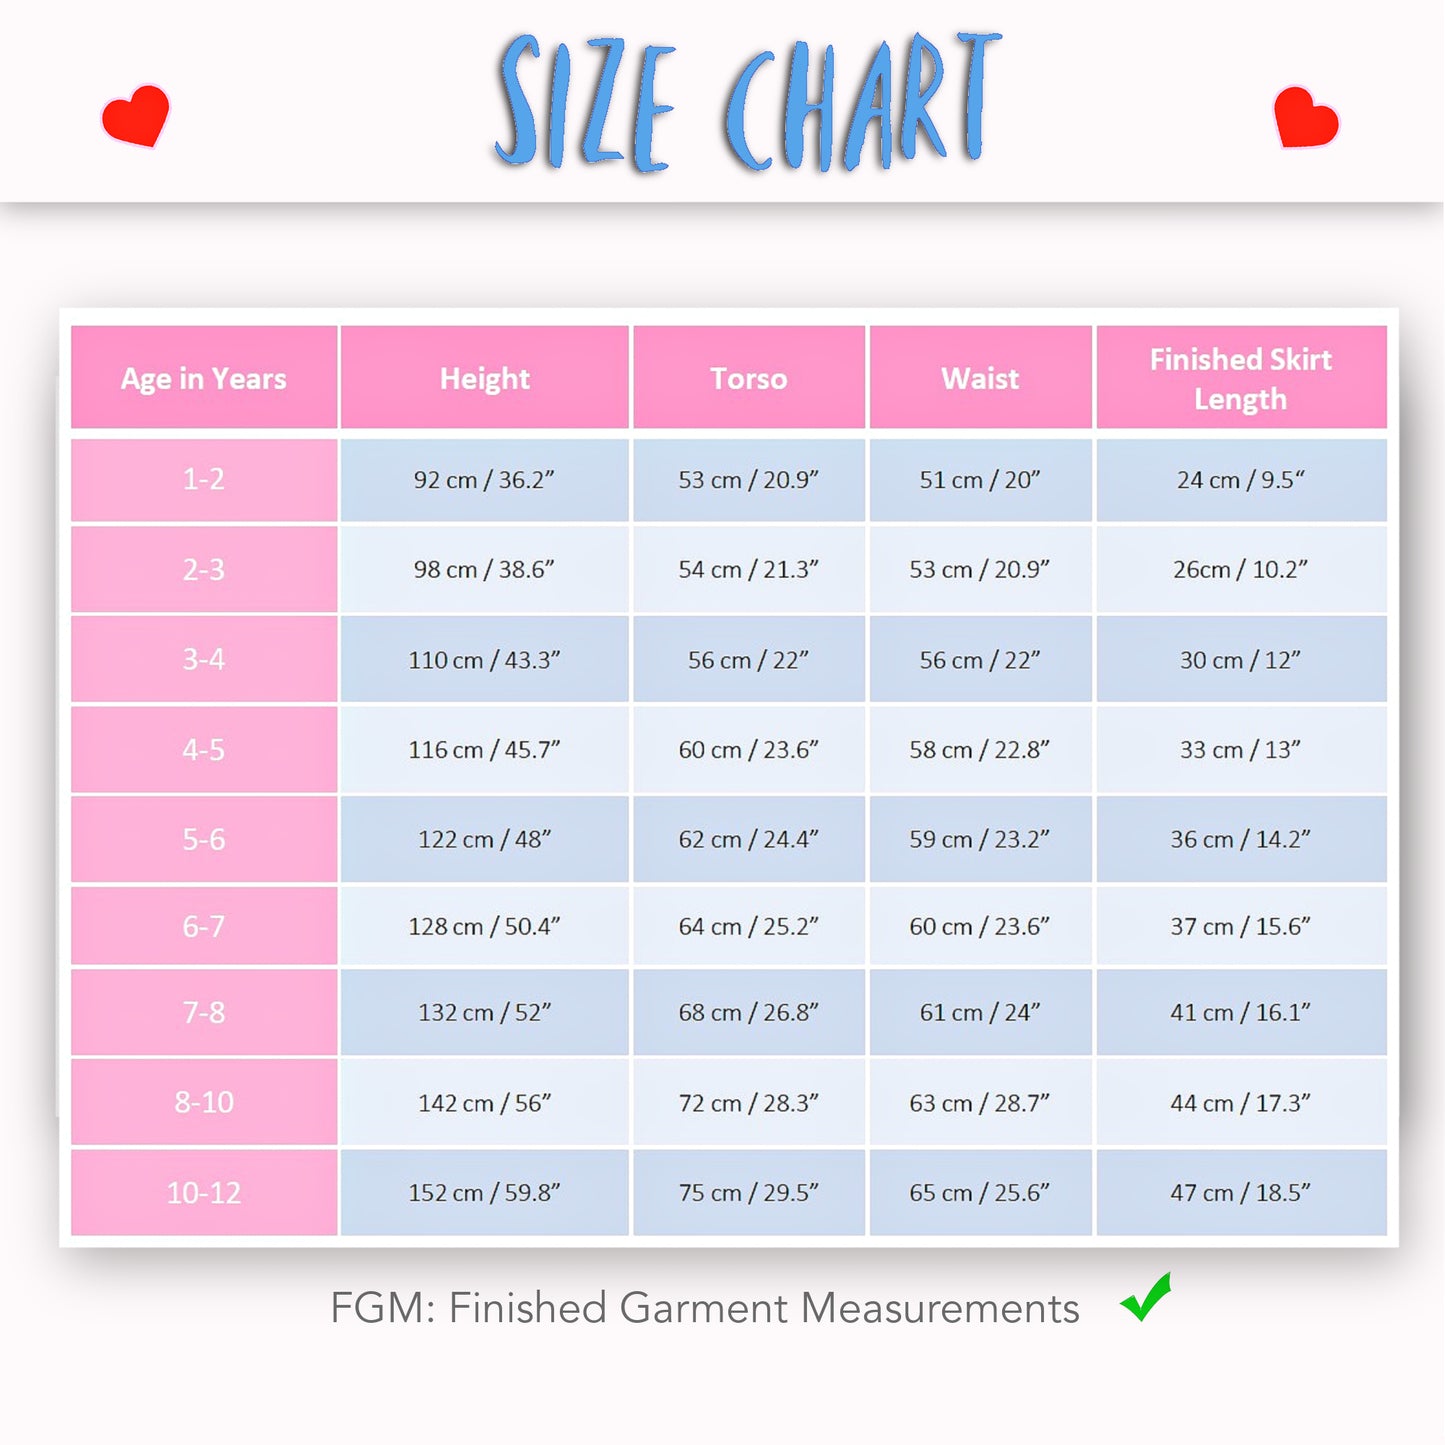
Available Sizes
Available Sizes
Please Read
Please Read


STEP-BY-STEP VIDEO TUTORIALS
INTRODUCTION TO THE PROJECT
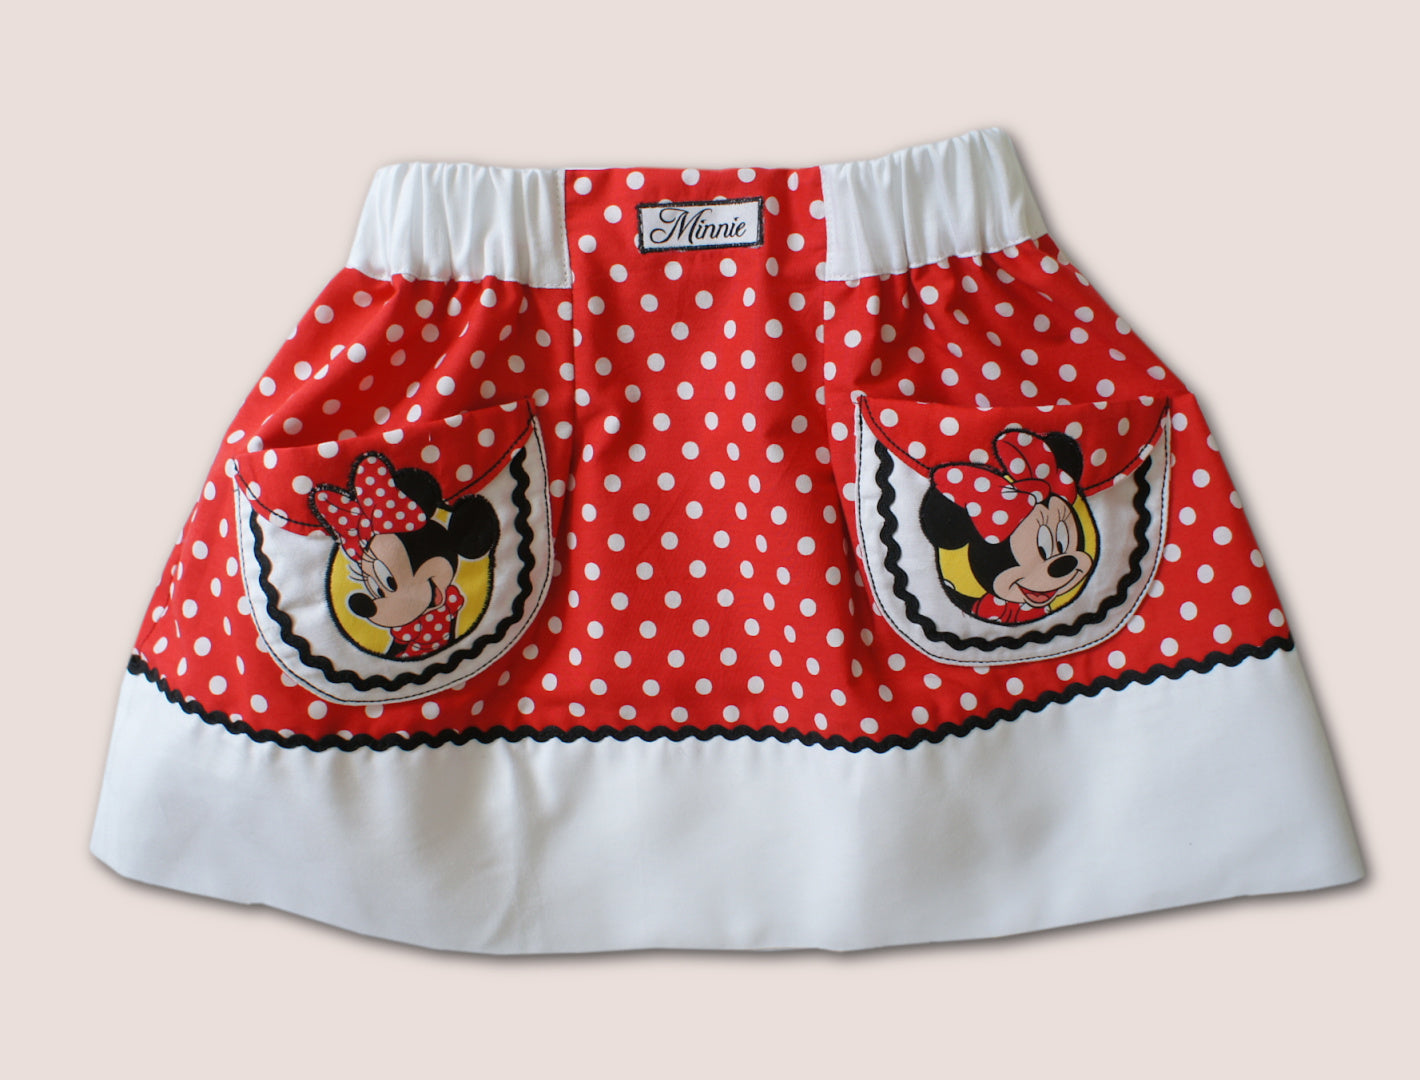
SKIRT WITH APPLIQUE POCKETS
SKIRT WITH FRENCH SEAMS
HEM TRIM WITH SUPER FLAT RIBBON FINISH