Skip to product information
1 of 20

BONNIE SKIRT

BONNIE SKIRT

Filled Circle
Filled Circle
Empty Circle
Empty Circle
Empty Circle
Regular price $8.50 USD
Regular price Sale price $8.50 USD
Sale Sold out

The Bonnie Twirly Skirt is everything we love about the vintage silhouette. The full length  tiered skirt sewing pattern has a  deep yoke  and the waistband features a flat front and gorgeous ties for a lovely back bow. 

It is sweet, swishy, and wonderfully beginner‑friendly, (just check out the video sewing course below) — the kind of project that makes you fall in love with sewing all over again.

Pattern Download Includes

  • Instant Download
  • DIN A4 & US Letter Size
  • Individual PDF files for every Size
  • All Sizes included
  • Detailed eBook
  • Video Tutorials

Design Options

  • Tiered skirt
  • Upper skirt is a circle skirt
  • Elasticated back waist with
  • Flat center front
  • Optional long ties

Fabric Requirements

BEST MATERIAL CHOICE
Lightweight woven fabrics such as linen, cotton, printed or plain, lace and trims of choice are best for the Bonnie tiered skirt PDF.

FABRIC REQUIREMENTS
•  Shell Fabric: You will need 39 inches–44 inches (75cm-1,10 m)
•  Elastic: 15-18 inches  (40-47cm)
•  Interfacing: 4 inches (10cm)

Available Sizes

Sizes: 1-12 Years

Please Read

  1. This is a digital pattern or PDF file, not a physical product. It will be delivered electronically via a download link delivered to the email used for the purchase.
  2. To ensure the pattern prints at its actual size, it's recommended that you use Adobe Acrobat Reader.
  3. The pattern creator, Frocks & Frolics, welcomes small-scale production using their patterns. 

Customers are encouraged to tag Frocks & Frolics when sharing projects made using their patterns on social media.

@frocksandfrolics #frocksandfrolics

View full details

STEP-BY-STEP VIDEO TUTORIALS

Thumbnail
INTRODUCTION TO THE PROJECT
Thumbnail
THE PATTERN
Thumbnail
CUTTING OUT
Thumbnail
THE TIES
Thumbnail
THE WAISTBAND
Thumbnail
SIDE SEAMS
Thumbnail
ADDING A LACE TRIM
Thumbnail
JOINING SKIRT & YOKE
Thumbnail
All-IN-ONE-VIDEO

VIDEO TEXT

The Pattern

Transcript for the Video: Pattern Preparation and Fabric Cutting

The first step is to cut your pattern pieces. This is a one-size profile system designed to be beginner friendly.

Before cutting anything, check that your pattern has printed correctly. Measure the test square on the page to confirm accuracy. It should measure five centimeters or one inch depending on the version. Print at actual size and disable any “shrink to fit” settings in your printer.

Understanding the Pattern Layout

The last page of the pattern always contains an assembly plan. This shows how all pieces fit together. Some pattern pieces are split across multiple pages to save space, and these are joined using clearly marked alignment lines.

Each piece is labeled and arranged in alphabetical order, making assembly straightforward.

Start by assembling larger components such as the circular yoke and waistband sections. The front and back waistband pieces are separated, and the front waistband includes a center marking to help align the ties evenly.

Aligning Key Construction Points

The center marking on the front waistband is important for correct tie placement. When the waistband is folded and assembled, this marking ensures the ties sit symmetrically.

Avoid guessing placement at the top edge, since the folded construction can make orientation confusing. Using the provided mark prevents misalignment.

Skirt Construction Method

The skirt piece is not provided as a full cut-out pattern. Instead, you are given a measurement chart in the instructions that defines width and length.

The skirt is constructed as a rectangle rather than a shaped pattern piece. This reduces paper waste and allows flexibility in fabric choice.

Fabric Direction and Layout

Fabric direction is important for achieving proper volume. Cutting across the width of the fabric may not always produce enough fullness, especially in sizes six and above.

To achieve proper drape and volume, cutting along the selvage is often required. This allows multiple panels to be joined together.

In some cases, fabric width is not sufficient, requiring several panels to be cut and joined. For example, narrower fabric may require four separate panels, each cut to the required length.

If using standard wide fabric around 140 centimeters or 57 inches, two panels cut across the width are usually sufficient.

Planning Fabric Usage

Panel length depends on the desired skirt volume. Longer panels create more fullness but require more fabric length.

In the example, each panel was cut to approximately one meter, meaning a total of two meters of fabric length was needed to achieve the final volume.

Next Step

Once pattern pieces are assembled and fabric is prepared, you can proceed to cutting and construction in the next stage of the tutorial.

Cutting Out

Transcript for Video: Bonnie Skirt – Pattern Preparation and Fabric Cutting Guide

In this chapter we are going to prepare and cut the bonnie skirt pattern pieces. This is a one size system designed to be beginner friendly, but accuracy in printing and cutting is essential for a good result.

Preparing the Pattern

Start by checking that the pattern has printed correctly. You should always confirm that the test square measures five centimeters or one inch depending on your version. Print at actual size and make sure shrink to fit is disabled in your printer settings.

The last page of the ebook contains the assembly plan. This shows how the pages fit together. Some pattern pieces are split across pages, so you need to align the matching edges carefully and tape them together following the markings and alphabetical order.

Once assembled, you will see clearly labeled pattern pieces. The skirt itself is based on a circular construction, so you will notice curved sections and structured waistband pieces for both front and back.

Fabric Selection and Layout Considerations

For this project, two fabrics are used. A baby basics polka dot cotton from michael miller and a floral fabric from the rosalinda collection. The fabric used here is approximately 42 inches wide.

Fabric width is important because it affects how much volume the skirt will have. If your fabric is at least 140 centimeters or 54 to 57 inches wide, you can cut across the width normally. If it is narrower, you need to adjust your cutting layout.

For narrower fabric, you may need to cut along the selvage instead of across the grain. This allows you to create enough length and volume, especially for larger sizes. If you cut incorrectly across narrow fabric, you may end up with seams in visible areas like the center front, which should be avoided.

Cutting the Skirt Pieces

The skirt piece is a circle-based shape. You will not receive a full skirt pattern piece in paper form. Instead, you will use the measurement chart on page six of the instructions.

The skirt is essentially a large rectangle that is transformed into a gathered circle effect. Depending on your size, you will cut panels according to the chart provided.

When cutting the circular sections, place the pattern flat on the fabric. Keep your scissors low and follow the curve slowly around the inner and outer circle. This helps maintain accuracy and prevents jagged edges.

Always follow the grain direction carefully. For gauze or lightweight fabrics, the fabric may appear flat during cutting but will gain volume once gathered.

Cutting waistband and interfacing

The back waistband is cut on the fold. The front waistband includes a center marking that helps you align the tie placement accurately. This marking is important because the waistband is folded, and incorrect placement can shift the design off center.

Because the waistband does not contain elastic, it requires reinforcement. Apply iron on interfacing to strengthen the structure. Only interface the necessary sections, usually the center areas, rather than the full seam allowance, to avoid unnecessary bulk.

A medium weight interfacing such as vilene works well. Apply it carefully with heat, ensuring it lies flat and smooth before proceeding.

Cutting ties

The ties are cut as long rectangular strips. The length can be adjusted depending on how you want them to wrap and finish. In this case, slightly longer ties are used so they can wrap around and tie at the side.

If you are working with gauze or loosely woven fabric, you may notice thread lines when cutting along the grain. These disappear once pressed and assembled, so do not worry if they appear during cutting.

After cutting, press the ties to stabilize them and prepare them for sewing in the next stage.

Elastic preparation

Elastic length should be based on waist measurement rather than height. This ensures a better fit from the beginning.

The elastic used here is reduced from five centimeters to four centimeters for a cleaner finish, but you can also use three centimeter elastic if preferred. The waistband construction allows flexibility, so minor variations in elastic width will still work.

Always prioritize comfort and movement. A small allowance in elastic length can make top stitching and finishing easier later in the process.

Final notes

Once all pieces are cut, you should have the skirt panels, waistband pieces, ties, and elastic prepared. At this stage everything is ready for assembly.

In the next chapter, we will begin sewing the ties and start constructing the skirt step by step.

The Ties

Transcript for the Video: Bonnie Skirt – Tie Construction and Finishing

In this chapter we are going to construct the ties for the bonnie skirt. This is a simple step technically, but accuracy matters because the ties need to be clean, symmetrical, and durable.

Preparing the Ties

Start by folding your fabric lengthwise with the right sides facing inward. This creates the tube structure for the tie.

If you want a more refined finish, you can shape a slight angled corner at the tip before sewing. This is optional, but it helps create a cleaner and more defined point once turned.

Secure the fabric using a few strategic pins. Place them in key areas to prevent shifting while sewing. This is especially important with lightweight or slippery fabrics.

Sewing the Ties

Use a one centimeter seam allowance throughout the construction. This is the standard seam allowance used in this project, although a foot width allowance can also work as long as it stays consistent.

Set your stitch length to 2.5 and align your fabric with the presser foot guide or seam marking. Sew steadily from one end to the other.

When sewing, maintain gentle control of the fabric from the back to prevent bunching or pulling. Lightweight fabrics can sometimes feed unevenly through the machine.

As you approach the tip, reduce your stitch length to around 1. This gives you better control when forming the point.

Sew a slightly rounded tip instead of a very sharp angle. This helps prevent distortion when the tie is turned right side out.

Turning the Tie

Once sewn, trim back the seam allowance to reduce bulk.

Turn the tie right side out using a tool such as a pencil, chopstick, or turning stick. Gently push the fabric through until the full shape is formed.

Use a pin or needle to refine the tip. If the point looks rounded, push the fabric outward from the inside until the shape becomes sharper and more defined.

Press the tie carefully with an iron to set the shape and smooth out the seams.

Topstitching Technique

Before topstitching, a useful technique is to pull a double thread through the tip area. This helps stabilize the fabric and prevents it from being pulled into the machine, which can happen with lightweight materials.

Set your stitch length to 3.5 for topstitching. Use a fixed point on your presser foot as a guide and keep the fabric aligned with it instead of focusing directly on the needle.

Sew slowly and steadily, maintaining alignment throughout the length of the tie.

Keep the needle down when turning the tip. This helps stabilize the fabric and prevents shifting.

Because the tie is cut on the bias, it may stretch slightly. Handle it gently and avoid pulling too tightly.

When sewing the tip, avoid going too sharply into the point. A slight rounding gives a cleaner and more stable finish, especially on domestic machines.

Repeating the Process

Repeat the same steps for the second tie. Make sure both ties match in length, shape, and stitching quality.

Check symmetry carefully before moving on to the next stage.

Final Notes

Once both ties are completed, they should be cleanly turned, pressed, and topstitched. At this stage, they are ready to be attached to the waistband in the next step of construction.

The Waistband

Transcript for the Video: Bonnie Skirt – Waistband Construction and Elastic Insertion

In this chapter we are going to construct the waistband and attach it to the skirt. This includes inserting the ties, reinforcing the waistband, and installing the elastic for a secure and comfortable fit.

Preparing the waistband

Start by applying your interfacing. Iron it onto the waistband pieces carefully using dry heat. Steam is not necessary, but ensure the interfacing bonds fully to the fabric and does not lift at the edges.

Once fused, fold the waistband according to the pattern and press it well. This helps define the structure and makes alignment easier later.

Attaching the ties

Position the ties on the waistband before assembling it fully. Remember to account for a one centimeter seam allowance.

Mark the center point of the waistband and align the ties so they sit evenly on both sides. The direction of the tie tip should be consistent, although small variations will not affect the final result.

Pin the ties securely in place. Make sure both sides match in placement, height, and spacing to maintain symmetry.

Closing the waistband

Place the back waistband piece right sides together with the front waistband piece.

Align both edges carefully and sew them together using a one centimeter seam allowance. This will form a complete waistband loop.

Once sewn, finish the upper edge of the waistband with overlocking or a similar method. Do not finish the tie attachment edge if you plan to fold or topstitch it later.

Mark the key reference points on the waistband, including the center front and side positions. Since there is no traditional side seam, these markings are essential for accurate alignment.

Preparing the skirt for attachment

Mark the corresponding points on the skirt. Identify the areas of highest stretch or natural shaping, which will typically correspond to the center front and side positions.

Ensure that both the waistband and skirt are marked consistently so that the gathered sections distribute evenly during assembly.

Attaching waistband to skirt

Place the waistband and skirt right sides together.

Align all marked points carefully. The inner circumference of the skirt should match the waistband measurement, making it easy to distribute evenly without excessive stretching or forcing.

Pin from the waistband side rather than the skirt side. This gives better control and prevents distortion of the gathered edge.

Sew around the full circumference using a one centimeter seam allowance. Keep the fabric flat underneath and maintain steady alignment throughout.

Press the seam allowance toward the front of the garment. This orientation helps the ties sit correctly and keeps the structure balanced.

Finishing the waistband edge

Overlock or finish the inner waistband edge. This reduces fraying and prepares the channel for elastic insertion.

Fold the waistband down so that the overlocked edge slightly overlaps the seam line. This creates a clean internal finish and ensures proper channel width for the elastic.

Pin thoroughly along the entire waistband. Because this is a circular seam, the fabric naturally wants to shift, so adequate pinning is essential to prevent twisting.

Stitching in the ditch

Start stitching at the back waistband seam. Sew along the seam line, securing the folded waistband from the outside using a stitch in the ditch technique.

Use a stitch length of approximately 3 to 3.5. Sew slowly and follow the seam line carefully, ensuring the stitching remains hidden in the groove of the seam.

Work steadily around the waistband until fully secured. Check occasionally that the internal fold remains even and that no sections have slipped.

Inserting the elastic

Attach a safety pin to one end of the elastic and thread it through the waistband channel.

Pull the elastic through until both ends extend evenly from the opening. Secure one end with a vertical pin to prevent it from slipping back inside.

Check the fit before final securing. Adjust the elastic length based on the intended wearer’s waist measurement. The elastic should sit slightly smaller than the waist to provide gentle tension without discomfort.

Recheck symmetry and distribution before final stitching. It is still possible to adjust at this stage if needed.

Securing the elastic and final stitching

Once satisfied with the fit, stitch the elastic ends securely together.

Continue stitching through the waistband, reinforcing the elastic inside the channel. Use a controlled topstitching method, moving slowly over the gathered area to maintain even tension.

Keep the needle down when turning corners and maintain alignment with the seam line to ensure a clean finish.

Check that the elastic is evenly distributed and fully secured inside the waistband.

Final notes

At this stage, the waistband is fully constructed, the ties are secured, and the elastic is installed and stabilized.

The skirt is now ready for the next stage of assembly and finishing.

The Side Seams

Transcript for Video: Bonnie Skirt – Side Seams and Hem Finishing

In this chapter we are going to close the side seams of the skirt and prepare the hem for finishing. This step brings the skirt structure together and defines its final shape.

Preparing the side seams

Normally, the side seams would be sewn and overlocked in a single step. However, because this fabric is a thicker gauze with multiple layers, it effectively behaves like four layers when joined. For better control and a cleaner finish, the seams are first overlocked and then sewn together.

Place the fabric with right sides facing each other.

Use a one centimeter seam allowance and align the fabric edge carefully with your seam guide. Pin lightly at the top and bottom to hold the layers in place. Additional pinning is not necessary.

Sewing the side seams

Sew the seam using a steady one centimeter allowance. Keep the fabric aligned and avoid pulling, allowing the machine to feed it naturally.

Because the fabric is layered and slightly bulky, maintaining even pressure is more important than speed. Focus on keeping the seam consistent from top to bottom.

Pressing the seams

Pressing is an important part of achieving a clean finish. First press the seam flat to set the stitches. Then press the seam allowances open.

If available, use a tailor’s clapper to apply pressure while the fabric cools. This helps set the seam more sharply and improves the overall finish, especially with thicker fabrics like gauze.

Final seam preparation

Once pressed, check that both side seams are smooth, even, and fully opened. Any irregularities should be corrected at this stage before moving on.

Preparing the hem

With the side seams complete, the skirt is ready for hem finishing. At this stage, ensure the lower edge is even and free from twists or uneven gathers.

Final notes

The side seams are now secured and pressed, and the structure of the skirt is fully formed.

In the next chapter we will move on to hemming and completing the lower edge of the garment.

Adding a Lace Trim

Transcript for Video: Bonnie Skirt – Adding a Lace Trim

The next step is to do the hem.
Now, you could serge the top edge and then just topstitch it, or you could turn in the edge and then topstitch it — that’s okay.
But I want to show you how it works when you put some lace on, because I really like that finish a lot.
It makes it look like there’s a petticoat underneath, and it’s very, very pretty.
It’s like a double layer, really.

I do it so I have just a little lace peeping out at the bottom.
We’re going to sew that just to the edge and then serge it and create my 2.5 cm hem.
I’m just going to put it on there so that the little scallop at the top is cut off.

I’m not going to pin this all the way around — there really is no need.
I just want to show you here what it’s going to look like when it’s done.

Once we’ve sewn that together, we’ll pull down the skirt and create this extra layer, and that will get me to that 2 to 2.5 cm, depending of course on the width of my lace.

So what I’m going to do here is just have a good look which is the right height on the wrong side of the lace, and then I’m going to put it together right sides facing.
I’m going to fold over this end so that when the other end comes over, it’s really neat.
I’m just going to pin that — that’s all I pin — and then I go over to my sewing machine and sew it on.

It looks ever so pretty.
It’s folded over towards you, and I can actually see what I’m doing through it.
I’m lining up the edge of my presser foot with the skirt fabric that I can see through underneath.
I could also line up a scallop to one of the markings on the needle plate, but that really isn’t necessary here.

Some of you might want to do this straight away on the serger.
If you are a good sewer and you’ve not sewn since yesterday, I would definitely recommend that — I would do that too.
But I thought I’d show it here the long way around, simply because if you haven’t been sewing for a long time, you might slip off, cut into your fabric, or not get the distance right.
It’s more accurate when you do it like this — at least as a beginner.

We’re going to sew all the way around.
This is so beautiful — I love this technique.
I’ve seen it a lot when people sewed it on the Natalie dress, and they still didn’t understand the rolling over of the fabric so that you create this faux petticoat.
It’s so simple and so much nicer than just banging the lace on the edge so it hangs down from the end of the fabric.
It just doesn’t work as well.

Make sure you do it like this.
When we come to the end, we’ll just let it overlap a little bit and secure it — and that’s it done.

Serging the Lace

Clean Finish Before Turning the Hem

Now I’m going straight over to the overlocker or serger, and I’m going to serge it off so I get a really neat finish.
You need to find your fixed point on your serger as to where you want it to be cut.

I’m going to cut off the scallop, so I need to move it a little bit over.
All sergers are different — this is the Brother 1034D.
It’s a very cheap machine, but it does the trick.
If you can’t afford an $800 machine, why not get one for $250?
It works beautifully.

I’ve bought three of these over the years for various places I worked, and everyone I know starts with this machine.
I think I had something to do with its popularity.
You can also get it in our Amazon shop — you can order it there and support a small business.

This is a very good machine, and the link to the Amazon shop is in your instructions on the last page.
All the equipment I use is listed there.

Let it overlap a little bit, cut off your thread, and now comes the intriguing part — the part I really love.

Before I do that, I think I overlapped it a little too much here, so I’m going to take my little scissors and cut this back a bit.

Rolling the Hem

Creating the Perfect Even Edge

Fabulous — on we go.

Again, I could sew this down, but I’m not doing it now.
You could, though.

I’m going to move down my fabric so that one point of the lace is showing.
This lace has little holes in it — broderie anglaise — and I’m going to use that certain point all the way around.

Just roll the fabric down and press it in.
That will give me the most even edge.
Then I can pin it.

You don’t need a lot of pins.
I put my clapper on now to make a really pristine, sharp edge.

If you’re a beginner, definitely use pins.
If you’ve been sewing for thirty years, you probably don’t need them.
Know yourself — don’t cut corners if you’re not ready.

Always use the clapper — it makes such a difference and looks so beautiful.

This ironing pad is from Cottage Lane in New York — really good.
I don’t need to go to the ironing board; I can have it right on my table.
It’s soft, with calico over it, perfect for small things.

Topstitching the Hem

Using Guides for Accuracy

Now it looks absolutely beautiful.
I’m going back to my sewing machine to topstitch in the seam.

I’ve got another gadget here that helps guide the edge of the fabric.
With this color, you might not see the distance properly, so this is quite handy.
It came free with my sewing machine — it should really be standard.

If you’re wondering what it is — that’s what it is.

My sewing machine is a Pfaff, and you won’t find it in the Amazon shop because Pfaff only sells through registered dealers so they can repair your machine.
I think that’s wise.

If you have a dealer near you, I really recommend Pfaff sewing machines.
They sew literally anything.
Since they’re made in China now, they’re not as good as they used to be.
I had my first machine for 28 years — beautiful.
This is the same model, made in China, and I’m not as happy with it, but it’s still much better than most machines I’ve used as a teacher.

Finished Hem

Ready to Attach the Skirt

Joining the Skirt & Yoke

Transcript for the Video: Bonnie Skirt – Attaching Skirt to the Yoke

In this chapter we attach the skirt to the yoke and create the gathered shape that gives the Bonnie skirt its volume.

This step requires patience because even distribution of gathers directly affects the final look. Precision matters more here than speed.

Creating Gather Threads

Start by sewing two parallel rows of long stitches along the top edge of the skirt.

Use the longest stitch length available on your machine. Keep the right side of the fabric facing up.

The first row is sewn about half a presser foot width from the raw edge. The second row is sewn parallel to it, again about a presser foot width away.

These two rows will act as control threads for gathering. Using a contrasting bobbin thread helps you identify and pull the correct threads later without confusion.

Leave long thread tails at both ends of each row. Do not backstitch.

Preparing the Skirt and Yoke Alignment

Before gathering, mark the center front of the skirt. This ensures correct alignment with the yoke.

Match this point with the center front marking on the yoke. This alignment is critical because it determines how evenly the skirt distributes around the waist.

Once the center is matched, pin it in place.

Continue matching key points such as side positions and any pre-marked quarter points. Use vertical pins to secure accuracy before gathering.

If the fabric width is insufficient, additional panels may be required. In that case, ensure seams are not placed at the center front, especially with directional fabrics or visible patterns.

Pulling and Distributing Gathers

Begin gently pulling the bobbin threads to form gathers.

Pull both threads evenly while sliding the fabric along them. Do not rush this process because uneven tension will create bunching.

Work section by section. Adjust gathers manually so they distribute evenly between marked points.

Use your fingers or a pin to spread fullness where needed. The goal is a consistent density of gathers around the entire skirt.

Wrap thread tails around pins in a figure-eight pattern to secure them temporarily and prevent slipping.

Continue adjusting until the skirt circumference matches the yoke.

Pinning the Skirt to the Yoke

Once the gathers are evenly distributed, attach the skirt to the yoke starting from the center front.

Work outward toward the sides, aligning all marked points.

Insert pins vertically through both layers to maintain stability. This helps prevent the fabric from shifting during sewing.

Check regularly that no sections of fabric are folded or caught incorrectly underneath.

Final Adjustment Before Sewing

Before stitching, do a final check of the gather distribution.

Use a pin to shift small sections of fullness where needed. The goal is not perfect pre-distribution but even final appearance.

Make sure the yoke remains flat underneath and that no excess fabric is trapped in seams.

Sewing the Skirt to the Yoke

Sew from the skirt side so you can control the gathers as you go.

Maintain a steady seam allowance and adjust gathers continuously while sewing.

Take out pins gradually as you reach them.

If any areas look uneven, pause and redistribute the fabric with a pin before continuing.

Take care at this stage because uneven stitching will permanently affect the skirt shape.

Overlocking and Finishing the Seam

Once the seam is sewn, finish it using an overlocker or serger.

Be careful not to catch the yoke fabric while finishing the edge. Keep the layers flat and controlled as you guide them through.

Overlap slightly at the end to secure the stitching.

After overlocking, remove visible gathering threads carefully. Using contrasting thread makes this easier because you can clearly identify which threads to pull.

Final Adjustments and Pressing

After finishing, shake out the skirt to release tension in the gathers.

Inspect the seam to ensure fullness is evenly distributed.

At this stage, the skirt already shows its final volume and structure.

Press lightly if needed, but avoid flattening the gathers.

Optional Edge Decoration

A decorative trim such as rickrack can be added along the seam line for extra detail.

Attach it using a zigzag stitch, positioning it directly over the seam for a clean finish.

Take your time during this step because alignment affects the final visual balance.

Final Notes

At this point the skirt is fully assembled and the gathered structure is complete.

The remaining steps are finishing details, but the main construction is done.

Careful gathering and alignment at this stage determine the professional quality of the final garment.

Bonnie Skirt: How to sew the Skirt

Transcript for the Video: Bonnie - All-in-One-Video

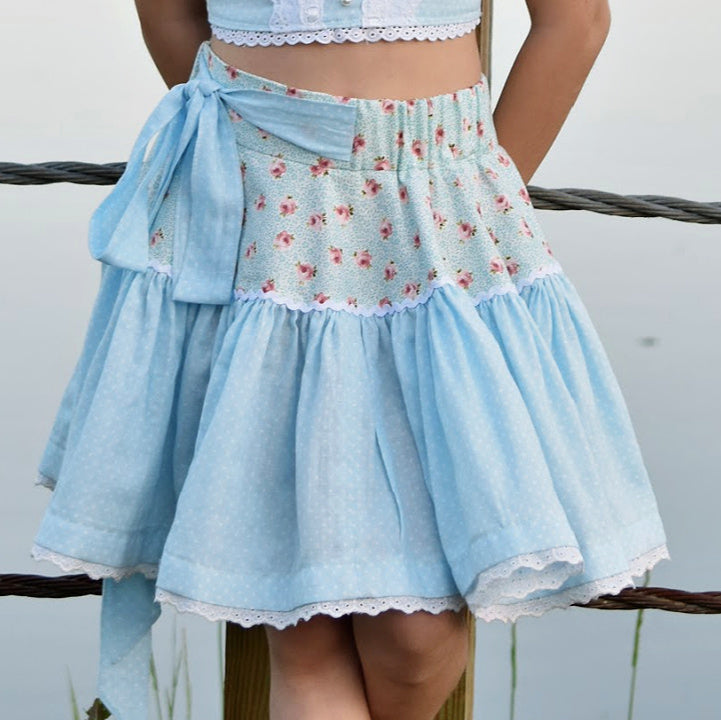
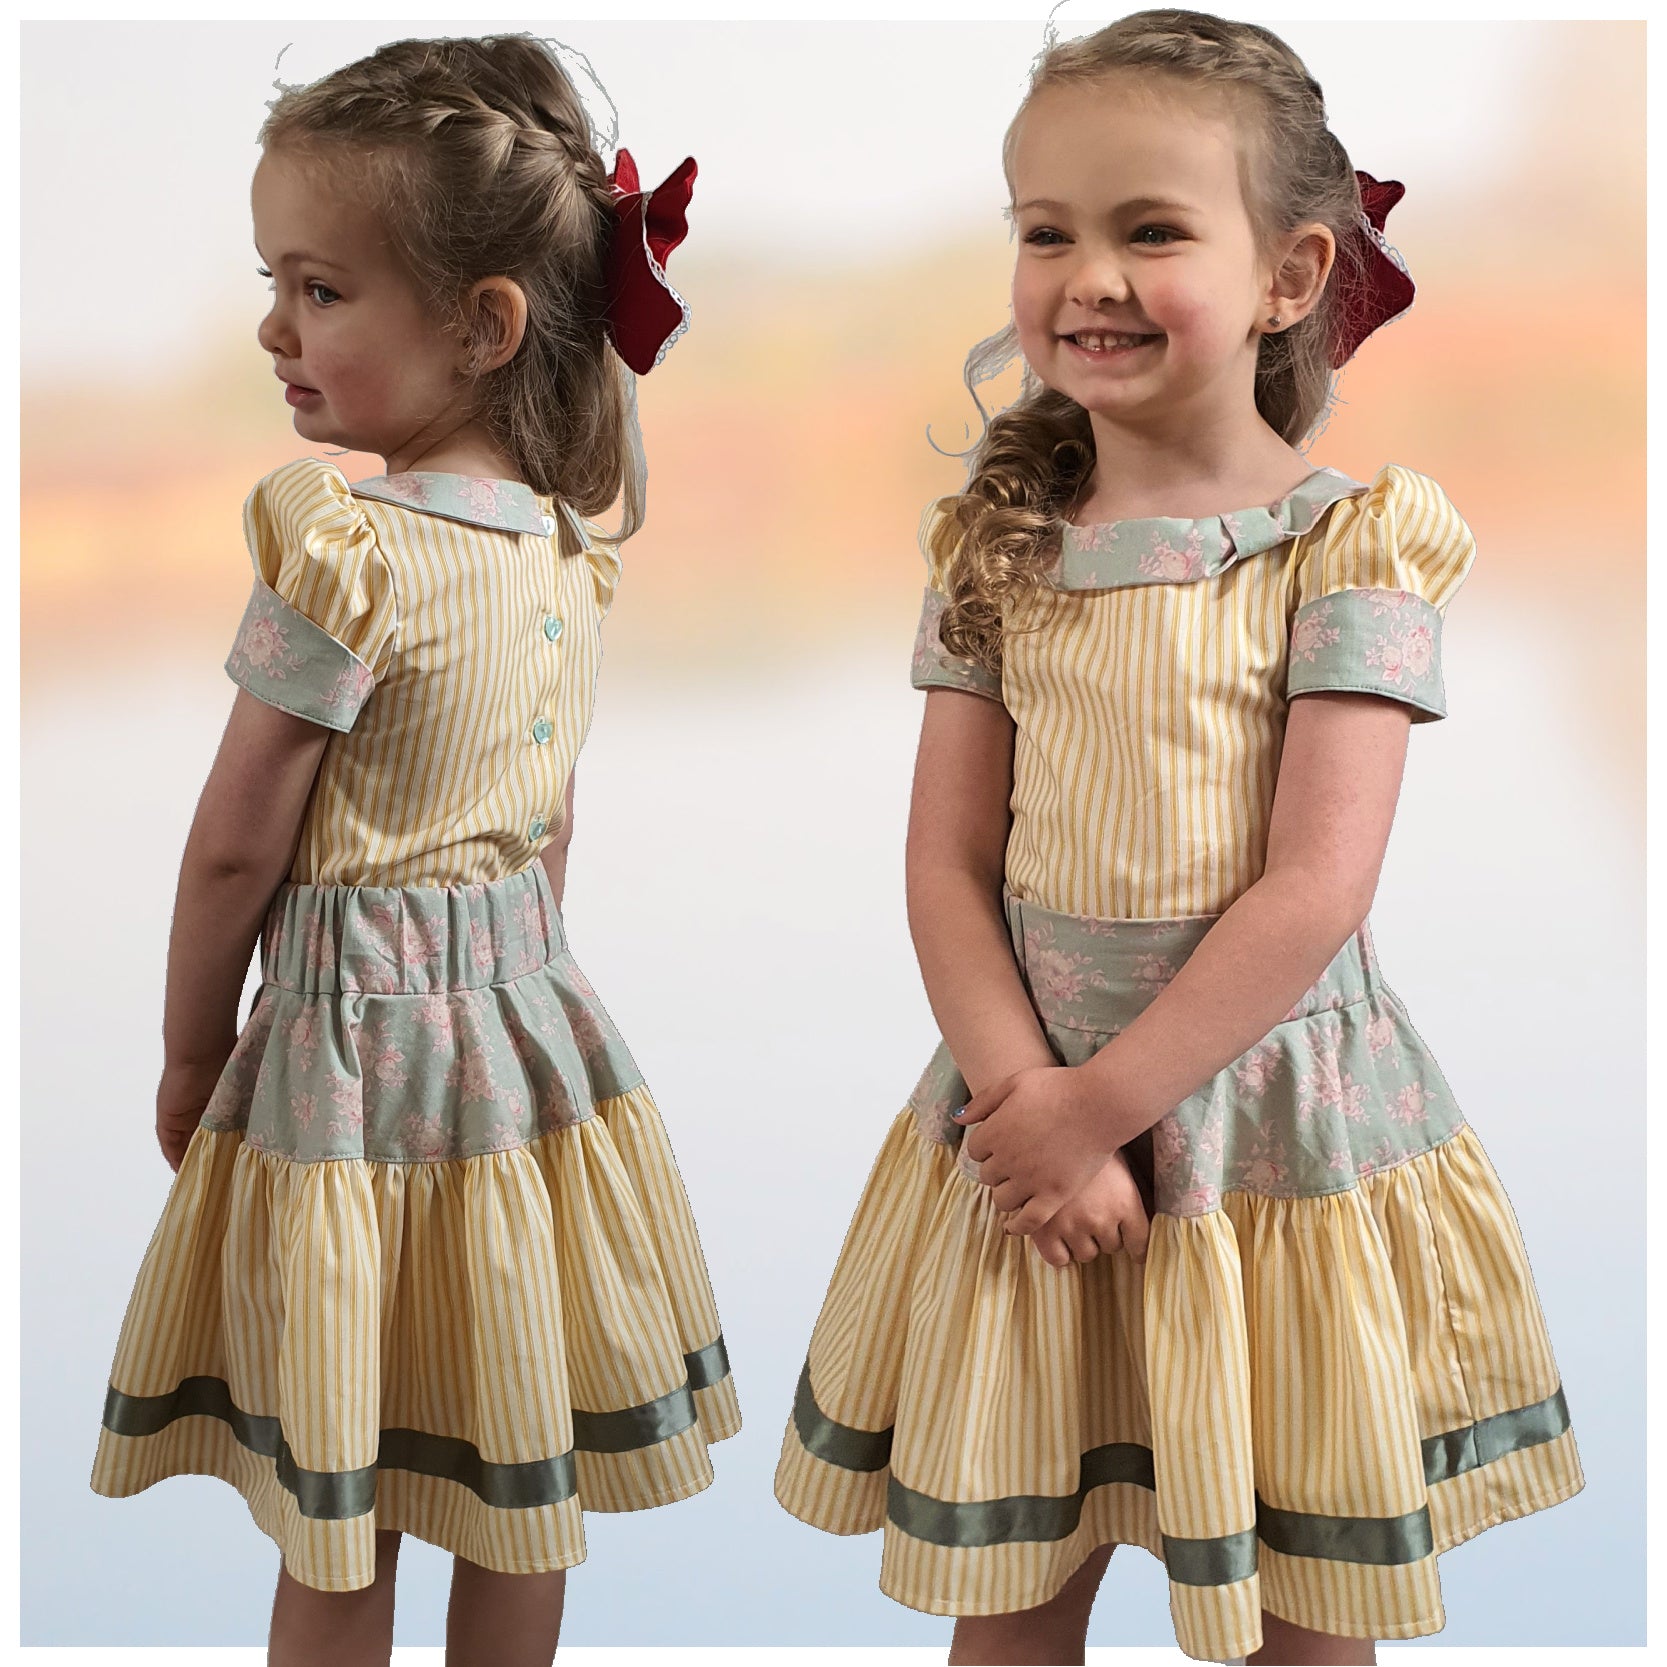
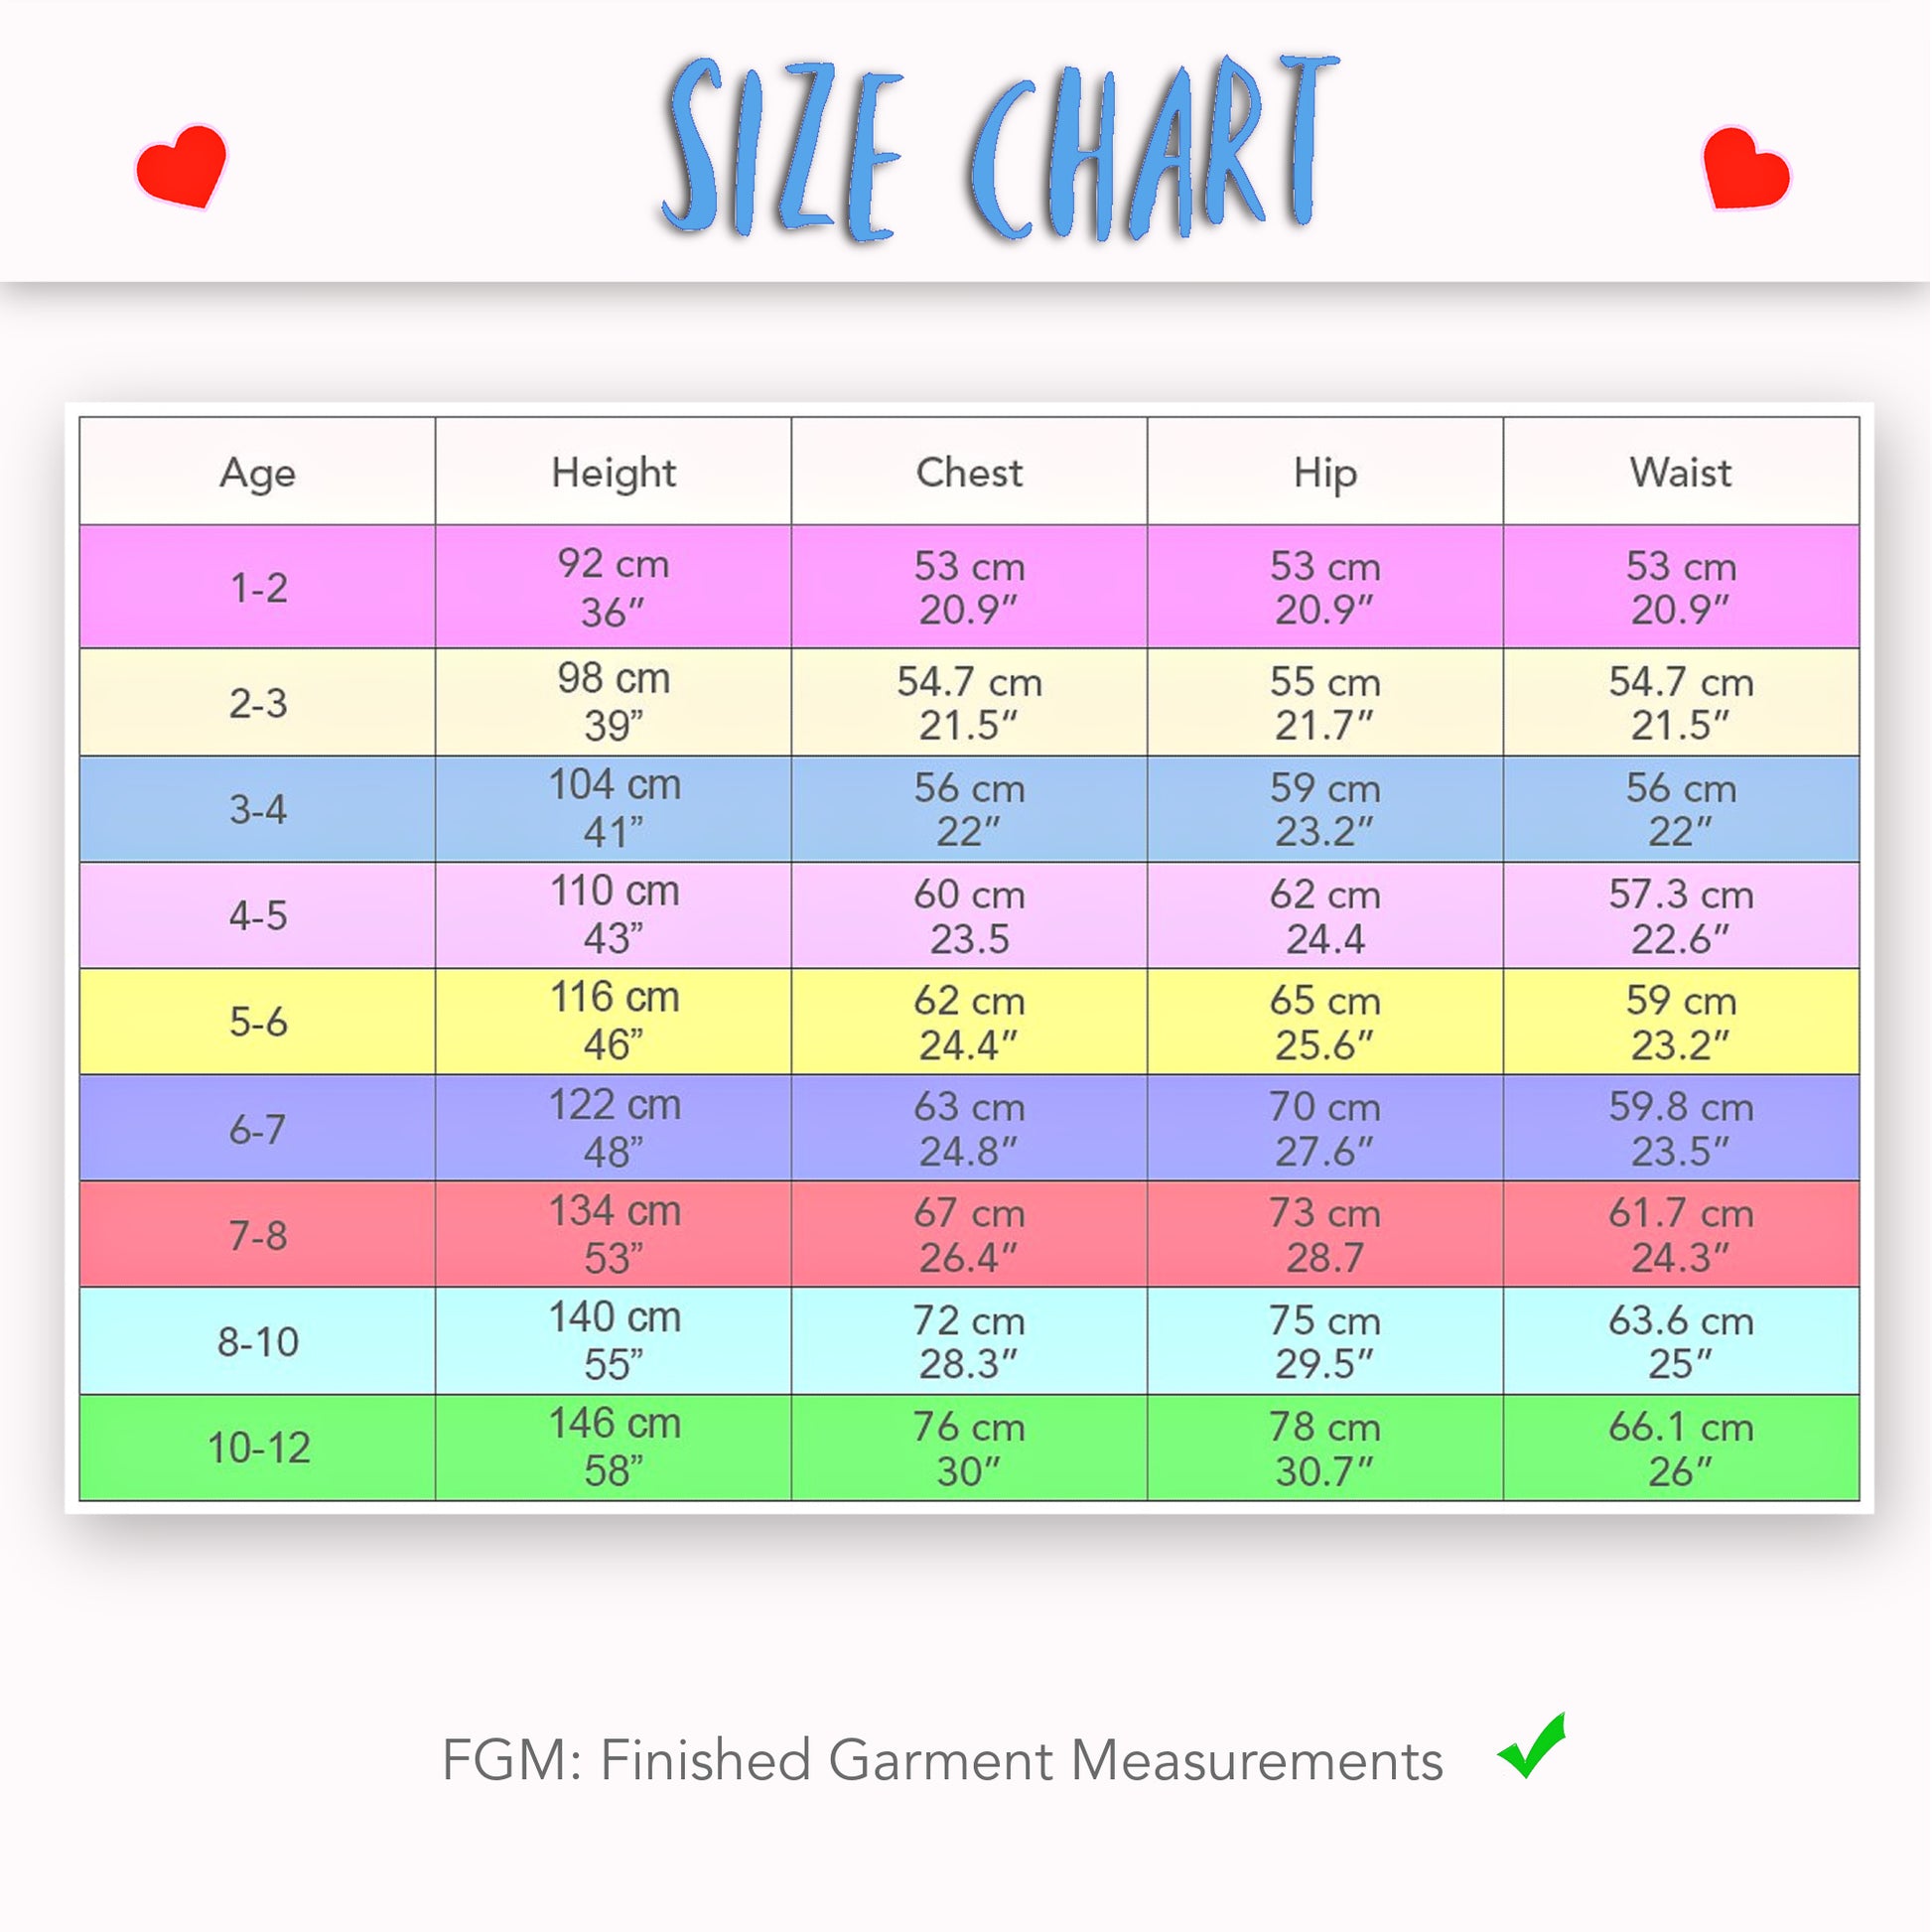
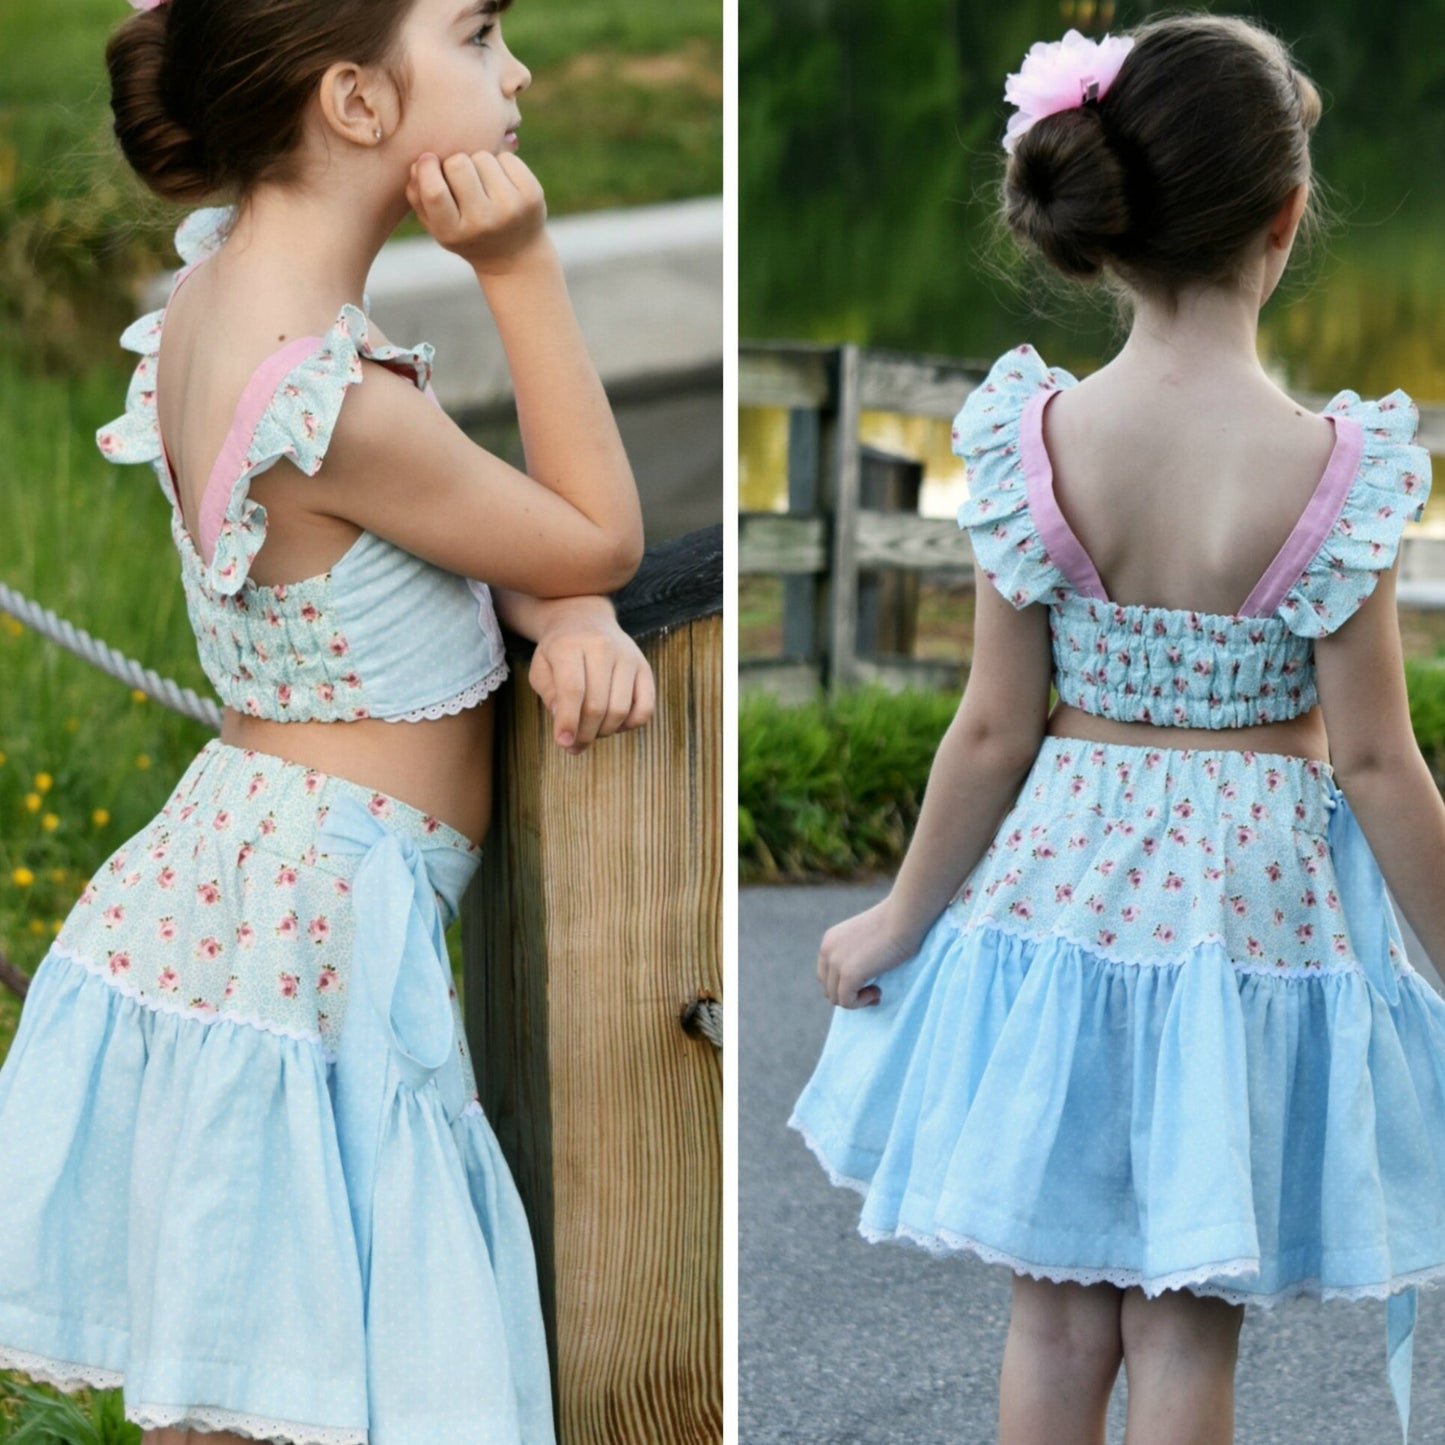
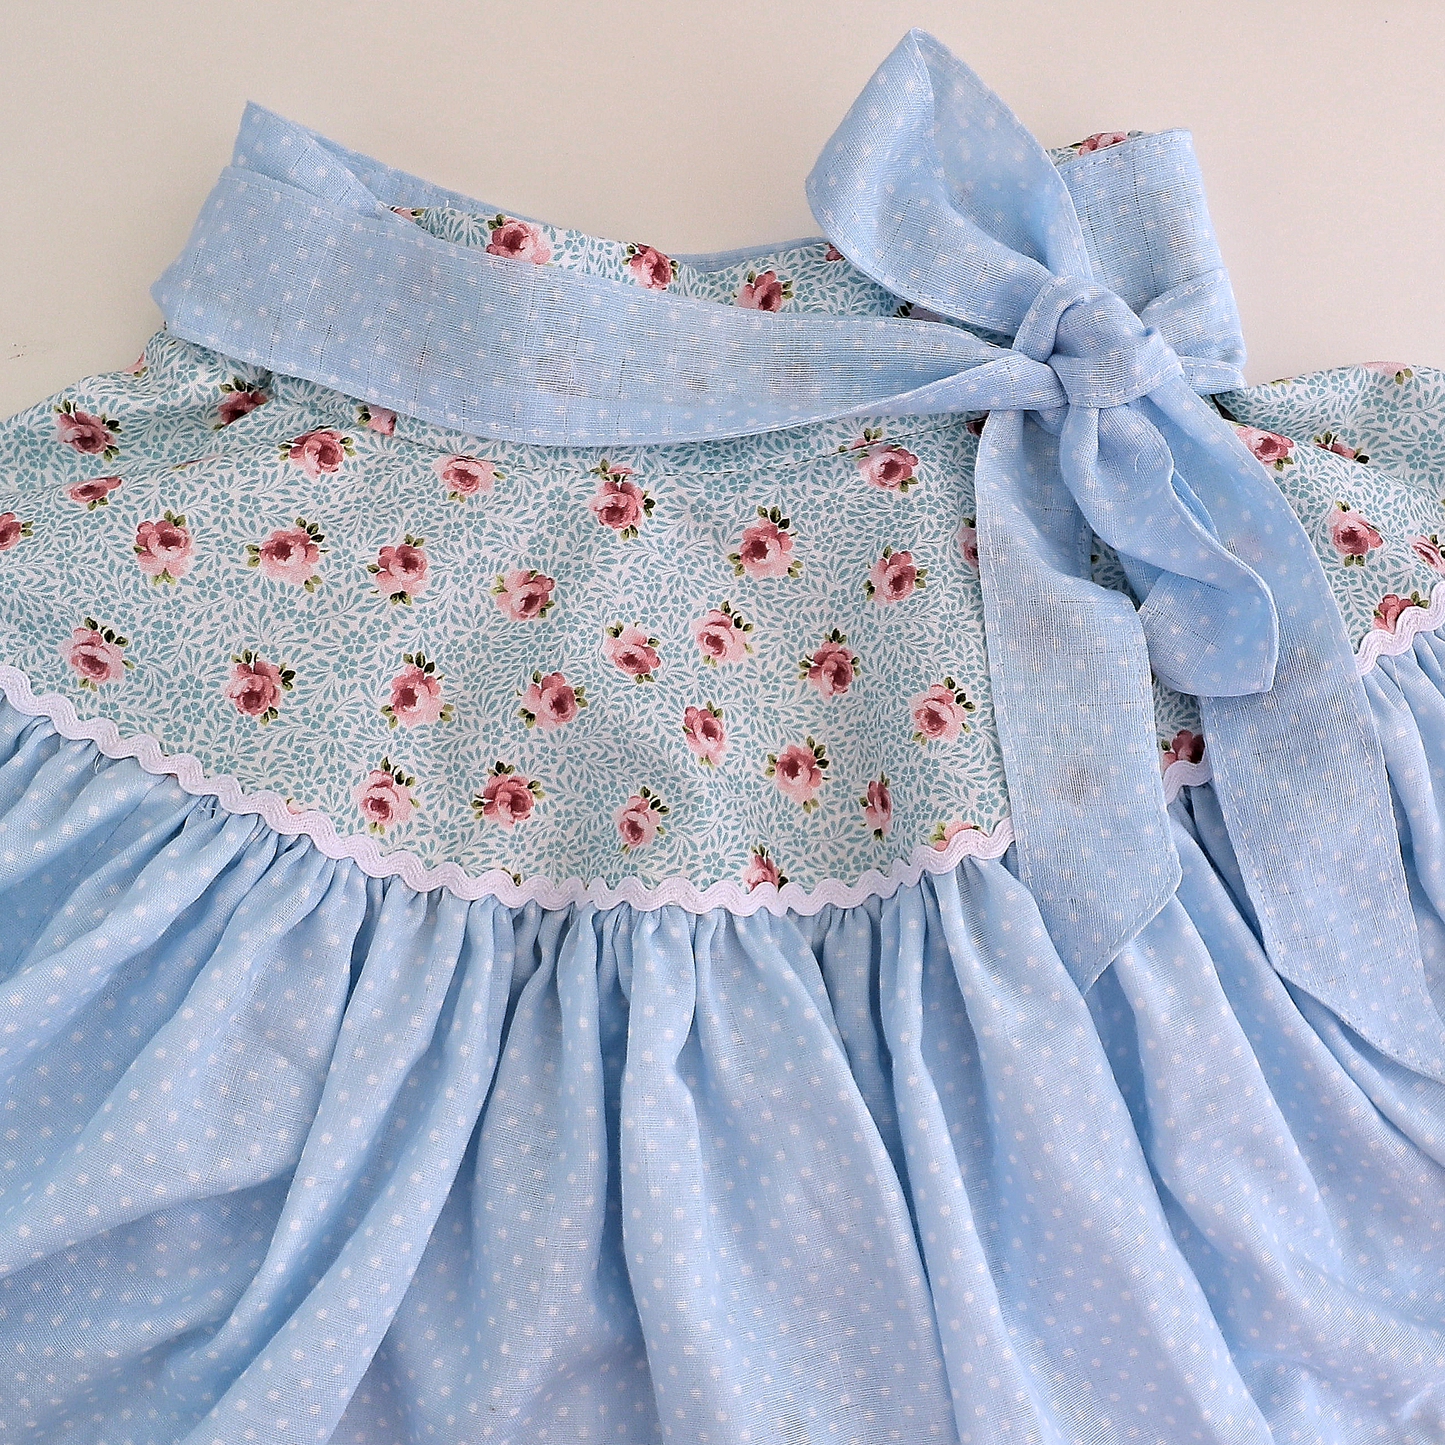
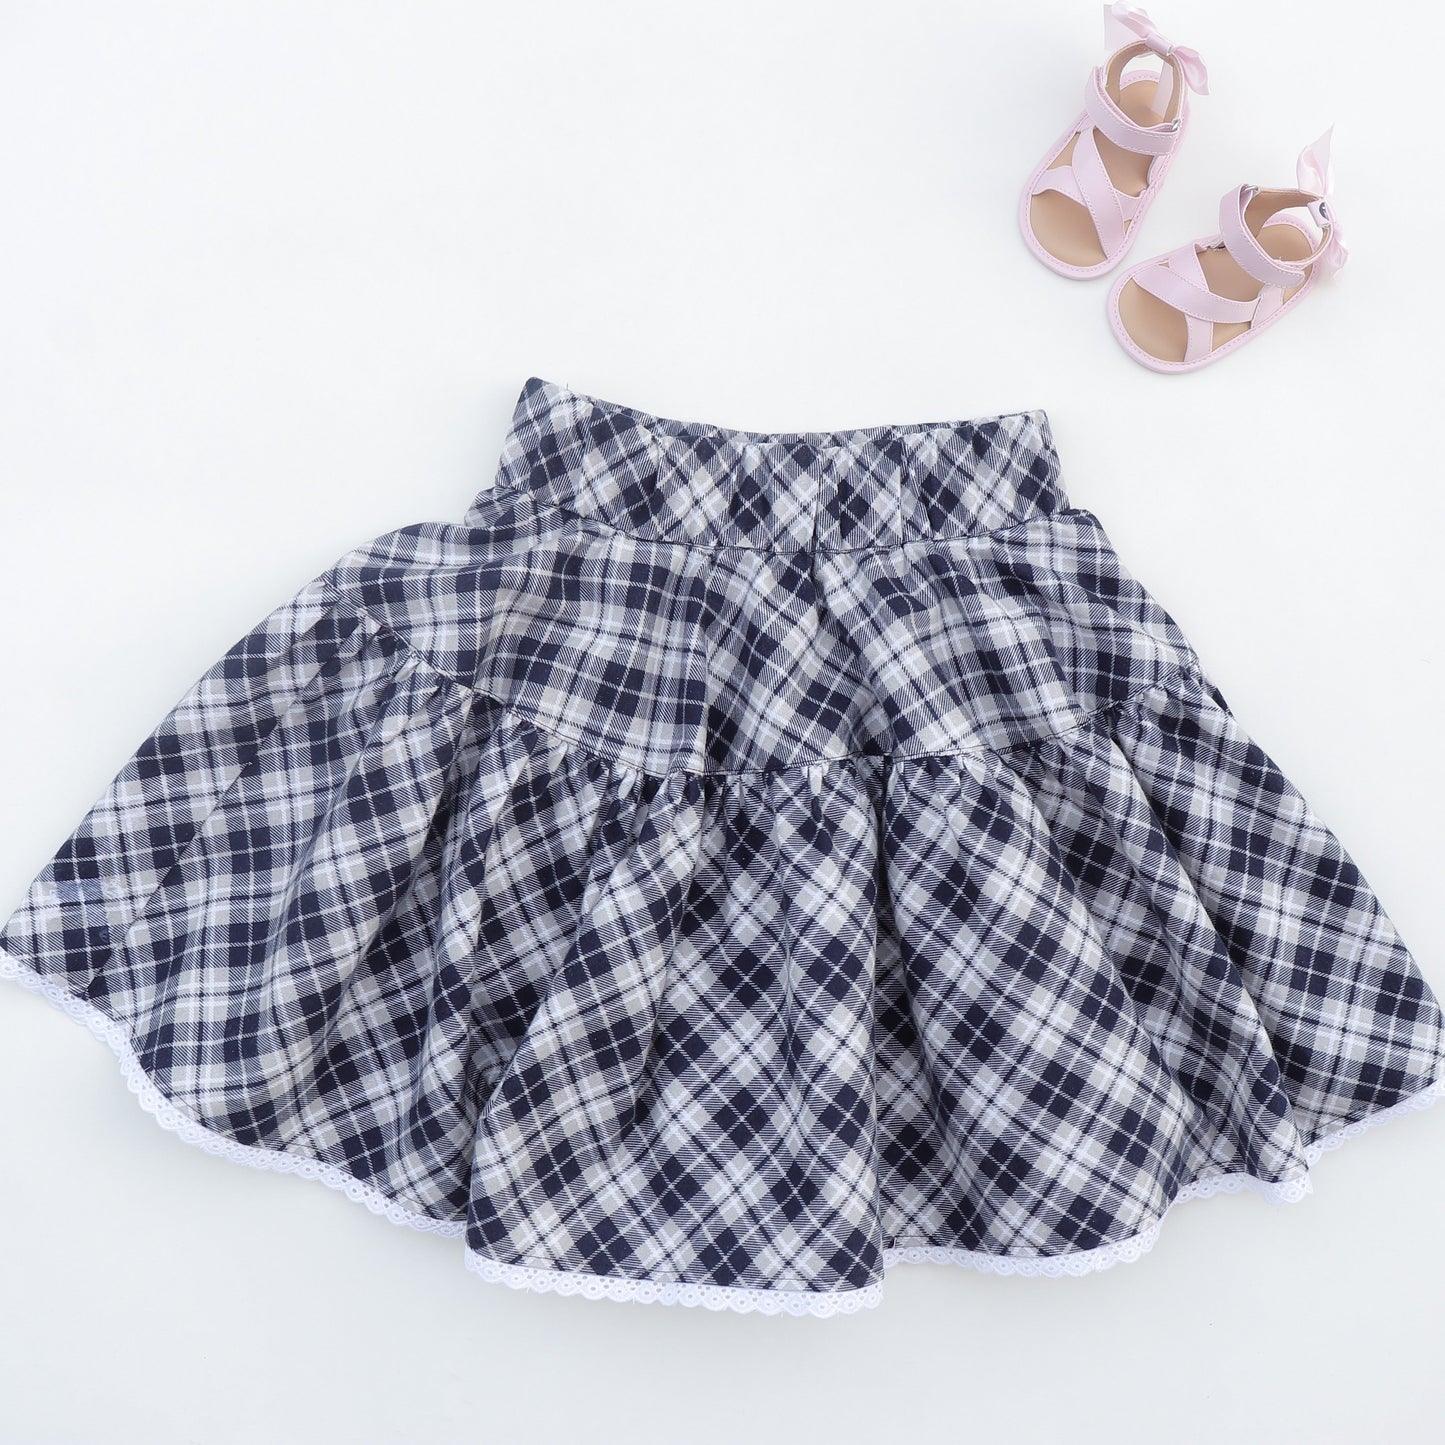
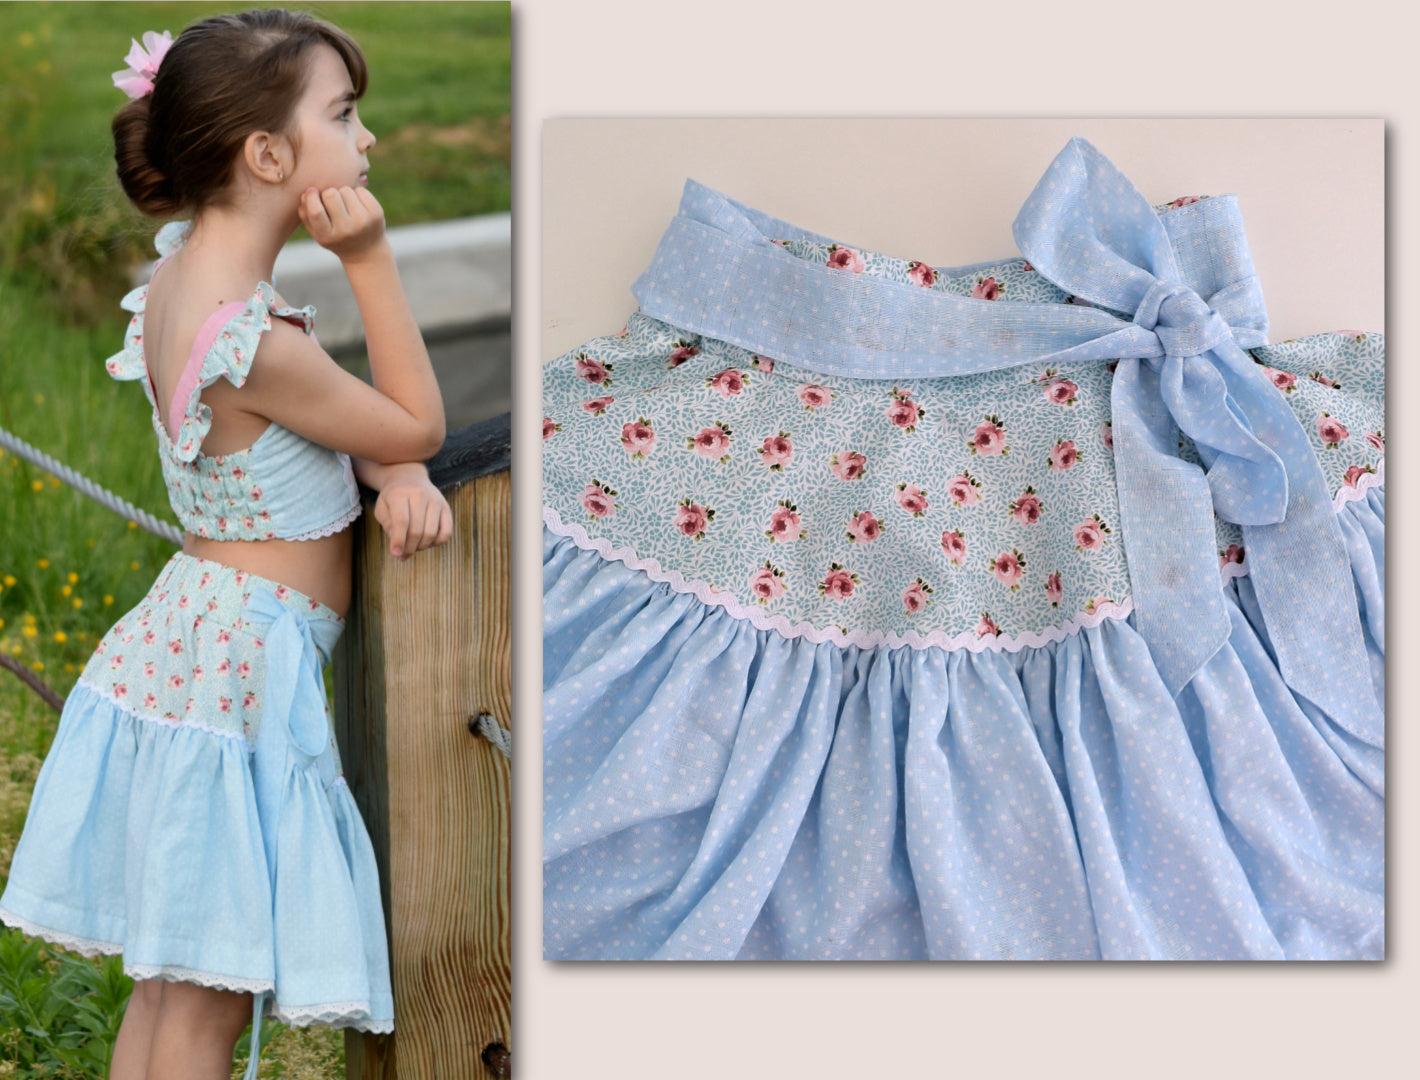
The Bonnie skirt features a flat front and an elasticated back, so it's really super comfortable. We've got a yoke which is effectively a circle, which is really nice because it gives you that fantastic volume for the skirt. I've added some rickrack, which I'm going to show you how to do. My skirt is really super voluminous, and then we've got the hem down here, which I also want to show you because it's got the lovely lace attached to it. It's really simple to do, any beginner can do it, and it looks so, so nice. I'm really liking this. My ties are a little bit longer than they are on the pattern — 90 centimeters long — because I wanted to wrap them around to the front for my little model.
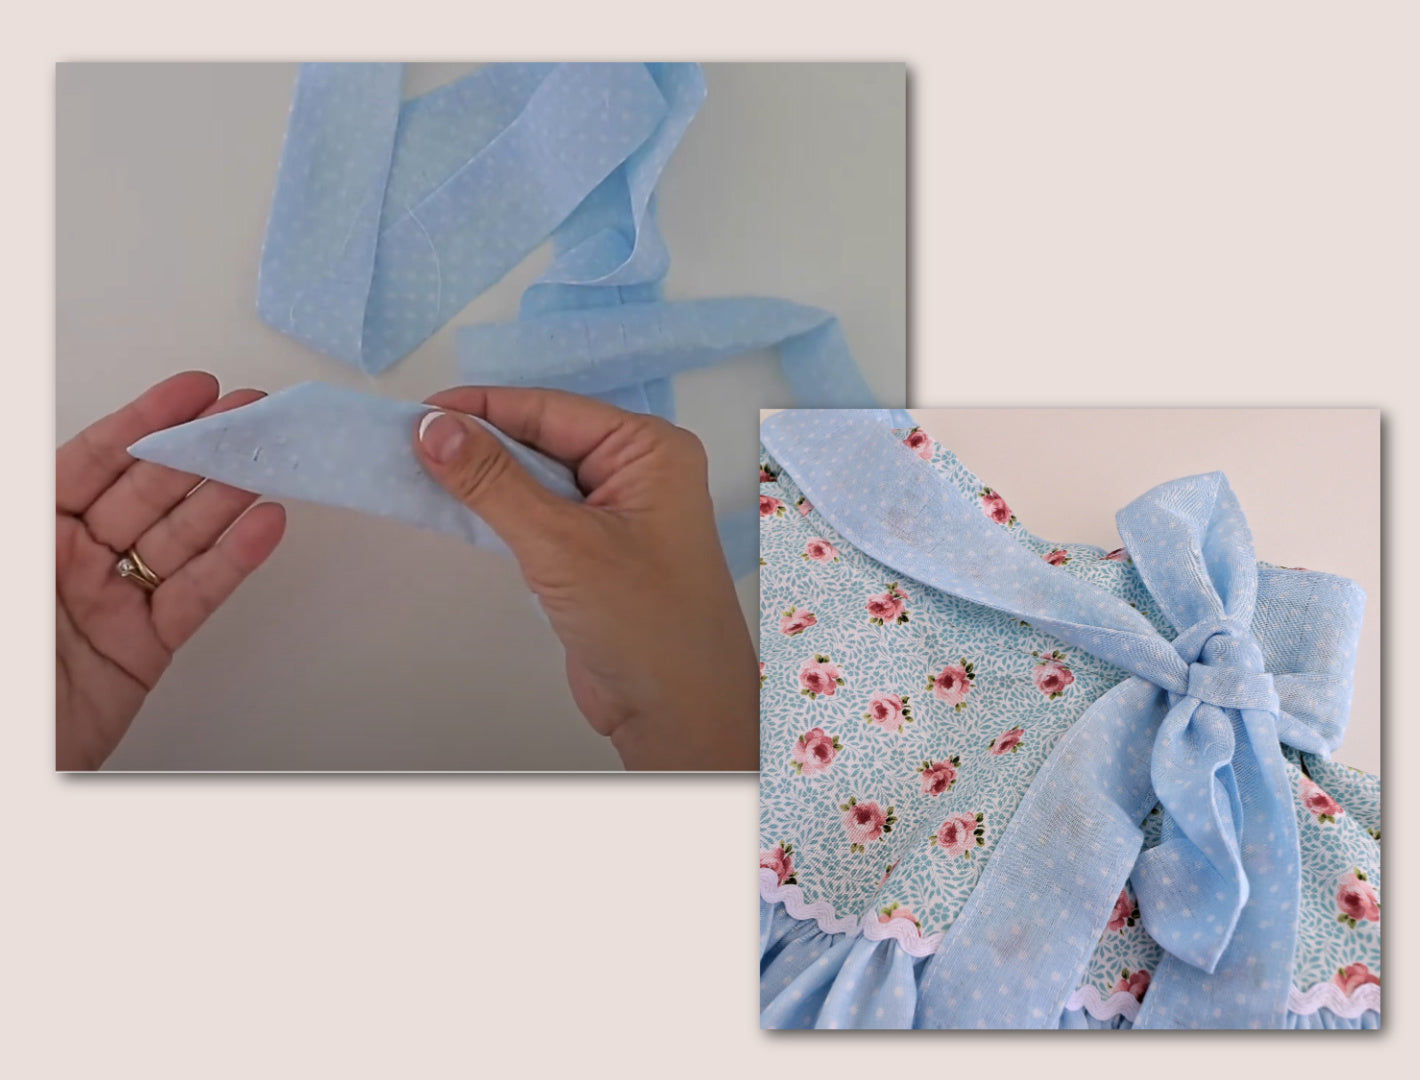
Making the Ties

To make the ties, fold your fabric lengthways with right sides facing in. I'm using a 1 cm seam allowance — that's what I always use. You could also do foot width; it doesn't matter too much. Stitch length 2.5, line up with the presser foot or the 1 cm mark, and sew from one end to the other. I'm pulling mine a little from the back because sometimes my machine gets stuck, especially with light fabrics.

When you come to the tip, reduce your stitch length to about 1 and sew a slightly rounded tip. That gives you a much better result because you can manipulate the corner to come out sharp and beautiful. Before ironing, lift out the tip with a needle. If it's too rounded, push it in with your pin to create a sharp corner.

Now for the trick: pull a double thread through the tip so the machine won’t eat it. Go to the sewing machine, stitch length 3.5, line up with a fixed point on your presser foot. I’m not looking at the needle — just the fixed point. Because this part is on the bias, it wants to shift, and that’s when you grab the threads and hold it steady. Don’t go too close to the tip or the machine will eat it. Pull the threads from the back and it lifts beautifully, giving you a pristine finish.

Preparing the Waistband

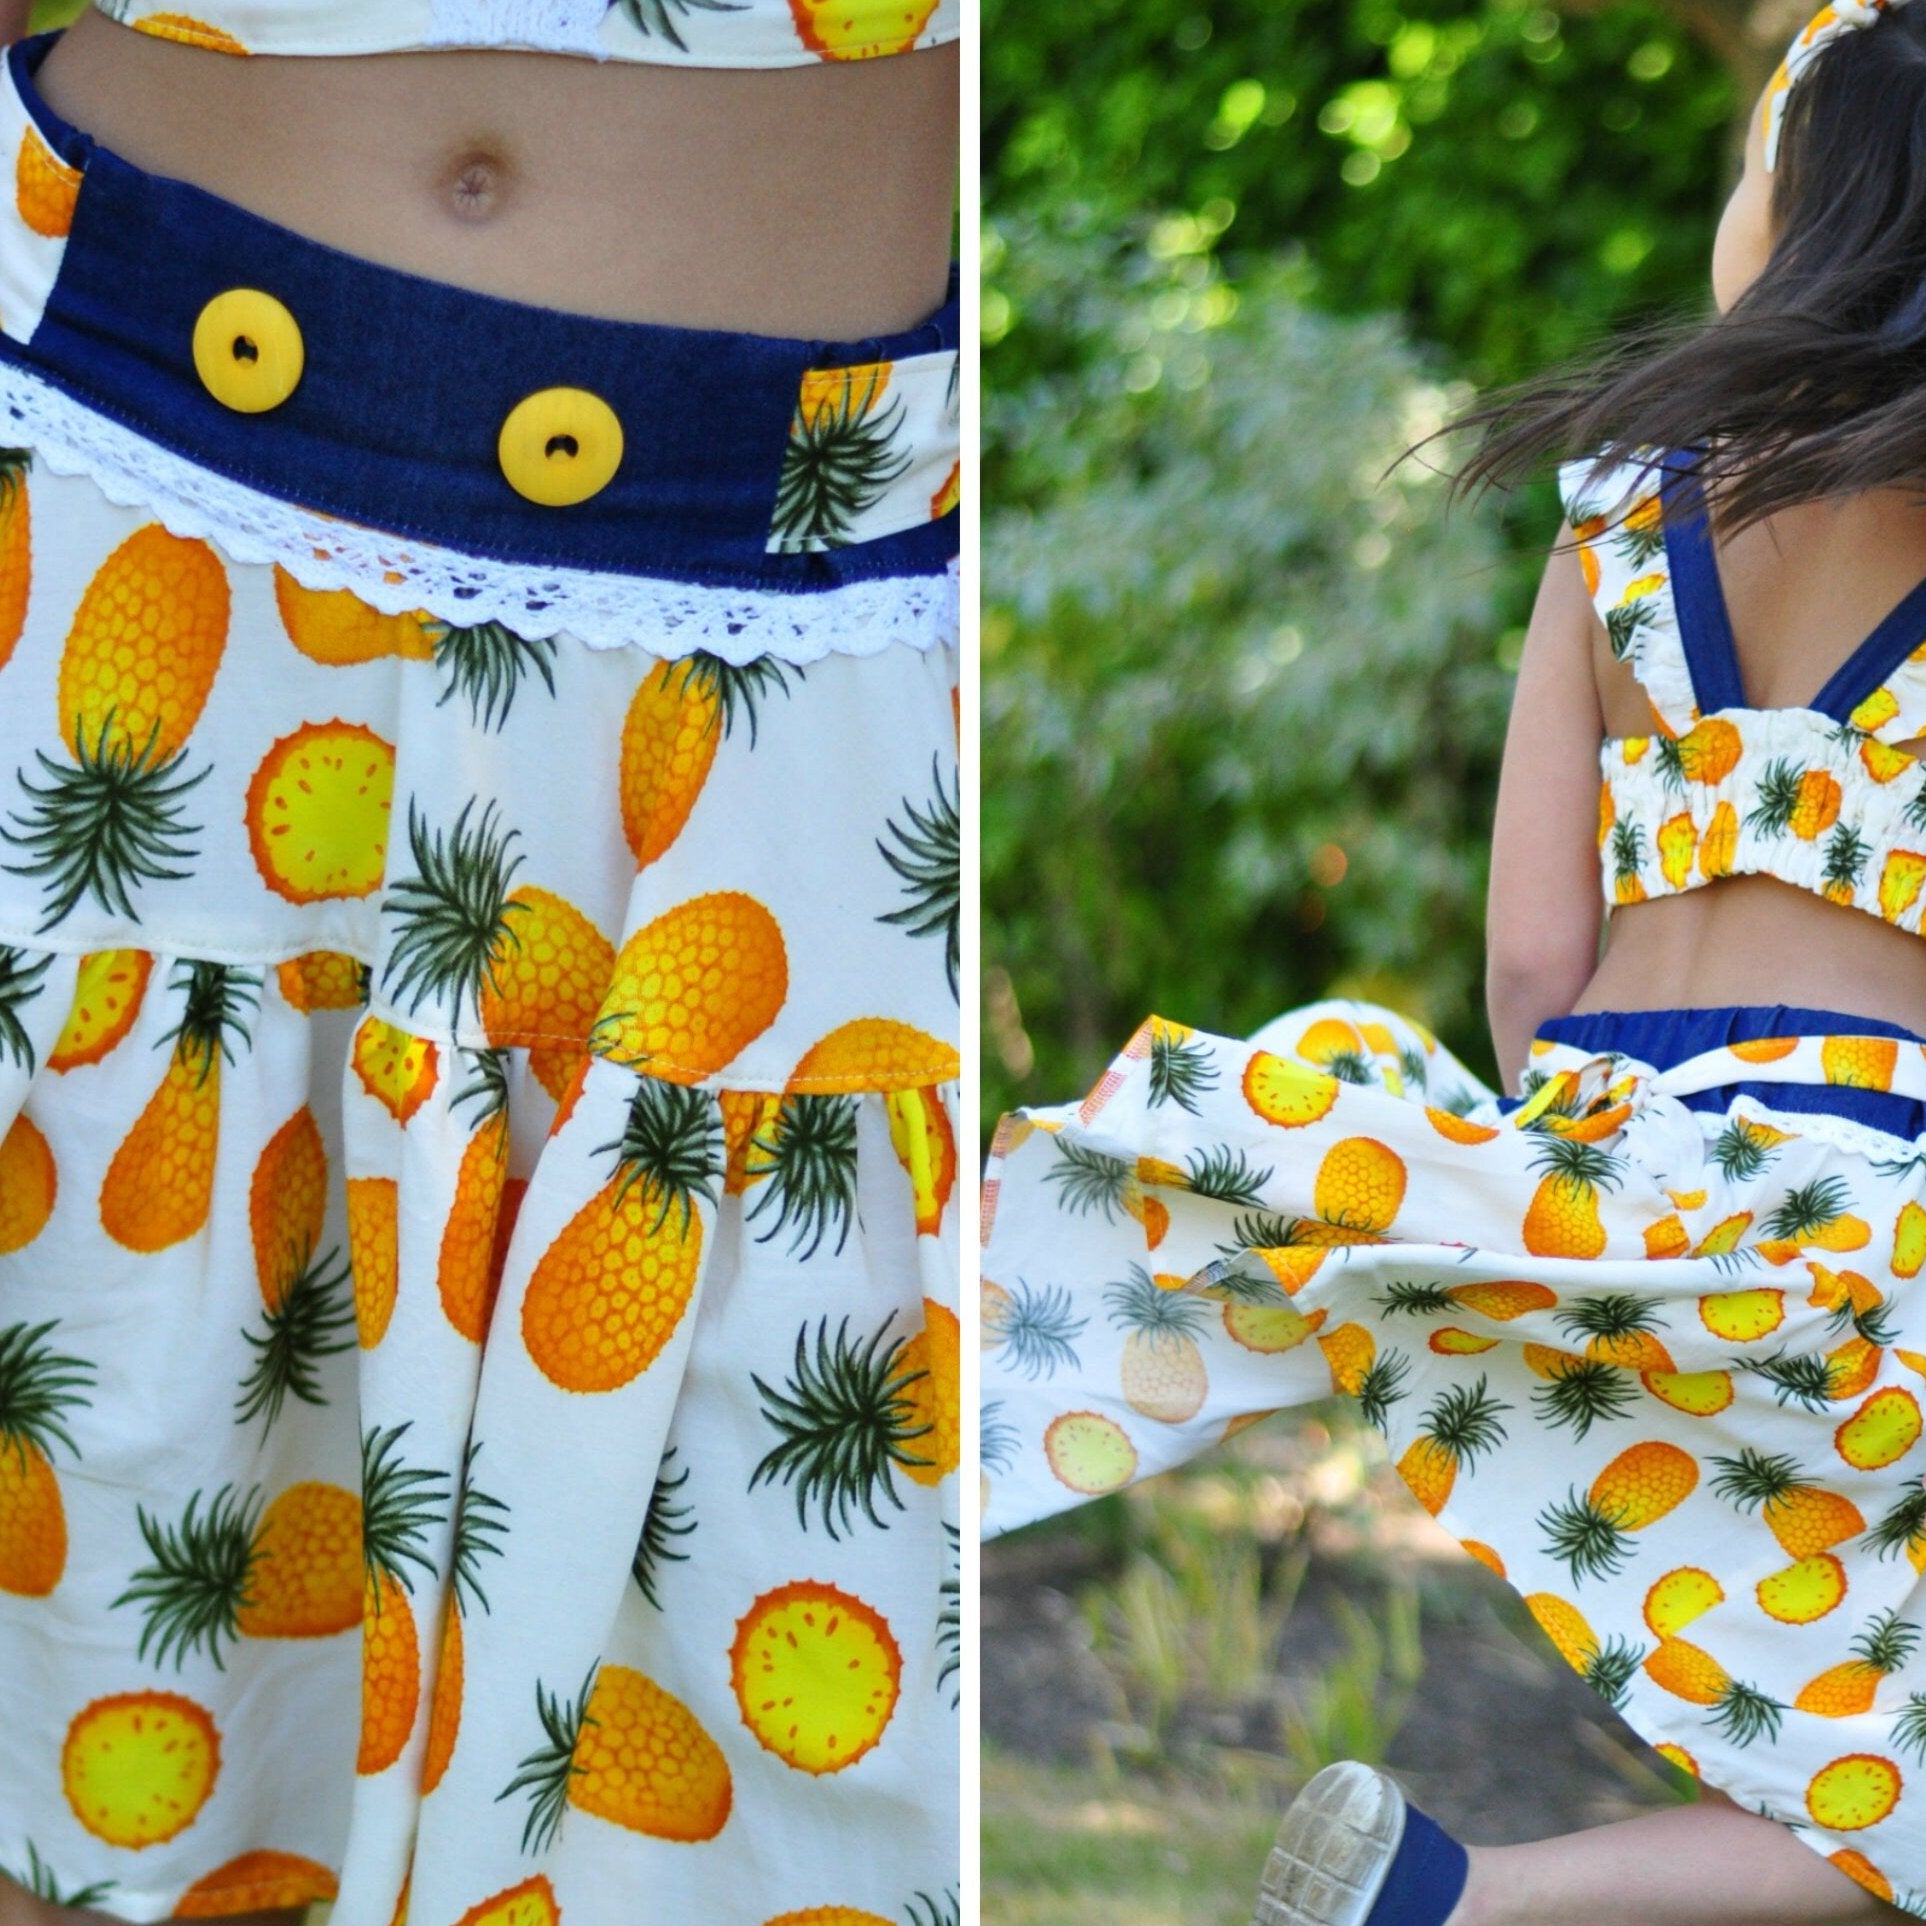
Now we can make the waistband. You don’t really need steam, but my iron never stops steaming. Iron on the interfacing, fold over your waistband, and give it lots of steam.

Next, place your ties. Make sure the tips go the same way, though it doesn’t matter too much. Go up 1 cm and center your tie. Pin vertically. Check both sides start and end in the same place.

Take the back part of your waistband and place it right sides together on top. Once that’s done, serge the upper side of the waistband — not the one with the ties. If you're tucking in your waistband, you don’t need to serge. Mark the sides and the center front.

Preparing the Yoke

Mark the skirt as well. Where it stretches most is the center front. Where the fabric falls nicest is the center front. Where it’s tightest is the side seam. Mark the outer edge of your yoke.

Attaching Waistband to Yoke

Pin from the waistband side, not the circle side — that’s much easier. Sew together with a 1 cm seam allowance. Make sure it’s flat underneath. The seam needs to go toward the front because the ties face the back. Normally you iron toward the back, but not this time.

Iron the seam into the waistband. You can tuck it in now. I’ve serged the upper edge. There’s enough movement room. With a 3 cm waistband, you'd have even more room and could topstitch both sides. I’m stitching in the ditch, so I don’t need that. Iron it into the waistband so it’s easy to pin. Because it’s a circle, it will try to roll out.

If you turn in the edge instead, remember your elastic needs to be slimmer — 3 cm elastic works better.

Stitching in the Ditch

Start at the beginning of the back waistband and go to the other end. Stitch length 3.5. You’re not meant to see it, but a slightly bigger stitch looks nicer. You can use 3 as well.

Inserting the Elastic

Now insert the elastic with a safety pin. Thread it through. Adjust so it overlaps just on the seam allowance. Pin it. If you're sewing for your child, try it on before stitching — sometimes you need more or less elastic.

I’m measuring for Ella in Virginia, who takes beautiful photos for us. Her waist is 58 cm. Ideally, the elastic should be a little smaller so it has some stretch.

Topstitch from the edge of the waistband down, across, and back up, securing elastic and waistband in one go. Needle down, turn the fabric, sew along the seam, remove pins as you go.

Sewing the Skirt Panels

Now we sew the skirt. I serged it first and then sewed it together, right sides facing, 1 cm seam allowance. Pin top and bottom. Sew along the 1 cm line. Iron the seam flat first, then open. Use a tailor’s clapper for a pristine seam.

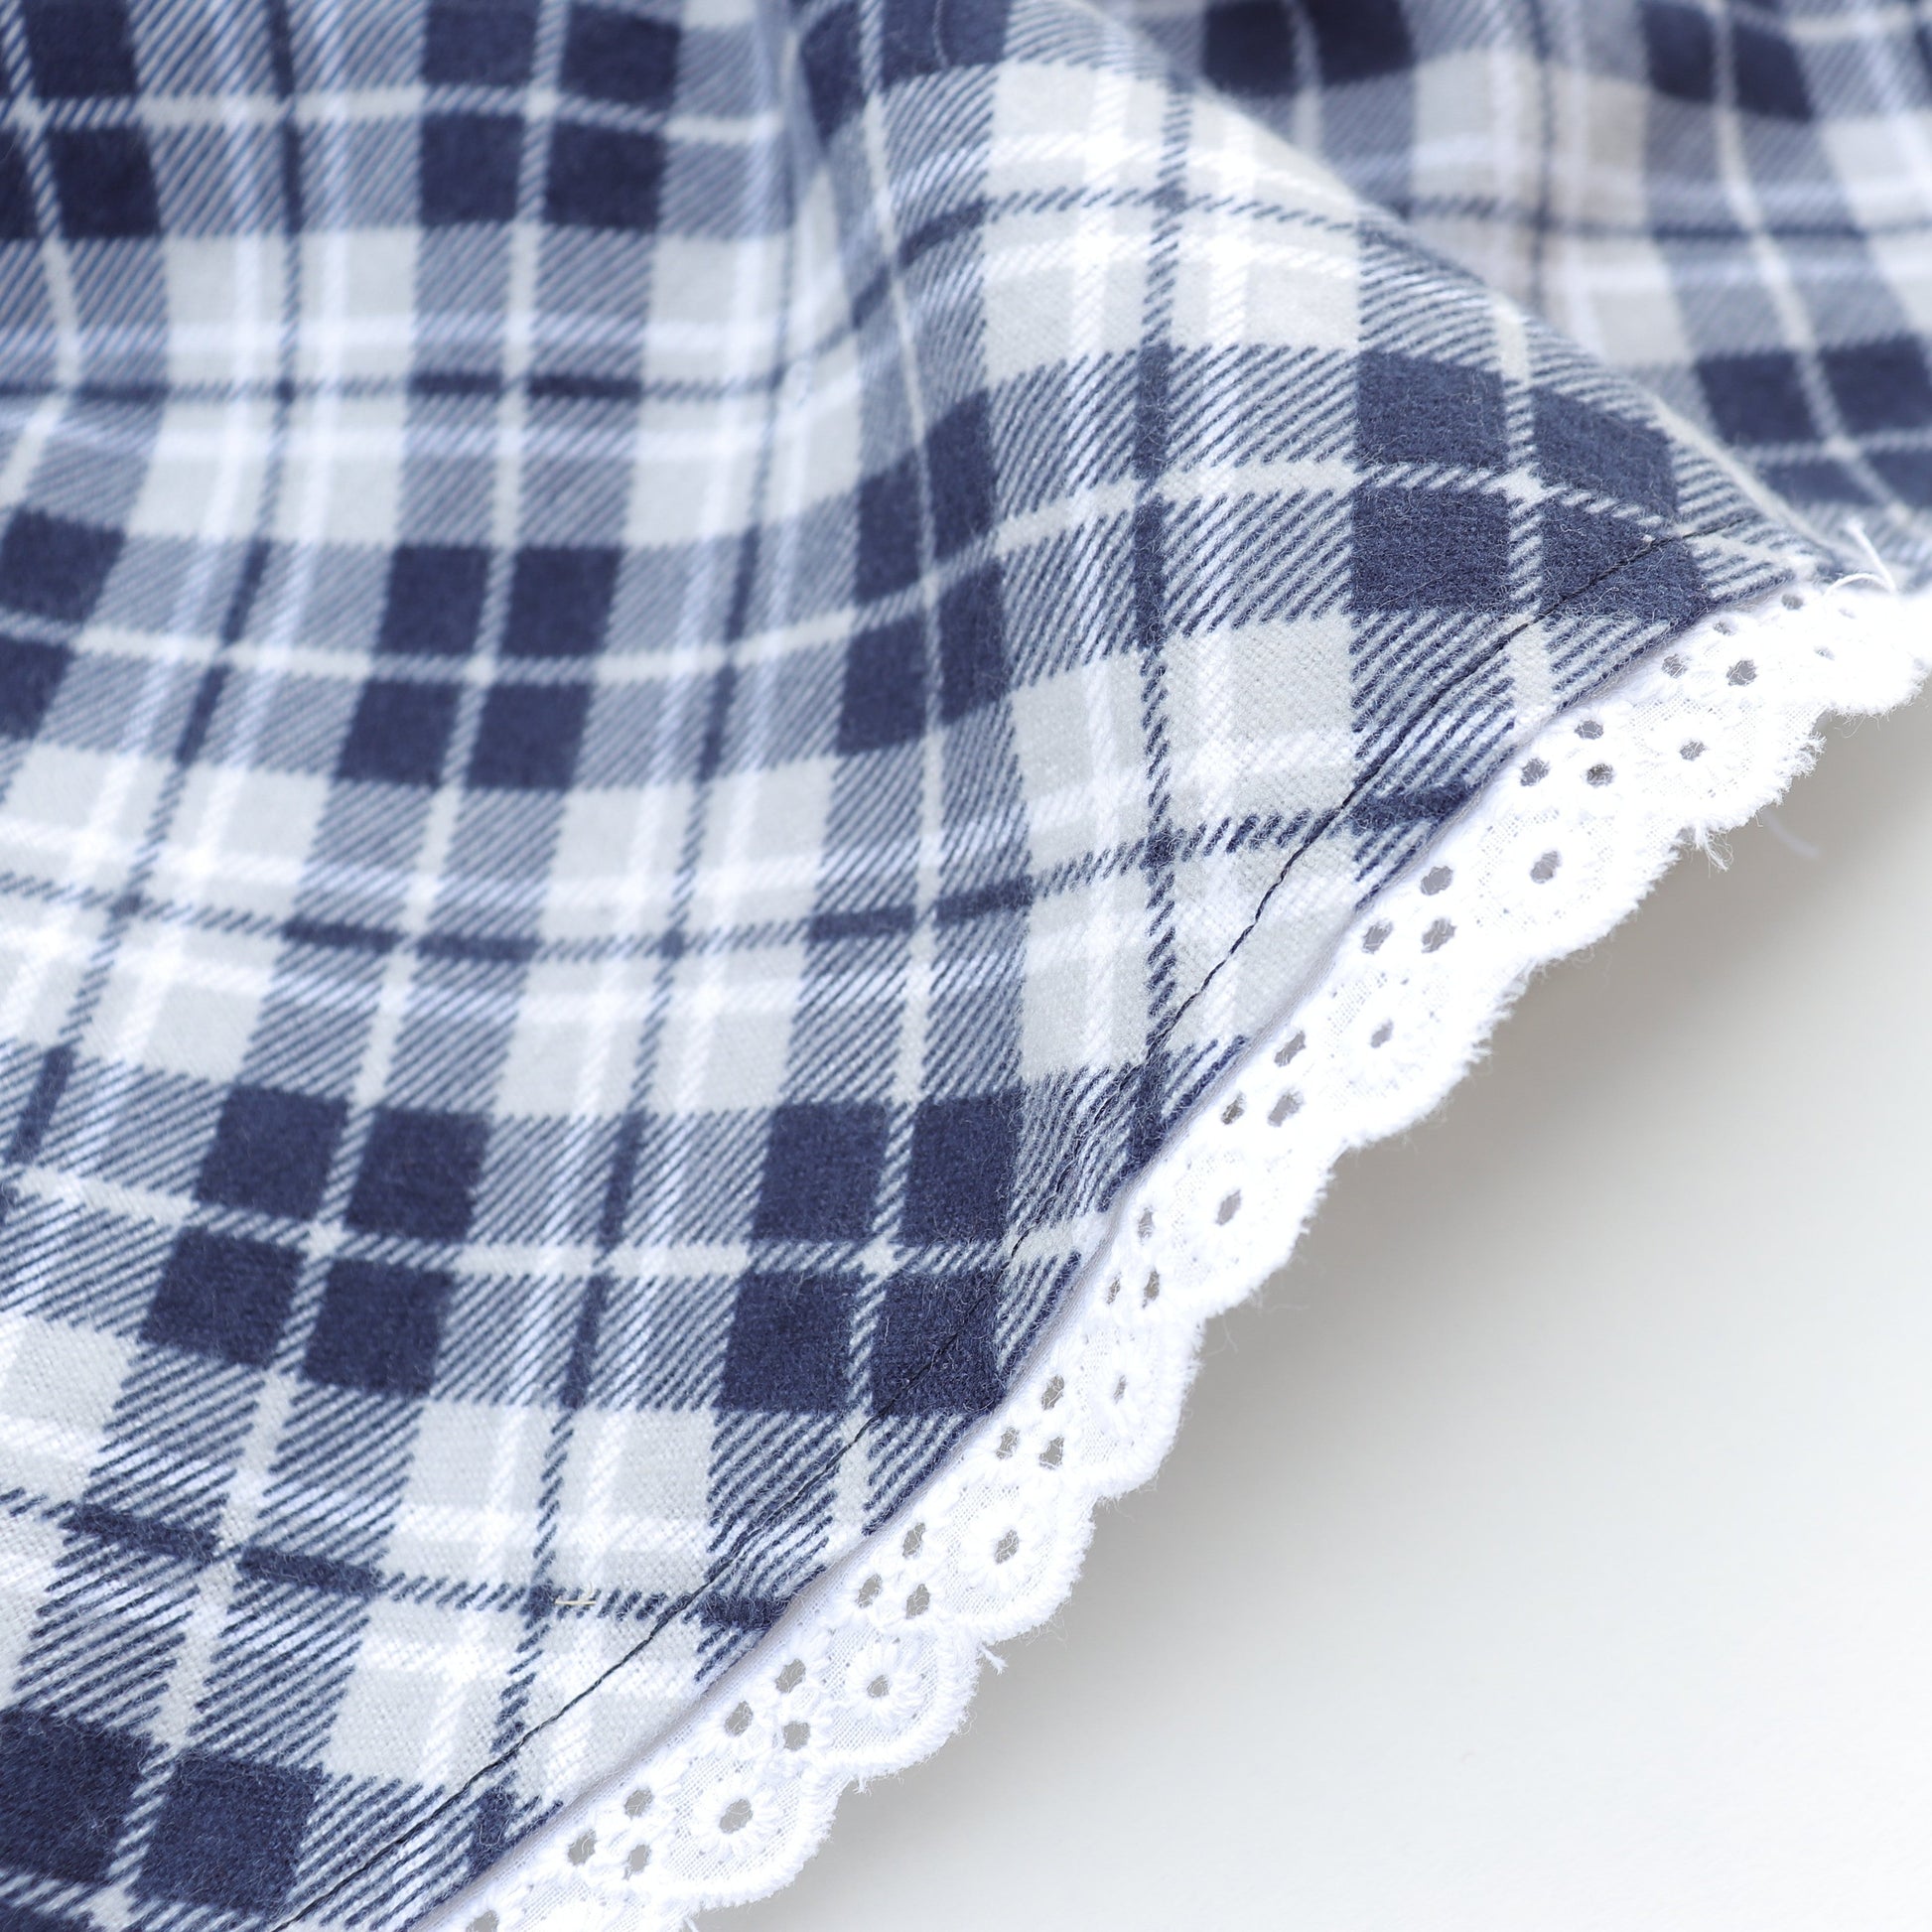
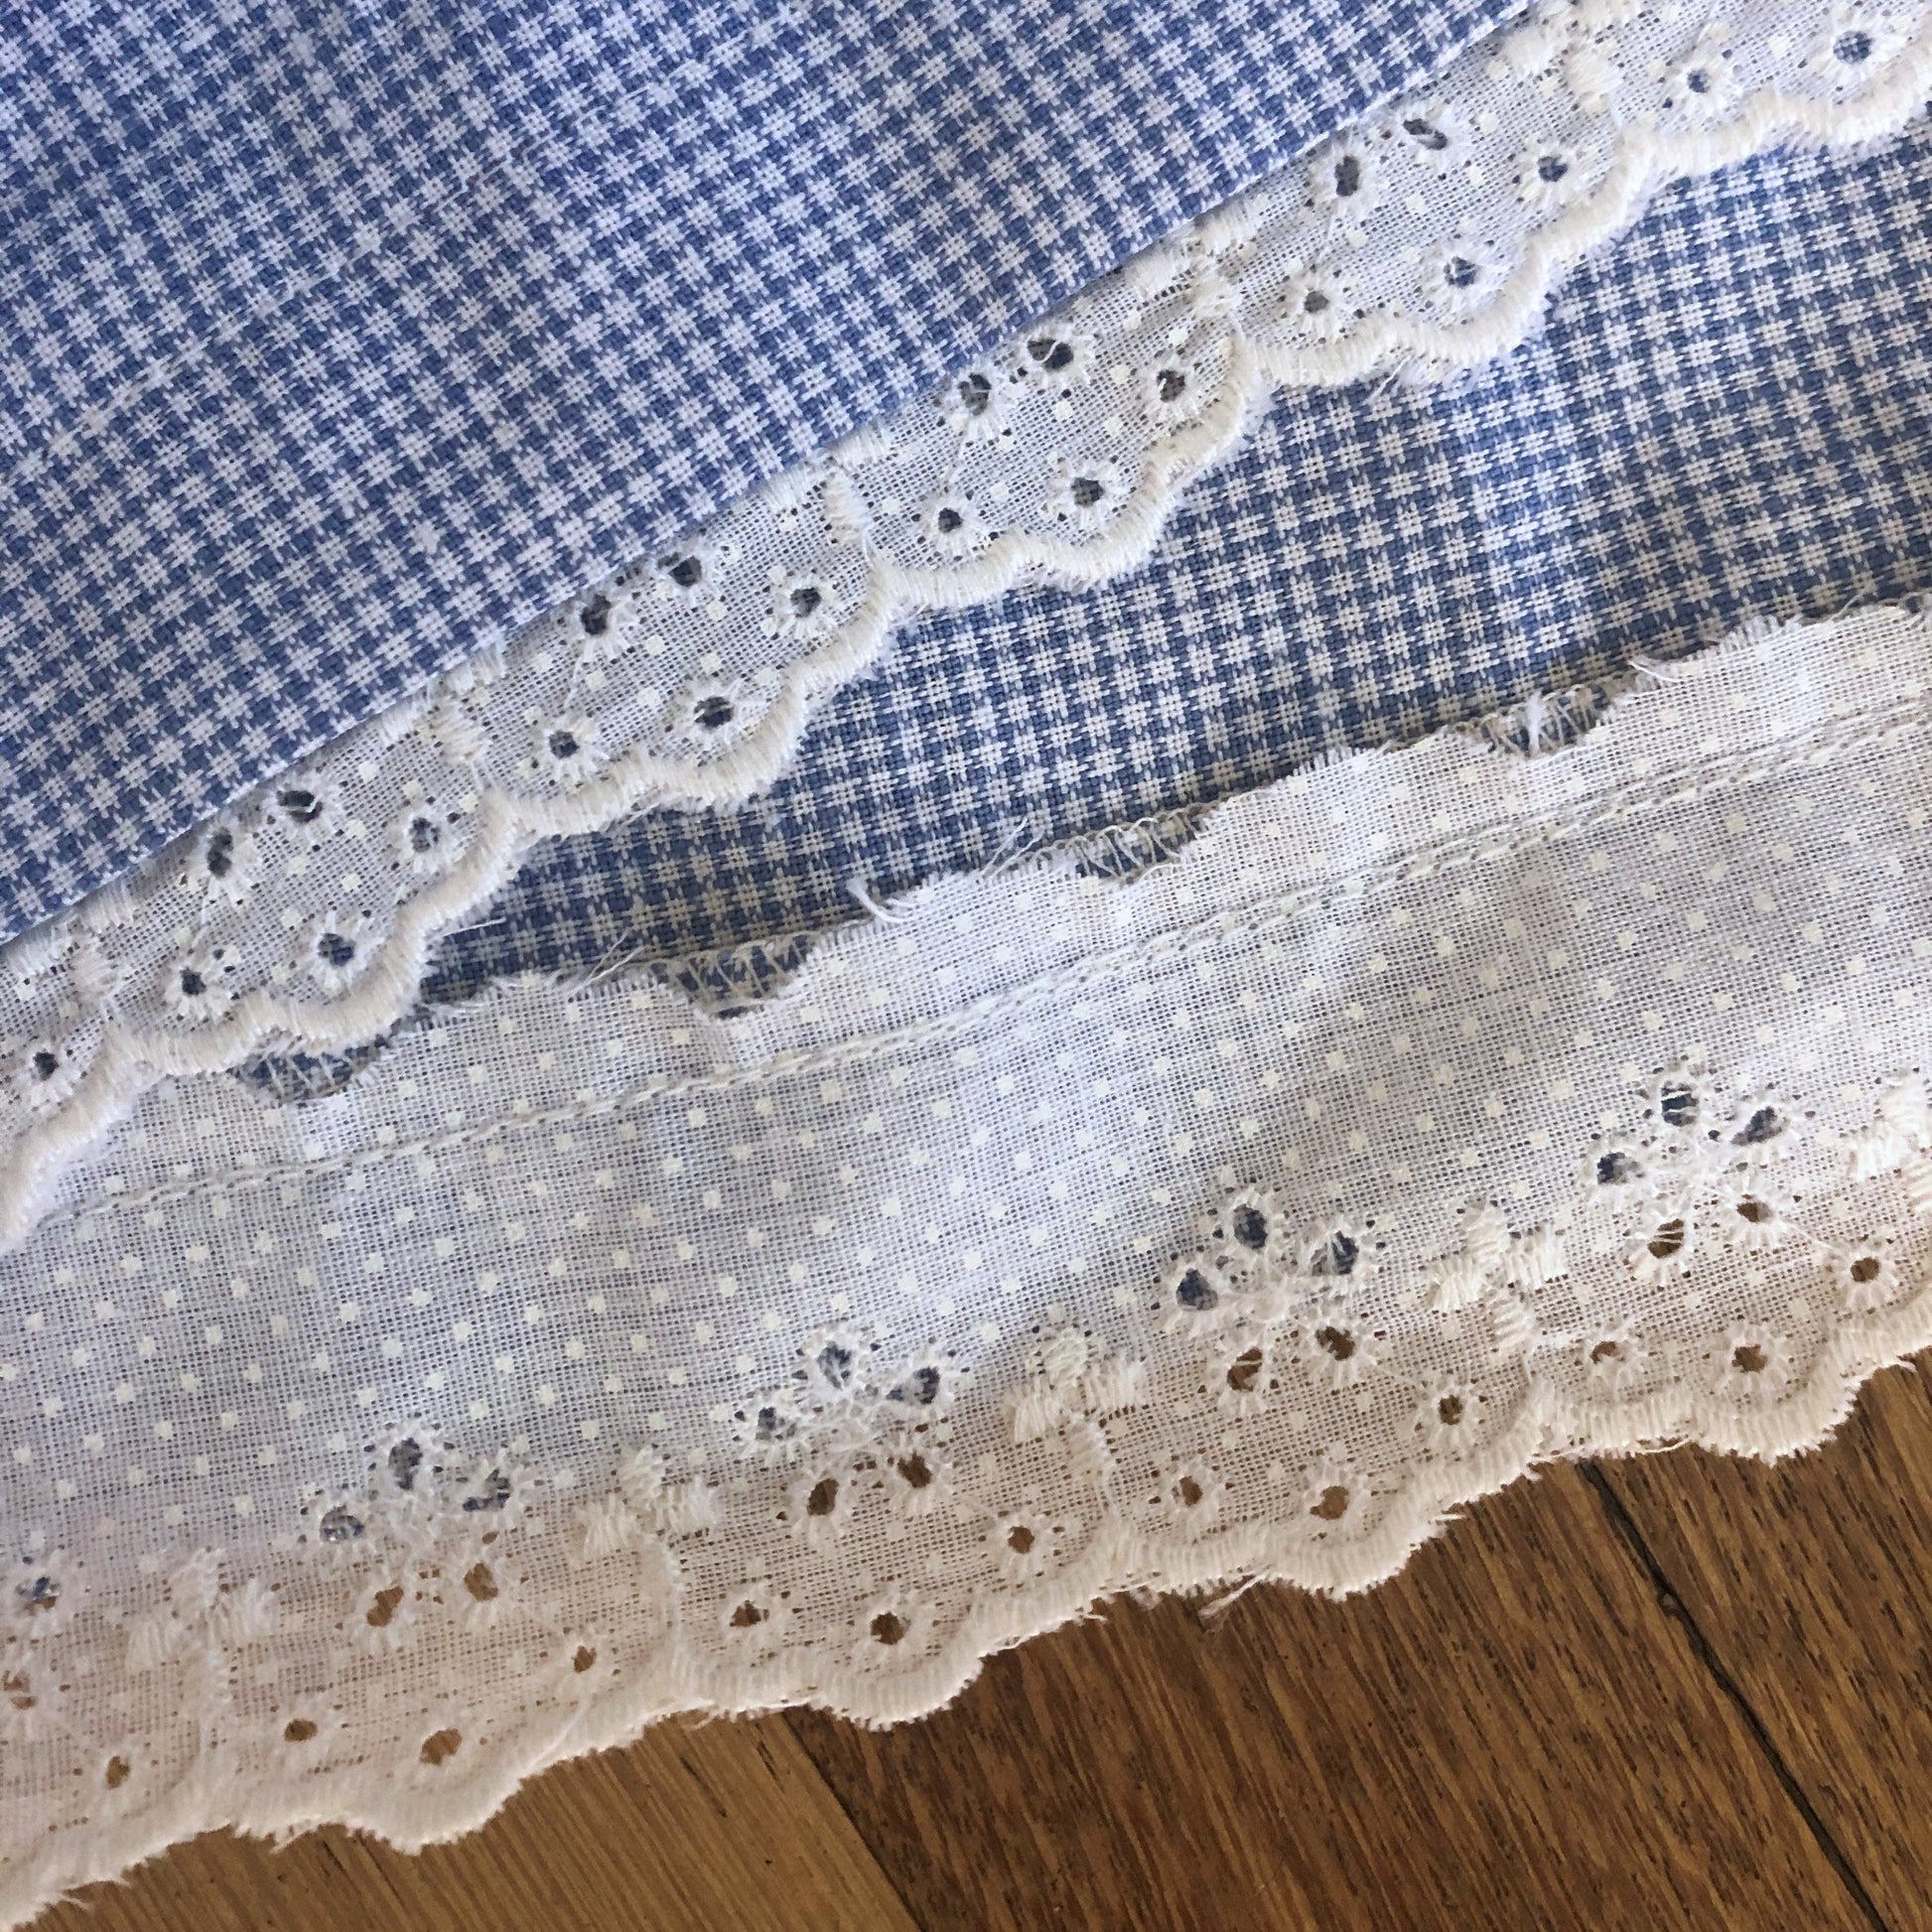
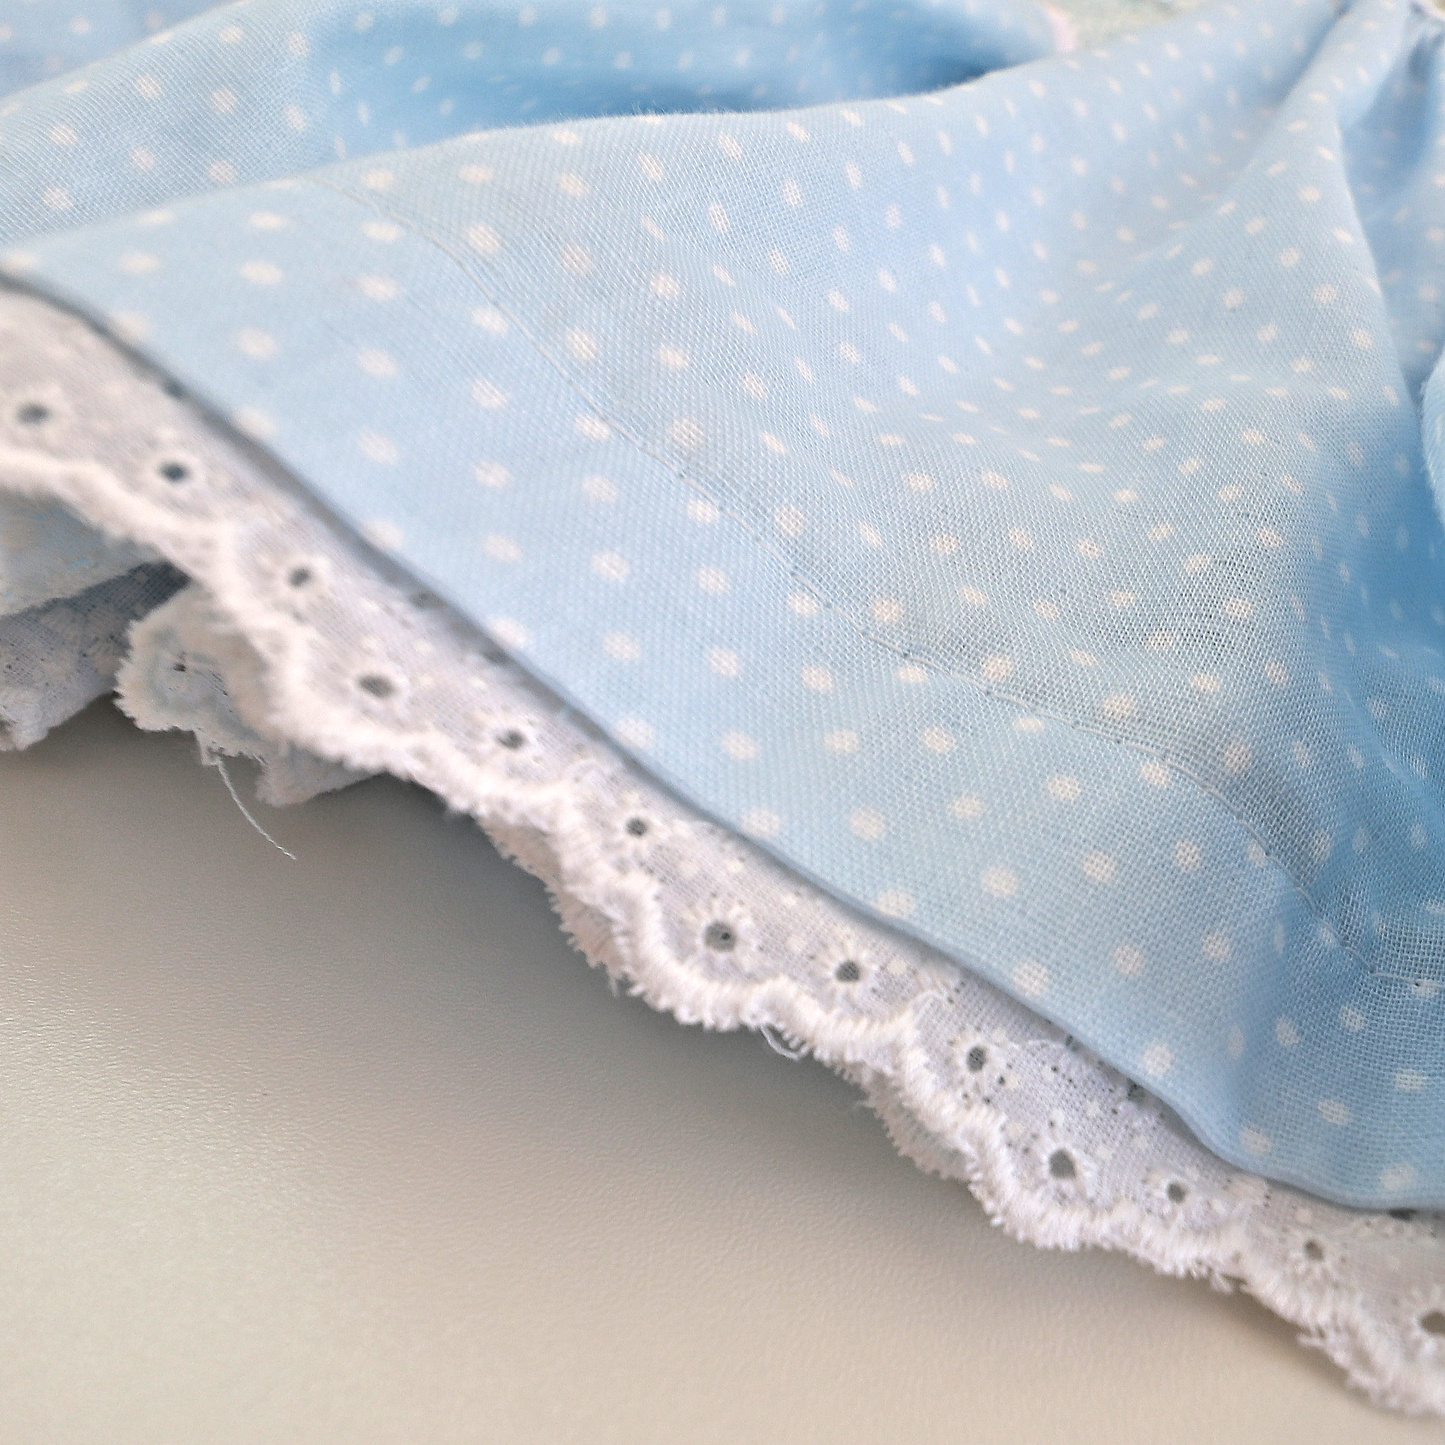
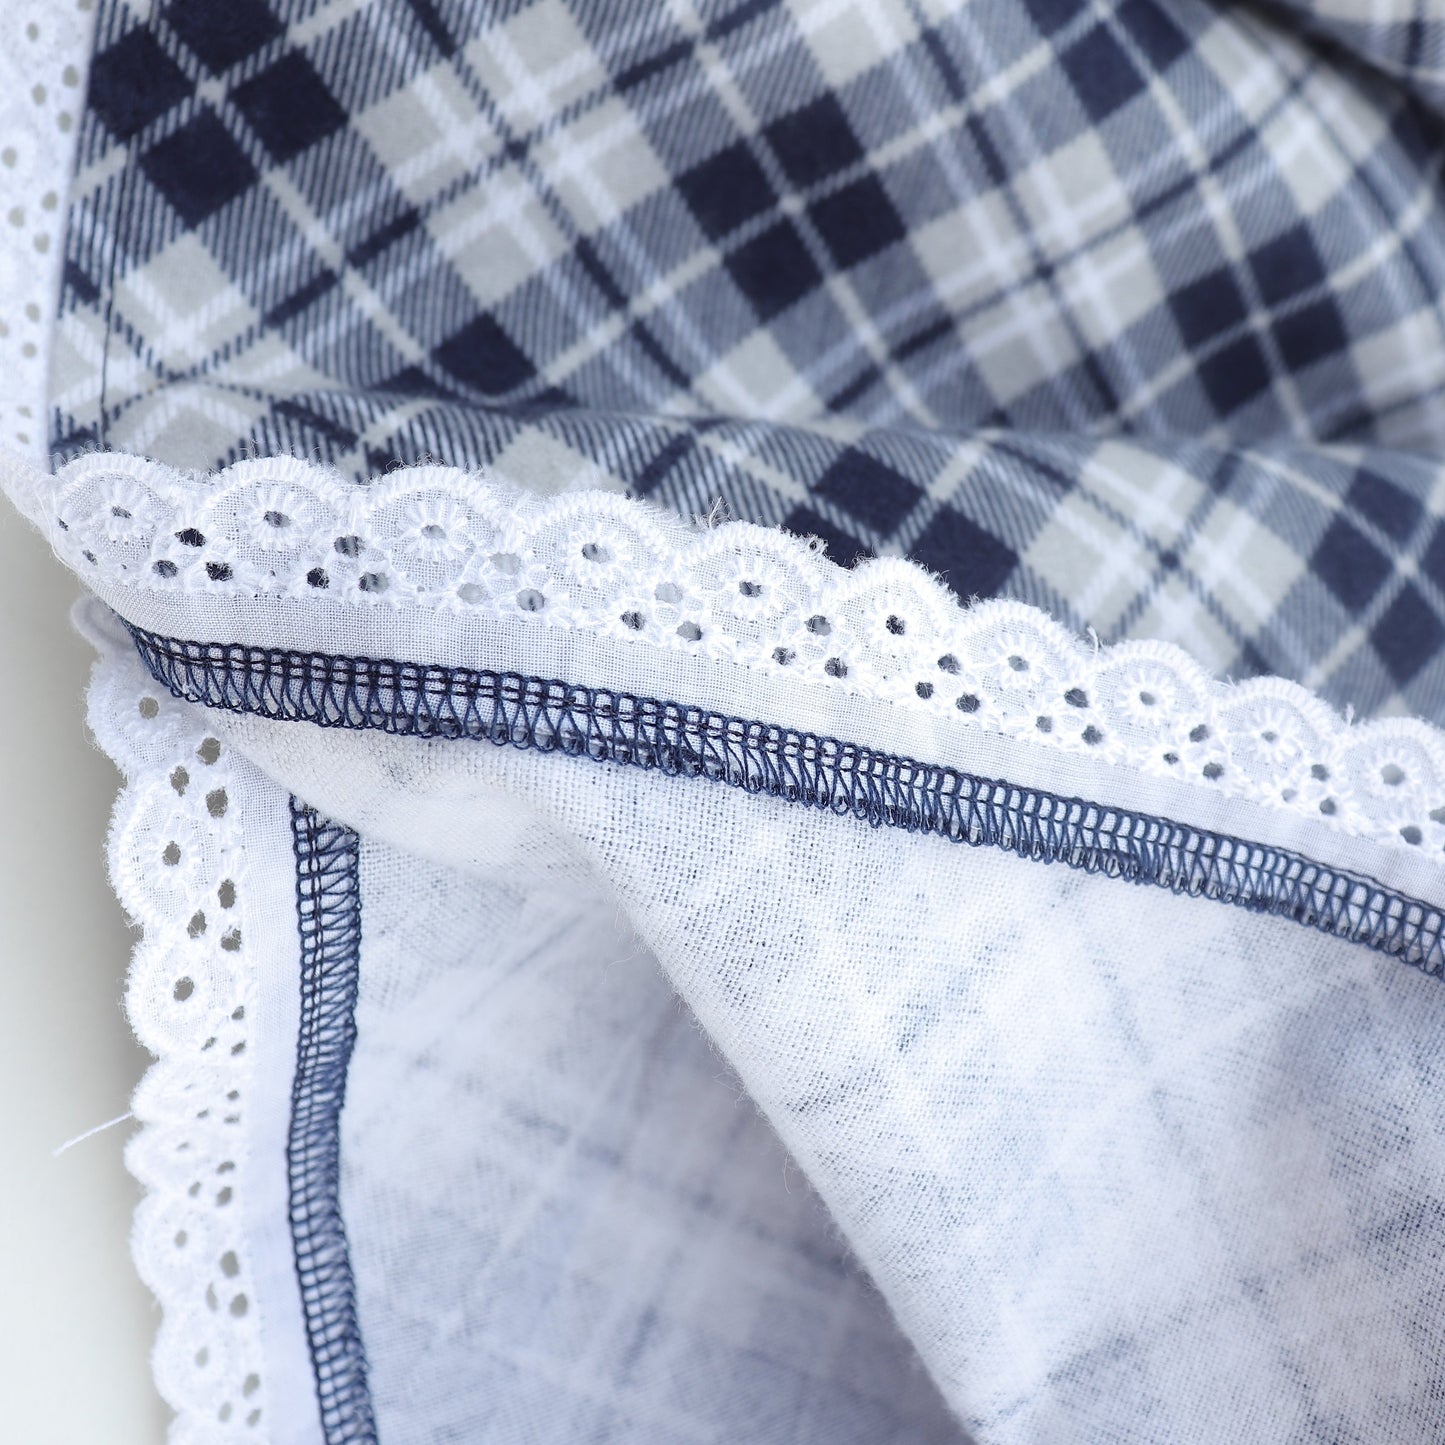
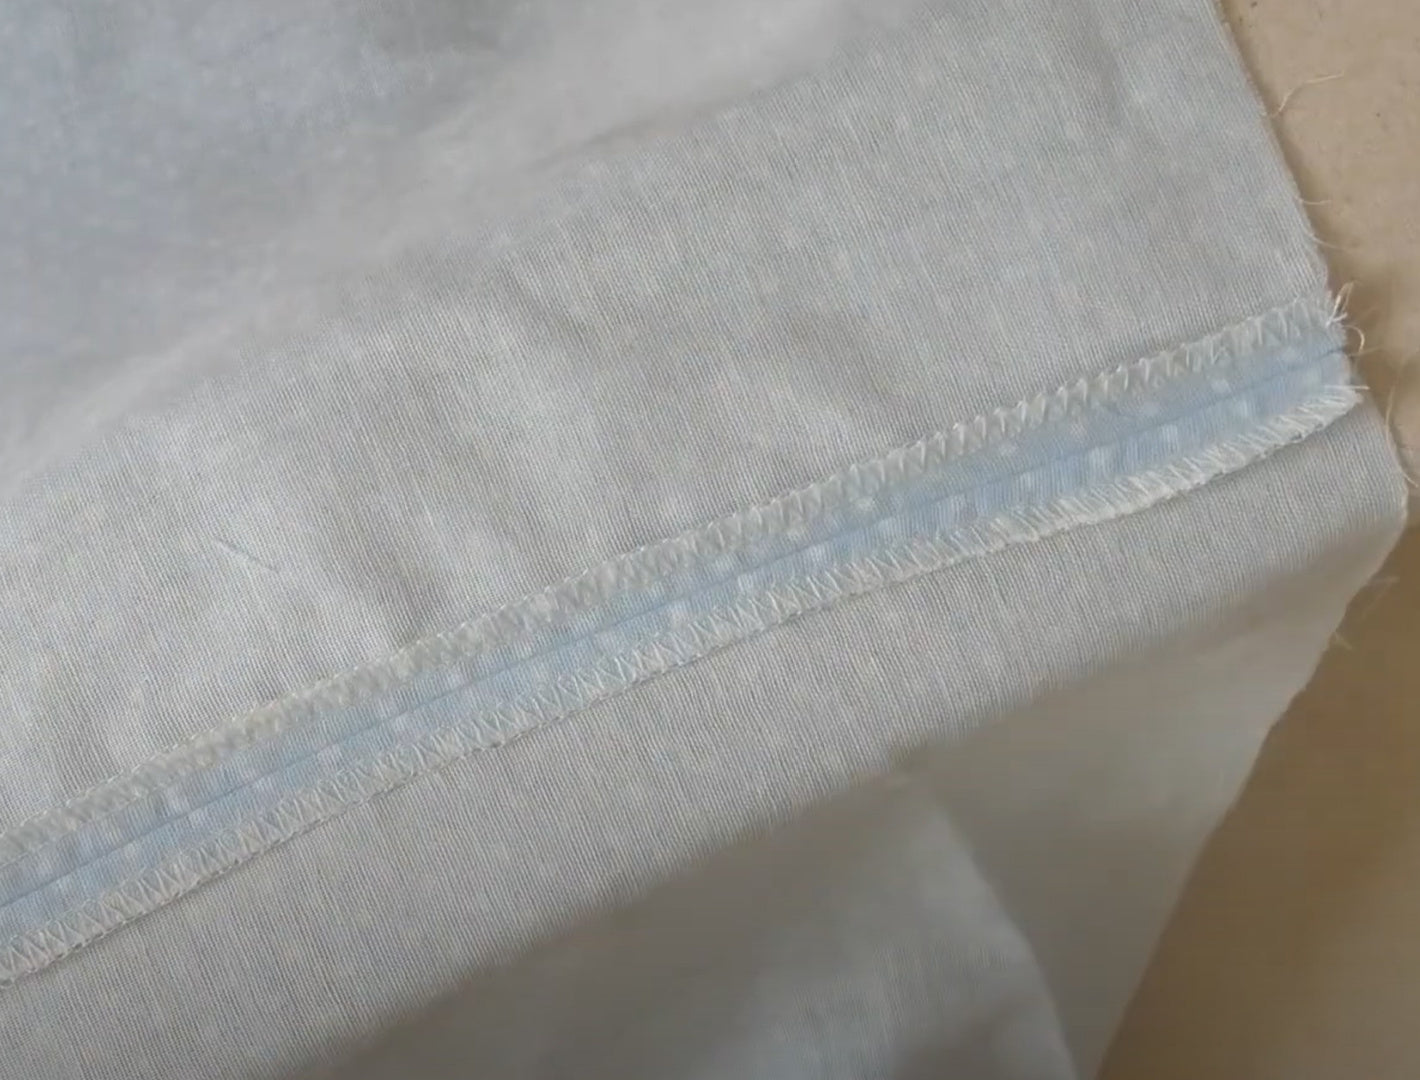
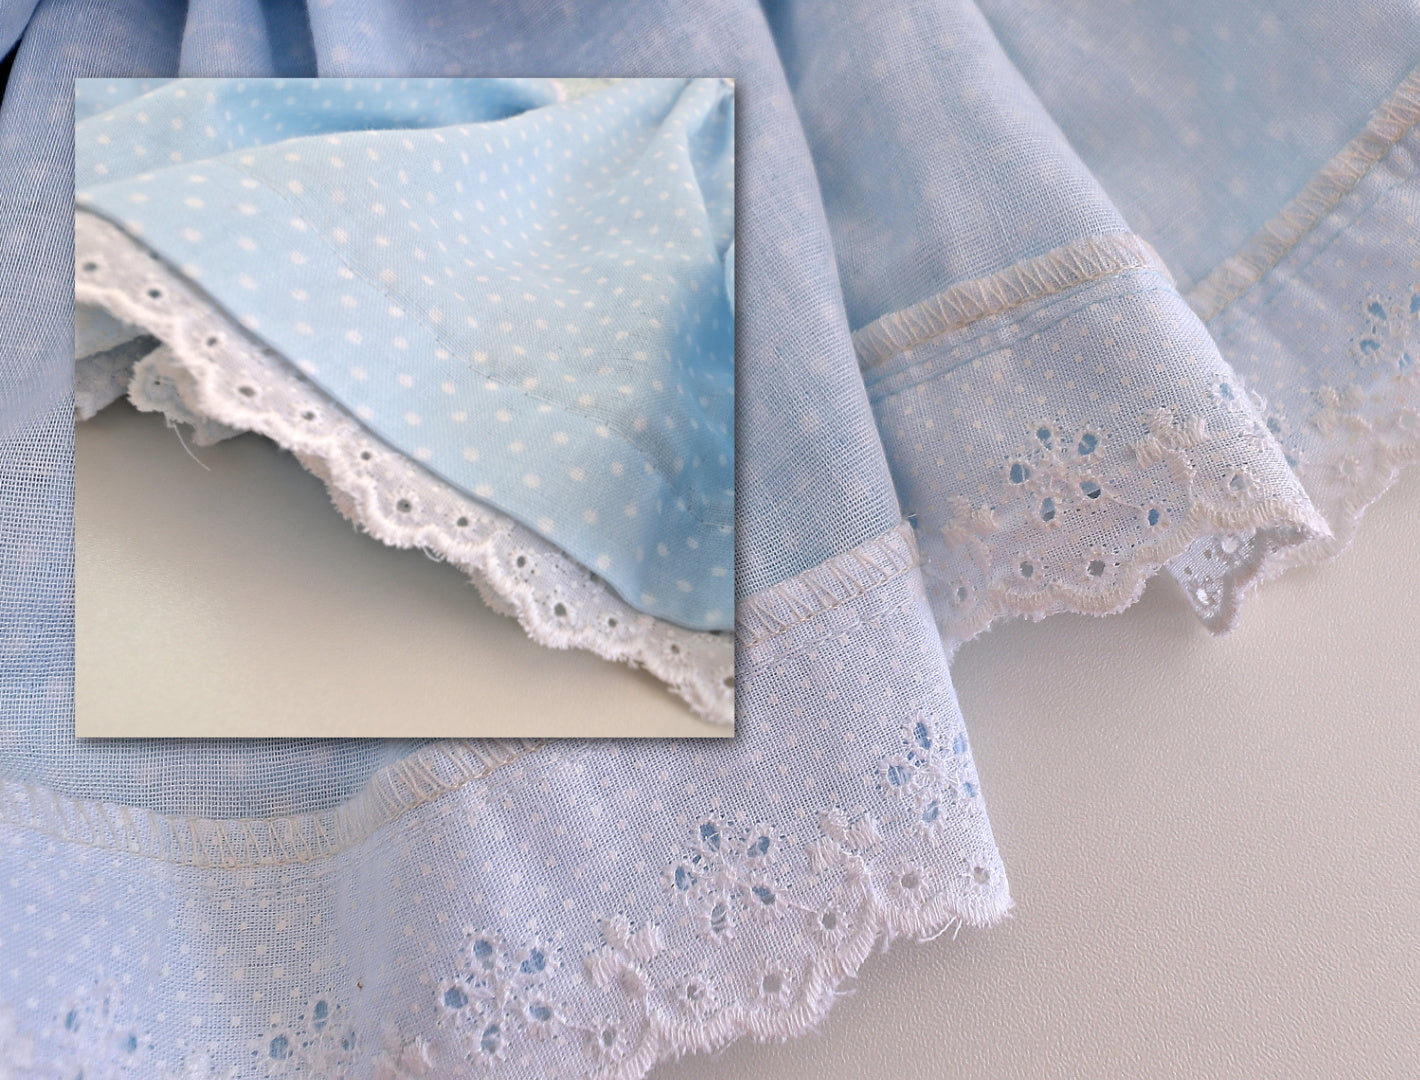
Hemming the Skirt with Lace

Next step: the hem. You could serge and topstitch, or turn in and topstitch, but I want to show you the lace method. It looks like a petticoat underneath — very pretty, like a double layer. I let just a little lace peek out.

Sew the lace to the edge, then serge it and create a 2.5 cm hem. Some might serge it straight away — if you're confident, do that. But beginners should do it the long way so they don’t cut into the fabric.

Sew all the way around. Then serge with the Brother 1034D — a cheap but excellent machine. I’ve bought several for schools. You can get it in our Amazon shop.

Now roll the fabric down so one point of the lace shows. Press it in. This gives the most even edge. Pin if needed. Use a clapper for a sharp edge. My ironing pad from Cottage Lane in New York is great — soft wool, perfect for small things.

Topstitch in the seam. I use a little gadget that helps guide the edge — it came free with my machine. Pfaff machines don’t sell on Amazon; they only sell through dealers so they can repair them. My old Pfaff lasted 28 years. The new ones aren’t as good, but still better than most.

Gathering the Skirt

Now we attach the skirt to the yoke. Insert gather threads at the top edge. You could use a gather foot. I’m using contrast bobbin thread so it’s easier to pull and remove later.

Sew two rows of long stitches. Mark the center front of the skirt and match it with the center front of the yoke. Match side marks. Pull the gather threads. You can pull straight over the pin without losing the point. Wrap the threads in a figure‑eight so they don’t slip.

Distribute the gathers evenly. It takes time, but it looks gorgeous.

Sewing the Skirt to the Yoke

Sew from the skirt side so you can adjust the gathers as you go. Make sure it’s flat underneath. Use the pin you remove to adjust the gathers. Take your time.

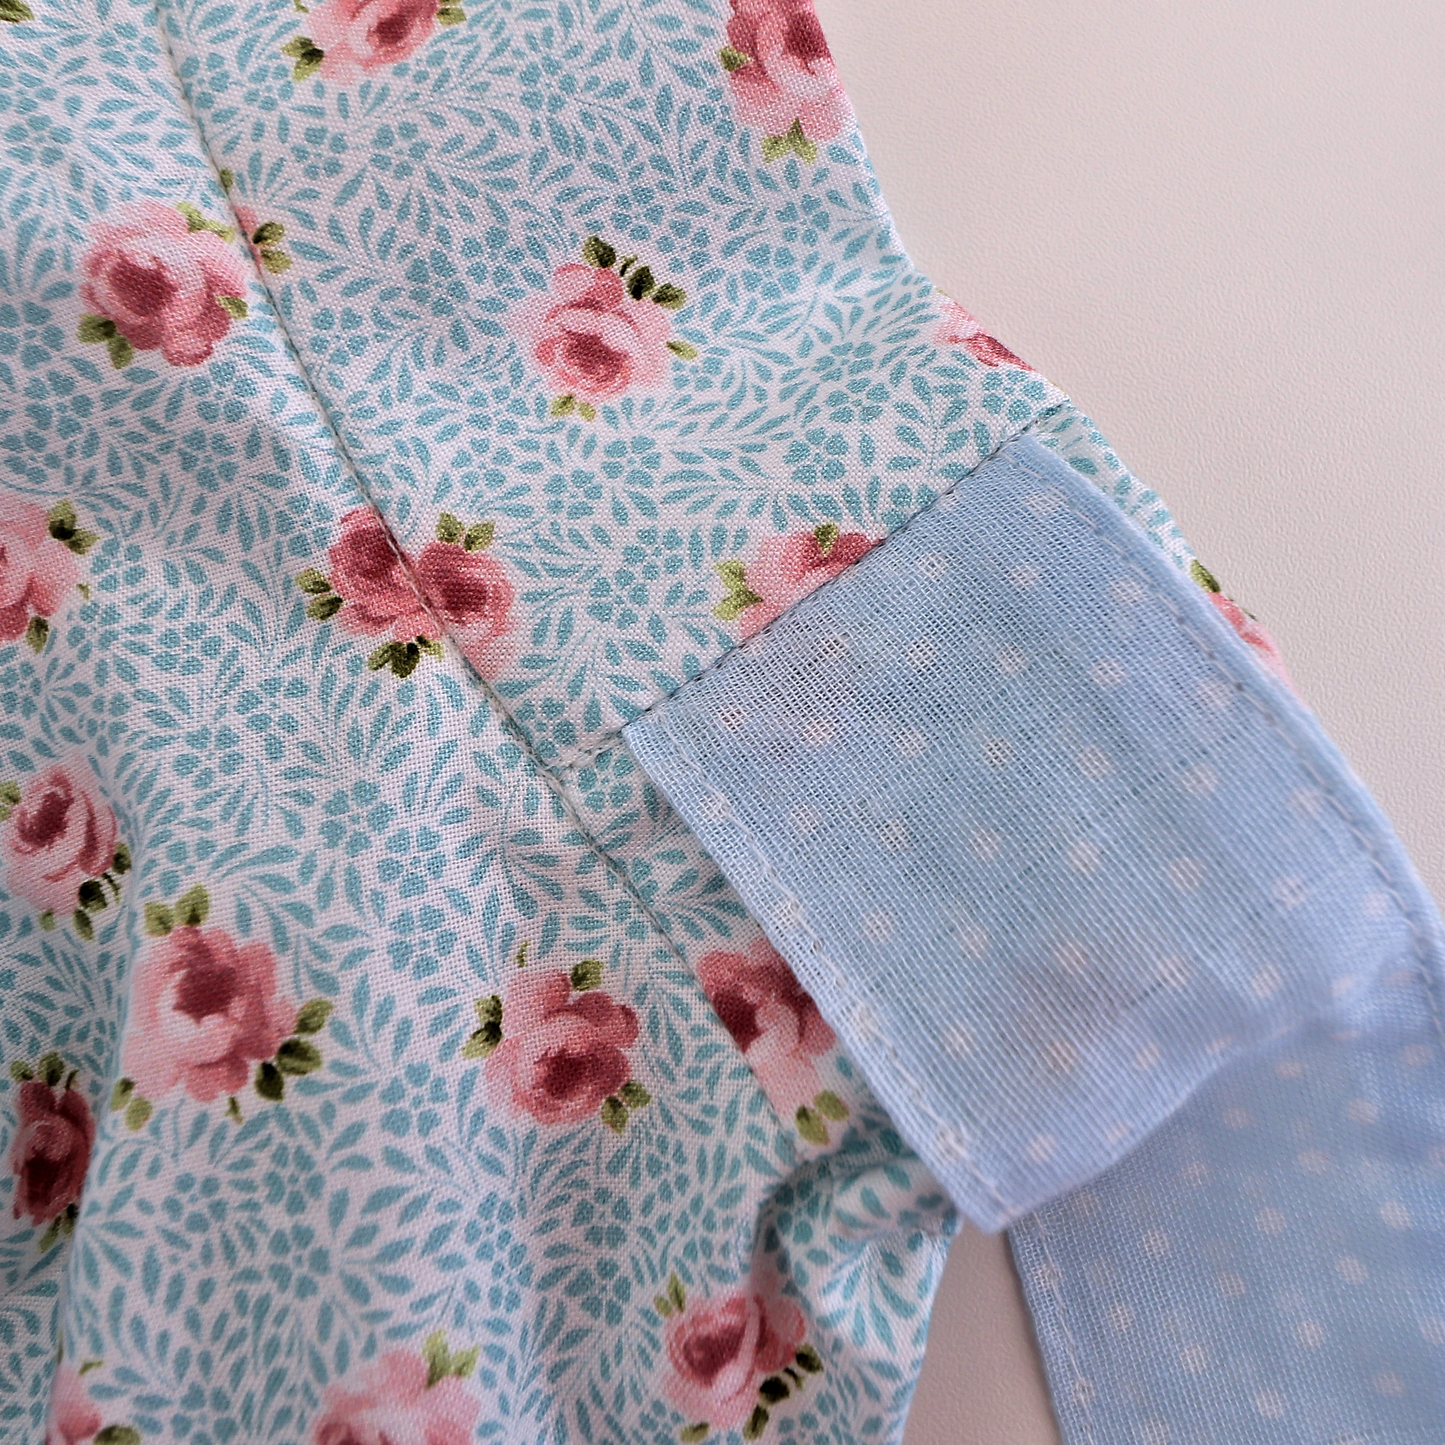
Then serge the seam. Remove the gather threads afterward. You can topstitch or add embellishment — I’m adding rickrack. Use a light zigzag stitch and place it right on top of the seam.

Finished Skirt

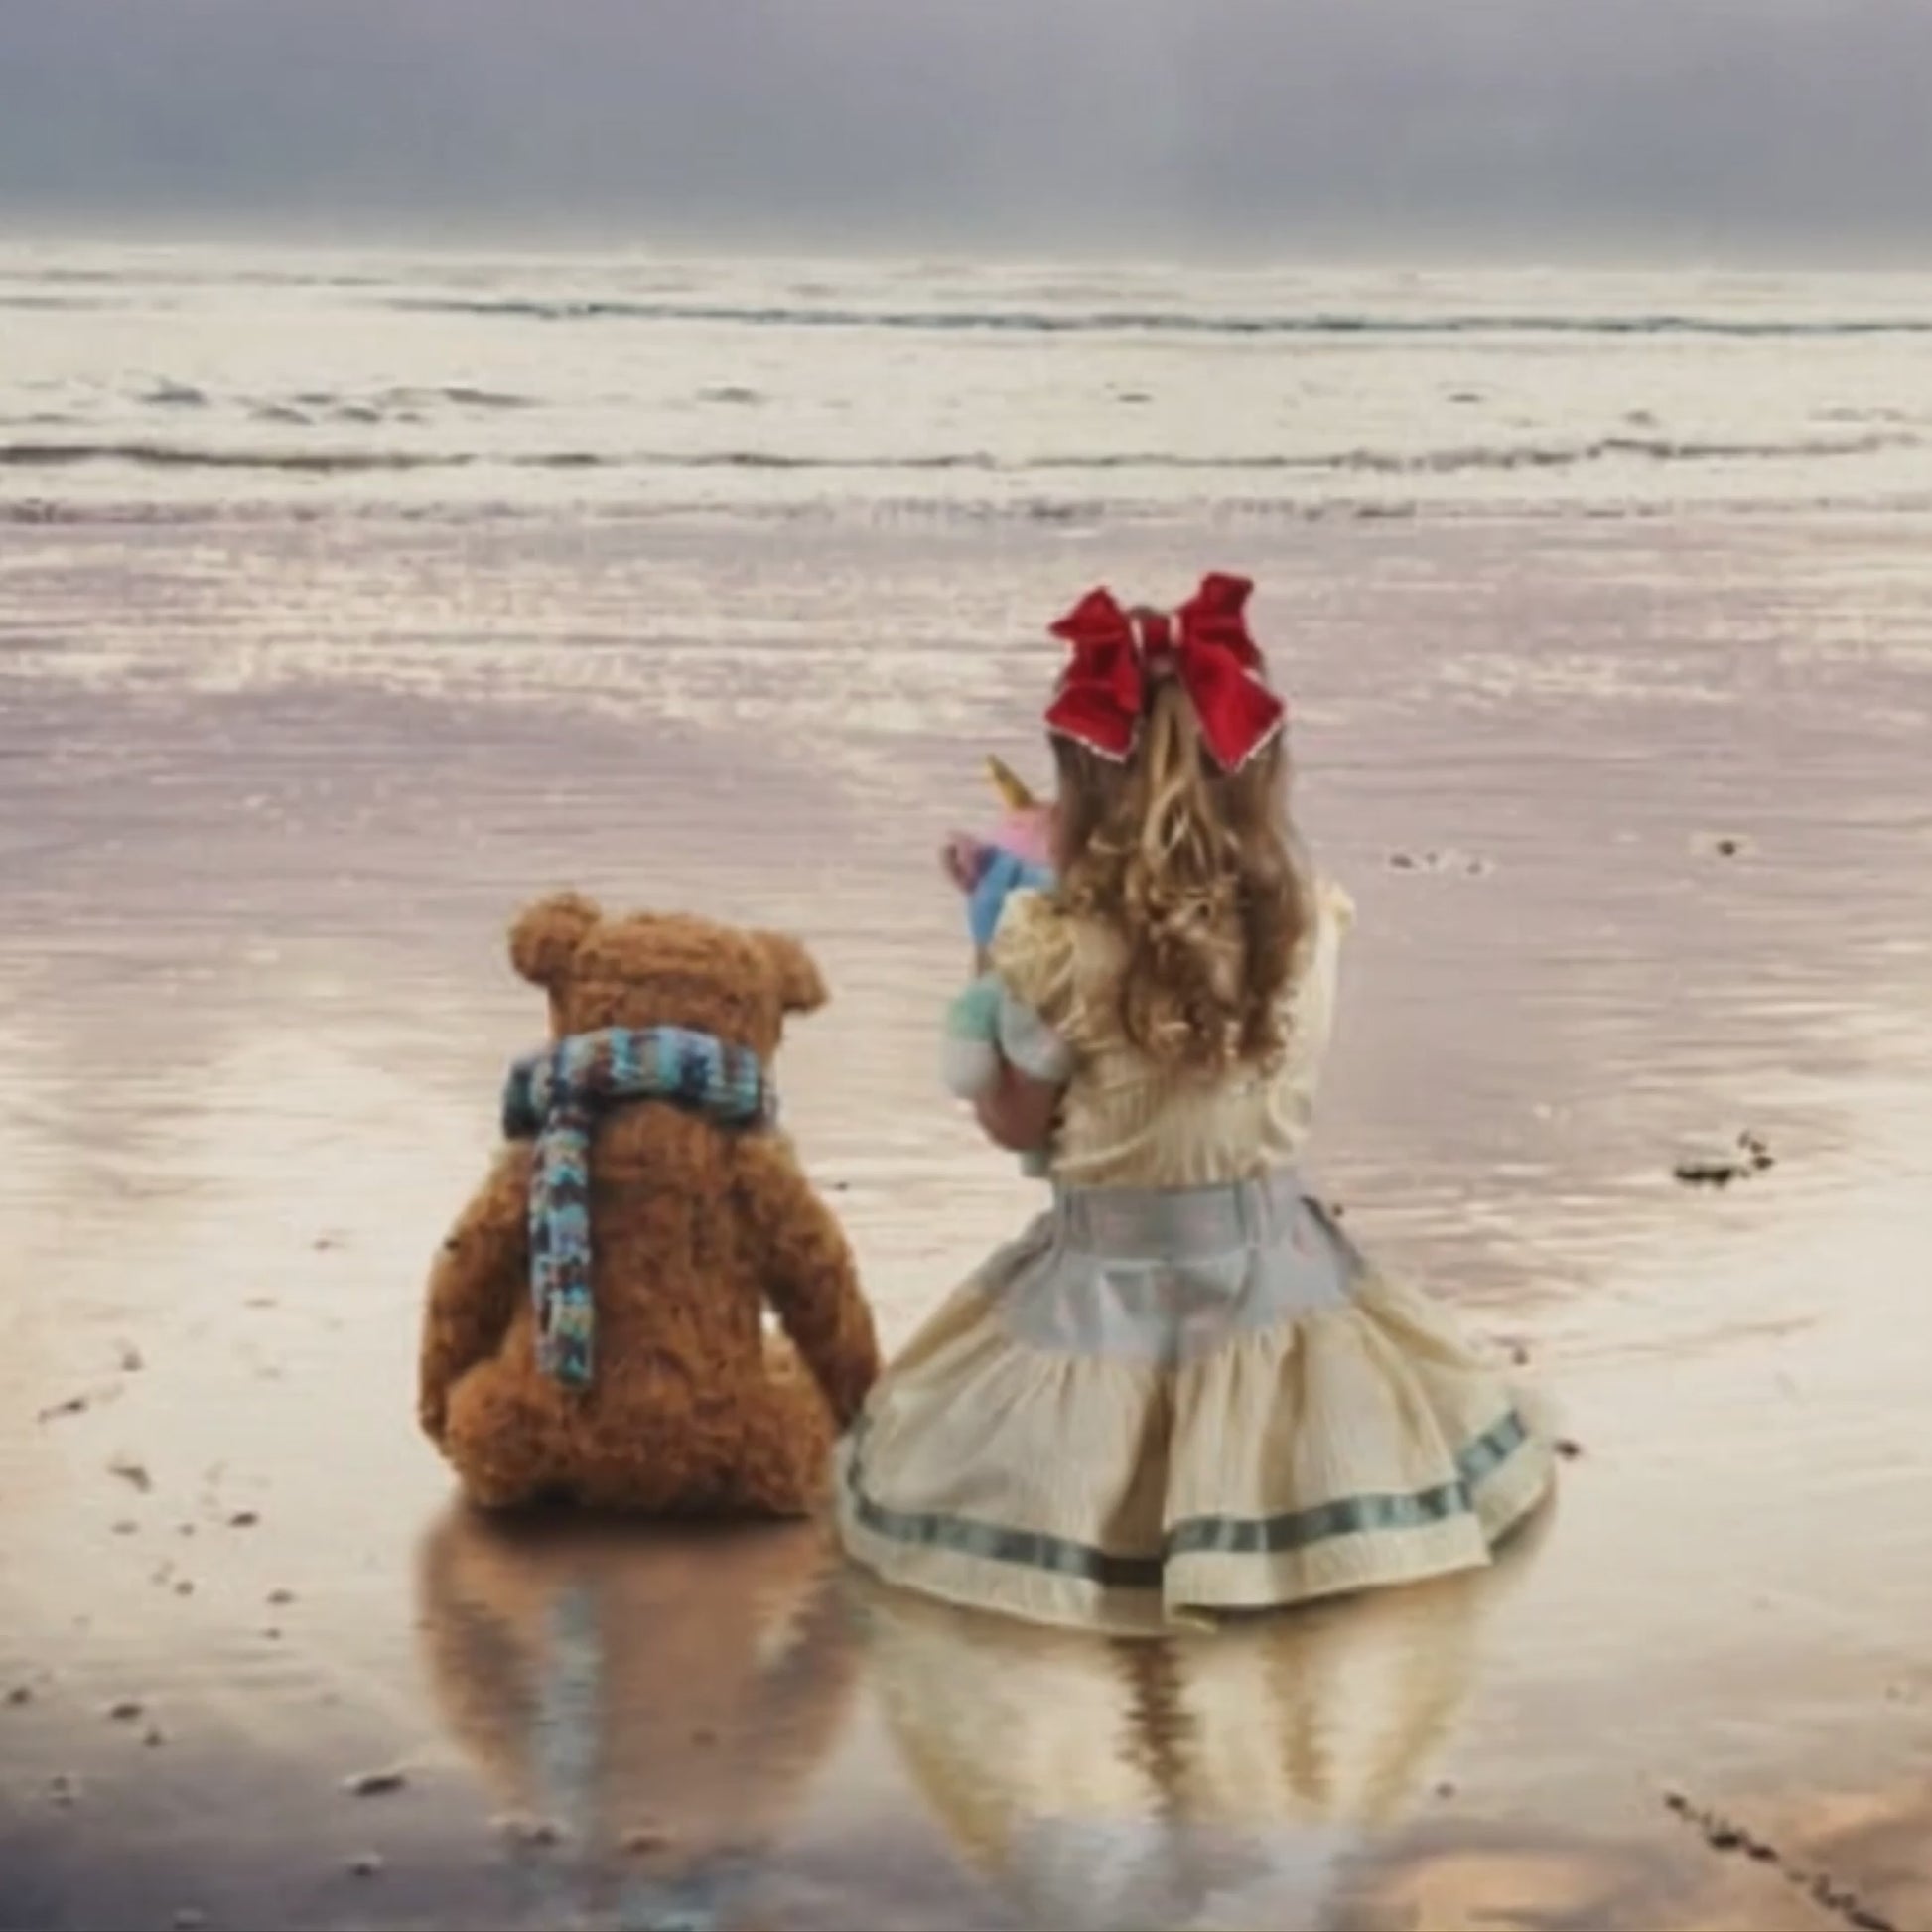
The skirt is finished and I absolutely love it. I tied mine to the side — so beautiful. All the little details will make someone very happy.

That’s the end of this course. We’ve got loads more videos and patterns coming — every week or every other week something new. I’ve also made a matching crop top, which you can get in the shop.

Thank you so much for being part of this course again, and I hope to see you soon. Bye for now.

YOU MAY ALSO LIKE

Beatrice

SHOP NOW

Audrey

SHOP NOW

Bonnie

SHOP NOW

Connie

SHOP NOW

Isabella

SHOP NOW