Skip to product information
1 of 13

DAKOTA & JUTTA

DAKOTA & JUTTA

Filled Circle
Filled Circle
Filled Circle
Empty Circle
Empty Circle
Regular price $10.50 USD
Regular price $14.00 USD Sale price $10.50 USD
Sale Sold out

Create a charming, coordinated outfit with this girls’ PDF sewing pattern bundle. The A‑line Dakota coat pairs beautifully with the straight‑cut Jutta wrap skirt, making a stylish combo for everyday wear or special occasions. 

Marina’s beginner friendly video tutorials leave nothing out and guide you step-by-step. Just scroll down and start watching.

Pattern Download Includes

  • Instant Download
  • DIN A4 & US Letter Size
  • Individual PDF files for every Size
  • All Sizes included
  • Detailed eBook
  • Video Tutorials

Design Options

Please refer to the individual listings:

Fabric Requirements

DAKOTA
Shell Fabrics: This coat can handle medium to heavier weight fabrics like wool or denim and of course laminated cotton fabrics for raincoats.

Lining: Soft brushed cotton for a comfy autumn and spring coat. For the winter you can use a quilted fabric for extra warmth. And for the warmer season you can even make the coat without lining.

FABRIC REQUIREMENTS

  • Shell Fabric: 1.5-2 yards (1.2m-1.6 m)
  • Lining: Max 1.2 yards (1m)
  • Buttons: 3 x
  • Iron-on interfacing: 1.2 yard (1m)

JUTTA
Medium to heavier weight fabrics such as plain weave cotton, cotton sateen, cord, chambray or denim.

FABRIC REQUIREMENTS
• 1/2–1 yard (50-80cm )
• Buttons: 2 x
• Iron on interfacing: 4 inches (10cm) 

Available Sizes

Age 1-12

Please Read

  1. This is a digital pattern or PDF file, not a physical product. It will be delivered electronically via a download link delivered to the email used for the purchase.
  2. To ensure the pattern prints at its actual size, it's recommended that you use Adobe Acrobat Reader.
  3. The pattern creator, Frocks & Frolics, welcomes small-scale production using their patterns. 

Customers are encouraged to tag Frocks & Frolics when sharing projects made using their patterns on social media.

@frocksandfrolics #frocksandfrolics

View full details

STEP-BY-STEP VIDEO TUTORIALS

Thumbnail
JUTTA SEW-ALONG
Thumbnail
DAKOTA: INTRODUCTION
Thumbnail
DAKOTA: COAT WITHOUT LINING
Thumbnail
DAKOTA: COAT WITH LINING

VIDEO TEXT

Transcript for the video: Dakota & Jutta - Jutta Sew-Along

Hi everyone, this is Marina from Frocks and Frolics with the wrap skirt “Jutta”. This skirt pairs beautifully with the Dakota coat we released recently. It’s very versatile, all-year-round, and especially comfortable in winter fabrics. It’s also very easy to make.

Pattern preparation

First, check your pattern pieces. You’ll see waist measurements and skirt length, along with a 5 cm test square to confirm correct scaling when printing.

All patterns are marked with flowers: a pink flower for the back and a white flower for the front, so you won’t get confused.

There are only a few pattern pieces:

  • Front pieces (A, B, C, D depending on size)
  • Back (usually 2 pieces, taped together if needed)
  • Two facings (front and back)

Assemble the front pieces (A + B, then C + D), then join them to form the full front. Do the same for the back if it comes in two parts, taping them together.

Cutting out the fabric

The back piece is cut on the fold, so place it on fabric folded selvedge to selvedge. Arrange all pattern pieces efficiently to avoid waste.

Use fabric weights if needed to hold everything in place. Mark the front facing clearly when cutting.

Interfacing is optional depending on your fabric. If using stable or structured fabric, you may not need it.

Preparing the facings

Start by sewing the facing side seams with a 1 cm seam allowance. No need to overlock yet. Press seams open once sewn.

Overlock:

  • Lower edge of facing
  • Side seams
  • Front edges

Then place the front pieces onto the back pieces and sew side seams with a 1 cm seam allowance. Press seams open.

Attaching the facing

Place right sides together and attach the facing around the skirt edge. The facing will be slightly shorter due to the wrap design.

Sew with a 1 cm seam allowance, then press.

Pin side seams of facing and skirt together so everything aligns correctly, especially at the overlap point marked on the pattern.

Fold over the front wrap section and align using the notches. Adjust slightly if needed for accuracy.

Topstitching and finishing the waist

Mark a stitching line (around 3 cm from the edge). Stitch along this line, stretching the fabric slightly if it is elastic to avoid puckering.

Fold seam allowance toward the facing and press well.

Trim seam allowance where needed, then overlock the hem edge.

Understitching

Under-stitch the facing by sewing about 2 mm from the seam line, keeping the seam allowance toward the facing. This helps the edge roll neatly.

Press thoroughly, then pin and topstitch the front section from the outside for a cleaner finish.

Hem preparation

Press hem allowance (around 3 cm), then pin in place. Topstitch from the outside to keep stitching even and clean, especially important with checks or visible fabrics.

Stitch with a longer stitch length for a more professional finish.

Elastic waistband

Create a tunnel for elastic by stitching from side seam to side seam, leaving an opening to insert elastic.

Thread elastic through using a safety pin. Adjust to fit comfortably (do not make it too tight initially).

Overlap elastic ends and sew securely.

Close the opening using “stitch in the ditch” so it is invisible from the outside. Do this at both side seams to secure evenly.

Button and closure

Mark and sew a buttonhole (or optionally use a popper or Velcro instead if preferred).

To sew the button:

  • Hold thread slightly loose using your thumb as a spacer
  • Wrap thread to create a stem
  • Secure thread neatly underneath

Attach button and test closure. A faux button option is also possible for simpler construction.

Final result

Turn the skirt right side out, press well, and admire the finished piece. It’s comfortable, quick to sew, and very versatile. You can also adapt it with fake buttons or alternative closures depending on your skill level.

Finished wrap skirt “Jutta” paired with the Dakota coat—practical, stylish, and suitable for all seasons.

Dakota Introduction

Transcript for the video: Dakota & Jutta - Dakota Introduction

Hi everyone, this is Marina from Frocks and Frolics. This coat is part of the Winter Wonderland Collection and focuses on layering.

For this version, I’ve combined jeans fabric, jersey, and a soft cardigan underneath. The denim I used has very little stretch, so it’s suitable for coats. It also has a reversible side, which I used for the cuffs for a contrasting detail. The cuffs can be worn turned up or down, which also helps extend wear as children grow.

Design features

For the hood version, I added eyelets and decorative toggle ends, along with snowdrop-style embellishments. The buttons were sourced from Mood, and I used a striped shirting fabric for the lining.

The hood is lined with soft brushed cotton for warmth. I initially planned to use denim on both sides, but ran short of fabric—so I used a contrast trim instead, which turned out to be a design feature.

The coat includes:

  • Functional pockets
  • Optional collar or hood
  • A slightly A-line silhouette
  • Three-button closure (more can be added, but three is usually enough)

Pattern overview

Each size comes as its own file. Start by checking the test square (5 cm or 1 inch) to ensure correct scaling.

Patterns are marked with flowers:

  • Yellow flower = front pieces
  • Pink flower = back pieces

Pieces are labeled alphabetically and assembled in order. Larger sizes include more pattern pieces.

A layout guide is included to help you place pieces efficiently and reduce fabric waste. Both hood and collar options are shown so you can choose your version before cutting.

Front piece and construction details

The front piece includes an integrated facing. The dotted line indicates where the facing folds.

  • Hood attaches into the full front opening
  • Collar starts from the marked attachment point
  • Shoulder notch must be snipped for alignment
  • Pocket placement is marked on the front (optional variations available via additional tutorials)

You can convert the front into a full pattern piece by taping and flipping it.

Hood and collar options

The hood is cut as a separate pattern piece and attaches around the neckline. The shoulder markings ensure correct alignment.

If you prefer a collar, it attaches only from the marked point and follows the neckline seam allowance.

Lining construction

The lining mirrors the outer coat but differs in key areas:

  • No pocket
  • Slightly shorter length
  • Higher armhole for comfort and seam allowance movement

The lining must accommodate the outer shoulder seam allowance so it sits correctly when worn.

Back lining includes shaping at the hem so it sits smoothly when turned up.

Sleeve construction

Sleeves are provided in both outer and lining versions.

  • Match notches carefully (front notch must be marked)
  • Sleeve head may be adjusted slightly depending on fabric drape
  • Optional contrast cuff can be created using two different fabrics

When assembling, align sleeve head markings and check hang before final stitching.

Construction notes

  • Overlock seams after joining pieces
  • Press seams carefully for structure
  • Topstitching improves durability and professional finish
  • Check sleeve balance before final stitching

Optional pocket variation

A standard side pocket is included. A welt pocket variation is available via an additional tutorial if preferred.

Final assembly

Once all pieces are constructed:

  • Attach lining to outer coat
  • Match shoulder seams and notches
  • Ensure hem alignment between lining and outer shell
  • Insert sleeves and check fit before final securing

Final result

This is a structured but comfortable winter coat designed for layering, warmth, and flexibility. It works well with hood or collar variations and can be adapted with different fabrics for seasonal styling.

More variations and advanced techniques (including piping and additional pocket styles) are available in upcoming tutorials on Frocks and Frolics.

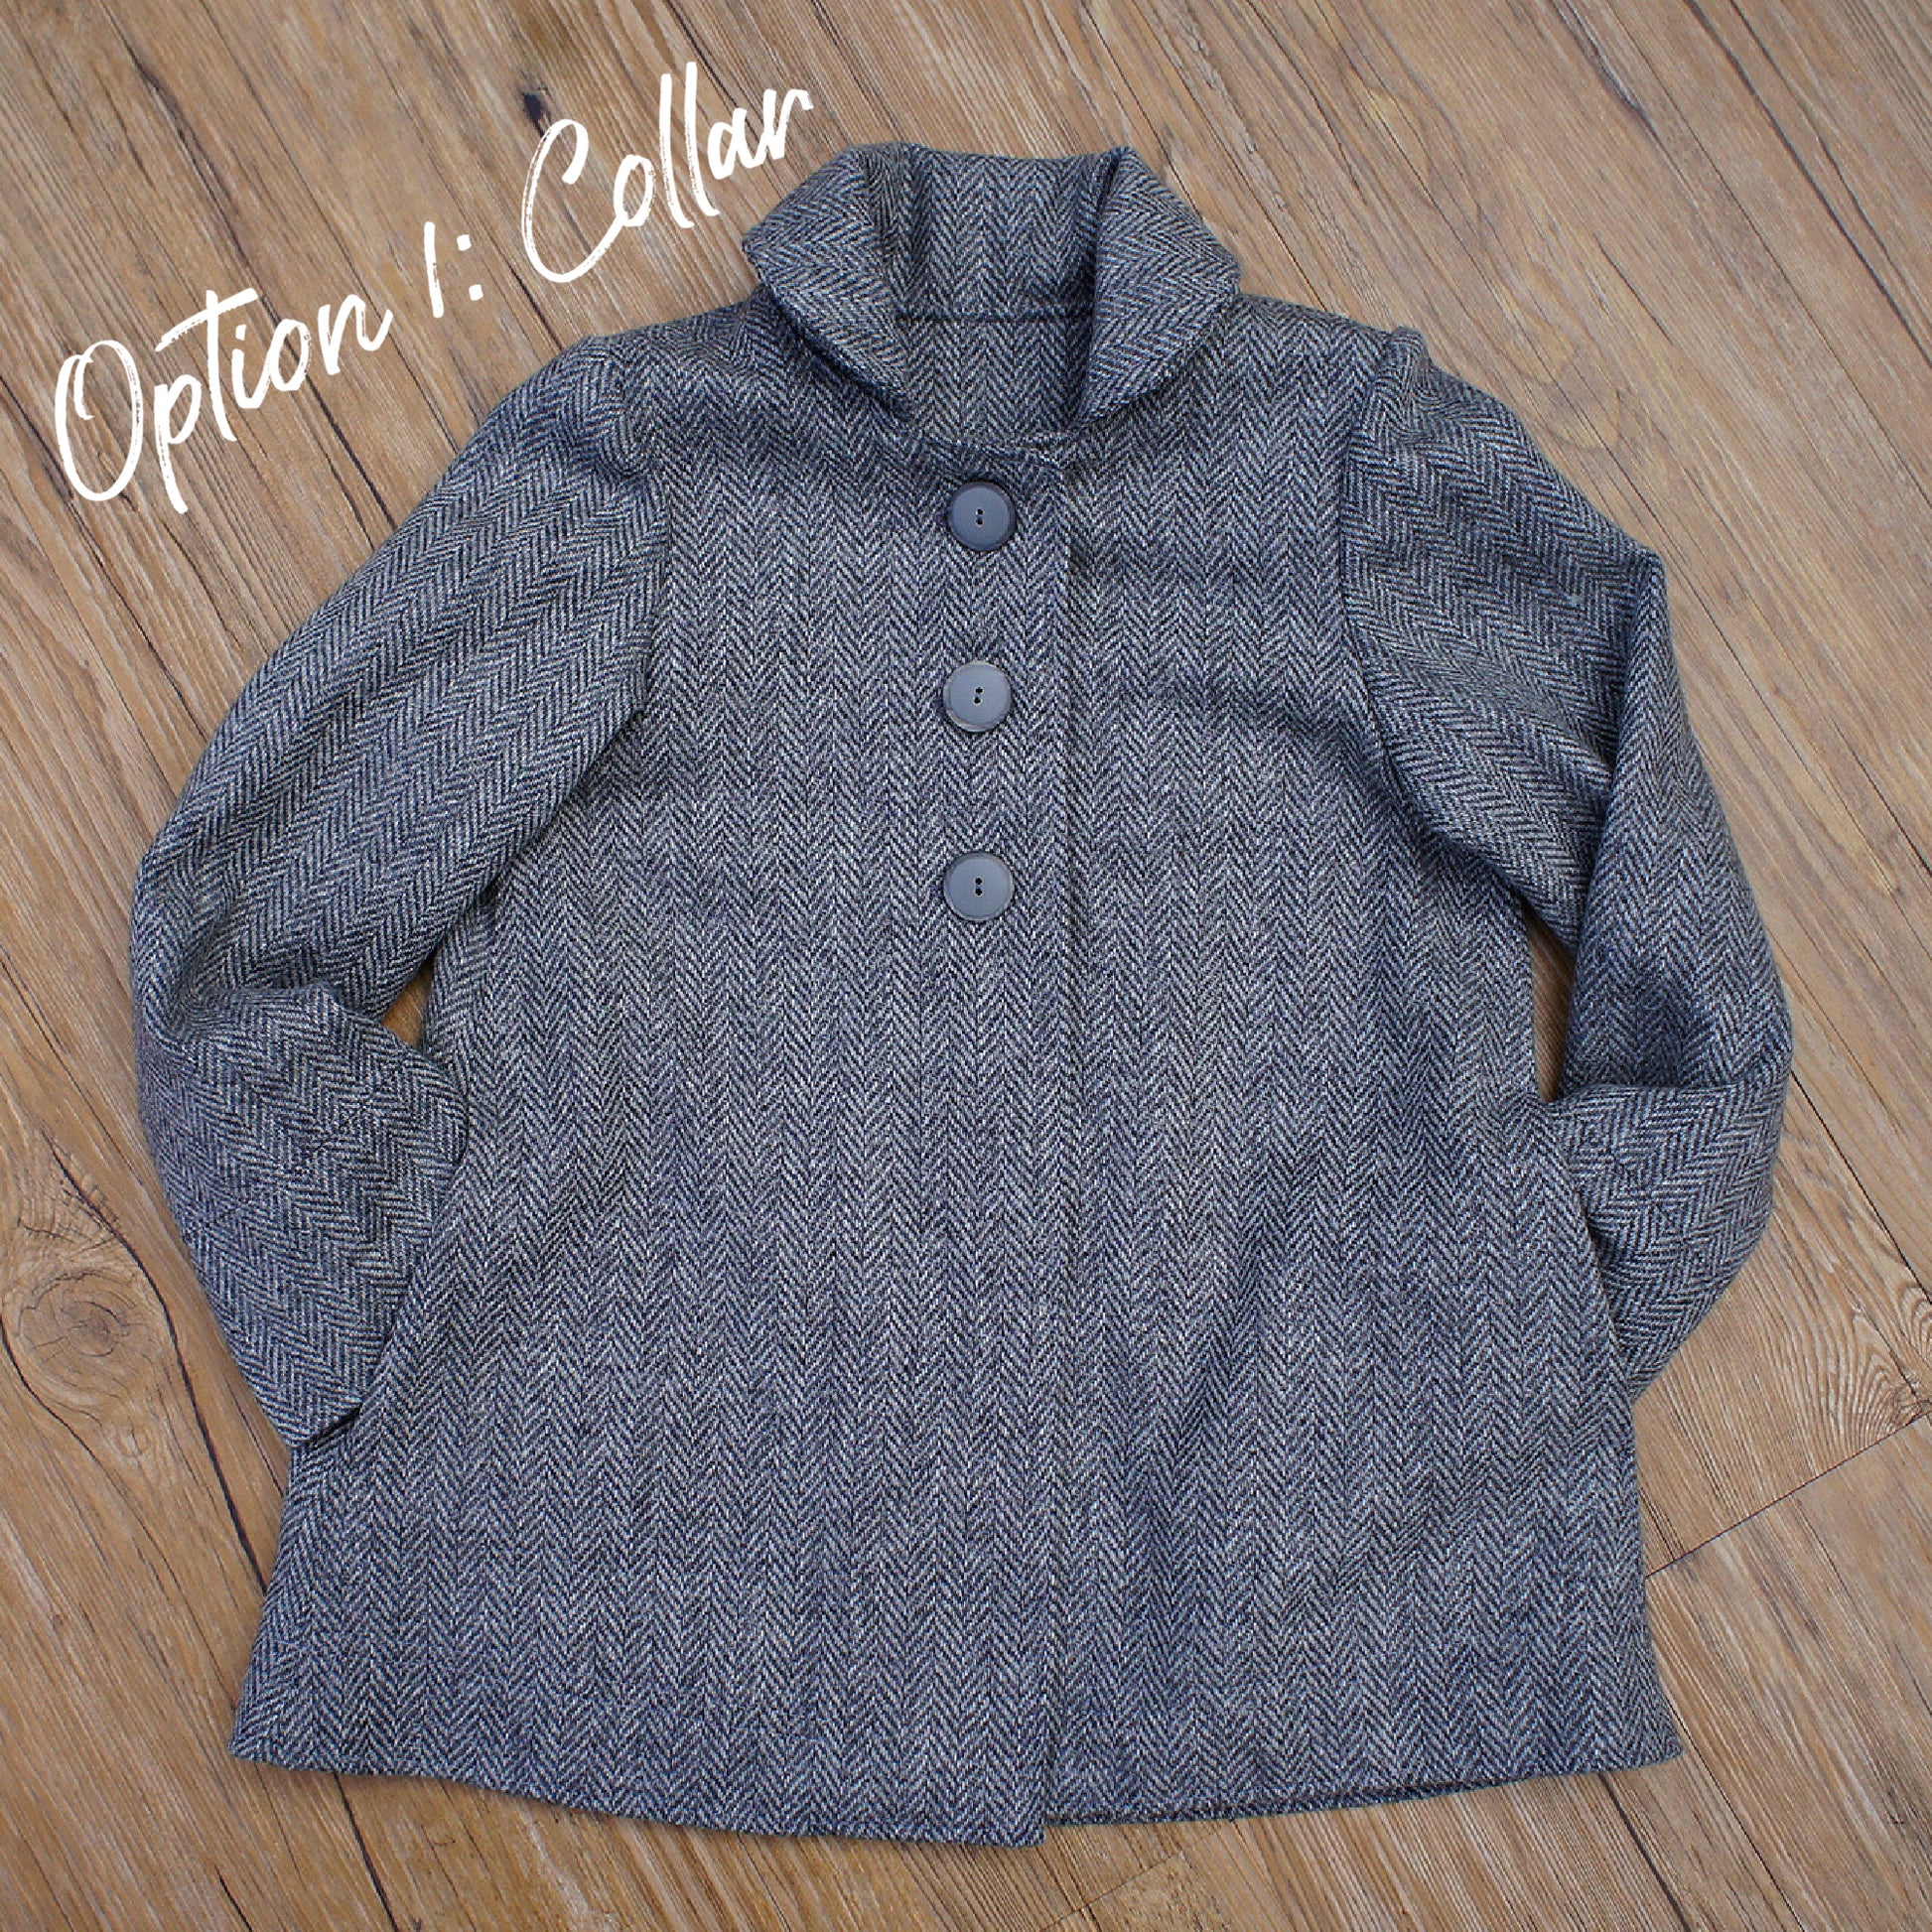
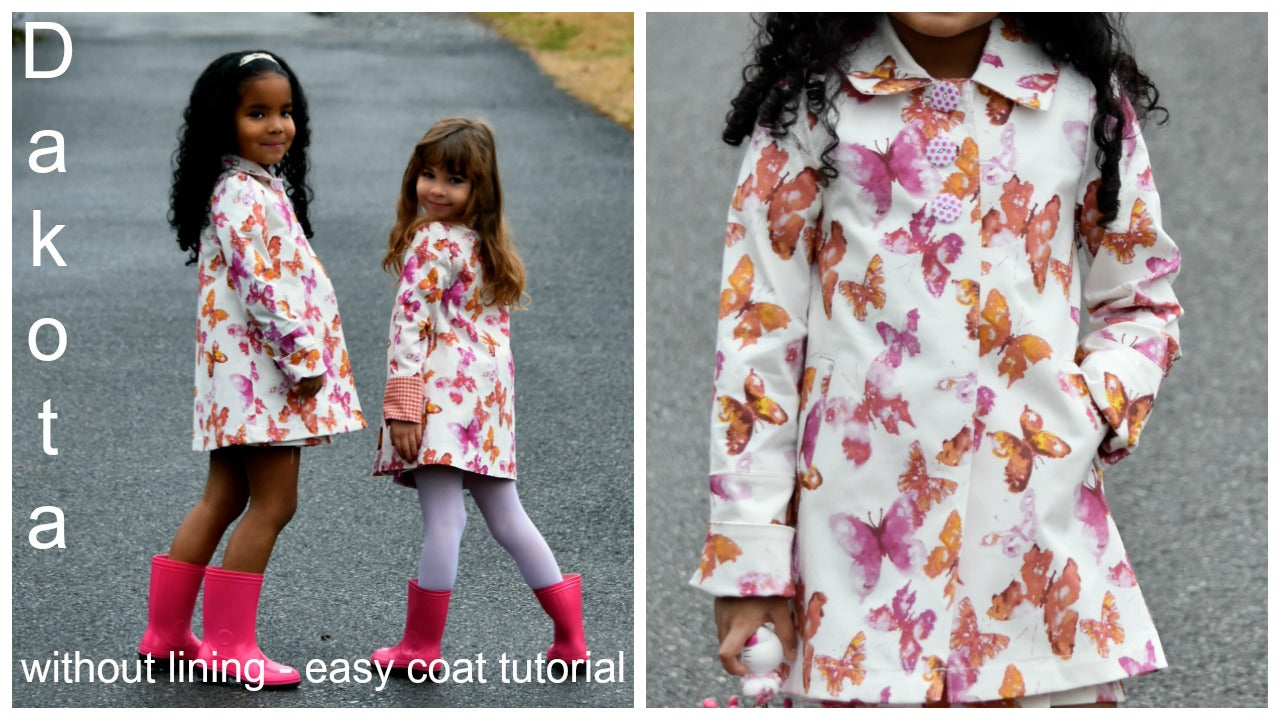
Dakota Coat Tutorial Without Lining

Transcript for the video: Dakota & Jutta - Dakota Coat Without Lining

Hi everyone, this is Marina from Frocks and Frolics, and I'm going to show you how to sew the Dakota coat without a lining.

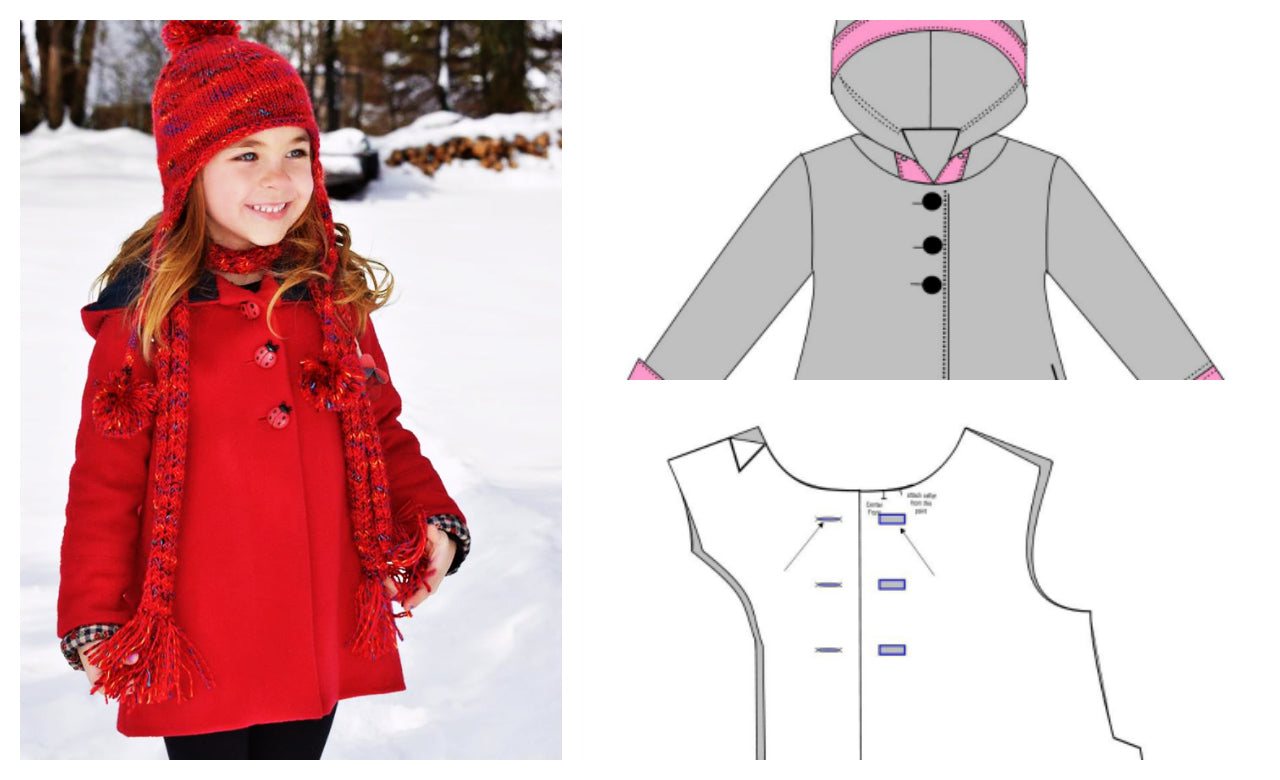
For this version, we need the front twice, the back on the fold once, the sleeves twice, the collar twice on the fold, the cuffs twice on the fold, and finally the back facing once on the fold. If you're using interfacing, cut the front facing and use it as a template for your Vilene as well.

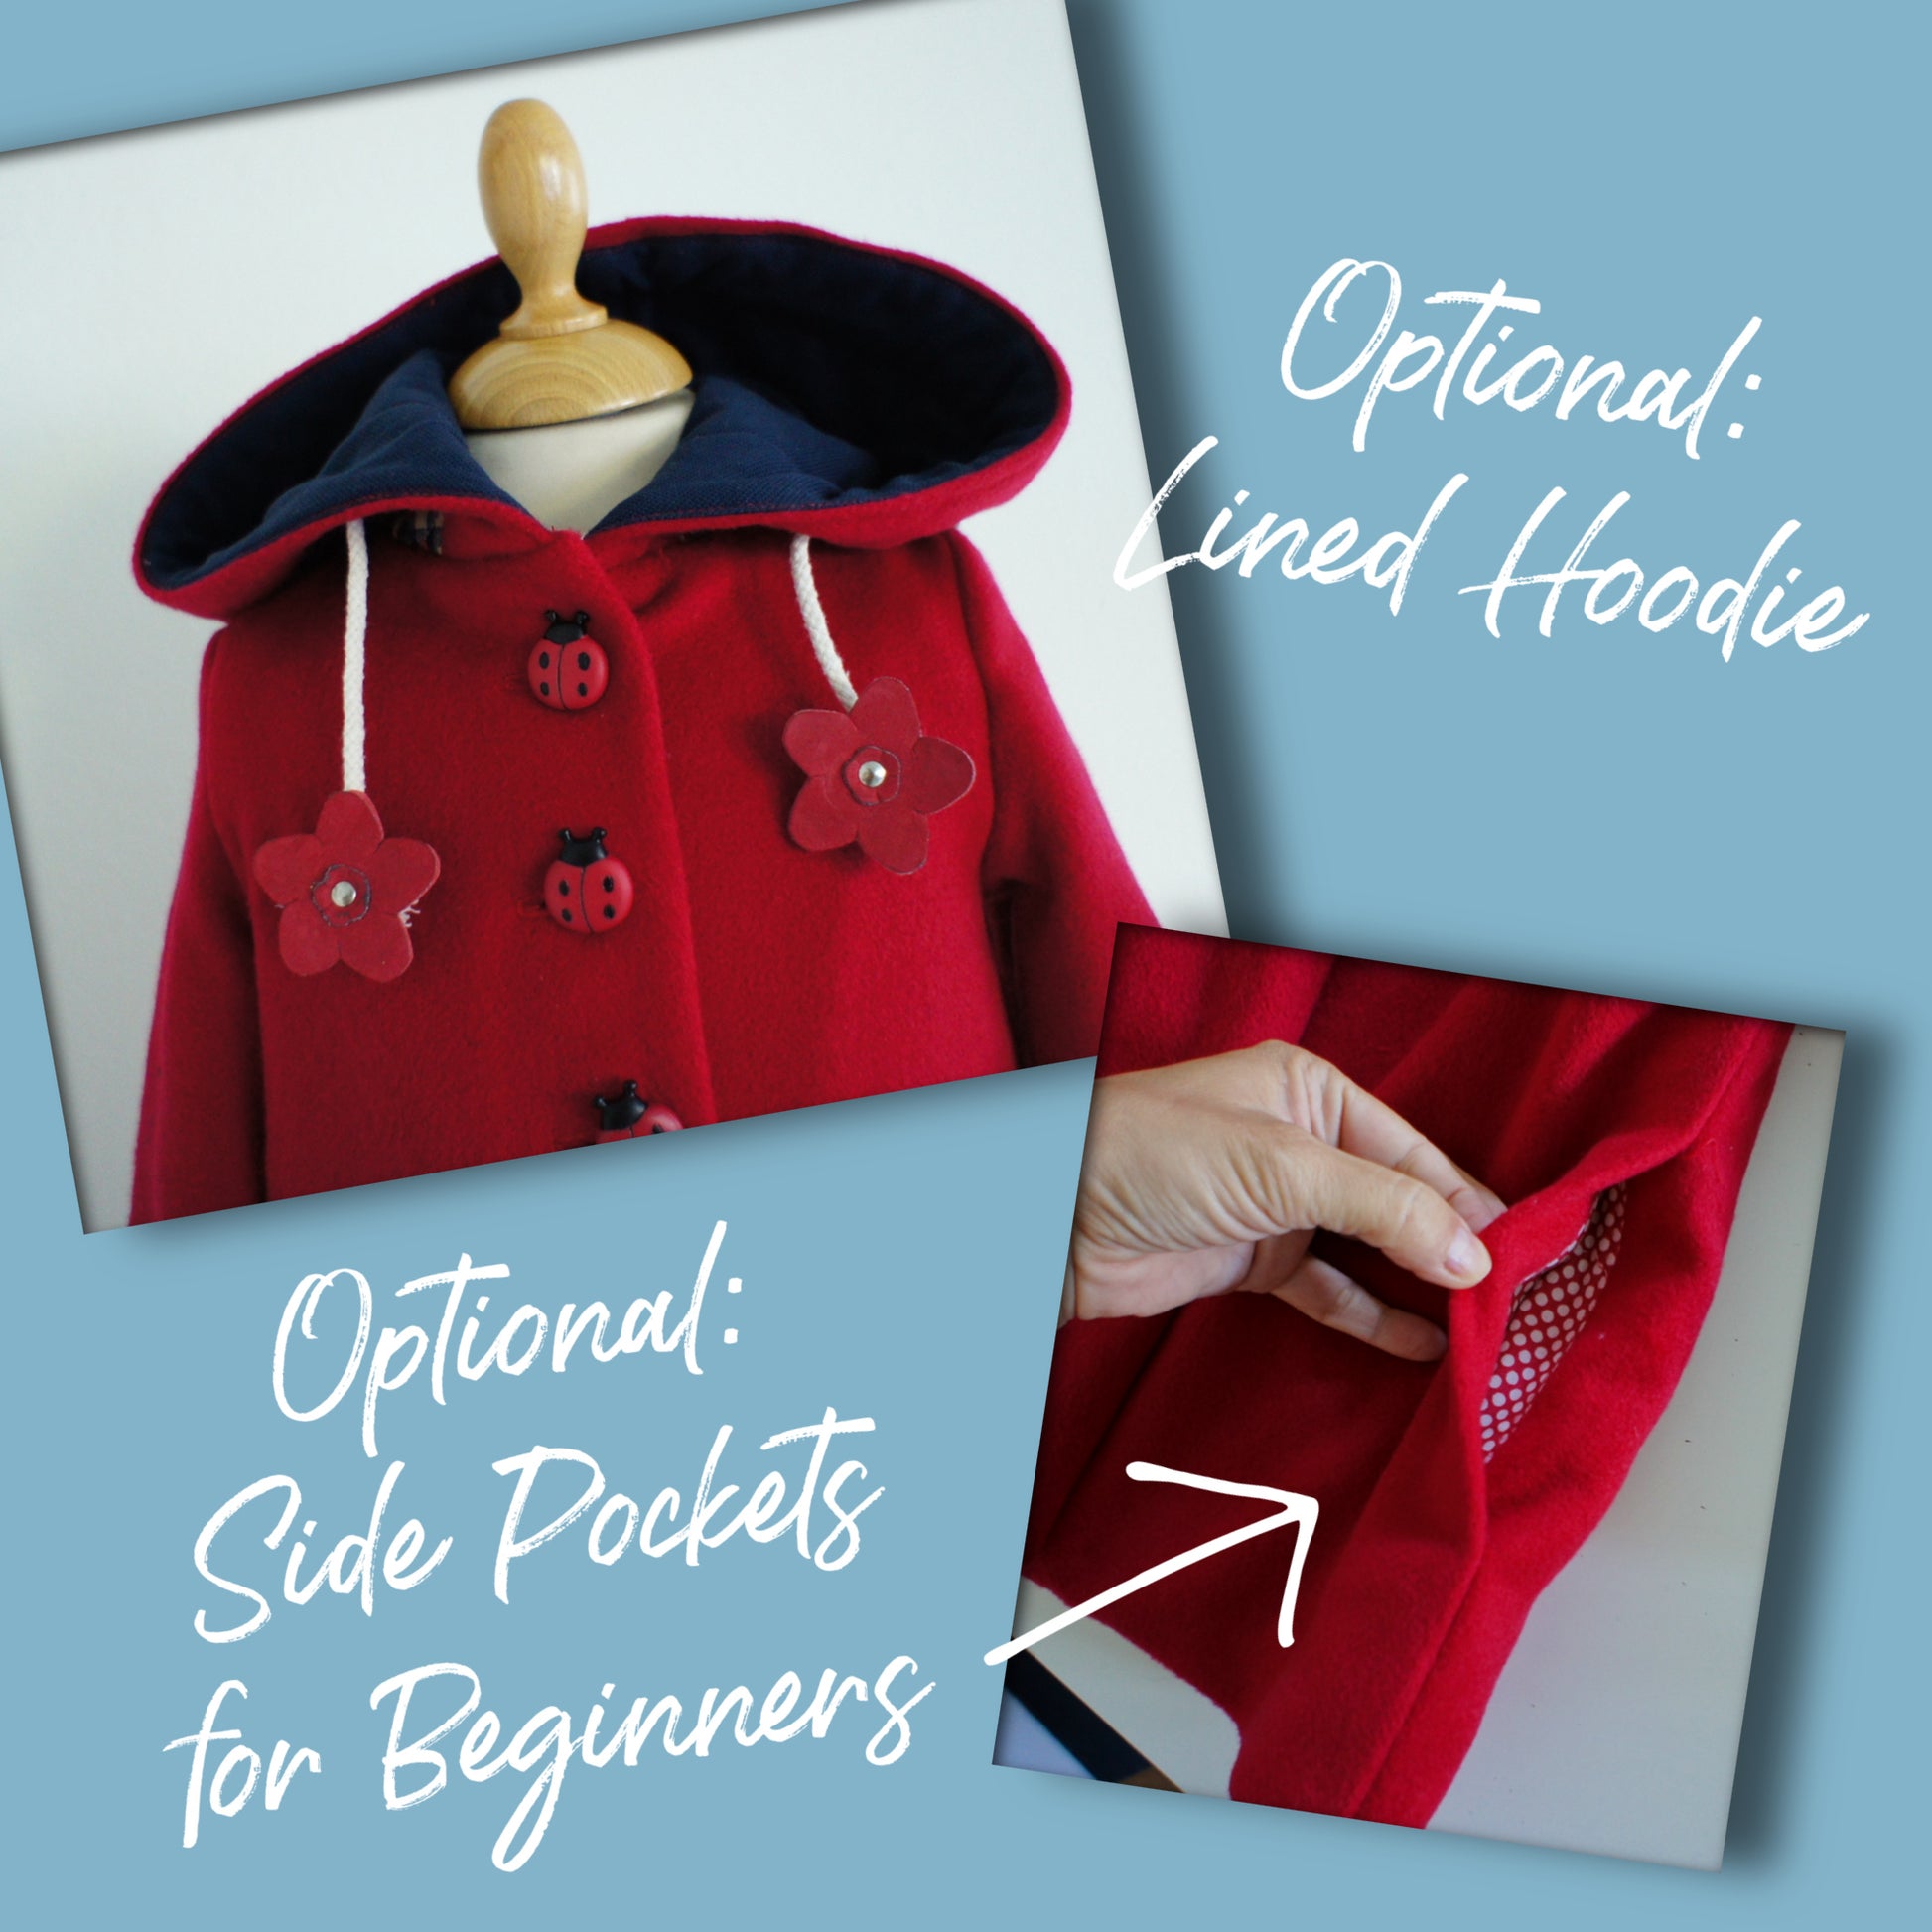
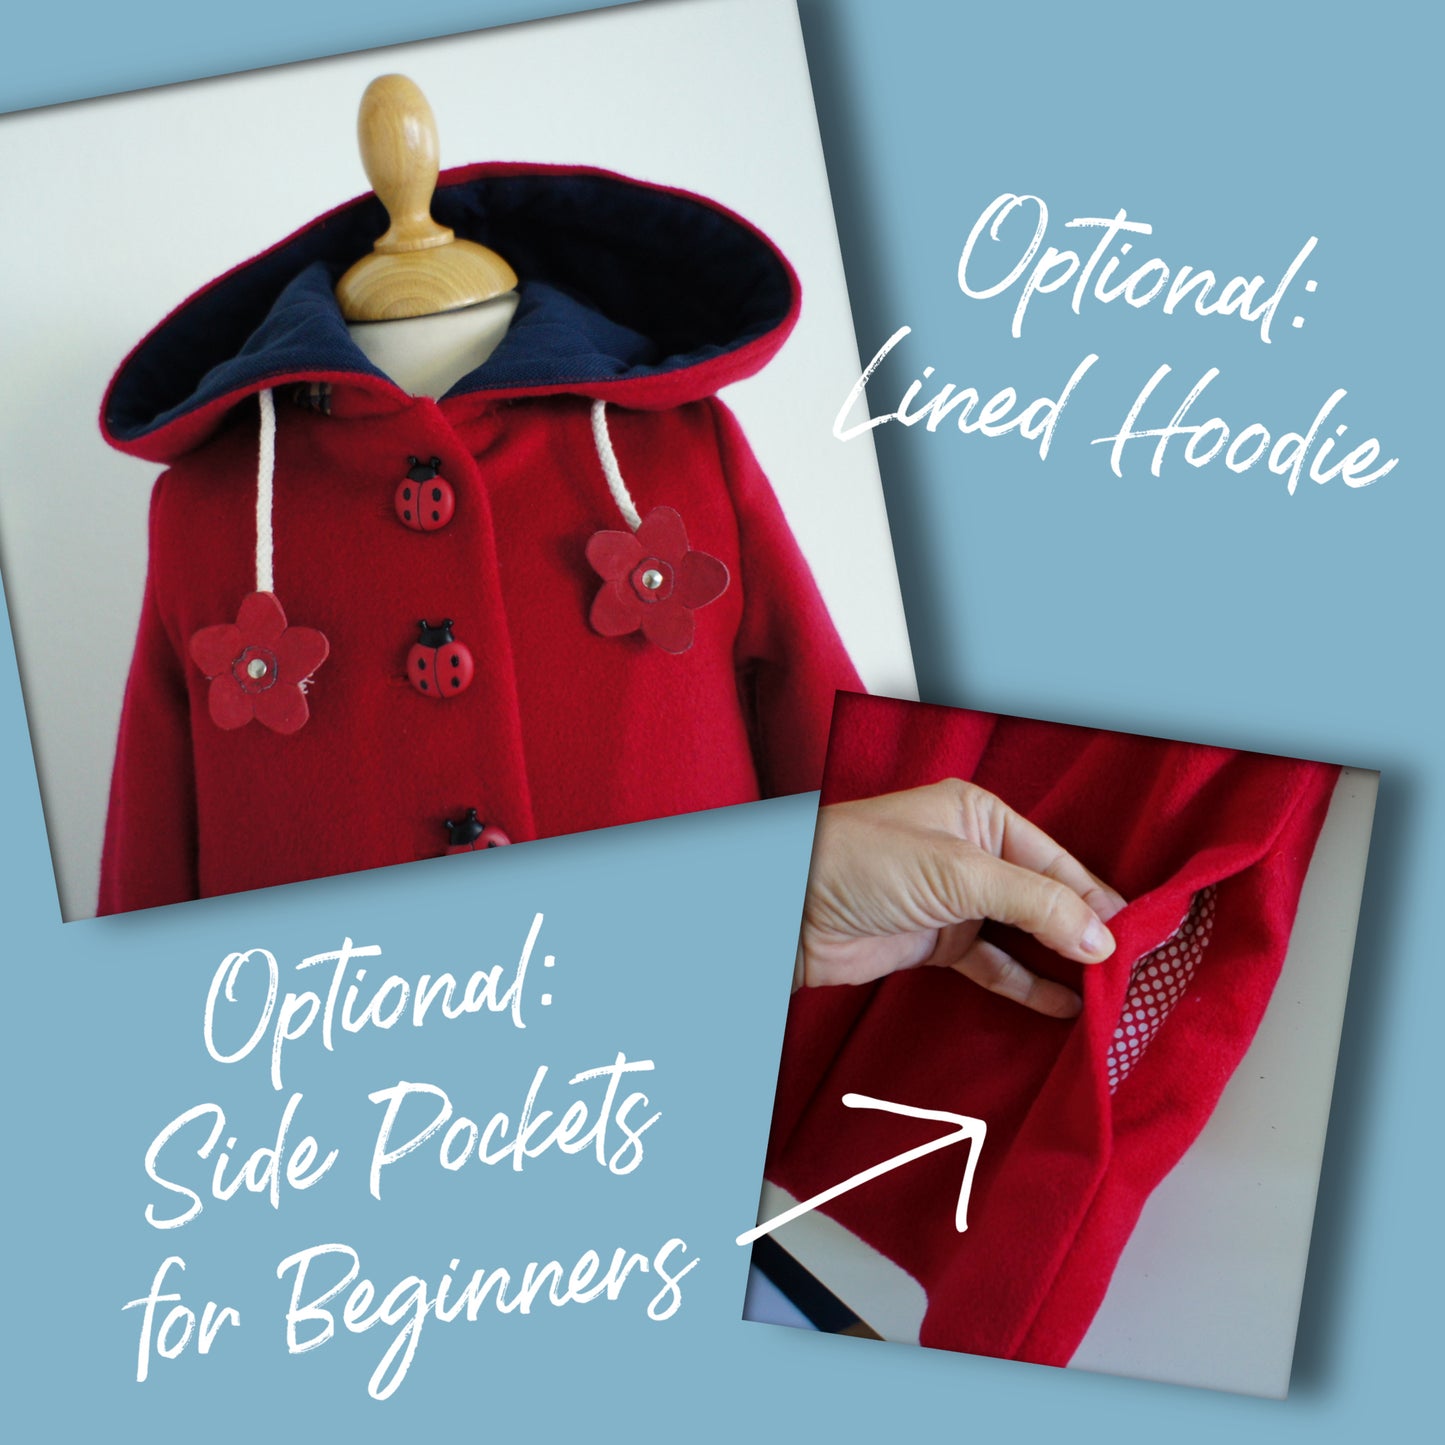
We’ve already prepared some parts of the coat in separate videos, such as the beautiful welt pocket (there’s a 20-minute tutorial for that), so I won’t repeat it here. If you’re using that pocket, you can skip the simple side pocket included in the basic version.

Preparing the Pieces

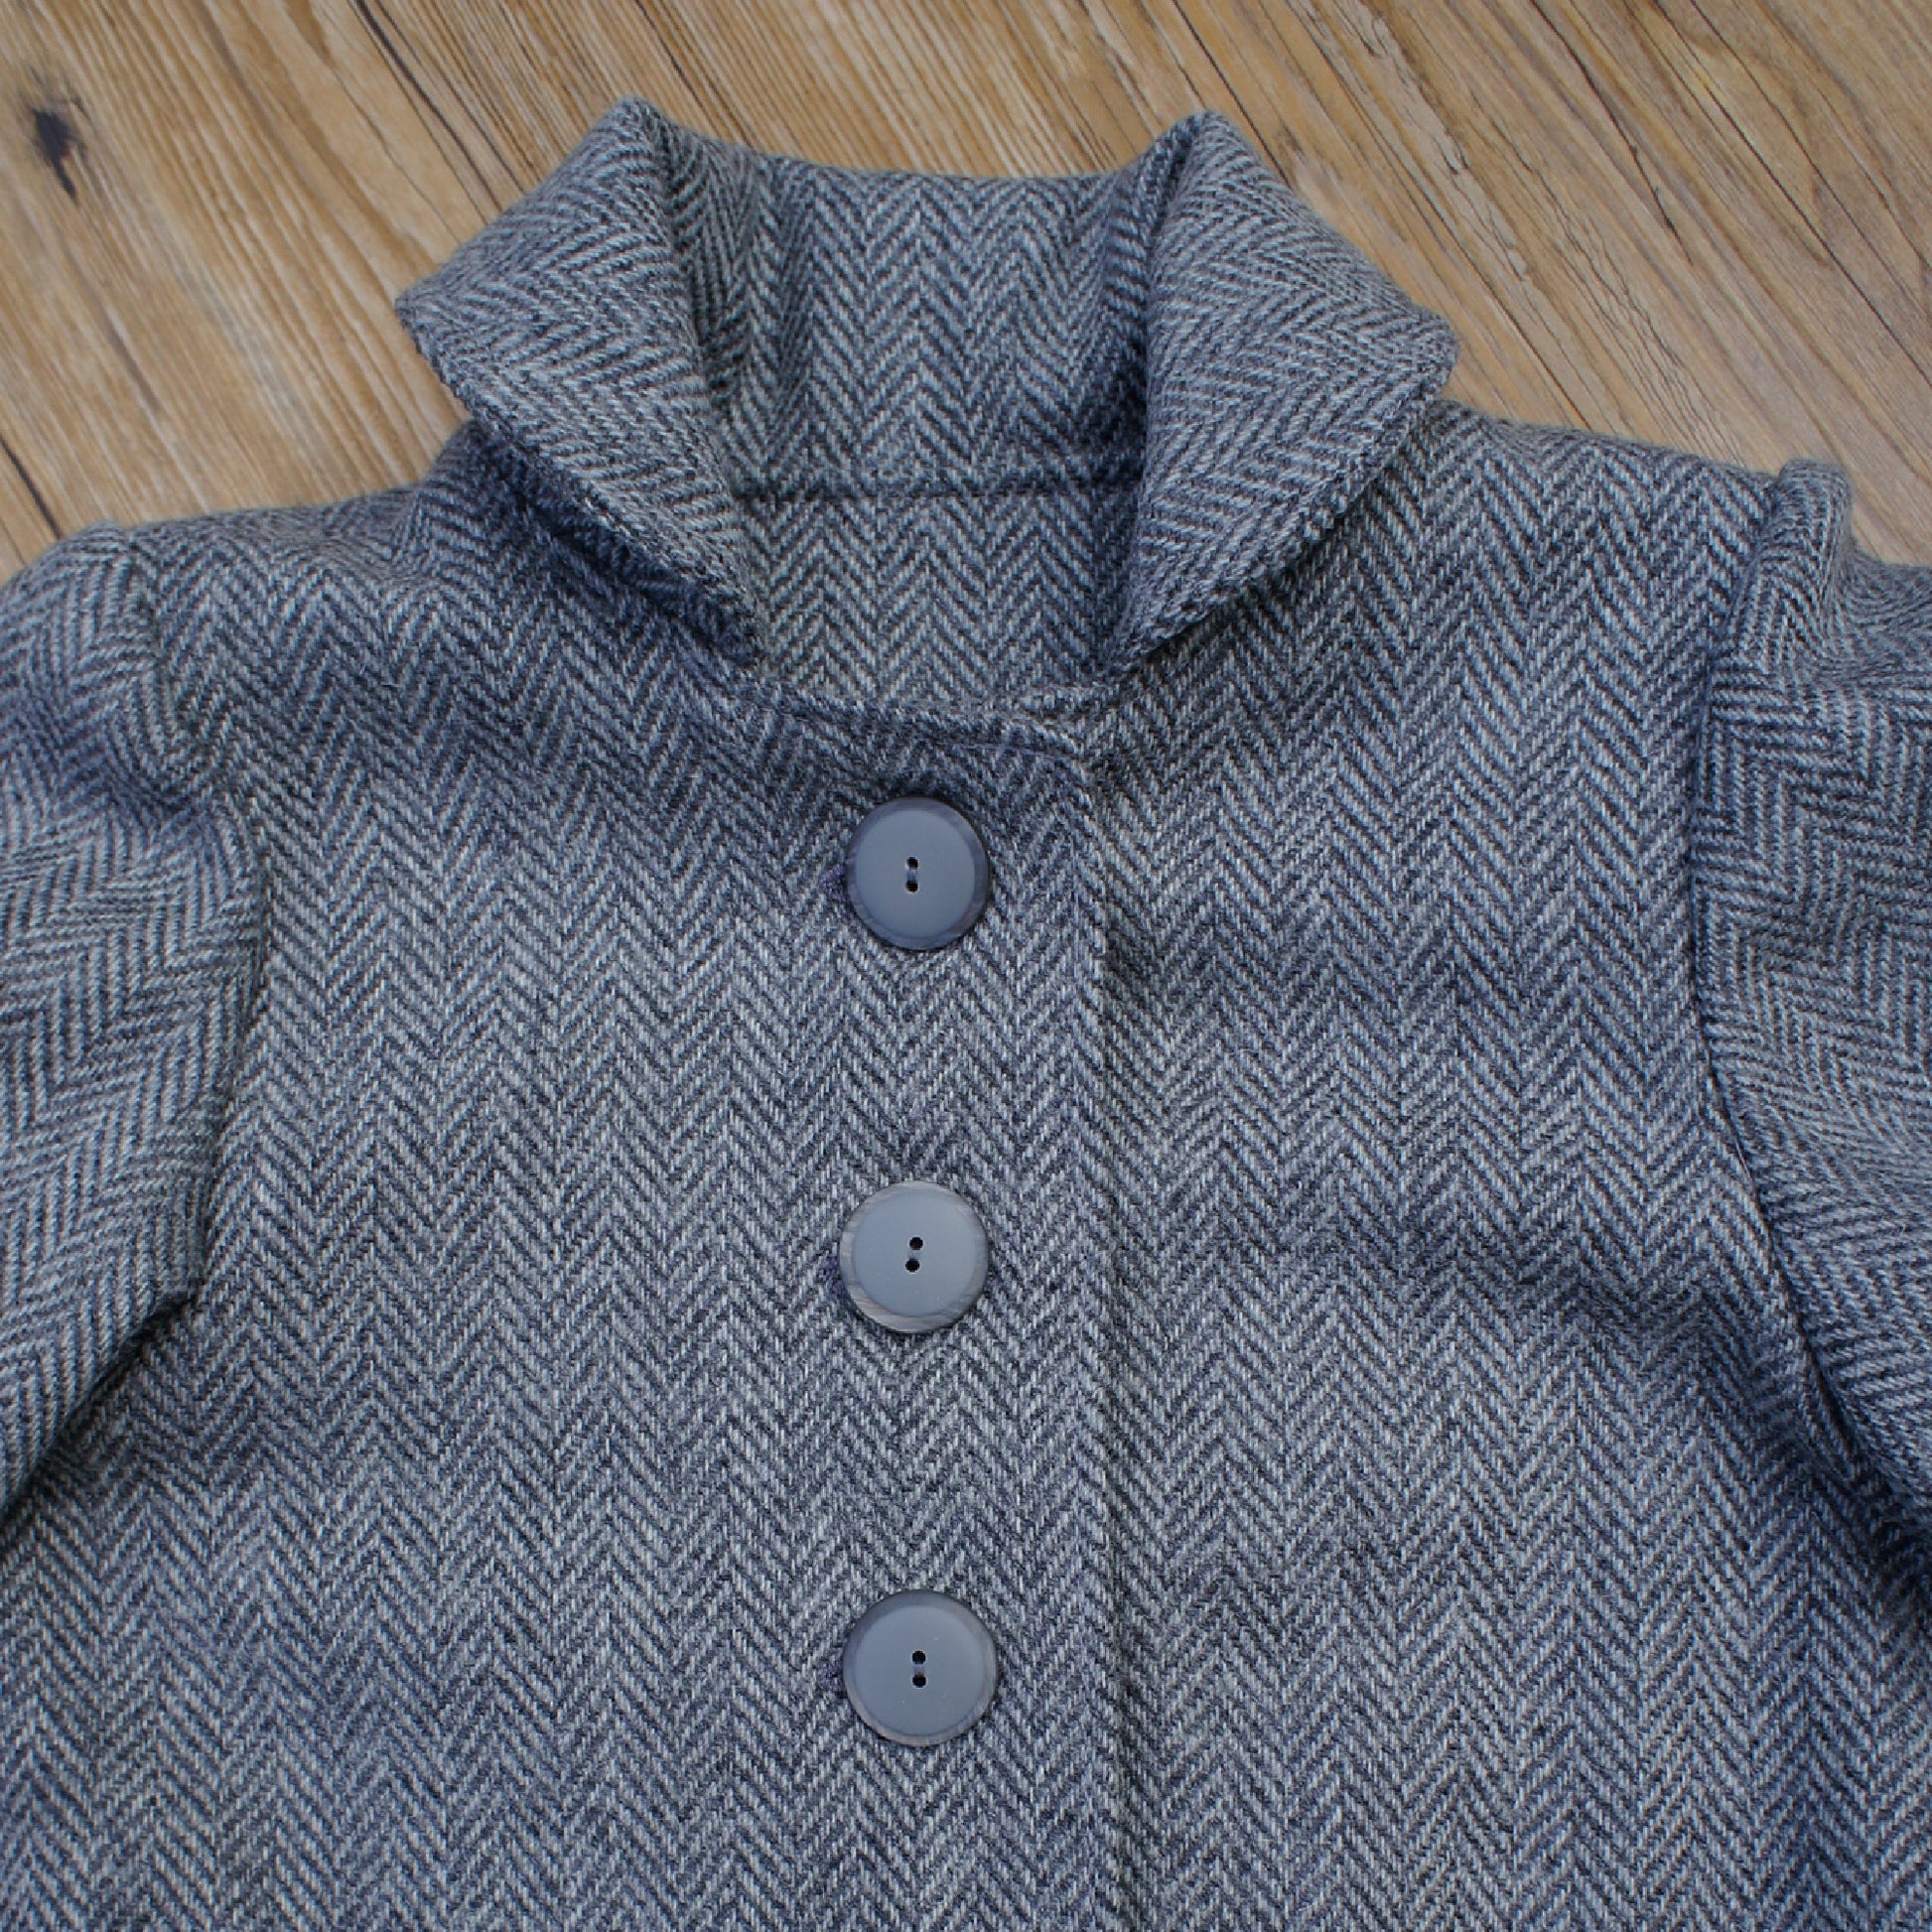
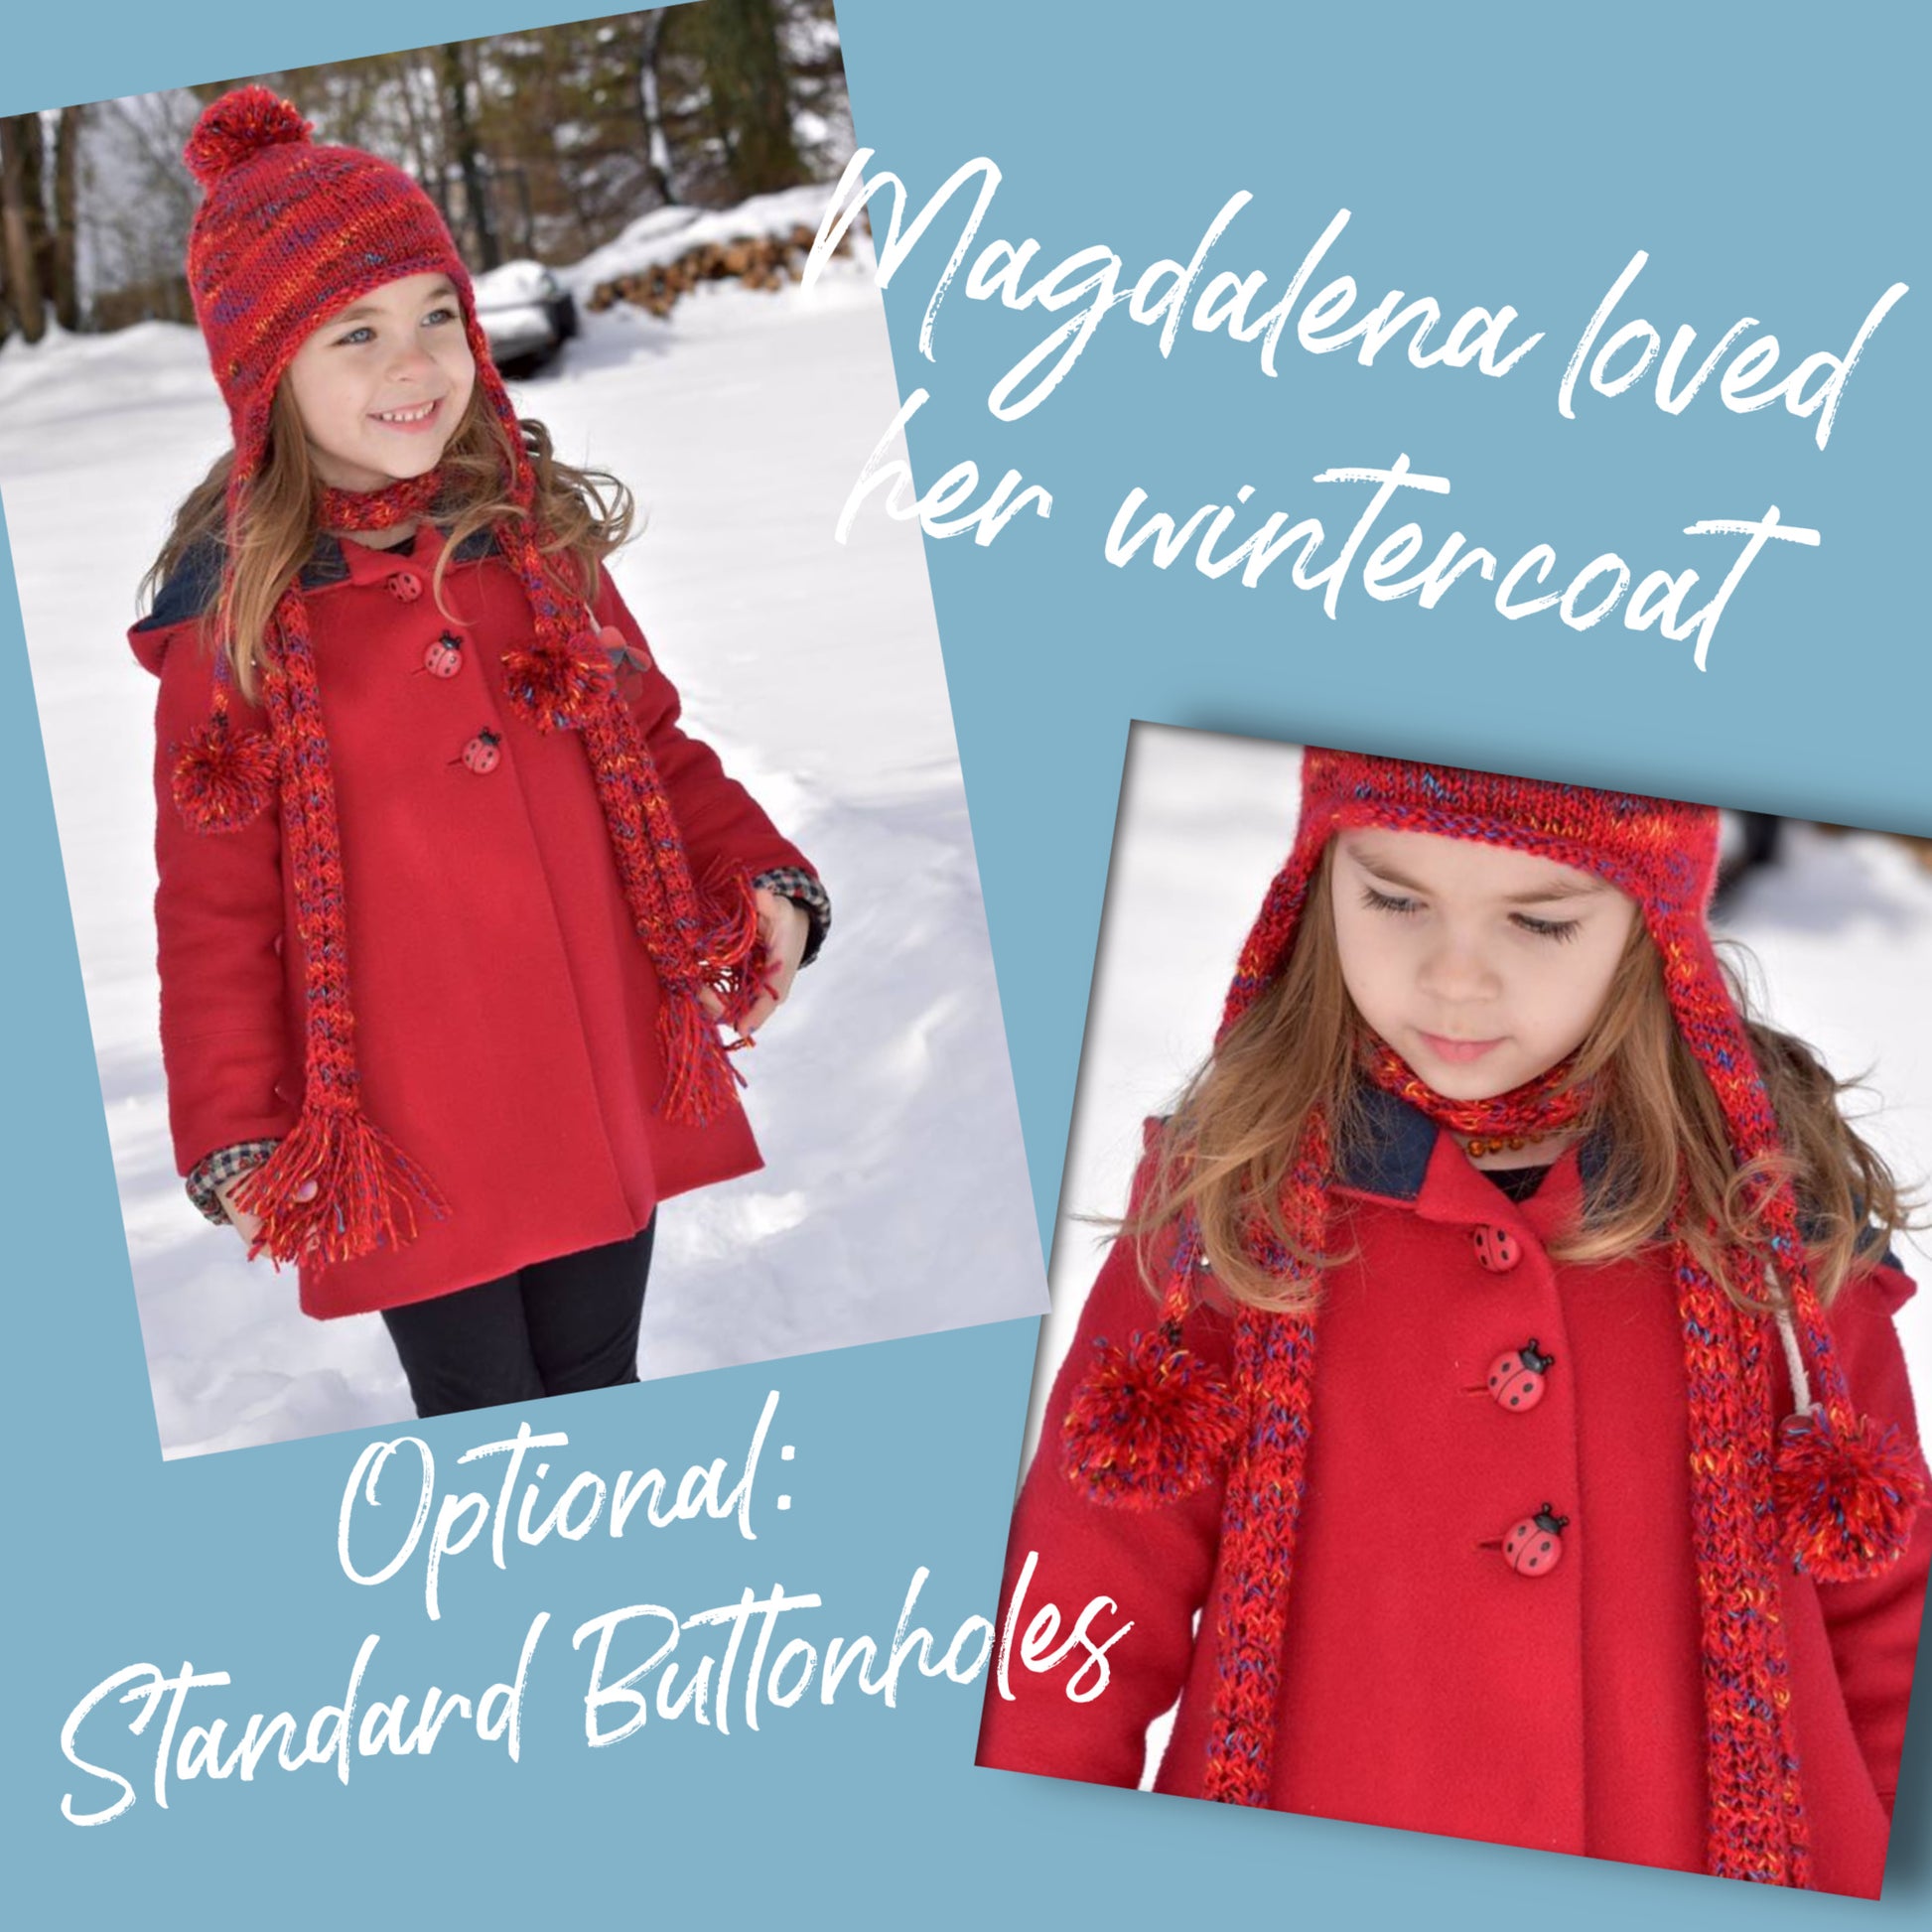
You can see I’ve already inserted the buttonholes in the front. We also have a separate video for that.

Start by overlocking the shoulder seams and side seams. On the sleeves, overlock only the lower edge. On the cuffs, overlock both sides.

Then set the cuff pieces aside for now.

We begin by closing the shoulder seams and side seams. The back shoulder is slightly wider than the front so it sits better, so you need to ease it in with a 1 cm seam allowance as per the pattern.

Try to sew without pins where possible by guiding the fabric edge to edge. It speeds things up significantly.

When sewing the hem area, ease it into the width of the overlocking so it sits correctly when turned up.

Pressing and Shaping

Iron the seams apart. At the hem, snip slightly into the seam allowance so it turns neatly.

On a winter coat, the hem is slightly tighter due to thicker fabric. For lighter versions, adjust accordingly so it sits cleanly.

If you prefer a turned hem instead of overlocking, snip the seam allowance to allow folding.

Bias Binding Finishes

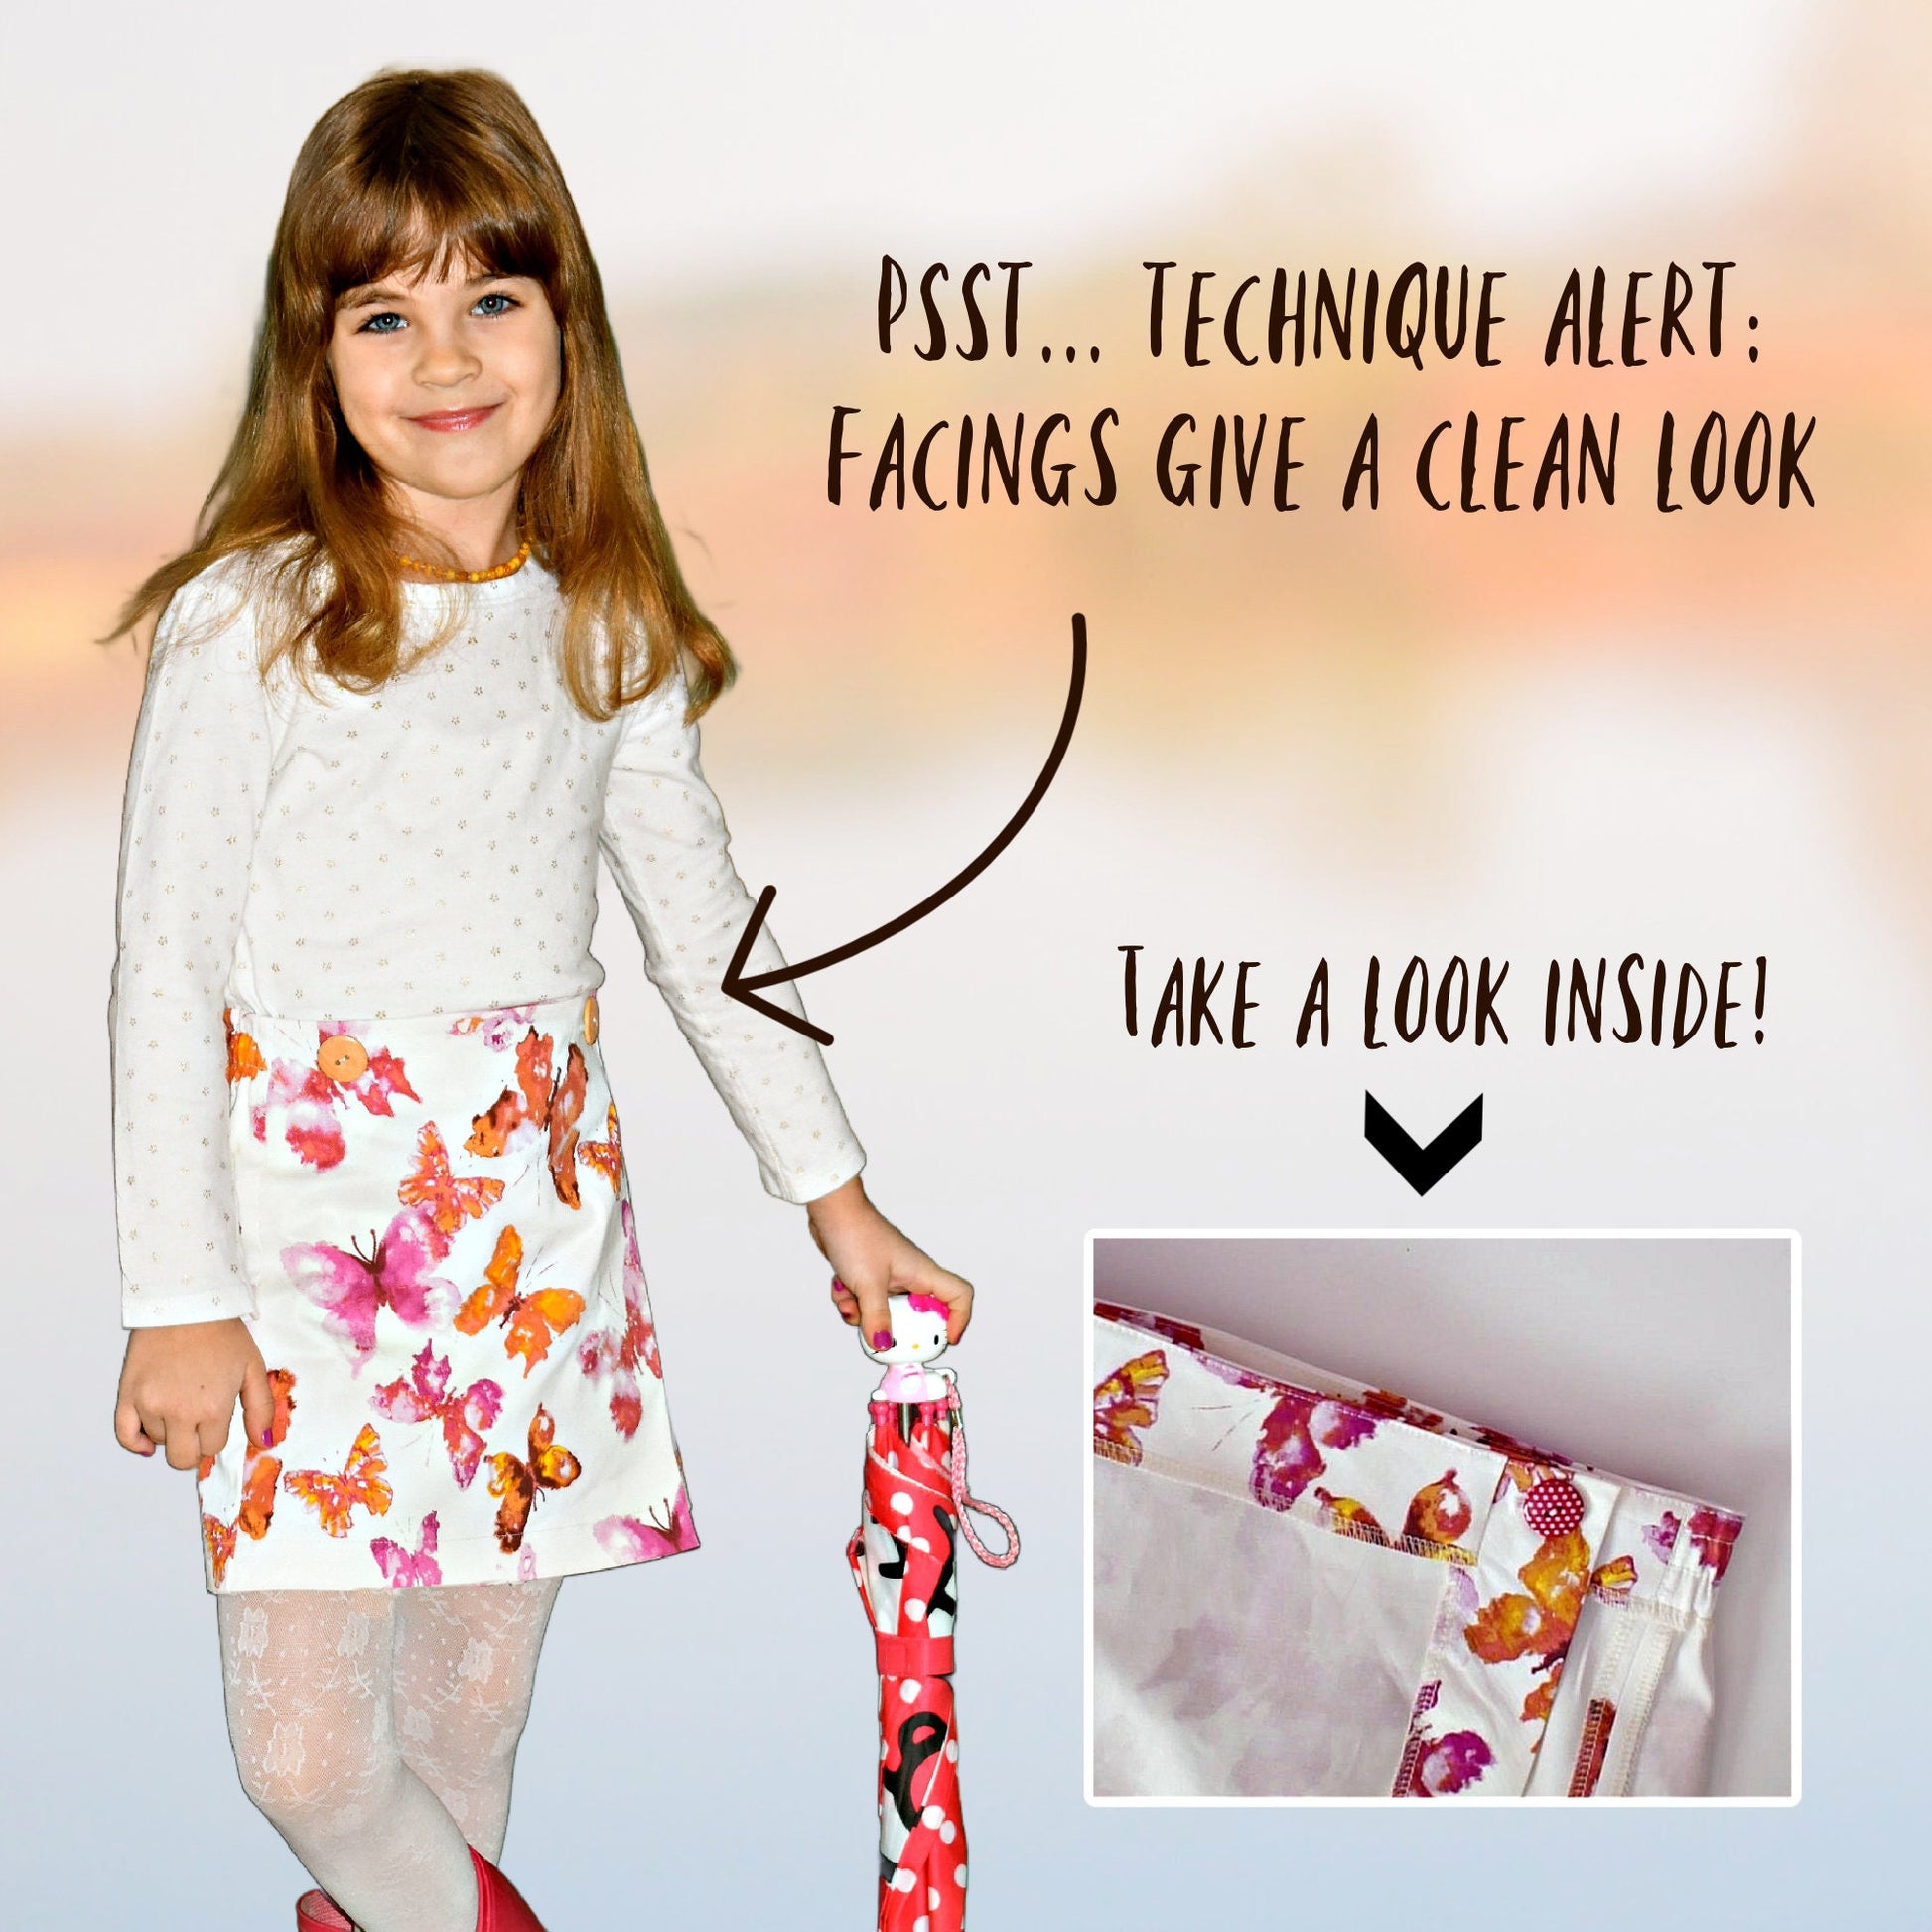
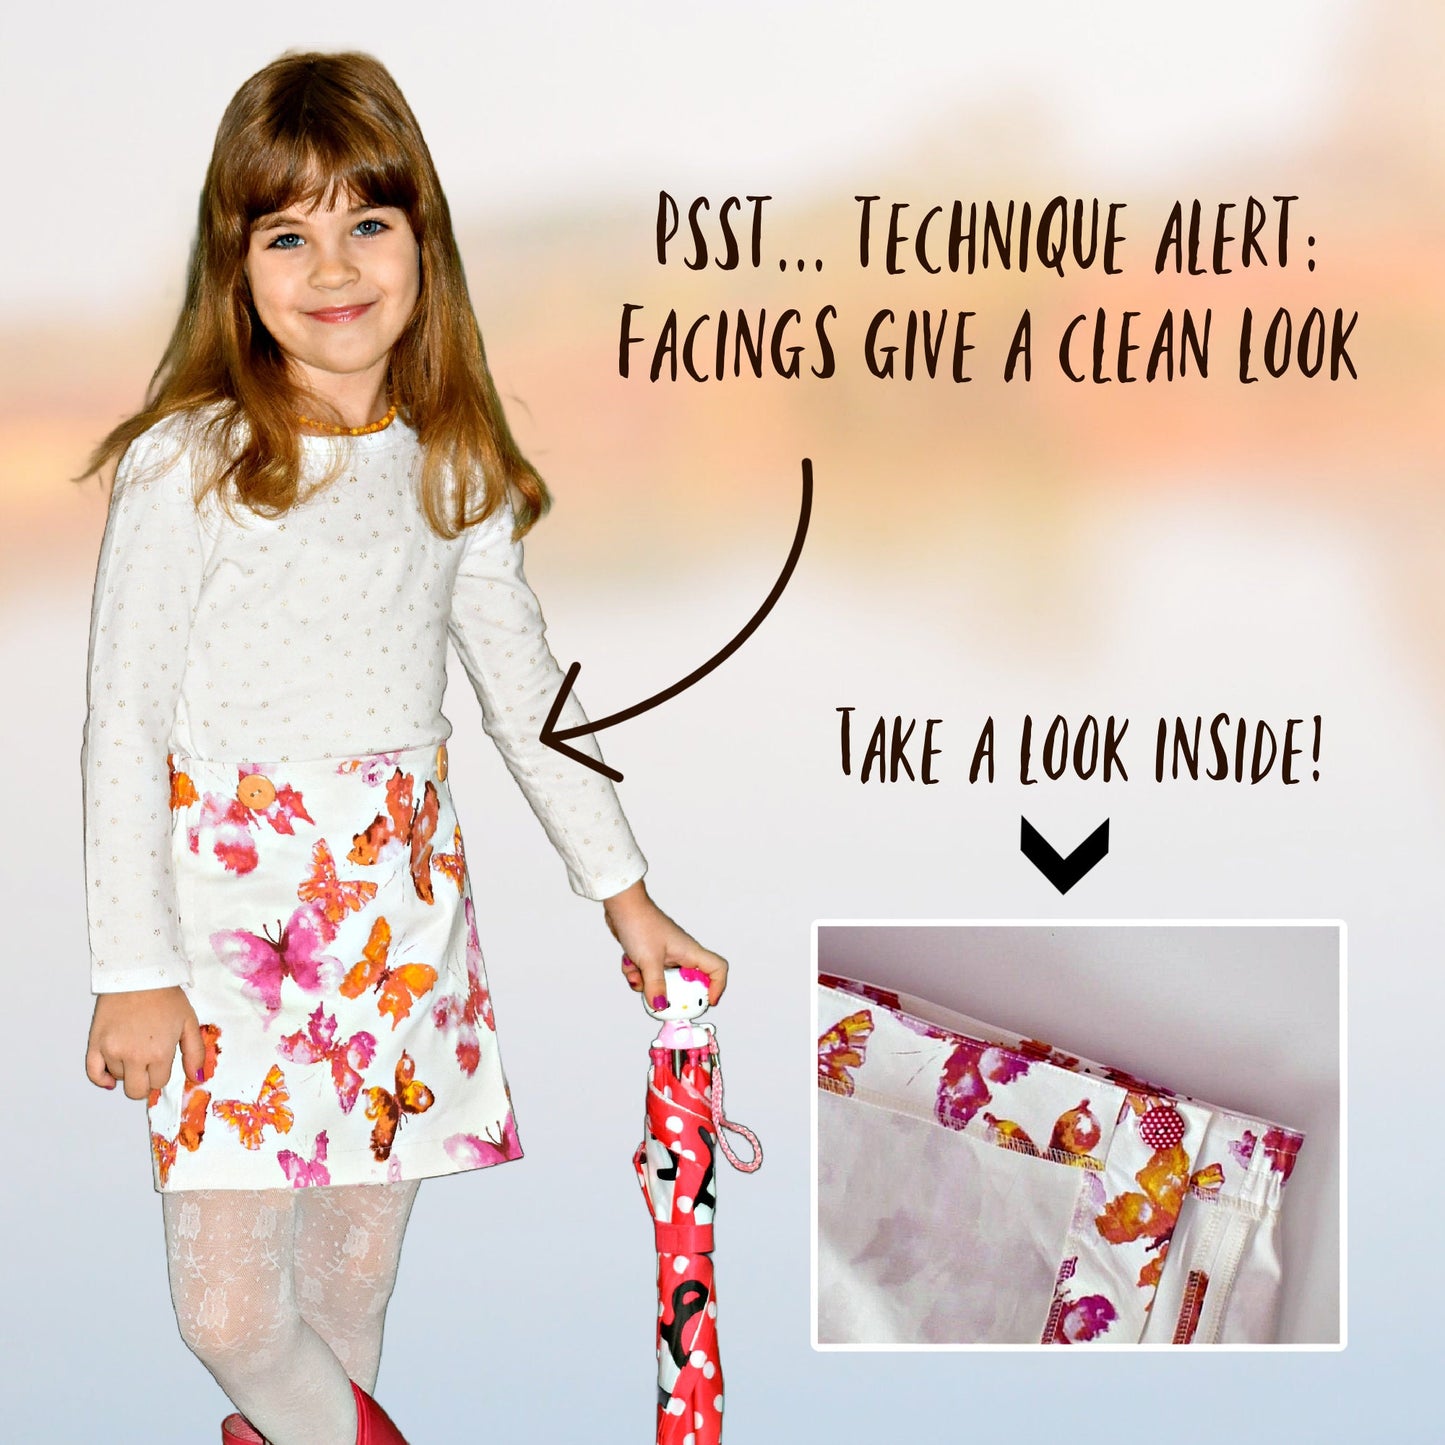
Attach bias binding to the front facing edge. This gives a much cleaner finish than simply turning it in.

Make sure the narrow edge of the bias binding is on top so you catch it properly when sewing.

Repeat this for the back facing as well. You can also use bias binding on the hem if you prefer, though I didn’t include it here due to fabric limitations.

Constructing the Facing and Collar Base

Attach the back facing to the front facing at the shoulder seams.

Once sewn and pressed open, the collar will be sandwiched between these layers later.

At this stage, everything should already be forming the structure of the coat front.

Collar Construction

Apply Vilene (interfacing) to the undercollar.

Place right sides together and sew the collar starting from the Vilene side. This helps control fabric movement.

Use stitch length 2 for most of the seam and reduce to stitch length 1 at corners.

Trim corners carefully and reduce seam allowances in stages before turning.

Turn the collar and push out corners neatly, then press.

Make sure the seam rolls slightly toward the underside so the edge is not visible from the top.

Attaching the Collar

Pin the collar carefully to the neckline, aligning notches and shoulder seams.

The upper collar (slightly larger side) should face you.

The collar starts at the marked snip line and sits with a 1 cm seam allowance.

Check both sides carefully to ensure symmetry before sewing.

Joining Facing and Body

Sandwich the coat layers: front, back, and facings together.

Make sure shoulder seams align perfectly.

Sew carefully and check for pleats or puckering.

If needed, snip into tight curves to help the fabric sit better.

Press lightly at the front and shape the collar on the ironing board without flattening its form.

Hem and Finishing Structure

Fold in the front facing along the marked line (about 4 cm seam allowance) and stitch it down.

Trim excess seam allowance carefully.

Finish hem at 3 cm turned up and 1 cm folded in, or alternatively overlock and turn up as one step.

Use a guide (like a card or seam marker) if your machine doesn’t have clear markings.

Sleeves

Attach sleeves with a 1 cm seam allowance.

Topstitch with a longer stitch length (around 3.5) for a more professional finish.

Overlock sleeve seams and insert gathering stitches at the sleeve head.

Use two rows of gathering stitches: one at 1 cm from the edge and one closer to the edge.

For heavier fabrics like denim, you may need more control when easing the sleeve in.

Attaching Sleeves

Match sleeve notches: underarm seam to underarm seam, shoulder to sleeve head.

Ease in the sleeve gently, gathering the top portion where needed.

Keep everything flat while sewing and adjust gathers as you go.

Press once complete.

Cuffs and Finishing Sleeves

Attach cuffs, ensuring correct alignment and seam matching.

Stitch 1 cm seam allowance and press.

Turn cuff up and secure.

Stitch in the ditch or topstitch to secure the cuff neatly.

Pockets and Final Details

Secure pocket edges to prevent movement by stitching or hand sewing.

Topstitch front edges if not already done with the collar.

Add buttons using a small “stem” technique so they sit loosely and comfortably over fabric layers.

Final Notes

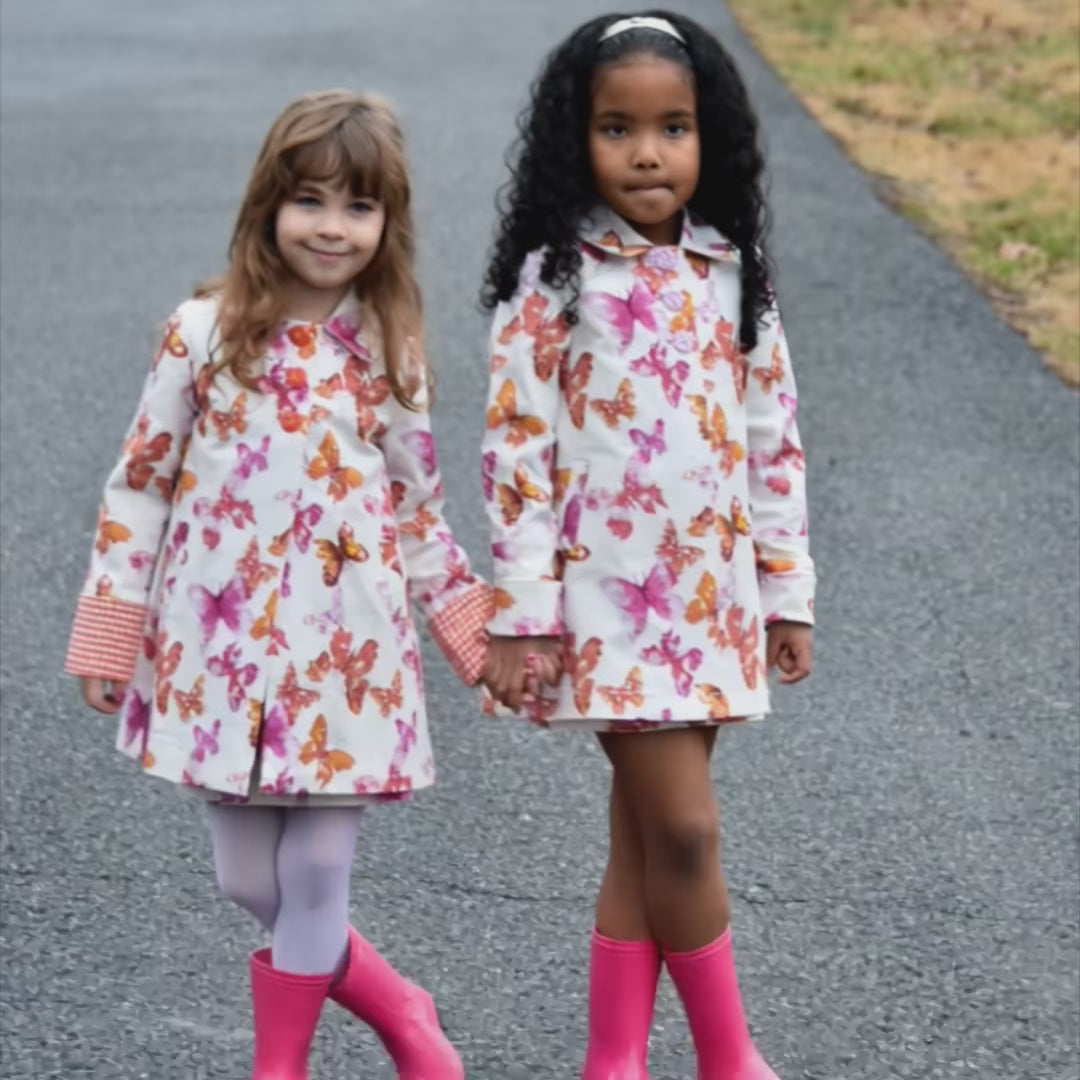
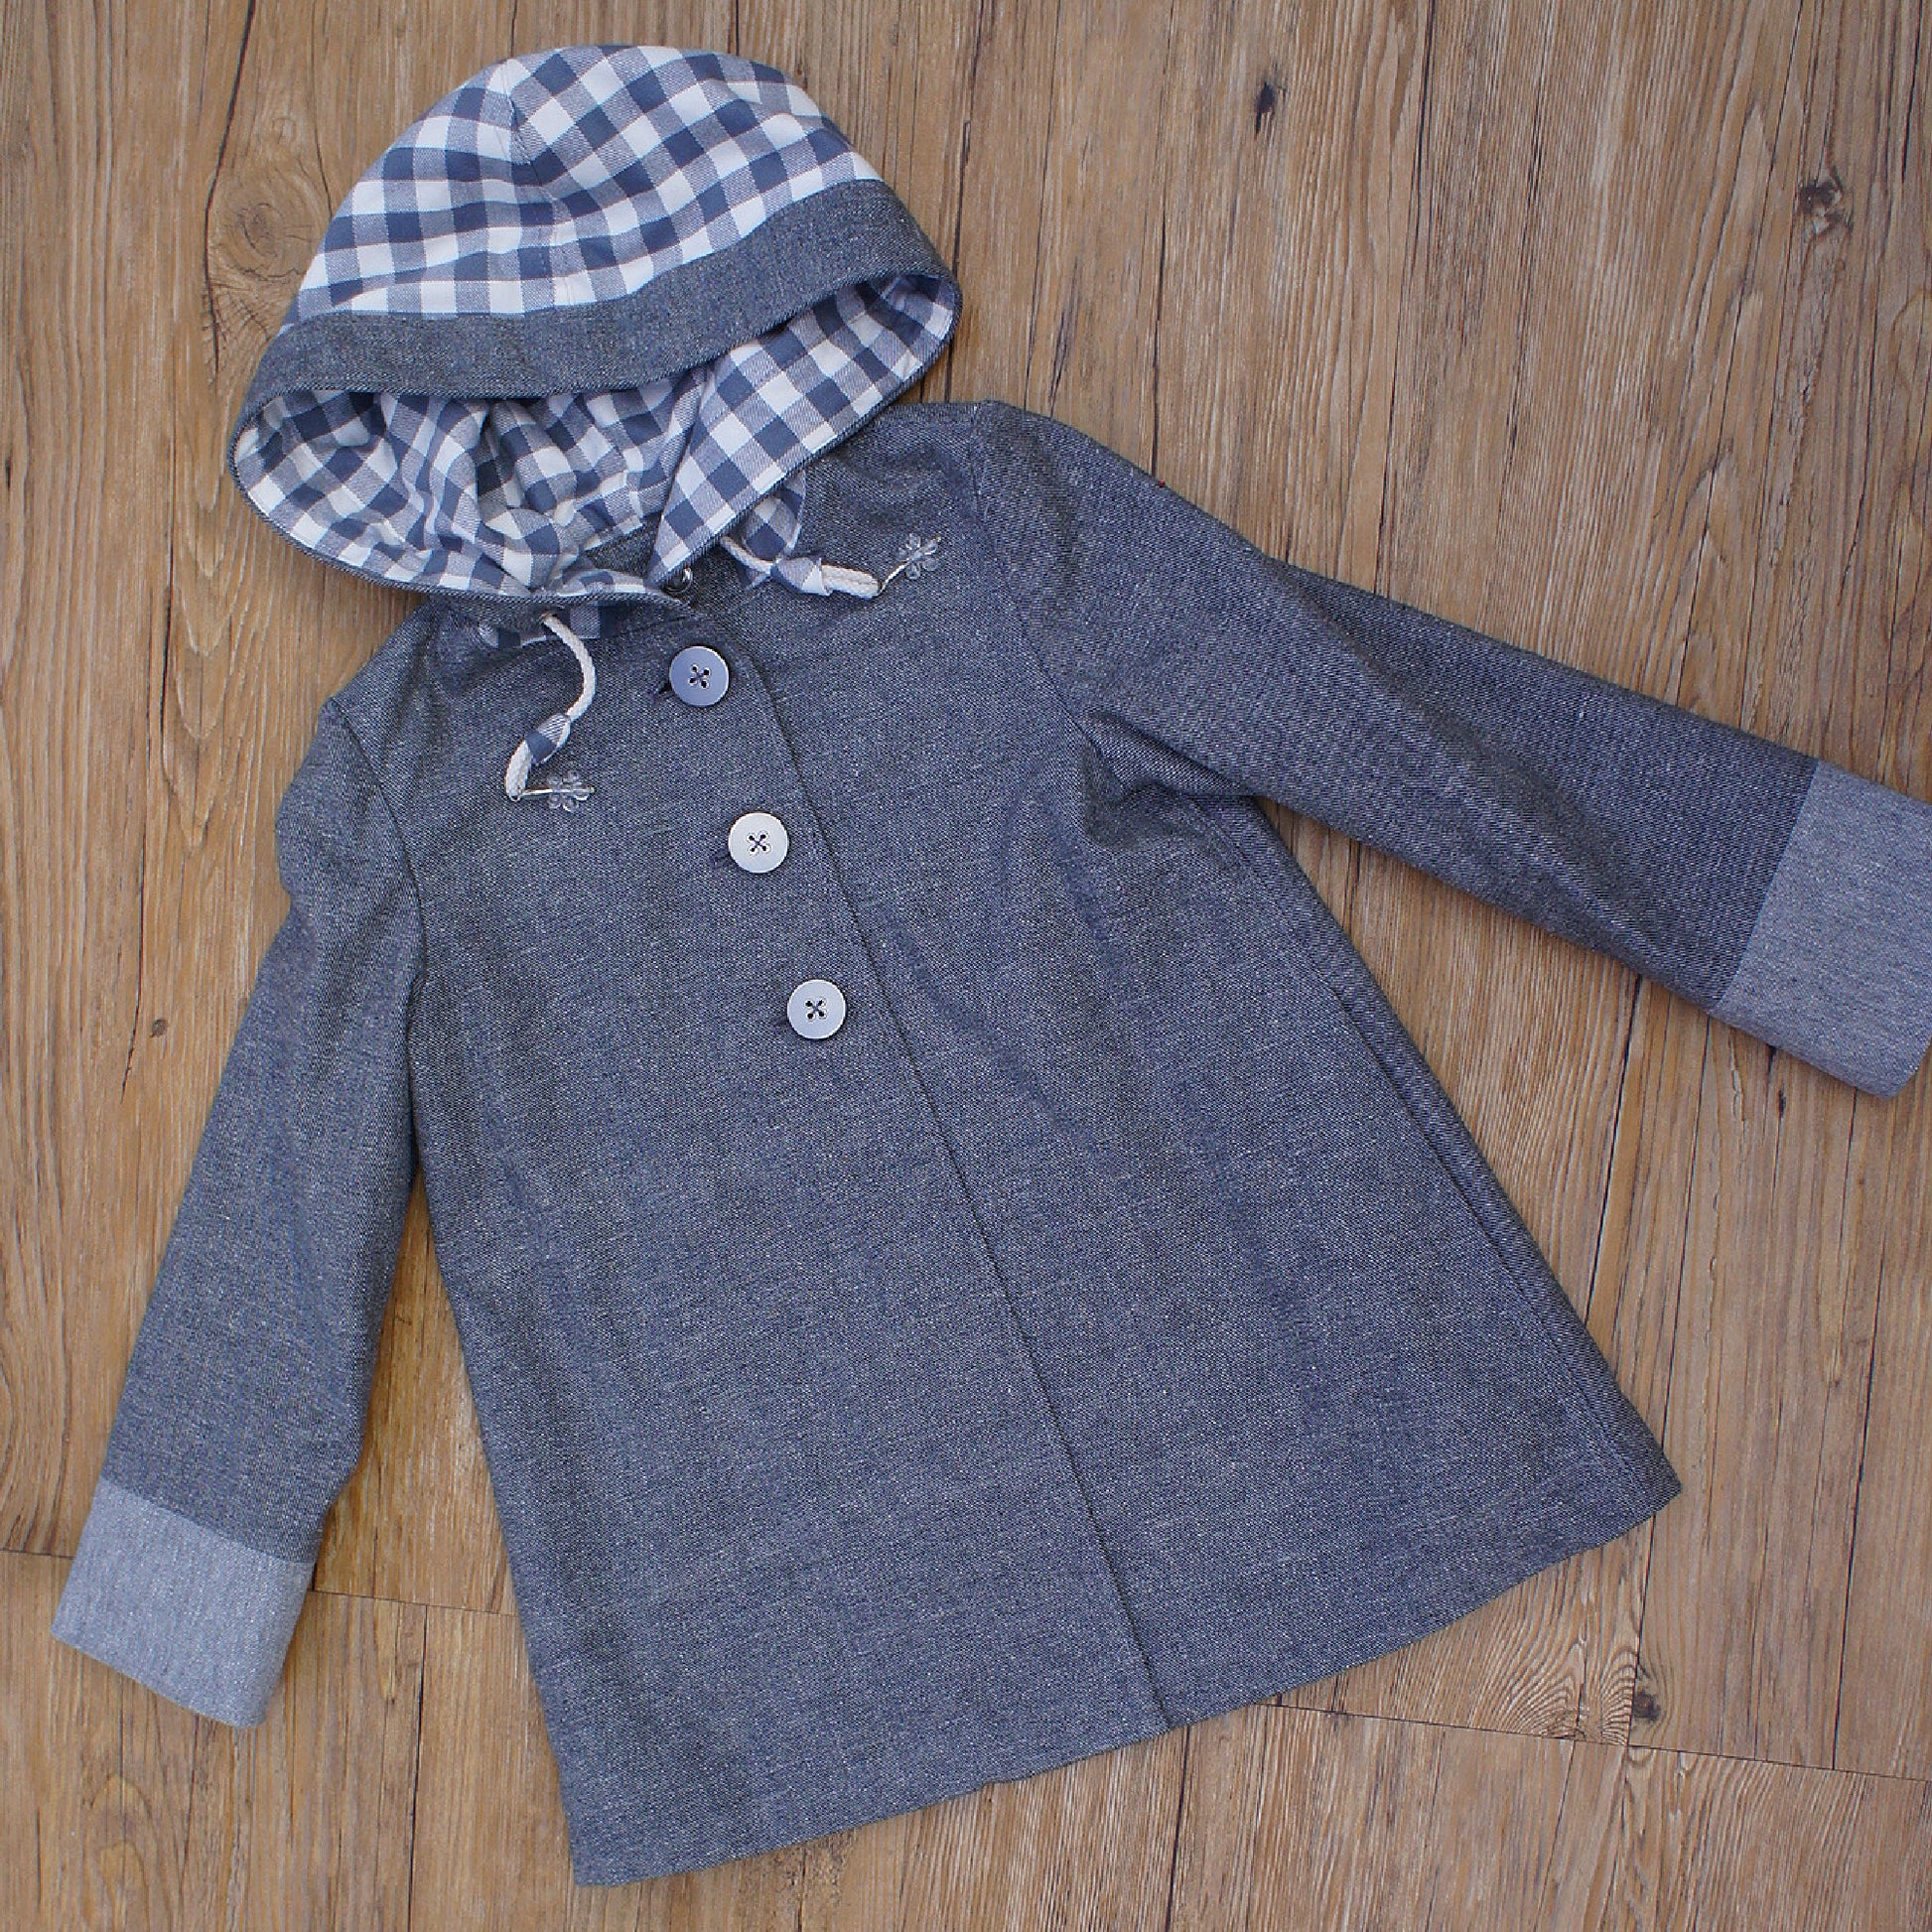
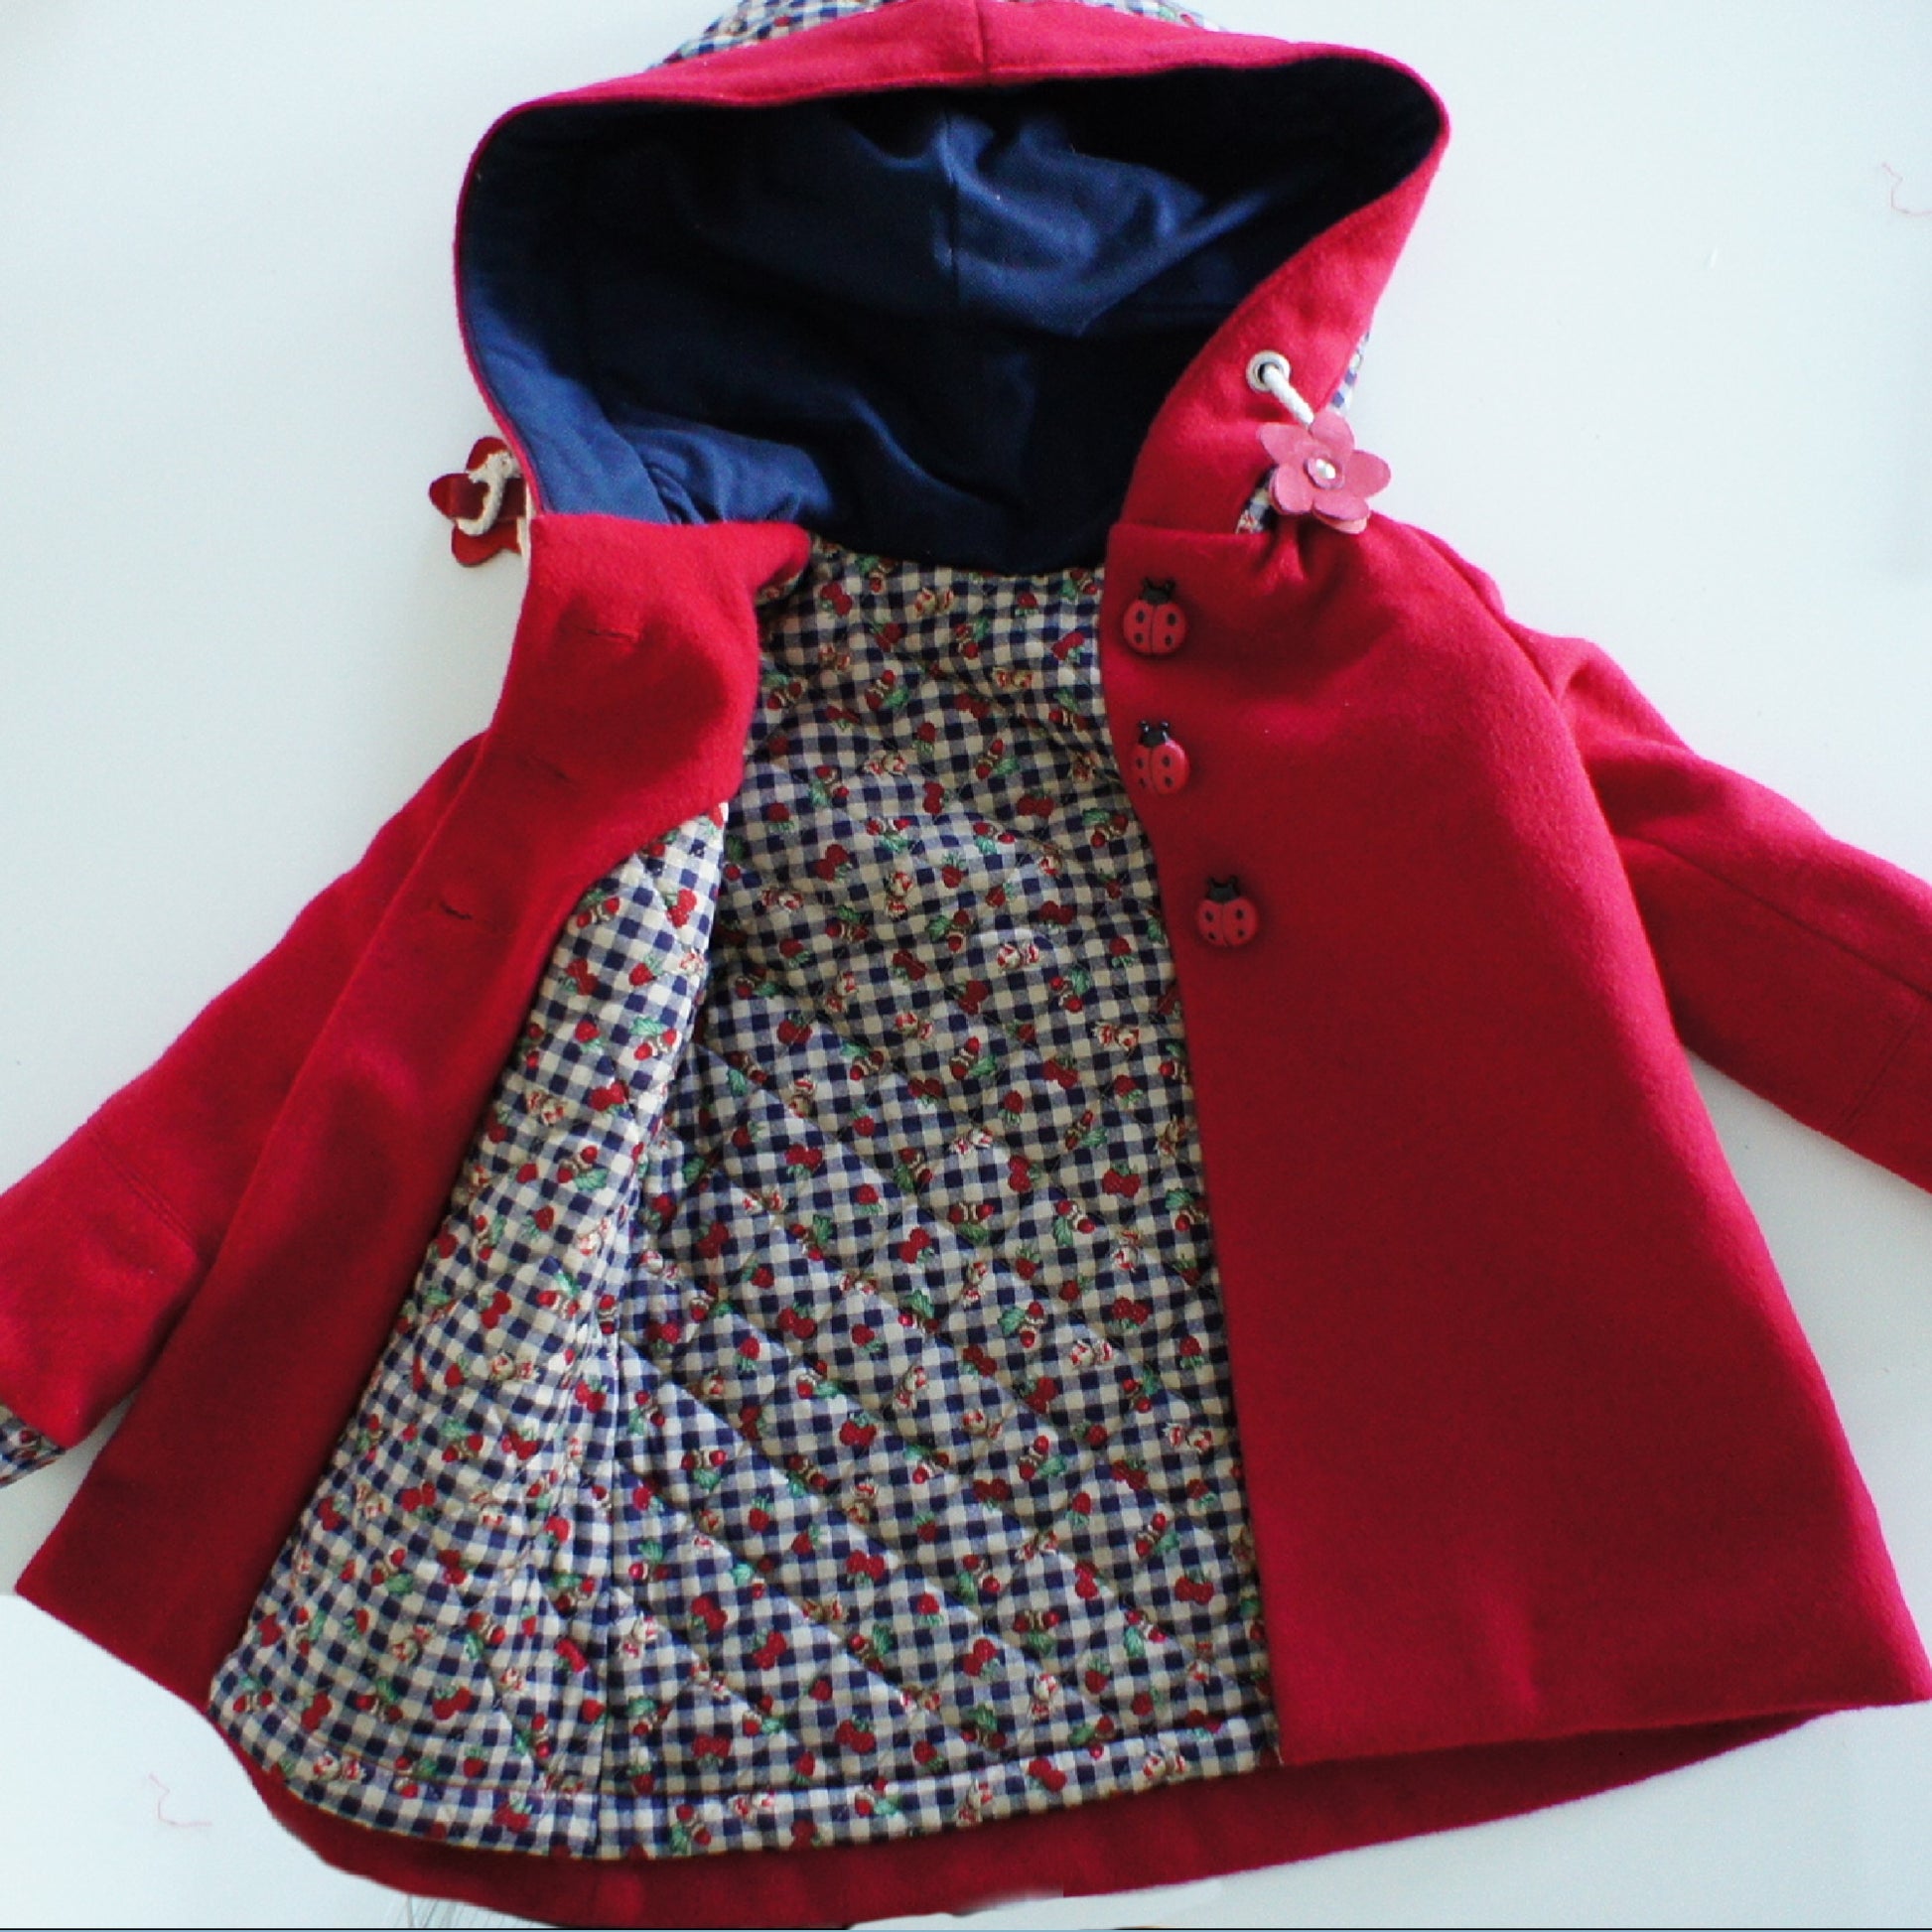
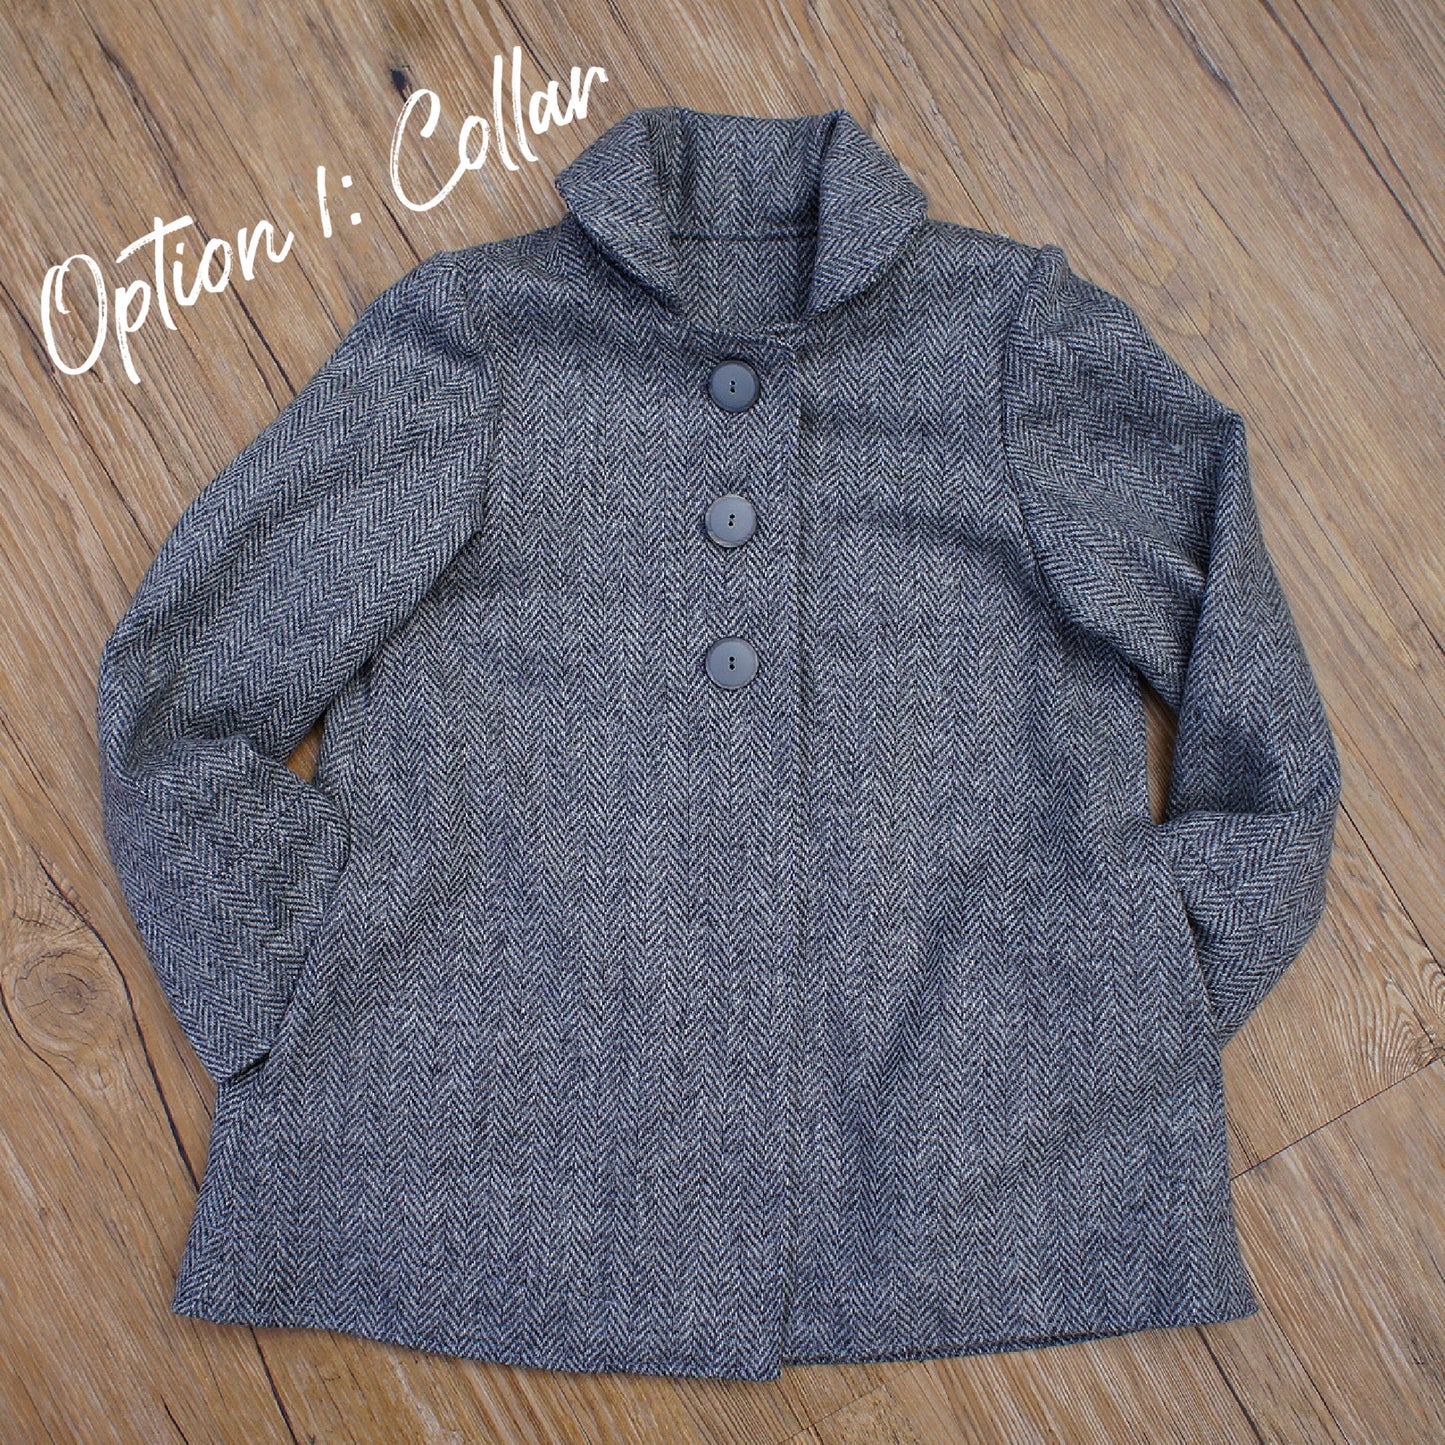
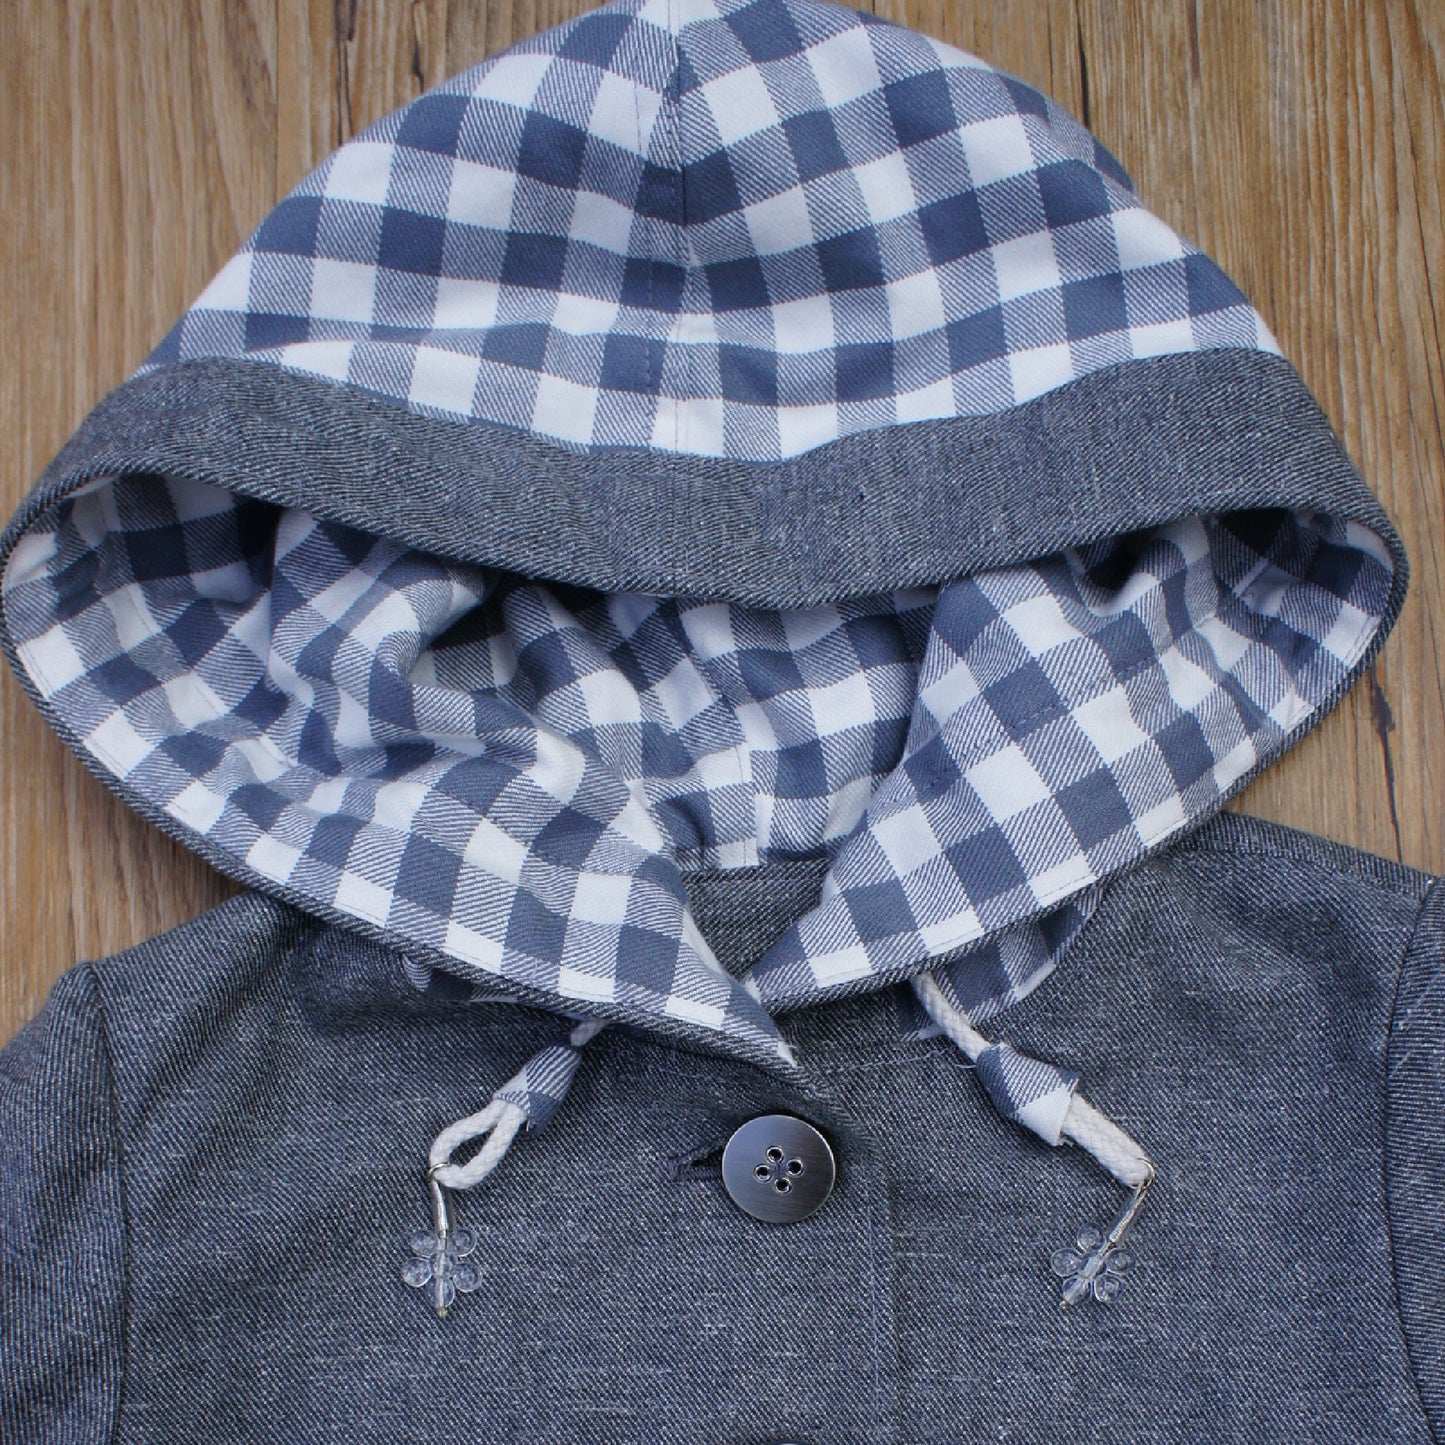
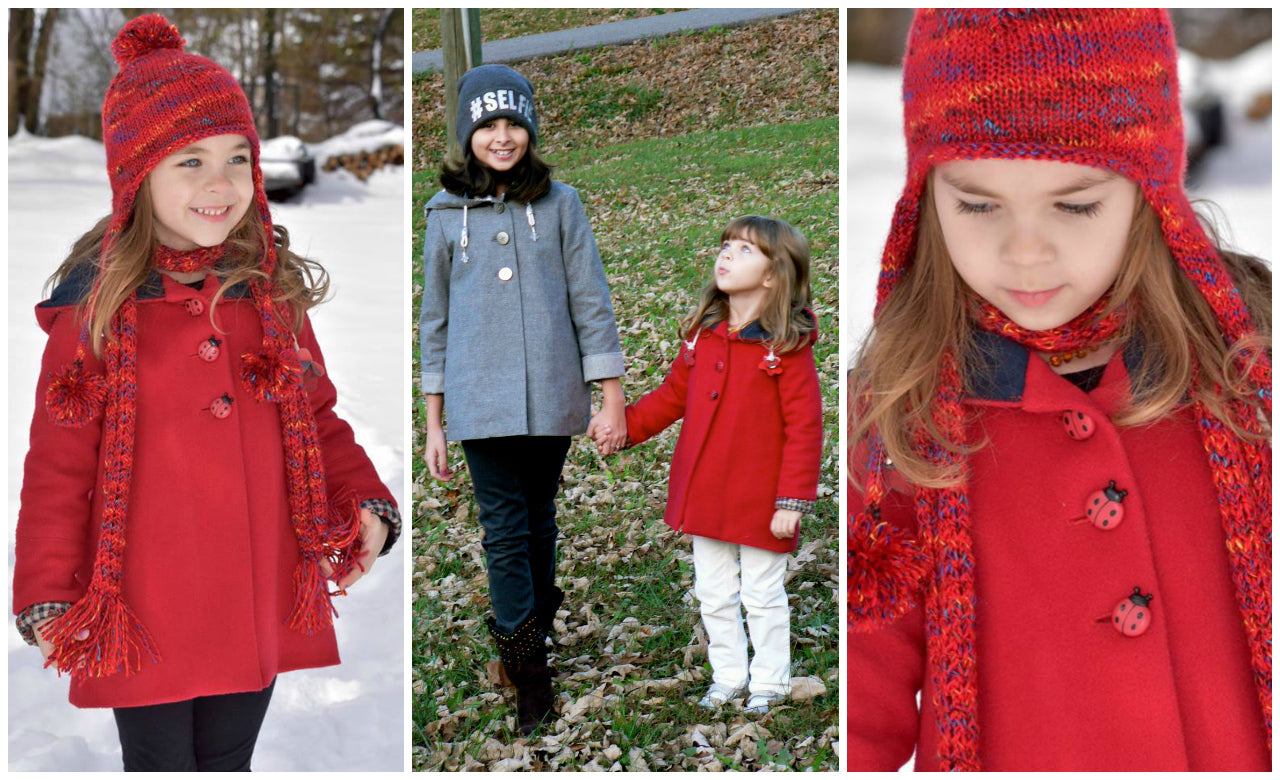
The Dakota coat is extremely versatile — it can be made lined or unlined, with collar or hood, and works across multiple seasons.

Because of its construction, it fits a wide age range and can grow with the child due to adjustable cuffs and relaxed structure.

Thank you for watching, and I’ll see you next time.

Transcript for the video: Dakota & Jutta - Dakota Coat With Lining

Hi, this is Marina from Frocks and Frolics, and I’m going to show you how to make my Dakota winter or autumn coat. This pattern is designed for ages 2 to 12, so you can make it for a toddler or a slightly older child, and it still works beautifully as a grow-with-me piece.

For the lining, I’ve used a quilted fabric, which keeps it nice and warm. The outer fabric is a merino and cashmere blend, so it’s lightweight but still very cozy. My daughter wore it all last winter.

Normally, the hood and sleeves would both be made in the outer fabric, but I ran out, so I shortened the sleeves and extended the lining instead. Honestly, I actually like the look—it’s a nice design variation if you want something a little different.

Pattern Overview and Cutting Out

Once you’ve printed your pattern, the first thing is to check your scale (either 5 cm or 1 inch) so everything is accurate. Each size has its own file, and the pieces are marked with flowers so you don’t mix them up.

The back is cut on the fold, and the front pieces include an integrated facing. The hood or collar is optional, and both options are included in the layout plan.

When cutting out, follow the layout carefully. I’ve packed the pieces tightly to reduce waste, so you’ll need to plan fabric use carefully. Don’t forget to pre-wash your fabric in case of shrinkage.

Fabric Choices and Preparation

For this coat, I’ve used a mix of materials:

  • Quilted fabric for warmth in the lining
  • Merino/cashmere blend for the outer layer
  • Jersey for some lining sections

If you’re using a directional fabric, make sure the grain runs consistently, especially on sleeves and cuffs.

The hood is cut twice (outer and lining), the sleeves are also cut in both fabrics, and the back lining is cut on the fold. Some pieces also require interfacing, especially for structure in the facings.

Pockets and Interfacing

Start by attaching the pockets to the front pieces using a 1 cm seam allowance. Mark their placement clearly on the pattern so they sit evenly.

Then apply interfacing (vilene) to the wrong side of the fabric where needed, especially on pocket areas if your fabric is soft or unstable. Use a low heat iron and press for a few seconds at a time until it bonds properly.

Sleeves and Cuffs

Sew the sleeve cuffs first with right sides together using a 1 cm seam allowance. Press the seam open (or finger press if preferred), then top stitch if desired.

Attach the sleeves to the coat body, matching notches carefully. Use a larger stitch length for smoother curves, and ease the sleeve head in gently so it fits without puckers.

Repeat the same process for the lining sleeves.

Hood Construction

Take the hood pieces (outer and lining) and pin them right sides together. Sew around the edge using a 1 cm seam allowance.

If you are adding eyelets, mark their position carefully before construction. Reinforce the area and install the eyelets before fully closing the hood.

Once sewn, turn the hood right side out and press lightly.

Assembling the Coat

Now attach the lining to the outer coat. Match notches at the front facing and shoulder seams carefully. The lining will be slightly shorter than the outer fabric, which is intentional so it sits cleanly inside the coat.

Sew the lining and outer shell together around the front edges and neckline.

Under-stitch the seam allowance into the lining so the facing rolls neatly inward. This helps the coat sit properly and keeps the edge clean.

Side Seams and Hem

Close the side seams in one continuous seam, including the pocket areas. Mark turning points carefully so everything aligns.

Finish raw edges with overlocking where needed.

Turn up the hem by 4 cm, pin in place, and slip stitch by hand for a clean finish. Make sure the hem is even all the way around before stitching.

Attaching the Hood

Sandwich the hood between the outer fabric and lining at the neckline. Align center back and notches, then pin thoroughly.

Sew with a 1 cm seam allowance, ensuring seam allowances stay flat.

Trim and notch curves carefully so the neckline sits smoothly when turned.

Sleeves and Final Assembly

Attach sleeves into the armholes, matching front and back notches. Ease the sleeve head in gradually—don’t force it.

Sew outer and lining sleeves separately, then attach cuffs and finish by joining lining to outer sleeve openings.

Make sure everything sits smoothly before final stitching.

Buttons and Buttonholes

Mark button positions 1.5 cm from the edge. Make buttonholes using your machine setting, and always test on scrap fabric first.

If your machine sensor is sensitive, be careful not to disturb it mid-stitch. Open buttonholes carefully using a seam ripper.

Sew buttons on securely, using a stem (wrap thread underneath the button) so the coat can close easily over thick fabric.

Final Notes

Once finished, press the coat thoroughly and check all seams. The coat can be made with either a hood or collar, depending on your preference.

There are additional video tutorials available on the Frocks and Frolics website for alternative techniques and variations.

Thank you for watching, and enjoy making your Dakota coat!

YOU MAY ALSO LIKE