Skip to product information
1 of 10

AMELIE DRESS

AMELIE DRESS

Filled Circle
Filled Circle
Filled Circle
Empty Circle
Empty Circle
Regular price $4.50 USD
Regular price Sale price $4.50 USD
Sale Sold out

Amelie is a cozy and stylish girls dress sewing pattern designed especially for knit fabrics. With the option of long or short puff sleeves, a relaxed fit, and a playful drop‑waist shape that flows into either a pleated or gathered skirt, it’s the perfect choice for a back‑to‑school dress that feels as good as it looks.


Perfect for beginners, Marina’s video tutorial makes every step feel completely doable. Give it a try and enjoy how simple and satisfying this quick sew can be.

Pattern Download Includes

  • Instant Download
  • DIN A4 & US Letter Size
  • Individual PDF files for every Size
  • All Sizes included
  • Detailed eBook
  • Video Tutorials

Design Options

  • Raglan sleeve, slim cut and long
  • Short puff sleeve
  • Drop waist
  • Gathered skirt
  • Easy Kam-Snap closure
  • Round neckline with ribbing finish

Fabric Requirements

BEST MATERIAL CHOICE
Stabile knit fabric and medium to heavier weight four-way stretch knit fabrics.

FABRIC REQUIREMENTS

  • 24 inches-39 inches (60cm-1 m)
  • Interfacing for the neckline finish

Available Sizes

Sizes: 1-6 Years

Please Read

  1. This is a digital pattern or PDF file, not a physical product. It will be delivered electronically via a download link delivered to the email used for the purchase.
  2. To ensure the pattern prints at its actual size, it's recommended that you use Adobe Acrobat Reader.
  3. The pattern creator, Frocks & Frolics, welcomes small-scale production using their patterns. 

Customers are encouraged to tag Frocks & Frolics when sharing projects made using their patterns on social media.

@frocksandfrolics #frocksandfrolics

View full details

STEP-BY-STEP VIDEO TUTORIALS

Thumbnail
INTRODUCTION TO THE PROJECT
Thumbnail
AMELIE: ALL-IN-ONE TUTORIAL
Thumbnail
HACK: AMELIE PRINCESS DRESS
Thumbnail
HACK: DAISY NECKLINE & AMELIE SKIRT
Thumbnail
HACK: DAISY LONG SLEEVES & AMELIE SKIRT

VIDEO TEXT

Introduction

Transcript for the video: Amelie Dress - Introduction

This is going to be a very quick introduction to the Amelie and the Daisy dress.

The Amelie dress I want to begin with is what you see on your pattern cover. I'm showing it with one tier, but in fact, you can make it with two tiers, two layers, both gathered to make it a little bit more like a dress. This is more like a tunic and shorter.

So this is the Daisy pattern, and this has got a turn-up sleeve, and basically it's just a simple turn-up which is turned up again. That way, you get a really nice, clean edge here, and you don't have any of the inside fabric showing. It works with a trim which just draws from the inside to the outside, so leaves are quite nice and clean.

Fabric and Materials

The fabric I've used for the sample dresses, both this one and of course this one, are from Fabfab, a German company which works out of Pforzheim but they have got websites all over Europe. Their English website is myfabrics.co.uk.

I think this is absolutely super because I can just stretch it and stretch it, and it just goes back, so this will last a long time.

Design Features and Variations

I've also used circles on here to applique them onto the lower half. There's so much you can do, and of course, I'm showing you that in a complete video with this.

Moving on to the Daisy dress, it hasn't got butterflies. I am aware I talk about butterflies, and it's actually ladybirds. The ladybird detail on here comes with the patterns; I've included it already. If you've ordered the pattern very early, you might not have had that, I'm going to put that onto the project page so you can just download it.

I did these bows as well on here, which I actually afterwards didn't like so much but you can leave them off if you don't like them. It works again with the trim at the bottom. It's just simply placed on, and I could have had it rolled to the outside, in this case, I just put it on and turned it up. You can do it in different ways.

You've also got these lovely fastenings from Cam or Snaply, they are beautiful and very easy to do.

Styling Options

You might want to just make the dress plain, as it is, and I think that is really nice as well. You could run these up, especially if you've got an interesting fabric; you don't necessarily need trims and all the rest of it. This is really quick.

On the back, what I've done is I've covered my cam snap with a fabric, and that works well too, and it's not hard.

Sleeve Options

Here we have the Daisy with the long sleeves. This pattern comes with either short sleeves or long sleeves.

This again is one of my early ones where I've decided to make the trim a little bit bigger, which I think is quite nice. I've got my contrast snap fastening and a different fabric for the sleeves, and I think that works very well.

Combined Designs and Techniques

Moving on to the Christmas dresses I've made, which are a mixture of both.

What you're using here is the top of the Daisy, so you can put the fastening in, and the lower half is the Amelie. You cut underneath the arm, and then you put them both together as shown in the diagram.

This is the gathered sleeve of the Amelie, and this time I've put elastic in here. There is a full video for this whole dress.

You've also got a beautiful velvet ribbon finish with a bow on it.

Then I've done another version of this, this time it has got long sleeves. I've put some binding on which you could do or leave off. This is not in the pattern; I just explained in this video how you can do that.

We are also putting the skirt slightly differently, just to show a variety of techniques.

Alternative Styling Ideas

Once you know a lot of techniques, you just pick the one that works best for you.

You can, of course, just sew a bit and put a ribbon down this line; that is also really effective.

You can do a long sleeve with this too.

Final Variations and Simplified Version

Here we've got the Daisy dress and the Amelie sleeves. I've put the Amelie sleeves in.

The Amelie sleeves are actually a little bit shorter because the neckline is a bit bigger for the Amelie dress, but I have to tell you that when I put all these sleeves in I didn't even notice.

So if it's like a tiny little bit out then just trim it, that works fine.

And for everyone that says they don't like facings or complicated fastening and can't get snap fasteners, you can do it just like this.

What I've done here is I've bound the edge and just put a tie in the back and that's actually really simple. Put a little ribbon on, put a little bow on, and as long as you've got interesting fabrics, it'll look cool.

Closing Thoughts

I cannot wait to see your combinations, to be honest. Because as ever, I tend to find what other people do much more interesting than what I do.

So the next production I've been doing will be from sunny California. Thank you for watching, bye.

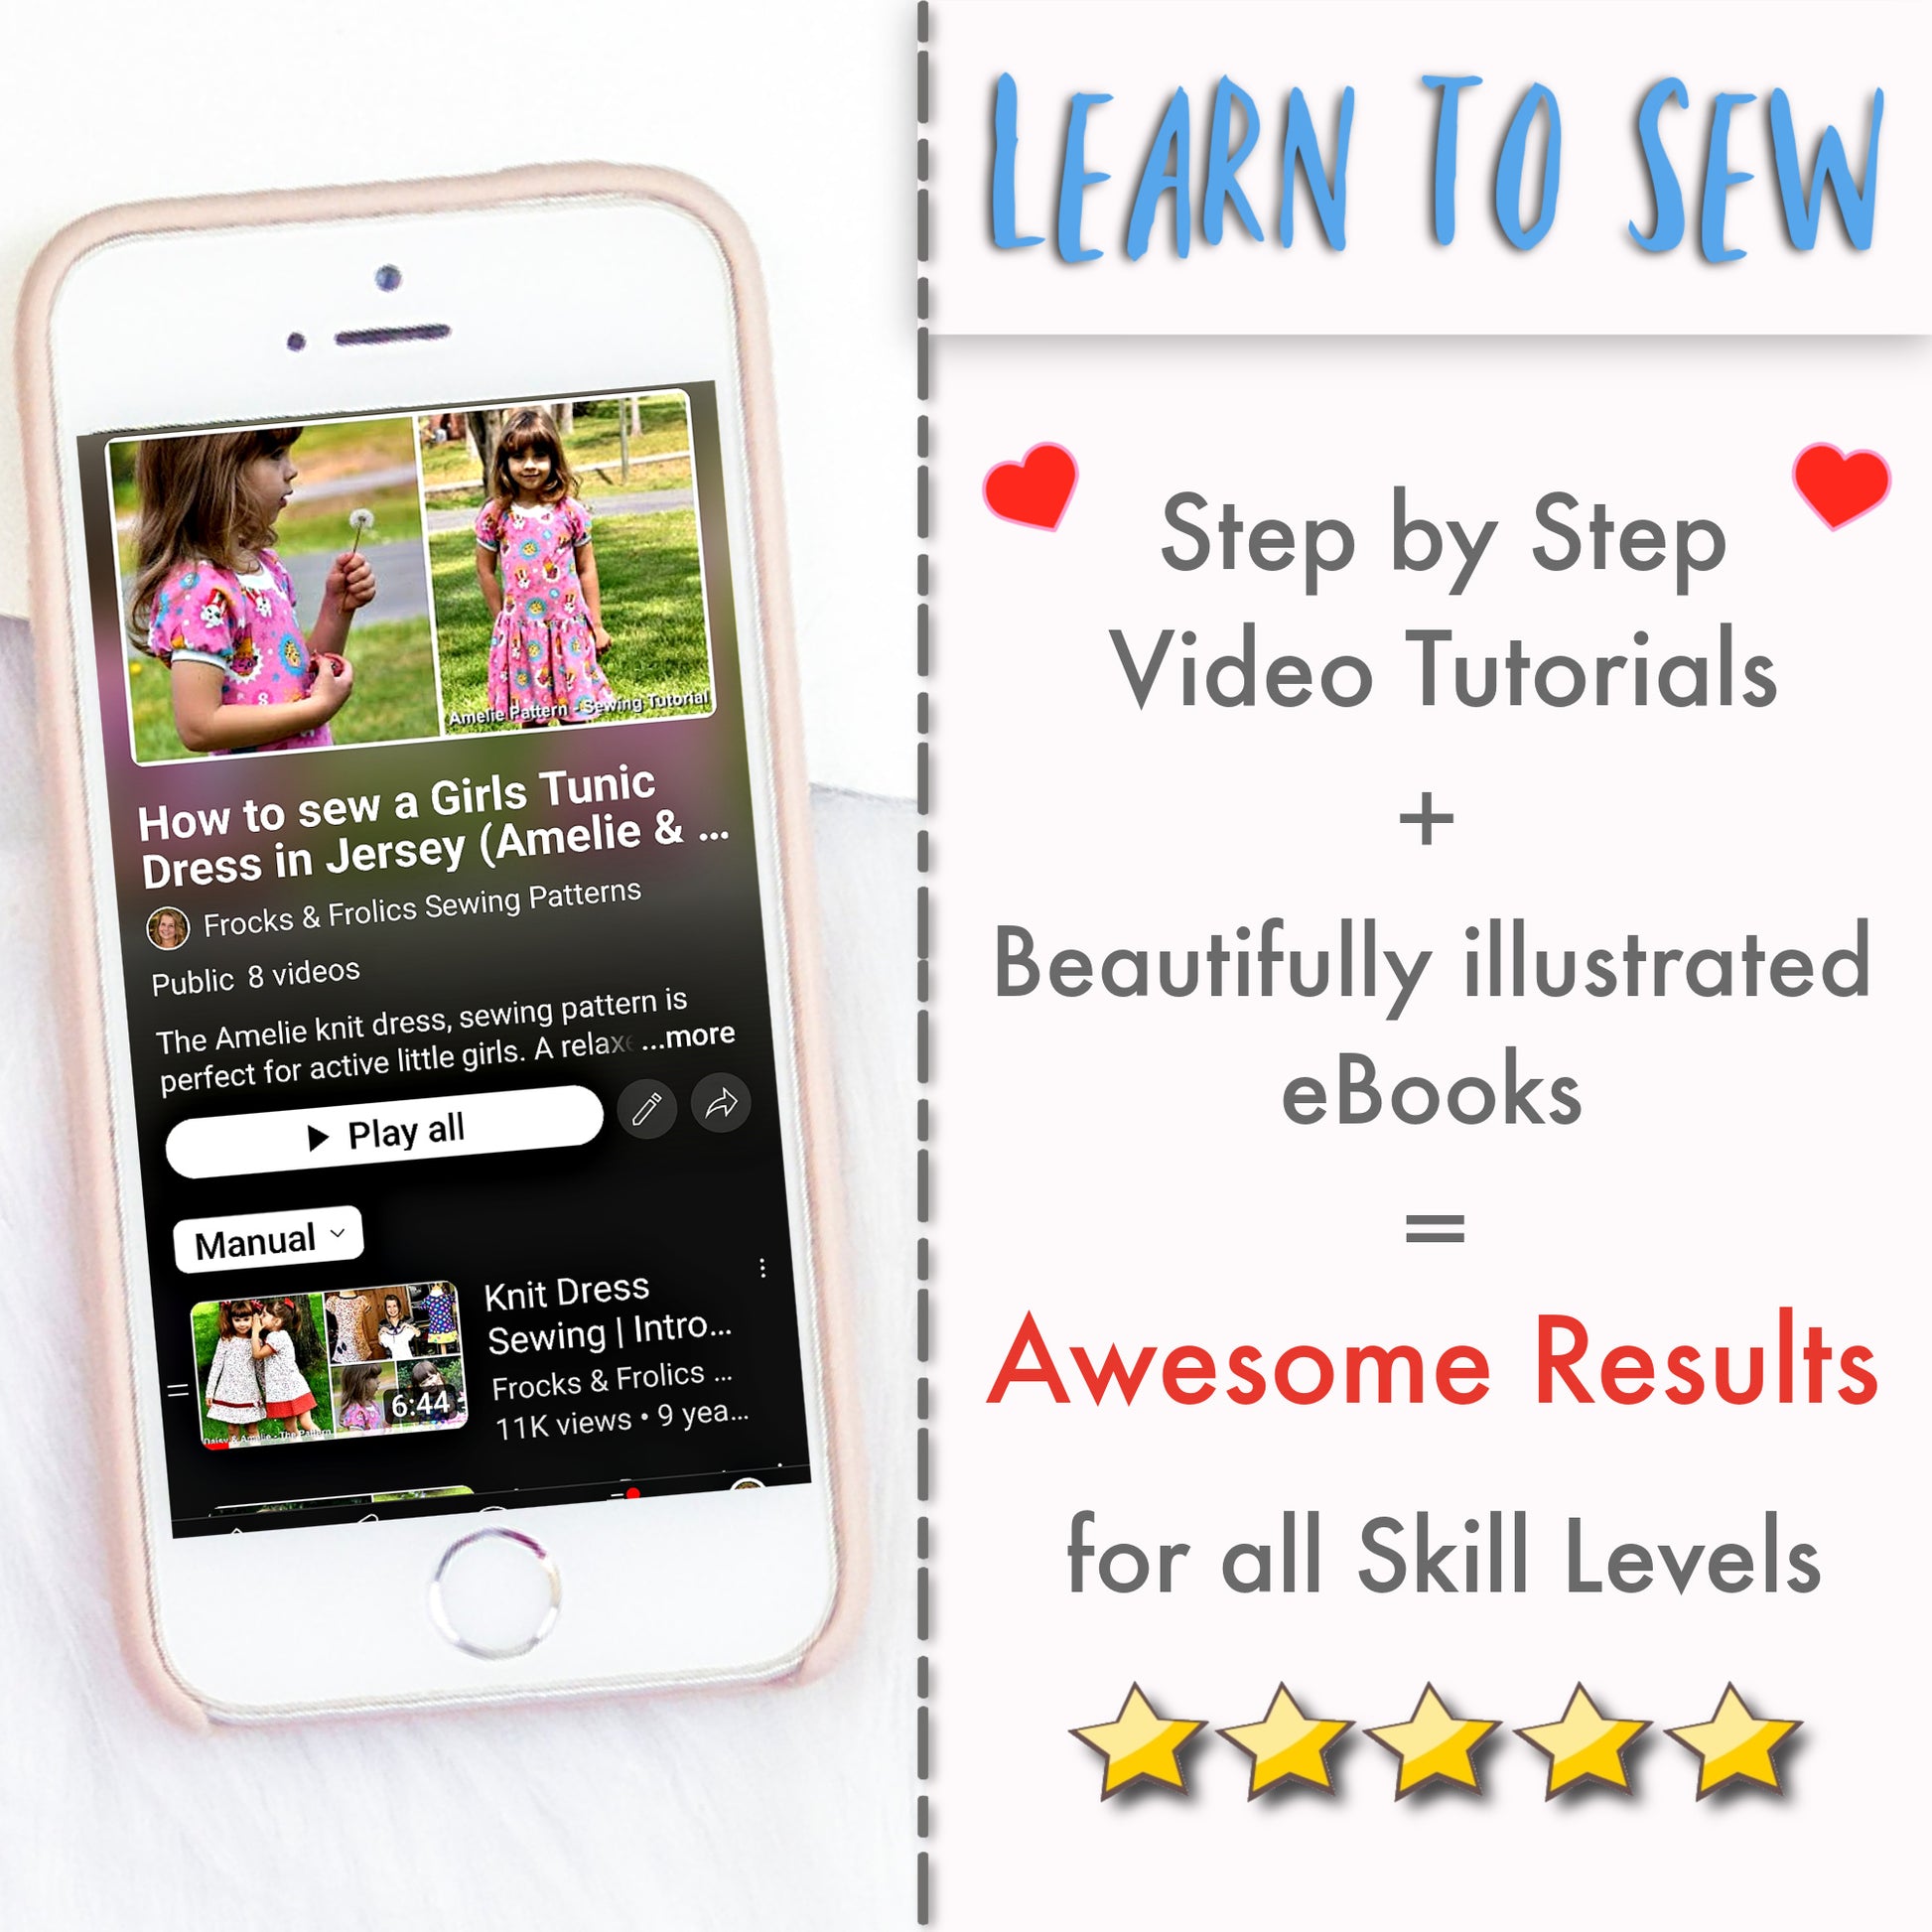
All In One Tutorial!

Transcript for the video: Amelie: All-In-One Tutorial 
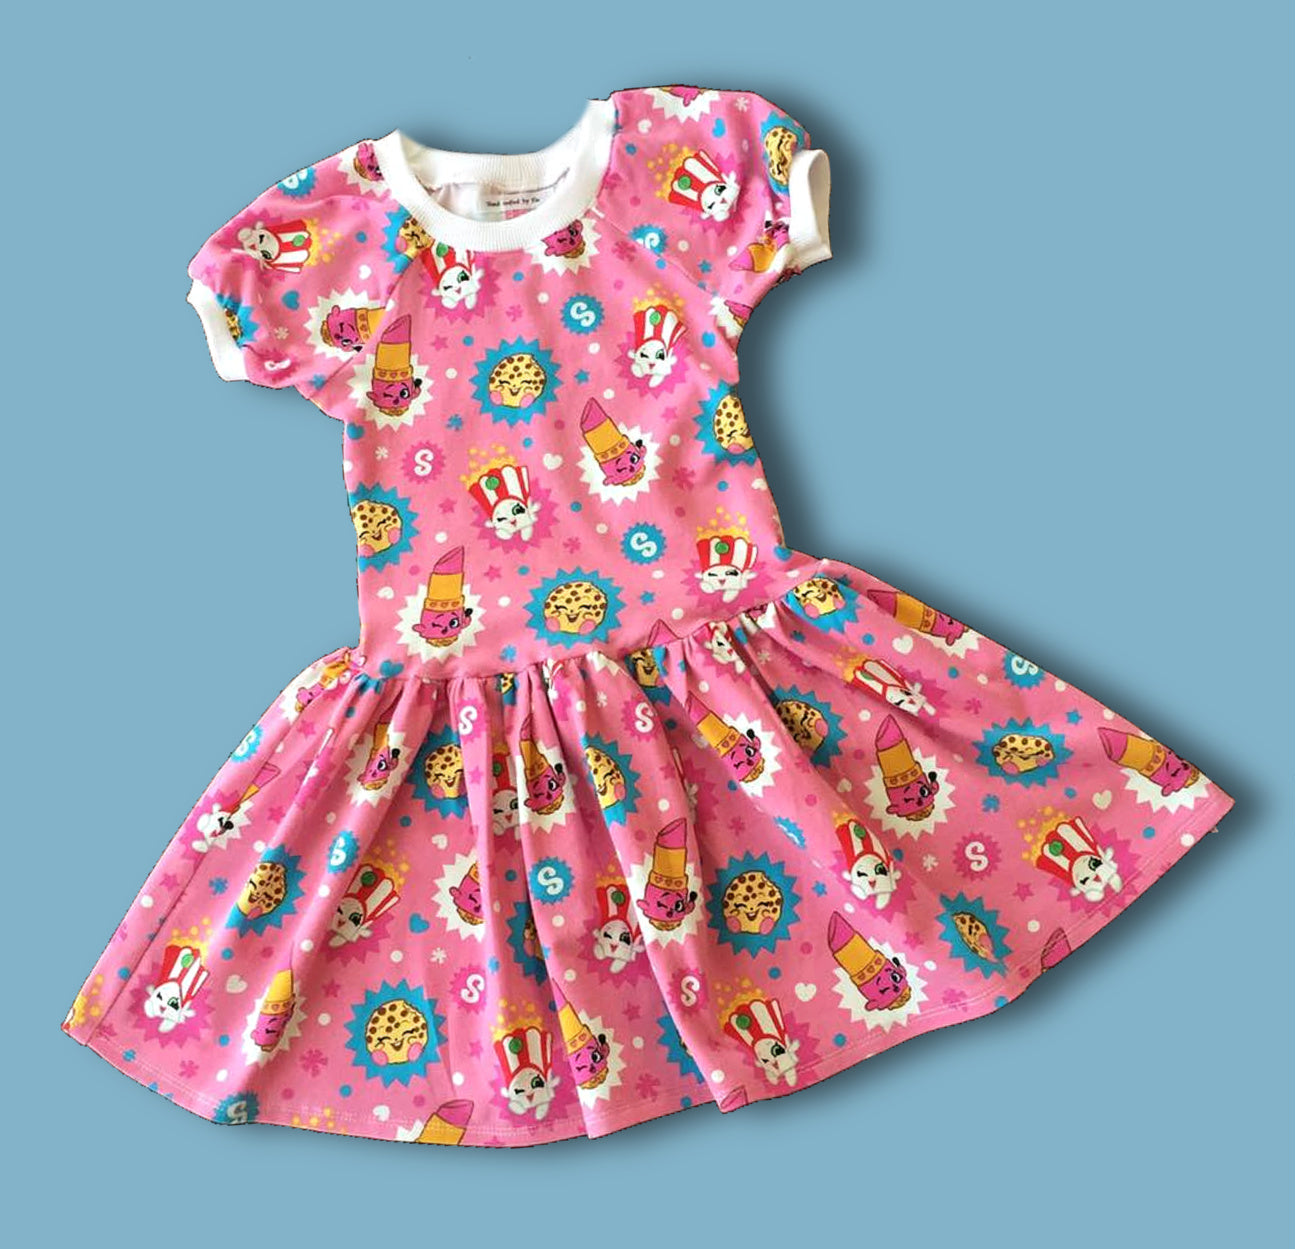
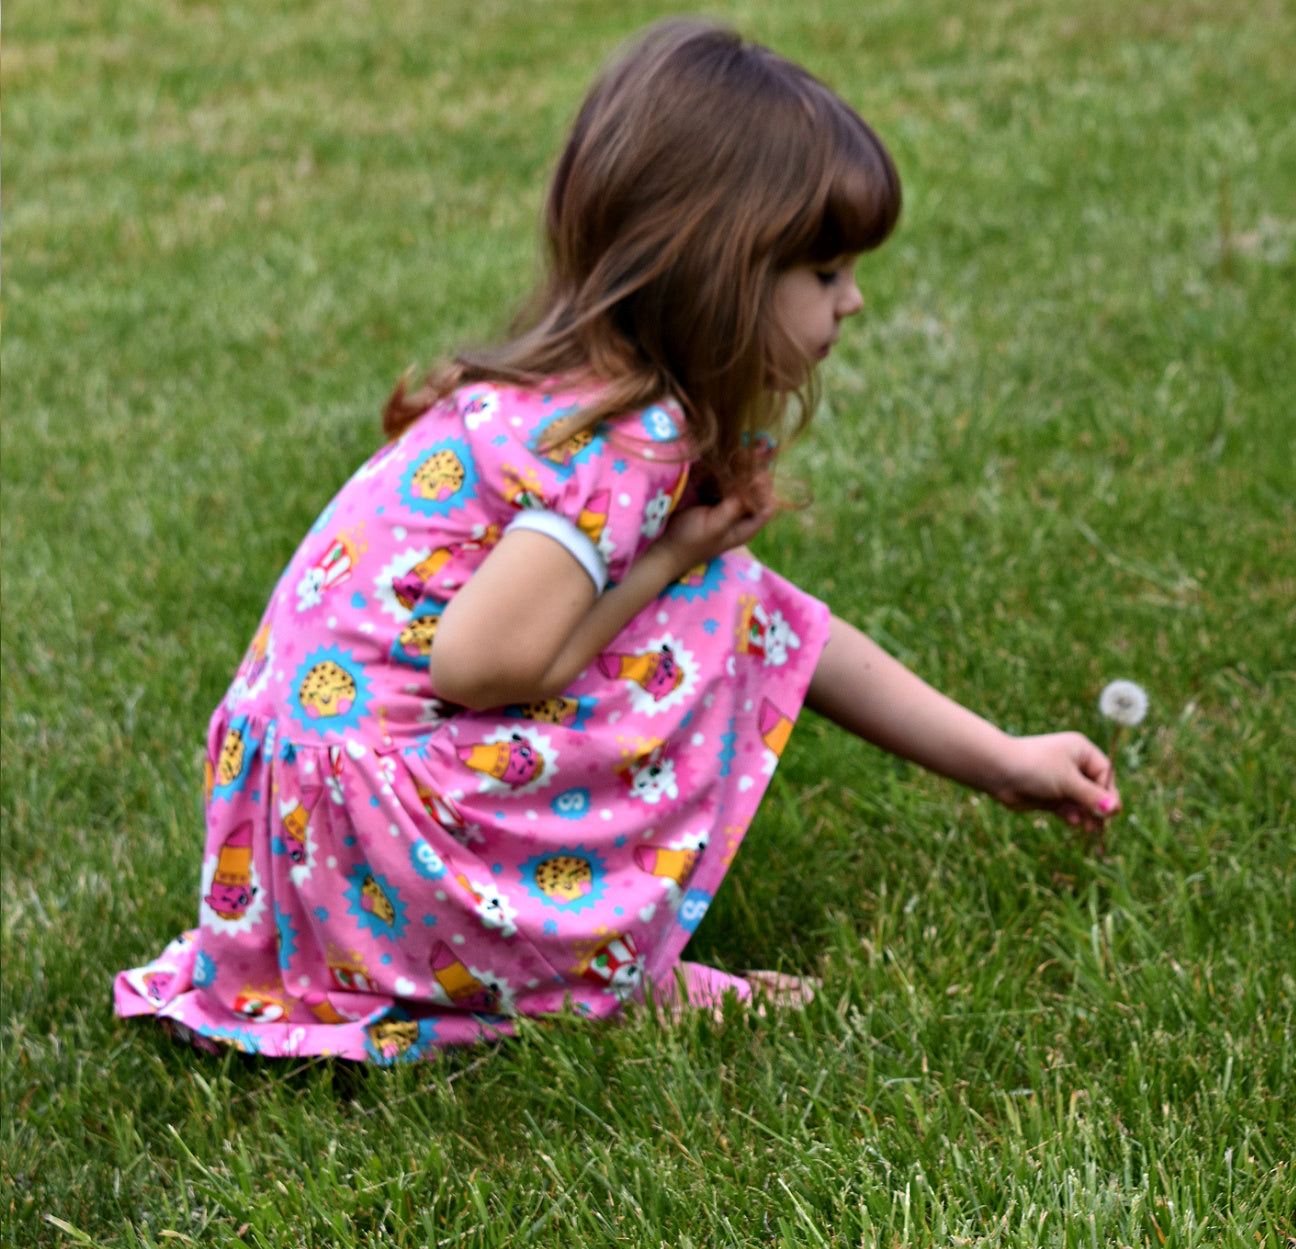
Introduction

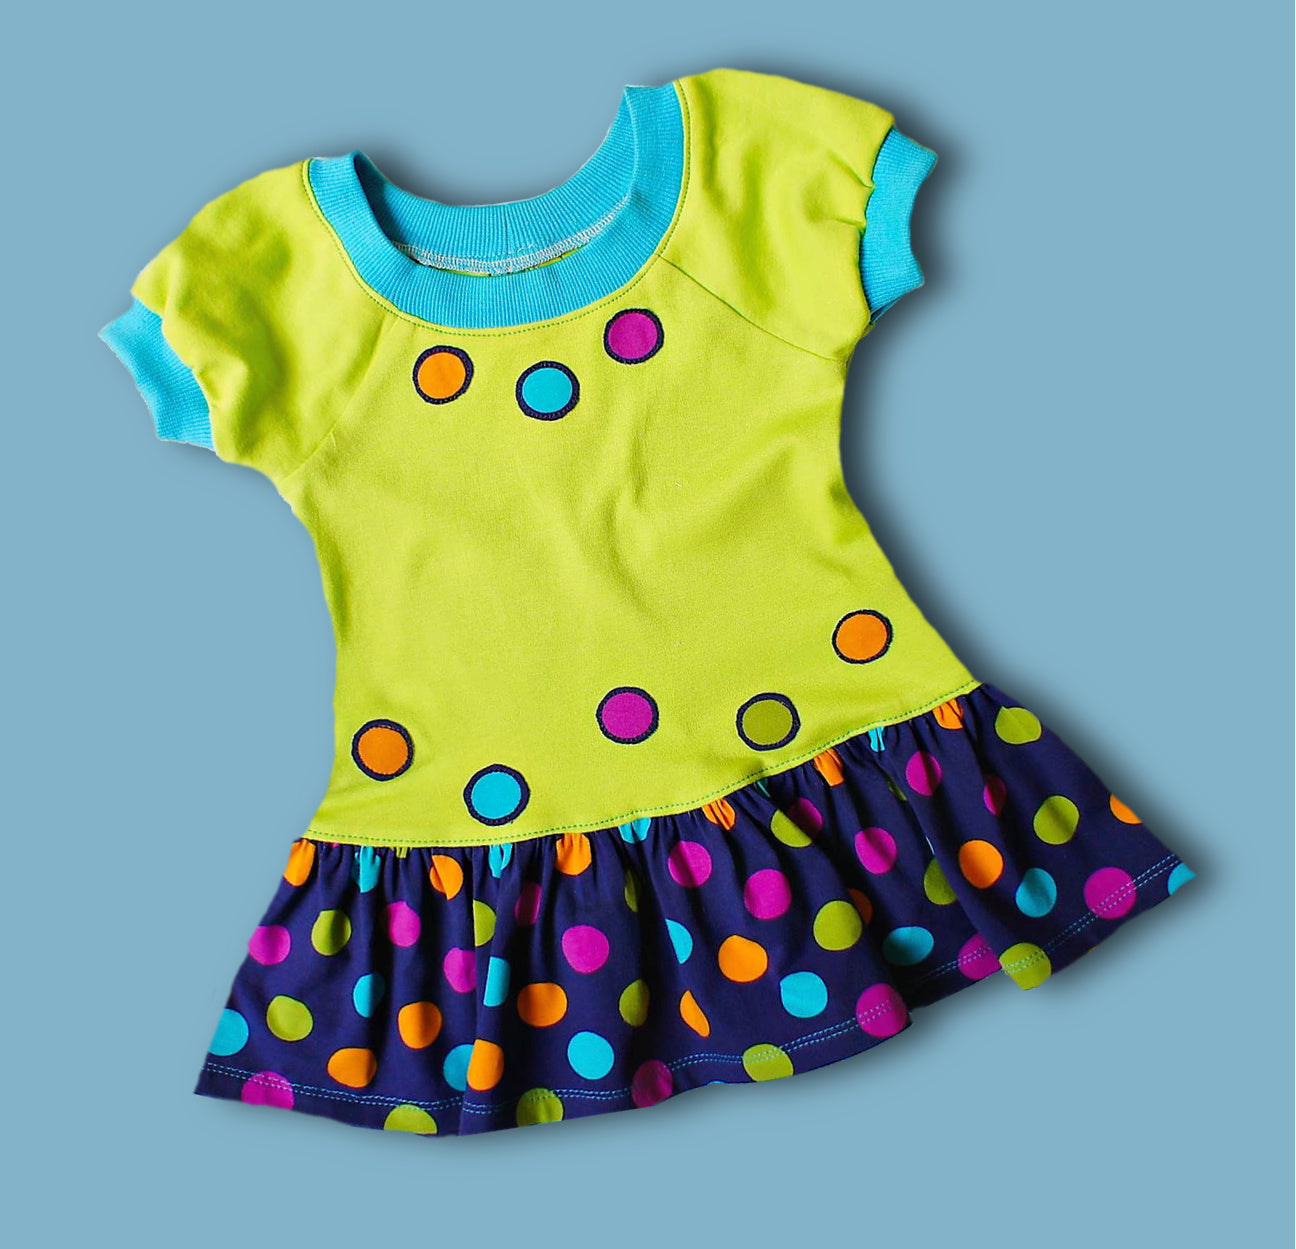
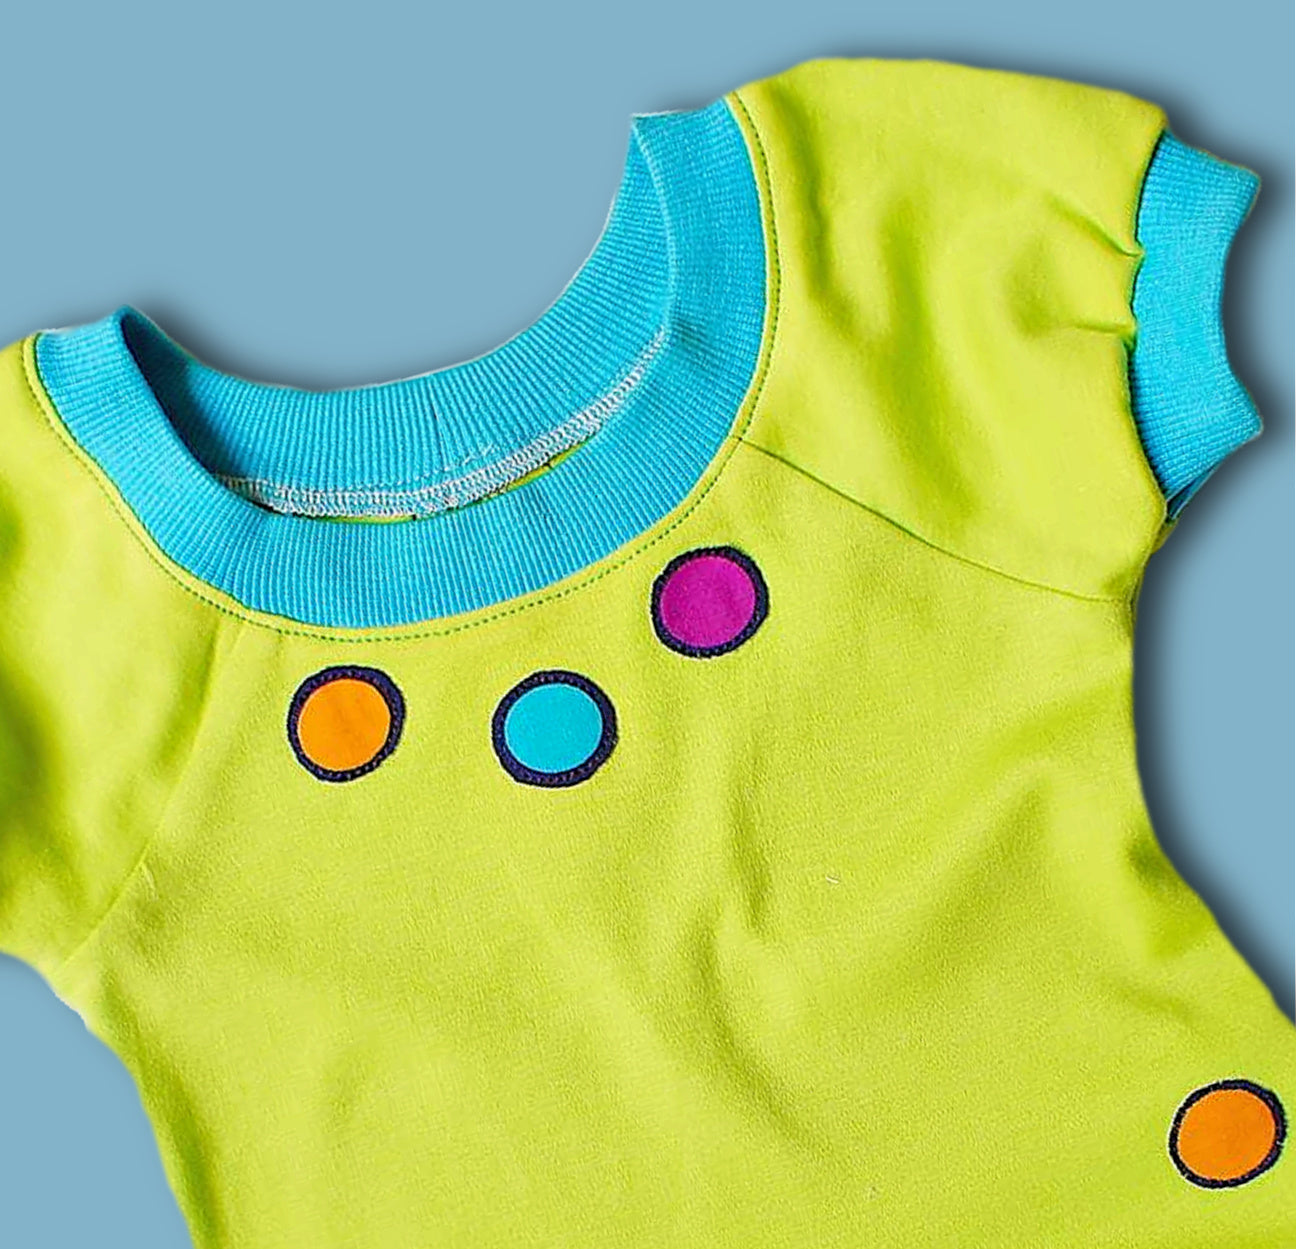
Welcome to the Amelie tunic. This pattern has two different sleeves, long and short, and the fabric was provided by FabFab from my fabrics.co.uk. My patterns don't come as multi-size, but there's one file per size which makes cutting out ever so easy. I've used a two-way stretch Jersey for the ruffle and for the bodice, and I've applied circles that came from the lower fabric that you can see in the ruffle onto the dress. I've also used some really lovely blue ribbing. Also, the fabric is from Fabb. I can not only say that I was really excited when I worked with those Fabrics because they were fabulous.

The first thing to do is to check the scale, is it 5 cm, which is just under 2 inches, and if so, then you've printed it off correctly. It needs to be actual size. You need to select borderless just to make sure you don't cut anything off. Cut out your pattern and then assemble them.

Preparing and Organizing the Pattern

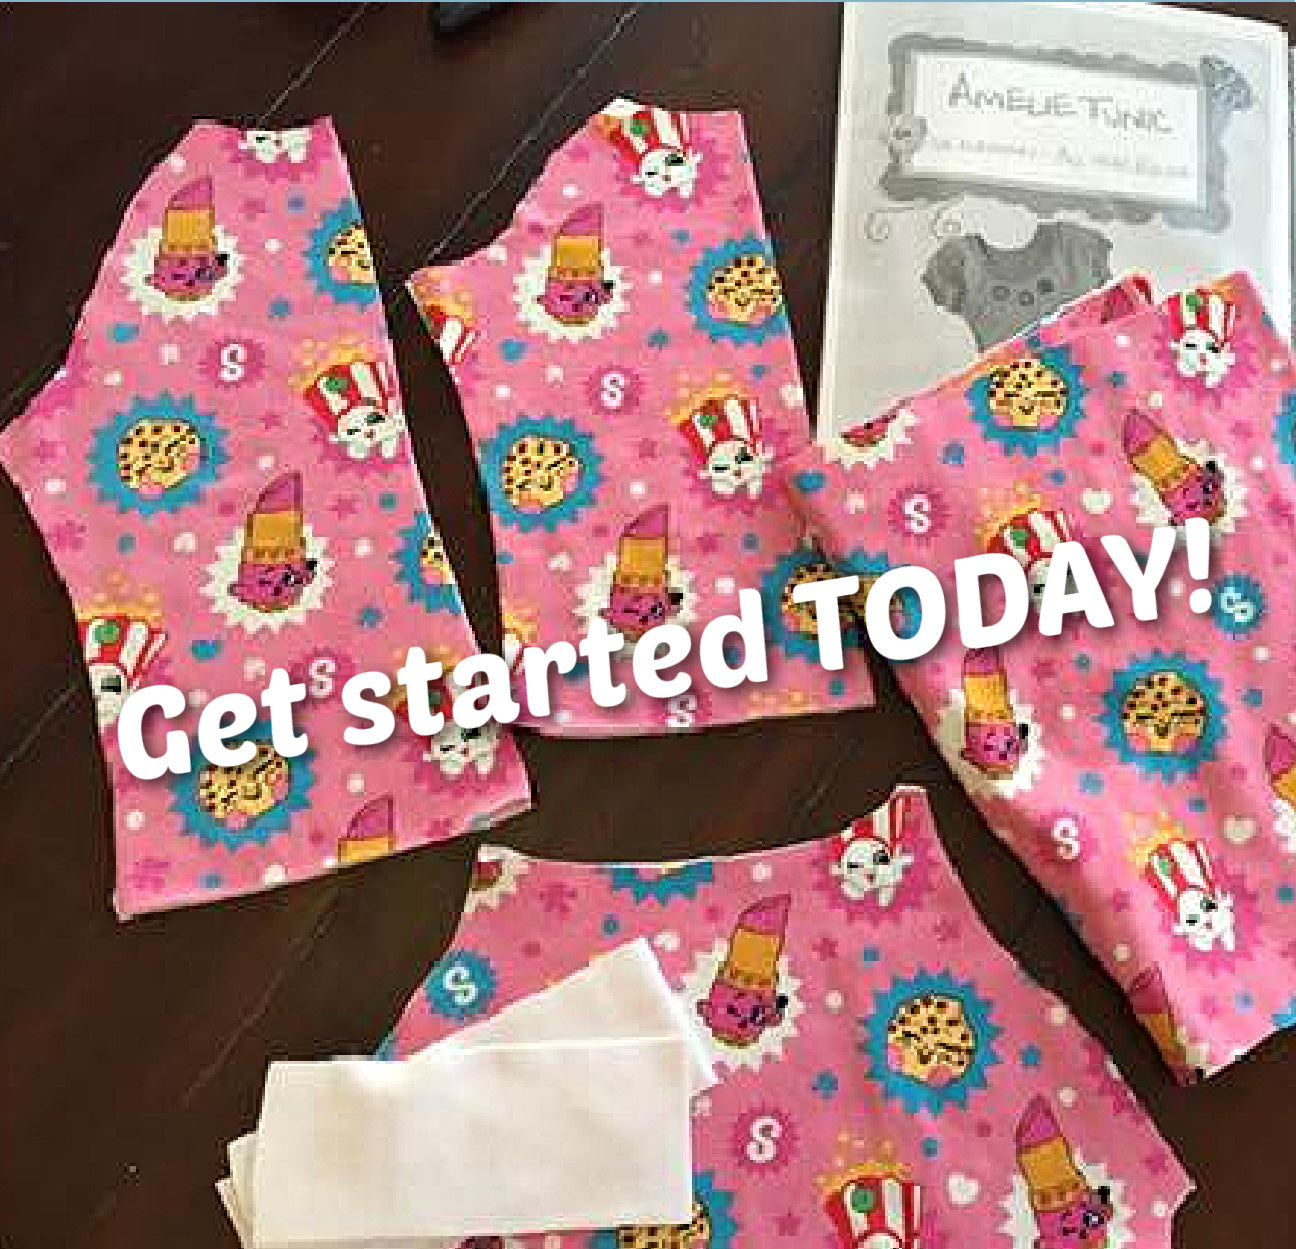
First of all, I start by putting everything into different piles, so whatever has an orange flower goes on the orange pile, and whatever has a button on it goes on the button pile, so I don't really need to understand what I'm looking at yet. And once I've done that, I just put them together, and it'll be very easy to do because it's A, B, C, D, and E labeled, so and also has got this little picture on it so you can't really go wrong.

Once you assemble the pattern, you're ready to go. I've got a front and a back, and the back is slightly bigger than the front because we have got a seam allowance in there, which we don't have on the front, which is cut on the fold.

Pattern Pieces Overview

You get the two different sleeves. You've got the short sleeve, and you've got the long sleeve in this dress. Of course, I'm using, as you can see, the short sleeve, and it's slightly shaped differently on the underarm region.

I'm using a pattern for the ribbing, which is just going to be stretched on. You could use the same pattern for the cuff as well, or alternatively, of course, you could use the tunnel pattern that I've got here that you can sew on to make it look nice from the outside as well or simply turn the lower edge over, turn it in, and put an elastic in.

I've also got ribbing for the top. Again, that's just folded over and put on. So altogether we have front and back, we've got ribbing for the neckline, ribbing for the cuff, the short sleeve, and we're ready to go.

Cutting and Construction Preparation

Here you can see all the pieces cut out, so we've got the ribbing, we've got front, back, the ruffle, and of course the sleeves.

We start by putting the ruffle together. So, 1 centimeter seam allowance, just sew it together. You will have two pieces cut on the fold, so you've got two seams. It's easy to put that on as well because you know what the side is then.

Then overlock either side, put some gather threads in from foot width from the edge and then foot width again, and it's the largest stitch on your sewing machine. Then turn over the lower edge and iron it so it's nice and sharp, and then we're just going to top stitch it. It's not even an inch, it's 1 and 1/2 cm here or two. You don't want this to be too wide because I think that looks really homemade, and it's not a look that you want, obviously.

I stitch around once, and then I stitch again next to it so that I get this twin needle effect. Of course, you could use a twin needle if you like.

Appliqué and Sleeve Preparation

Next, I'm going to apply the W or Bond web to the area where the circle is and then cut the circles out. If you then remove the white paper from the back, you can iron that to anywhere you want on your garment.

A raglan works with the sleeves inserted fairly flat, which is really easy, especially if you're a beginner. It's much easier than a fitted sleeve or one which has got a puff sleeve at the top.

Sleeves and Construction

What we're going to do is put the ribbing on and just stretch it onto the sleeve first. It's always best to have everything done before you put it together; otherwise, you have got all this other fabric there in the way. So stretch it across and pin it.

On your sewing machine, select the triple stitch, which is the one with the three lines, and we want to now stitch this across. It's a stitch which goes forward, backward, forward, forward, backward, forward, etc., so that it stretches, and that is obviously really good. I don't like using little zigzag stitches, I think it does make it look messy and not very professional so I don't do those.

If you haven't got a triple stitch on your sewing machine, obviously you use a slight zigzag. You need to really pull it from the back to make sure that you have got enough stretch in there.

Now I can put the other part down, and I can overlock it. The reason I'm not doing it in one go is because it's very easy to slip out because you can't use needles. If you use a needle or pin under the overlock, and you hit the knife. The knife  is about £30 or $50, so it's not nice if you have to buy it again.

So you've got the sleeve done, and you can now put the sleeve in. Just move the fabric edge-to-edge. It should fit all very, very nicely together. There's no need to pin this but it has to go edge to edge.

Then you overlock that edge as well, and you iron the seams towards the body middle so that if you wanted to top stitch, you could do that.

Body Construction

You also want to overlock the center back. Please ignore that you still got the fastening flaps from the daisy tunic style on there. It would be straight on your pattern.

You can top-stitch your seam here, but I didn't do that. I decided to leave that off this time.

Appliqué Placement and Side Seams

Let's iron on our little dots where we want them. Once I've done that I'm going to stitch around with a triple stitch. Same way as I always do and once that's done they are securely attached to my garment.

I can now do my side seam and I do that on the overlocker in one go. You mustn't put pins in there because you're going to get them caught one day.

Try to do it without pins. The key is really lining it up well. You could of course top stitch it first so that the cuff can't slip, but what I do is I put the cuff slightly longer on one side and let the overlocker bring them together.

Lift the presser foot, turn your fabric over, and then just catch it. That way, you've secured it.

Neckline Construction

Next, we're going to do the neckline. Right sides facing, close the ribbing, and make sure you've got all the markings for where the sleeve starts and ends.

You stretch it across and of course there's going to be a lot more gather in the sleeve area than at the back and the front.

Back to the sewing machine, triple stitch all the way around. Once this is done you overlock the whole lot together.

Because you've already done it it's just so much easier. All you have to do is move your fabric out of the way.

Final Assembly and Finishing

Now it's together. If you like more gathers, make the ribbing 6 cm longer.

Then, top stitch all the way around. You could use the triple stitch as well.

Finally, we just have to put on our gathers for the lower skirt. Line up the side seams, center back, and center front on both ruffle and dress, and then gather.

Once you're done, you put this on with a triple stitch. I really do hate pulling gathers, but once it's done, it looks lovely, and it's worth it.

Remove gather threads where needed to keep things tidy. Overlock and then top stitch again for a clean finish.

Final Thoughts

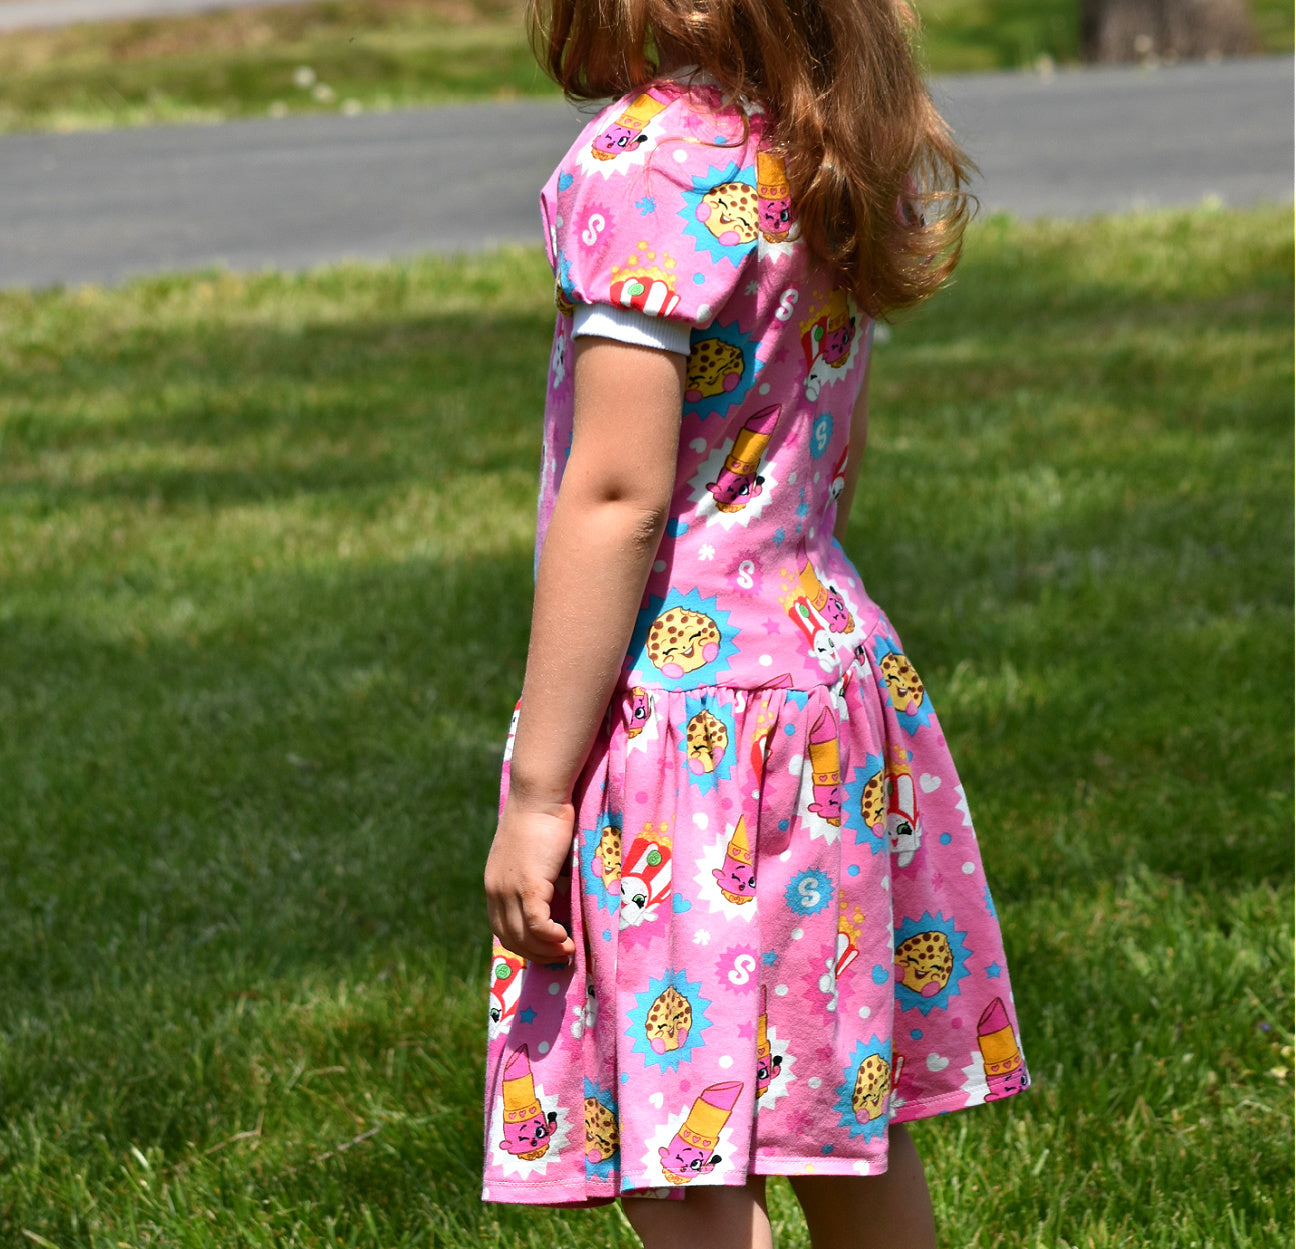
I've actually changed the pattern after I made this because I thought it was a bit too wide at the bottom, so I shortened that.

Push towards the needle slightly when sewing so it holds shape better, and steam it in at the top so there is no wobbling.

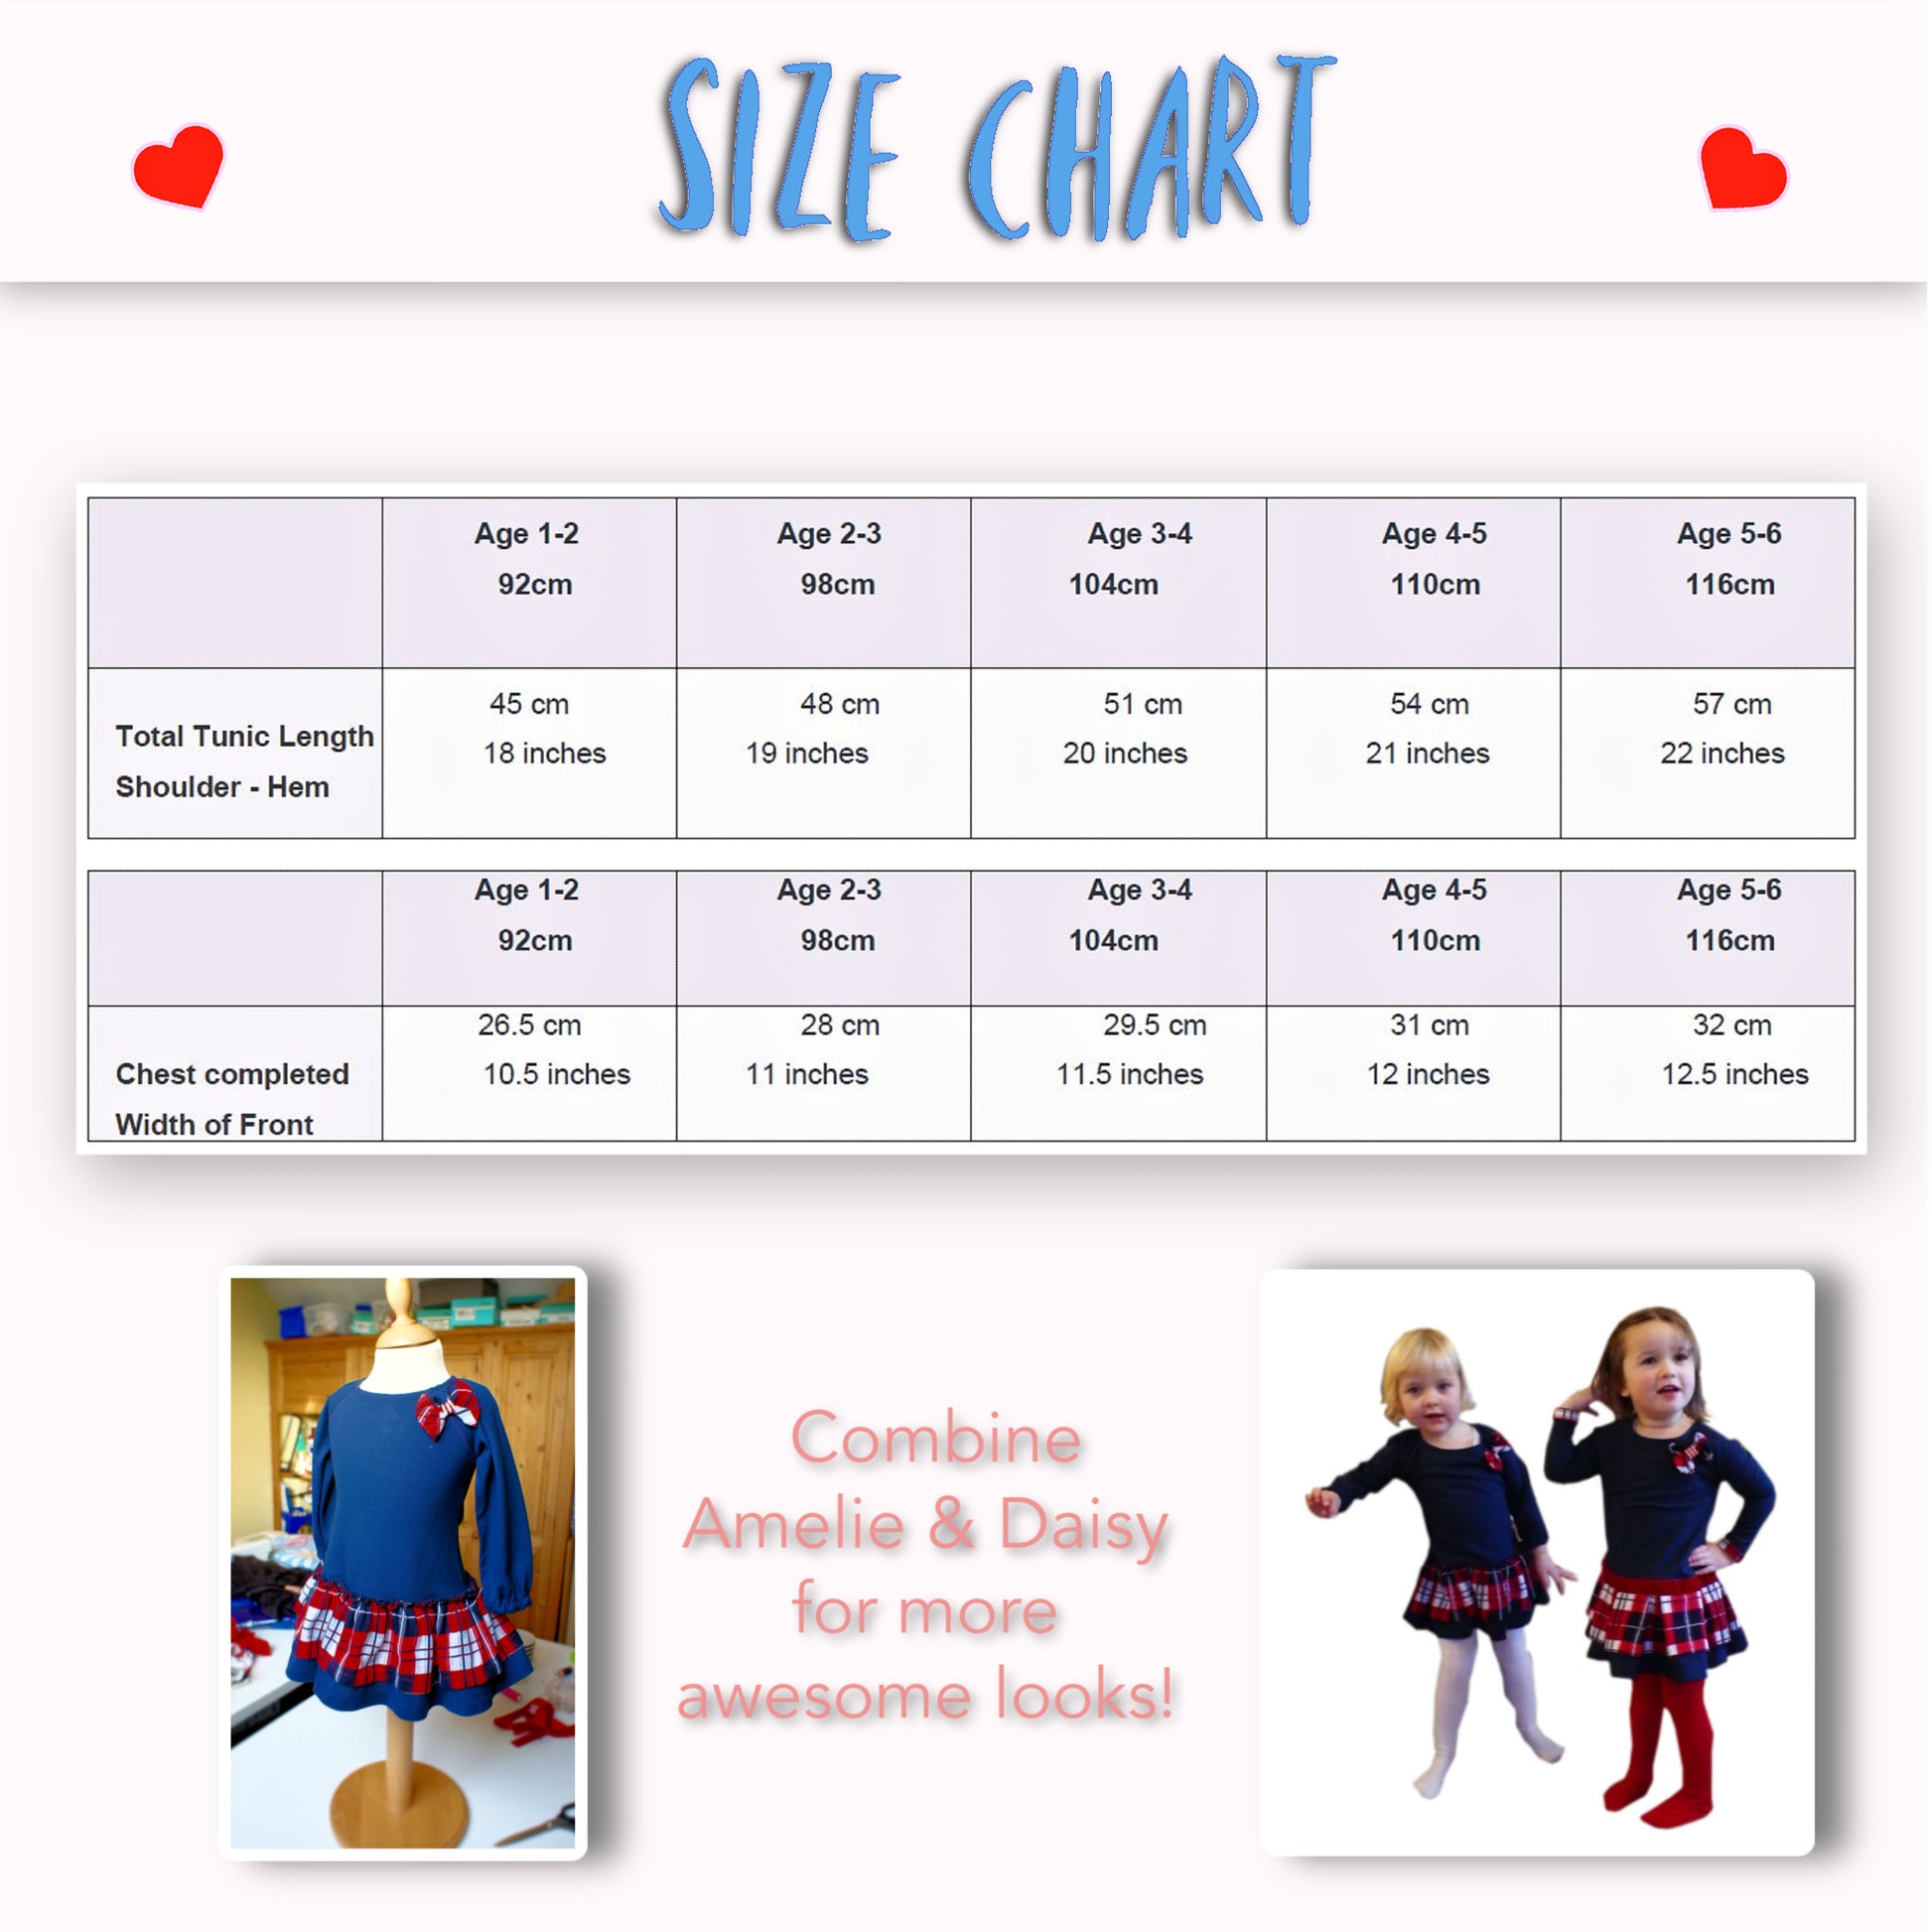
That concludes this dress. You could mix and match the Amelie and Daisy patterns, including sleeves and bottoms. There are many variations, including Christmas dresses and princess styles, all shown in the course.

Thank you for watching Frocks and Frolics.

Amelie Princess Dress!

Transcript for the video: Hack - Amelie Princess Dress.

In this video I'm going to show you how you can make a princess dress with the Amal pattern. I've actually changed this idea a little bit. I would not recommend that you do the neckline the daisy neckline with this dress but instead do it like I've photoshopped here quite nicely. Have the ribbing on the arms and the neckline just like the main dress.

So you need the jersey for the top. I've actually used some embroidery as well saying because I'm a princess which I think is quite nice. I'm using netting for the sleeve and I'm also using netting to make the skirt. I've got four layers so two layers come with the pattern and I've just made two more in between layers.

Preparing the Pattern and Materials

You need the jersey for the bodice and ribbing for the neckline and sleeves just like the main dress. I also added embroidery that says “because I'm a princess,” which I think is quite nice.

I'm using netting for the sleeves and also for the skirt. There are four layers total. Two layers come with the pattern and I added two more in between layers.

Constructing the Skirt Layers

First, you join the side seams with the right sides facing each other. I do this straight on the overlocker because there is no reason to use a sewing machine for this. Since it is a delicate fabric like netting, make sure you stretch it slightly while overlocking because it tends to bunch up in places.

Then you set your overlocker to a narrow rolled hem. There is actually a really good video on this. Take the guide out and the left needle and basically that will reduce the width of the overlocking to make it narrower, which looks quite pretty. You can get it really tiny, especially for dance costumes.

In my version it is a little bit wider, but you can make it finer if you prefer.

Assembling the Layers

You then put the layers into each other. The longest layers go on the bottom and the shorter layers go on top until everything is stacked together.

Make sure the side seams are aligned left on right, left on right, left on right. It is a bit tedious, but once done you can add your gathering stitches.

Sleeves and Bodice Construction

Next we do the Amalie sleeves the same way as in the standard version, but I am putting the sleeve cuff on straight away on both sides. This is a bit more advanced, but it is possible.

You can either do it like in the Amelie dress or do it this way if you are more experienced. Then overlock everything.

Inserting the Sleeves

Now we put the sleeves in, right sides facing each other. Sew them in and I do not pin anything for this. I expect people making this are quite experienced. If you are not, then you should practice with the standard Amelie dress first.

Then overlock everything and close the side seams in one go. As you reach the end, go a little further so you can lift the presser foot, turn the fabric, and continue a few stitches to lock it in. You can also pull it through with a big needle.

Attaching Skirt to Bodice

Next, attach the side seam of the skirt to the side seam of the dress, right sides facing. Once done, gather the skirt so it fits snugly. Adjust the gathers evenly and pin them.

Then use a big stitch to secure everything before overlocking. The first stitch is just to hold it in place.

After overlocking, remove the stay stitches and gathering threads. You now have beautiful layered construction.

Decorative Finishing

At this point you could leave it as it is. However, the daisy top has a facing that becomes visible through the netting, so I had to cut it back and hand stitch it. Because of this, I would recommend using the Amalie top instead for this style.

To create decoration, take two layers, bunch them together, twist them, and sew across with the machine. This creates a gathered decorative effect. You can add a bow or a rose on top of this.

Final Guidance

If you want more help, you can watch the Amelie dress first, as it explains the construction in more detail.

You can find the pattern in A4 or US letter format, and there are links in the description. You can also return to the video through the link provided there.

Thank you very much for watching.

Hack: Daisy Neckline and Amelie Skirt

Transcript for the video: Hack: Daisy Neckline and Amelie Skirt

For this dress, we're going to use the Daisy and Amelie pattern again. You're looking here at the back pattern for both dresses, and when you put them on top of each other, you can see that they're clearly very, very different. So what you want to do is draw a line on the underarm, then cut along that line and join the lower part of the Amalie dress and the upper part of the Daisy tunic together, and that gives you a complete pattern piece. The same also goes for the front.

We also need the gathered short puff sleeve and the tunnel for the elastic but you could also just cut your own bias binding. Then the facing of course and the ruffles, both short and long.

Here you can see the back of the two neck which has a snap in which is very important because that shows you how far you sew the dress up. The facing can be interfaced with iron-on Vilene or you could just do it in the area where you have the closure. Very important is to mark all the bits where the sleeve go so the sleeve beginning and the sleeve end as marked on the pattern piece.

You can cut off this side already and it fits together very nicely as you can see here.

Bias Binding and Preparation

Then we have got the bias binding, which I cut from a long strip of 45° angled fabric and then you just have to cut off the edge. About 5 cm is enough. If you're working in cm you might want to go for 5 cm because most elastic is not that wide.

Sleeves and Construction

The first thing to do is to put the sleeves in. We want to put the sleeves right sides together and afterwards we're going to gather in the top there. So, edges together, pin them, and then bring them together on the sewing machine edge to edge again.

Then we're going to overlock the seams, and we're going to iron them towards the body middle because we want to then also top stitch them in that area so that we have got a really nice professional look. You want the stitch length to be quite long for this.

Bias Tunnel and Gathering

Now we're going to put the bias binding or the tunnel, depending on what fabric you have chosen, onto the inside of the fabric so it rolls to the outside. Make sure that you leave a gap at the end so that we can actually close the side seam later.

Now we're going to put our gather stitches in. Line up the presser foot with the edge of the fabric for the first line, and then for the second line you line that up with the edge of the presser foot again and go all the way over. You need the longest stitch available on your sewing machine.

Facing and Shaping

Then we're going to put the facing on, starting about 2 cm above where you would normally start. Put a pin where the sleeve begins and another where the sleeve ends. Secure your thread on one side with the needle and then pull the gathers to fit the gap in the middle.

Pin it all the way around. It looks really super like that.

Now we can sew in our facing all the way around. I would recommend a smaller stitch length as you go up to the corner, then a longer stitch length along, then small again at the rounded part.

Make sure the needle is in the fabric when you lift the presser foot to turn.

Turning, Snipping, and Pressing

Next, we get rid of all our threads. Snip all the curves and snip right to the point at the fastening and across the corners.

Next, we understitch the facing so that the edge will roll really nicely. The seam allowance has to go into the facing. Then we iron the whole lot.

You can also top stitch from the end of the sleeve to the other side. If needed, secure the facing with a few hand stitches to the sleeve seam.

Back Seam and Closure

Now I am ready to close my center back seam. You can mark it with tailor’s chalk or do it by eye. Sew with a 1 cm seam allowance, iron the seam apart, and then finish the facing ends by hand stitching them together.

Then I put on cam snaps. I really love those, they are so easy to put in. Just make sure you don't iron on them.

Side Seams and Waist Construction

Now we do the side seam. You leave a little bit open so you can get in, then overlock and iron towards the back. Close with 1 cm seam allowance.

Next, I prefer to put the long lines on first before everything is fully joined. Then fold over, pin, and sew all the way around, leaving an opening gap for elastic.

This width is quite wide. You may need to adjust depending on your elastic and measure it on your child for comfort. Then pull the elastic through and close the gap.

Skirt and Ruffle Construction

Now we do the skirt. If your fabric rolls a lot, pre-steam it. Overlock the lower edge, sew side seam, and prepare hems.

If you have a check fabric, do not sew the hem from the inside because it can look messy. You should sew it from the outside. You can also do a double stitch if you like.

Then bring both layers together with wrong sides together facing up. Add gather threads from one side seam all the way around, two rows: one foot width from the edge and another foot width again. Mark the center front. Then gather to match the pins. It is easier to gather while attached so you can see exactly how much you need.

Attaching the Skirt and Finishing

Sew the skirt on with the rough edge to the outside. Then cover the seam with ribbon to hide raw edges and reduce bulk.

Start where the bow will go and sew along your original stitching line, then another line at the top. This is more advanced and not recommended for beginners because velvet and ribbon can shift.

Then form the bow by cutting and wrapping bias binding around the center and stitching it in place.

Final Thoughts

You are basically finished. You have a beautiful seasonal dress for Christmas, but in different colors, it works all year round.

If you want more versions or combinations of this dress using the Amelie and Daisy patterns, you can explore more on the project page at Frocks and Frolics.

Amelie Hack: Daisy Long Sleeves and Amelie Skirt

Transcript for the video: Hack: Daisy Long Sleeves and Amelie Skirt 

For this super cute dress, we are combining the Amelie and the Daisy dress. You can see here the back of the Daisy tunic and the Amelie tunic, and they are not the same.

When you place them on top of each other, you’ll notice the red one is the Amelie back, which is quite different.

What you want to do is cut both pieces apart right where the arm starts. Then we are going to join them together: the Amelie lower part with the Daisy tunic upper part, creating a complete pattern. You repeat the same process on the front so you also get a new combined pattern.

Sleeve and Pattern Adjustments

For the sleeve, I’ve added a 5 cm slit, placed one-third from the back of the sleeve.

We also need the facing and the skirt pieces for both the short and long version.

Here you can see the sleeve: we will gather the top edge, and we’ve also got the slit. We will gather the lower edge as well.

Facing and Closure Preparation

As with the Daisy dress, we’ve got a small snip here that marks where we stop sewing the back closed.

We also have the facing, which includes both rounded edges. On one side, we will trim it off because we only need the overlap on one side.

You can interface the whole facing or just the section where the closure is attached.

The first step is to cut off the left side. If you follow exactly what I’m doing, you’ll be fine.

This facing will then sit underneath the back like this.

You could also cut off the rounded edge on the other side of the back at this stage.

Bias Binding for Slits

We are going to use bias binding. It is ironed in half.

From either side, cut:

  • 2 long pieces (22 inches each)
  • 2 short pieces (6 inches each)

They are only folded in half, not sewn yet.

Attach the bias binding for the slit to the wrong side of the sleeve, keeping to the 1 cm seam allowance. This creates that clean dipped opening, similar to the Natalie dress I showed before.

If you want more detail on the closure, you can check that tutorial.

Now roll the bias binding over, pin it, and topstitch.

Make sure to stitch very close to the edge. I often see people stitching too far in, which can reveal the seam underneath and looks untidy. Stay about 1–1.5 mm from the edge.

Once sewn, it should look clean and neat like this.

I’ve pressed mine open. You could stitch it down on the inside, but I personally like the rounded finish, so I would keep it like this.

Setting in the Sleeves

Now we can insert the sleeves. Place right sides together and pin the sleeve all the way around the armhole front and back.

When sewing, you’ll notice the curve of the raglan—it may feel wrong, but it is correct. Make sure all edges stay aligned on top of each other.

Then overlock each seam, and press. After that, topstitch from the outside. I’m using red thread for contrast, which I think looks really nice.

You can see the seam sits about one-third under my presser foot, which keeps everything even. From the outside, it should look clean and professional.

Facing and Gathering Preparation

Next, overlock the edge of the facing and the center back. Now we can add gathering stitches to the sleeve.

Set your machine to the longest stitch and sew one line along the edge, then sew a second line just beside it.

Attaching the Facing

Now attach the facing. Do not start at the very bottom—start about 2 cm up to make sewing easier.

Place pins at:

  • the snip marking where the sleeve starts
  • the point where the sleeve ends

This helps you see exactly how much gathering is needed.

Secure one side wrapping the thread in a figure-eight around the pin, then pull the threads from the other side. This makes gathering much easier and more controlled.

I also want to mention that the original pattern actually has less gathering—this version had too much initially, so it has been adjusted.

Sewing the Facing

Now sew all the way around again. Keep edges aligned neatly. When you reach corners or curves, reduce stitch length slightly so nothing frays and the shape holds well.

At the curved section, I reduce to stitch length 1 to keep everything tight and smooth. You can also mark the curve first if needed.

Then return to normal stitch length once you pass the curve and continue to the pinned point.

Understitching and Finishing Facing

Now understitch the facing so the seam allowance is directed inward. Stitch about 2 mm from the seam all the way along.

Press everything so it sits neatly. Then pin and topstitch the front section from the outside.

I use a visible guide on my presser foot for a consistent seam allowance. I also increase stitch length to around 3 for a cleaner finish.

Instead of backstitching heavily, I go forward a few stitches, pivot, and continue neatly.

Sleeves, Binding, and Final Assembly

Now close the underarm seam, overlock it, and press. Next, attach bias binding to the bottom of the sleeve. You will also need gathering stitches here.

Measure the child’s wrist to ensure the correct fit—I’m using 6 inches here. Mark the center of the bias binding (11 inches on a 22-inch strip), and also mark the center of the sleeve.

Then mark 3 inches on each side of the center so the gathers distribute evenly.

Pull gathers until everything fits evenly, then secure with a figure-eight stitch and sew along the pressed fold.

Remove gathering threads afterward for a clean finish. Trim seam allowance slightly so it rolls better.

Final Sleeve Binding

Fold the bias binding to the outside, always starting from the inside so the stitching looks clean from the top.

Use tissue paper underneath if the fabric starts to get sucked into the machine—this is common with jersey. It helps it feed smoothly.

Sew very close to the edge, about 1 mm. At the end, remove the tissue paper—it tears away easily.

This creates a very neat finish with a small decorative tie at the end.

Finishing Details

The facing can be sewn by hand for a clean finish, like I did on the Daisy dress. Alternatively, you can sew a triangle from the outside, but if it’s not done well, hand stitching is often better.

I’ve also added cam snaps and decorative bows at the front.

The sleeves may look large here, but the final adjusted pattern has a smaller neckline and fewer gathers, which makes it much more balanced.

Skirt and Hem

Before attaching the skirt, starch fabric well if it tends to curl, then iron and overlock the edges.

Close side seams first before hemming. You can sew from the inside or outside depending on the fabric. For checked fabric, lining up the presser foot with the pattern helps keep everything even.

I also added a second line of stitching for a double-needle jersey look.

Then place right sides together and sew gathering stitches from side seam to side seam.

Distribute gathers evenly and attach the skirt. Sew carefully between the two gathering lines for control and neatness.

Final Result

And there we have it, we’ve finished the dress!

It has beautiful side ties and a very soft silhouette. The sleeves are not actually as big as they appear; they look much cuter in real life.

Check my website for more variations, including slim sleeves and elasticated versions, as well as skirt attachments in different styles.

Thank you for watching.

YOU MAY ALSO LIKE

Dungies

SHOP NOW

Bobby Dazzler

SHOP NOW

Bubble Gum

SHOP NOW

Lollipop

SHOP NOW

Jelly Bean

SHOP NOW