Skip to product information
1 of 27

VIVIENNE GIRLS DRESS

VIVIENNE GIRLS DRESS

Filled Circle
Filled Circle
Filled Circle
Filled Circle
Empty Circle
Regular price €7,95 EUR
Regular price Sale price €7,95 EUR
Sale Sold out

Vivienne is a sweet and versatile girls dress sewing pattern. Featuring princess seams, a gentle V neckline to the front and back, plus a sleeveless and ¾ length sleeve option. 

You can choose from several skirt styles twirl skirt, pleated and plain circle skirt or the classic gathered look — giving you options that work for everyday wear as well as special moments. And with a neat zipper and a fully lined dress finish, everything comes together beautifully.

Each style includes a beginner friendly video tutorial; Marina will guide you step by step and Vivienne is ready to bring a little magic to your sewing table.

Pattern Download Includes

  • Instant Download
  • DIN A4 & US Letter Size
  • Individual PDF files for every Size
  • All Sizes included
  • Detailed eBook
  • Video Tutorials

Design Options

  • Sleeveless dress
  • ¾ length sleeves with cuffs
  • Back scoop neckline
  • Peter Pan collar
  • Neckline without collar
  • Princess seams
  • Oversized tabs with large decorative buttons
  • fully lined bodice

SKIRT OPTIONS
All skirts available in peplum or knee skirt length and can be made with or without a hem trim.

  • Circle skirt pleated (box pleats)
  • Circle skirt plain
  • Circle skirt gathered
  • Straight skirt pleated (box pleats)
  • Straight skirt gathered

Fabric Requirements

BEST MATERIAL CHOICES
Medium weight cotton, linen, or wool for everyday wear. Dupioni, Brocade, or Jacquard for special occasions  and cotton Sateen with stretch for comfort.

FABRIC REQUIREMENTS
 • Circle skirt version: 1.3-2.6 yards (1.20-2.40m)
 • Straight skirt version: 1.2-1.9 yards (1- 1.70m)
 • Contrast fabric (collar & cuffs): 20 inches (0.50m)

NOTIONS

  • Tab Buttons ø 1.2 inches (3cm): 2 x
  • Concealed zipper: 12-16 inches (30-40cm)
  • Interfacing (H180): 50cm (20 inches)
  • Matching thread: 2 reels

Available Sizes

Sizes: 1-12 Years

FIT OPTIONS

  • Slender
  • Regular

AGE 7-8 ALSO INCLUDES

  • Extra slender
  • Sport

The additional sizes were added during testing as we discovered the development differences in this age group and I wanted to accommodate body shapes on both ends of the spectrum.

Please Read

  1. This is a digital pattern or PDF file, not a physical product. It will be delivered electronically via a download link delivered to the email used for the purchase.
  2. To ensure the pattern prints at its actual size, it's recommended that you use Adobe Acrobat Reader.
  3. The pattern creator, Frocks & Frolics, welcomes small-scale production using their patterns. 

Customers are encouraged to tag Frocks & Frolics when sharing projects made using their patterns on social media.

@frocksandfrolics #frocksandfrolics

View full details

STEP-BY-STEP VIDEO TUTORIALS

Thumbnail
INTRODUCTION TO THE PROJECT
Thumbnail
LINED, SLEEVELESS WITH PLAIN CIRCLE SKIRT
Thumbnail
LINED, PETER PAN COLLAR, GATHERED CIRCLE SKIRT WITH EMBROIDERED CHIFFON OVERLAY
Thumbnail
LINED BODICE, PETER PAN COLLAR & PLEATED CIRCLE SKIRT
Thumbnail
HOW TO FOLD BOX PLEATS (ENGLISH ONLY)
Thumbnail
LINED, 3/4 SLEEVES, COLLAR & GATHERED STRAIGHT SKIRT
Thumbnail
LINED ROSE EMBRODERED NECKLINE & PUFF BALL SKIRT
Thumbnail
DRAFTING AN ASYMMETRICAL COLLAR
Thumbnail
ATTAPTING THE PATTERN FOR JERSEY
Thumbnail
TIPS FOR SEWING A LINED VIVIENNE IN FINE JERSEY

VIDEO TEXT

Transcript for the video: Vivienne Girls Dress - Introduction to the Project

Hi everyone and welcome to my new dress design it's called the Vivienne. It's sized from 2 to 12 years old so you will find when you look at your pattern pieces that the smaller sizes from 2 to 8 all look the same, and then the ones from 8 to 12 all look the same.

Here we've got the back and we've got one center back panel and then two side panels, one for sleeved and one for the sleeveless option. In the front it's exactly the same as in the back. You've got all your options here, and then for both we've got the back lining and the front lining as one piece lining. This makes it much, much easier to put this together.

Due to the shaping from 8 to 12 you can't have these one-piece linings anymore, but we also have a center back for the sleeveless and a center back for the sleeved version to go with the side panels. The same in the front, we've got two center front panels as well.

The only important thing is that when you cut your pattern out that you put the right ones together. And as always, we've got everything marked for you.

Sleeve and Pattern Identification

I've actually got, and this is not a lipstick like somebody suggested, I've got a little sleeve on here so you know immediately this is the sleeved version.

So if you're making a sleeved version then you cut the whole bodice part out with everything that has a sleeve on it. And if you're making the sleeveless version then find all the bits that have the little sleeveless diagram in it.

You also get with your pattern pack all your dress options. The skirts are either a straight skirt, which you complete or gather. It's not that wide. If you wanted a really big pleated skirt you can just make it bigger and do it as you want to.

I've actually worked the box pleats out for every size, almost to every cm, so it is quite nice if you can just cut out and go. You can make that also gathered.

Then the third skirt is the plain circle skirt, which is like this or flat to the top. And then we've also got a box pleat circle skirt, and that is really nice because it gives you lots of volume yet not so much volume up here. It's nice and flat, so I really like that too.

You can make it with a collar obviously, and the cuffs on there, the tabs on the side, you can leave them on or put them on. Anyway, you've got a diagram here that tells you how to do that.

Sizes and Fit System

I thought I would end up with 10 sizes and I've ended up with 20. Why was that? Because when we were testing this dress we found that most kids actually didn't fit into the suggested sizing from standard sizing that I'm using.

But for the fittest dress it really was quite important that I had more sizes for you to go on. So we've done everything in a slender size and a regular size.

Then also at 7 to 8 we found vast differences in sizing. For that you've actually got four sizes. So you've got 7 to 8 extra, slender, regular, and sport, which is the wider width cage.

So you don't have to go now and get the size 14 to make it fit you. You can just go for the sport in the appropriate height for your child and also in the appropriate shoulder width. That's really important.

The important thing when you're choosing your size is that you go by height first.

Sleeve, Collar, and Construction Details

Quick look at the pattern. This is my sleeve pattern. You've got a little mark on the back, that's where the cuff is to be attached.

The cuff itself needs to be folded over. It comes in two parts that you need to sellotape together for most sizes. For small sizes it comes as one part. Then when you attach it to that point there you get that cute little opening at the back of your arm.

Then we've got the collar. It's very high round the neck at the front, and then you've got this lovely swoop in the back. It's age appropriate for the sizes, so it'll be less swoop on the small sizes, more swoop on the big sizes.

Tab Placement Adjustment

Now let's have a quick look at the tab. Initially on my video instructions I say put the tab onto the center back piece, but actually I found that because it needs to be almost put on so it looks wrong, people did get it wrong.

So why not put it simply onto the side panel? That's much easier and then you can see it will be straight.

So let's just put the side front panel under to see where that ends. It should just end where the panel ends and then you can put a cute little button on the top.

Skirts and Construction Options

You have three different skirts.

The plain circle skirt has black dots. You've got a peplum length, a shorter length, and then the classic standard length. It goes together A, B, C in alphabetical order, and you want to cut that as a full circle. Duplicate it four times and then stick them together and cut out your circle.

This is the bigger circle for the box pleat, again alphabetical order A, B, C, D, E, and F depending how big your skirt is. We've got blue dots marking though so you can't get them confused.

You put the box pleats in by just folding from the side towards the center. Of course you need to cut two backs and one front on the fold. When you're cutting on the fold you need to fold away the seam allowance.

And again we have got the peplum length, the shorter length, and the regular length. So let's fold away that seam allowance now so you can see what that needs to look like.

I'm going to fold this away and then turn it back over, and that now would have to lie on the fold of the fabric. That way I get a whole big front and then I cut two backs as well.

This is the final skirt. It's got pink dots for the back and black dots for the front so you can't get confused. We've got the box pleats again and the peplum length and the regular length.

Now if you wanted a bigger skirt you just need to extend to the side and make it much bigger.

We've had a fantastic success with this and I hope you really, really enjoy making this dress. Let me know how you're getting on. Join our Facebook group, post a picture, and really enjoy this.

Thank you very much for watching

Transcript for the video: Vivienne Girls Dress - Lined, Sleeveless with Plain Circle Skirt

Hello everyone and welcome to the Vivienne. This is my new design and you can make this dress in so many different ways. You can put a collar on or not, you can put sleeves in or not, you could use a circle skirt, you could make it with a gathered skirt. The options are just endless.

Here I'm going to show you how to make it with a circle skirt and beautifully covered by the gorgeous hair was just the back neckline. So let's have a look at this dress.

I'm using a fully lined circle skirt here and we are going to use a concealed zip to finish this dress off and give it the really nice fit.

Pattern Overview and Fabric Notes

Here you can see that my princess seams are so obvious because I didn't really line up my checks very well. So the way around that is to just simply use a different fabric for the sides.

All your princess dresses here, they are sorted with this one. It's a fabulous little dress which you could also make with a collar and tabs and beautiful sleeves with these gorgeous little cuffs. This comes in a different video. It has a gathered skirt which you of course could also put on this one.

We're doing now the sleeveless option and we've got that beautiful petticoat which has all gathered bit at the hem. Here again, concealed zip, absolutely beautiful finish.

If you want to know how to do that, that's videos coming up as well.

Cutting and Construction Preparation

The front is cut on the fold and then you've got two sides to that, and that gives you the princess theme. Just like I said, it's far easier if you cut them on the diagonal or use a different fabric altogether.

And that's the back here with a nice swoop. The lining of this is actually cut in one piece. My zip here is 37 cm long, that is about 14 in.

So let's put together the back. You actually have these markings which you need to snip when you're cutting out, and that tells you where you have to sew the center back to the side back. That makes it also very easy.

If you've got a check fabric like I do here, it's not so easy. I actually ran out of fabric so my checks really don't line up and there was nothing I could do about it. The easiest way really is to just not use a check fabric on the sides.

Sewing the Bodice

Now we've pinned the front and the sides. We could also have a tie here.

Next step is to sew close your lining across the shoulders. Place with the right sides facing each other, the shoulders on top of each other, and stitch with a 1 cm seam allowance.

Now you're going to sew the side pieces to the center backs and to the center front. Again we have the 1 cm seam allowance. Just take the pins out as you go along.

Now I'm sewing the front and I do it exactly the same as on the back. And now that that's done, I'm going to close the shoulder seams of my dress as well.

I have just sewn those together too, and now I'm moving over to the ironing board and I'm going to give this all a good press.

Pressing and Assembly Order

Let's just recap. We're putting in the sides to the front and the back, we're closing the shoulder of the shell and the lining, and then we're ready to put them together.

You always want to iron the princess seams towards the center front or the center back. Iron the seams apart of your lining.

Skirt Construction

Now I'm going to prepare my skirt first. Don't get confused here, I changed the way I do it so your circle only has one seam and that's the center back.

You place your lining with the right sides down onto your shell fabric and you sew it all the way around only. Instead of having a half circle, you've got the full circle.

We're going to sew it all the way along the edge with a 1 cm seam allowance, then cut this seam allowance back and turn my skirt.

Next we press this. In this rolling motion I make sure that it's edge to edge. You can understitch if you want, but I left this out because I found it not necessary.

Now we're going to close the center back from where the snip is so we can put the zip in at the top. From the shell fabric opening all the way down into the lining, leaving the top open for the zip.

Neckline and Armhole Construction

Now we're going to work on the bodice. Take your lining and place it over your shell fabric. Then we're going to close the neckline, stopping about 3 cm from the center back.

We sew all the way around the neckline, and we also do the armholes in exactly the same way.

Any diagonal areas can stretch, so my trick is to cut strips from fabric and use them as stabilizing tape along the neckline and armholes. This is like industry China tape. It keeps everything flat and prevents stretching.

Now I've sewn this all on. I'm cutting back the seam allowance so it's nice and slim. I'm also snipping the curves so it lies nicely.

Now I'm going to pull the back through the front. This is the same method used in my flower girl dress.

Turning and Pressing

Once that's done, I can iron the neckline and armholes. Take your time with this because it's what will be visible from the outside.

What you will see straight away is that it doesn't stretch anymore. It's firm around the armholes now.

Side Seams and Construction Adjustment

Now we close the side seams in one go. Start with lining and go onto the shell, 1 cm seam allowance.

Iron seams apart and then turn everything through to get a clean finish.

Next we pin the shell skirt to the shell lining. The hem is already closed, so it will feel like pulling a sausage through. Just follow the rule that right sides must face each other.

Zip Insertion

I'm cutting back my zip slightly because my seam allowance is only 1 cm.

First we do a holding stitch with the zip teeth facing you. Right side of fabric to the outside.

Then we pin the other side, making sure waist seams line up. Zips often look like they don't fit, but they do.

Stitch with a normal foot first, then switch to a zipper foot and sew down the gap.

After that, fold in the lining and zip over the top and stitch the small section closed.

Finishing the Zip by Hand

Now we sew the lining to the zip by hand. I really like doing this for control.

Use a needle and thread, pick up a little bit of zip and then a little bit of lining, working your way around carefully.

Final Result

Now the dress is finished. I'm hoping you are really excited about this one and want to make your own.

This dress is part of the Wonderland Collection. It is a summer, winter, autumn, spring dress. This dress has so many options you probably never need to buy another dress pattern again.

Anyway, I hope you enjoy it and I shall see you next time. Thank you for watching until the end, bye for now.

Transcript for the video: Vivienne Girls Dress - Lined, Peter Pan Collar, Gathered Circle Skirt with Embroidered Chiffon Overlay

Guess what, we're back with another Viv video, and this time I've gone all out here. I've made this beautiful dress, and it's got a silk organza skirt which is lined with satin, and I've got a dupion cir bodice. We've got a bow here, and instead of having the tabs that come from the back and go to the front, what I've done is I've put a tie in, and when you turn it to the back, you can tie it into a bow or just leave it hanging like that. I think it's really beautiful. It doesn't have to hold in anything on these dresses because they're fitted, so you could just tie it. It doesn't quite fit on here because I've got a very tiny model, but you've got the beautiful, beautiful collar here, and what I've done is I've actually covered it with the same fabric that we've got here.

And because when you're working with oranza there are a few things that you have to work differently. For example, when you want to put in the zip, you can put the zip straight under the oranza and it will look really, really horrible. So we're working this kind of a little bit backward and then ending up with a seam here which captures all the fabric in together, and that way it's a beautiful finish for my zip all the way down.

And because that's really quite different to how you would work normally, that's why there is another video. This video is not as detailed. It won't show you every single step on the sewing machine. It'll show you every single step though in the instructions so you can see: then do this, then do that, then do this. If you wanted to see every single sewing step for the Vivienne dress, you have to go back to the original videos. This is really for when you want to make a very special occasion dress and a labor of love.

Now let's get started with our pure silk dress.

Pattern Pieces Overview

That's a quick look at the cutout pattern pieces. We've got the collar four times; you need that two for left, two for right, and the overlay which is in a silk organza. Then we need for the undercollar the Vilene or interfacing. You also need a strip so that you can make your ties. You need to decide on your width minus 15 cm, and the length should be about 90 cm up to 120 cm. Then we've also got a bow and the center of a bow, and we've got the front and the back and the side pieces.

The lining comes in a one piece again, so no joining of the princess seams here. And then we've got the front for the oranza skirt on the fold and two back pieces, and the matching lining for this. It's exactly the same pattern, but here I was able to cut the circle in one go and just open up the back.

Collar and Preparation

Now the first thing to do is to put over the overlay on the collar, and I would just pin it in a few places. Then you need to put the Vilene or interfacing onto the undercollar, iron it on, and then with the right side facing, you're going to sew this together all the way around and leave the neckline open.

Obviously, once you've done that, you might notice on collars like this that the front of the collar stands up. So what you do is you push down the upper collar, about 2 or 3 mm, which will automatically push the collar down instead of pushing it up.

Ties Construction

Now this is my ties. I've sewn them together with 1 cm seam allowance, and mine are quite slim really, but you could, like I said, make them much, much wider and then gather them. So here is my tie. You work out the edges, and I would definitely have a tip at the back.

Bodice Assembly

Then we're going to put the bodice together, and you have got the side panels for the back and the back, so that's easy. And in the front you need to insert the ties you've just made.

And you can see here mine was already done, I forgot I had to go back. So the ties go about 1.5 cm above the edge of the fabric, and then from the inside I'm going to cut off that little triangle. I wouldn't do it before because it can easily go wrong. Just make sure it goes in dead straight.

Then you also close the shoulder seams, and you're ready to put on your collar.

The collar is just stay stitched all the way around. Then you're going to put your lining over the top, and you're also going to sew that around the neckline and stop 4 cm before the end. And you're also going to do the armholes, and there we go, bodice is finished. And as you can see, the collar stays down nicely. Lovely ties. You can make them longer as well if you like. Like I said, 90 to 120 cm for bigger girls, 150.

Side Seam and Structure

Then we're going to do the side seam, and when you iron the side seam you want to release the tension on either side of the seam so that there's no pulling, and then you can push it back, iron it, and the bodice is almost prepped up.

But we need to do one more thing, and that is at the back we want to put on some Vilene or iron-on interfacing so that when we put the zip in this can't rip out at all. So that's very important, make sure that's secure on there.

Skirt Construction

Now we are finished with our bodice and we can start on the skirt. You want to close the side seams of the skirt first, but this time we're doing a French seam. So we're sewing it together with the right side facing the outside and a 5 mm seam allowance only, and then cut it back. Iron it if you like, or just fold it over and do another seam, this time the right side on the inside.

Then we are going to put the lining over the top, but instead of what you usually do, which would be shiny side down here, shiny side is up, very important, it looks much nicer. And you go all the way around the skirt, pin it all in, and half an hour later you've done it and you can sew it together afterwards.

You need to cut back your seam allowance quick sticks, and then you can understitch the whole lot and turn it over to the right-hand side and press it.

Now if you're working with polyester fabrics, you might want to put an ironing cloth over it. For me it's fine here because I use silk organza, and silk can take any heat, it's not going to burn, it's a natural fiber.

Next we're going to over the center back seam, and then you can pull away your overlocking, make it nice and neat, and we're also going to put some gather threads in here. I'm not going to pleat it this time. Two lines of stitching, use good thread so that it doesn't break when you pull them, and you're only going to pull the upper threads to put the skirt on.

Then you can close the center back seam. Some people like to leave that open and do it last and put the zip in, so either side first and close the center back last. You can do that however you like, whatever you prefer. I've used both methods; they both have merit.

Zip Insertion

I have now attached the skirt and it's all gathered and lovely, and I know it's caught nowhere, and I'm going to put my zip in.

How to put the zip in, you can see in the Sewing Workshop video showing you how to do the concealed zip. Now what I would like to say here is that because the zip ends are really long, I will trim them down so that you do get your 1 cm seam allowance because it's really difficult otherwise to line it up properly.

Then we're going to pin in our zip and sew it in. And when that is done we use the old trick of folding over the lining and then the zip over it, sew that little bit down, and you're done basically. It's so simple and your top edge comes out beautiful.

If you want you could also put hook and eye in here just to make sure it doesn't pull. I tend to just leave that.

Then we have to do a little bit of hand stitching, slip stitching this, and again this takes quite a while. We want to pin it in all very neatly, and at the bottom as well covering all my seam. And when you've done that there's a whole lot of slip stitching to be done, and afterwards well that's basically the dress done.

Bow Construction

Now if you want to put a bow on the front as well like I have done, what you do is take a letter size or A4 piece of paper, a little bit wider than that, and then you fold one of the long sides over, and then the other side so they slightly overlap.

Then you come in from the side and fold that over as well, and then from the other side and fold that over as well so it overlaps. Make sure it's nice and straight, all of it.

Then you want to fold it over so you get a crease and you know where the center is. Get yourself a needle and thread, double thread I would, with a knot in the end, and then we're going to do a running stitch through that crease all the way to the top and then pull so that we get our bow. It's really terrific, easy. I really love this method, and it gives you a very nice and big and voluminous bow.

Wrap around, secure your thread, and all you need to do now is the center. So grab yourself a ribbon or the same fabric, in my case I just used both sides in a center piece, and then you stitch that to wrap it around really neatly, and then we can secure it from the other side again.

It's always nice to use a contrast. This particular bow I made for the Wizard of Oz themed wedding where I did the flower girl, and I thought that would be really nice and to tie it all in.

And there your bow is finished, just needs putting on the front of the dress, and we are done.

Closing

Thank you for watching again, and don't forget there are many more videos, and you can go on FrocksandFrolics.com, find the project page for the Vivienne dress, and you will find many, many more ideas on how you can use this pattern. Bye and see you next time.

Transcript for the video: Vivienne Girls Dress - Lined Bodice Peter Pan Collar & Pleated Circle Skirt

Hi everyone, I’m back with another variation for my Vivienne dress. This time I’ve used a denim fabric printed with quite a bit of stretch, and this is the same pattern that I’ve used, and the same size, as I’ve used for the little silk dress with the organza skirt, which didn’t fit on the dummy and could not be shut in the back.

So you can see what a massive difference fabric can make.

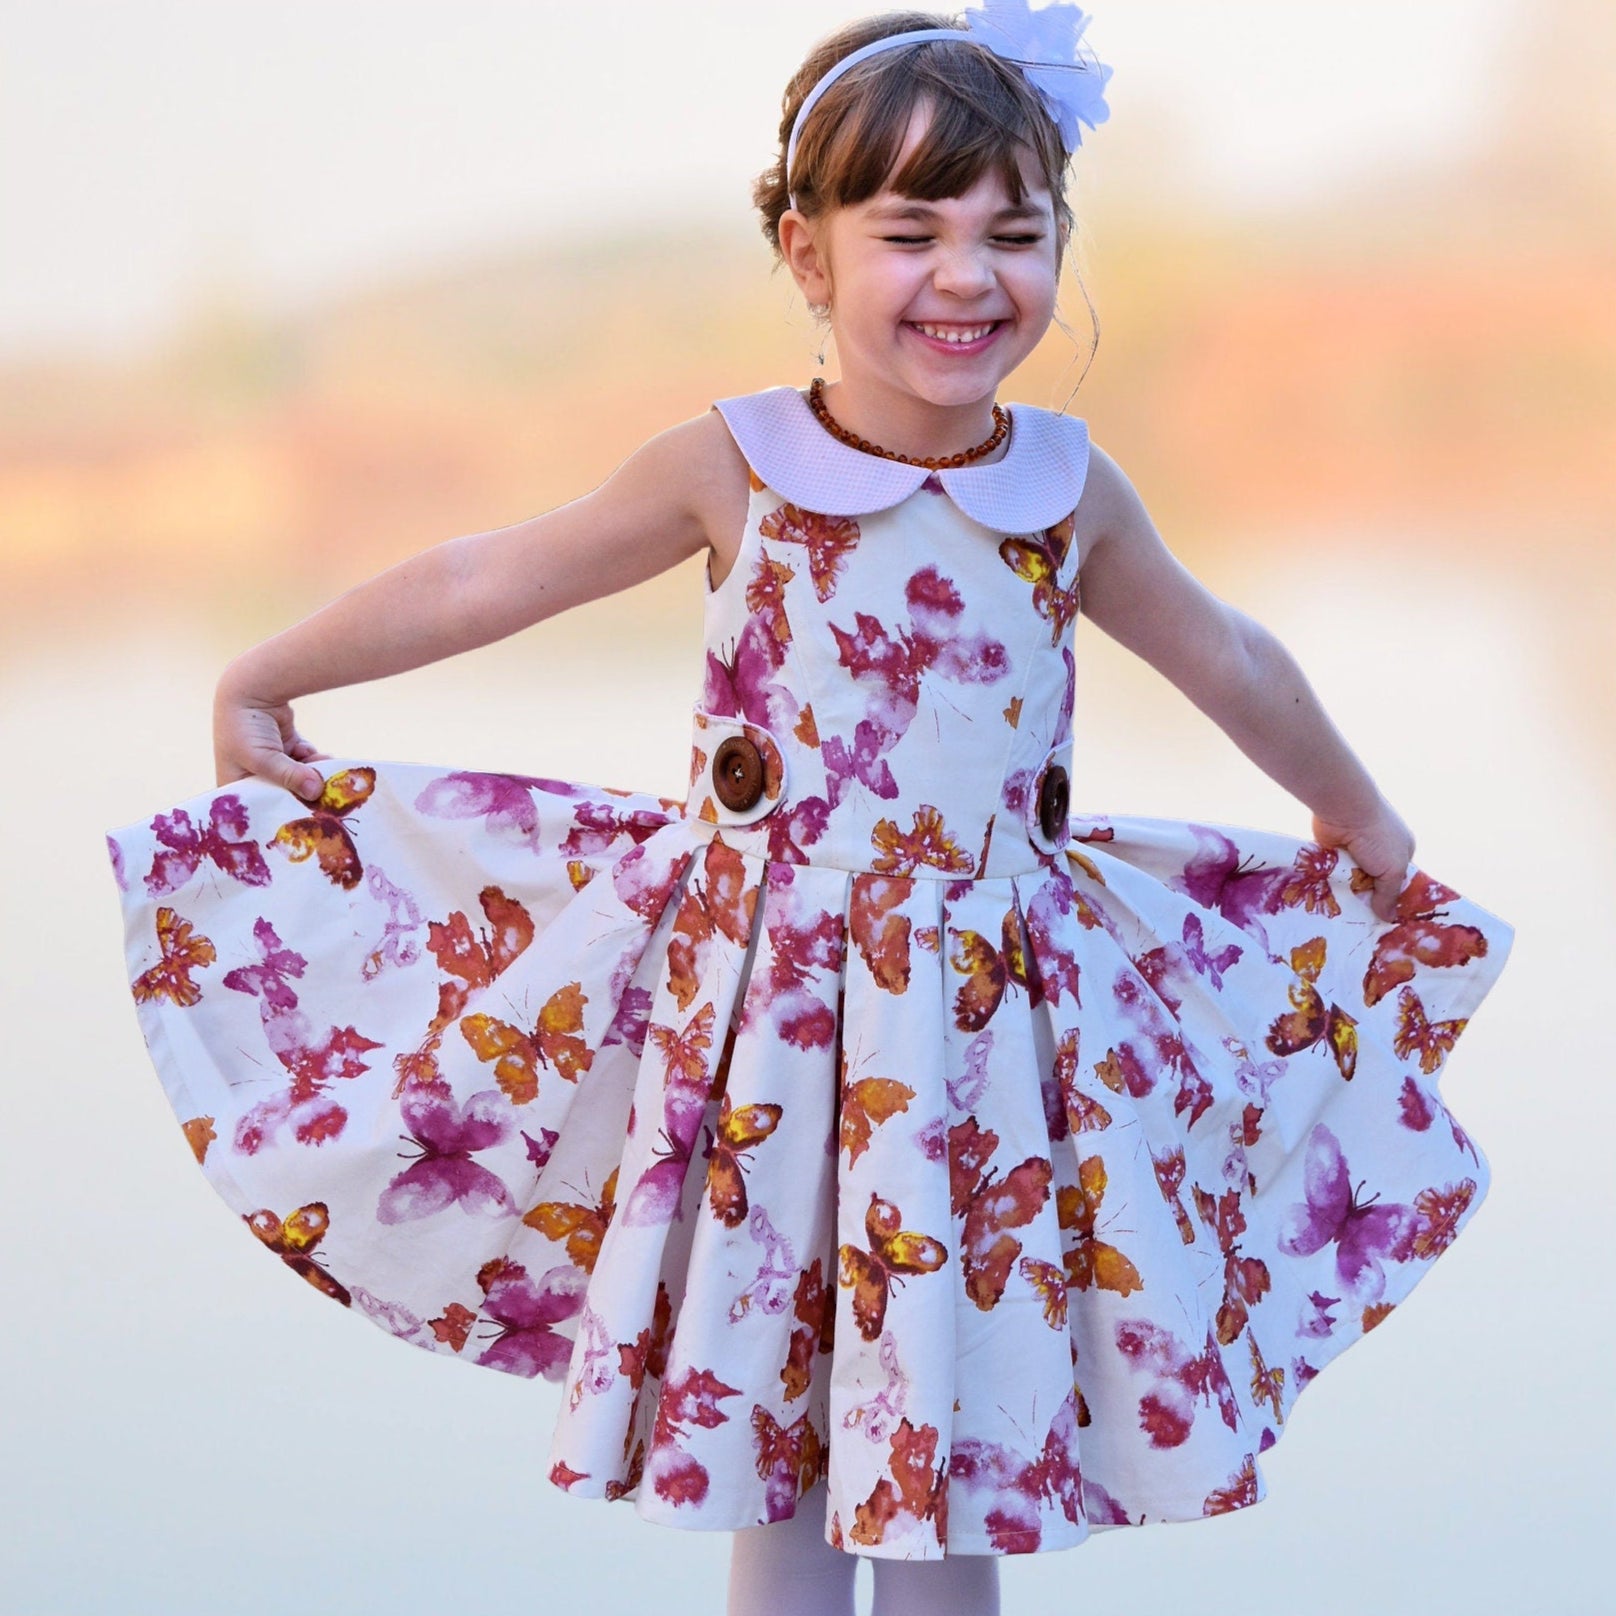
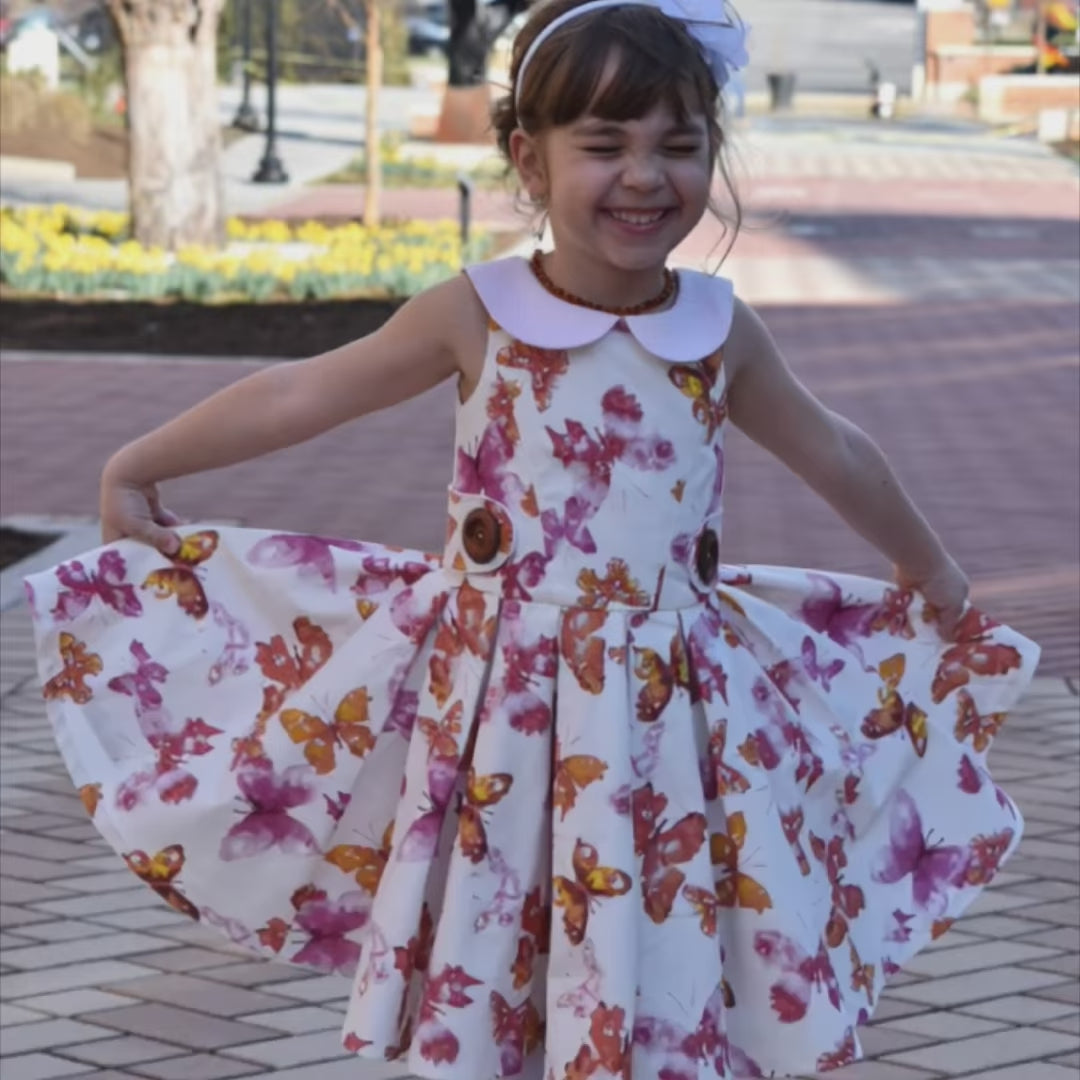
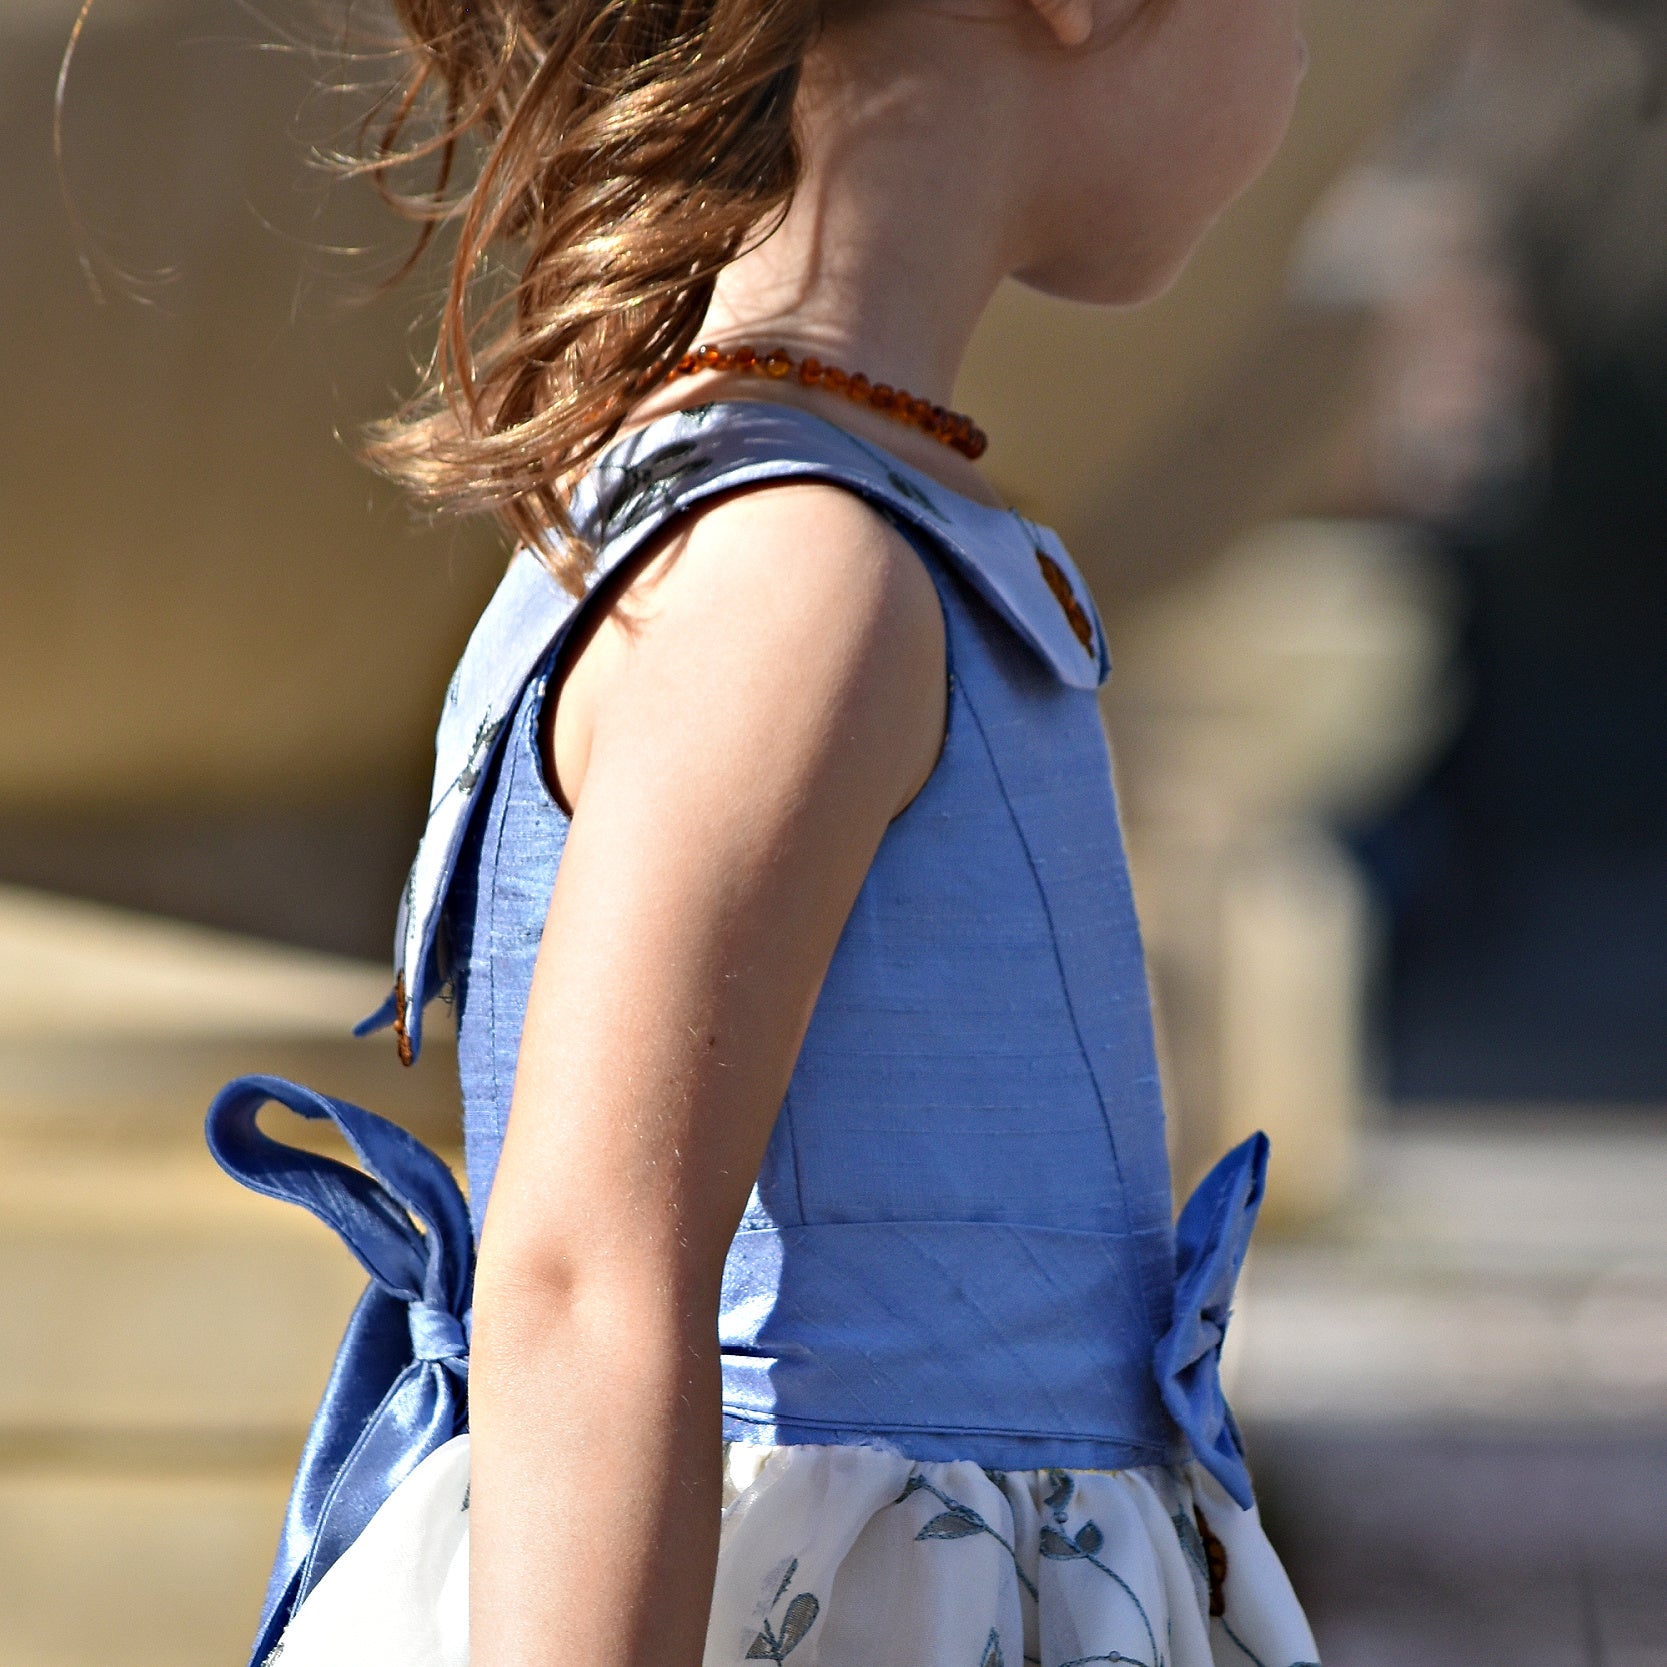
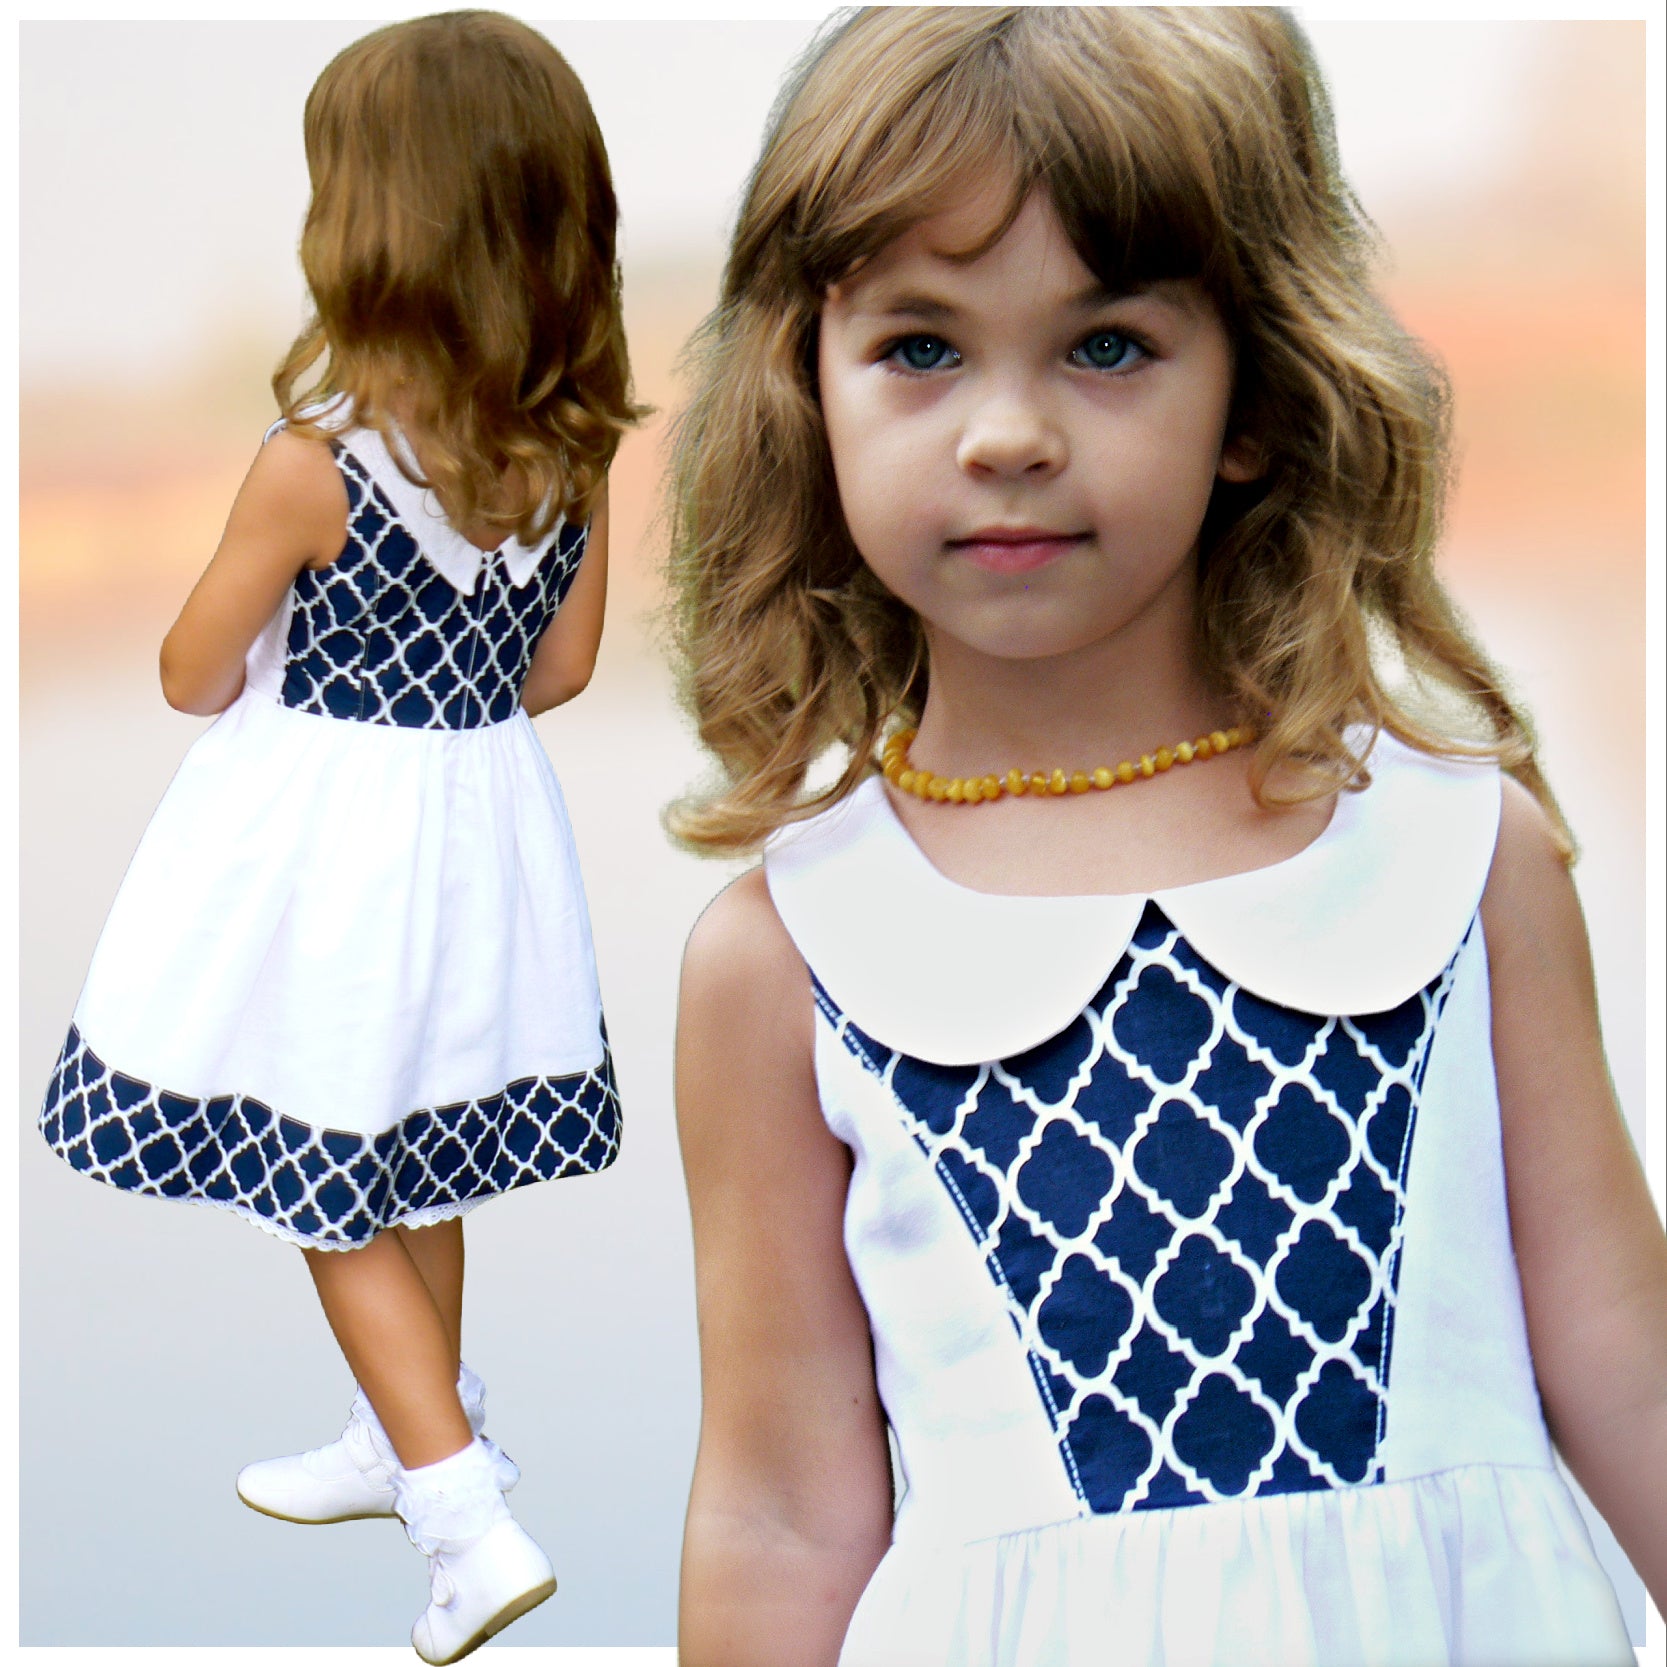
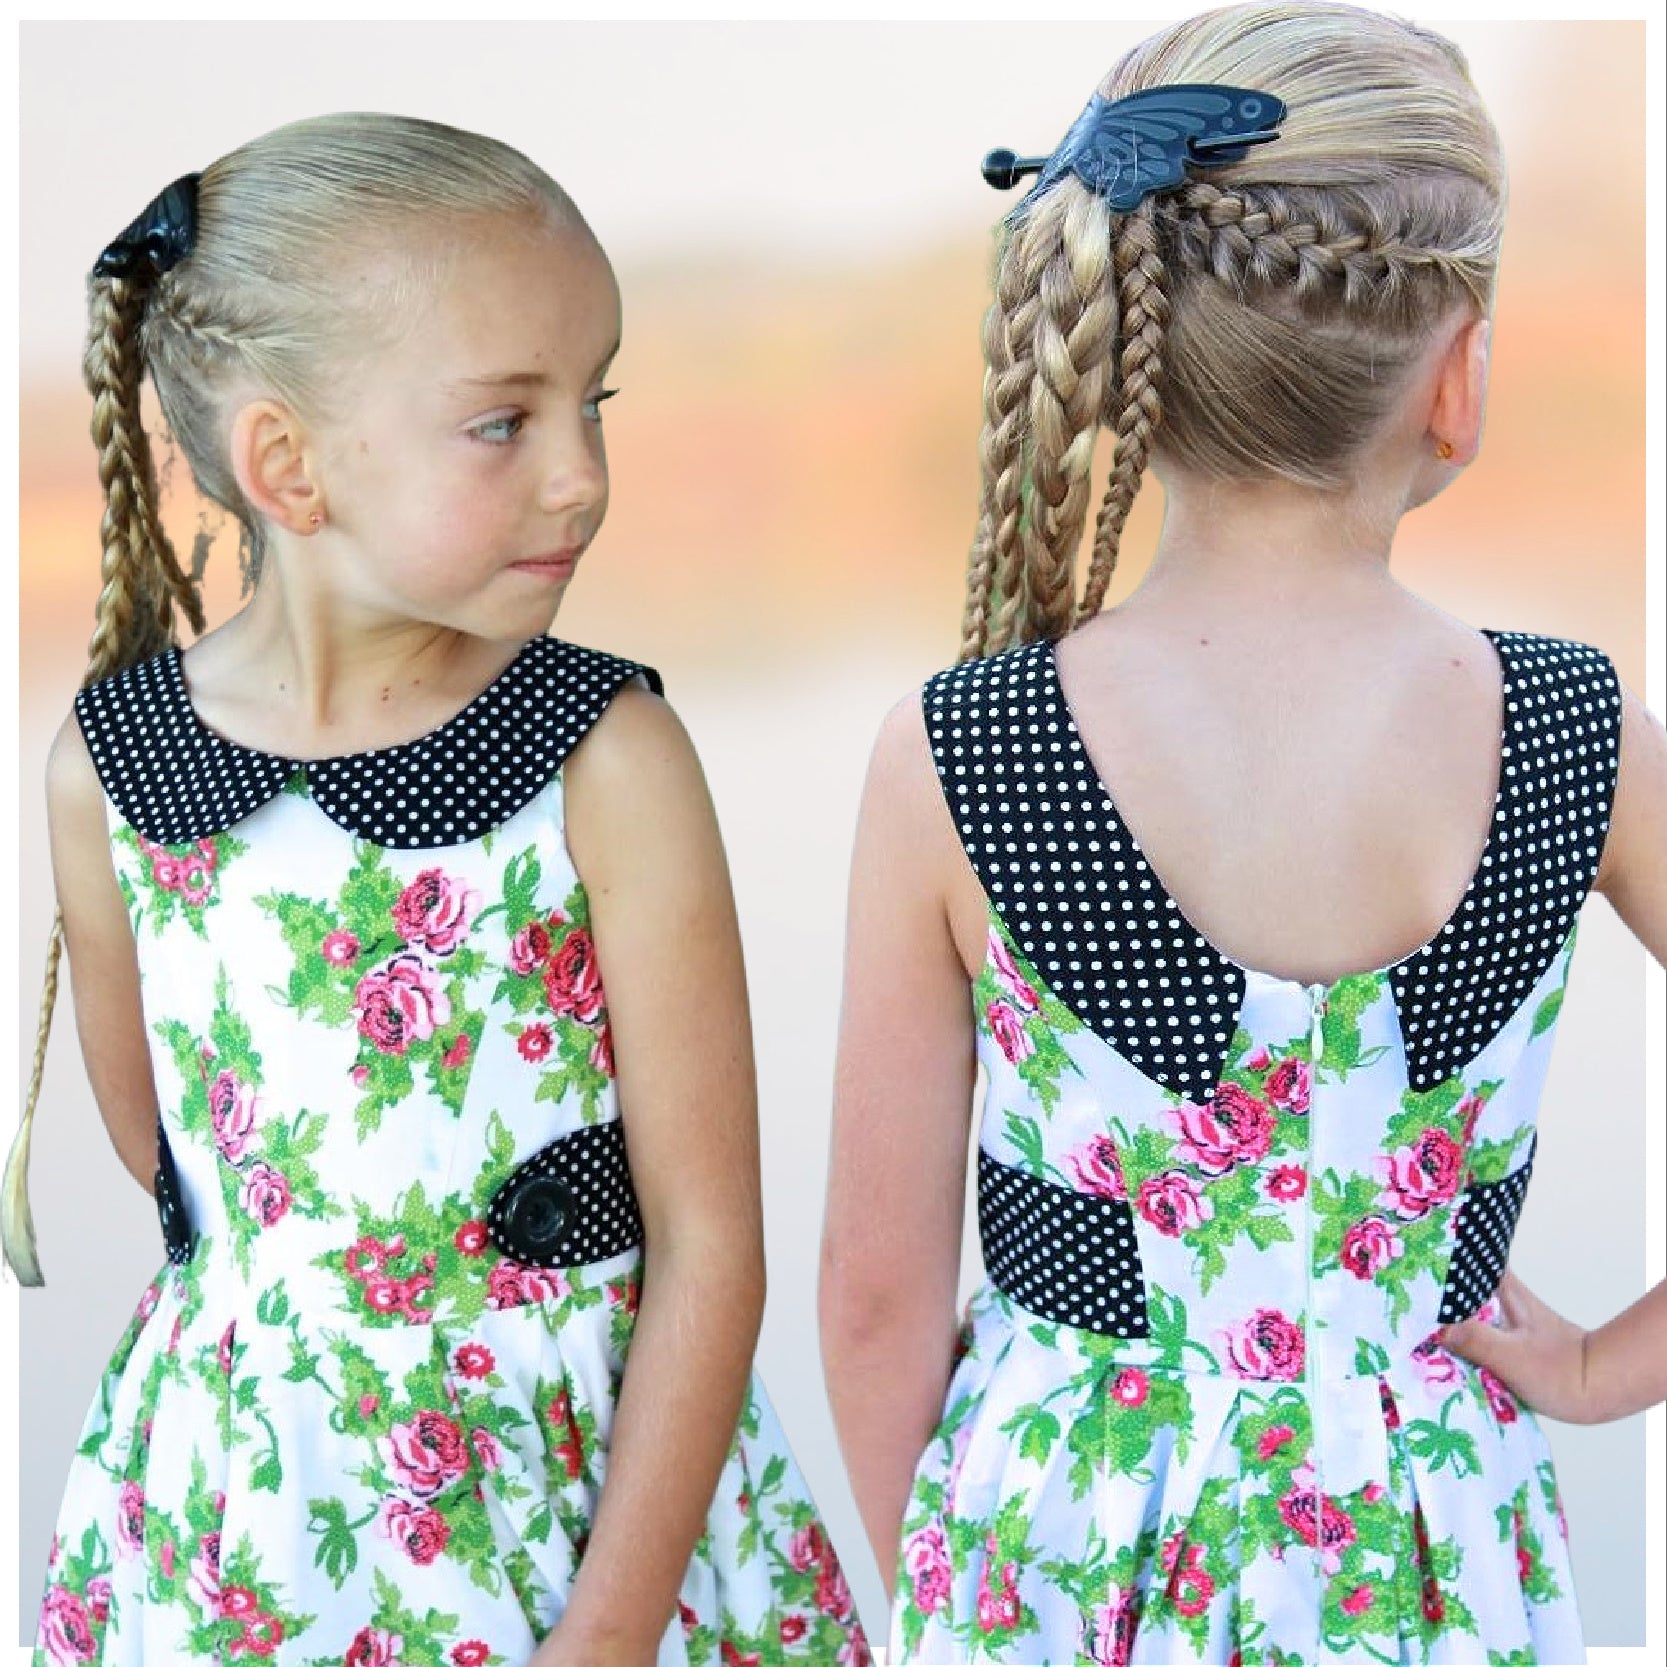
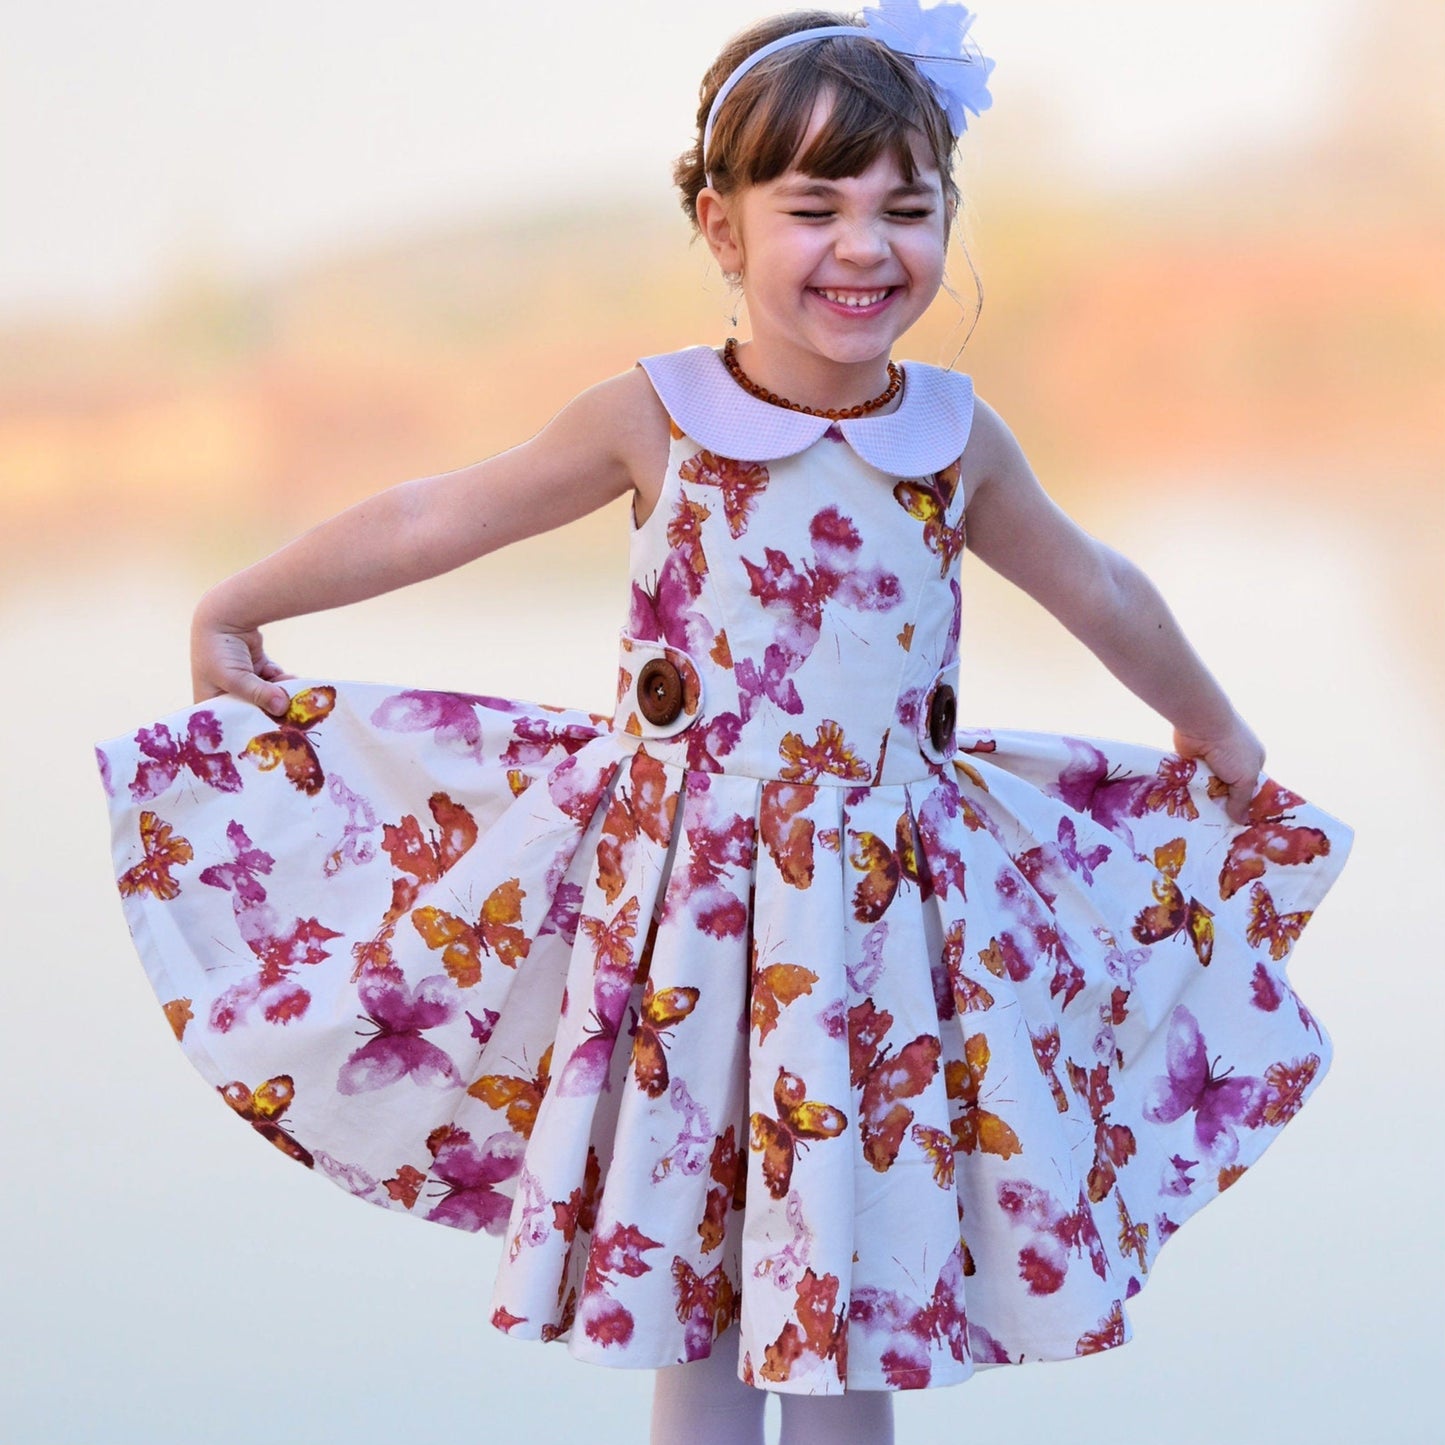
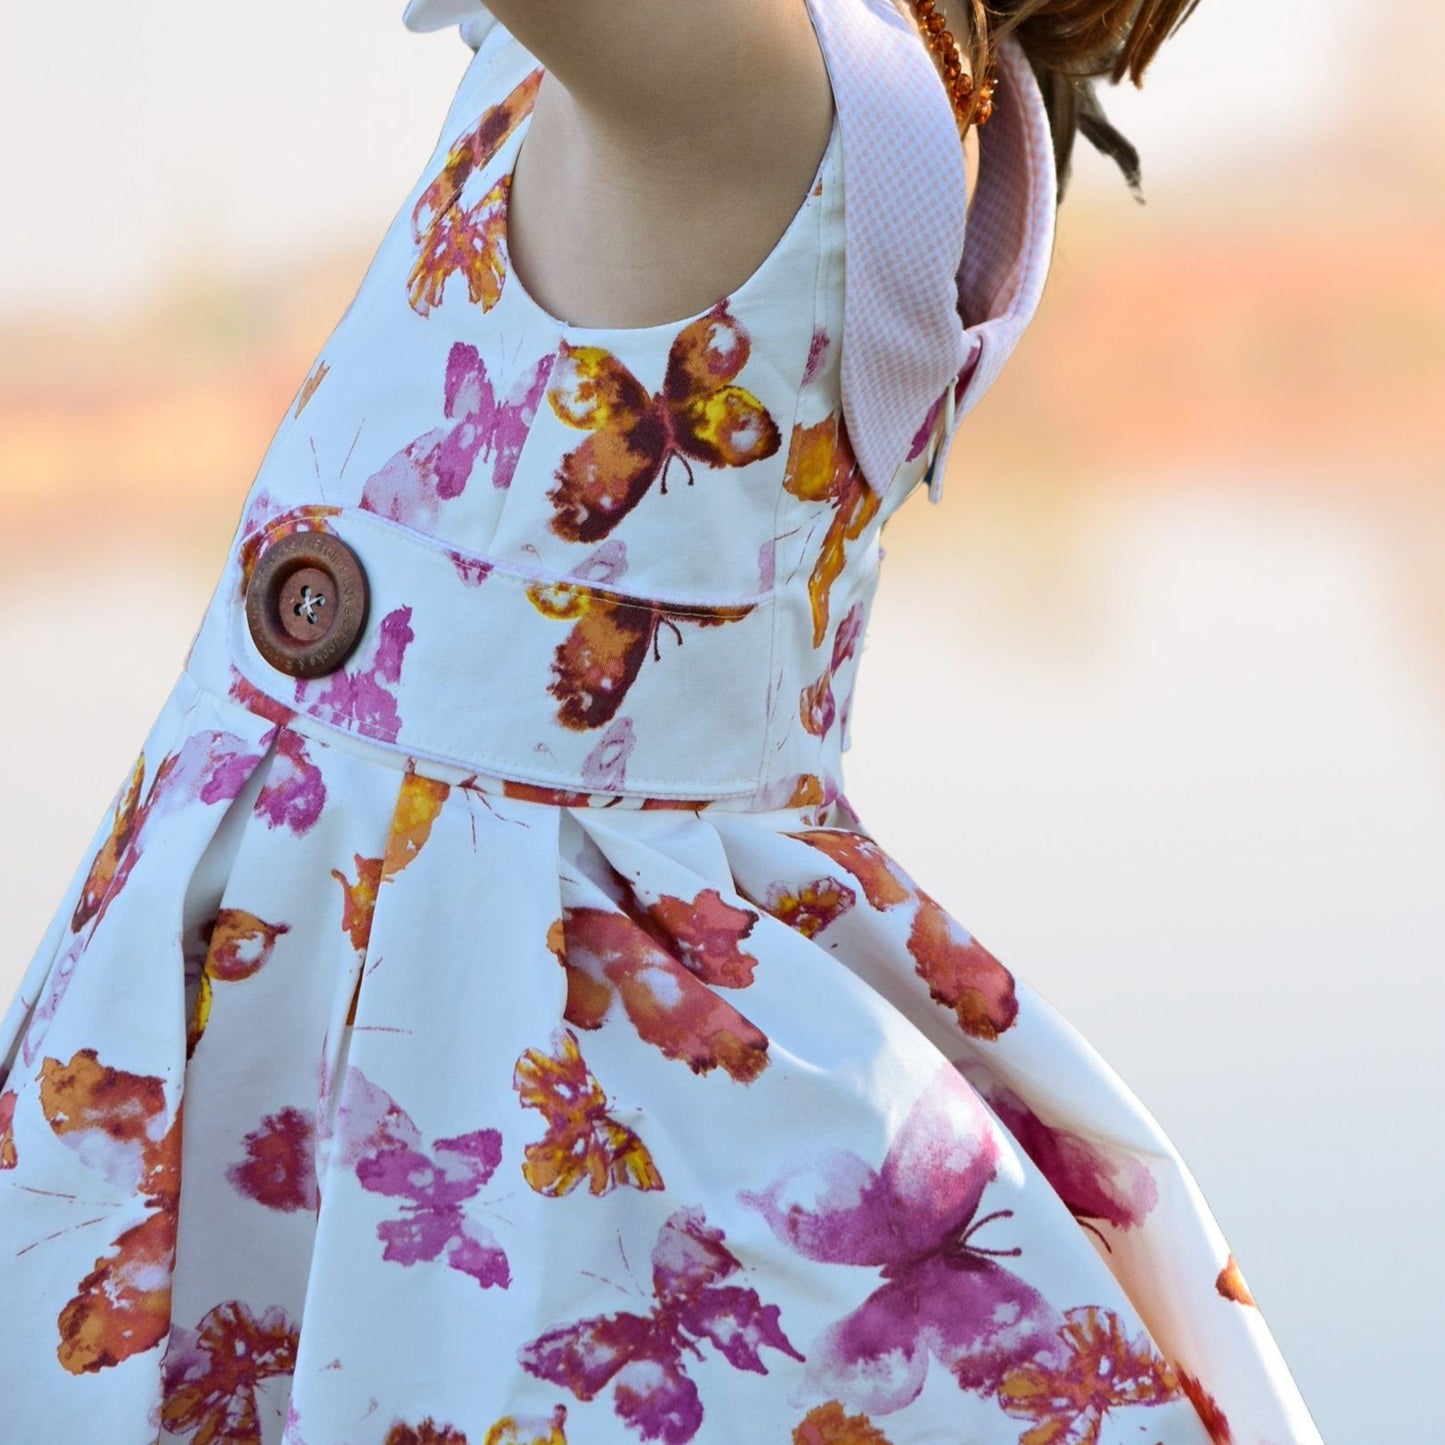
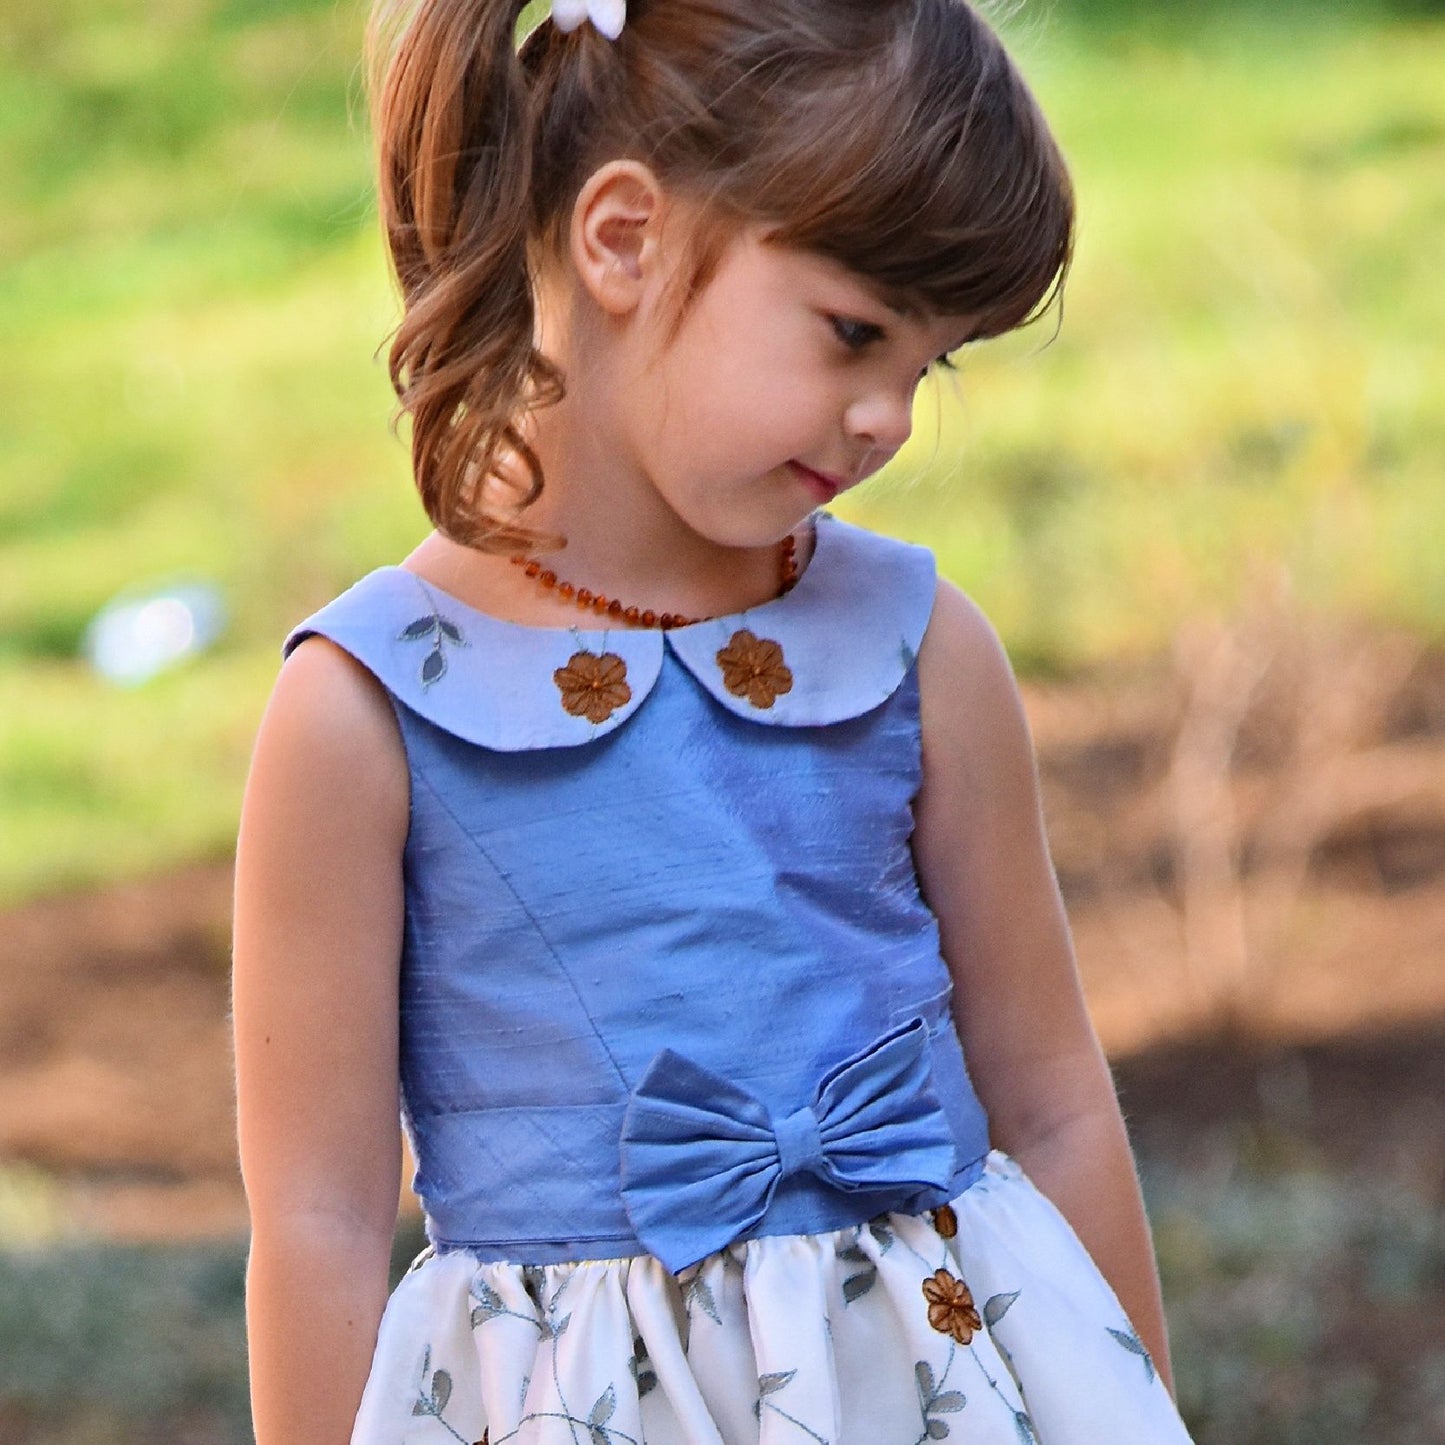
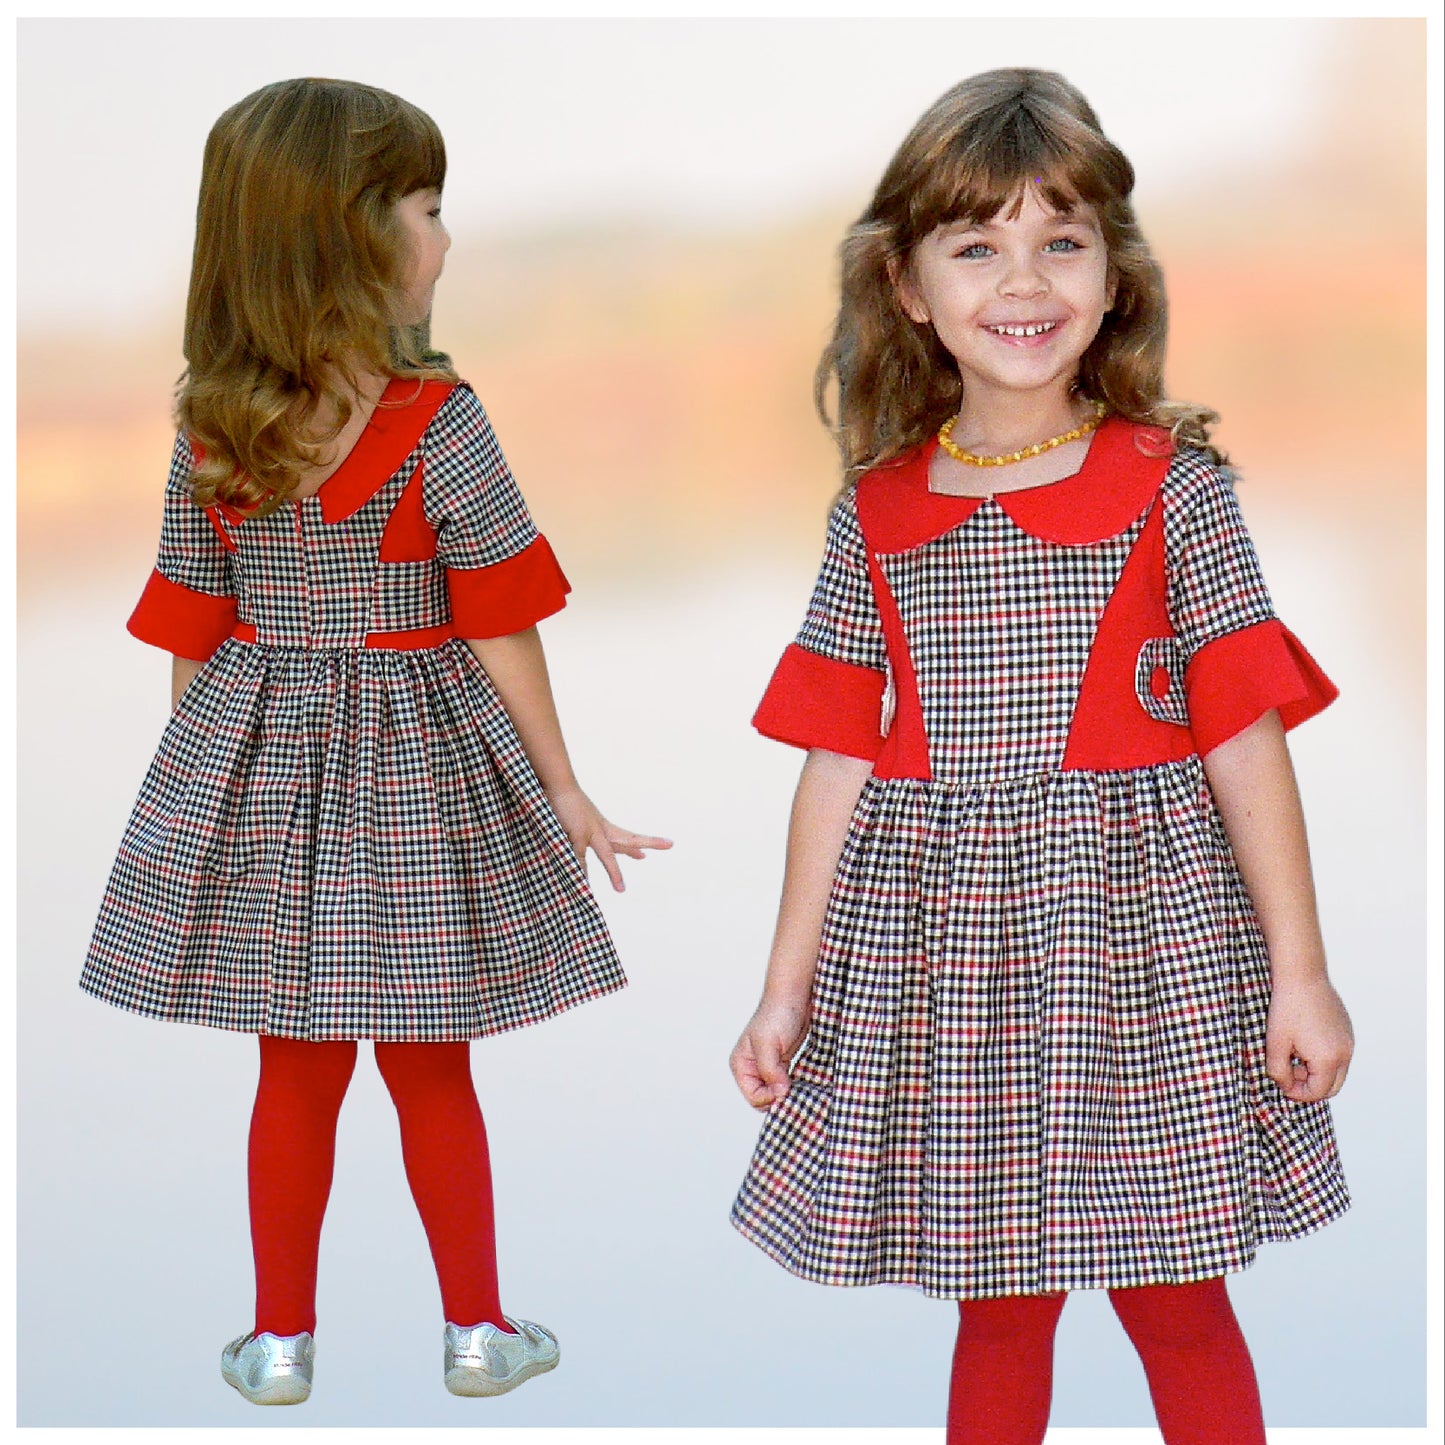
On this particular dress, the skirt does not have a lining. We are just going to overlock and stitch it up. We’ve got the same typical Vivienne collar here, and we’ve got those beautiful buttons that say “Love Frocks and Frolics.” I like those.

Anyway, on this dress it’s all hand stitched too, also along here, and you’re getting a very clean finish.

Pattern Overview

So we can now get started with how to sew one of these lovely dresses.

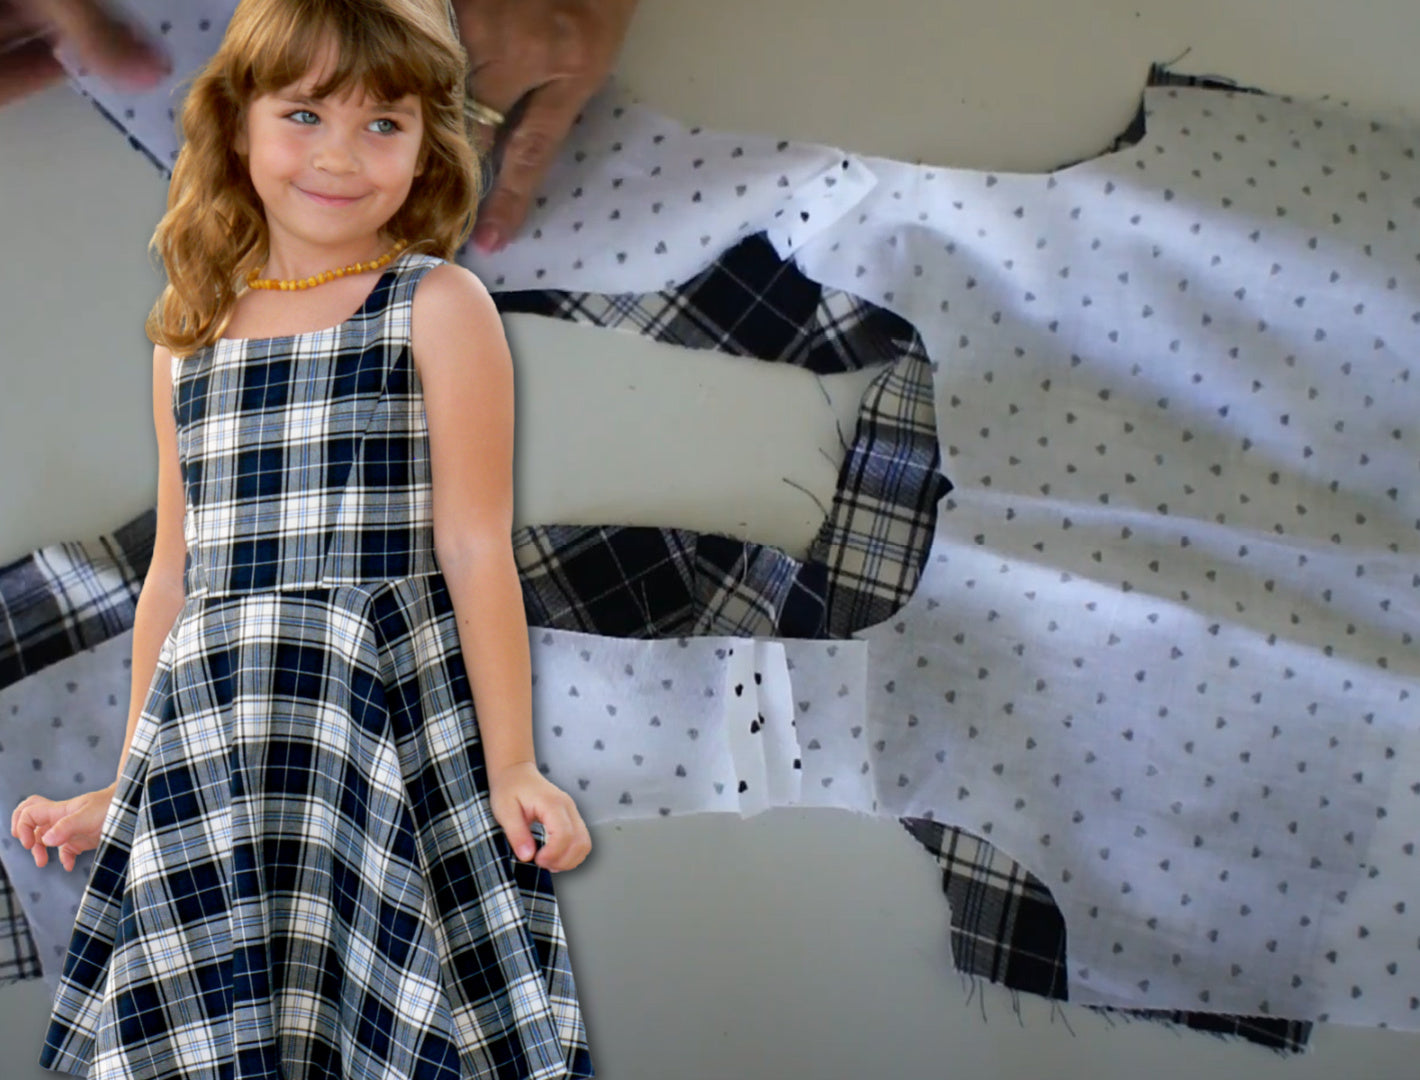
We have, for the back, two backs of course, and the sides for that. Then the front has a side as well on the upper fabric and the center front, which is cut on the fold.

Then we’ve got the tabs. You want them in Vilene, you want them in lining, and in the shell fabric. The lining I’ve also cut a little bit bigger so that it looks when it’s done as if it was piped. You can of course pipe it too.

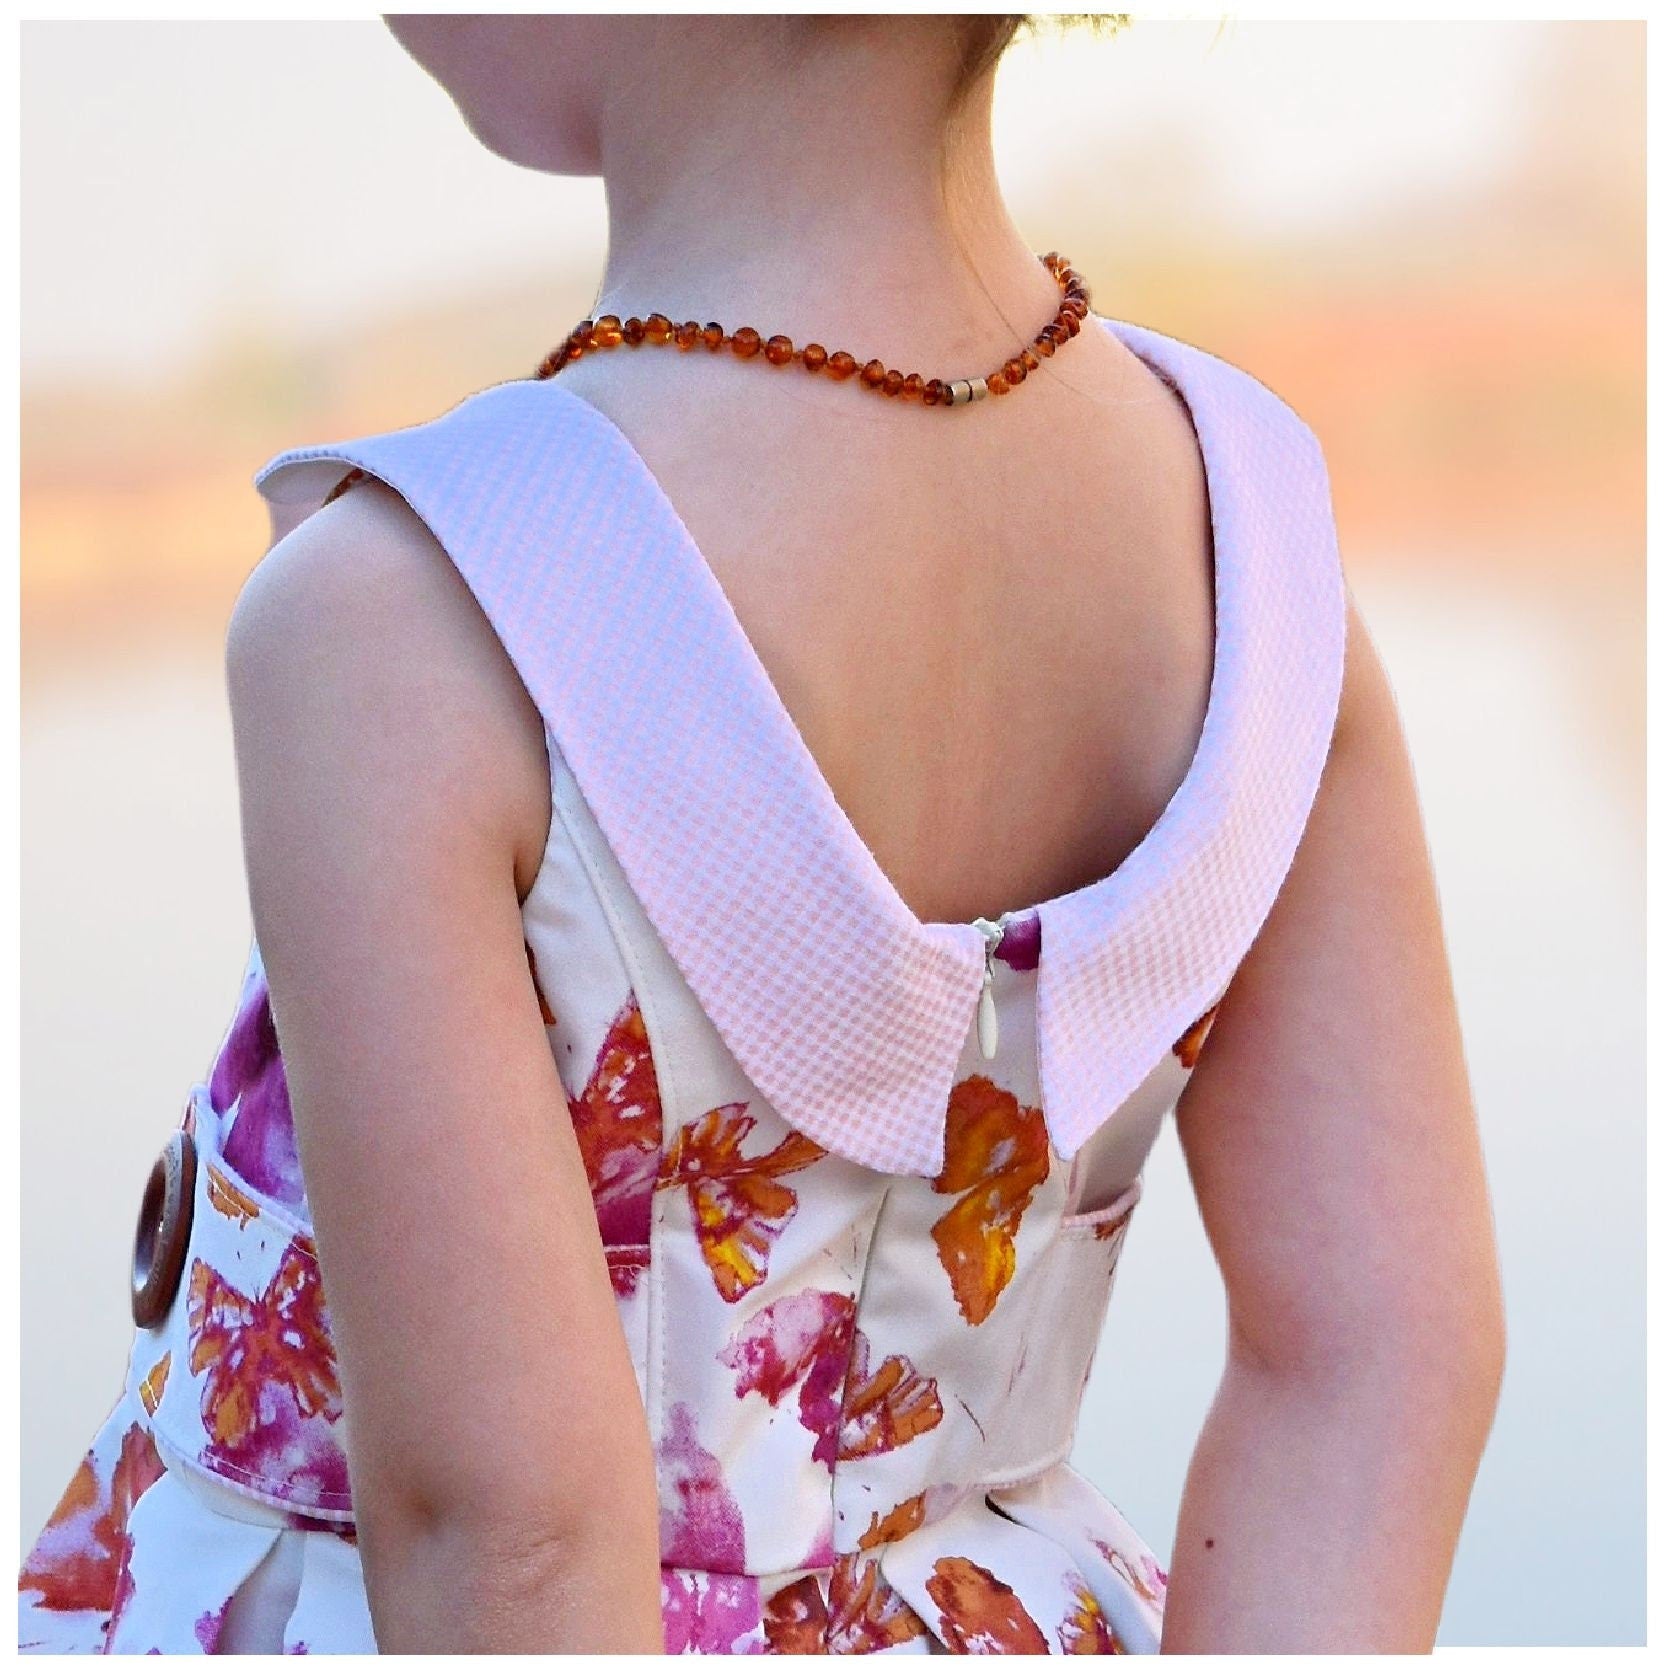
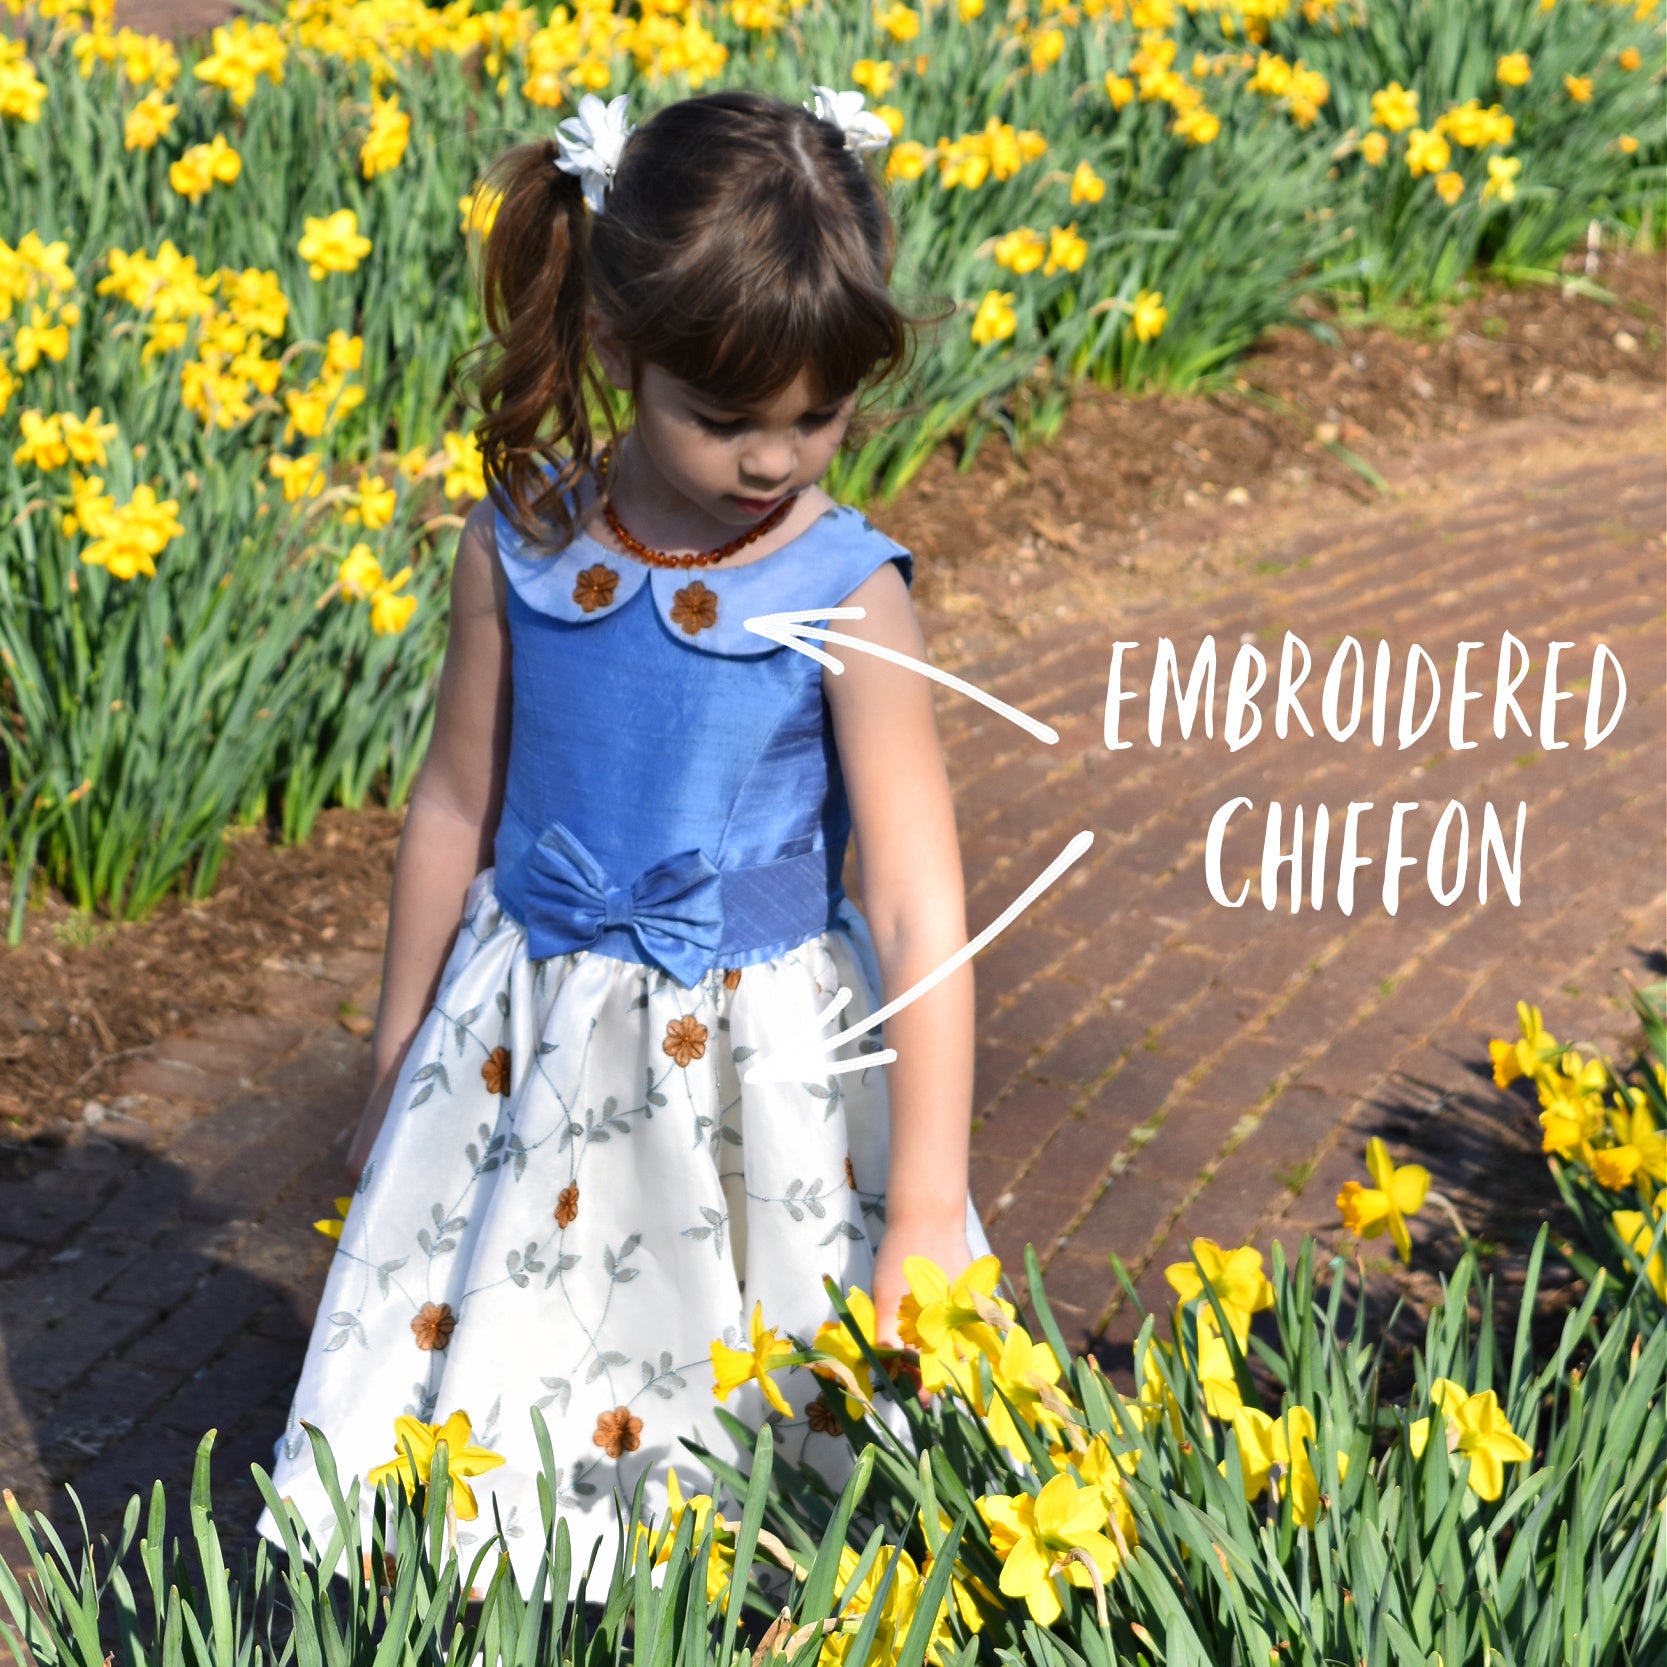
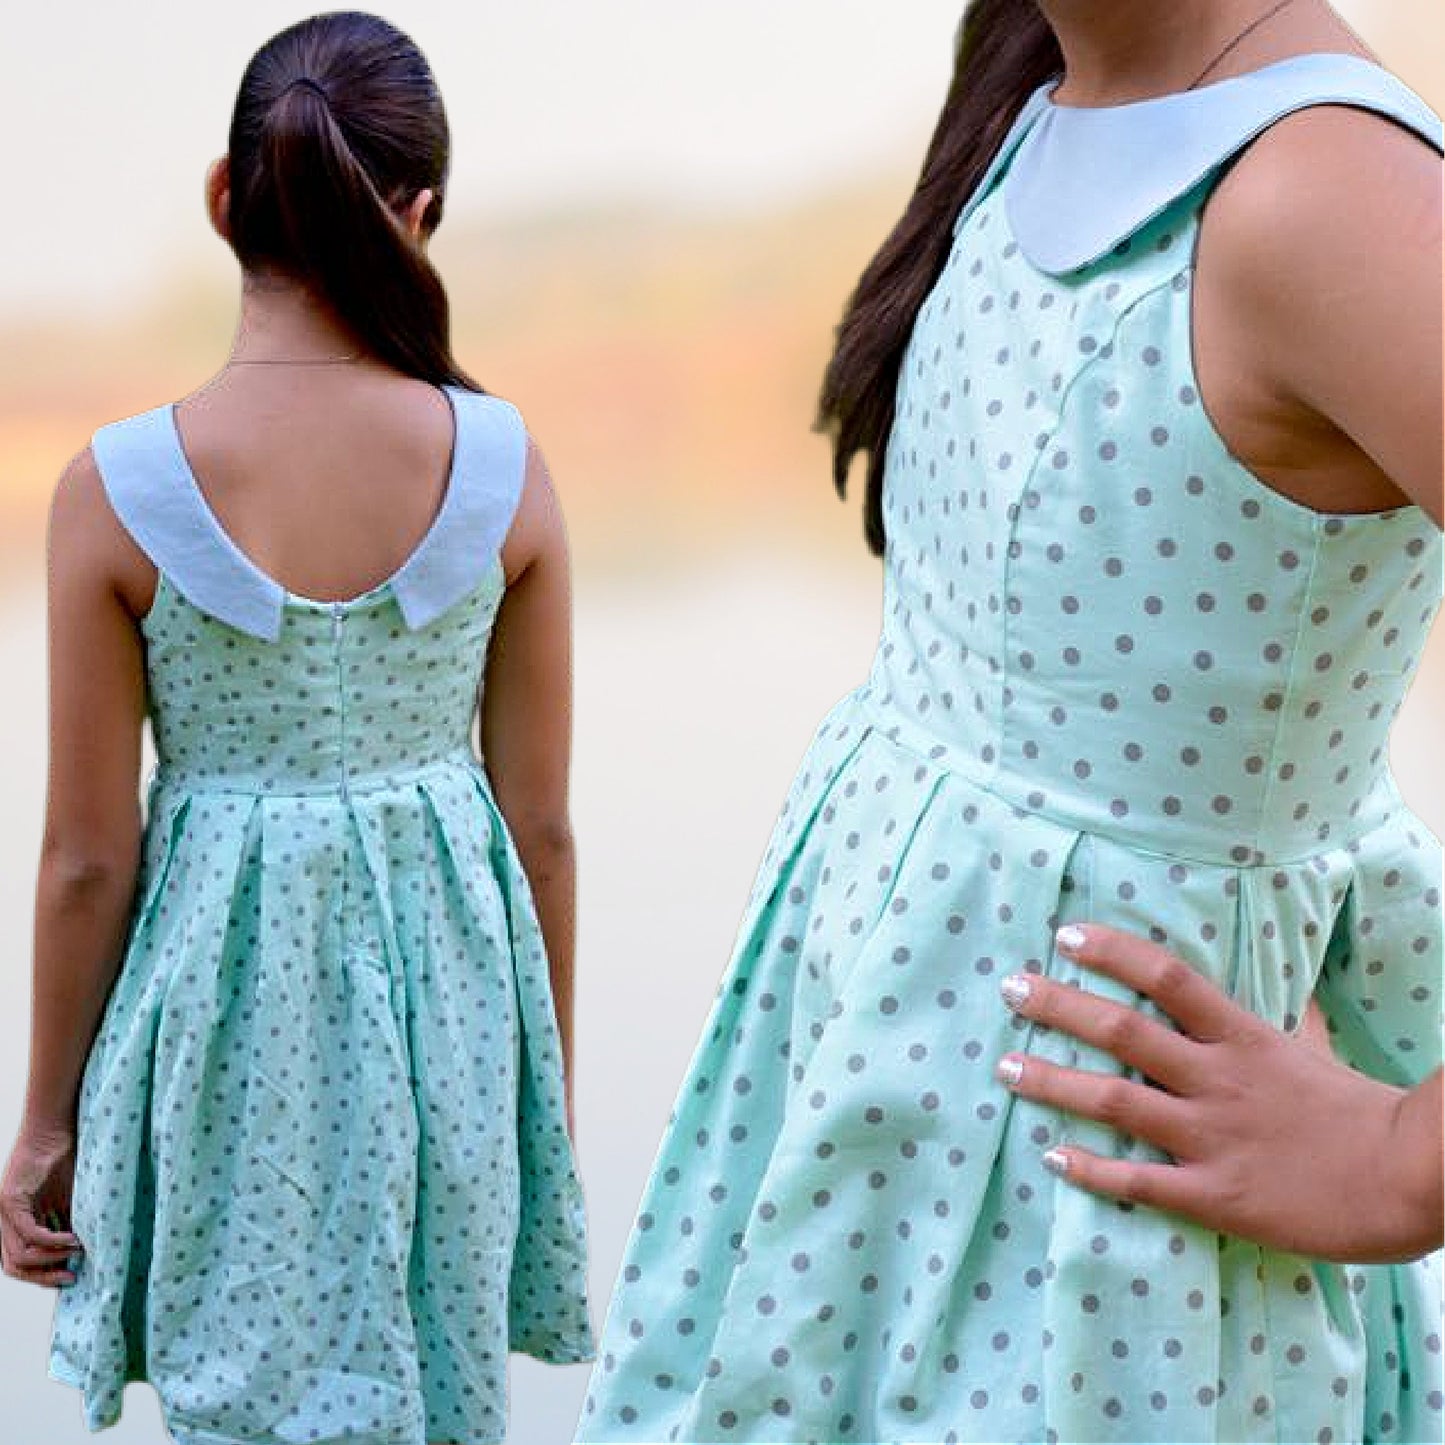
Then the collar: we have got Vilene, we’ve got the under collar or lining, and the upper collar. For the lining we’ve got an all-in-one lining, which makes it so much easier.

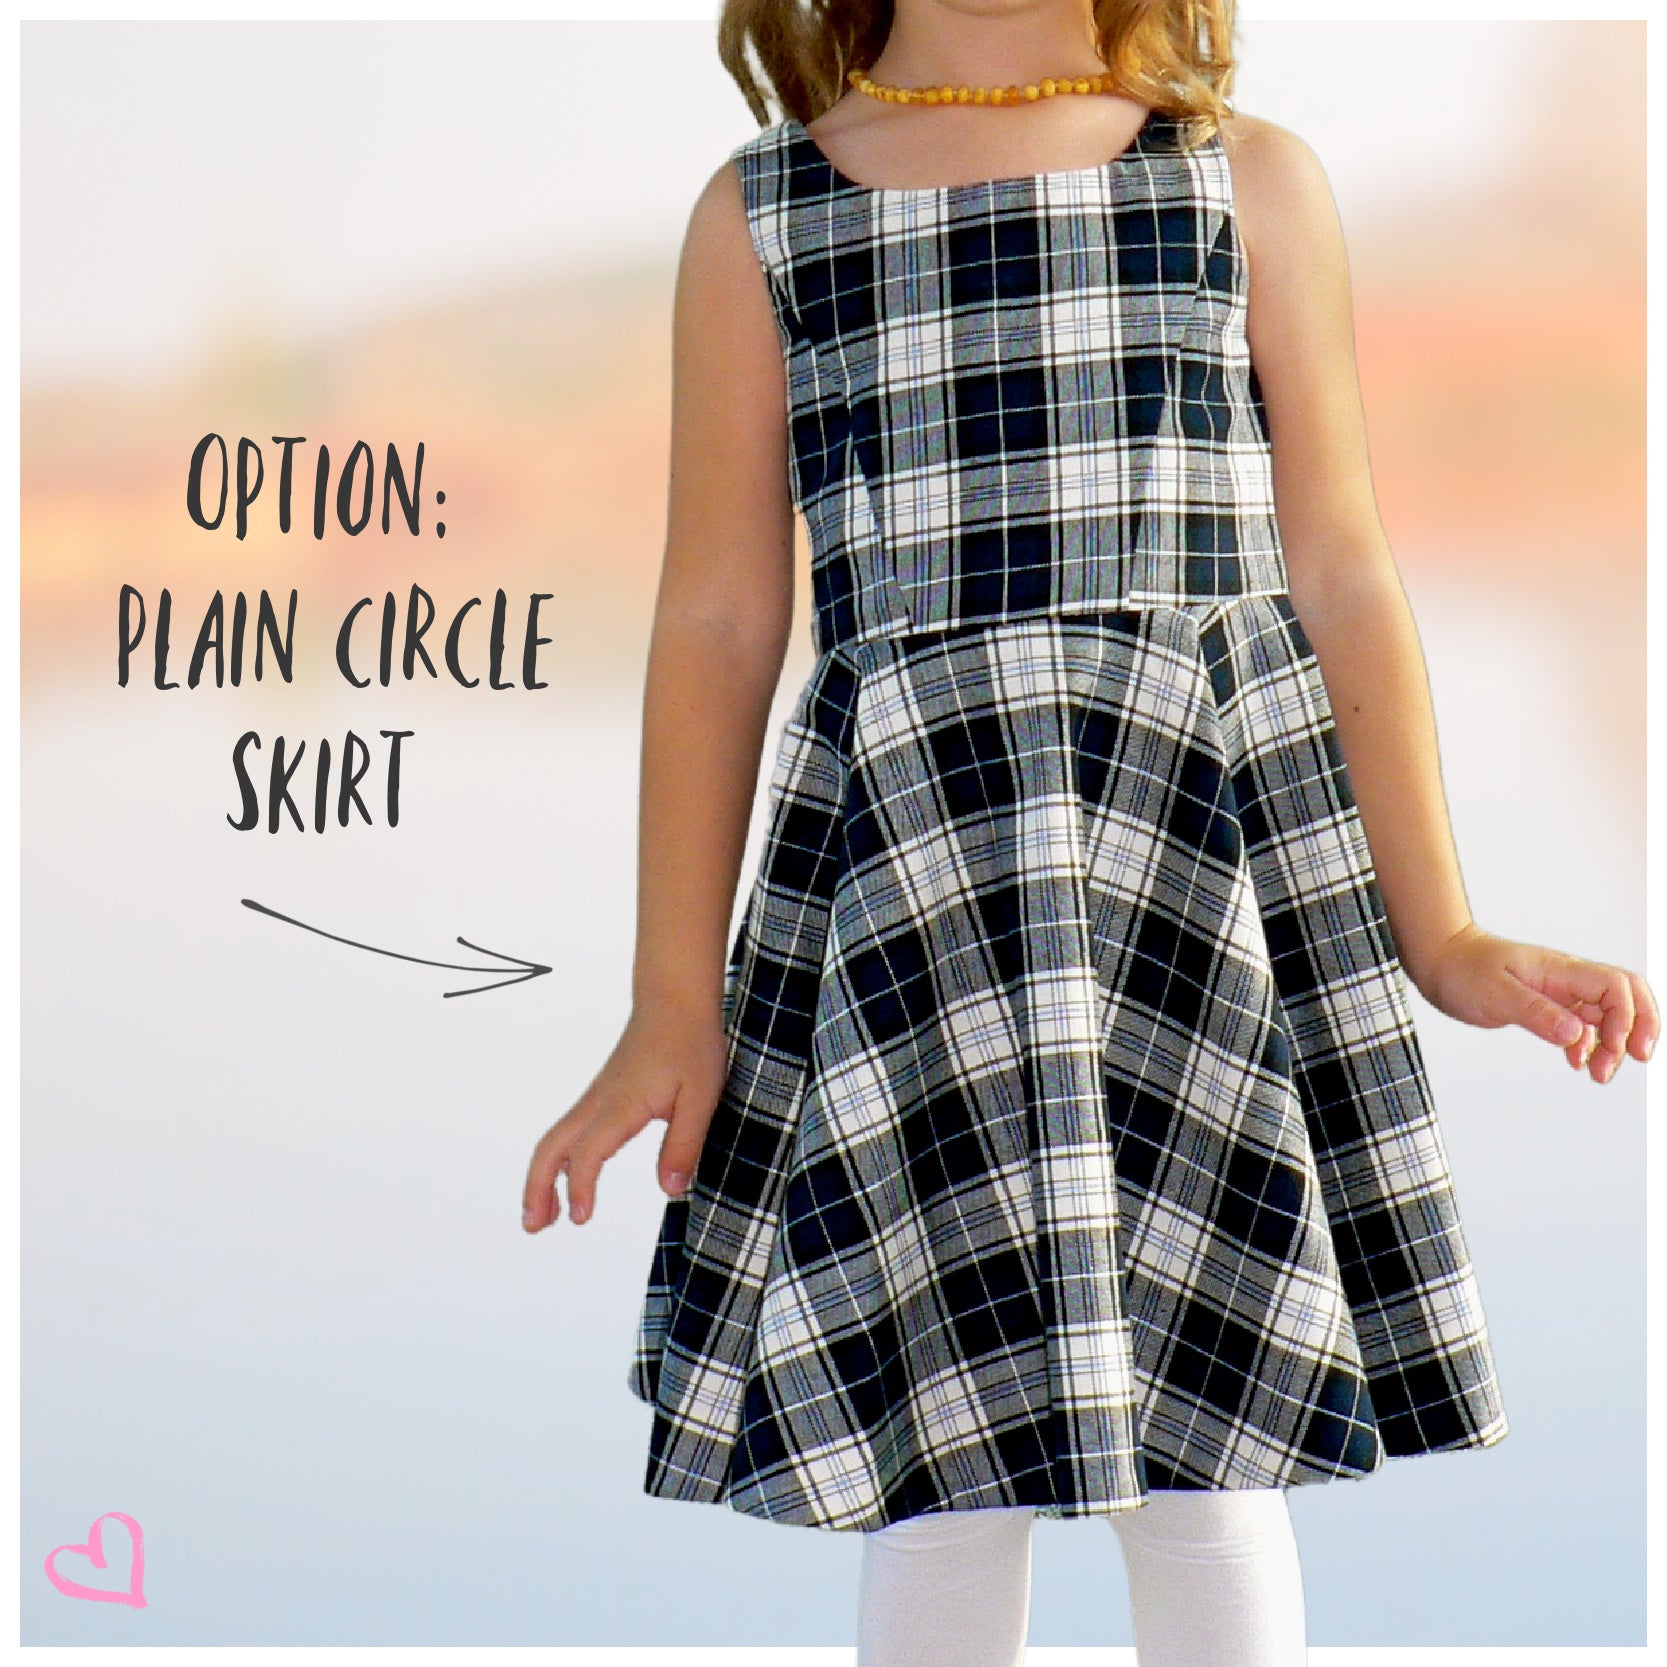
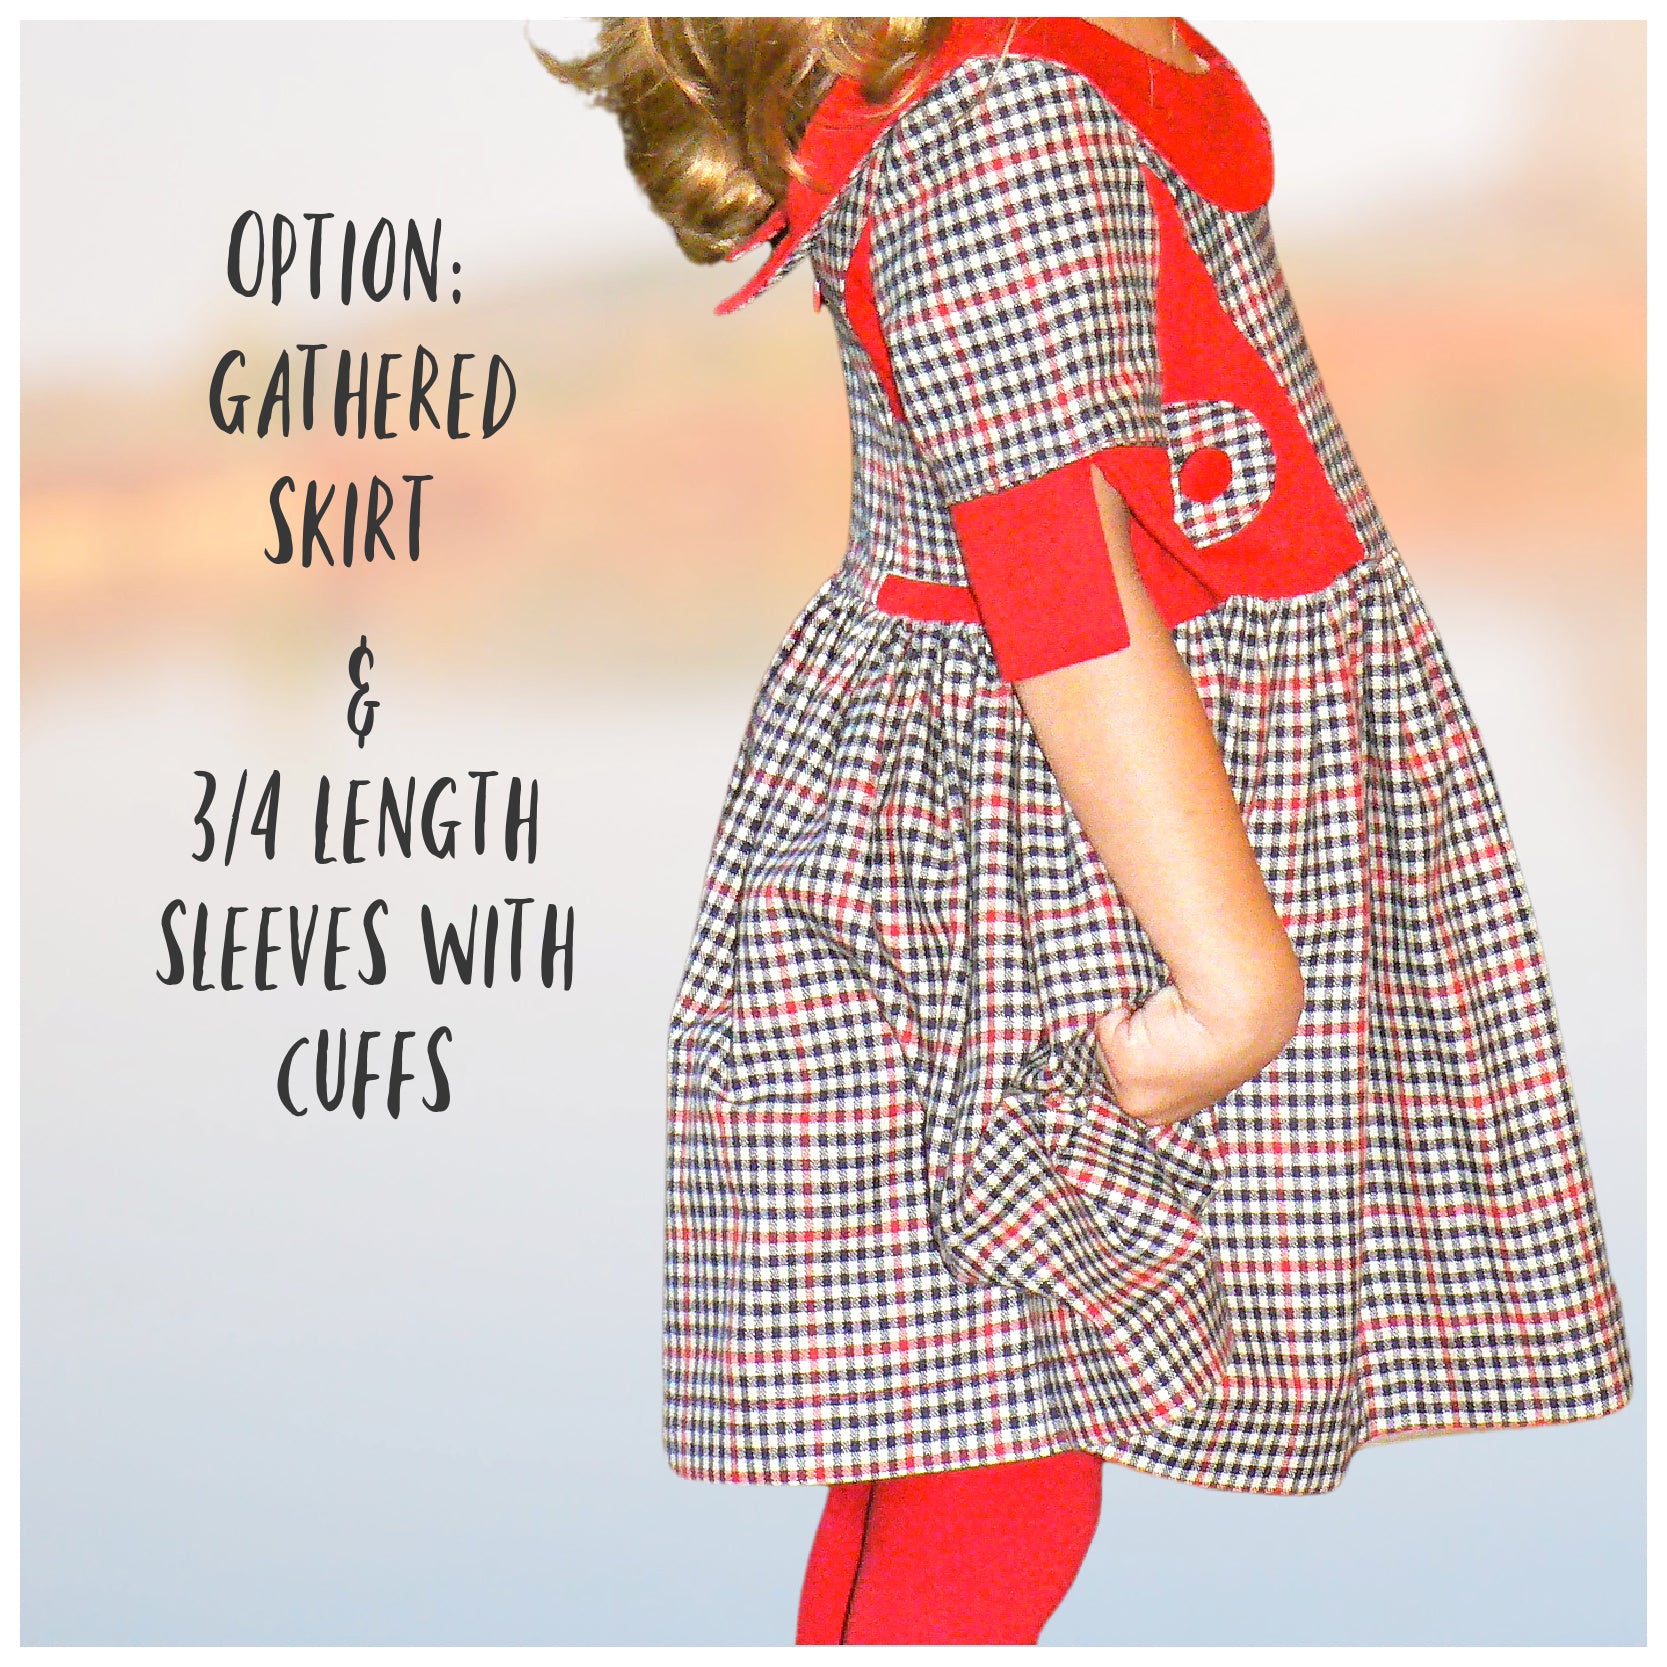
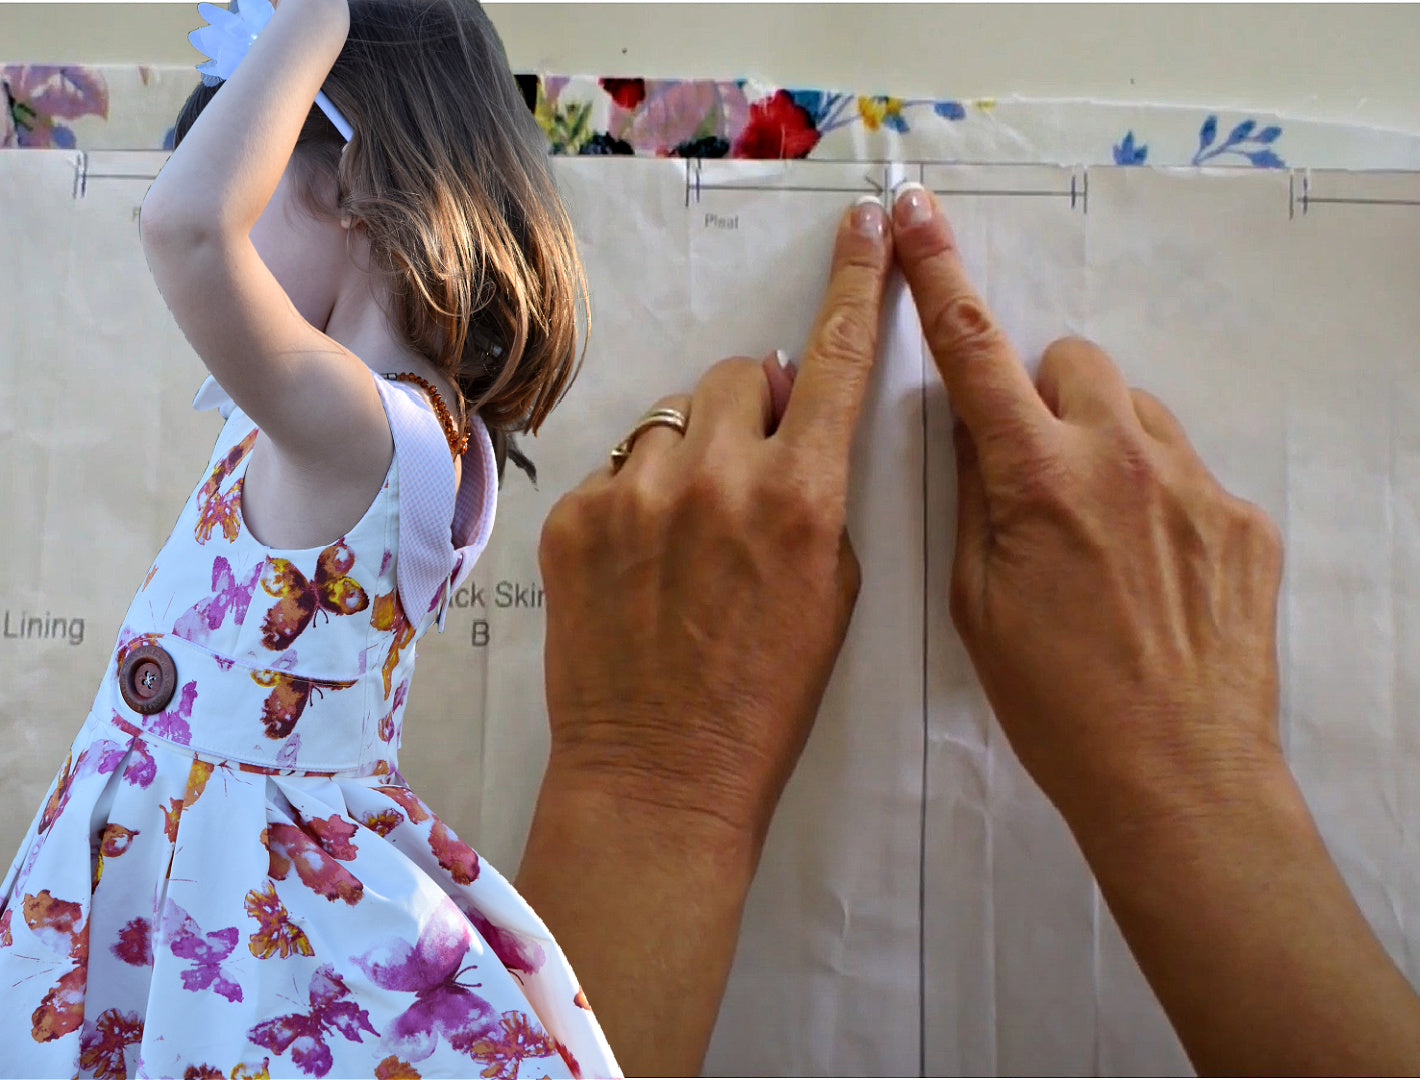
For the back we’ve obviously got two backs. The skirt has got a front cut on the fold and two backs. And don’t forget to mark your pleats because this has pleats.

Bodice Preparation

Now we’re going to close our princess seams on the front, and I would try to do that without pinning actually. Then we’re closing the shoulder seams of the lining as well.

Next you can also prep up your tabs, iron on your Vilene, and iron the Vilene also onto the collar. Then we’re going to sew around here, leaving the neckline open. Obviously do that on both collar and tabs.

Here you can see I’ve sewn together my tabs as well, and then you turn them. When you press them you can see that because the underside is a little bit bigger, it presses out towards the side and it looks a little bit like piping. I really like that effect. Obviously you can pipe it properly, that is up to you.

Pressing and Construction Details

Next you’re going to iron the seam allowances to the center front, and also top stitch with a long stitch, 3.5 setting on your sewing machine, the front seams. Then iron the seam apart, also from the shoulders.

Here I want to show you a little trick. This is the collar point. If you sew it round with a really small stitch, you’re going to get a perfect corner. If you’re sewing a corner, you will get a round little nose, so that’s something to remember.

Also something I don’t show here, but keep in mind that when you iron your collar, in order for it to not roll up and stand up with a little flip to the front, you want to make the underside a little bit shorter so it pulls the collar down.

Tabs and Collar Assembly

So here I’m going to insert my tabs, and I would recommend you put them on the side back. They need to be about a centimeter and a half above the edge.

Once we’ve done that and sewn them in and top stitched the seam, we can then put together the shoulder seams here as well.

I have to say though, if your fabric is really heavy this is really hard to pull through, so you might want to do that last.

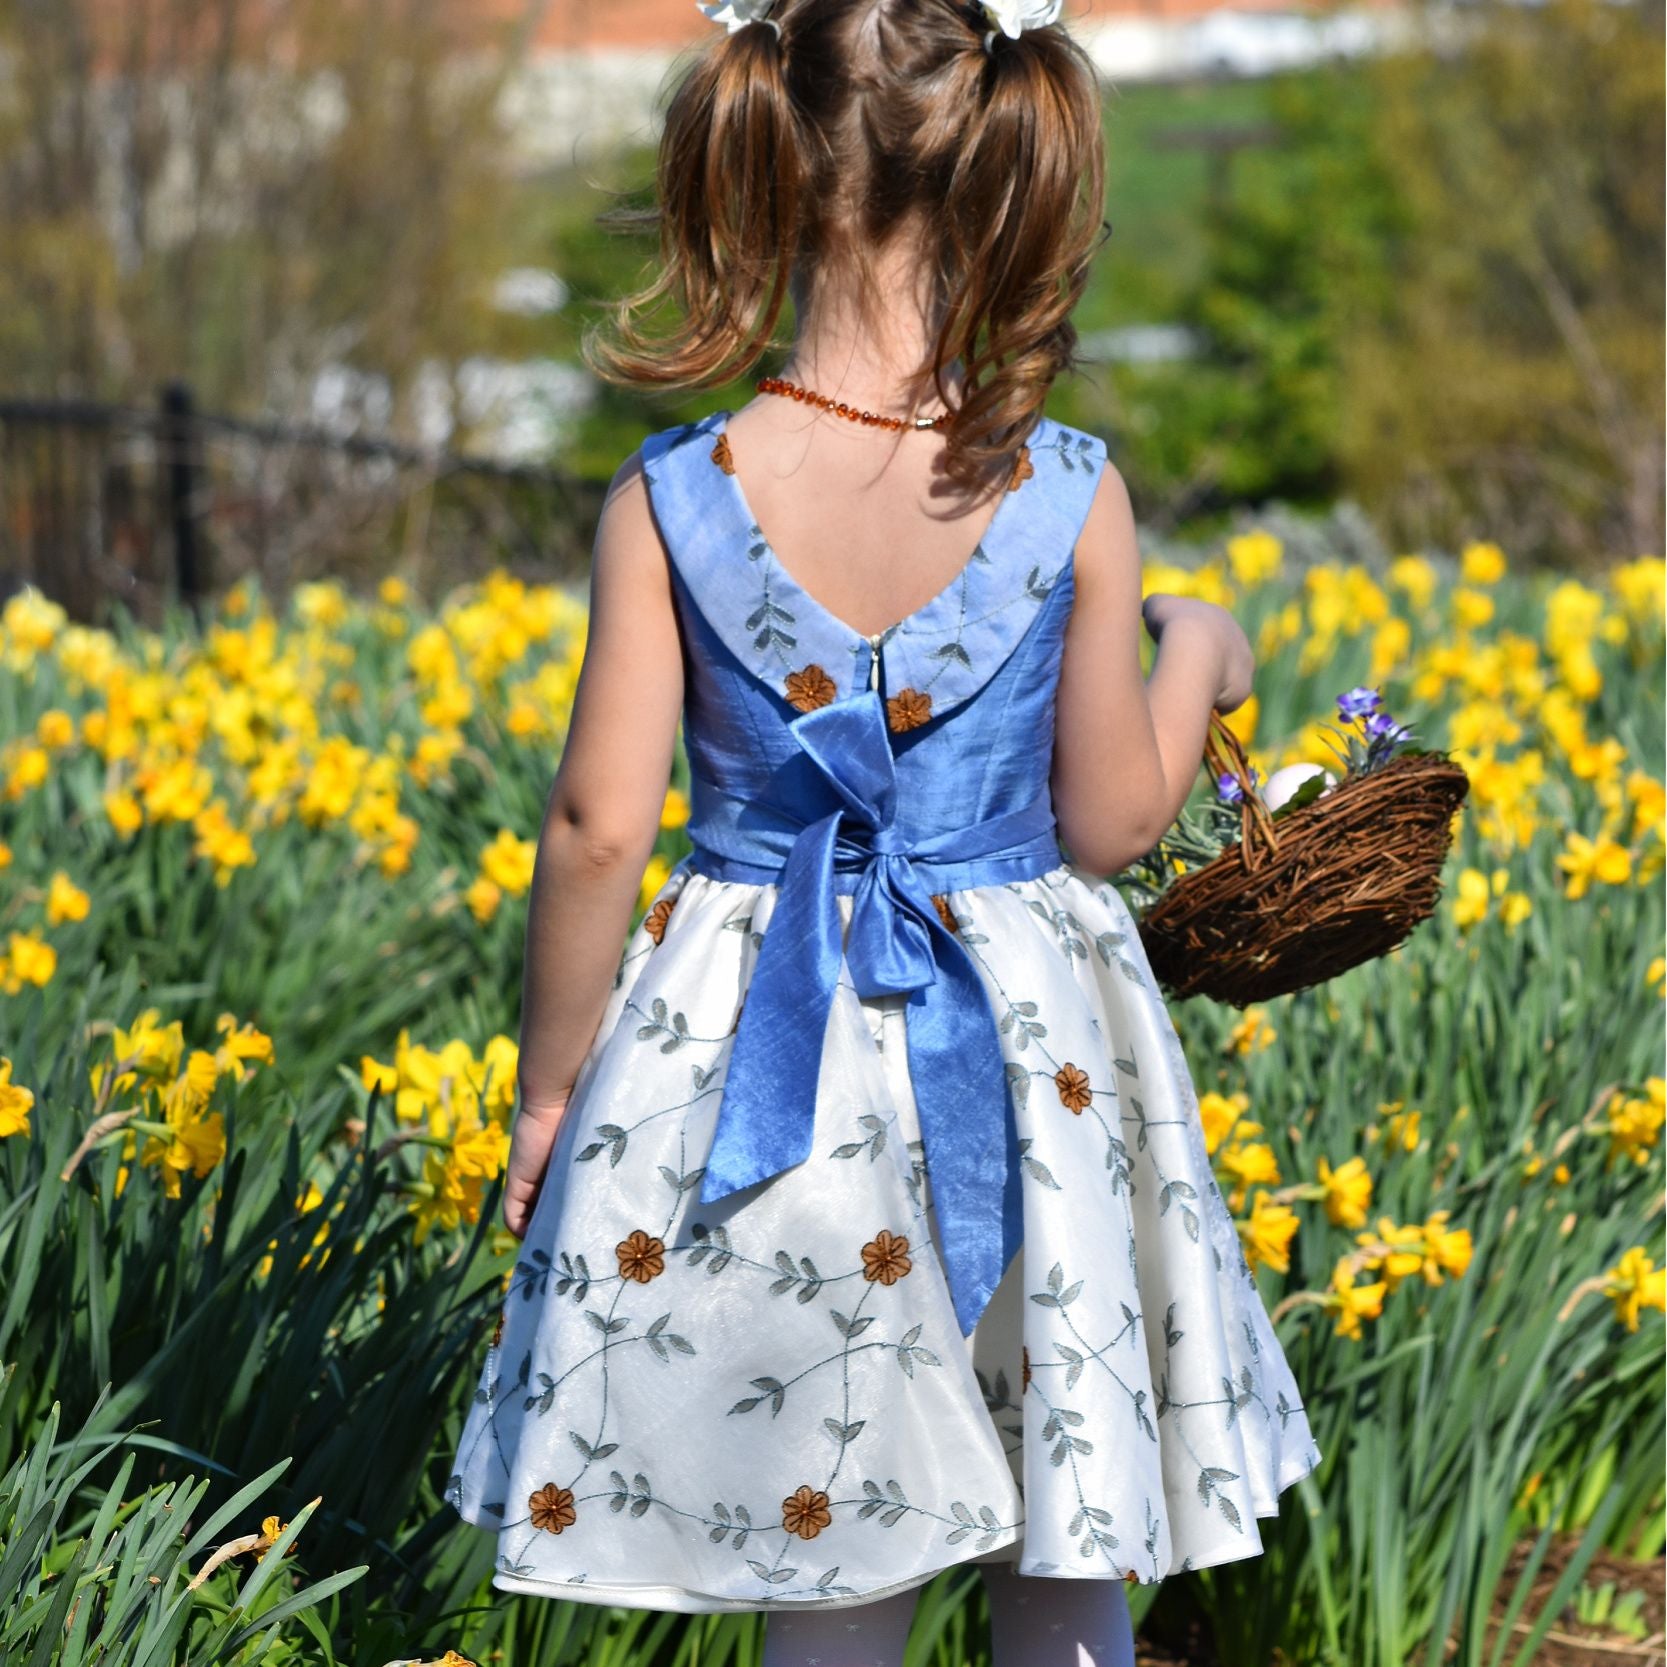
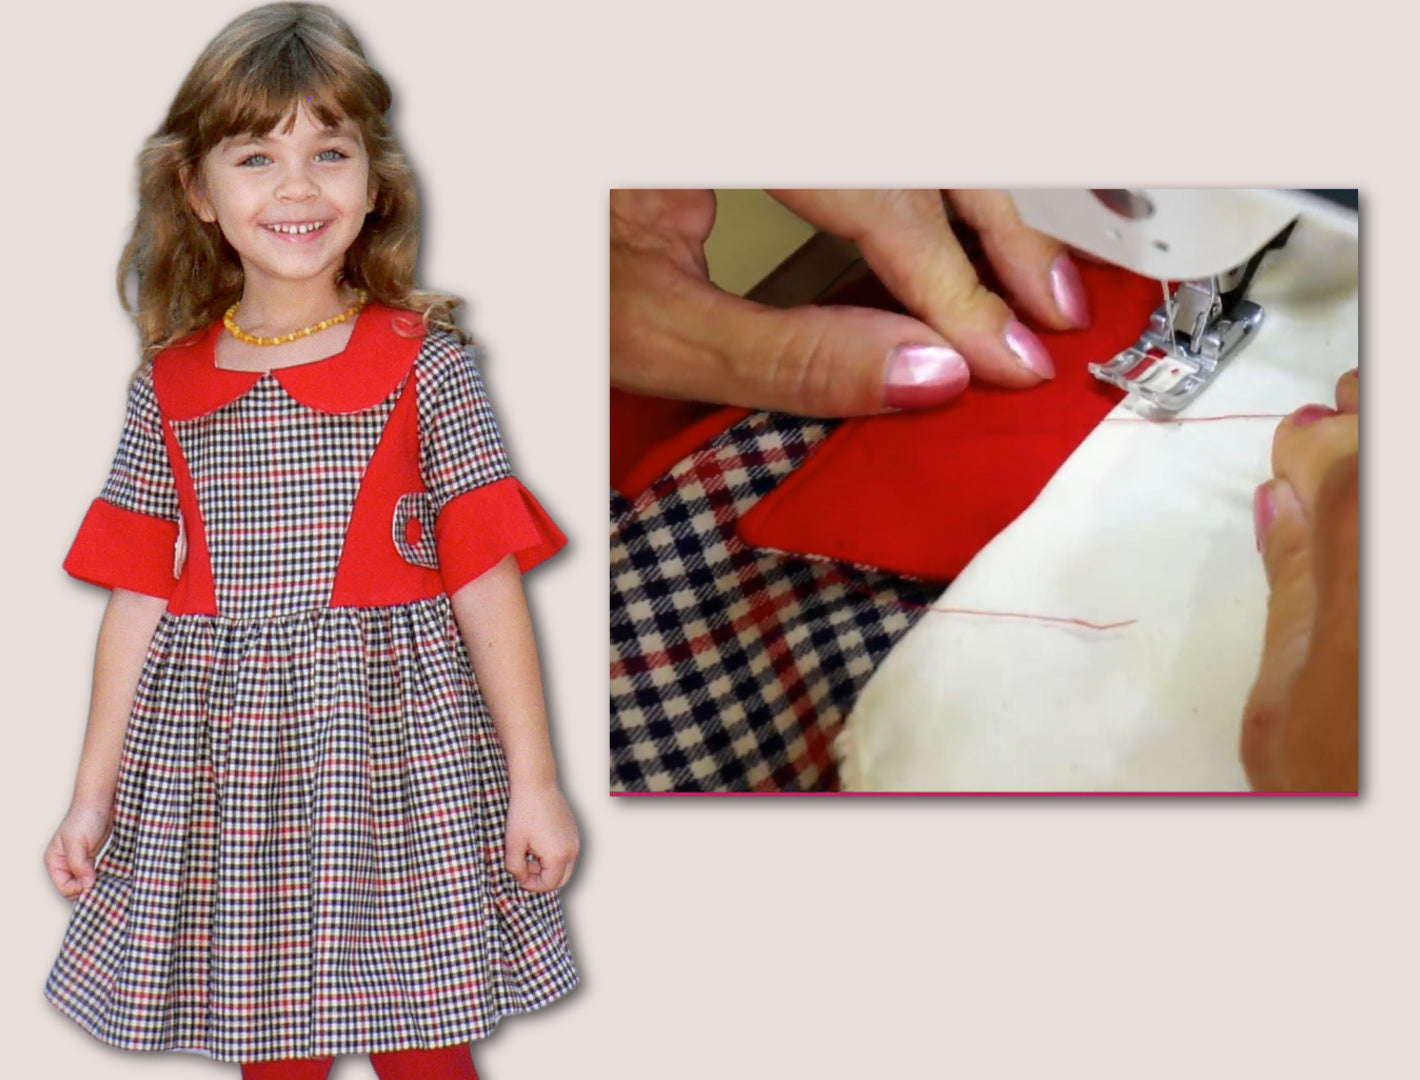
Now mark the center front and then pin on your collar. When you sew the collar on here, you stop about 4 cm before the end so that you can get the zip in.

Also, very close to the edge, you don’t want this to be seen afterwards. Once it’s sewn on all the way around, we can then put the lining over the top.

Make sure that you fold away your collar. You might want to hand tack it down a bit so that it can’t get caught.

Armholes and Stabilizing

For the armhole I’m using stay tape. I’m not using it for the neck, that’s not really necessary, you’ve got a collar in there.

Here you can see it, I’ve put the stay tape on and sewn it in, and that will prevent the armhole from stretching.

Cut back as much as you can on these, because if you’re using jeans heavy fabric like I have here, that is really important. You could also cut back in stages so you’ve got like a staggered seam, and that of course will make it much flatter.

You also snip so that when we turn that there is no stress, no tension on your curves.

The other thing we want to do is understitch a little bit. That prevents the lining from rolling out. I’ve stitched the seam allowance down onto the lining just a little bit, and it looks beautiful when you turn it over.

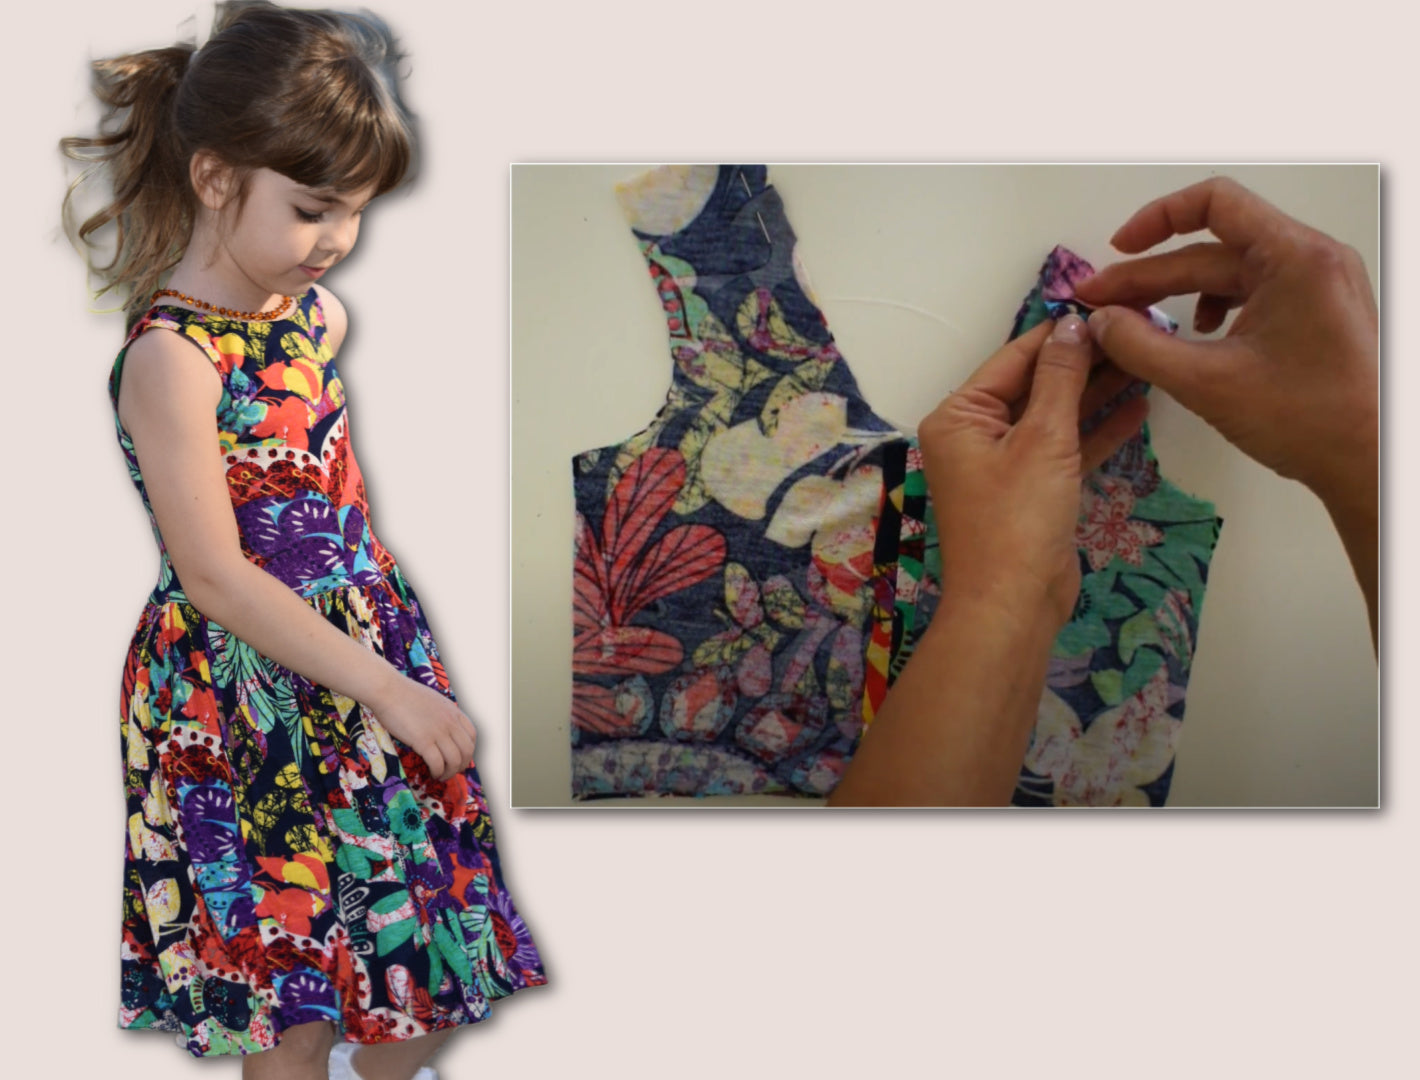
The Difficult Pull-Through

Now comes the really, really hard part, which is putting a safety pin into the back end and then pulling it through.

Because I’m using really heavy tabs and really heavy fabric, I struggled so bad. This did not go through and you can see it got totally stuck.

I thought I’d leave this in because you think I get it right every time. No. I thought I could get it through, but no way.

So I gave up at this point and rolled my tabs really tightly and tried again. That was almost impossible as well.

But five minutes later I managed to pull it through.

I would suggest that if you have really heavy fabric like that, you can just leave the back little bit open at this part and then put your tab on afterwards, because it’s almost impossible to pull through.

Finishing the Bodice

Now I can press the whole lot really well. I just love how this comes together so quickly and so neatly.

Make sure you iron the neckline as well really well.

My bodice is almost finished. I can now close my side seams. I iron the seam apart, and then we also want to release the tension on the underarm because this is all really thick fabric.

I actually cut it all away. You don’t necessarily need to do that, a snip will do, but in my case I did. Then get your thumb in there and hold it in place while you turn it and then iron it. It gives you a perfect finish.

The tab needs to sit really straight towards the front. Very, very pretty.

Skirt and Pleats

We can do the skirt next. Make sure it’s the stretchy side you have on the side. That is easy to get wrong on the center back, trust me.

Make sure that the straight grain is on the center back. Sew them together and then iron the seams apart.

Now we’re going to start doing the pleats. It’s important to start on the side seam and move the first snip you’ve got on either side onto the side seam. That is really the easiest.

Then you move the other one towards the center of the front, and then you come from the other side and move that on. Essentially the small distance is what is showing on the top.

On the center front we’re actually going to have the pleat underneath it.

Work your way all the way around, and then on the other side from the side seam you work your way to the center back and we’re moving it over again.

Don’t think I always get this right. When I first filmed this I had to undo it. After a while it becomes second nature.

At the center back we have a little gap to put our zip in.

Now I can close the center back. A lot of people like to close the center back last, and that’s totally fine. I prefer to do it at this stage, but you can use your own method.

Attaching Skirt to Bodice

Now I’m going to put my bodice onto the skirt. I find the center back, pin that together, then move around to the side seam, center front, other side seam, and back again.

I’ve worked out the pleats quite accurately so you don’t have to adjust much. It fits on perfect.

The only time you adjust pleats is when you’ve adjusted the bodice.

Now we iron the seam upwards so it sits nice and flat.

Hem, Zip, and Finishing

Then I’m going to quickly do my hem. It’s just turned up, and because this is stretchy fabric it’s no bother to stitch through.

On silk and similar this is not so easy, and I prefer to line my skirt, but this is so heavy I didn’t want to line it.

I stitched it up 2 cm or 1.5 cm is plenty and pressed it.

Now we put the zip in just as shown in my video. Go and have a look at the concealed zip tutorial if you don’t know how to do that yet.

Finally we slip stitch the lining, and that takes some time. You need to pin it all down and an hour later you’ll be done.

What you want to watch out for is that your lining doesn’t slip too close to the zip. Keep moving down with your needle as you sew so it doesn’t interfere with the zip.

You can also use a little hand stitch here. If your collar comes up you can tuck it to the dress permanently, which I would actually do on most dresses.

Buttons and Closing

Now I’m sewing on these lovely “Love Frocks and Frolics” buttons, which I ordered thinking they’d be much smaller. I didn’t check, I just ordered them one Saturday morning while I had my coffee in bed, and they are massive.

But on this dress I think they’re absolutely beautiful, and they go really well.

So this is the dress finished, and it’s also the very last one in the series of Vivienne dresses.

They are now all in the YouTube playlist, so hop on over there and see what we’ve got in store for you.

Thank you for watching again, and don’t forget there are many more videos on YouTube and also on Frocks and Frolics.com on the project page for the Vivienne.

See you again soon, bye.

Pleat Placement

Transcript for the video: Vivienne Girls Dress - How to Fold Box Pleats

Next we're going to put in our pleats. Now they're all marked already and this is the pattern piece I've used for cutting it out, and you can see that the arrows point together.

So what we're going to do is we're going to take this center pleat that goes together and grab that first, and we're going to do that like that. That's my favorite method. You can also do the coming towards the middle, but I prefer to grab them and put one pin in here like that.

First Pleat

Then the side one goes to the center back. It's just a little pleat which stops a centimeter before the end because that's where the zip is going to go.

You open out that pleat. You could also sew it. I sometimes just go on the sewing machine and sew those down because I know it fits me. But if you're not sure yet and you're making it for the first time, you don't want to sew this bit and then find actually you have to shimmy a little bit.

And that's my first pleat.

Second Pleat

I go to my next mark and the big gap I've got, again I've put them on top of each other. There we go. Do exactly the same. Just open it out, put your fingers in there sort of halfway like that, and you get your pleat.

What's on the top is the box pleat. Pin on either side so that when you're sewing them they can't fold over, because that is what they want to do. They'll want to go over like that when you're sewing it.

Side Seam and Pocket Pleat

Now we've come to the side seam. This is where it's really cool because it hides your pocket. Put those two on top of each other, same thing again. It should be the same distance to the side seam, of course.

There we are. Same thing: open out. This time the side seam sits exactly on the pleat pin, and pin on the other side.

And the pocket now meanders towards the front as well. And that is of course gorgeous because you can go here in your pocket and it's like covered by the pleat. I love this.

It took me so long to work out my pleats so they come like that. Honestly, it just took me days, I'm not kidding. Ella will say yes, she did. I kept sending her messages saying no, no, it's not right, it's not working, and I went back to the drawing board.

Final Pleat Setup

Anyway, now I've got them perfect. You can trust that this is going to come out a beautiful, beautiful skirt.

So I do it again and now I just do the same. I work my way all the way around the skirt.

And you can make these totally even, nicely sitting pleats because I've worked them out for every size. And if you have to shimmy a little bit then you take a little bit more in or a little bit more out, but you have to do it evenly.

Transcript for the video: Vivienne Girls Dress - Lined, 3/4 Sleeves, Collar & Gathered Straight Skirt

Welcome everyone to another tutorial for the Wonderland Collection. This time I’m going to show you how to make the Vivienne dress with sleeves and 60s style cuffs. The dress has a concealed zip at the back and a beautiful collar. It’s really for any occasion, but I think it’s a very smart dress for going out.

If you want to style it a bit more childlike, you can put tabs on and contrast panels. Here we have some groovy modeling by Magdalena for this dress.

Dress Overview and Design Details

Let’s have a look at the dress in detail. We’ve got a Peter Pan collar, a gathered petticoat, and everything is really overlocked, so it’s quite easy to sew. For the side panels, I would recommend a firm jersey if you are using jersey like I am here.

Those beautiful tabs can run from the back, but you could also have them running from the front. At the back, we’ve got a concealed zip. The whole dress is fully lined.

We only have one piece for the front and two pieces for the back lining, which makes it much easier to assemble.

Making the Tabs

Let’s start with something easy: the tabs.

Put the fabric on top of each other with the right sides facing. Sew all the way around, lifting the presser foot as you turn to keep a smooth shape. Cut back your seam allowance and turn the tab through.

You can press it or simply topstitch around the edge, making sure all corners are neatly pushed out. Press your tabs and set them aside.

Assembling the Panels

Next, insert the side panels. I’m using jersey, which makes it more comfortable, although mine is a bit too stretchy for this project.

Insert the front and back panels. The tab has a slanted edge, so make sure you place it correctly and leave at least 1.5 cm at the lower end so the skirt can attach without catching the tab.

Pin the panels in place and sew with a 1 cm seam allowance, keeping everything edge to edge and removing pins as you go.

Do the same for the shoulder seams on both the shell fabric and lining.

Press all seams. Princess seams are pressed toward the center body; in this case, toward the back. On the lining, press seams open.

Overlocking and Finishing Seams

Overlock all princess seams on front and back pieces. Do the same for:

  • Center back and side seams on lining
  • Sleeve seams on both sides
  • Skirt center back and side seams

Repeat the same process on the lining.

You can topstitch the princess seams if you like, but that step is optional.

Preparing the Collar

Apply Vilene (iron-on interfacing) to the upper collar first.

Sew around the collar, leaving the neckline open. Lift the presser foot as needed when turning corners. Secure stitches and trim seam allowance.

Turn the collar right side out, push out edges, and press.

Topstitch if desired using a longer stitch length (around 3–3.5) for a professional finish.

Pin the collar from center front to back, leaving about 1.5 to 2 cm at the ends. Add a holding stitch close to the edge.

Attaching the Lining to the Neckline

Place the lining over the neckline and secure with pins. Leave about 3 cm open where the zip will go.

Sew all the way around with a 1 cm seam allowance, ensuring everything lies flat and seams do not fold over.

Snip curves to reduce tension, then turn through.

Understitch the lining close to the seam (about 2 mm), stopping before the end of the stitching line so the zip can be inserted later.

Joining Side Seams

Join the shell fabric side seams with a 1 cm seam allowance and press.

Do the same for the lining side seams.

Skirt Preparation

Join the hem trim pieces with a 1 cm seam allowance. Press seam open and then fold lengthwise.

Create pleats in the skirt instead of gathers for a flatter finish.

Join lining side seams and center back, leaving the center back open for the zip.

Adding the Ruffle Hem

Attach the ruffle trim to the hem, starting slightly away from the edge. Adjust pleats if needed for correct fit.

Sew with a 1 cm seam allowance, trim excess, overlock, and press.

Topstitch around the edge with a longer stitch length for a neater finish.

Attaching Skirt to Bodice

Find the center of the skirt and bodice. Match right sides together.

Gather the skirt evenly between center points, leaving 1.5 cm at the center back open for the zip.

Attach lining using pleats instead of gathers so it sits flatter.

Sew in place and ensure all seams align correctly.

Inserting the Zip

If needed, refer to a separate concealed zip tutorial.

With teeth facing up, pin one side of the zip, then the other. Align waist seams carefully.

Sew the zip in, starting from the opening to the top, then back down. A longer zip makes this process easier.

Attach the lining over the zip and secure at the top.

Slip stitch the lining to the zip tape by hand for a clean finish.

Sleeves and Cuffs

Join sleeve seams with a 1 cm seam allowance and press open.

Attach cuffs, ensuring correct orientation if using patterned fabric.

Sew from the inside for easier handling.

Overlock edges for a clean finish.

Inserting Sleeves

Match sleeve notches to armholes. The front notch indicates orientation.

Attach sleeve seams to underarm seams, easing in excess fabric at the sleeve head.

Pin carefully and sew in place.

Check from the outside for smooth shaping.

Final Steps

Attach buttons (covered buttons if desired). Adjust placement as needed.

Pin hem and sew for a clean finish.

Overlock sleeve and hem edges.

The dress is now complete.

Final Look

Here is the finished Vivienne dress, beautifully modeled by Tina.

The Wonderland Collection also includes the coat (with hood or collar options) and the blouse with multiple sleeve variations. Options are endless.

Hope you enjoyed this tutorial, and I’ll see you next time.

Transcript for the video: Vivienne Girls Dress - Lined Rose Embroidered Neckline & Puff Ball Skirt

Hello everyone. Welcome to this Vivienne fantastic little flower girl special occasion dress with a bubble hem. Here I’m going to show you how you can create a bubble hem that won’t be out of place at any posh occasion.

I’ve also made a small sleeve alteration so you get a soft extension over the arm, almost like a cap sleeve but not quite. If you extend it further, it becomes a true cap sleeve, and I’ll show you how to create that effect.

I’ve also added decorative roses afterward. You can buy them by the meter, and they are not expensive. You don’t even need a full meter for this. They are stitched to the front and all the way around to create a beautiful finish at the back.

I always line garments with something a bit fun for children. I also prefer cotton against the skin. Satin looks beautiful and works well for skirts, but not for bodices where skin touches, so I avoid it there.

Materials and Overview

For this dress, I used:

  • Decorative roses by the meter
  • Concealed zip (30 cm works well)
  • Dupion silk for the bodice
  • Taffeta for the skirt (for structure)
  • Matching thread
  • Satin
  • Interlining and lining

For the pattern, you need the sleeveless Vivienne dress pattern:

  • Center panels
  • Side panels
  • Optional tabs (not used in the final version)

For the skirt, you would normally use:

  • Plain circle skirt
  • Box pleated circle skirt (reference only here, as the skirt is gathered instead)

Pattern Adjustments: Sleeve and Neckline

Start by lengthening the shoulder slightly to create a soft cap sleeve effect. Draw your adjustment and cut it out.

Transfer the same adjustment to the back piece so both front and back match exactly. You can also test fit on a child if needed.

You could also add scalloped edges for decoration if desired.

Because of the dropped shoulder, you can slightly widen the neckline by about 1 cm, easing it smoothly without lowering it too much. Transfer the same adjustment to the back so both sides remain balanced.

Cutting the Fabric

Fold your dupion silk strategically to minimize waste. This method allows efficient cutting of the bodice pieces.

If your silk has directional sheen, ensure all pieces are cut in the same direction.

Cut:

  • Shell fabric
  • Interlining
  • Lining

For the bodice:

  • Front has 3 layers (shell, interlining, lining)
  • Back has 3 layers per side

For the skirt:

  • Front is cut on the fold
  • Back is cut in two mirrored sections
  • Lining is cut using the same circle method

Open the circle and cut along the straight grain where needed.

Interlining and Bodice Construction

Place interlining underneath all silk pieces and treat them as a single layer. Avoid sewing them together first, as this can cause puckering.

Join side panels to center panels with right sides facing.

Press seam allowances:

  • Lining seams toward side seams
  • Shell seams toward center front and center back

Press toward the body center for a clean finish.

Close the shoulder seams and snip curves where needed. Press carefully using a curved surface for shaping.

Attaching the Lining (Armholes and Neckline)

Place the lining right sides facing the bodice.

Sew armholes and neckline, starting 3 cm from the center back and stopping 3 cm before the opposite center back opening for the zip.

Use stay tape along armholes to prevent stretching. This helps maintain clean curves.

At curves, keep the needle down, pivot, and ease the tape around the shape. You may also mark stopping points beforehand for accuracy.

Clip seam allowances carefully, but avoid the zip area. Clip all curves to reduce tension.

Turn the bodice through using a safety pin and press carefully, rolling edges slightly inward so nothing shows.

Closing Side Seams and Finishing Bodice

Close side seams in one continuous pass:

  • Shell to shell
  • Lining to lining

Press seams flat, then open, then press again.

Clip seam allowances where needed to remove tightness around curves.

The bodice is now complete with a clean armhole and neckline finish.

Skirt Construction and Bubble Hem Base

Close center back and side seams on the outer skirt.

Mark zip placement carefully on both outer and lining skirts so they match exactly.

Work with care when pressing polyester, using a pressing cloth to avoid damage.

Mark quarter points on both skirt and lining for alignment.

Creating the Bubble Hem Effect

Attach lining to outer skirt by matching all quarter points.

Sew from the lining side and distribute pleats evenly as you go. This step creates the controlled bubble shape.

Check underneath constantly to ensure nothing shifts or gets caught.

This creates a structured but soft reduced-width skirt shape.

Elastic Bubble Hem Finish

Decide how wide you want the finished skirt to be.

Stretch elastic fully and attach using a triple zigzag stitch. This gathers the skirt into a bubble hem shape.

Adjust tension depending on how full you want the skirt.

Attaching Skirt to Bodice

Attach outer skirt to bodice by aligning side seams and center points.

Distribute gathers evenly. Do not aim for perfection while pinning, as adjustments are made during sewing.

Sew carefully while checking underneath frequently.

Remove gather threads once secure.

Attaching Bodice Lining

Attach bodice lining to skirt lining starting at the center back.

This part can feel awkward as the fabric twists, but continue easing and pinning until it aligns.

Once sewn, the structure will straighten naturally.

Inserting the Concealed Zip

Insert concealed zip with right side first.

Sew two passes:

  • First to anchor
  • Second to secure

Snip seam allowance slightly at the waist to reduce bulk.

Roll lining over the zip tape for a clean finish and secure.

Adding Decorative Roses

Plan rose placement evenly from center front to back.

Decide whether to place one rose or split placement at the center front.

Hand stitch using double thread. Remove netting carefully as you work.

Use a tunneling technique through the neckline edge, ensuring stitches are hidden and no netting shows.

Work slowly around the entire neckline and hem area.

Final Notes

This Vivienne dress combines structure, softness, and decorative detail for a beautiful occasion piece. The bubble hem adds volume, while the silk bodice keeps it elegant.

Thank you for watching. There are many more Vivienne designs coming, from skirts to tops and more variations.

Transcript for the video: Vivienne Girls Dress - Drafting an Asymmetrical Collar

The reason for this tutorial is that one of my Facebook friends wanted to make the Vivienne dress for her daughter, and you can see her version blended in here. It turned out absolutely spectacular. However, she didn’t want the standard Peter Pan collar. Instead, she wanted the asymmetrical collar used in the teen version of the dress.

So I said, let me make a video to show everyone how to do this. It’s not hard, and this is exactly what she did. The result is stunning.

Preparing the Bodice Pattern

Here I’ve got my bodice pieces. These don’t have to be my pattern specifically; this works with any similar base.

The first step when modifying your collar is to join the front and back pieces with a 1 cm seam allowance (negative seam allowance adjustment for pattern alignment).

Mark 1 cm at both edges, then connect the lines. Do the same on the other side.

Once marked, overlap the pieces and tape them securely. This ensures any collar changes stay accurate and aligned.

Understanding Collar Shape and Fit

When modifying collars, it’s important to understand how shape affects drape:

  • A flat Peter Pan collar sits close to the neckline
  • The more distance you add, the more the collar curves and stands away from the neck

In this case, the collar has only a small amount of separation once seam allowance is removed.

To create a more rolled or shaped effect, we reduce length on the outer edge. This naturally forces the collar to curve.

Creating the Collar Roll Effect

To achieve the desired shaping, cut and overlap sections of the collar.

Overlap amount here is small (around 0.3 to 0.5 cm), which encourages the collar to roll slightly rather than sit flat.

Repeat this adjustment on both sides.

When measured, the final overlap is approximately 1.5 cm, which gives the correct balance for this style.

Redrawing the Asymmetrical Collar

Now we move to reshaping the collar into an asymmetrical design.

Place your adjusted collar piece onto paper and redraw the shape.

Decide how low the collar should sit. In this example, it sits about 2 to 2.5 cm below the shoulder point.

Draw a new line to reflect this lowered shaping.

This step ensures both sides remain balanced while creating the intended asymmetry.

Checking Alignment and Structure

Before finalizing, ensure all pieces are correctly aligned:

  • Keep everything straight and properly positioned
  • Draw a center reference line to check balance
  • Confirm both sides match in structure

This is not complicated pattern cutting, just careful alignment and adjustment.

Designing the New Collar Shape

Now we refine the final collar shape.

Here we create a more dramatic, styled edge rather than a standard rounded collar. A button placement is also considered at the center of the design.

Draw the final shape, ensuring seam allowance is included where needed (except where it has already been adjusted).

This becomes one side of the collar.

Mirroring the Collar Piece

The opposite side must match perfectly.

Trace or flip the finished section and ensure both ends align.

Place both pieces together to confirm symmetry and flow.

Adjust any uneven curves by trimming slightly for a clean finish.

Final Collar Check

Pin both collar pieces together and check:

  • Alignment
  • Curve smoothness
  • Balance of asymmetry
  • Button placement positioning

Once satisfied, the collar shape is finalized.

Final Notes and Finished Dress Example

The finished Vivienne dress shown here was made using:

  • Pleated circle skirt from the Vivienne pattern
  • Plain circle skirt for lining (slightly shortened)
  • A large gathered ruffle (approximately 4 yards)
  • Covered buttons
  • Quarter-length sleeves with variation options

You can also make this dress:

  • Without a collar
  • Without sleeves
  • Or add puff sleeves from other patterns

There are many possibilities with this design, and it adapts beautifully.

Thank you for watching, and thank you to Emily for creating such a beautiful interpretation of the Vivienne dress.

Transcript for the video: Vivienne Girls Dress - Adapting the Pattern for Jersey

Hi everyone. In this video, we’re going to look at how we can make the Vivienne dress using jersey. This time I’ve chosen a fairly thick jersey, so there’s no need to line it. It would be too hot and unnecessary.

This is a very easy option for beginners, and I’ll quickly show how to adjust the pattern for a better fit, then we’ll put the dress together. This really is one of the simplest ways to make a pretty dress quickly.

Pattern Adjustments for Jersey Fit

I’m working with the Vivienne pattern.

First, cut through the center front. Then mark 1 cm down. In total, we are reducing:

  • 4 cm from the front
  • 4 cm from the back

Overlap the pattern by 1 cm and stick paper underneath so you can redraw the shape.

Next, remove 1 cm from the side seam as well and cut it off. Jersey is very stretchy, so we reduce width to avoid a loose, sack-like fit.

On the back:

  • Remove the zip seam allowance
  • Mark this edge as a fold instead

This helps avoid confusion later if you return to the pattern.

Repeat the same adjustment on the front:

  • Remove 1 cm from the side seam
  • Overlap the center by 1 cm
  • Adjust the neckline slightly if needed

Once complete, cut out the new pattern pieces for front and back.

Make sure to clearly label your pattern as jersey version, so it is not confused with woven versions.

Cutting the Fabric

Cut out your bodice pieces using the adjusted pattern.

This fabric is thick jersey that stretches mainly widthwise. It has been overlocked around all edges.

For the skirt:

  • Use a circle skirt
  • No side seams needed
  • Overlock the hem edge

Turn up the hem by about 1 cm (or slightly less if preferred).

Preparing the Bodice

Start by closing the shoulder seams.

Press the seams open first, then fold under the edges. It is easier to do this before closing the side seams.

With thick jersey, the fabric behaves well and holds shape nicely without stretching out the neckline.

Give everything a good press to stabilize it.

Closing Side Seams

Close the side seams with a 1 cm seam allowance, but do not sew all the way to the top.

Stop about 5 mm before the edge to reduce tension at the neckline area.

Fold the edges in and stitch them down neatly.

Press the seams well once finished.

Preparing the Skirt

Find your center front placement based on the fabric pattern and mark:

  • Center front
  • Center back

Do the same on the bodice so everything aligns correctly.

Assembling Dress

Match:

  • Side seams to side seams
  • Front to front
  • Back to back

Pin the skirt to the bodice while gently stretching the jersey to fit.

Sewing the Waist Seam

Use a triple stretch stitch to sew the waist seam. This allows flexibility and durability for jersey fabric.

Once sewn:

  • Overlock the seam if needed
  • Press lightly to finish

Final Notes

This is a very quick 20-minute style dress when made with thick jersey. It’s ideal for beginners and requires minimal finishing.

If you are using a lighter or more delicate jersey, there is another method explained in a separate tutorial.

Thank you for watching, and see you in the next Vivienne jersey dress video.

Transcript for the video: Vivienne Girls Dress - Tips for Sewing a Lined Vivienne in Fine Jersey

Here we're going to have a very quick look at how you can work the Vivienne dress in jersey with a very fine jersey, so none of this just turning in the edges. Here you can see the fabric I've worked with. It's indeed very, very fine. I would recommend maybe not gathering it quite so much in this area; I overdid that a bit. But the techniques that you're going to learn here are really going to help you.

We are cutting the front and the back twice. Basically, we're going to line the back with the back and the front with the front.

Preparing and Cutting the Bodice

You're going to place two front pieces with the right sides facing on top of each other. Then we're going to pin the neckline and the armhole. We leave the shoulders open.

Because jersey stretches a lot, just in the neckline we're going to attach some stay tape. This is not necessary for the sides; we want a little bit of stretch in there. Close the armhole. Close the neck hole on both the front and the back. It's exactly the same.

Don't get confused because you can see a seam here at the back. It is cut on the front as suggested in the video from last week. You can also find that in the playlist. For the pink dress, we are cutting the back on the fold and we've amended the pattern, of course. So you need to do that—don't forget.

Sewing, Snipping, and Pressing the Bodice

Now I've sewn that together. I will snip my neckline, but not the armhole. We're just cutting back the armhole. Snip right to the quick here on the back as well.

Then you're going to turn it so that you've got the wrong side on the inside. Get out your shoulders on both pieces. Then they need to be pressed really neatly, and we can carry on.

You can see them looking absolutely lovely. It's such a quick and easy method. Just make sure there's stay tape on the neckline.

Joining Side Seams

Next, we're going to open them out and do the side seams. Pin those together. The only crucial thing is that the underarm seams are on top of each other.

Sew them together and then iron the seam open. You might want to release, if there's any tension, by snipping at the underarm, but it's not really necessary with jersey. You get a really lovely finish here.

Shoulder Construction Technique

Next, we're going to push the front shoulder through the back shoulder, or you can do the back shoulder through the front shoulder. That doesn't really matter.

You're taking it and pushing it right through, then grabbing them both so that one shoulder sits inside the other. This is a very well-known children's wear technique. It's very, very quick.

Make sure that whatever lies inside front to back shoulder is going all the way to the edge. You can also turn your seam allowance here and stitch that in when sewing across, but I would recommend leaving it as is—it is much harder to do it the other way.

Make sure you get a pin in there and put that shoulder right into the corner so you don't end up with a really ugly bump. I do it all the time, so you wouldn't be the first one.

Now we stitch across here, then cut back your seam allowance and cut back across the top as well. The last thing is we just have to pull this apart. This is how easy this is.

Preparing the Skirt

So that's it—shoulder done, pressed. We can now start working on the skirt. I would recommend that you don't have a really big skirt. Mine is just clearly too big. You don't even need a side seam; you can just do a center back seam and take the length or width of your fabric, whatever you have available.

For the hem, I would recommend that you turn up a centimeter and iron it because some fine jerseys really curl up when you pull them. Normally I wouldn't do this before going on the sewing machine, but with fine jersey, definitely.

I've pinned this not just where I filmed it—I actually pinned it all the way around and then stitched it close to the edge.

At the top, I've overlocked some stay tape on because it makes it really easy to put your gather threads in, which is the next step.

Gathering and Assembling the Dress

Two gather threads: one just foot width and one next to it. Then we're also going to put a stay thread into the bodice because all this jersey really likes to stretch while you're working, and you don't want that. You want it fairly firm while you're working.

Now I just mark the front, back, and side seams on my skirt, then gather them, pin them in, and stitch the whole thing together. It's very, very simple, just like a normal skirt.

Having the stay tape in made it so, so much easier. If you have jersey that curls up, you know that's really difficult to do.

Finishing the Dress

Once it's all sewn together, before you overlock it, remove your gather threads and that stay thread so you get the elasticity back for overlocking. Then take it to the overlocker and finish it.

Then your dress is finished.

This method works on anything for grown-ups as well. Again, I would recommend not too many gathers because it still pushed my waist a little bit, and I don't like that.

I hope to see you next time when we're going to do another Vivienne dress. Thank you for watching.

YOU MAY ALSO LIKE

Flower Girl

SHOP NOW

Isabella

SHOP NOW

Princess

SHOP NOW

Vivienne

SHOP NOW

Vivienne

SHOP NOW