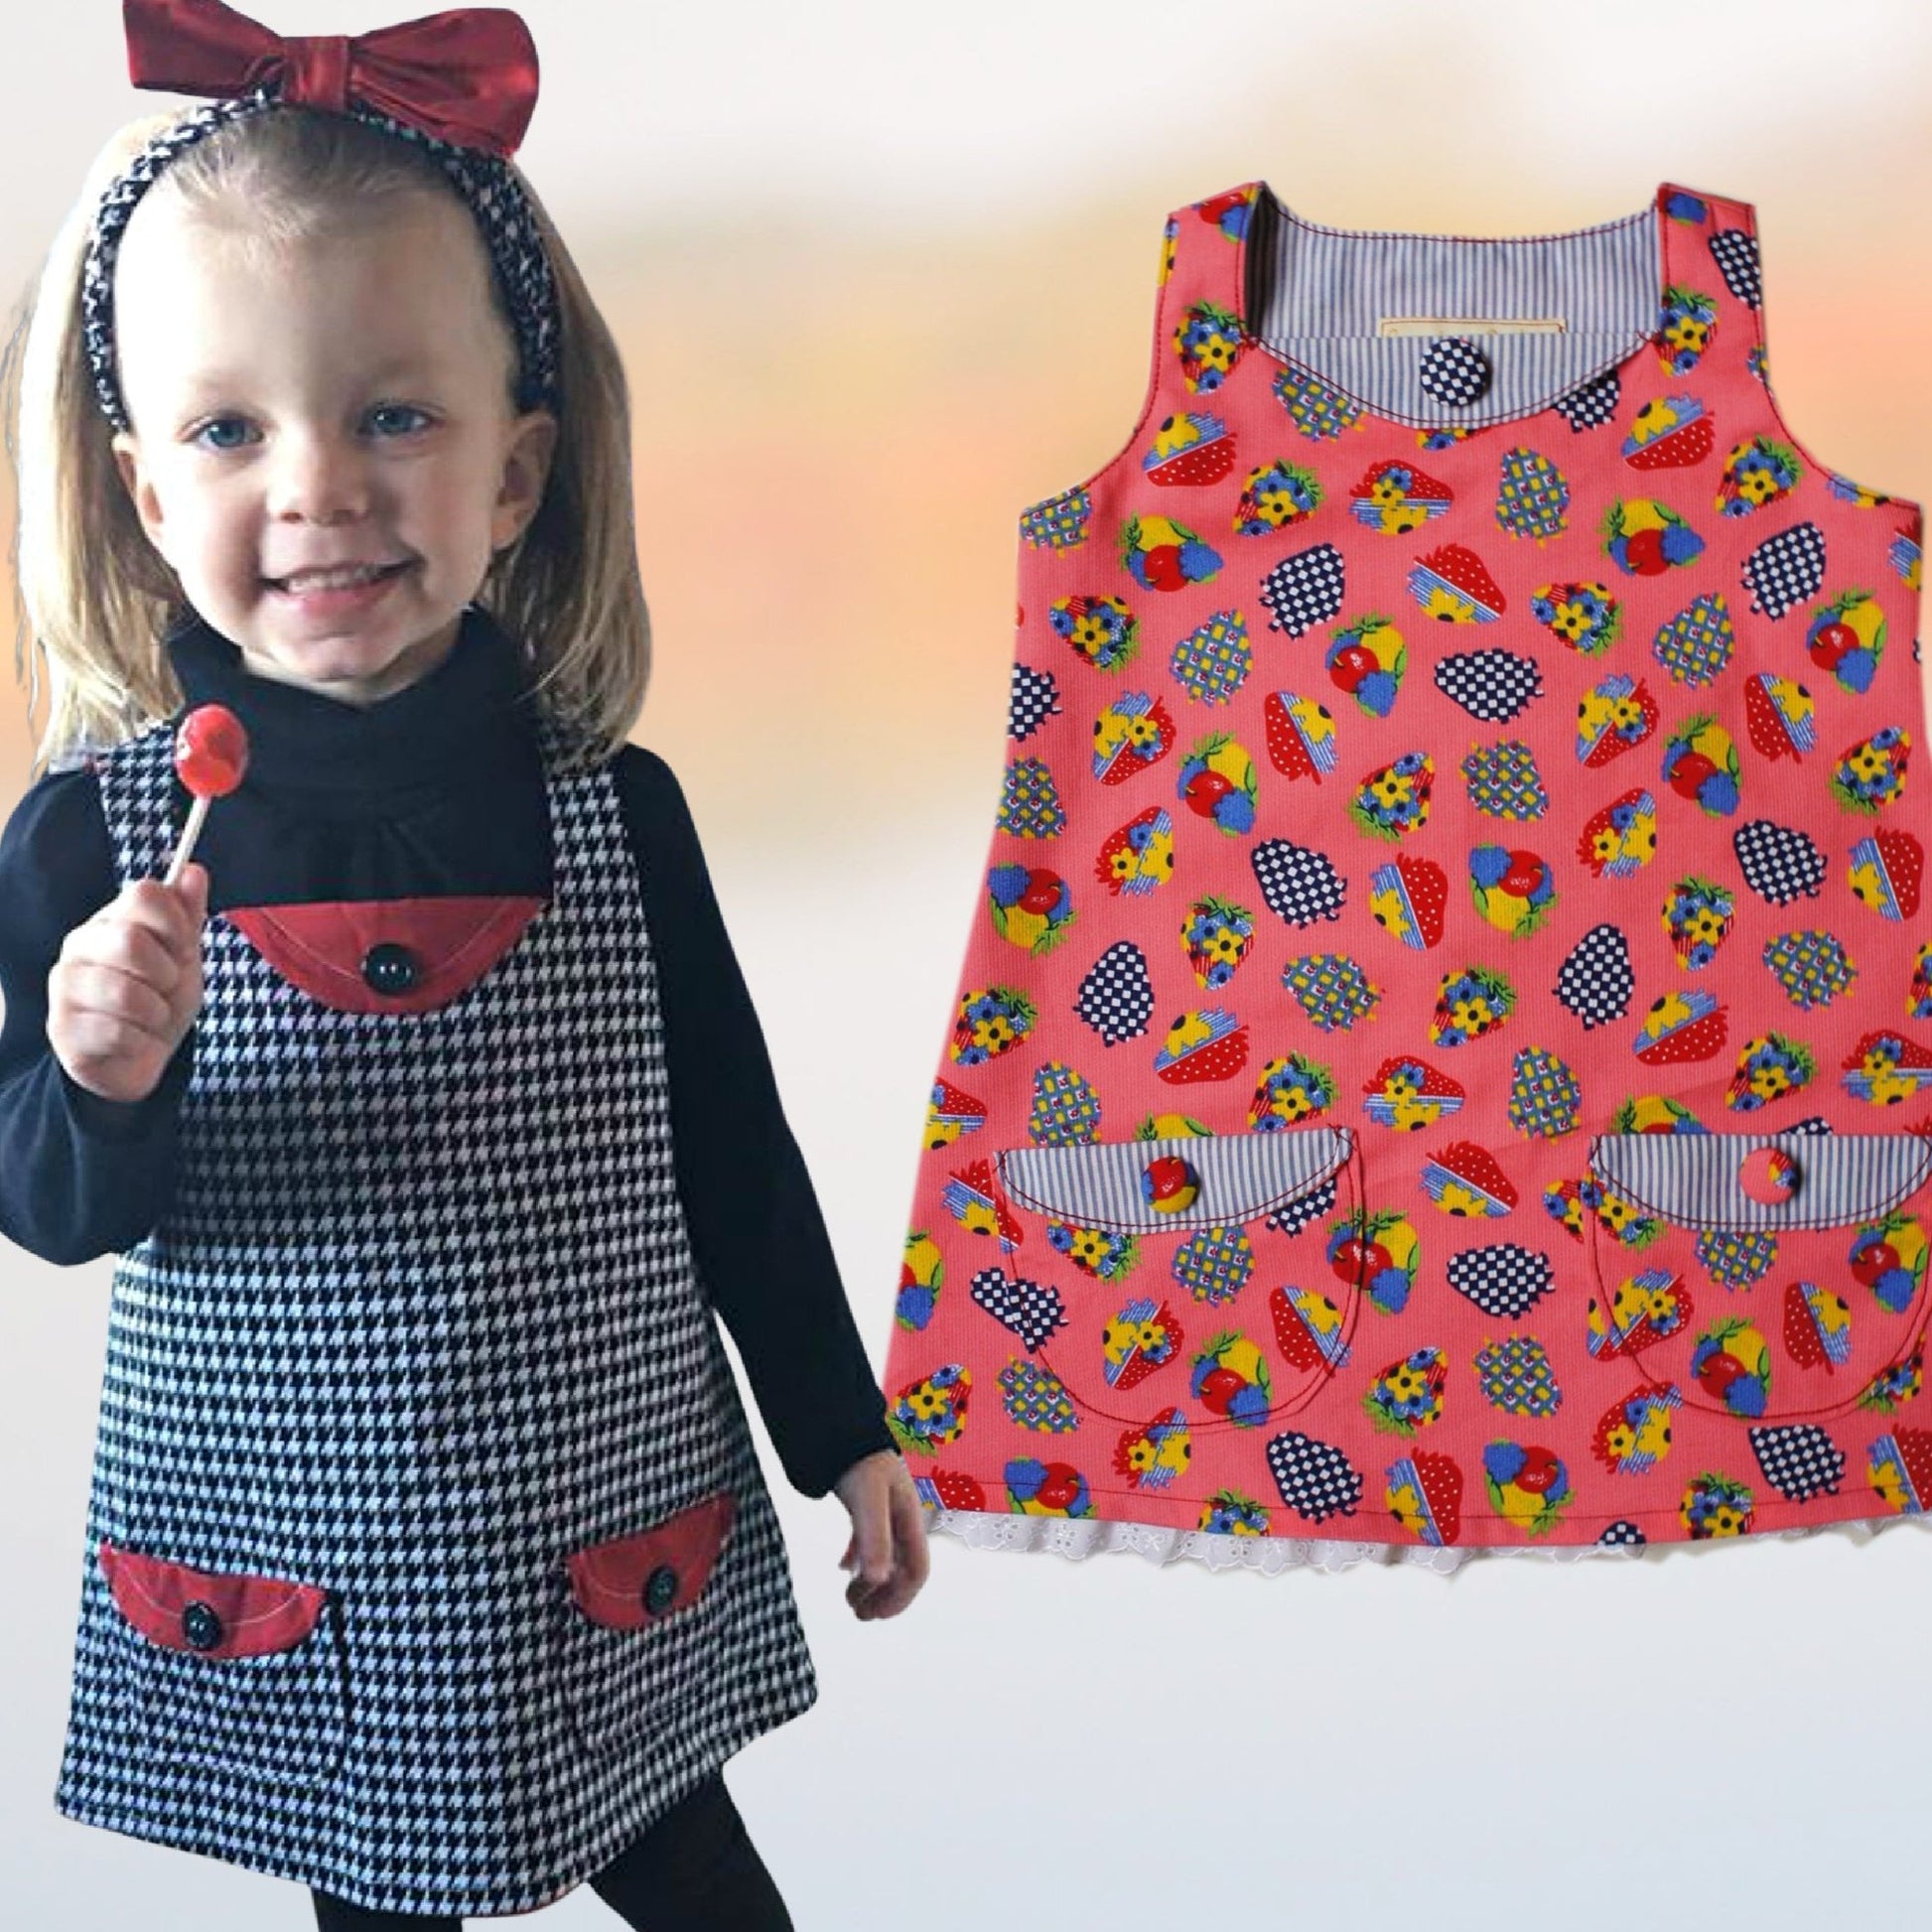
Transcript for the video: Megan Dress: All-In-One Tutorial
To make this lovely dress, you need my Frocks and Frolics Megan pattern. You need two types of fabric for the lining and outer, a little bit of lace, and three cover buttons.
Cutting Out the Fabric
First of all, you want to fold both fabrics over so just one pattern piece fits on. That means you have four layers, both of them on the fold, and that will save you a lot of time cutting out.
Make sure that you have the fold exactly on the edge of the pattern. Now you can see that's my pattern already, lining and front.
Now we go on to cut the back. Exactly the same applies. We fold over the fabric, put both folds on top of each other, place the pattern piece on top, and cut it out.
Once you've done that, you also want to cut out the pockets. We need two pockets: two times shell and two times lining.
The fantastic news is that you will have lots of fabric left.
Making the Pockets
Here you can see how we now have the front and the back with the linings.
Now we want to make the pockets first. Put the lining on top of the pocket and then we're going to sew them together, leaving a gap of about 2 cm.
Take your time going around the curves and, actually, if you're a beginner, you might want to put a few pins in just to make sure it can't move.
Don't forget to lock in your stitches.
Now you need to cut back the seam allowance and snip your curves.
Once you've done that, you're ready to turn the pocket inside out. Put your fingers in and start at the point furthest from you, then pull your pocket through.
The next step is ironing. Ironing is not that easy. You really need to work out all the curves in a kind of rolling motion with your fingers to make sure that you get everything out.
Now that that's done, fold over the flap and give that a good press as well. That is just brilliant so that you know which line to stitch on.
Now go on a jersey stitch on my sewing machine. That makes it look more like embroidery thread. Keeping the same distance from the edge, go all the way around until you just cover that opening.
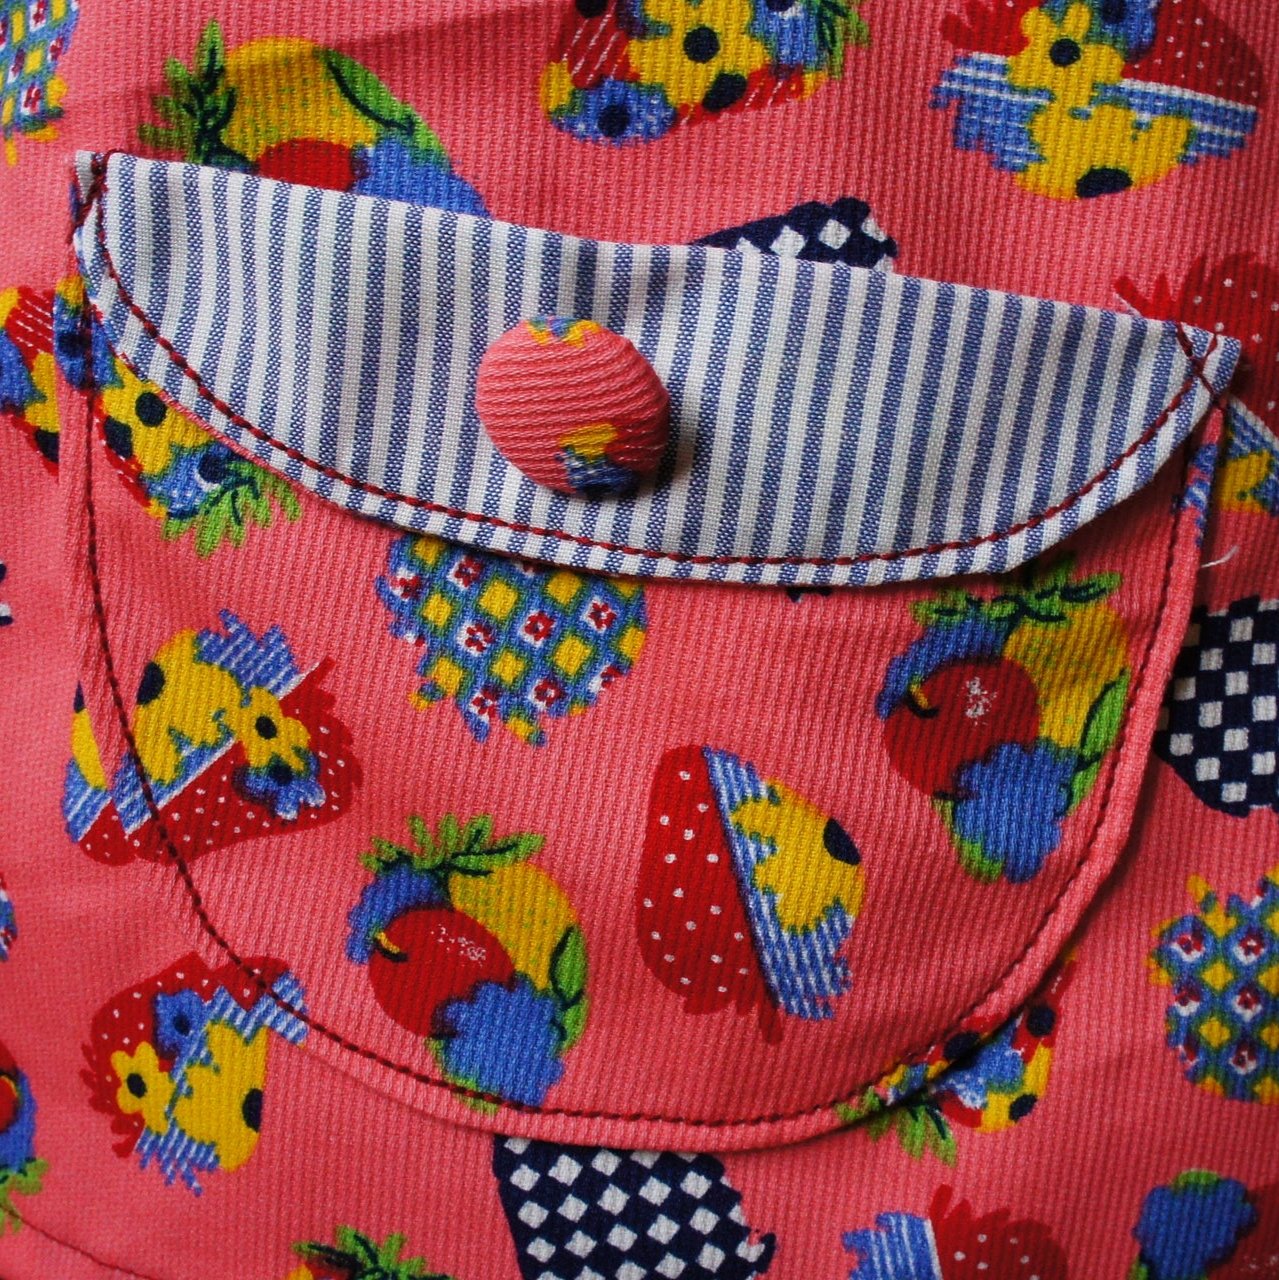
Positioning the Pockets
Now we're going to position our pocket. Fold your front in half, place your pocket on top, and it's up to you where you want to put it. Mine are very low. You could put them a bit higher or at a slant.
Pin them in place. Just two pins will do. Make sure you don't catch the lower fabric.
Then open the whole lot out and take the next pocket. Place it down, right sides facing, exactly on the other pocket.
Flip the front over so that the seam allowances are on top of each other and simply pin this pocket through.
When you open this out, you've got them in exactly the right position, and that's such a brilliant trick.
Now we want to topstitch all the way around. Again, I'm using the triple stitch, which looks a little bit like an embroidery stitch.
Make sure you move around the curve and lift the presser foot. Then you've got a lovely little pocket.
The pocket still rises up there, and I'm going to stitch across there just to keep that from happening. There you can see it won't go anywhere now.
Making the Cover Buttons
Now we're ready to do our cover buttons.
Put a running stitch around a circle that is bigger than your cover button. Obviously, if you've bought a pack, there will be a pattern in there for you.
Then pull that thread, take the second part of the button, and place it over the top.
Before you press it down, take a needle and work your way all the way around. Make sure there are no pleats and that it's really nicely done.
Press down hard, cut off your thread, and your button is finished and ready to sew on.
To get the right position, fold your pocket in half. I do it with a little crease; that's usually enough.
Secure your thread and then sew your button on.
Possibly I could have sewn it on before I put the pocket on, but then do whatever feels better for you.
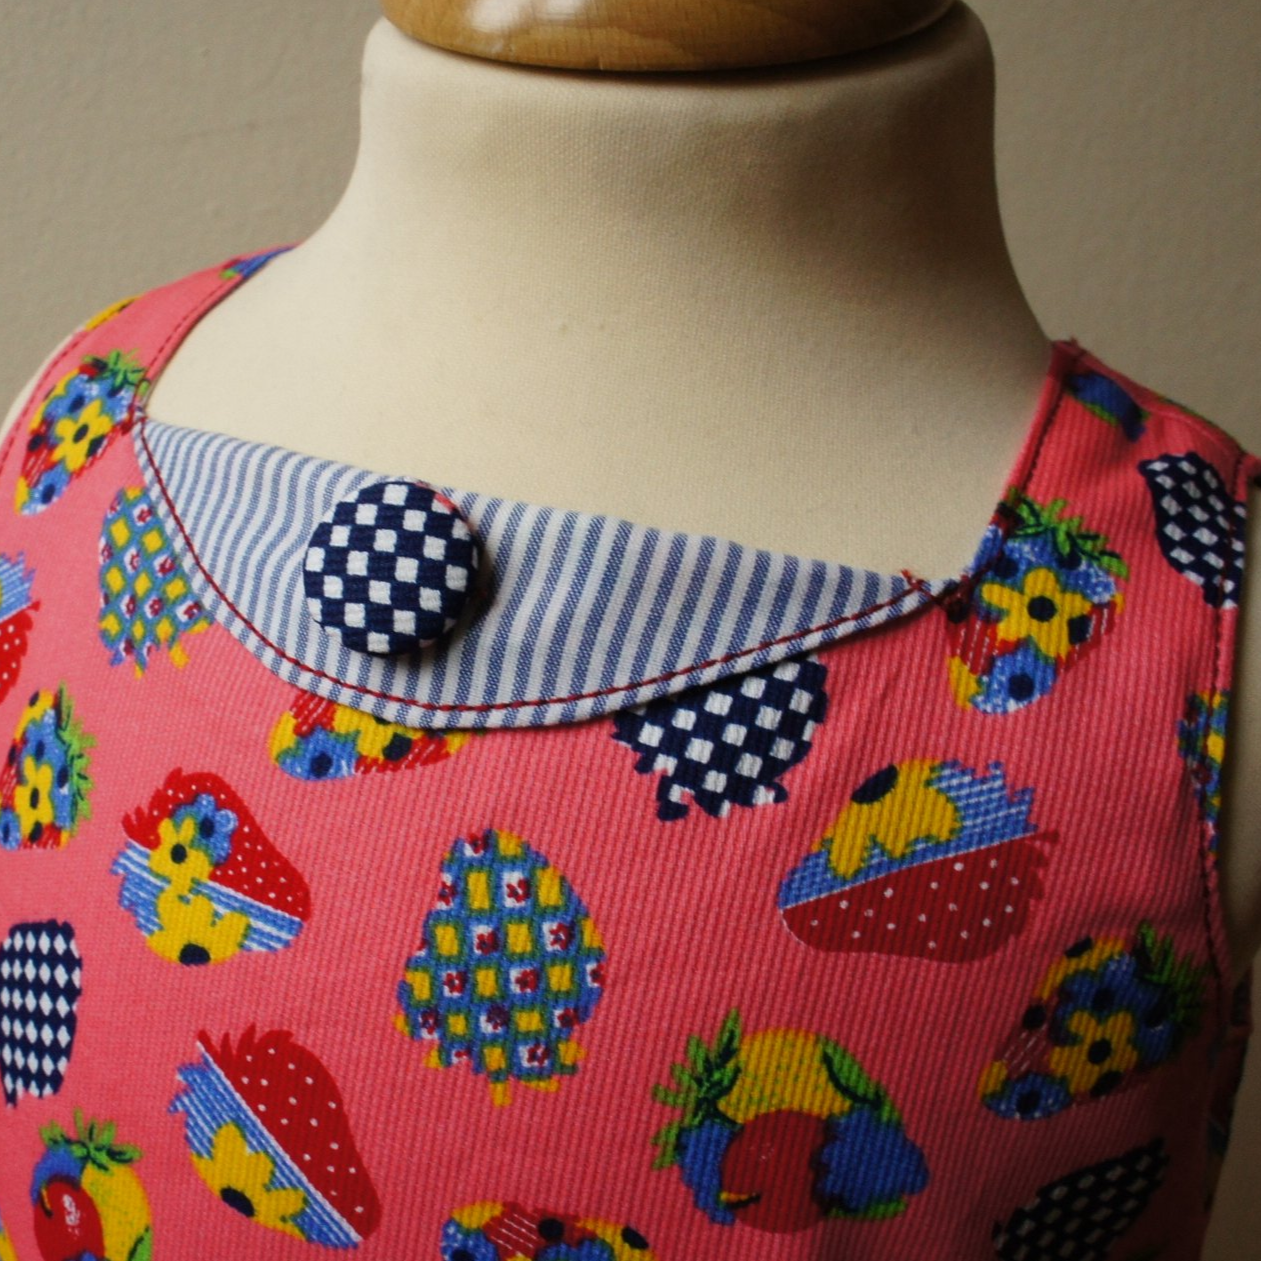
Constructing the Front
Now we're going to finish the front.
Put the lining over the top, right sides facing, and pin around the armhole, the neck hole, and the other armhole. Leave the shoulder open.
I'm also going to mark the point to which I sew. I just use a pencil, actually. I can't be bothered to get my tailor's chalk.
Now sew all the way around. Seam allowances are 1 cm.
Take your time going around the curve. I actually apply quite a lot of force with my fingers to the needle plate as I'm going along.
When you come down the front, I'm actually going backwards and forwards on the last stitch.
If you've got a mechanical machine, you can do that. If you've got an electronic machine, you can't. In that case, just reduce your stitch length to maybe 1 or 1.2 to make sure that there's no fraying because we're going to cut right into that point in a minute.
Now snip all your curves and cut right into the point. That's why it's so important to go backwards and forwards or use a really small stitch length.
Turning and Topstitching
Now we're going to turn the whole lot inside out so we've got our front and back.
Now all I need to do is iron this really well. Again, the same thing applies: really work out all the curves in that rocking motion. You have that seam allowance between your fingers and move backwards and forwards to get it right.
Once I've ironed it, I've also topstitched it and put the last button on the same way we've done the pocket, so I don't need to show it again.
Closing the Shoulders
Now we want to close the shoulders.
The front shoulder is basically inserted into the back shoulder. Put your fingers in, grab the front shoulder, and pull it through to the other side.
Move it right into the corner and use a pin for that. Then secure it.
On the other side, use a pin to really push it into that corner and pin it.
Now we want to sew across, starting at the seam. You can see me do that there. I'm only going from seam to seam because I don't want to cut off my securing thread.
Next, we want to cut the corners off. You could also cut a little bit of the seam allowances back so that they're staggered. When you pull that out, you'll get a really lovely shoulder.
Sewing the Side Seams
Next we're going to do the side seams.
This is dead easy. Just pull it all out, put the shell fabric and the lining fabric on top of each other, and make sure that your seam allowances on the underarm seam are facing downwards and sitting on top of each other.
Then simply sew down.
This is so easy. There are such complicated methods of doing this, and for a beginner or anyone who wants to do it really quickly, this is a brilliant way of doing it.
I've also overlocked that seam, but if you haven't got an overlocker or serger, you can just use pinking shears.
Topstitching the Armholes and Neckline
Now I'm also going to topstitch all the way around my armholes and the neck hole.
If you're an absolute beginner and you have trouble keeping your distances, then I would leave this out. But if you're quite good and you've got a bit of a feel for your sewing machine and where the stitches go, then this is really great and makes it look so much more professional.
Hemming the Dress
Now the next thing is to do the hem.
I just turn it in 1 cm and then up 1 cm, so it's very easy.
I don't actually pin this. I find it's easier not to pin it. I've got my seam allowance on the needle side. Just turn it in, keep it on that seam allowance, and then stitch very close to your folded edge.
It gives you a really lovely seam like that. Pins do get in the way.
Adding the Lace
Now don't do this at home, children. I've used my scissors because, as before, my tailor's chalk was downstairs.
In an ideal world, please mark it with tailor's chalk.
Then you want to reduce it another centimeter from the total length, and that will make that little bit of lace sit perfectly.
Make sure that you put the lace on that side of the lining where you can see the seam, facing upwards.
I've stitched it on, checked that it was all right, then overlocked it, and I'm now just topstitching the lining down.
That makes the edge nice and firm and a bit more professional than just leaving it hanging.
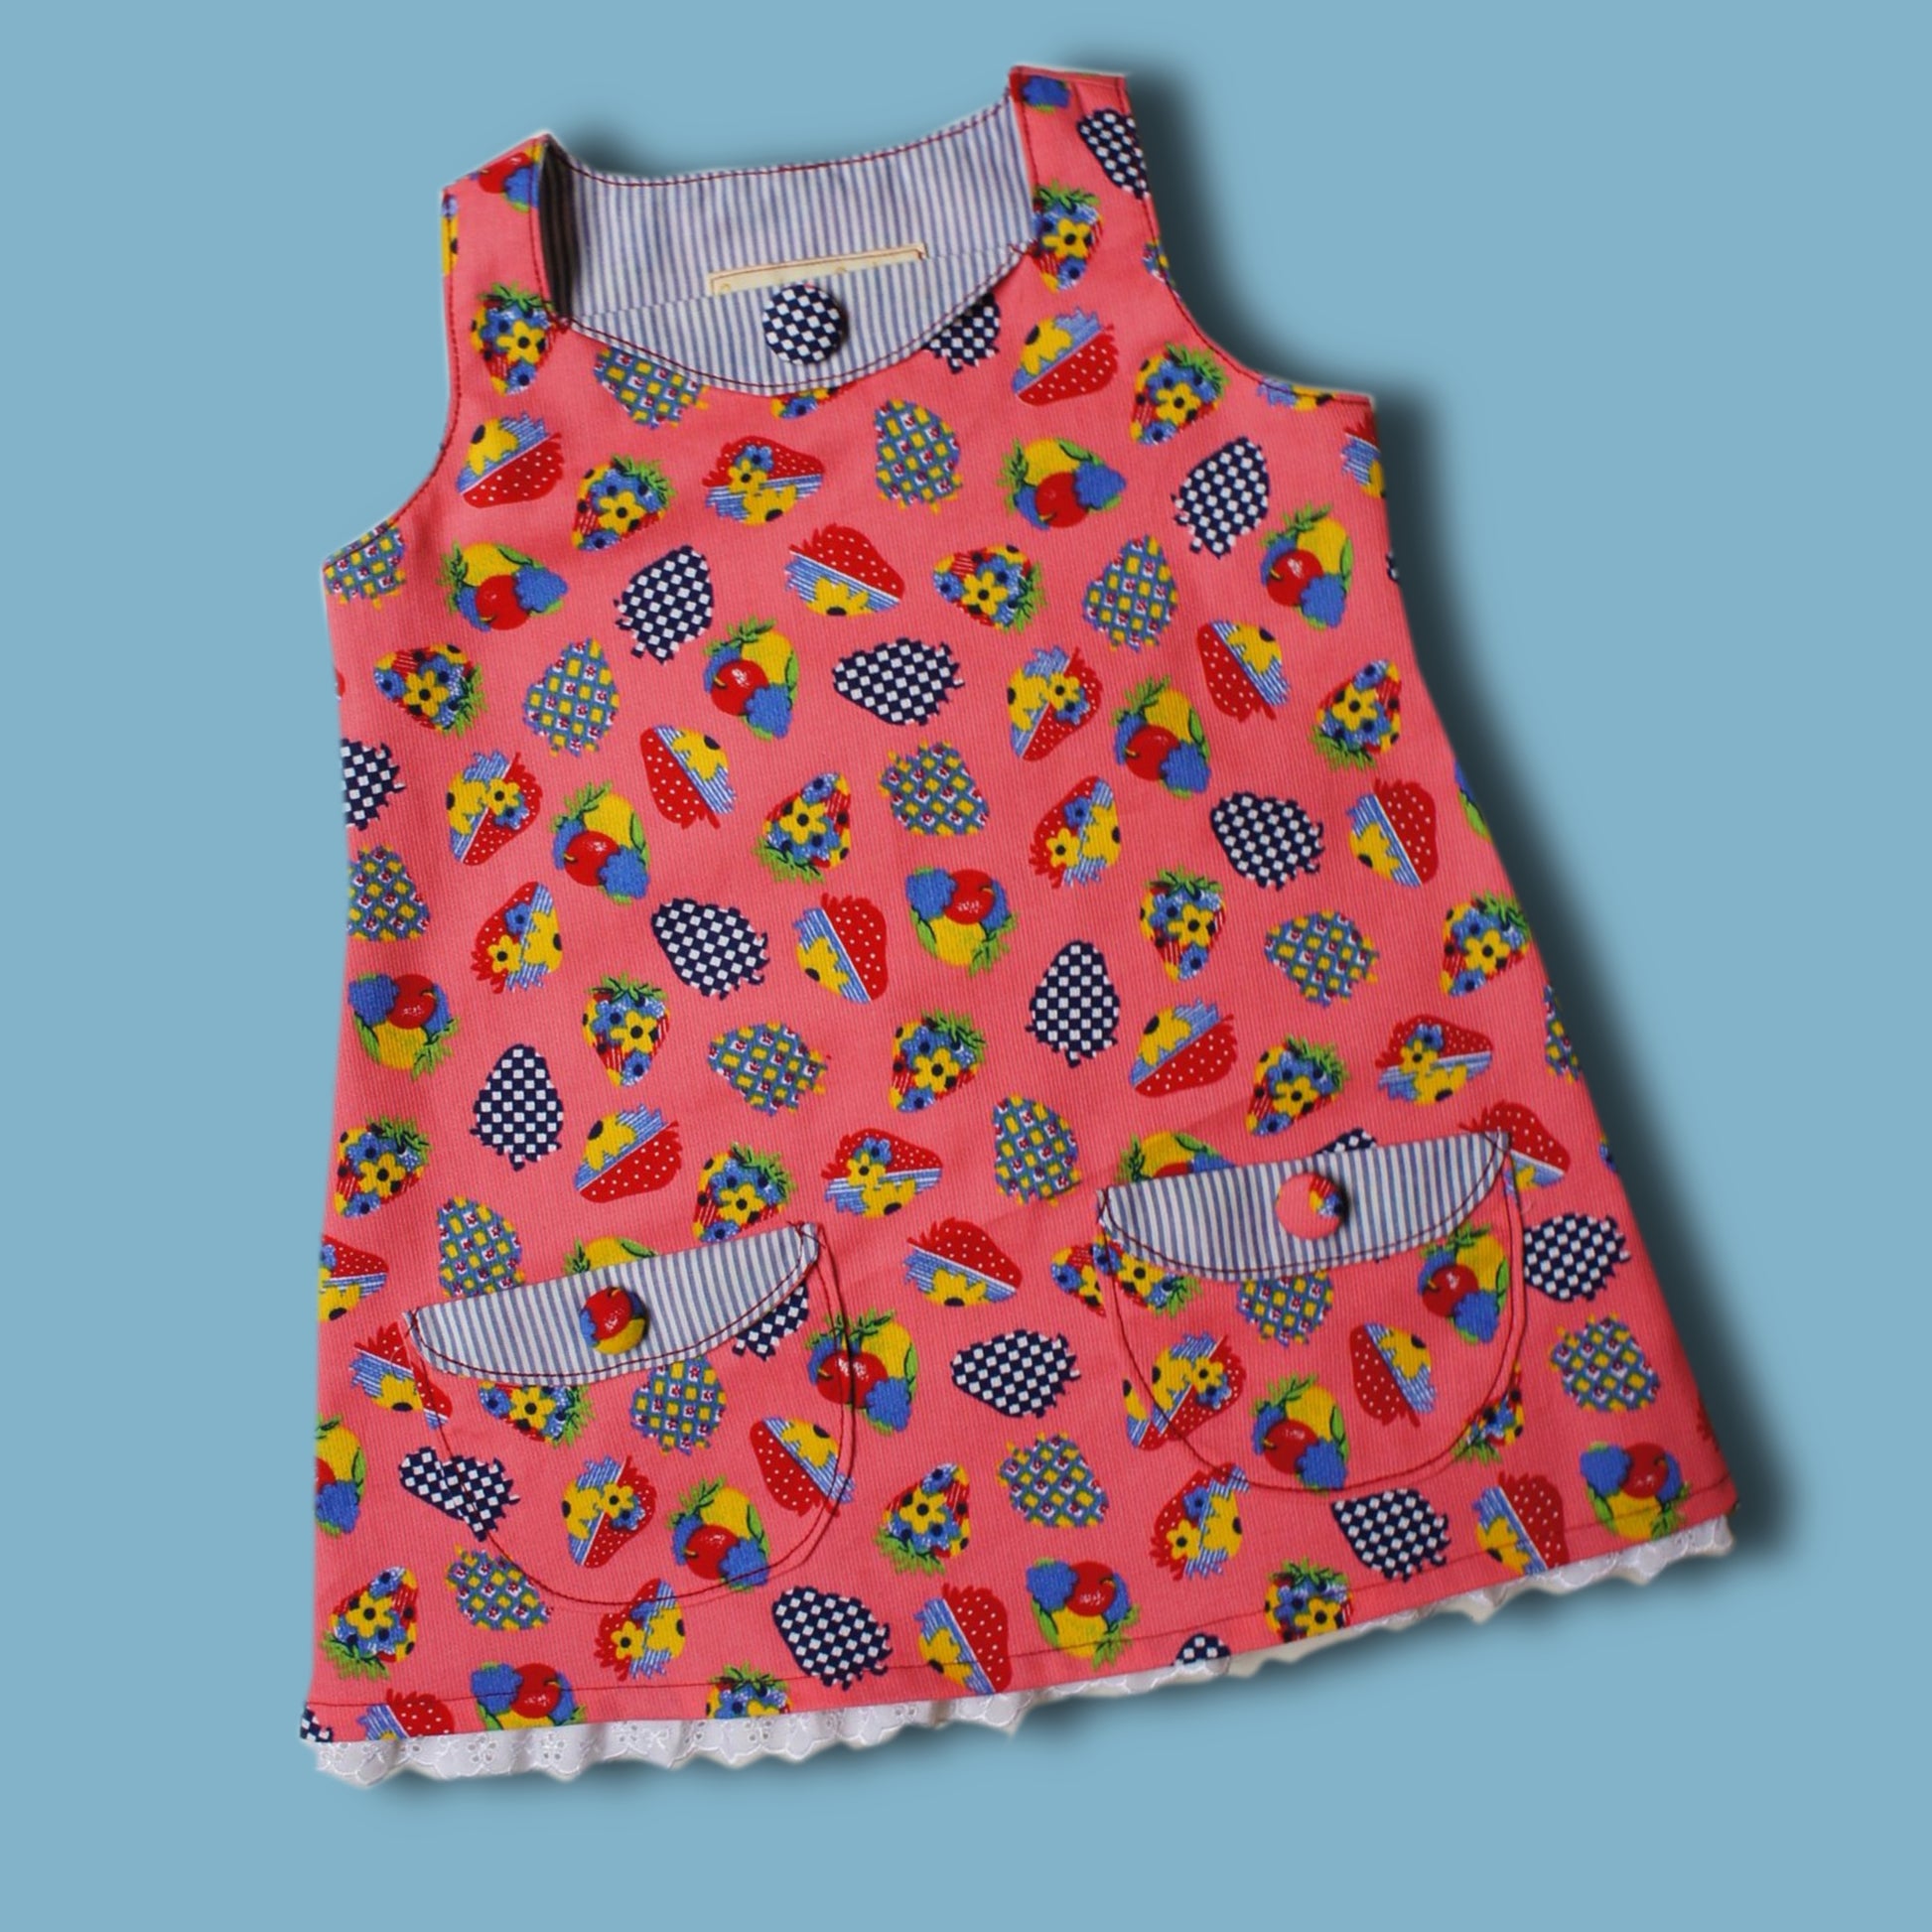
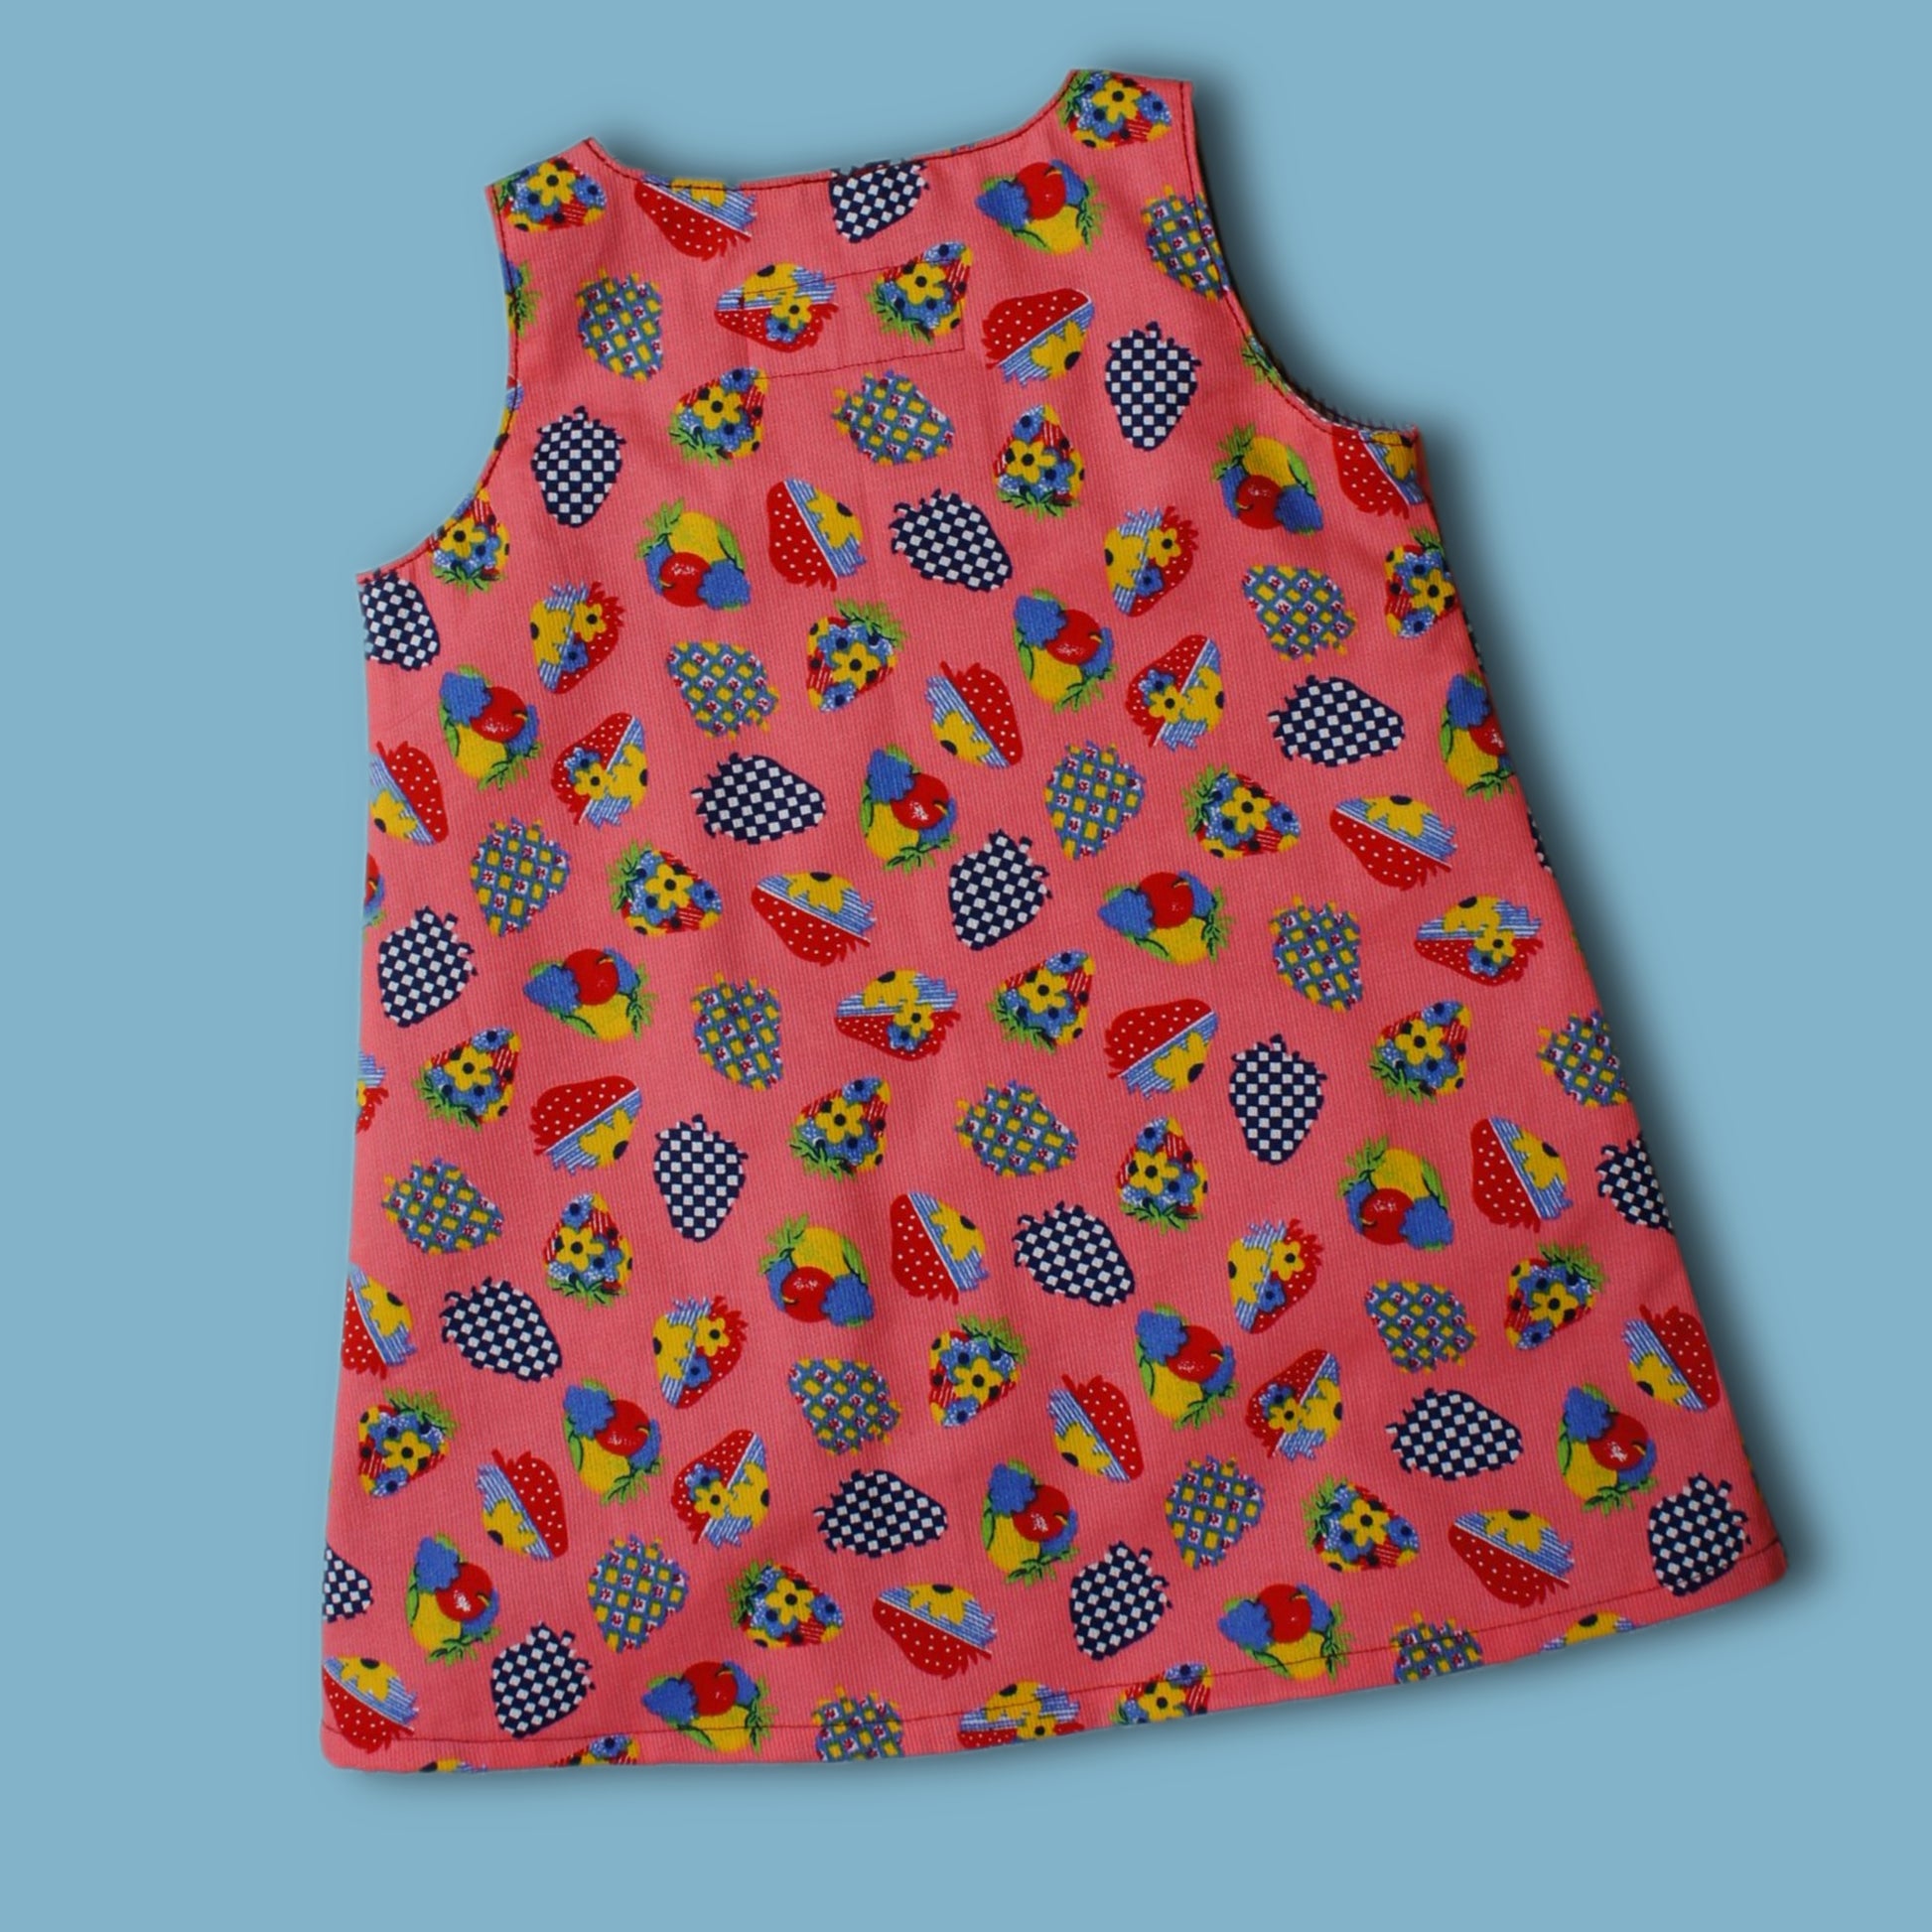
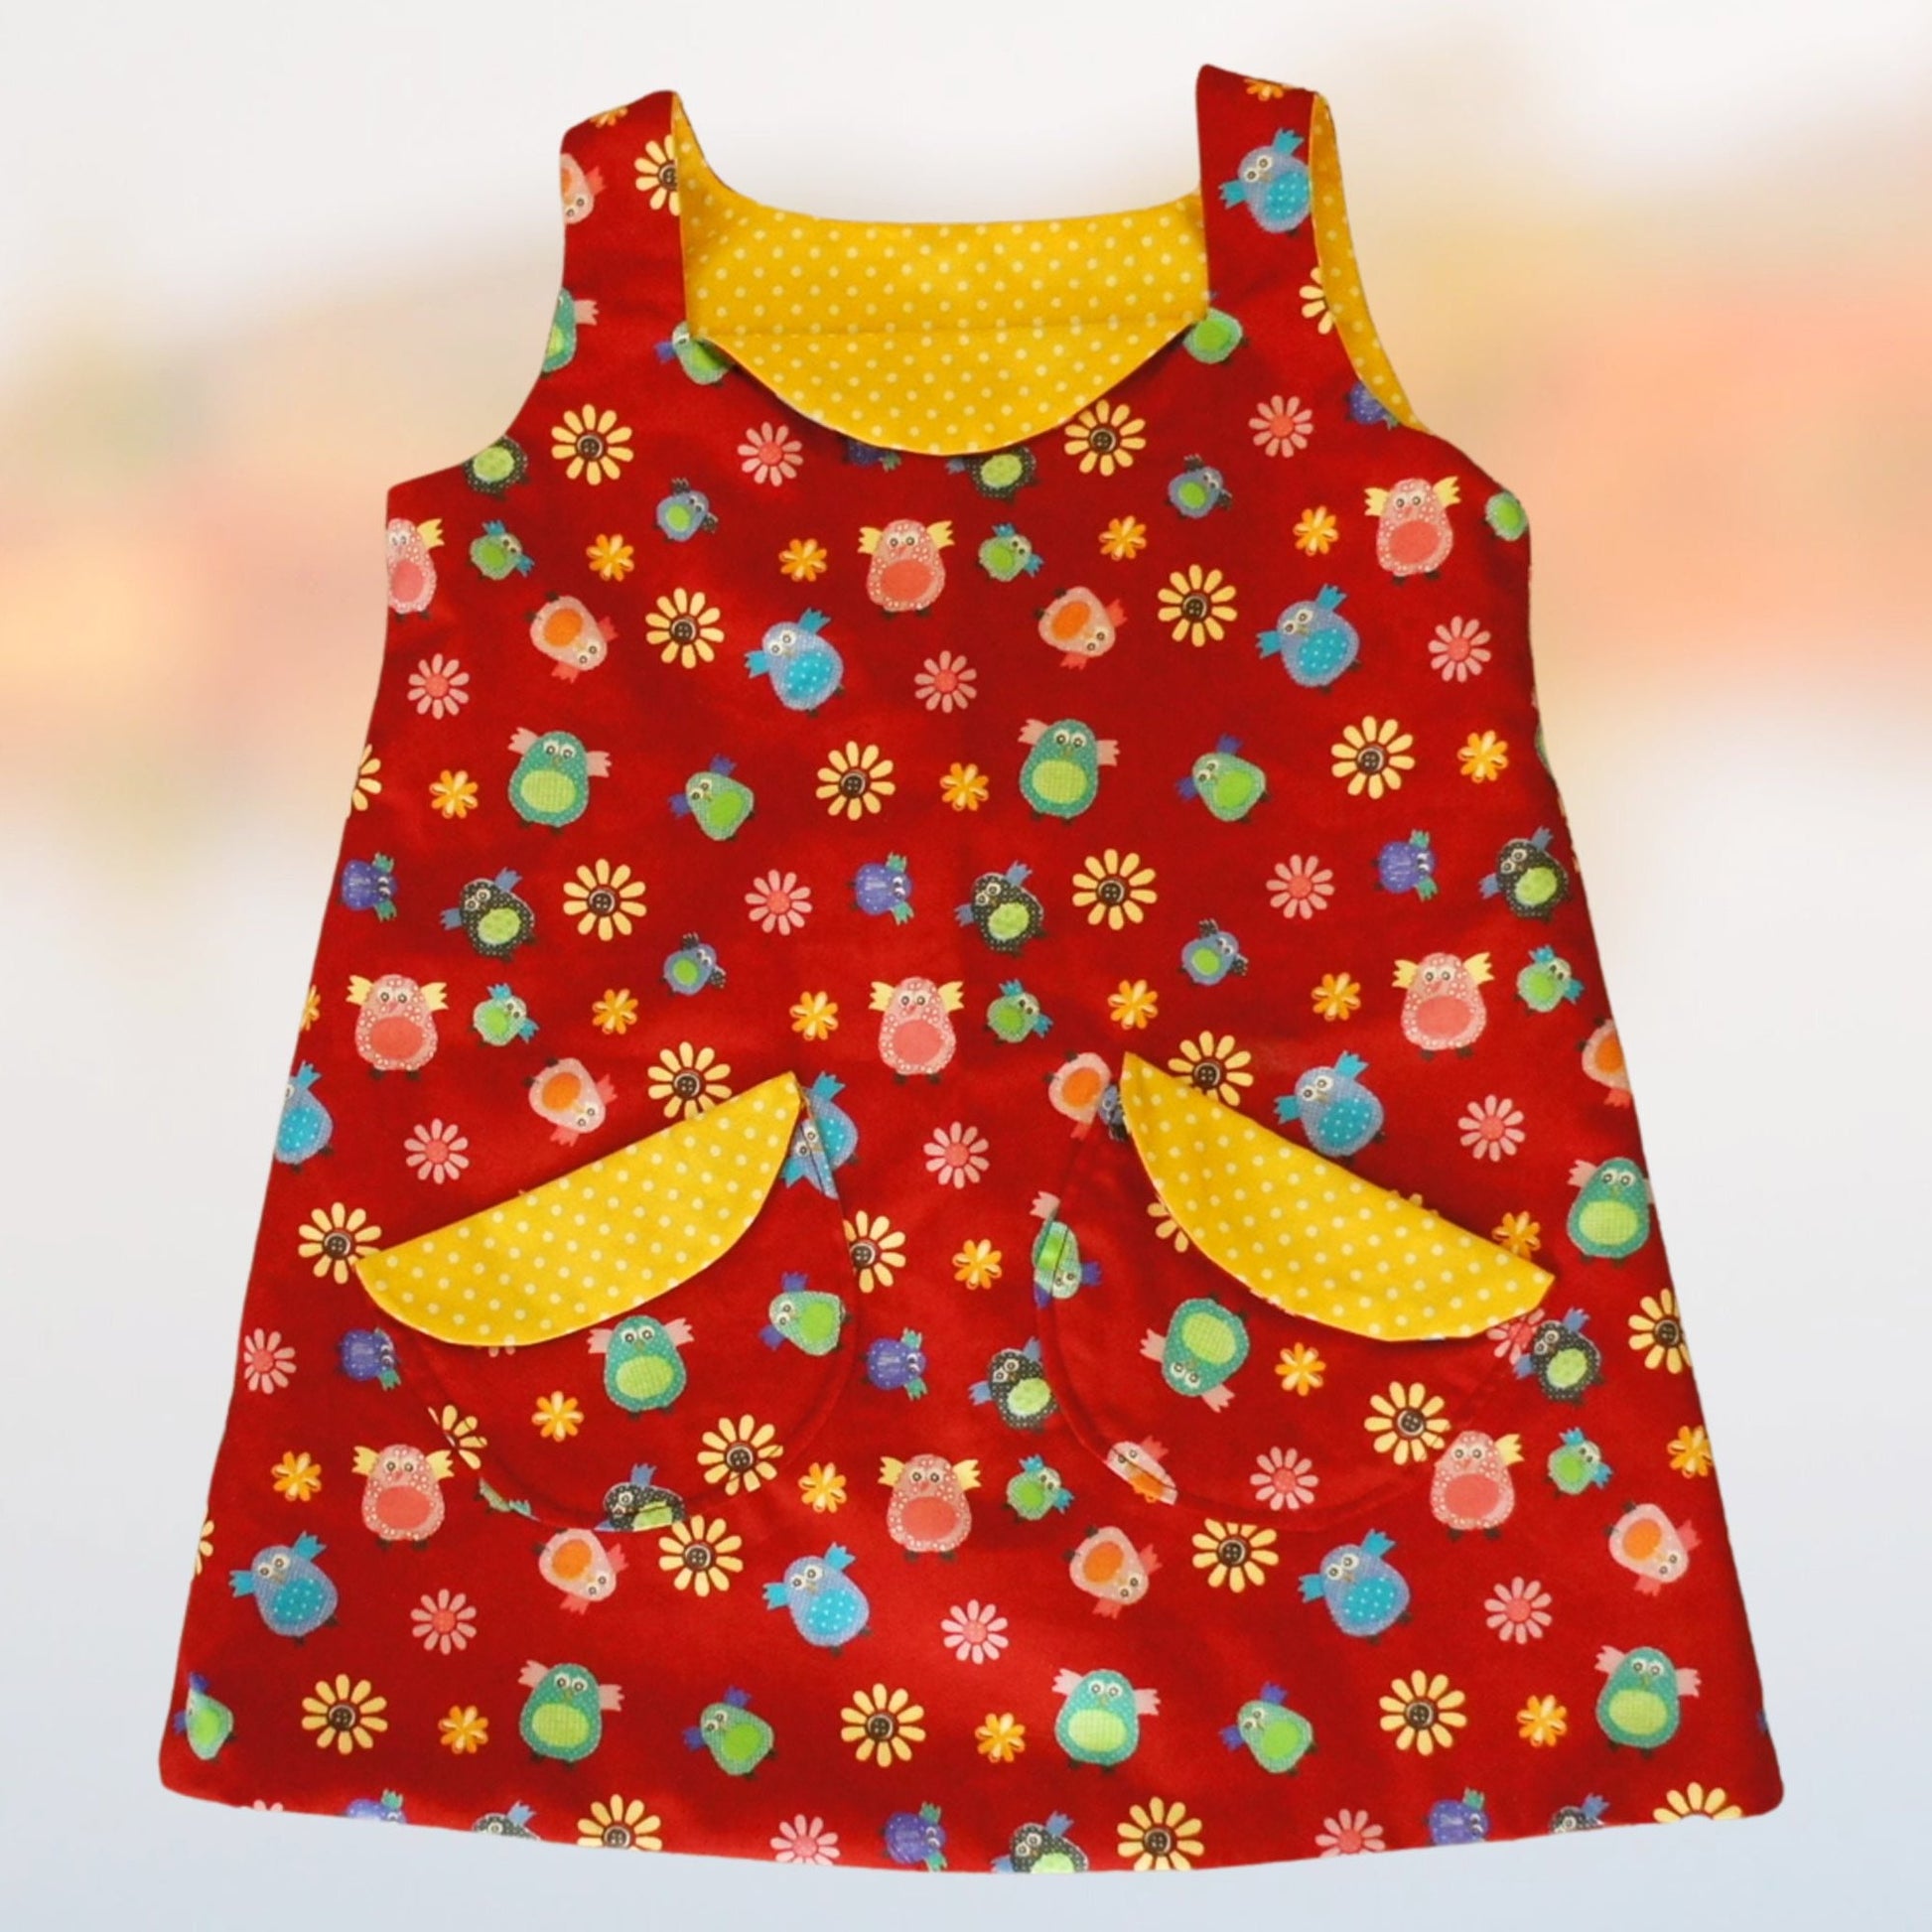
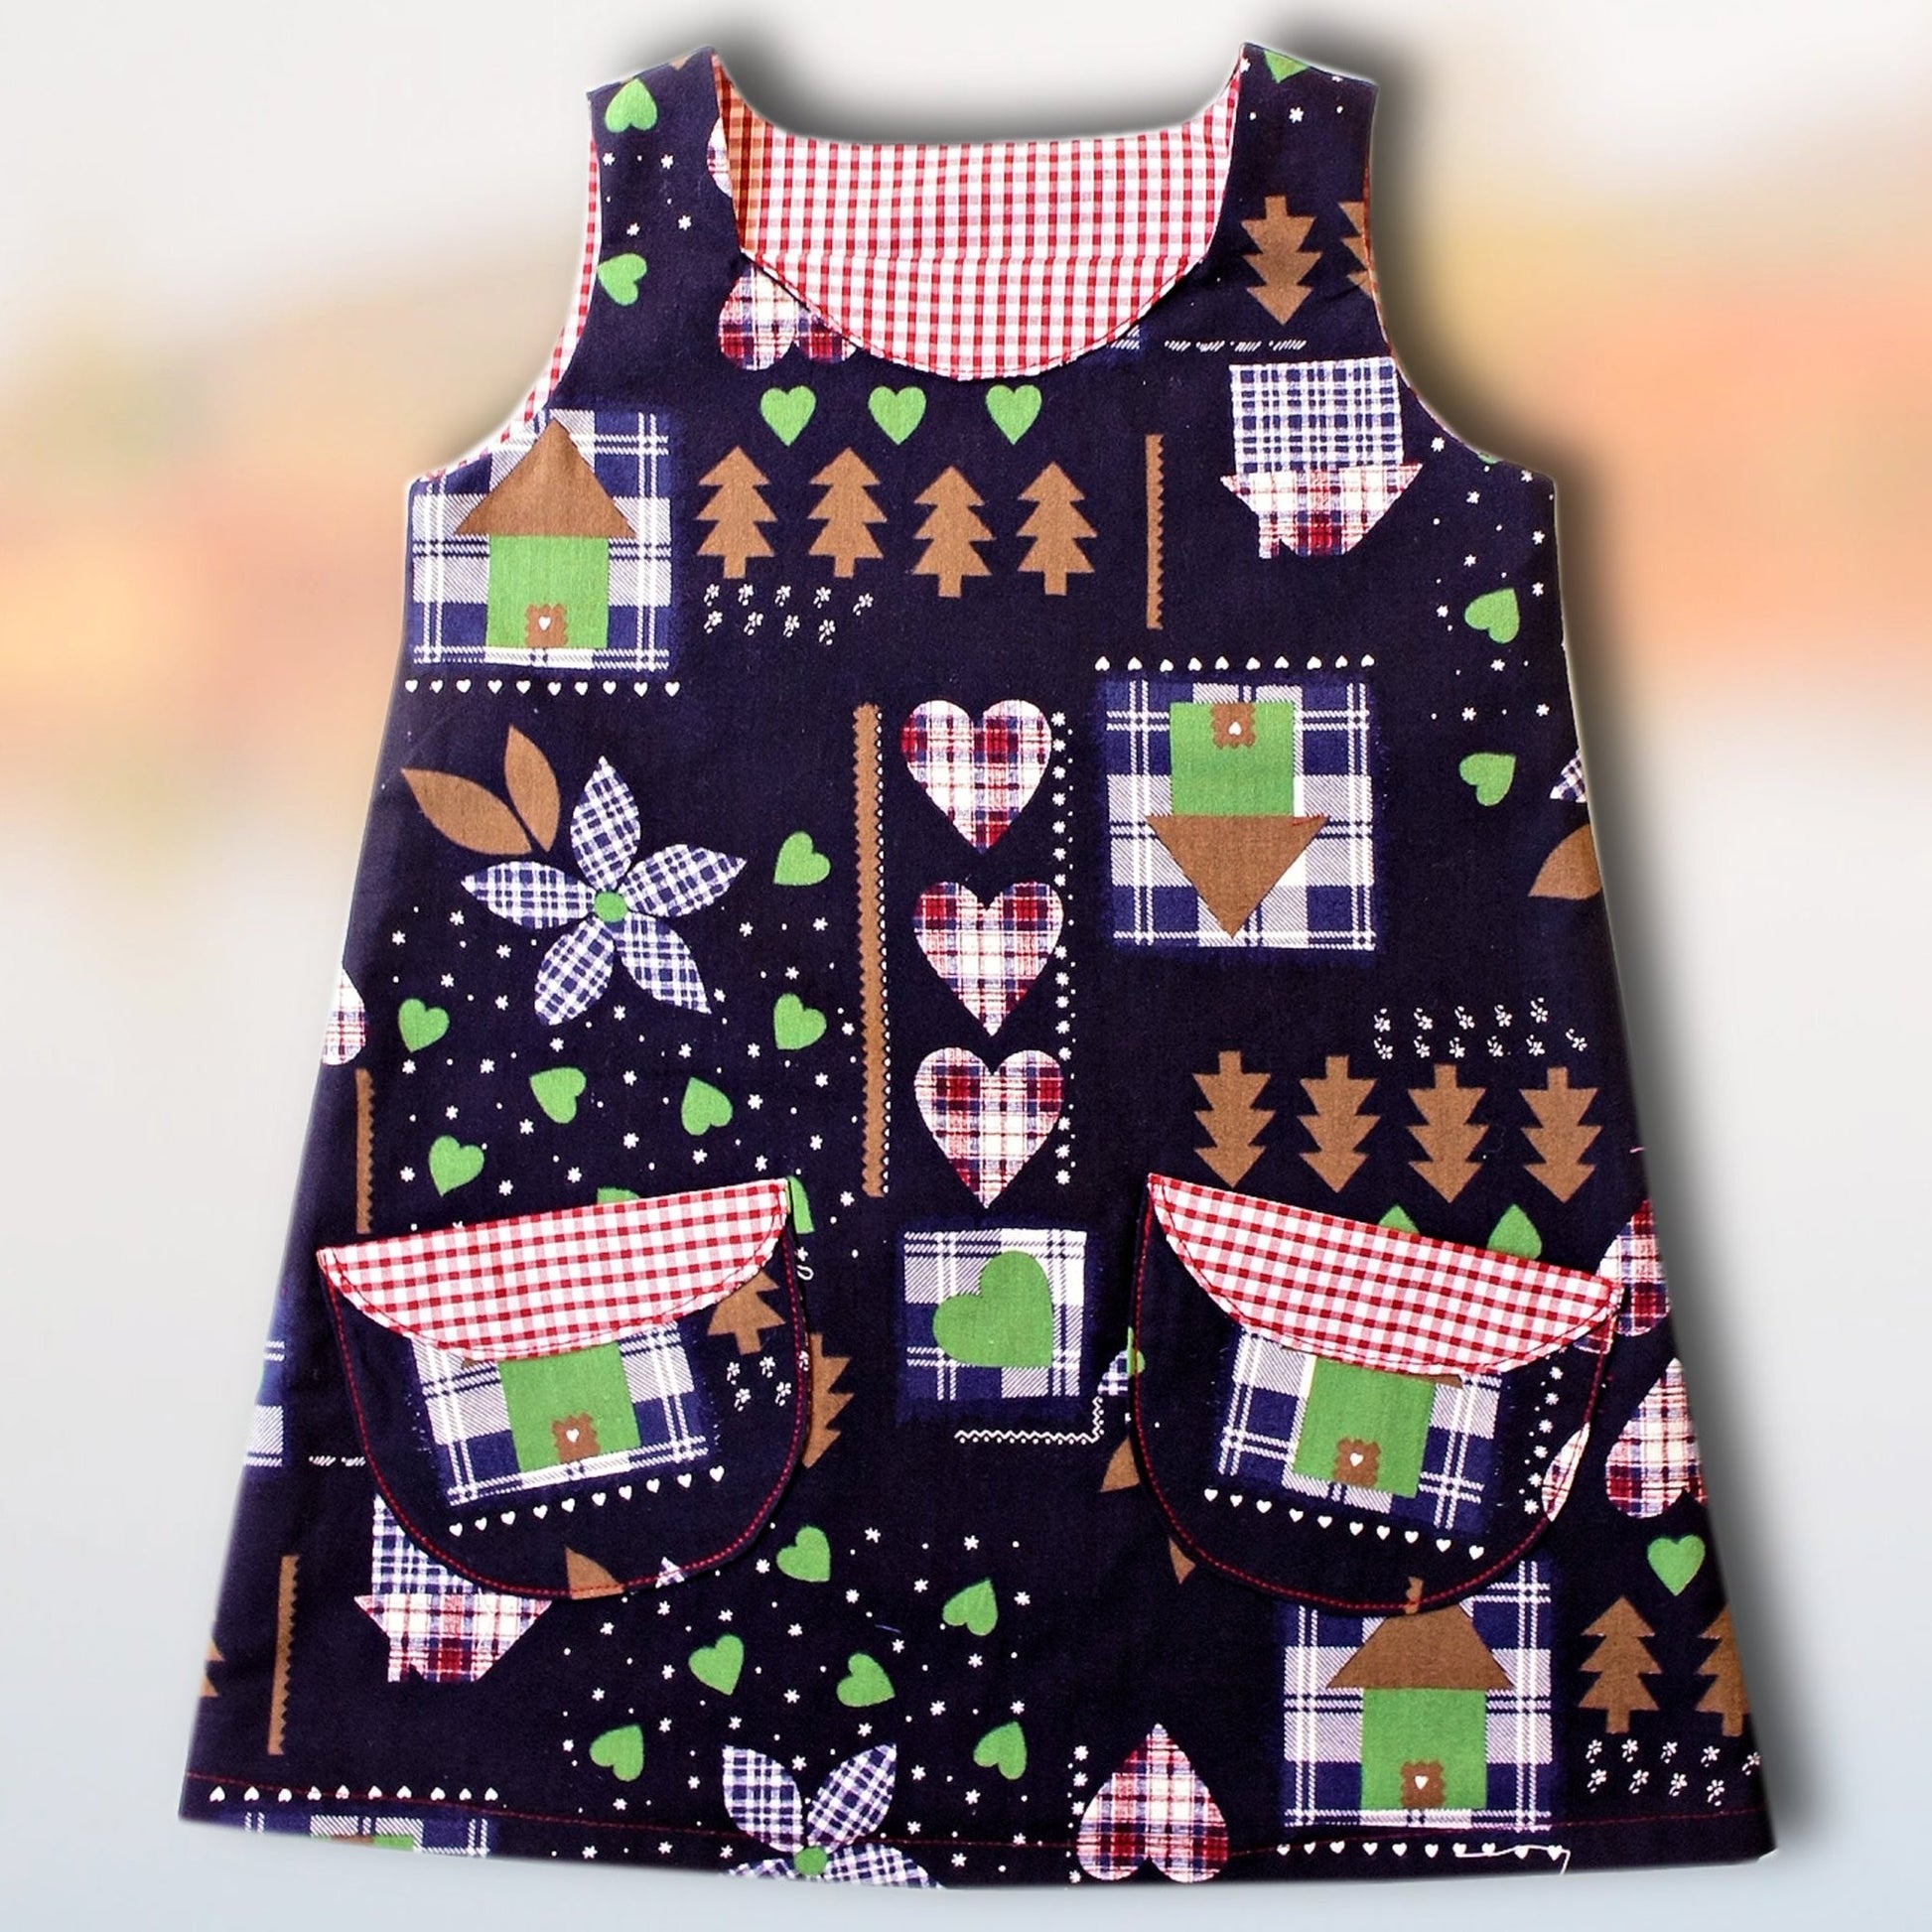
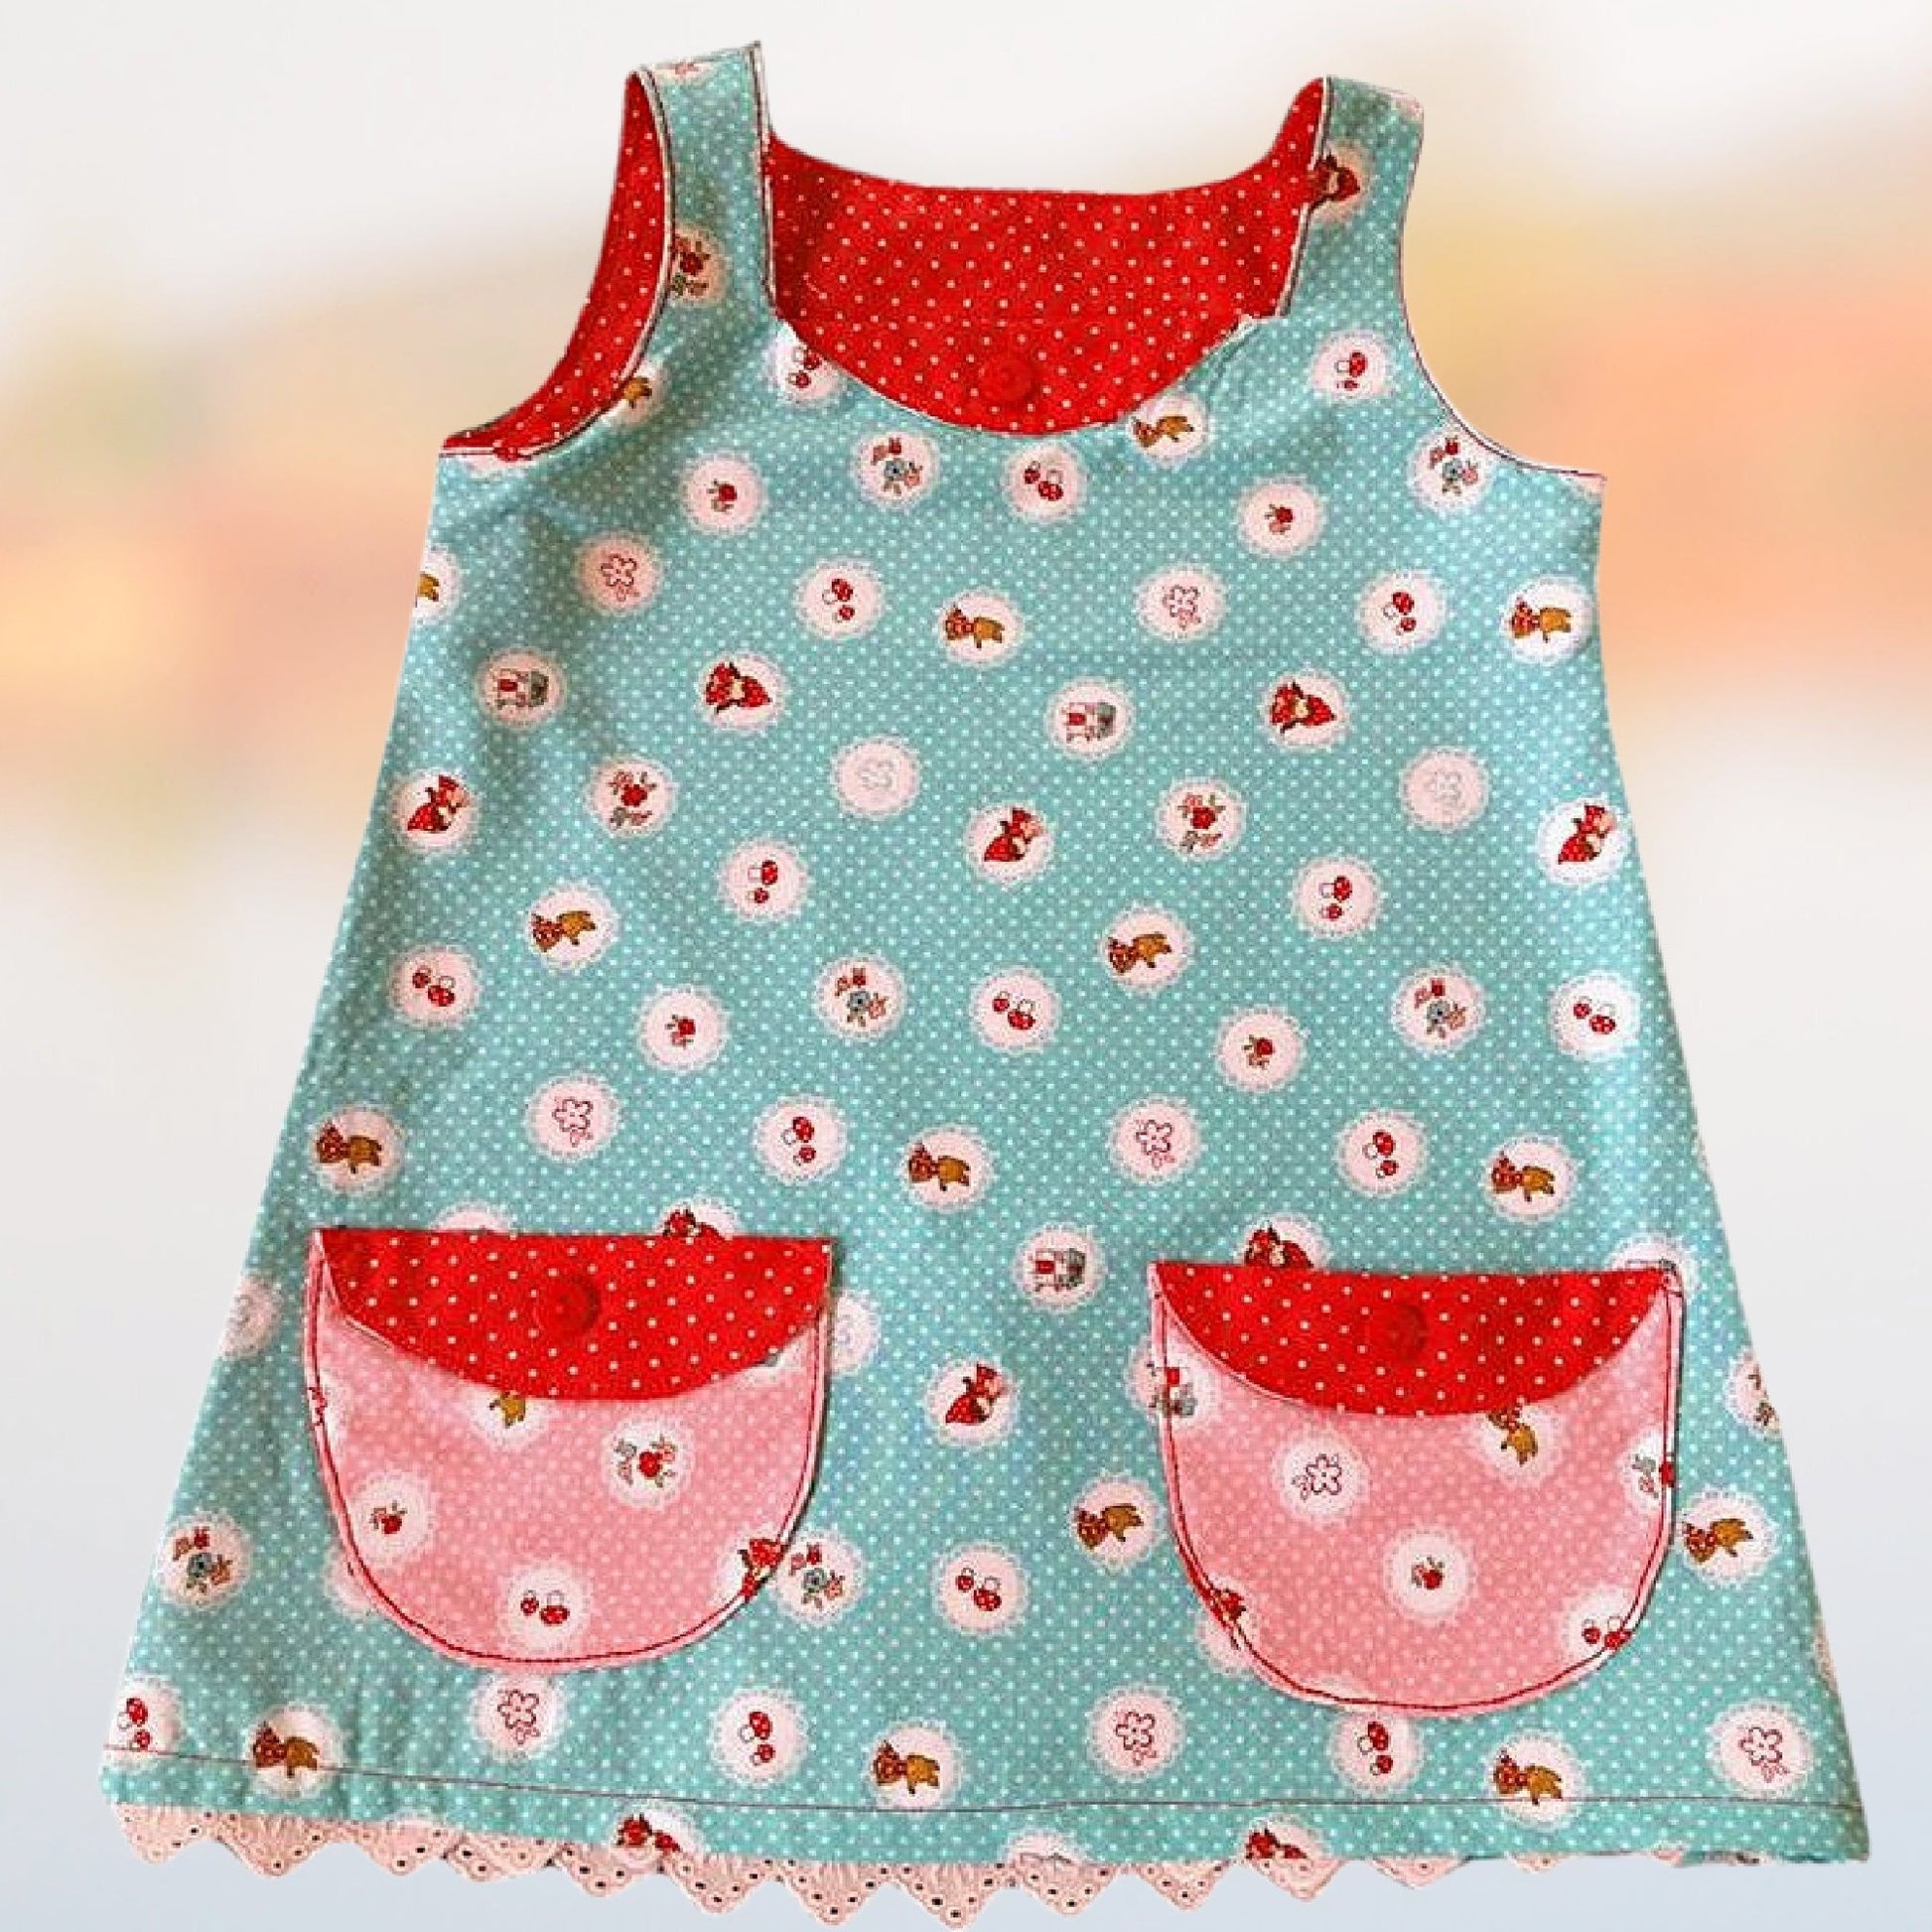
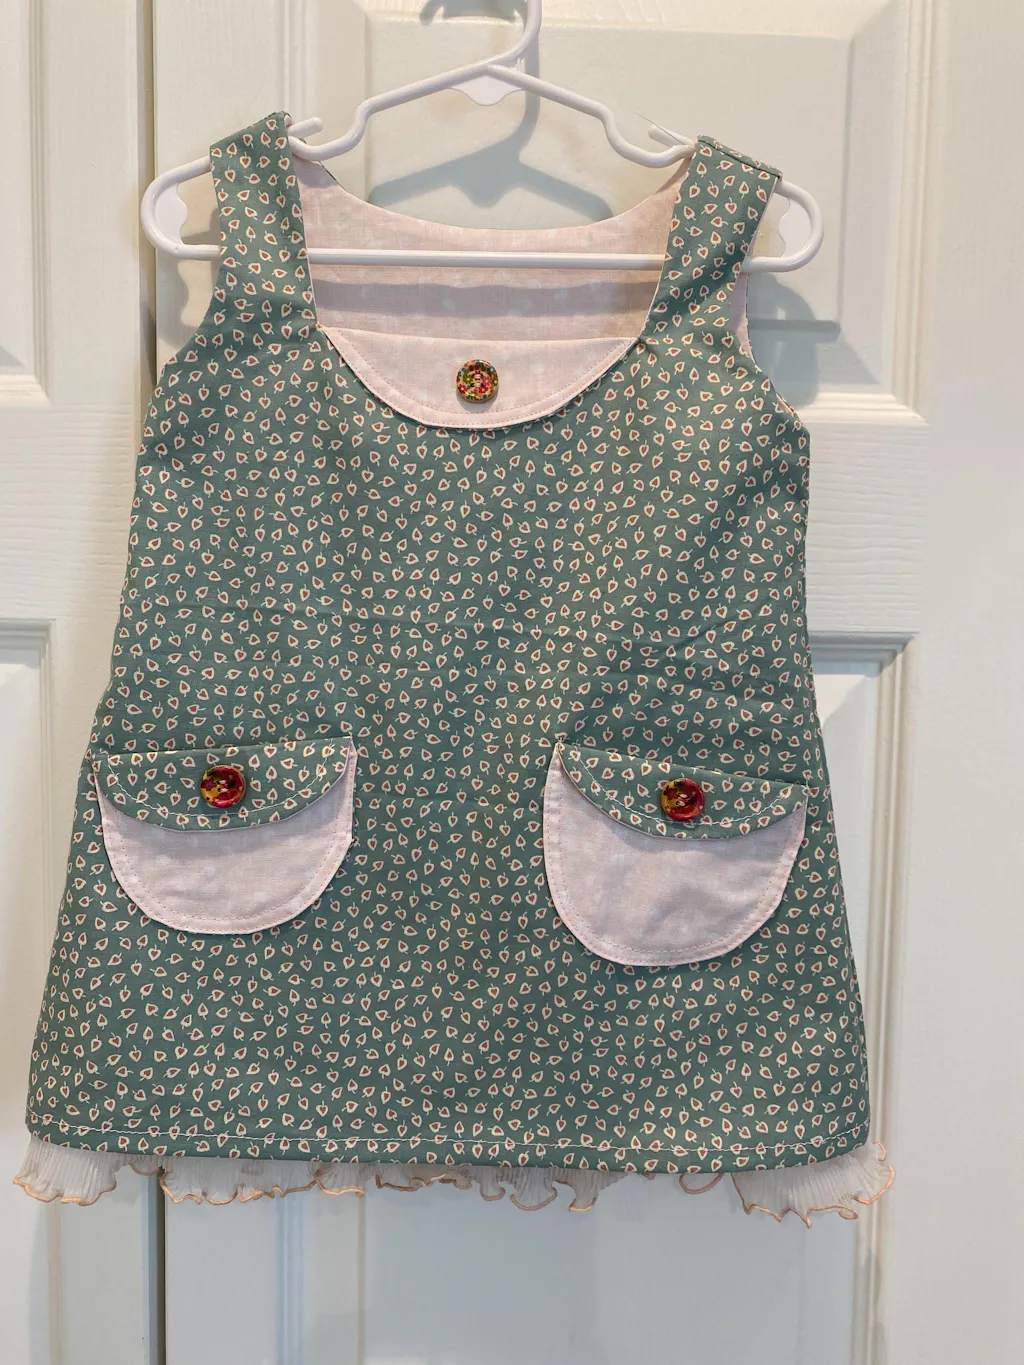
Finished Dress
And the dress is finished.
I hope you've learned a few techniques on how you can make a very simple dress but make it look as if it's come out of a really expensive shop somewhere.
They look complicated, but really they're not.
Don't forget, the link to the pattern is underneath the video, and you can get it from the Frocks and Frolics website.
Thank you very much for watching.