BROOKLYN WAISTCOAT
BROOKLYN WAISTCOAT
Couldn't load pickup availability
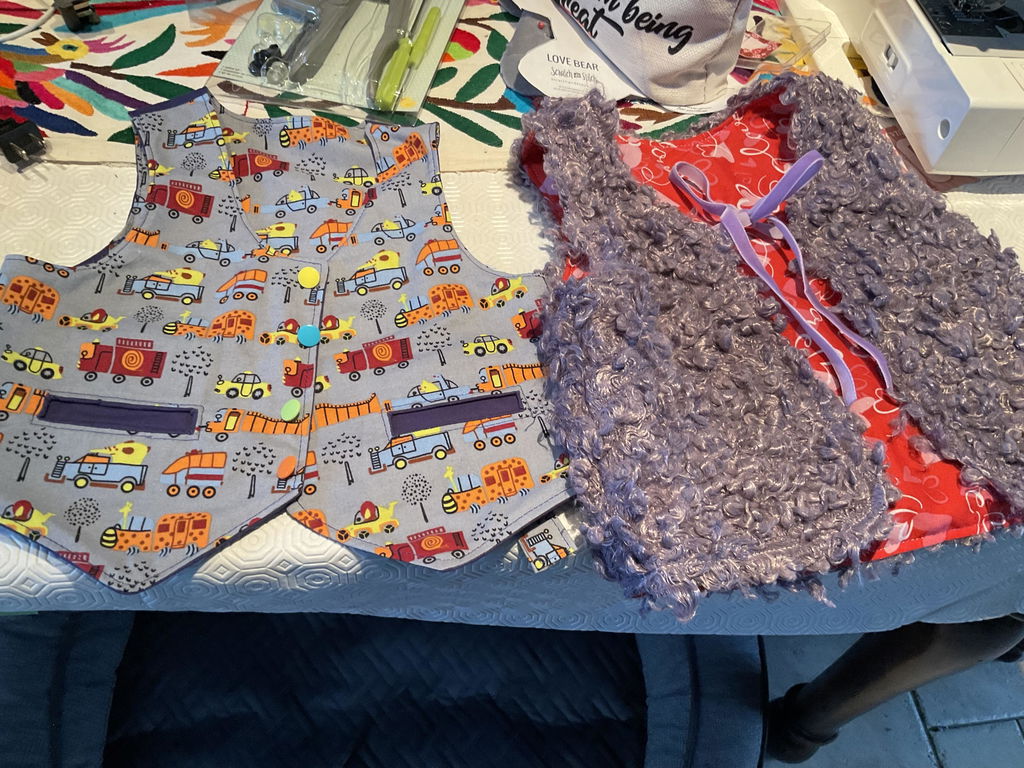
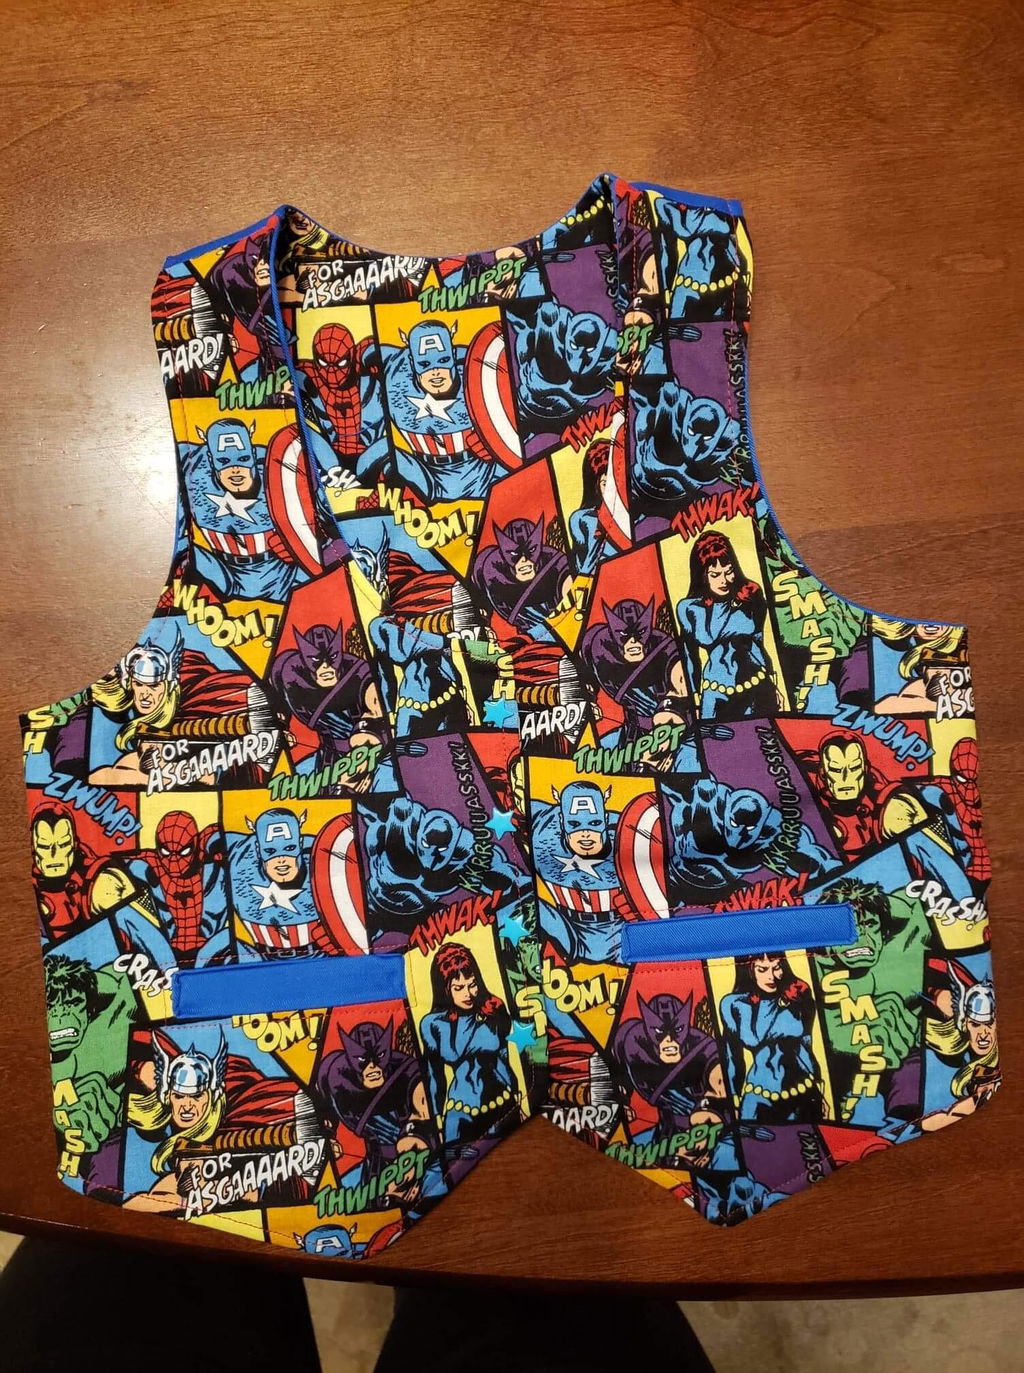
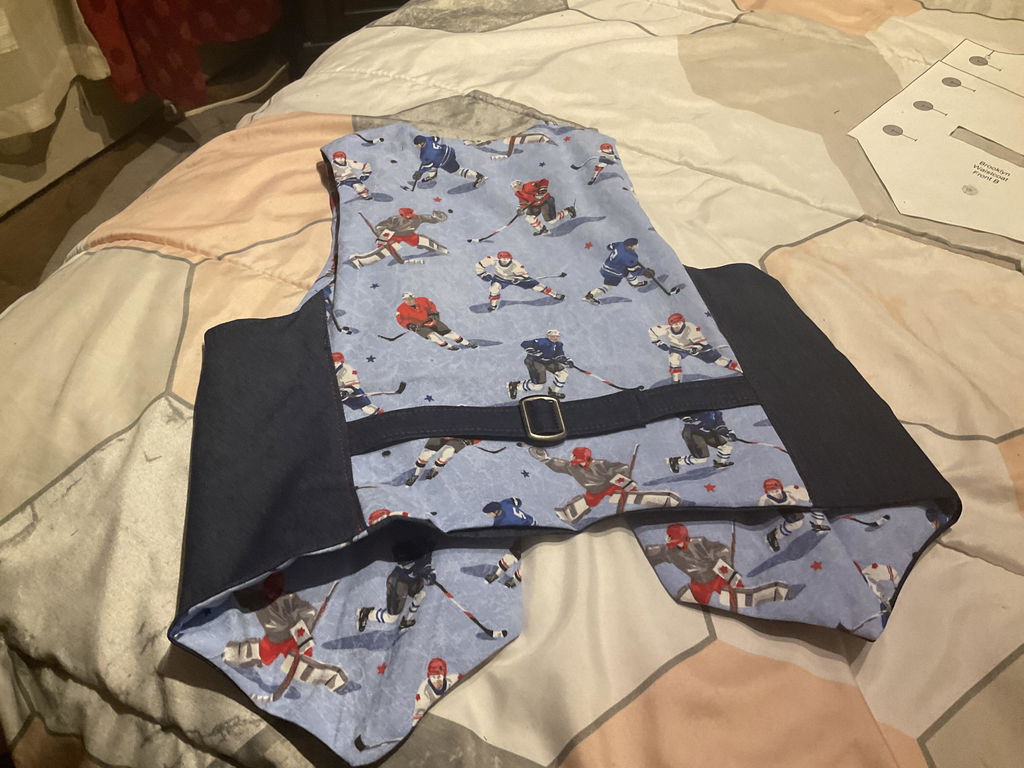
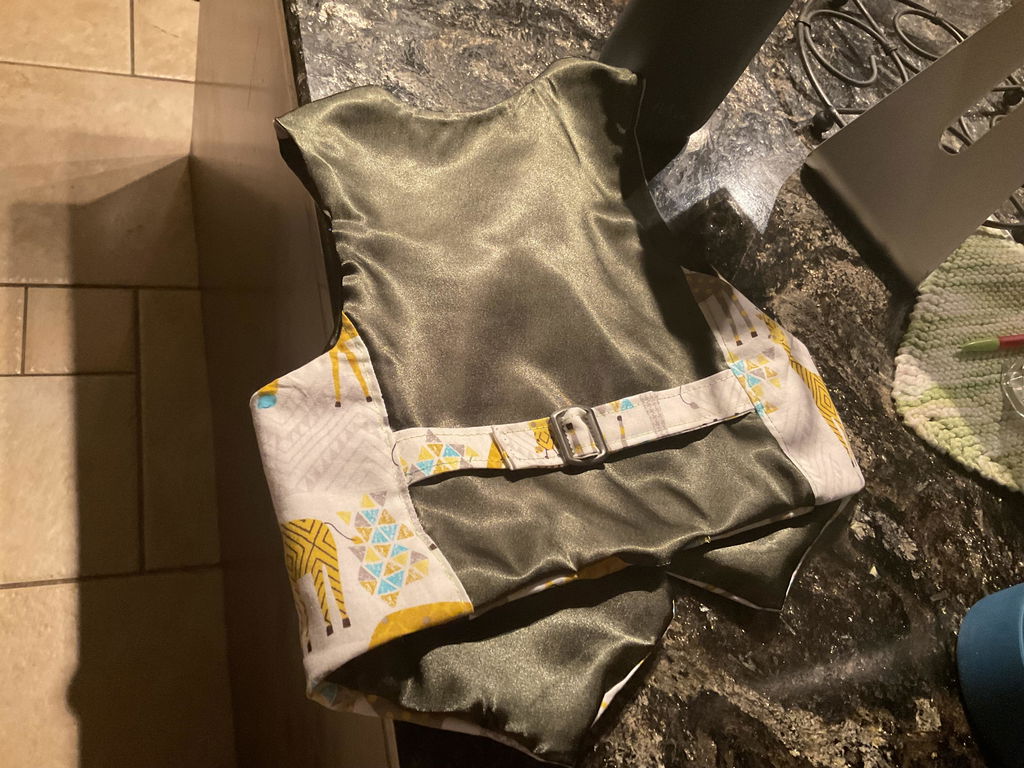
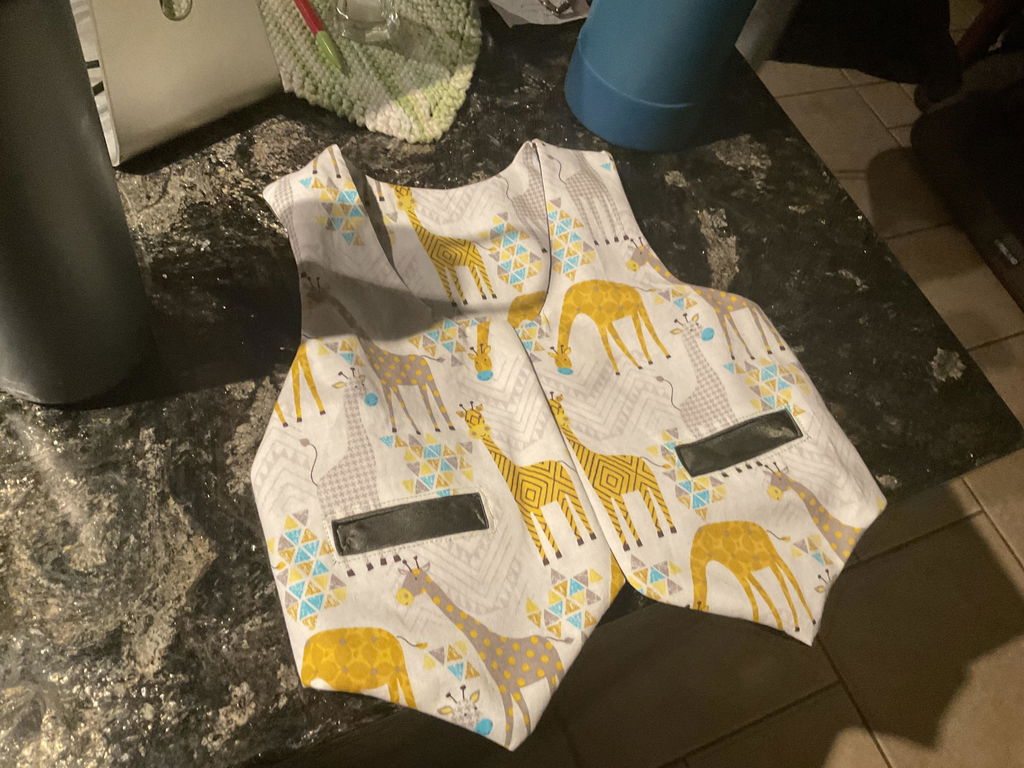
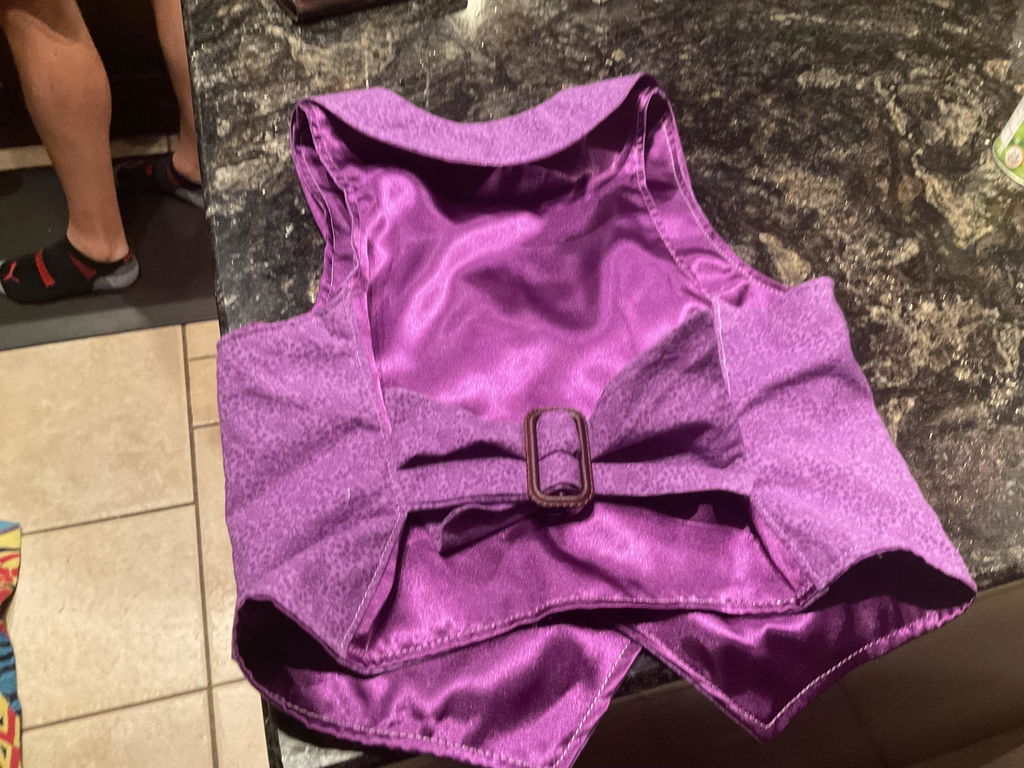
Brooklyn is the little waistcoat that loves to dress up. This PDF sewing pattern creates a fully lined, dapper boys vest, perfect for weddings, holidays, and every special moment in between. It’s a tailored formal waistcoat with an optional welt pocket detail and a perfectly shaped martingale — that’s the adjustable back strap with a buckle, keeping everything neat and handsome.
And when you're asked to sew up a page boy waistcoat or toddler vest, Marina’s video tutorials are waiting just below to guide you — just scroll down and start sewing.
Pattern Download Includes
- Instant Download
- DIN A4 & US Letter Size
- Individual PDF files for every Size
- All Sizes included
- Detailed eBook
- Video Tutorials
Design Options
Design Options
- Fully lined
- Optional single welt pockets
- Classic waistcoat back ties
- Fitted or boxy shape
- KamSnap closure
- Completely lined, reversible if you leave the ties off
Fabric Requirements
Fabric Requirements
BEST MATERIAL CHOICE
Medium weight fabrics in cotton, wool, or linen such as chambray, denim, cotton sateen, velvet and corduroy.
FABRIC REQUIREMENTS
- Shell & Lining: 16–20 inches (40cm-50cm)
NOTIONS
- Interfacing: 12 inches (30cm)
- KamSnaps: 3-5 sets
- Matching thread
Available Sizes
Available Sizes
Sizes: 1-12 Years
Please Read
Please Read
- This is a digital pattern or PDF file, not a physical product. It will be delivered electronically via a download link delivered to the email used for the purchase.
- To ensure the pattern prints at its actual size, it's recommended that you use Adobe Acrobat Reader.
- The pattern creator, Frocks & Frolics, welcomes small-scale production using their patterns.
Customers are encouraged to tag Frocks & Frolics when sharing projects made using their patterns on social media.
@frocksandfrolics #frocksandfrolics
Share

STEP-BY-STEP VIDEO TUTORIALS
VIDEO TEXT
Introduction to the Project
Transcript for Video: Brooklyn Waistcoat – Materials and Preparation Guide
In this section we go through all the materials needed for the Brooklyn Waistcoat. The aim is to keep the construction beginner friendly while still achieving a tailored and structured finish suitable for a smart vest style garment.
Fastening Options
For this waistcoat, Kam Snaps are highly recommended, especially for beginners who are not confident with buttonholes or traditional button sewing.
Kam Snap kits are inexpensive, usually around 19 dollars, and include a variety of colours along with the application tools needed to install them easily and securely.
If you prefer a more traditional finish, you can also use buttons. There is a separate tutorial available that explains how to cover buttons for a more refined look.
Thread Selection
For general construction and topstitching, use a strong high quality polyester thread. This helps ensure durability, especially around areas of stress such as seams and closures.
Polyester thread is preferred for visible stitching because it holds tension well and produces a clean finish. Cotton thread can still be used for internal seams where strength demands are lower and appearance is less critical.
Interfacing
For the Brooklyn Waistcoat, choose a soft or medium weight interfacing rather than anything overly stiff.
The goal is to give the waistcoat structure without making it feel rigid or uncomfortable to wear. A softer interfacing allows the garment to retain a natural drape while still supporting the shape of the front panels.
Always match the interfacing colour as closely as possible to your main fabric to avoid shadowing or visible contrast through lighter materials.
Additional Hardware and Design Elements
This waistcoat uses back ties or sliders depending on the variation you are making. These allow the fit to be adjusted and give a more tailored silhouette.
If you are making a more decorative or child focused version, the back ties can be made wider for a more playful bow effect when tied.
This variation is often used in matching outfits or special occasion garments where a slightly more decorative finish is preferred.
Fabric Considerations
Choose medium weight woven fabrics such as cotton, linen, denim, corduroy, velvet, or similar structured materials.
The fabric choice has a direct impact on the final look. Firmer fabrics will produce a more formal, structured waistcoat, while softer fabrics will give a more relaxed feel.
Always ensure your fabric is stable enough to support interfacing and shaping around the front panels and neckline.
Final Notes
These materials form the foundation of the Brooklyn Waistcoat construction. Correct choices in fastening, thread, interfacing, and fabric will significantly affect both the ease of sewing and the final professional appearance of the garment.
The Sewing Pattern
Transcript for Video: Brooklyn Waistcoat – Choosing the Size and Printing the Pattern
The first thing we are going to do is choose the correct size and print the pattern.
Getting the sizing right at the beginning is very important because it will make sure the finished waistcoat fits properly.
Taking Measurements
The first measurement that matters is the height of your child.
The second measurement is the torso measurement taken just underneath the armpit.
Take your tape measure, go all the way around the body, and note that measurement.
Then compare it with the height measurement to see where your child fits in the sizing chart.
Choosing Between Regular and Slender
This pattern comes in two fit options:
- Regular
- Slender
You will find finished measurements listed for both versions.
For example, if your child’s body measurement is 51 centimetres in the regular fit, the finished garment measurement should be about 3 to 5 centimetres larger.
It should not be much more than that, as too much ease will affect the fit.
Downloading the Pattern
To print the pattern, open the file using Adobe Acrobat DC Reader.
If you do not already have it, you can download it for free from the internet.
The link is included in the instructions.
When downloading, simply:
- Choose your operating system
- Choose your language
- Download the correct version
Be aware that sometimes there may be additional optional offers during installation. If you do not want those, simply untick them.
Print Settings
When printing the pattern in Adobe, make sure it prints at the exact size shown.
You can select:
- Custom scale – 100%
- or Actual size
Both settings work the same.
I usually choose Custom scale – 100%.
Important settings:
- Never select Fit
- Never select Shrink oversized pages
This will change the pattern size and make it inaccurate.
Saving Ink
Under Properties, you may want to choose Fast Printing if you want to save ink.
Then make sure you choose the correct paper size:
- A4 for most countries
- Letter size depending on where you live
Then print your pattern.
Checking the Test Square
Once printed, you will see a test square underneath the pattern.
This will measure either:
- 5 centimetres
- or 1 inch
Measure this square to check that it printed correctly.
If the measurement is wrong, the pattern has not printed at the correct scale.
Pattern Markings
The pattern pieces are colour coded to make assembly easier:
- The front pieces have a wide flower marking
- The back pieces have a pink flower marking
You will also see a dashed overlap line.
This shows you where the pattern pages overlap when taping them together.
Pattern Assembly Guide
The final page in the pattern set always shows you how to assemble the pattern pages.
This layout will vary depending on the size you print.
Larger sizes will need more pages, so the arrangement may look different.
Pattern Details
The front pattern piece includes useful markings such as:
- Button placement
- Welt pocket placement
This makes construction much easier.
You will also see another dashed line, which indicates the slender option.
Cutting Regular or Slender
For the fit options:
- Dotted line = Slender fit
- Solid line = Regular fit
Cut according to the fit you want.
Pattern Pieces Included
The pattern set includes:
- Front
- Back
- Ties
These are all the main pieces needed for constructing the Brooklyn Waistcoat.
Conclusion
Taking accurate measurements, choosing the right fit option, and printing at the correct scale are the first essential steps.
Once that is done, you can assemble the pattern pieces and move on to cutting your fabric with confidence.
Choosing Fabrics
Transcript for Video: Brooklyn Waistcoat – Fabric Selection and Material Overview
Before we start cutting or sewing, we need to look at fabric choice. This step is often underestimated, but it has a direct impact on how easy the garment is to construct and how structured the final waistcoat will be. Different fabrics behave in completely different ways, so understanding them first will save a lot of problems later.
Printed Cotton
Printed cotton is one of the most straightforward choices for this project. It is easy to handle, cuts cleanly, and sews without difficulty. The main drawback is that it creases quite easily. However, once interfaced, it becomes much more stable and suitable for structured garments. This is a strong option for beginners or everyday versions of the waistcoat.
Gingham
Gingham is a woven cotton with a clear check structure formed by the warp and weft threads. It can range from lightweight to more structured versions. The lighter versions are often slightly sheer, which makes them more suitable for lining rather than outer layers. It adds a classic visual texture without making the garment heavy.
Denim (Twill Weave)
Denim is a twill weave, recognisable by its diagonal structure. This weave gives the fabric strength and slight natural flexibility, which makes it very suitable for waistcoats. It holds shape well and improves durability, especially for everyday wear. It is one of the most reliable structured fabric choices.
Fleece
Fleece is soft, warm, and often has stretch. That stretch is the main challenge because it can distort seams and reduce precision if not stabilised. For this reason, fleece should always be paired with interfacing or a woven lining. This helps control movement and improves construction accuracy.
Upholstery and Furnishing Fabric
Upholstery fabrics are often overlooked, but they are actually very suitable for waistcoats. They usually contain thicker weft threads, which gives them natural structure and stability. This makes them ideal for garments that need shape retention. They are also often available as remnants, which makes them cost-effective.
Silk and Dupioni Silk
Dupioni silk has a textured surface with natural irregular slubs. It looks very high-end, but it creases easily and requires careful handling. It is best used by more experienced makers or as a lining or contrast fabric rather than a full structural outer layer.
Linen
Linen is breathable, natural, and clean in appearance. It has no stretch, so precision in cutting is very important. It works very well for waistcoats, especially in warmer weather garments where breathability matters.
Herringbone Wool
Herringbone is a variation of twill weave. It is highly stable, does not crease easily, and returns to shape well after wear. This makes it one of the most practical and professional-looking choices for a waistcoat. It is especially suitable for structured tailoring.
Velvet (Advanced Fabric)
Velvet is a difficult fabric to work with due to its pile direction and shifting surface. It requires careful handling, controlled pressing, and experience in sewing slippery or textured materials. It is not recommended for beginners. However, it produces a very rich and luxurious finish when done correctly.
Fabric Behaviour Overview
Different fabric types behave in predictable ways: woven fabrics provide stability and structure, stretch fabrics add comfort but require reinforcement, heavy fabrics create shape but are harder to manipulate, and lightweight fabrics are easy to sew but less structured. Understanding this balance is essential before choosing your final material.
Practical Construction Insight
In real sewing projects, fabric choice changes everything. Wool combined with satin or sateen creates contrast between structure and sheen, cotton and printed cotton combinations are beginner-friendly and predictable, corduroy is durable and ideal for children’s garments, and velvet produces a luxury finish but requires advanced skill. Each combination produces a very different final effect.
Design Considerations
Your fabric choice will also affect how well the garment holds structure, how clean seams appear, how pockets and edges behave, and whether interfacing is necessary. This is not just about appearance. It is about construction stability.
Conclusion
Choosing fabric is not a decorative step. It defines how the entire waistcoat behaves during construction and after it is worn. Once you understand fabric behaviour, sewing becomes significantly more controlled and predictable. After this, you are ready to move on to pattern preparation and cutting.
Cutting out the Waistcoat
Transcript for Video: Brooklyn Waistcoat – Cutting Layout and Interfacing Preparation
We are now ready to start cutting out the waistcoat pieces. This step is critical because accuracy here determines how well everything fits together later. Take your time, and always prioritise precision over speed. We will be cutting the back, the front, the welt pockets, and the ties. Depending on your size and layout plan, you may need more or fewer pieces, but the cutting principles remain the same.
Fabric Folding and Layout
The most efficient way to cut is to fold the fabric only as much as needed for each pattern piece. This helps reduce waste and gives you more control over positioning. Make sure the pattern piece sits exactly on the fold where required, and that the edge of the paper aligns precisely with the fabric edge. For right-handed cutters, it is usually easier to keep the fabric on the left side and cut from left to right. The left hand should guide and support the fabric while the right hand cuts.
Cutting Technique
When cutting around curves, always use the tip of your scissors rather than the full blade. This gives you much better control and reduces the risk of accidentally cutting into the fabric. If the fabric has been folded correctly, you will automatically cut symmetrical mirrored pieces. Pins can be removed once the shape is secure and fully cut.
Cutting the Front Pieces
For the front pieces, fold the fabric only as far as needed to accommodate the pattern. Align everything carefully before cutting. If you are working with directional prints or checks, make sure the pattern alignment is consistent before cutting both sides. This ensures the finished garment matches properly when assembled.
Cutting Pockets and Ties
For the pockets, alignment depends on fabric type. If using a contrast fabric, keep the grainline running parallel to the selvedge for stability. If using a non-directional fabric like linen, orientation is more flexible. Cut two pocket pieces. For the ties, cut two pieces as well. These can be made from the same fabric or a contrast fabric depending on the design you want.
Cutting the Lining
The lining is cut in the same way as the outer fabric. Place each pattern piece carefully on the fold, ensuring correct alignment. If you are using checks or stripes, matching the direction is essential so that both sides mirror correctly. In some designs, you may choose to mix contrast fabrics for front and back panels to create visual interest. This is optional but must be decided before cutting.
Interfacing Preparation
Interfacing is used to stabilise key areas of the waistcoat. You will need pocket interfacing pieces slightly larger than the pocket pattern, and narrow strips for structural reinforcement.
Stabilising the Neckline and Edges
The neckline is an area that can easily stretch during construction. To prevent this, cut narrow interfacing strips approximately 1 to 1.5 cm wide. These strips can be applied along curved edges and structural seams. They do not need to be continuous or visually perfect. Overlapping is acceptable and commonly used in industry. This method is also useful for reinforcing shoulders and front edges.
Pressing Interfacing
Carefully press the interfacing onto the fabric using heat and steam. Ensure it bonds securely. If it lifts, reapply with additional heat until fully fixed. Once applied correctly, the fabric should feel more stable but still flexible. Avoid heavy or stiff interfacing, as this will make the garment difficult to shape and uncomfortable to wear.
Full Panel Interfacing (Optional Method)
If your fabric is very lightweight or semi-transparent, full interfacing may be used instead of strip reinforcement. This prevents shadowing through the fabric and improves structure, especially in reversible or unlined designs. This is a design decision based on fabric behaviour rather than a fixed rule.
Stay Tape Reinforcement
For additional stability, stay tape can be applied to areas such as necklines or shoulder seams. This is a standard tailoring technique, but it must be applied evenly. Inconsistent tension can cause distortion, so care is needed during application. Alternatively, interfacing the full area may be more reliable for beginners.
Conclusion
Once all pieces are cut and all key areas are stabilised, the waistcoat is ready for construction. If pockets are included in your design, they are usually the next step. If not, you can proceed directly to assembling the main structure. Accuracy at this stage will determine how clean and professional the final garment looks.
The Welt Pocket (Optional)
Transcript for Video: Brooklyn Waistcoat – Faux Welt Pocket Construction
Now we’re going to start on the welt pocket. This is the part that often looks difficult, but once you understand the structure, it becomes a very logical and controlled process.
The key here is preparation: accurate marking, correct interfacing placement, and precise stitching lines.
Preparing the Pocket Area
First, identify where the welt pocket will sit on the waistcoat.
We cut out the pocket opening area using the pattern as a placement guide. This step is essential because it ensures the pocket is positioned correctly before any sewing begins.
Applying the Interfacing
Place the waistcoat front with the wrong side facing up.
Now position the interfacing over the pocket area, glue side down.
Pin it lightly so it does not shift.
Repeat the same process on the other side if needed.
Once both sides are positioned, press the interfacing on using heat only, without steam.
Make sure it is fully bonded before moving on.
Drawing the Pocket Box
Place the pattern piece back onto the interfaced area.
Mark the corners of the pocket opening clearly.
Then connect the marks using a ruler to form a precise rectangular sewing box.
This box is critical, so ensure all corners are sharp and the lines are straight and accurate, with 90-degree angles where required.
Positioning the Pocket Piece
Turn the fabric over to the right side.
Place the pocket piece using the pattern as a guide.
The top edge of the pocket should sit approximately 1.5 to 2 cm above the marked opening.
Ensure equal spacing on both sides.
Pin everything in place carefully, then remove the pattern piece so it does not interfere with sewing.
Stitching the Pocket Box
Reduce your stitch length to a slightly shorter setting than normal.
This ensures durability and prevents fraying.
Start stitching along the drawn rectangle, but not at the corners.
Begin in the middle of one side for better control.
Follow the drawn line precisely, using the presser foot as a guide.
At each corner, leave the needle down, pivot, and continue along the next side.
Repeat this process for both pockets to ensure symmetry.
When finished, slightly overlap the starting point instead of locking the stitches.
Cutting the Pocket Opening
Now carefully cut into the center of the stitched rectangle.
Cut toward each corner, forming a Y-shape into the corners.
Be precise but decisive cutting fully into the corners is important for a clean finish.
Use small sharp scissors if needed for better control.
Turning the Pocket Through
Push the fabric through the opening to the inside.
Gently pull out the corners so they become sharp and defined.
This is where the pocket starts to take shape.
Press the opening carefully with steam.
Flatten the edges thoroughly before folding.
Shaping and Pressing the Welt
Fold the pocket opening into position and press again.
At this stage, you can decide how structured you want the pocket to be.
Pressing the seam allowance in different directions will affect firmness and projection.
Use interfacing if additional stability is needed.
Reinforcing the Pocket
Apply interfacing strips if required, especially along stress areas.
These can be overlapped slightly; precision is not critical here, strength is.
Press everything firmly again to secure the structure.
Topstitching the Pocket
Now stitch around the pocket opening.
Use a straight stitch with consistent spacing.
You may adjust needle position slightly to maintain a uniform edge distance.
Choose whether to guide using the presser foot or rely on needle positioning both methods are valid depending on experience level.
Do not backstitch at the start or end; instead, leave threads and secure them manually for a cleaner finish.
Securing the Threads
Pull the threads to the inside using a needle.
Tie them off securely to prevent unraveling.
This keeps the pocket visually clean on the outside.
Forming the Pocket Bag
Now fold the inner pocket fabric upward.
Keep it compact so it does not get caught in later seams.
Stitch the pocket bag closed along the sides and top edge.
Make sure no front fabric is accidentally caught during this step.
Finishing the Pocket
Press the entire pocket again thoroughly.
This final pressing step defines the shape and gives a professional appearance.
The welt pocket is now complete, cleanly finished, and structurally stable.
Conclusion
This method may look complex at first, but it is built from simple, repeatable steps: mark, stitch, cut, turn, press, and finish.
Once you understand that sequence, welt pockets become a predictable and reliable construction detail rather than a difficult technique.
Now the waistcoat is ready for full assembly.
Sewing the Waistcoat
Transcript for Video: Brooklyn Waistcoat – Assembly, Construction, and Finishing
Now we are ready to assemble the waistcoat.
At this stage, the pocket may already be completed. The focus now is on constructing the garment pieces together in a structured sequence so everything aligns cleanly and sits correctly when finished.
Closing the Center Front
Begin by placing the front lining and front shell pieces together with right sides facing each other.
We are closing the center front only partway, stopping at the marked point.
Use a 1 cm seam allowance and sew carefully along the edge.
When you reach corners or curves, keep the needle down, lift the presser foot, and pivot before continuing.
Work slowly around any shaped areas to maintain a smooth seam line.
Trimming and Shaping the Seam
Once stitched, trim and reduce seam allowances where necessary to reduce bulk.
At corners, cut away excess fabric on one side if the material is thick, leaving the other layer intact to maintain structure.
Clip curved sections so the seam can spread smoothly when turned.
Turn the corner out carefully using fingers or a point-turning tool, then refine the shape.
Pressing the Front Pieces
First press the seam allowance into the lining.
Then press the entire front piece, rolling the edge slightly as you go to ensure a clean transition.
This step is essential for achieving a professional finish.
Preparing the Back Neckline
Now move to the back piece and close the neckline.
Stay tape can be used here for stability, but it must be applied with slight tension.
If applied loosely, it will not provide any structural benefit and interfacing may be a better alternative.
Sew the neckline with a 1 cm seam allowance, following the curve carefully.
Clipping and Pressing the Neckline
Clip into the seam allowance around the neckline to release tension.
This allows the fabric to turn smoothly without pulling.
Press the seam allowance into the lining and then press the entire neckline flat.
Ensure no fabric is caught or twisted inside the seam before continuing.
Joining the Shoulder Seams
Place the waistcoat as it will appear when worn.
Align the shoulder seams so that seam allowances face opposite directions to reduce bulk.
Pin carefully to prevent shifting.
Sew with a 1 cm seam allowance, easing slightly over the shoulder point rather than sewing straight across.
Repeat for the second shoulder seam in the same manner.
Pressing the Shoulder Seams
Press the seams flat first, then press them open.
Trim excess bulk if necessary, especially near the neckline where layers can accumulate.
The result should be smooth and flat with no visible ridges.
Constructing the Armhole (Burrito Method)
To close the armhole, use the burrito construction method.
Roll the garment layers inward so that seams align and can be enclosed.
Pin carefully, ensuring alignment at both ends.
Do not sew the entire armhole stop a few centimeters before the end points to allow turning.
Sew with a 1 cm seam allowance, moving slowly and checking that no internal layers are caught.
Trimming and Turning the Armhole
Trim seam allowances and clip curves carefully to reduce bulk.
Avoid cutting into the seam itself.
Turn the garment through the opening, pulling fabric from the furthest point first to avoid twisting.
Once turned, refine the armhole shape with your fingers.
Pressing the Armhole
Press the armhole thoroughly, rolling the seam slightly so it sits cleanly on the edge.
Ensure all internal layers lie flat and smooth.
Good pressing at this stage defines the final shape of the armhole.
Constructing and Finishing the Ties
Before closing the side seams, prepare the ties.
Fold in the edges by approximately 1 cm and press.
Fold both long sides inward and press again so all raw edges are enclosed.
Topstitch around the entire tie using a longer stitch length for a cleaner finish.
Ensure the finished width fits through the slider correctly.
Attaching the Ties in the Side Seam
Place the ties at the marked positions on the back.
Insert them into the side seam where indicated.
Pin securely so they do not shift during sewing.
Sew the side seam with a 1 cm allowance, making sure the tie is firmly caught in the seam.
Press the seam allowance forward into the front piece.
Closing the Lining Side Seam
Repeat the same process on the lining side.
Press seams in the opposite direction to reduce bulk.
Topstitch if required for additional structure and durability.
Closing the Underarm Seam
Begin stitching where previous seams ended to reduce overlap.
Pin carefully and sew with a 1 cm seam allowance.
Ensure seam allowances are aligned properly before sewing.
After stitching, clip curves and reduce bulk where necessary.
Pressing the Underarm Seam
Press the seam thoroughly.
This step ensures the armhole sits smoothly and maintains shape.
Repeat the same process on the second side.
Closing the Hem (Sack Method)
Turn the waistcoat inside out.
Align shell and lining at the hem edge.
Pin carefully and leave a turning gap in the center.
Sew around the hem with a 1 cm seam allowance, remembering to leave the gap open.
Turning the Garment
Trim seam allowances and clip curves.
Remove all pins before turning.
Turn the garment through the opening, pulling the furthest sections through first.
Refine corners and edges carefully after turning.
Pressing the Hem
Press the hem so the seam sits exactly on the edge.
Close the turning gap neatly by aligning both sides and steaming flat.
This ensures a seamless finish.
Final Topstitching
Topstitch around the entire waistcoat, including armholes if desired.
Use a longer stitch length for a professional appearance.
Start in an inconspicuous area and maintain consistent seam distance.
When sewing curves, guide the fabric inward rather than pulling it outward to maintain shape.
Remove pins as you sew and maintain steady control.
This topstitching also closes the turning gap.
Attaching Cam Snaps
Mark the center front and ensure both sides align evenly.
Check overlap distance carefully to ensure symmetry.
Mark snap positions along the front, dividing spacing evenly.
Use an awl to pierce through all layers for accurate alignment.
Install the lowest and highest snaps first to stabilize positioning.
Place cap, stud, and socket components correctly using the snap tool.
Press firmly until fully secured.
Repeat for all remaining snaps.
Conclusion
The waistcoat is now fully assembled.
This construction process is made up of many small, controlled steps rather than one complex action.
Success depends less on speed and more on accuracy, pressing, and consistent seam control.
With careful execution, the result is a structured, professional garment with clean internal finishing and durable construction.
Inserting the KamSnaps
Transcript for the Video: Brooklyn - Inserting the KamSnaps
Here I'm going to show you how to attach KamSnaps. They're really easy to attach. You've got two caps — they go for the upper button and the lower button — and then you've got one stud and one socket. Each cap is adhered to a stud or socket.
Marking the Placement
Now let's see how you can put the cam snaps on.
Of course, on your pattern piece it's already marked. You've also got the center‑front mark, which you want to mark with a pen. Then you can put both those pins on top of each other — they’re 1.5 centimeters from the edge. Pin again at the outer edge, then you know the overlap is in the right position. That's really, really important.
Then you want to check that the tip has the same length — and as you can see here, mine didn’t. So at this point you can still fix this. Once the cam snaps are in, you don’t want to unpick them. So you just measure and make sure that the tips have the same distance from the center front.
Measuring the Button Positions
You'll mark the top button and the lower button where you want them to sit — that's the same as when you put a buttonhole in.
Then you divide the distance by three, and that’s 4.6 roughly. I measure that down and draw a line here, and then I draw it on the lower end as well. So now I know where my buttons are going to go: 1.5 centimeters in and at the point I’ve marked.
Piercing the Fabric
Using the awl, you want to push through all the layers so the two snaps will line up and sit centrally on your front.
Always insert the lowest and the highest cam snap first. Here I'm starting with the lowest one.
Remove the lower layer from the awl, place a cap snap under the front and push through the prong so that it sits on top. Then you can place the socket on top of the prong.
Pressing the Snap
Place the snaps between the top and bottom dies of the pliers, press down, and release.
So simple — and you will see the prong now has been flattened and holds the snap in place.
Lift out the awl completely, push the cap snap with the prong through, and then we're going to place the stud on the top. Press together again with the pliers and release.
Repeating for the Top Snap
Now we can do the same for the top here.
So we go again all the way through with the awl, straight through, and we do the lower layer first just as we did before.
We just repeat this until we're done with all our buttons.
It's a brilliant method if you are unsure about buttonholes — it's so easy to do, beautiful on a waistcoat.
Final Notes
If you want to know how to put a buttonhole in, how to measure that one out, just pop on over to the bonus video — at the very end we are going to show you how to put the buttons in.
I am so glad you were with me for this course, and I hope that I've really given you a taste of what it's like to sew like a pro — and that you're back with me for another project.
See you soon.
How to cover a KamSnap
Transcript for the Video: How to cover a KamSnaps
Drafting a Peter Pan Collar for Brooklyn
Transcript for Video: Girl Waistcoat Adaptation – Peter Pan Collar and Construction
Now we are adapting the waistcoat so it can be styled for a girl. This version includes pattern adjustments, a Peter Pan collar, and optional design details like a ruffle at the hem. The back ties are also widened so they can form a bow-like feature.
The goal is to understand how small pattern changes can completely change the look of the garment.
Preparing the Pattern Base
Start by closing the shoulder seams first.
Because there is always a seam allowance, measure 2 cm down from the top edge to account for both seam allowances from front and back pieces.
Place the back piece onto the front and pin them together.
Drafting the Collar Pattern
Use several A4 sheets taped together to create a larger working space.
Trace the neckline area where the collar will sit, and mark the shoulder seam position.
Connect the shoulder line clearly and label front and back so there is no confusion later.
Add a 1 cm seam allowance to the neckline.
This seam allowance line is important because it helps define the true collar width.
Designing the Peter Pan Collar
Decide on the collar width, typically between 6–7 cm depending on the desired look.
Measure this distance from either the neckline or seam allowance line and mark it all the way around.
Slightly taper the collar toward the center back for a more natural shape.
At the center front, adjust for the overlap by extending around 3 cm.
Draw a smooth continuous curve to complete the collar shape.
If cutting on fold, no back seam allowance is needed. If not, add 1 cm seam allowance around all outer edges.
Refining Collar Shape
When overlapping the outer edge slightly (around 1–1.5 cm), the collar will naturally roll better when worn.
Adjust as needed based on fabric thickness and desired drape.
Trim any uneven areas for a clean final shape.
Cutting the Garment Pieces
Position the back piece carefully on the fabric, making sure it aligns with the center grain line.
Account for seam allowance before placing the pattern.
Cut carefully along the folded edge, ensuring no shift in fabric alignment.
Repeat the same process for the front piece.
Ensure symmetry by flipping pattern pieces when cutting the opposite side.
This method is especially effective for beginner-friendly construction or patterned fabrics like checks.
Cutting Lining and Contrast Pieces
Cut lining with attention to grain direction.
Vertical stripes work well for the center front, while horizontal orientation can be used for pockets or contrast elements.
Cut ties twice as wide if you want a bow effect at the back.
Add a small pointed extension if you want a decorative taper at the tie ends.
Cut all pieces carefully and symmetrically.
Interfacing Preparation
Cut interfacing for pocket areas, neckline reinforcement strips, and optionally full-piece reinforcement depending on fabric transparency.
Use soft, lightweight interfacing to avoid stiffness.
Apply interfacing using heat and no steam for proper adhesion.
If fabric is very sheer, consider interfacing the full piece instead of just sections.
For stability, use narrow strips (around 1–1.5 cm) along neckline and stress points. These can overlap slightly; precision is not required for internal reinforcement.
Collar Construction
Fuse interfacing to one side of the collar.
Place right sides together and pin securely.
Sew around the outer edge, keeping seam allowance consistent.
Clip corners carefully to reduce bulk.
Turn the collar right side out and shape corners using a tool or needle.
Press thoroughly, rolling edges slightly for a clean finish.
Understitch or press so the interfaced side stays stable underneath.
Topstitch around the collar for structure and definition.
Attaching Ties and Tabs
Mark center positions and alignment points.
Place ties symmetrically on both sides of the back.
Create small pleats or gathers at attachment points if needed for shaping.
Secure with pins before stitching.
Collar Attachment
Close shoulder seams first.
Mark center back on both collar and waistcoat.
Align and pin from center back outward toward the front.
Stop a few centimeters before the front edge.
Stitch a holding seam to secure collar placement.
Adjust shape if necessary before final stitching.
Attach lining using the same method as the base construction.
Adjust collar shape if it peaks incorrectly before final stitching.
Clipping and Understitching
Clip seam allowances carefully around curves.
Understitch the seam allowance to the lining close to the seam line.
This prevents the collar from rolling outward and ensures a clean edge.
Press thoroughly to set shape.
Burrito Method for Armholes
Roll the garment sections inside each other.
Sew partial seams, leaving openings for turning.
Clip seam allowances and corners.
Turn garment through the opening and press carefully.
Repeat for both sides.
Side Seams and Tie Integration
Place shell and lining right sides together.
Insert ties at marked positions between layers.
Sew side seams while securing ties inside.
Press seams toward the front or back depending on design balance.
Topstitch for reinforcement and finish.
Underarm and Hem Closure
Close underarm seams using standard seam allowance.
Clip curves to remove tension.
Press seams flat.
Use sack method to close hem, leaving a turning gap.
Turn garment right side out.
Press carefully to remove bulk and align edges.
Final Topstitching
Topstitch around entire garment including armholes and neckline.
Start from inconspicuous areas.
Use longer stitch length for a cleaner, more professional look.
Guide fabric gently rather than pulling it to maintain curve shape.
This step also closes the turning gap.
Strap and Slider Detail
Attach slider to back ties.
Feed fabric through and adjust length.
Ensure symmetry and clean alignment.
This creates a decorative bow effect at the back.
Button Placement and Cam Snaps
Mark button positions from center front.
Divide spacing evenly based on garment length and button size.
Use cam snaps if preferred over buttonholes.
Install lower and upper snaps first for alignment accuracy.
Attach remaining snaps carefully using correct tool alignment.
Finish by checking overlap consistency.
Conclusion
The waistcoat is now complete.
This adaptation shows how pattern adjustments, collar drafting, and simple design changes can transform a basic garment into a more stylized piece.
Key takeaway: precision in marking, cutting, and pressing matters more than speed.
This little vest pattern has been my favourite to do over and over for different occasions . So easy and change of fabric gives something new every time . I wish there was an adult version that’s the only downside which really is encouraging our hostess . Love it
Omg I love this pattern very easy to work with added a bow to the pockets to make it a little girlie
This is a great pattern! The lines are more elegant and less boxy than many kids’ best patterns; instructions are robust and clear; and the designer shares tons of ideas and examples for materials and modifications. Fun, quick sew with no issues!
Such a quick fun sew my little guy!