


WESTERNBLUSE & SCARLETT ROCK (PUPPE)
WESTERNBLUSE & SCARLETT ROCK (PUPPE)


Normaler Preis
$4.50 USD
Normaler Preis
Verkaufspreis
$4.50 USD
Grundpreis
pro
Verfügbarkeit für Abholungen konnte nicht geladen werden
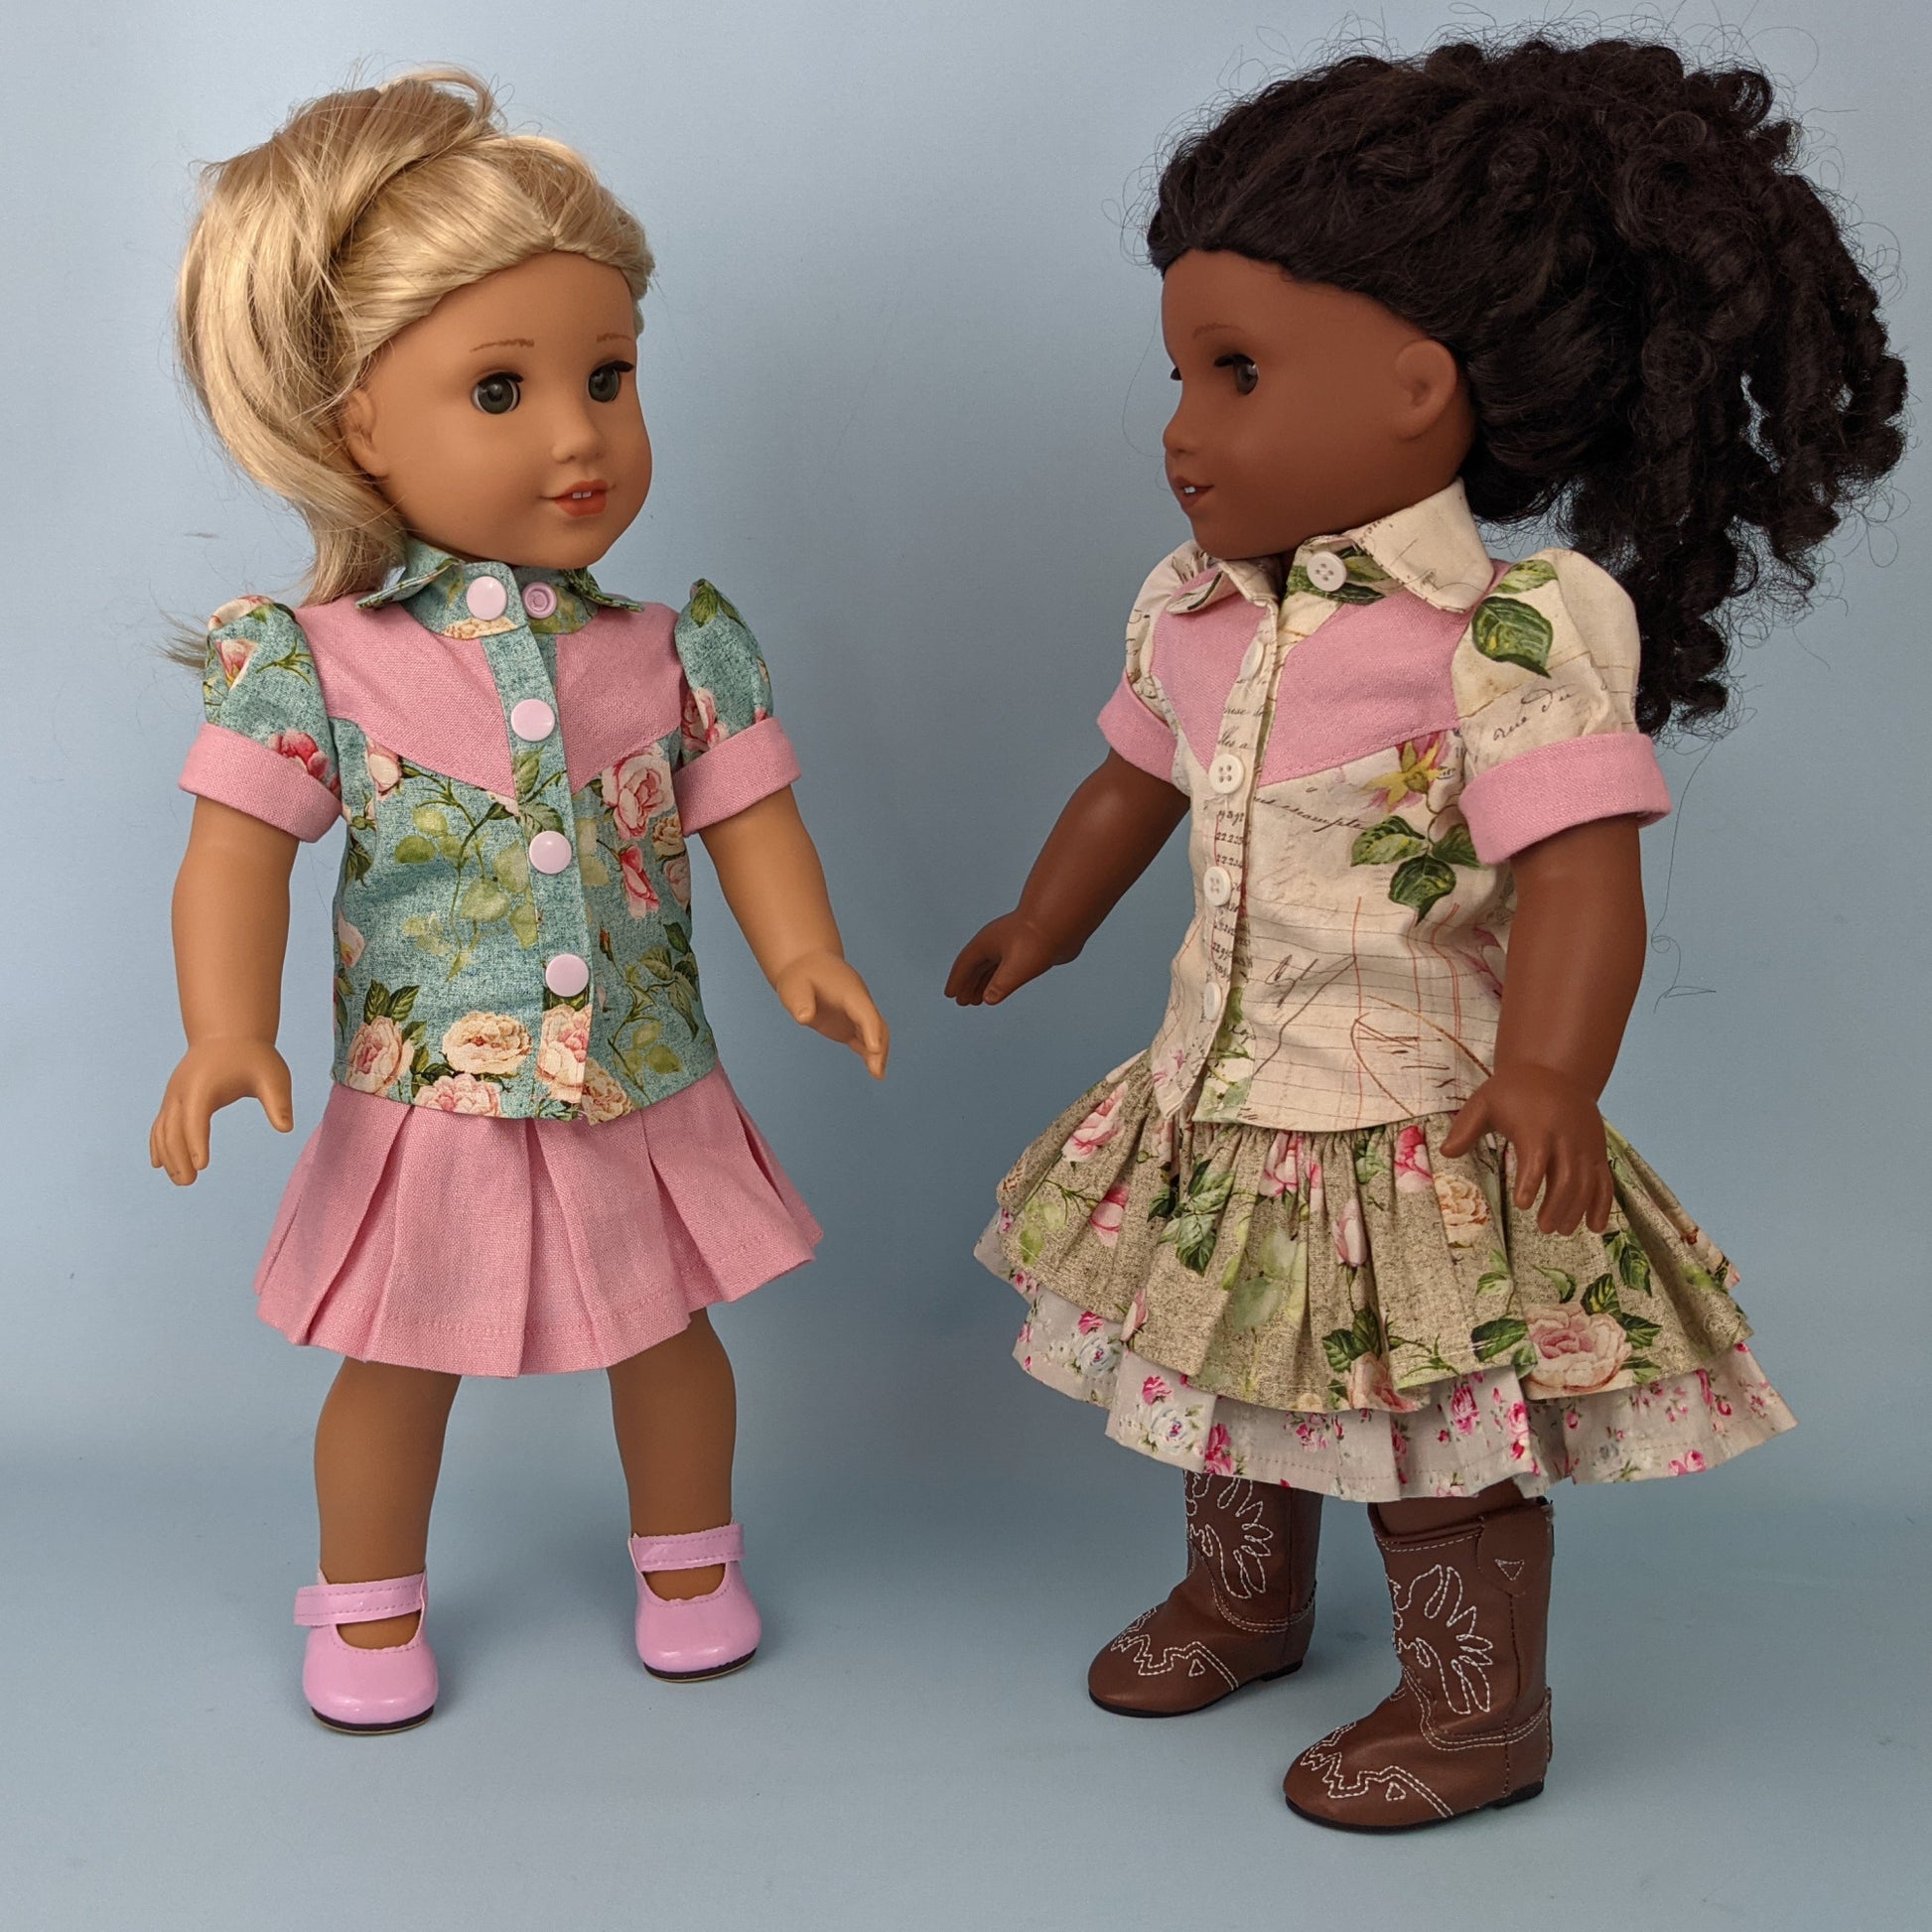
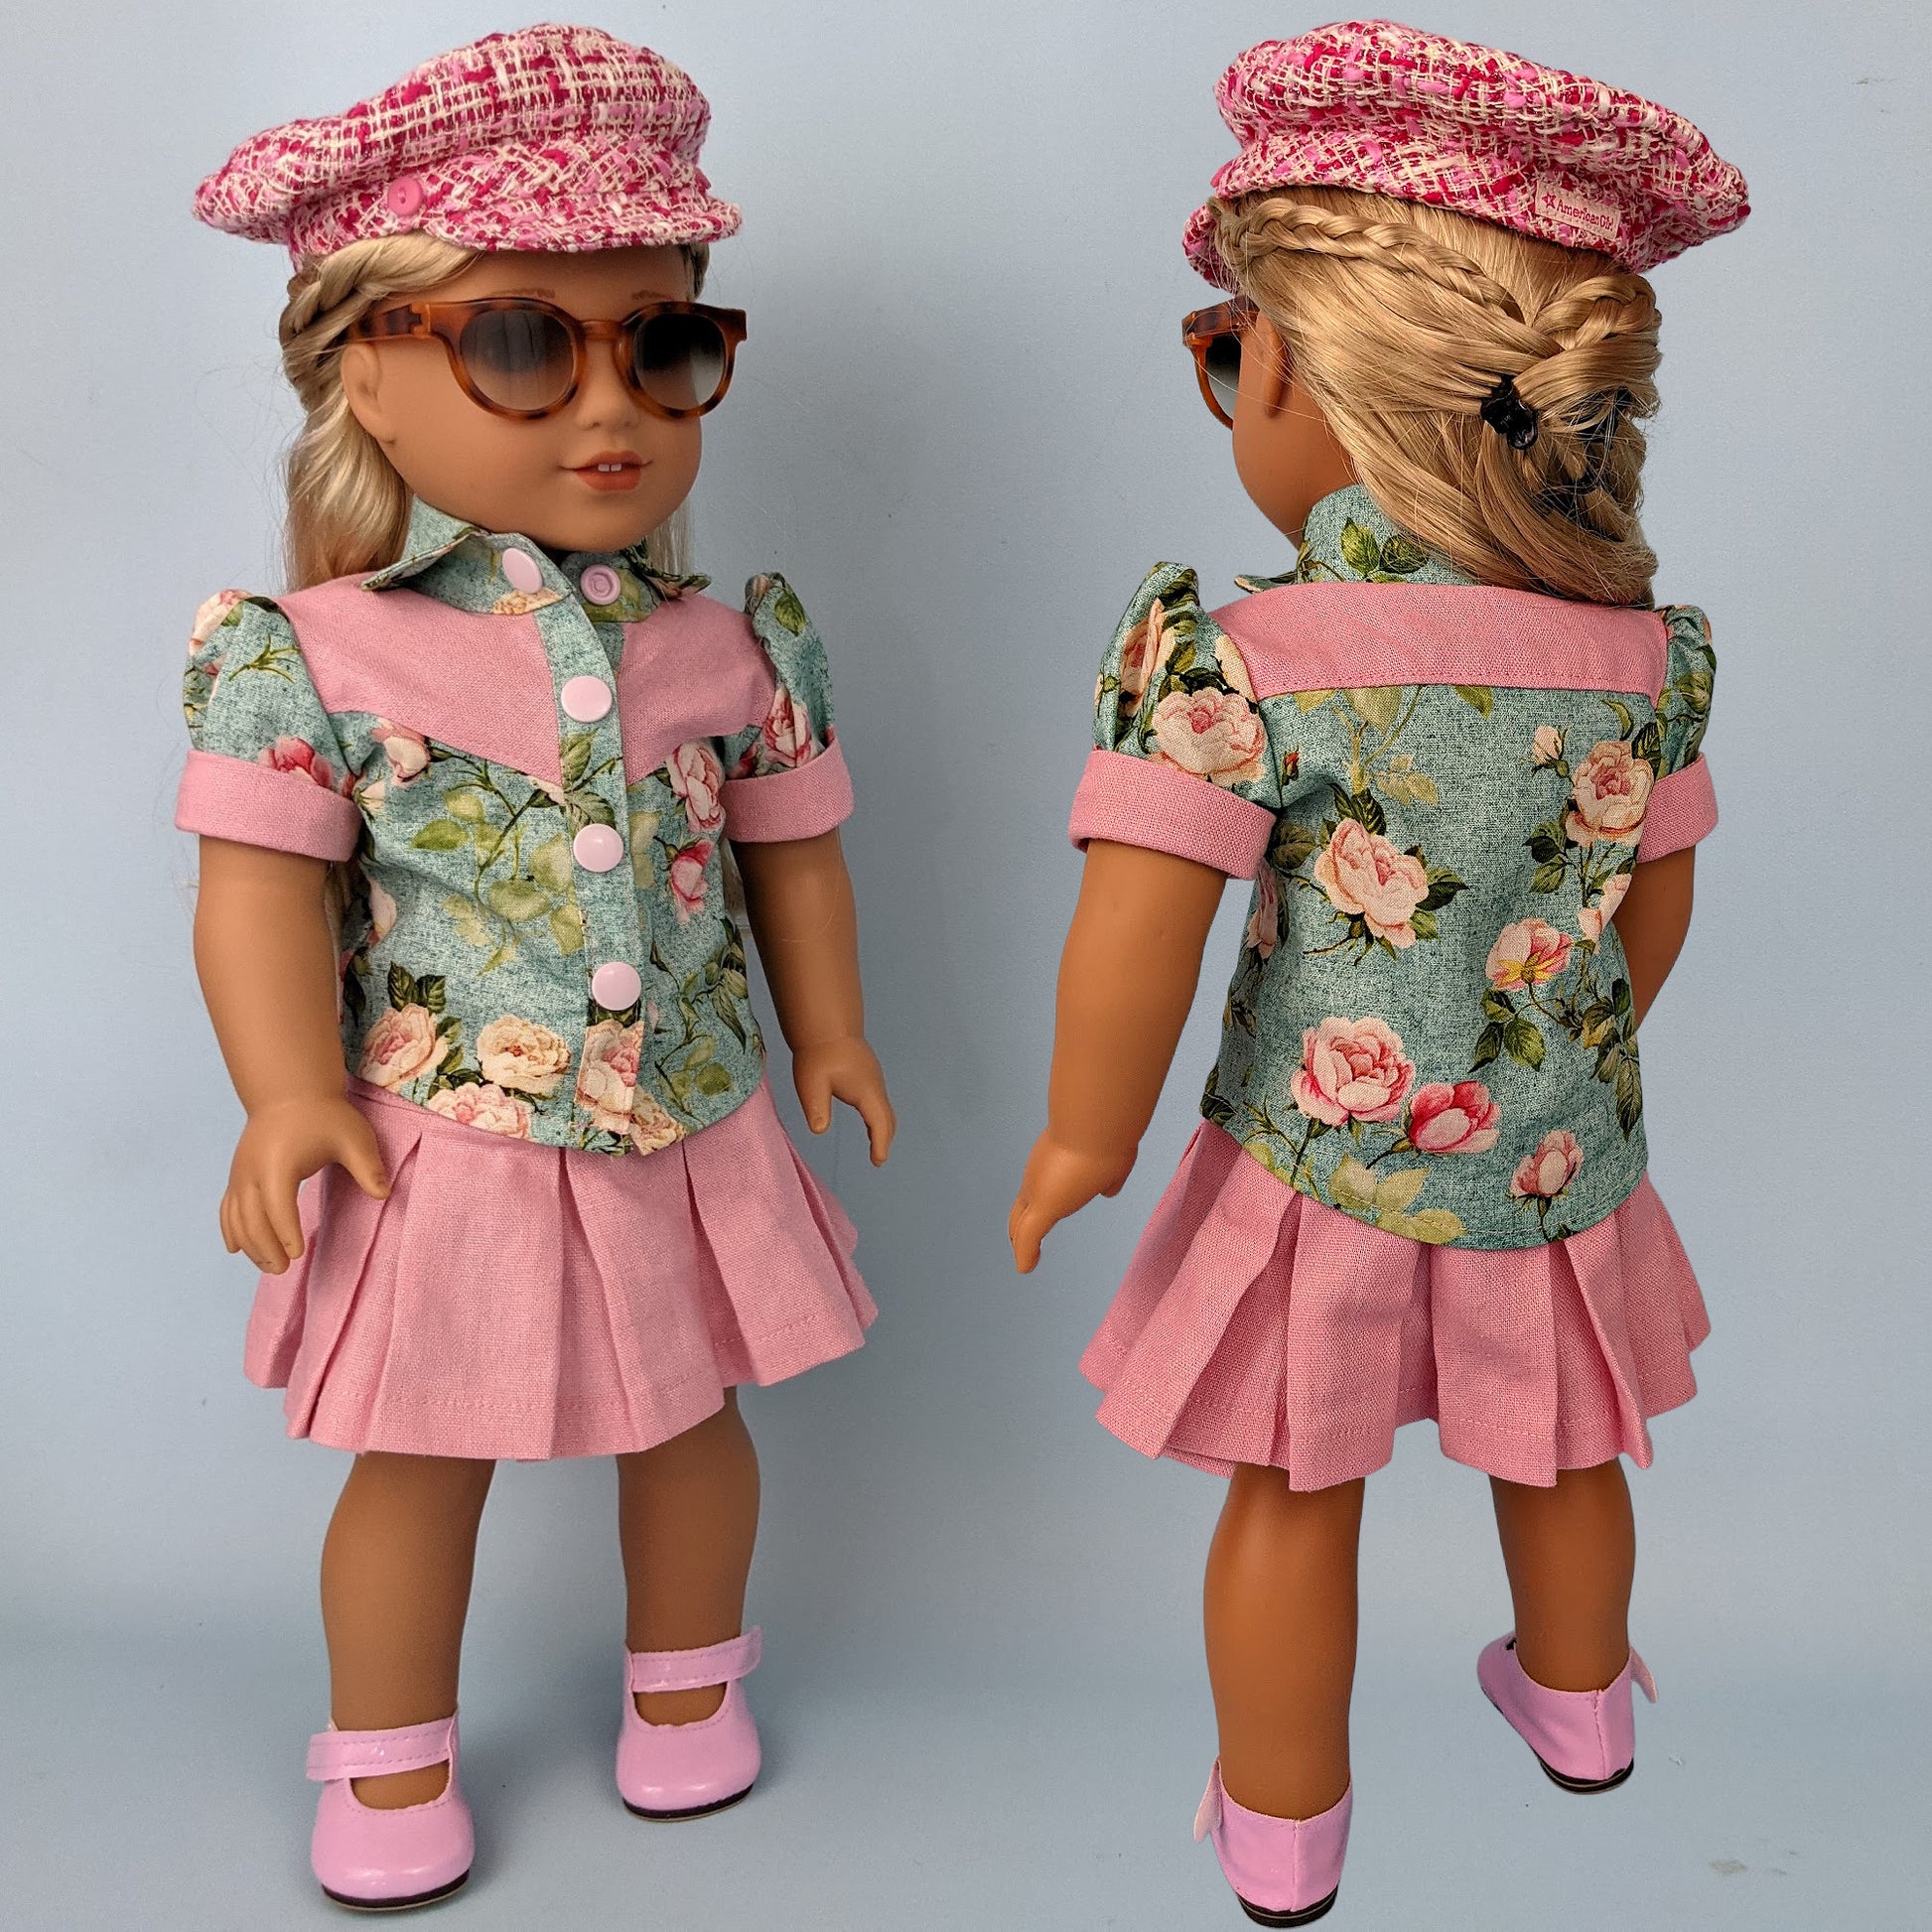
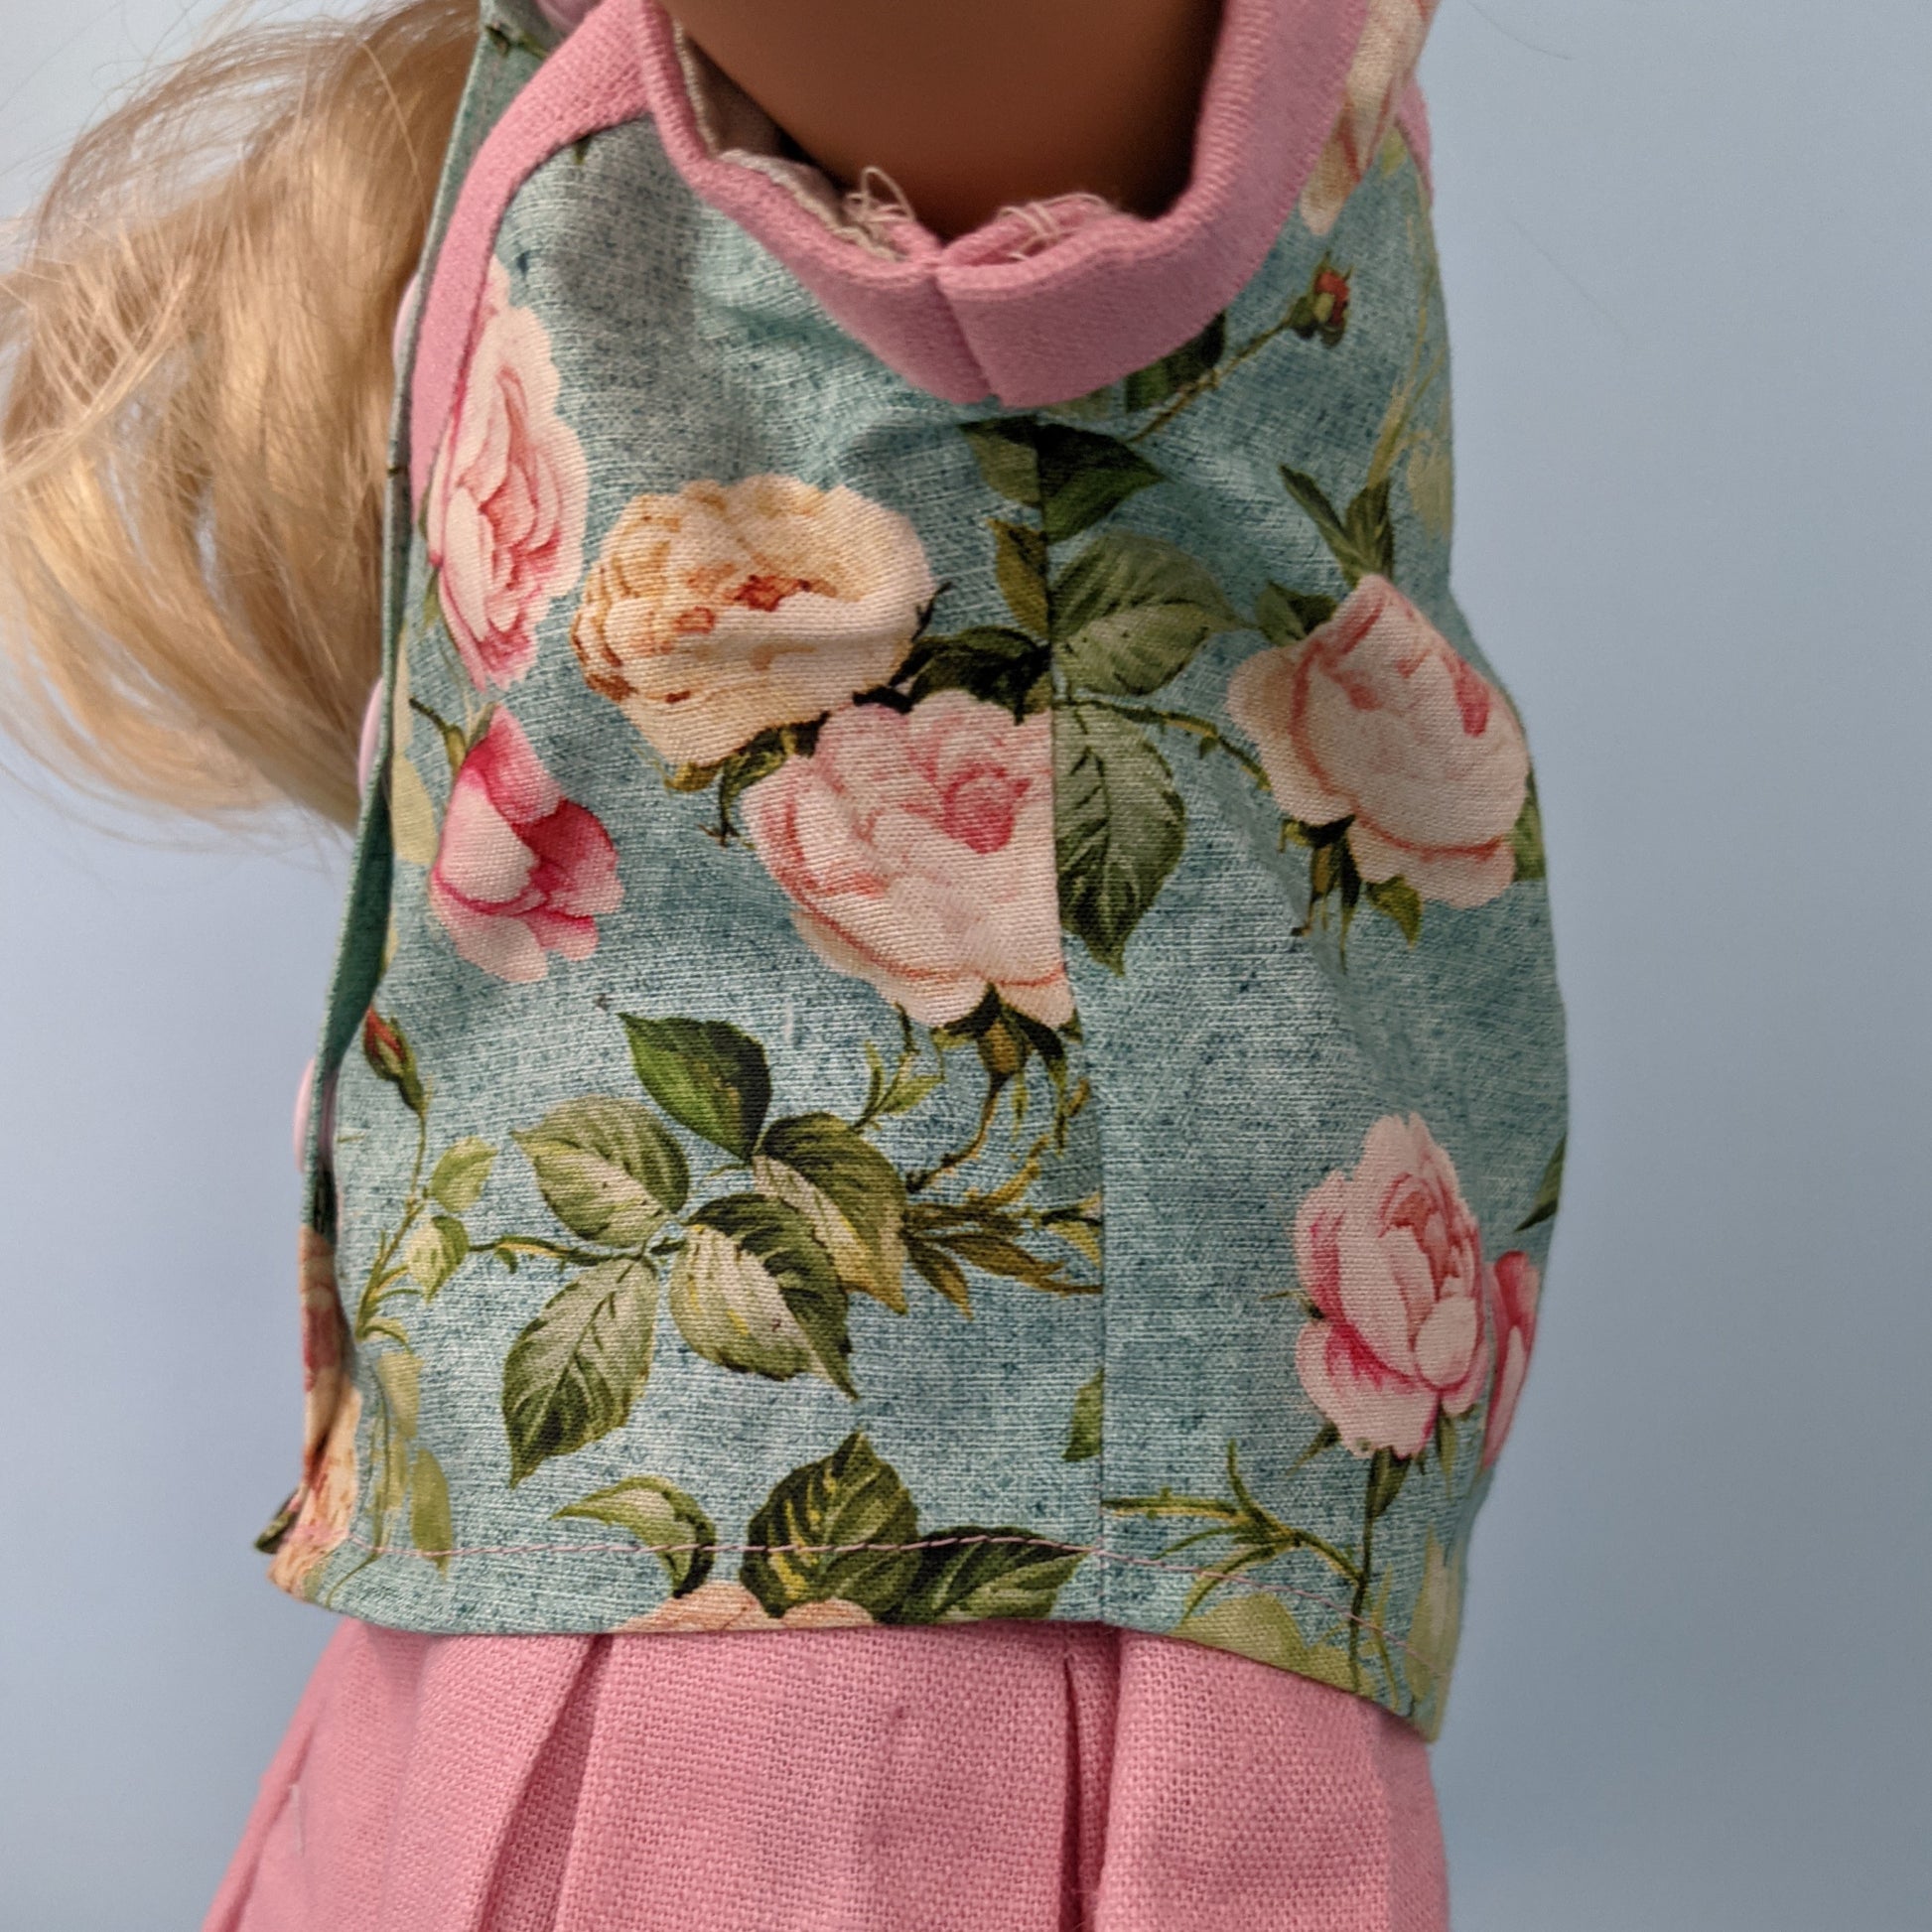
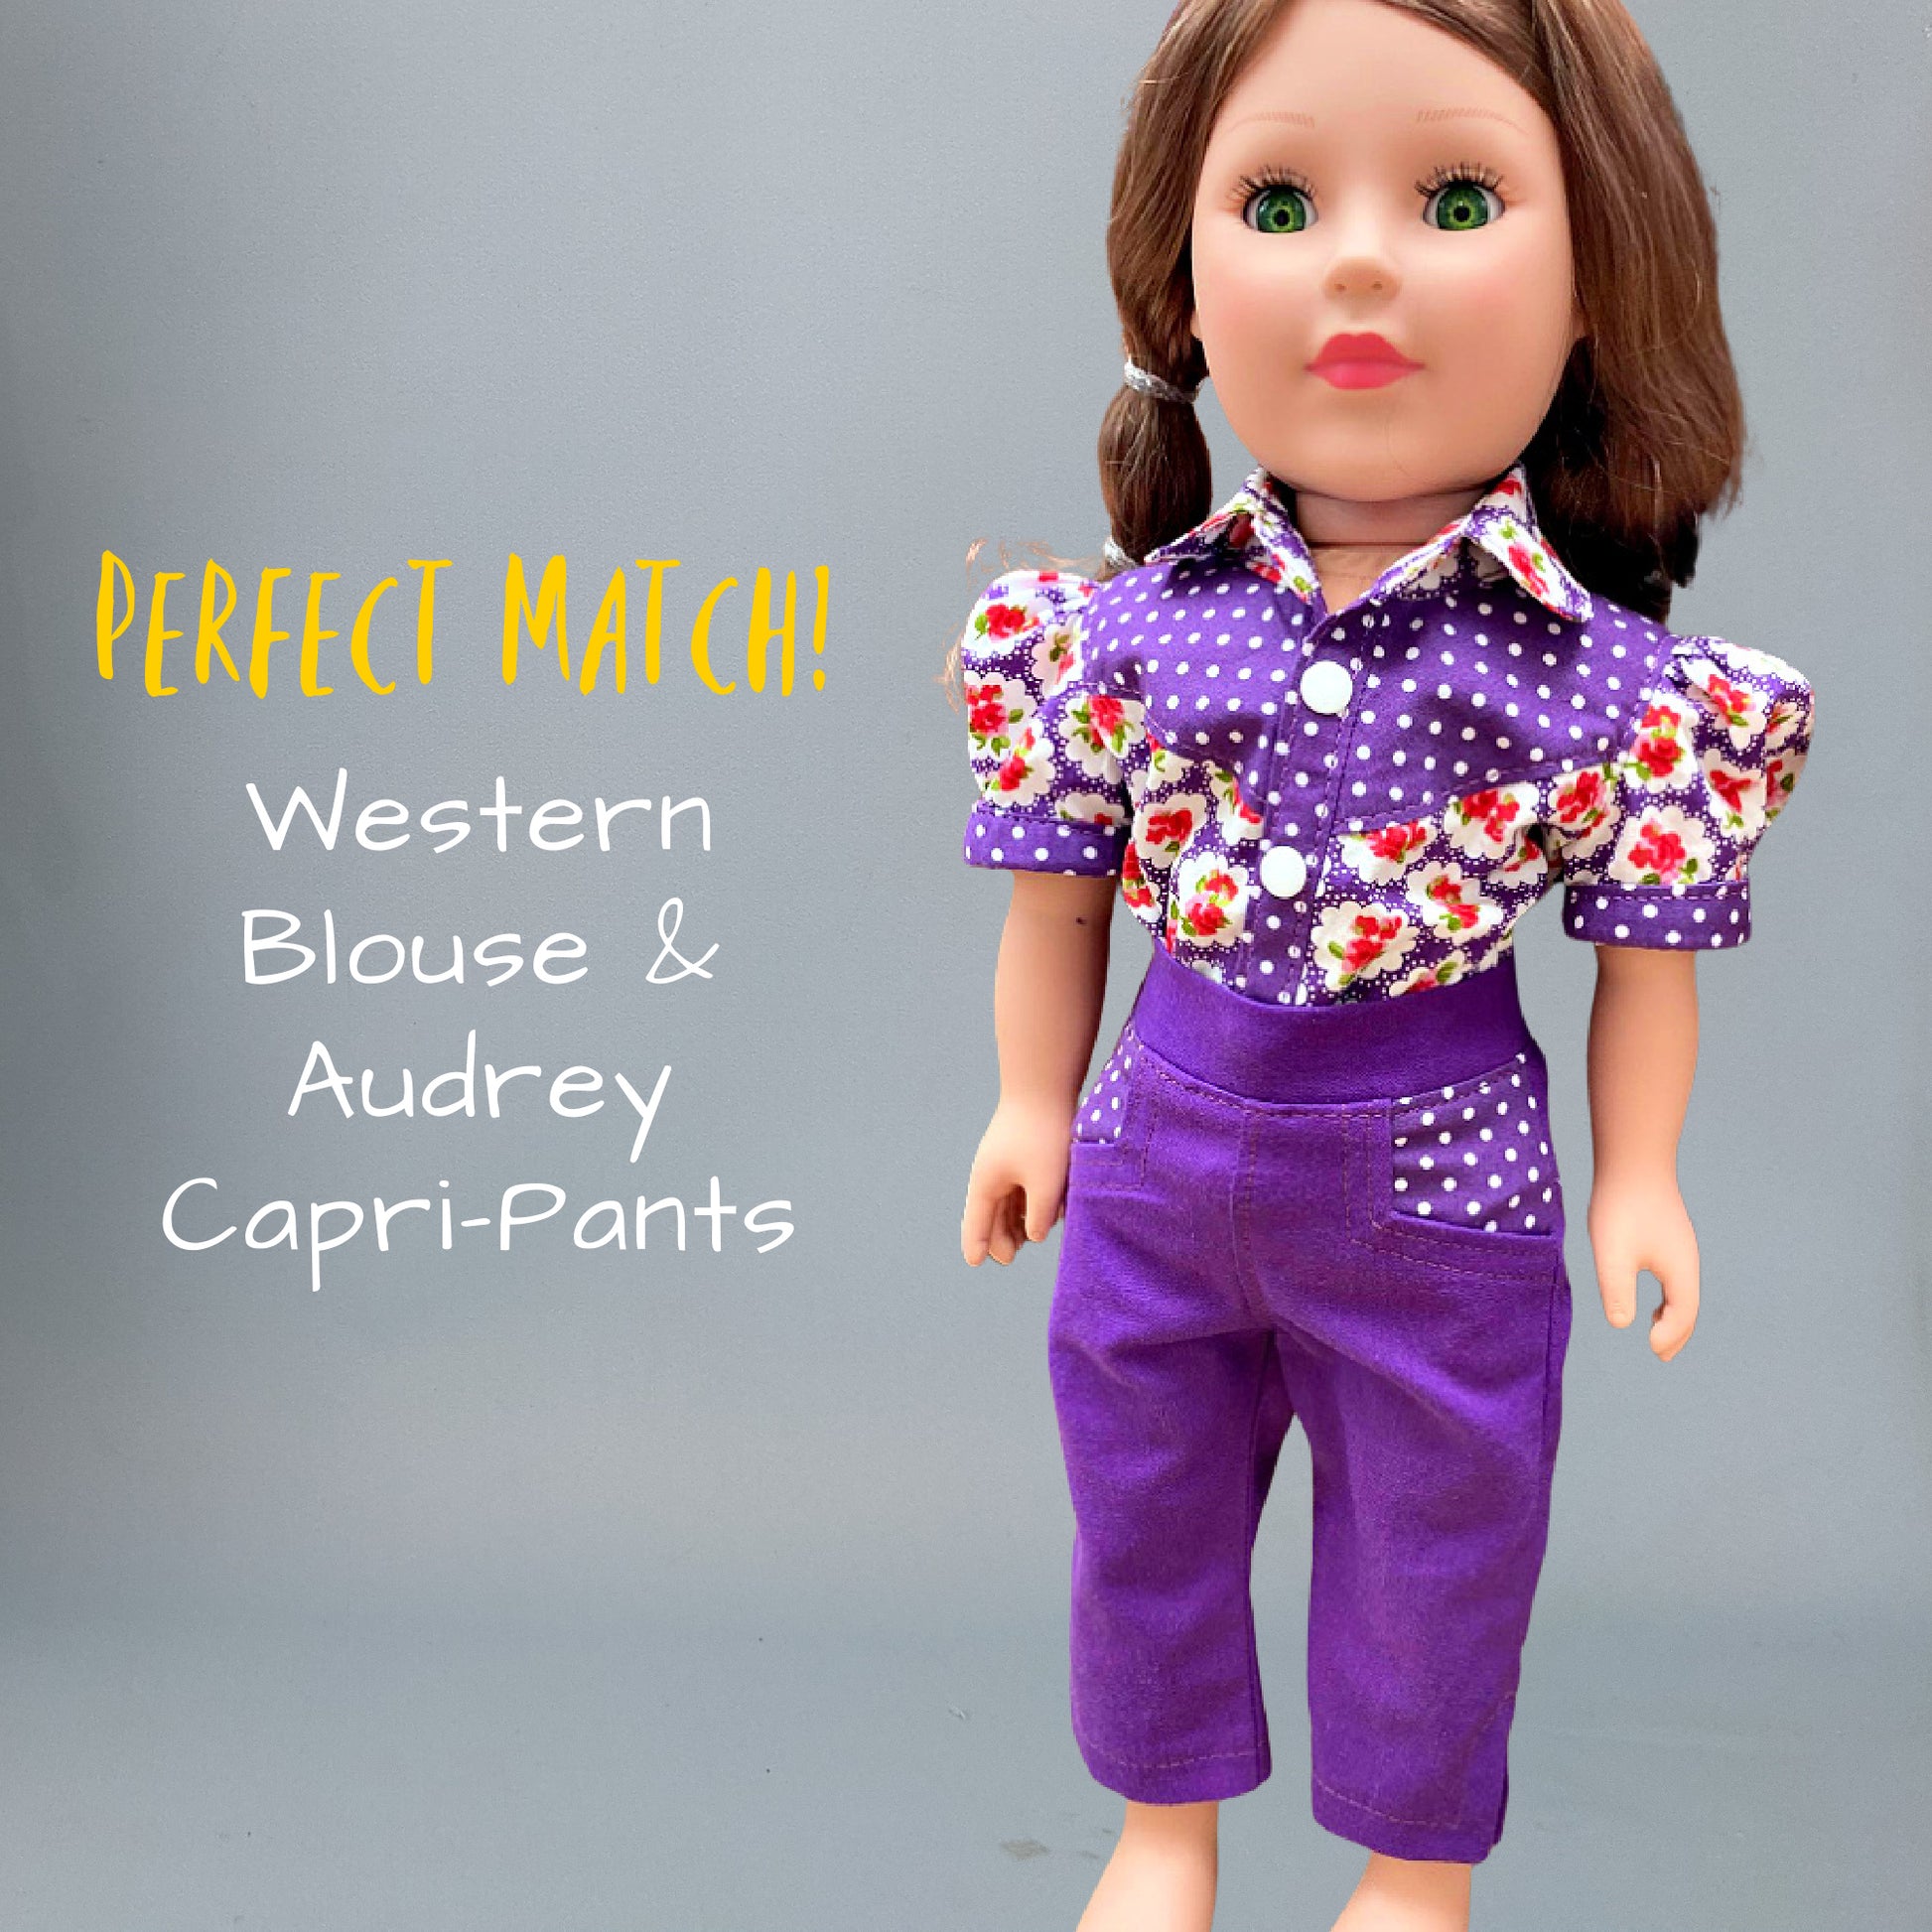
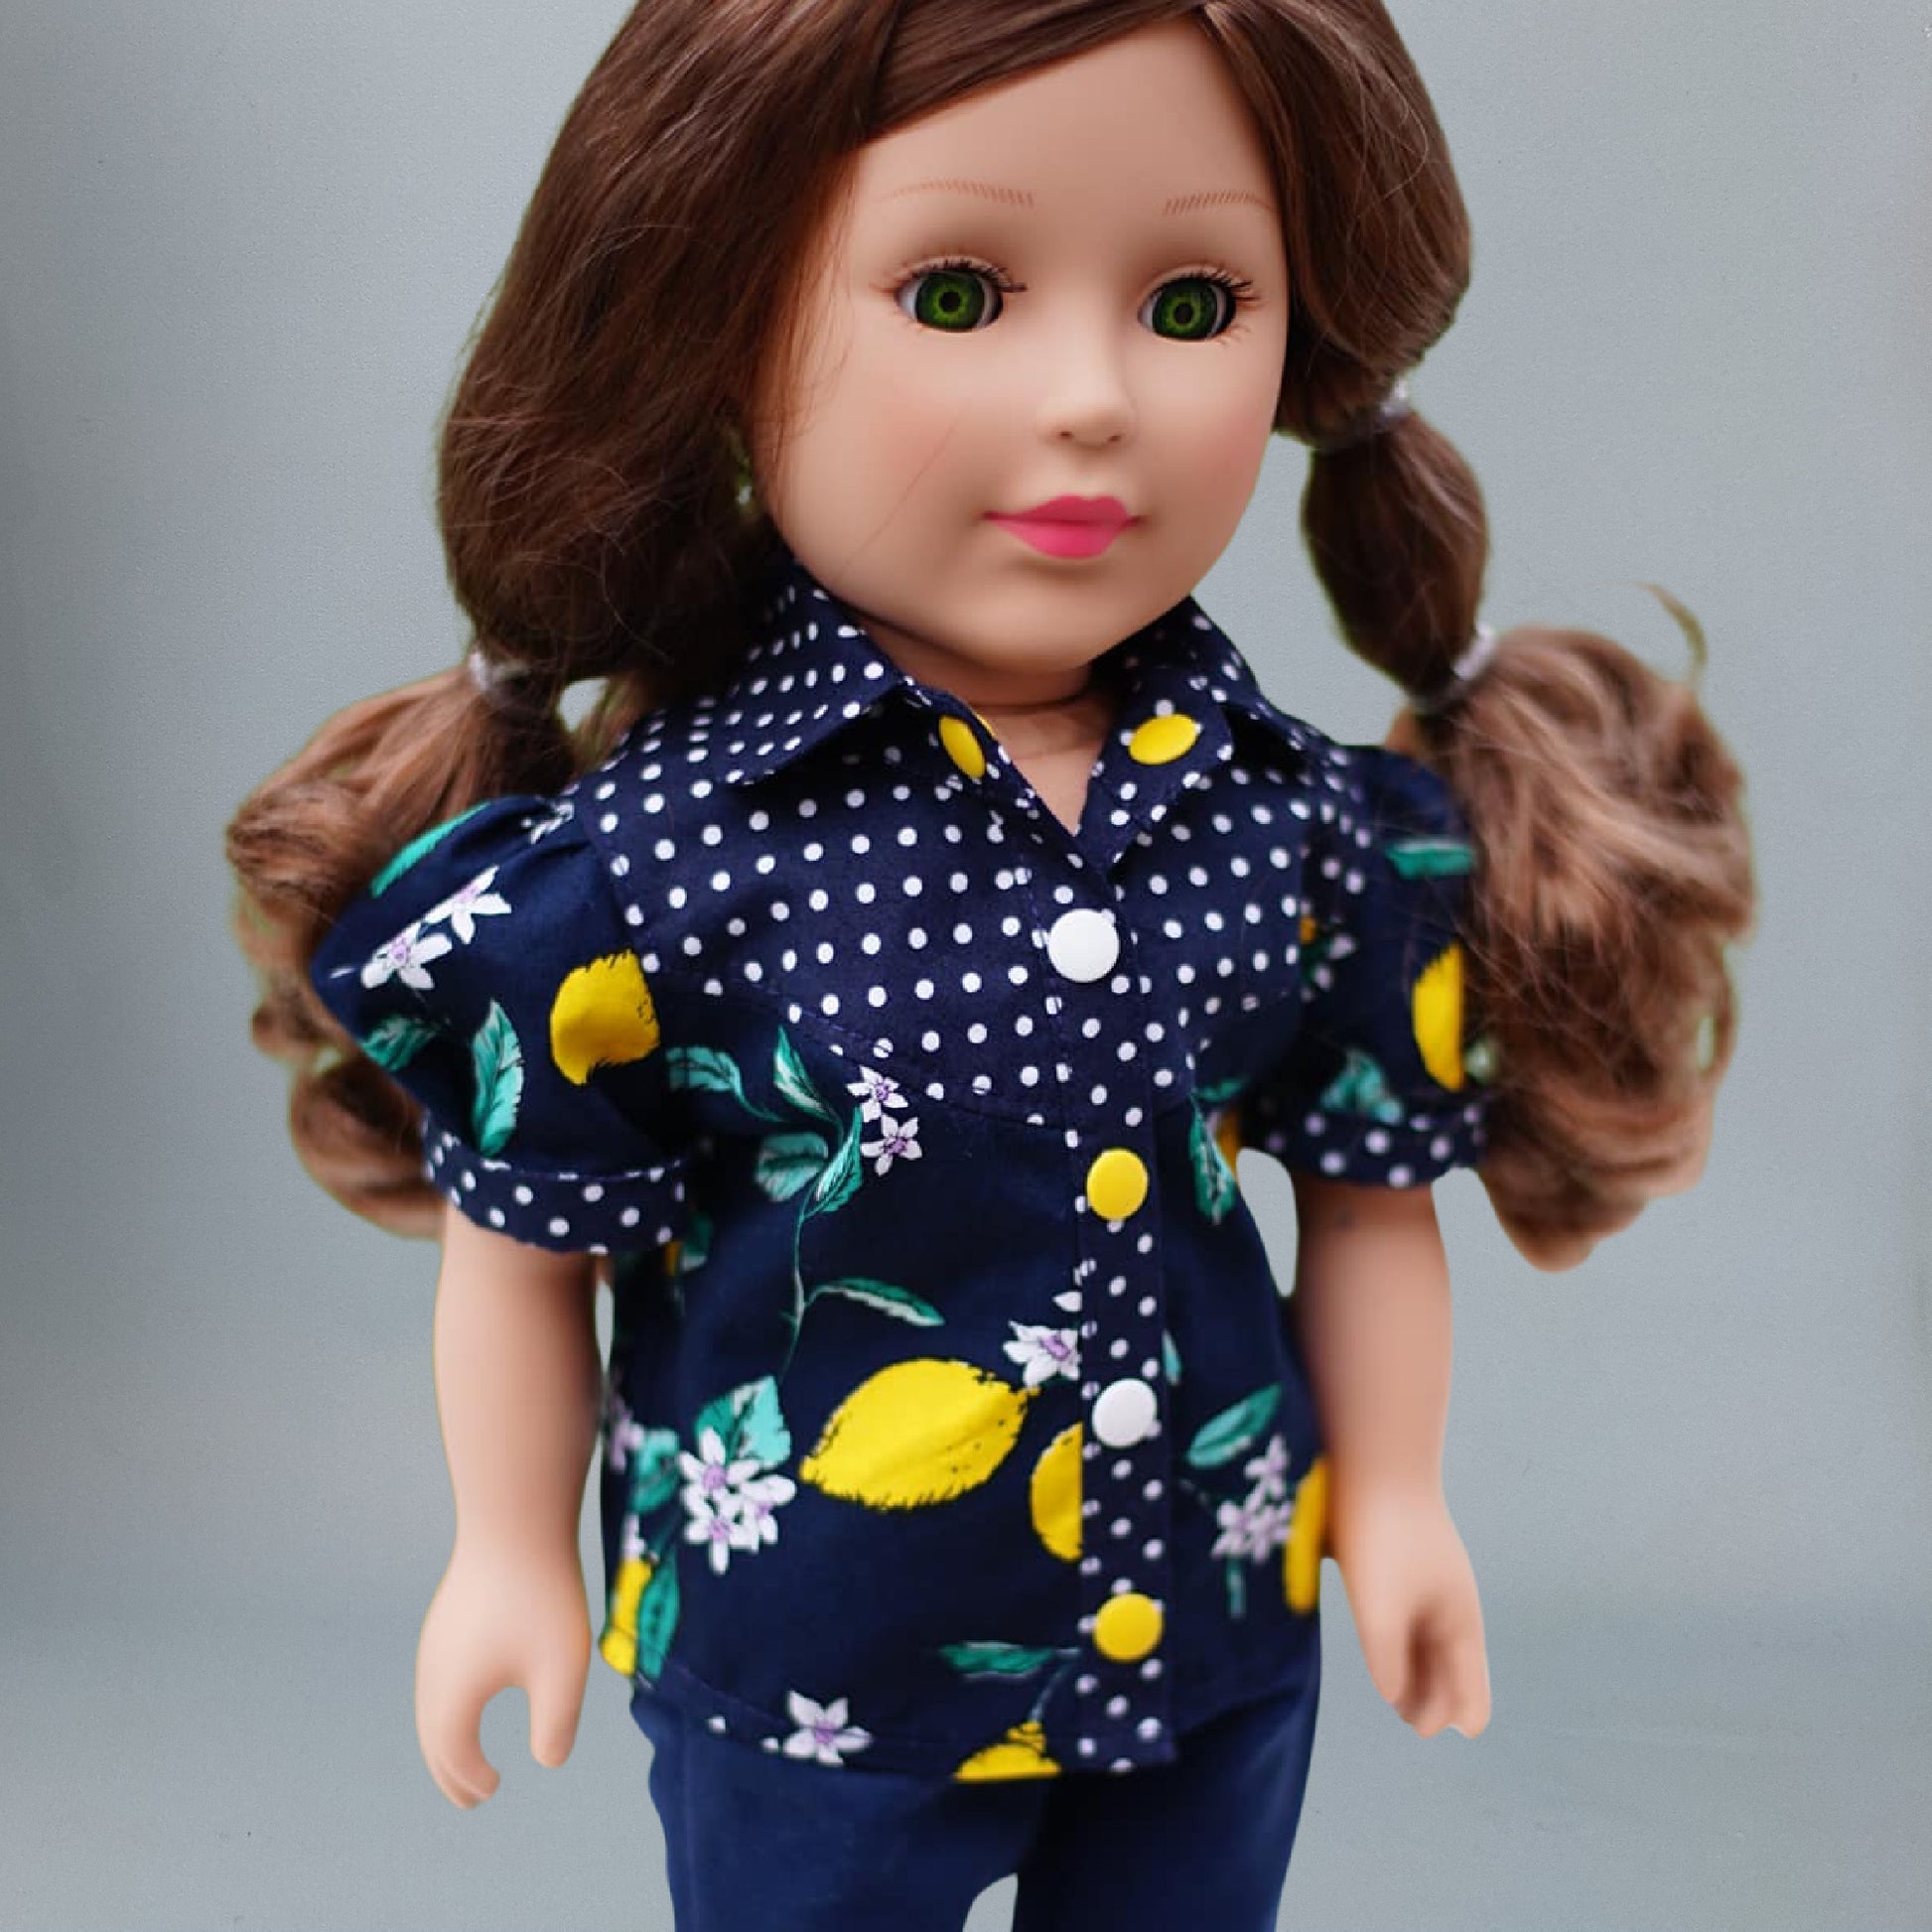
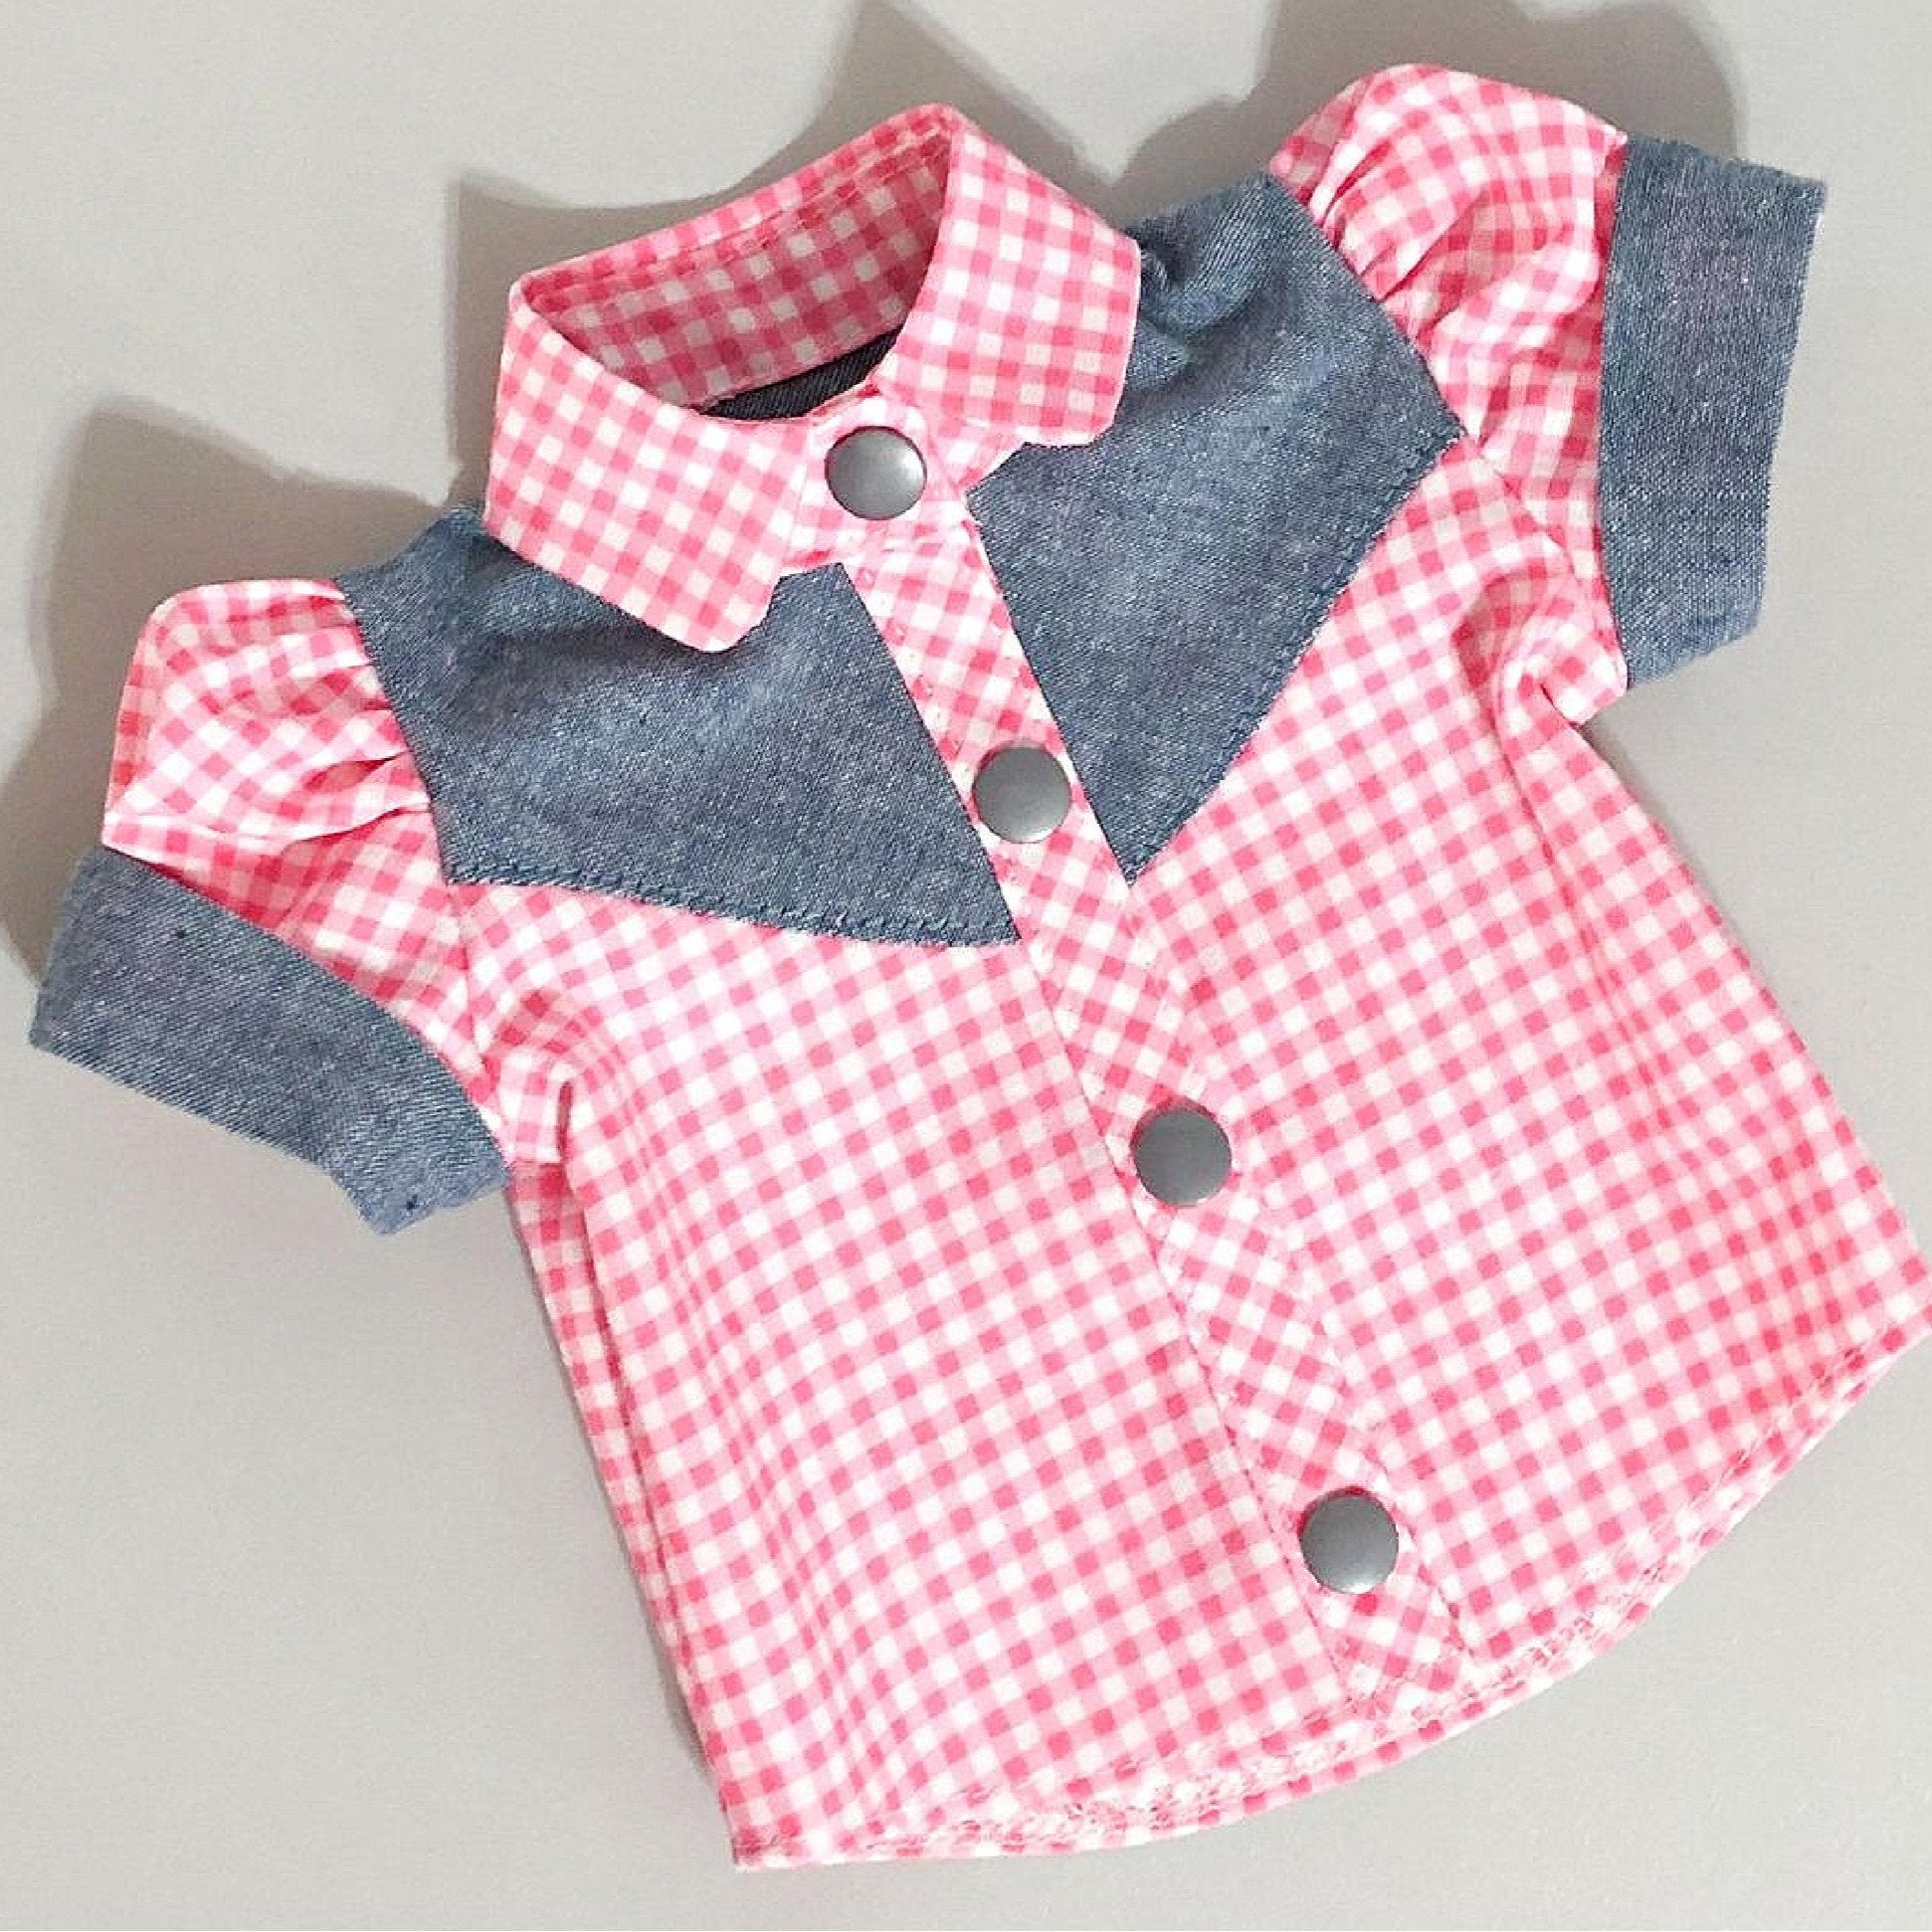
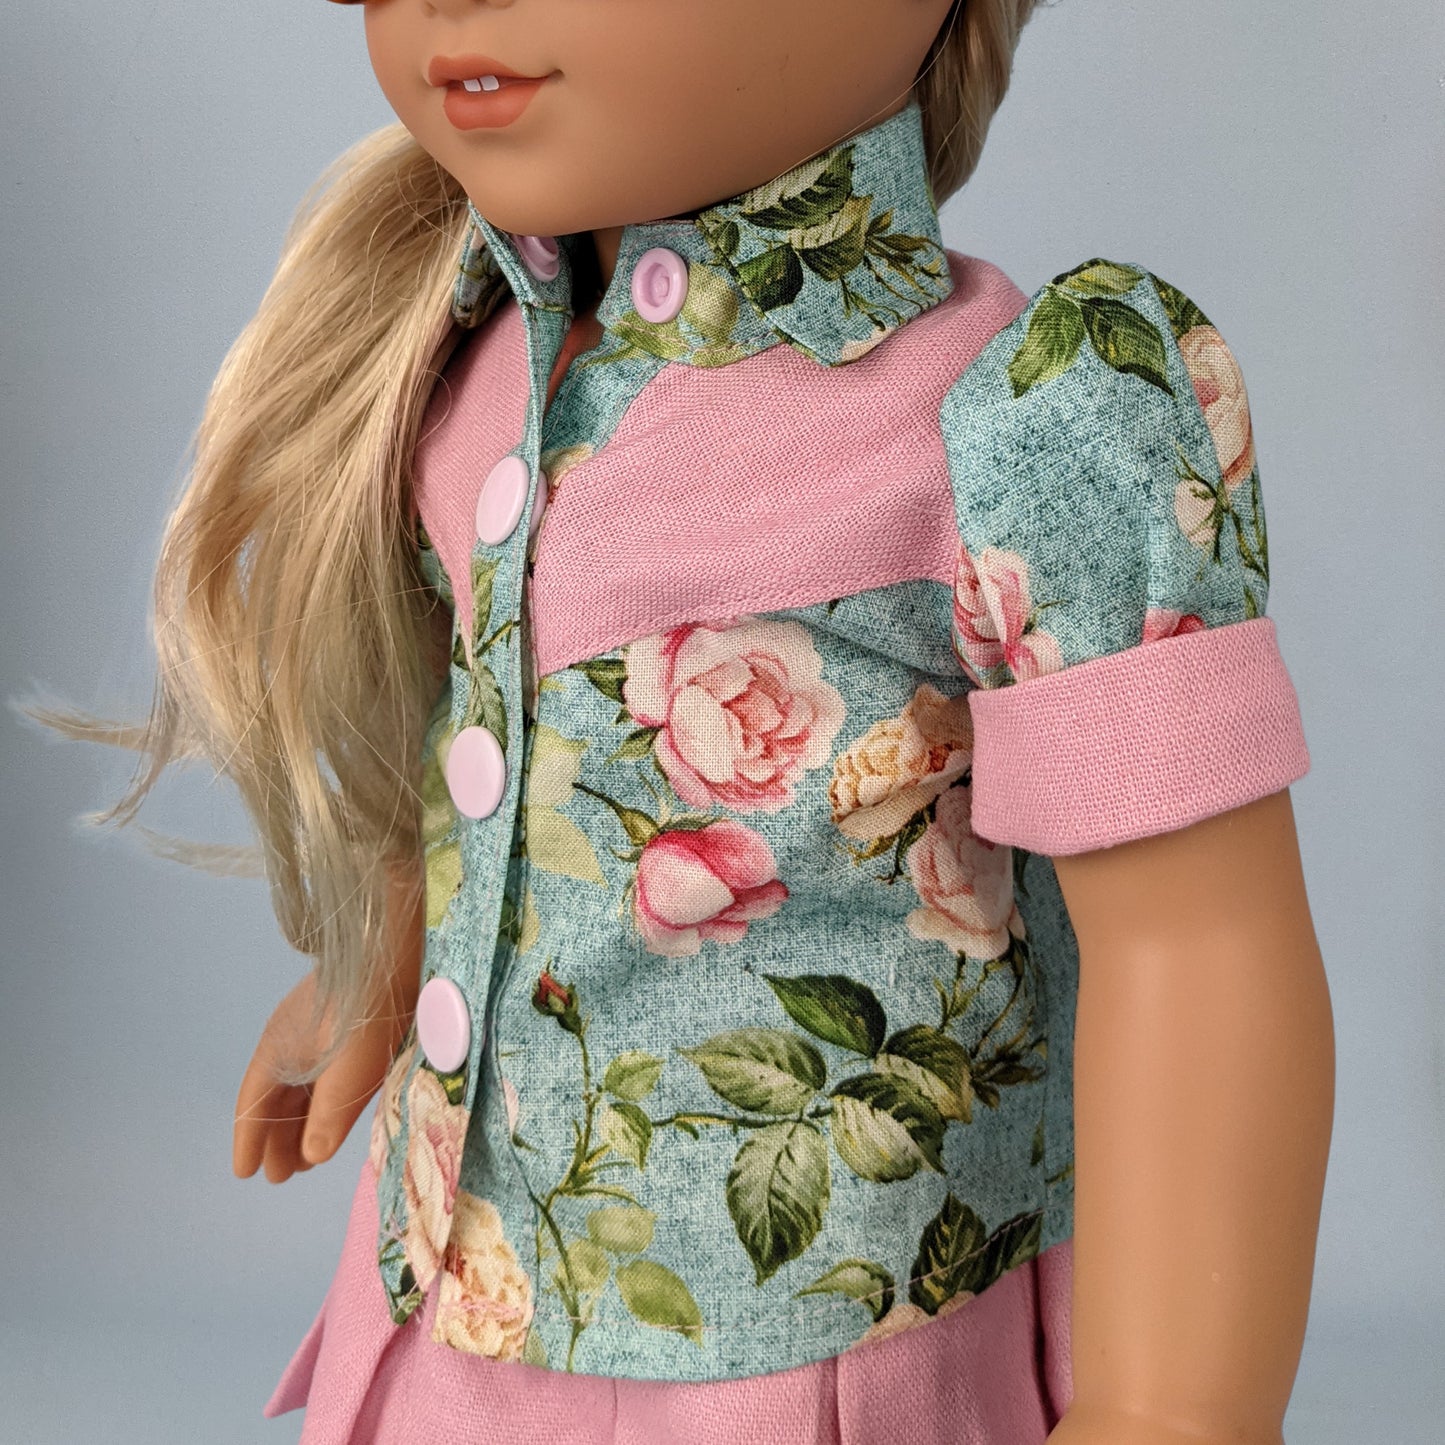
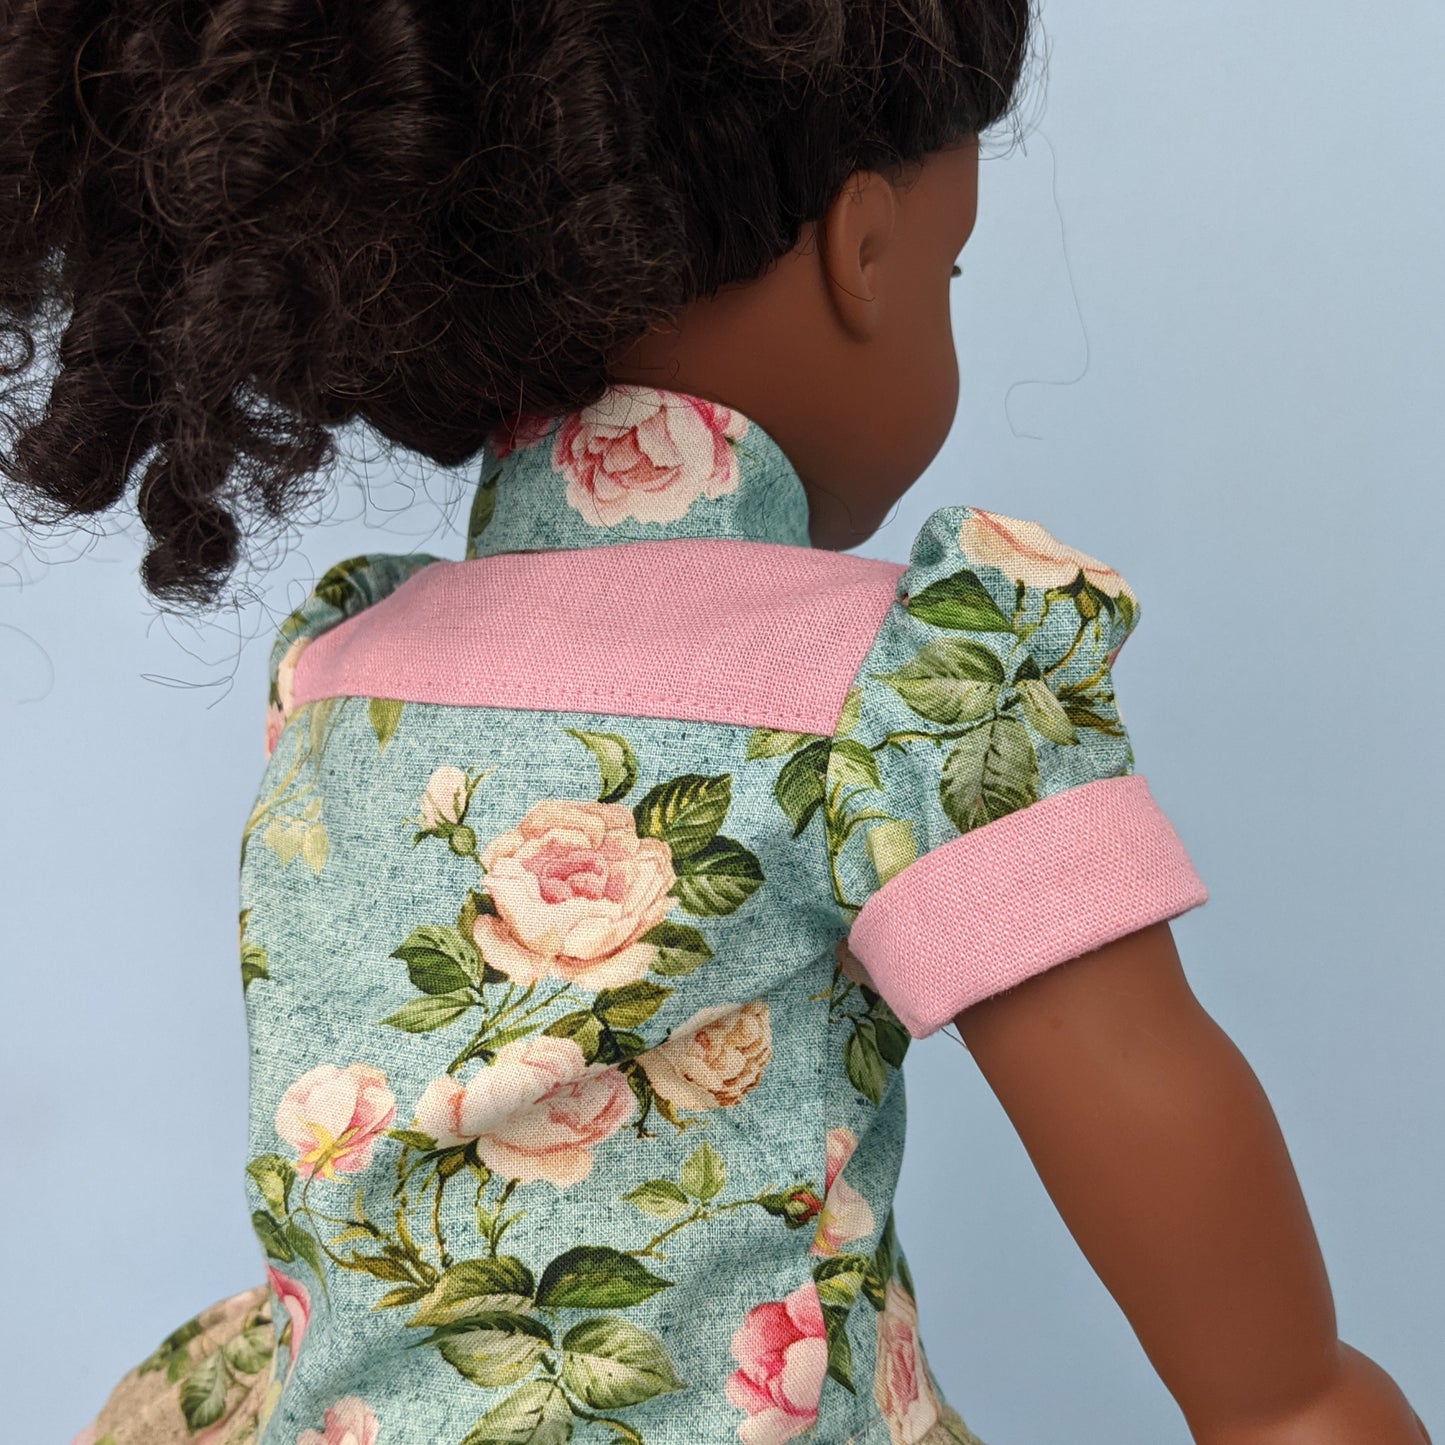
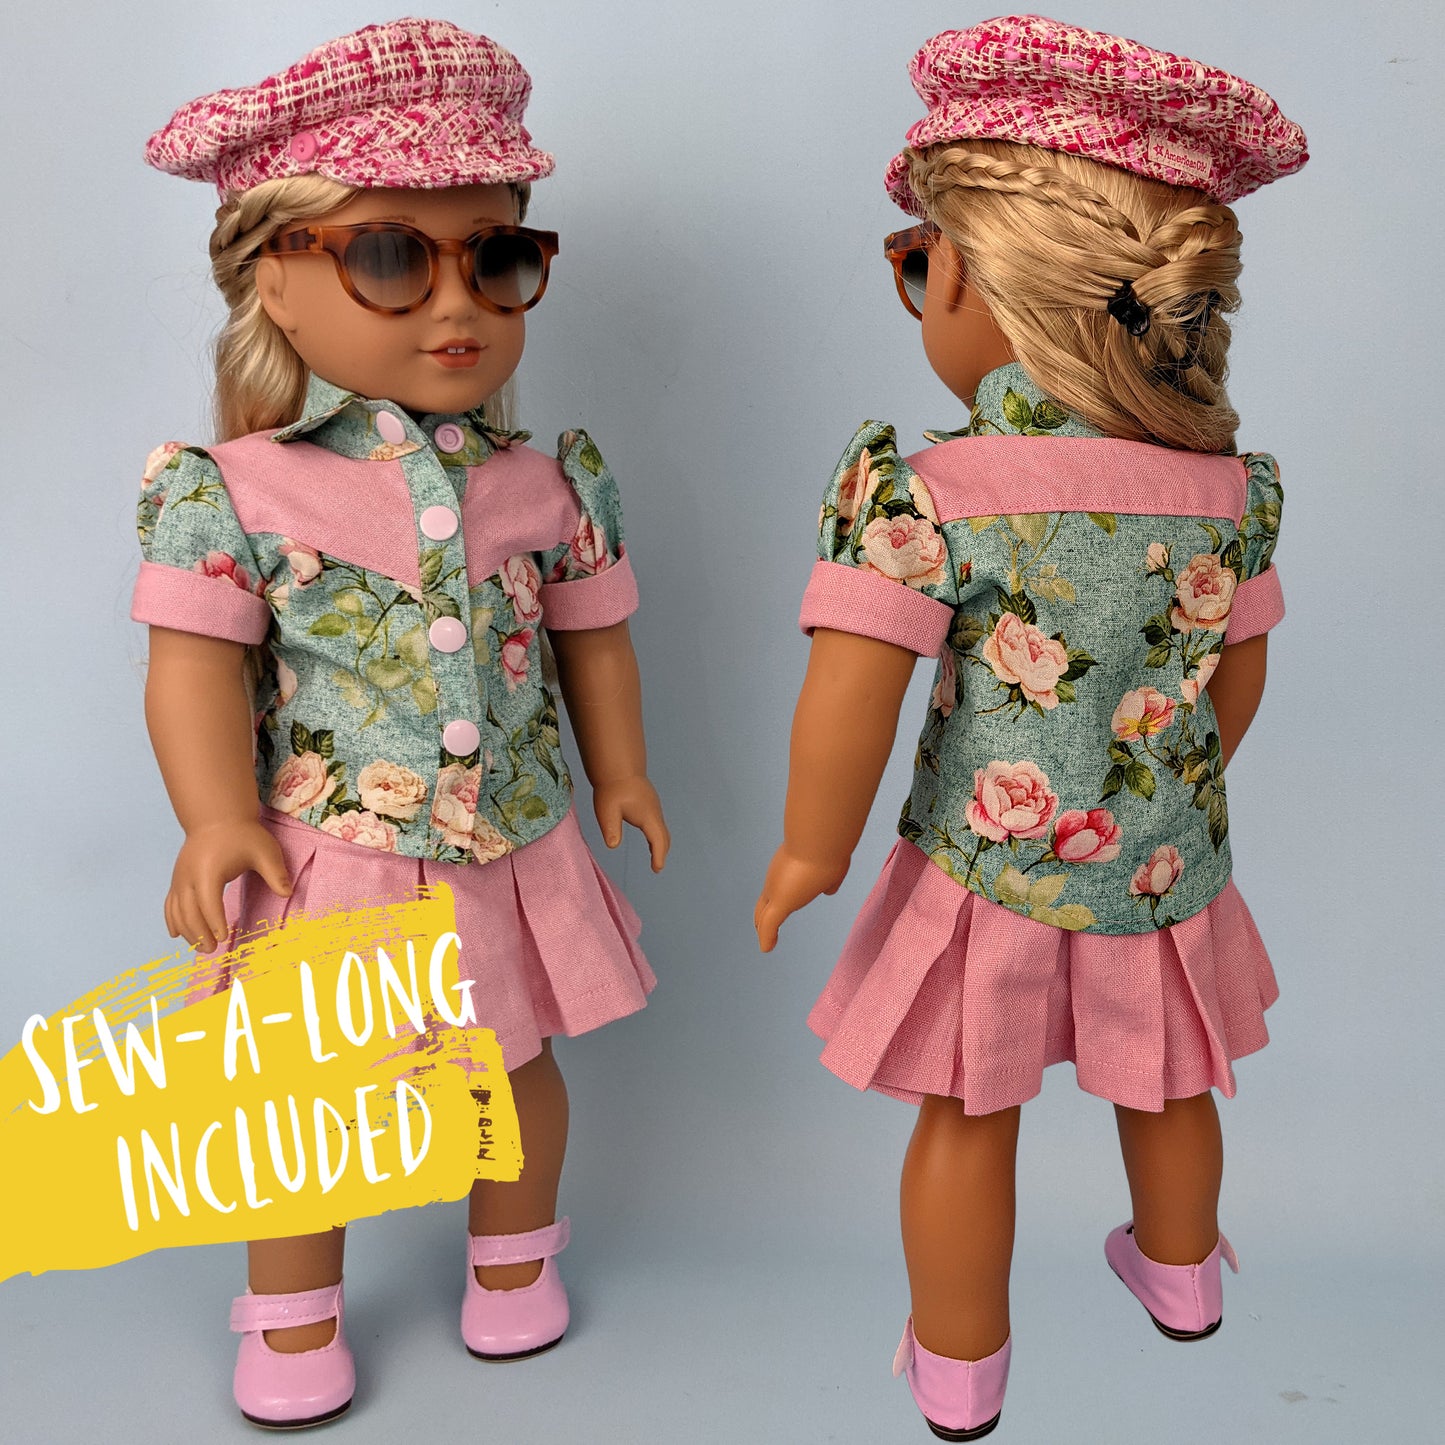
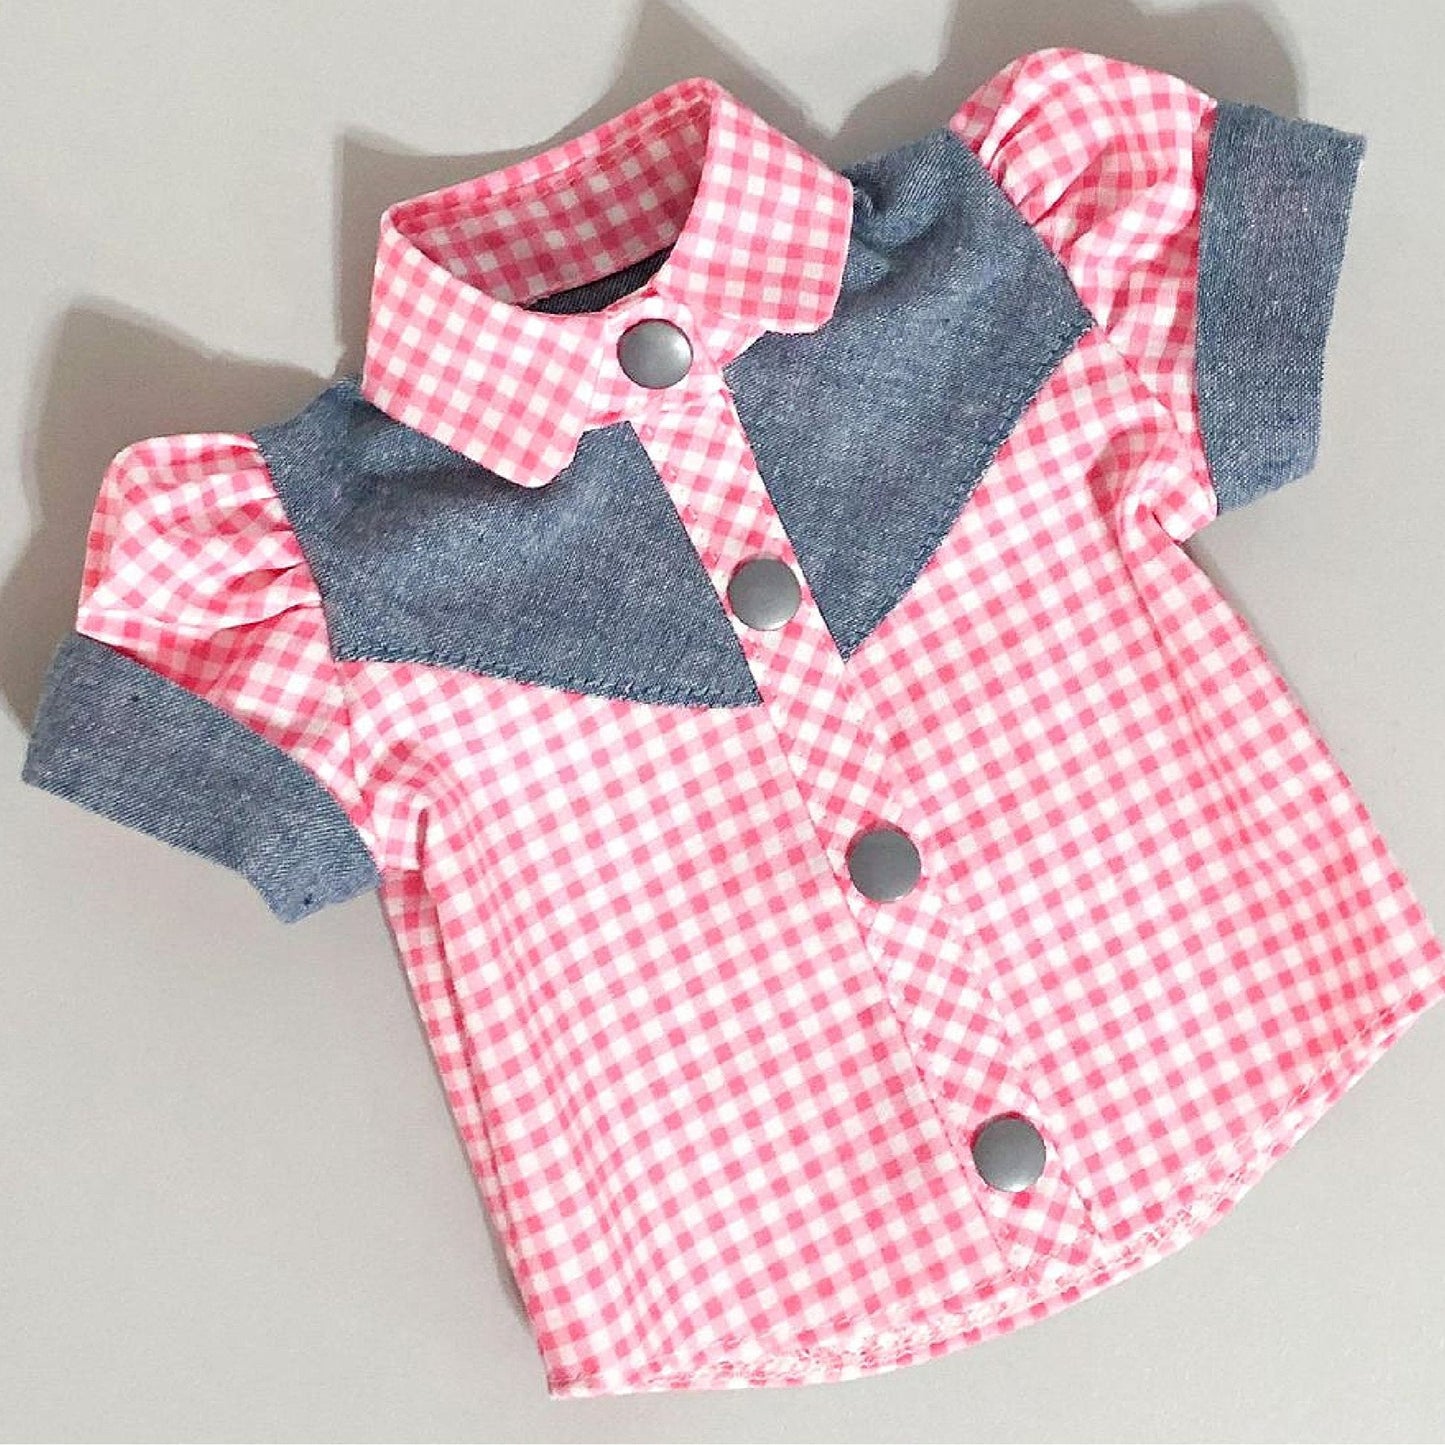
Die Country & Western Bluse für Puppen steckt voller entzückender Details – von den süßen Puffärmeln und dem High‑Low‑Saum bis zur klassischen Western‑Passe. Du lernst sogar Marinas Geheimtrick für einen perfekt genähten Stehkragen – ein kleines, geniales Verfahren, das auch bei normaler Kleidung wunderbar funktioniert.
Folge Marinas Video‑Tutorial, um zu lernen, wie man eine Westernbluse für 18‑Zoll‑Puppen näht, und sieh zu, wie die Country‑&‑Western‑Mode deiner Puppe zum Leben erwacht.
Was ist beim Schnittmuster dabei?
Was ist beim Schnittmuster dabei?
Design
Design
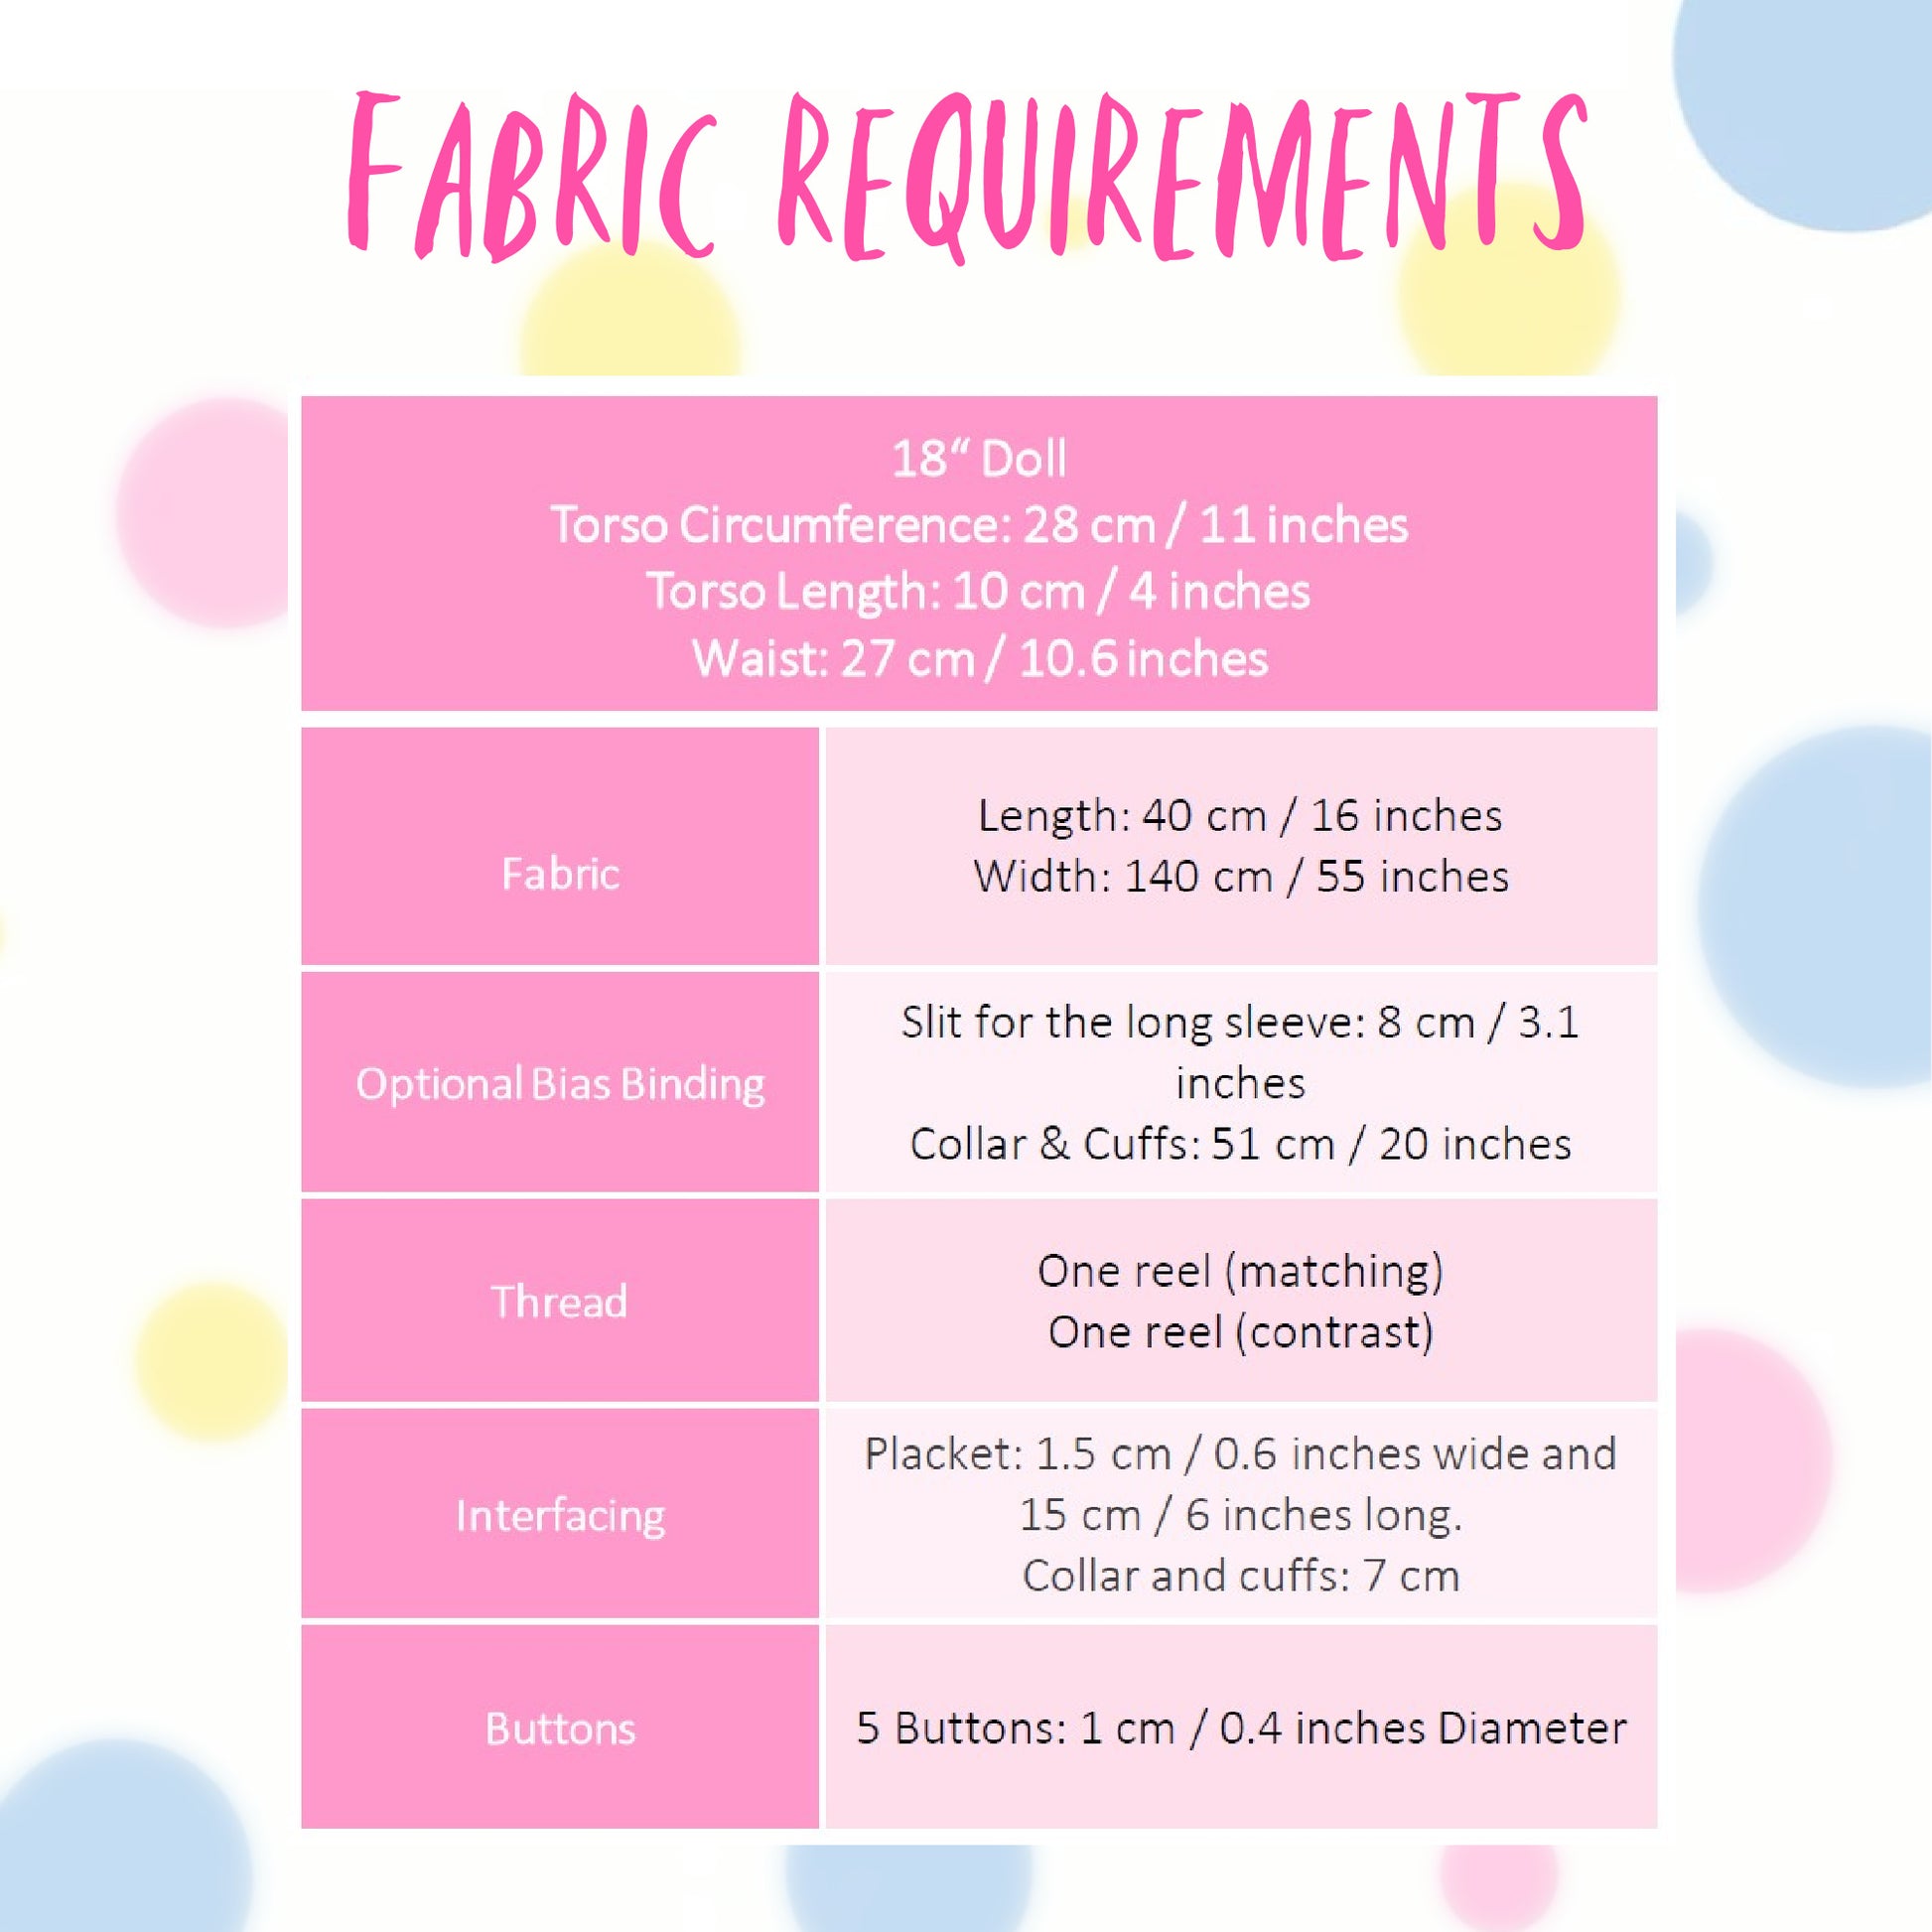
Stoffverbrauch
Stoffverbrauch
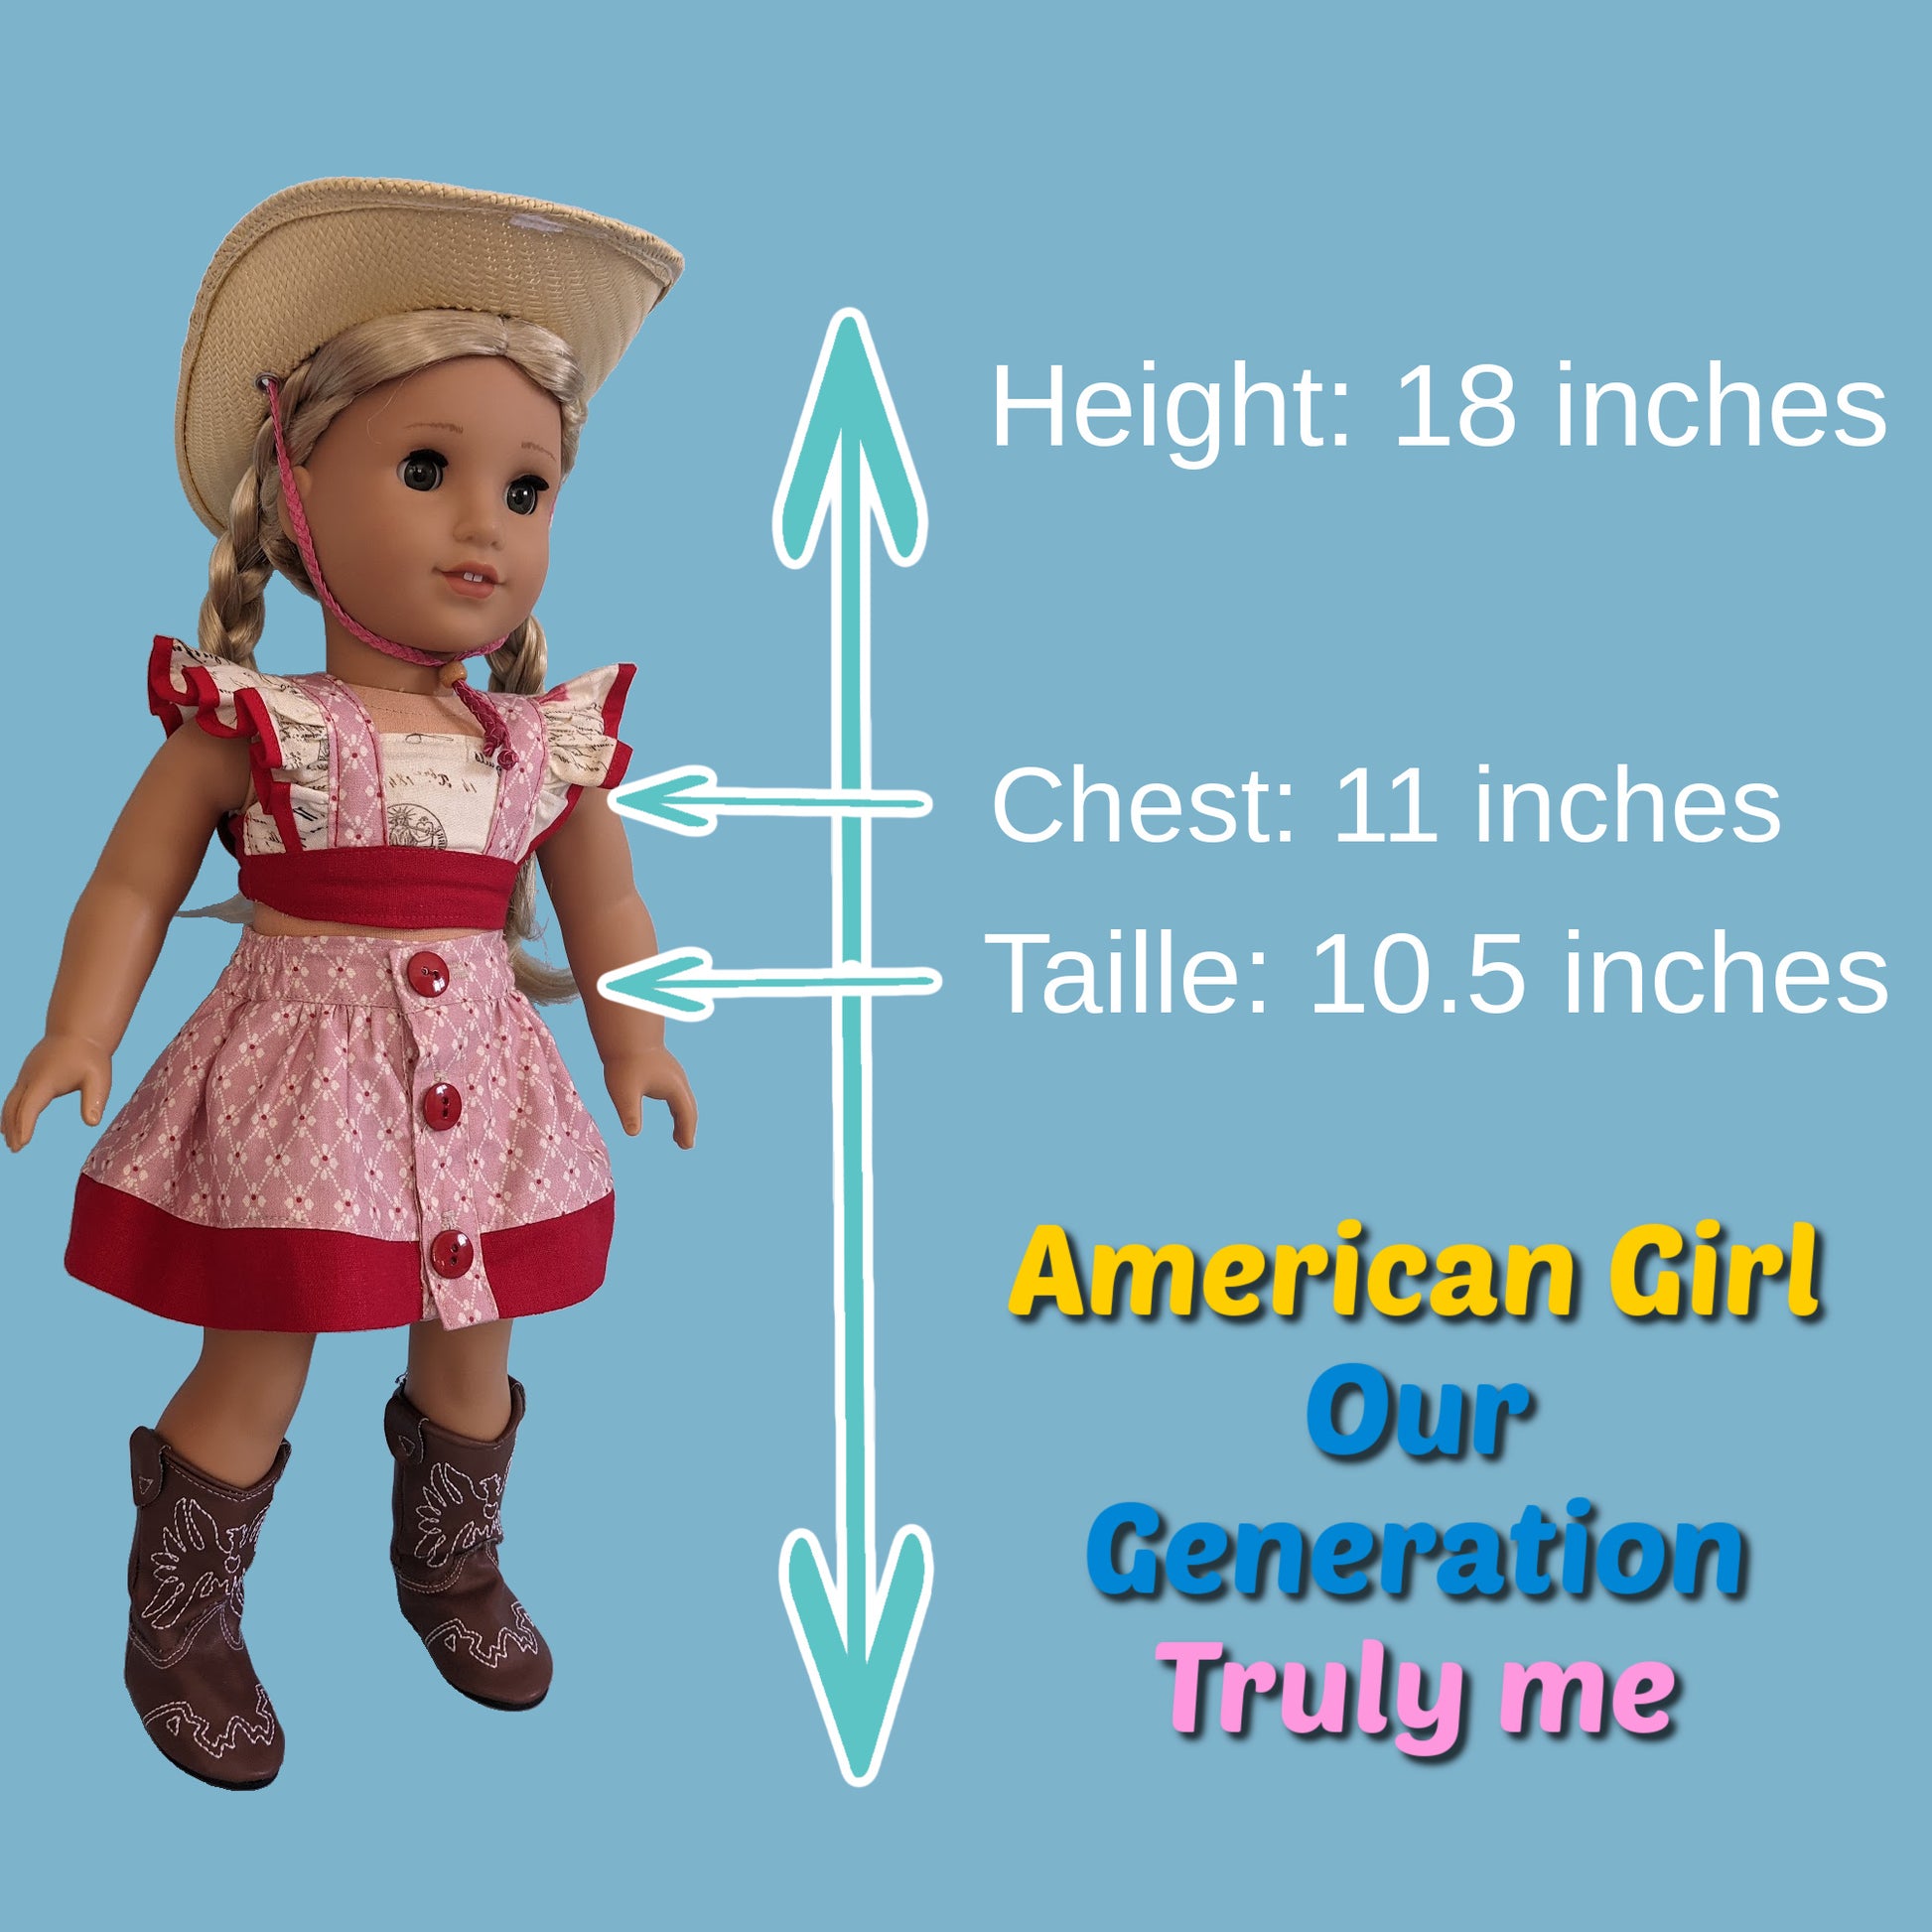
Verfügbare Größen
Verfügbare Größen
Bitte beachten
Bitte beachten


SCHRITT-FÜR-SCHRITT ANLEITUNG
WESTERN-BLUSE PUPPE