TILLY BLUSE
TILLY BLUSE
Verfügbarkeit für Abholungen konnte nicht geladen werden
Tilly ist ein hinreißendes Sommerblüschen Schnittmuster. Die Flügelärmel verlaufen und die Passe gibt dir die Möglichkeit, mit verschiedenen Stoffen schöne Kontraste zu erzielen. Damit Tilly leicht an- und auszuziehen ist, hat das Rückenteil einen Gummizug. Es passt daher auch wunderbar.
Dazu gibt es natürlich ein Video Tutorial, einfach etwas herunterscrollen, da findest du alle Videos für die Tilly Sommerbluse.
Was ist beim Schnittmuster dabei?
- Sofort-Download
- Digitale PDF Schnittmuster
- DIN A4 Format
- eBook
- Video-Anleitung
Design
Design
• Flügelärmel
• Gefüttertes Vorderteil
• Kastiger Tudor Ausschnitt
• Gefüttert
• Gummizug im Rücken
Stoffverbrauch
Stoffverbrauch
STOFFEMPFEHLUNG
Leichte Stoffe aus Leinen und Baumwolle, bedruckte Quiltingstoffe setzen hier romantische Akzente.
STOFFVERBRAUCH
- Rückenteil & Futter: 40-70cm
- Kontrastpasse: 15-25cm
- Fügelärmel: 25cm
KURZWAREN
- Gummi 1,5cm breit: 2m
- Dekorative Knöpfe: 2 x
Verfügbare Größen
Verfügbare Größen
Größe: 92-152, Alter 1-12
Bitte beachten
Bitte beachten
- Dies ist ein digitales Schnittmuster oder eine PDF-Datei, kein physisches Produkt. Die Zustellung erfolgt elektronisch über einen Download-Link an die beim Kauf verwendete E-Mail-Adresse. Zusätzlich kann das Schnittmuster von deinem Kundenkonto heruntergeladen werden.
- Um sicherzustellen, dass das Schnittmuster in seiner tatsächlichen Größe gedruckt wird, wird die Verwendung von Adobe Acrobat Reader empfohlen.
- Kleine Betriebe: Ich freue mich wenn meine Schnittmuster dir helfen, tolle Bekleidung für deine Kunden zu nähen. Industrielle Produktion ist untersagt.
Kunden werden ermutigt, Frocks & Frolics zu verlinken, wenn sie Projekte, die mit meinen Schnittmustern erstellt wurden, in sozialen Medien teilen.
@frocksandfrolics
#frocksandfrolics
Teilen

SCHRITT-FÜR-SCHRITT ANLEITUNG
VIDEO TEXT
Introduction to the Tilly Top
Transcript for the video: Tilly Blouse - Introduction to the Project
Welcome to our lovely Tilly Top. Here I’m going to show you how to make it. We have flutter sleeves, which are absolutely gorgeous. We’ve got two separated fronts, a yoke, and an upper front, which is really nice, and just an elasticated back, which you may already know from the Connie Top, which is also nice. The straps are just sewn onto the back.
I use bias binding for the edges of the flutter strap, and I hope that you will really enjoy learning about this top.
Checking Your Pattern and Understanding the Construction
Your first task is always to check your test scale. It’s 2.5 centimeters in either direction or an inch, and then you need to cut everything out.
You have an assembly plan that’s always the last page, and it shows you exactly which pieces come as one and which you need to assemble to create a whole pattern piece.
Once you have sellotaped everything together, let’s have a quick look at this pattern. It’s very simple. The back is just going to be folded lengthways in half, and then I’m just going to use my lining here to show you how that works. It’s inserted into the front, and that’s why it’s a centimeter shorter, because we have a fold there.
Then the front is put onto the lining as well, and the yoke too. But now we also have a flutter sleeve, and that flutter sleeve goes in here between those two layers.
Understanding the Flutter Sleeve
The flutter sleeve has a slanted side, which has a front so that it’s got a really nice taper towards the end. You need to make sure that you actually put the tapered end onto the front, so it comes over the edge a little bit of your top.
When I turn this over, I’ve got my lovely flutter sleeve that comes over a little bit further. You should always try this on before you finish it, and then it gets slotted in between the upper and lower front, and it looks really fantastic.
Now with a flutter sleeve, you need to be careful that you attach the front to the slanted front and that you cut a pair. That’s really important. That means you have it as a mirror image so that you don’t end up with two flutter sleeves the same, and they are sewn together edge to edge.
On the back, you need to leave a centimeter seam allowance so that when we sew this together, it’s completely flush, and so here you can see that quite nicely how it’s done.
Choosing How to Finish the Flutter Sleeve Edge
Your flutter sleeve has a straight edge and a curved edge. The curved edge is much harder to hem, which is why on my pattern I mark it as the side where we put in the gather threads.
However, the curved side is a little bit longer through the curve than the other side, and it looks really nice if that is the side where your hem or your bias binding goes, but it’s much harder for beginners. So you have to make a decision about what you want to do.
When I made this before on the Connie Top, I used the straight edge for my hem because it’s way easier to do, and I used the curved side to gather it. On this one, I do it exactly the other way around because I do have bias binding, and bias binding goes beautifully around curves.
Whenever you have a seam, say you would add some lace to it, the same would apply. It’s very simple to put whatever edge trim you have onto the curved edge. In that case, I would use the straight edge to put my gather threads in.
But if you’re just hemming it and you do a narrow rolled hem and you are a beginner, then I would suggest that you do that on the straight side because it’s much easier to do, and it doesn’t make much difference in the way it looks. It looks very, very similar, and I think to the untrained eye, or someone who hasn’t made ten of those, you wouldn’t even see the difference.
So make up your mind what you want to do. If you want to use bias binding or an edge trim with lace, then you put that edge trim on the curved edge. If you want to use a narrow rolled edge hem, then you put it on the straight edge.
Fabrics and Materials Used
The fabrics I’ve used here are really, really tremendous. This year I’ve used a lot of my Camilla fabrics, and this is the Rosalinda collection.
This particular one here is called Lillian Rose, which I think is absolutely beautiful and worked so well. The one with the lovely writing is also from the Rosalinda collection, and it’s called Cursive.
My bias binding is from Jo-Ann’s fabric stores, and it’s the slimline bias binding. It’s quite reasonable.
I’m also using fold-over elastic because it’s the slimmest that you can get, and it’s very, very cheap. You can use the link to our Amazon store in the instructions to purchase a whole roll of this stuff, and it’s actually really, really super for this sort of thing instead of cheap.
Cutting Out the Fabric
Cutting out is really quite simple, and not much needs to be said for it.
The back is cut on the fold, and our lower front is cut on the fold as well.
You can see here on the Connie Top this time how a very stark contrast looks absolutely fabulous. Here it works well with the yellow and the blue.
You want to mark which part is attached to the top front with a snip because they look very similar, but they are not the same.
Then we’ve also got a strap which we need to cut out, and I don’t think you necessarily need to mark which is the front because it is the tip at the front anyway, so you know which one that is.
The last thing I’m going to cut is the top front lining. I could cut that in any fabric, but I’m cutting it in the same fabric just because I really like it and have cut quite a lot of it.
Now we’re ready, and we can start sewing our flutter sleeves together, and we do that in the next chapter.
Preparing the Flutter Sleeves
Transcript for the video: Tilly Blouse The Flutter-Sleeves
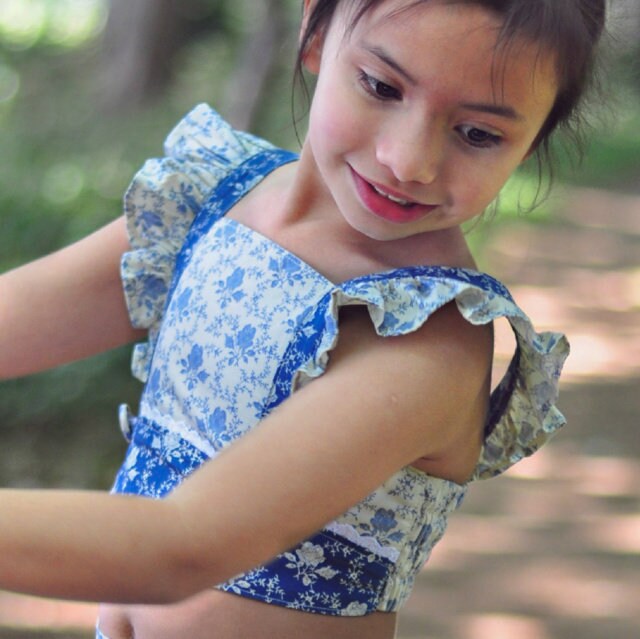
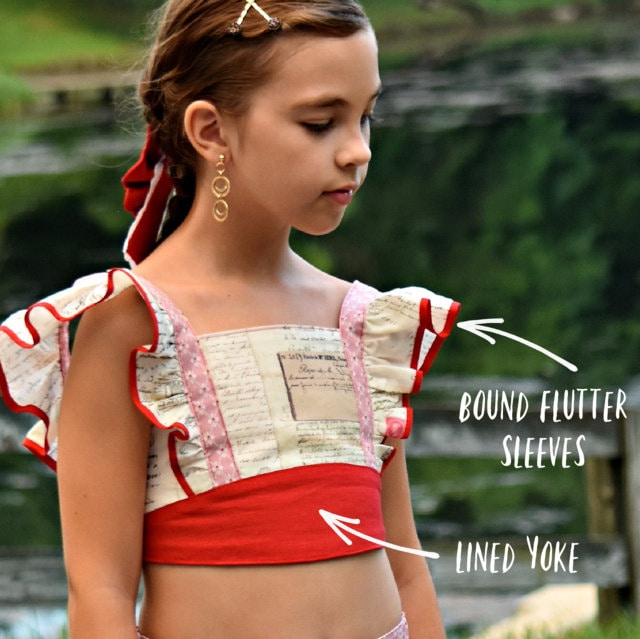
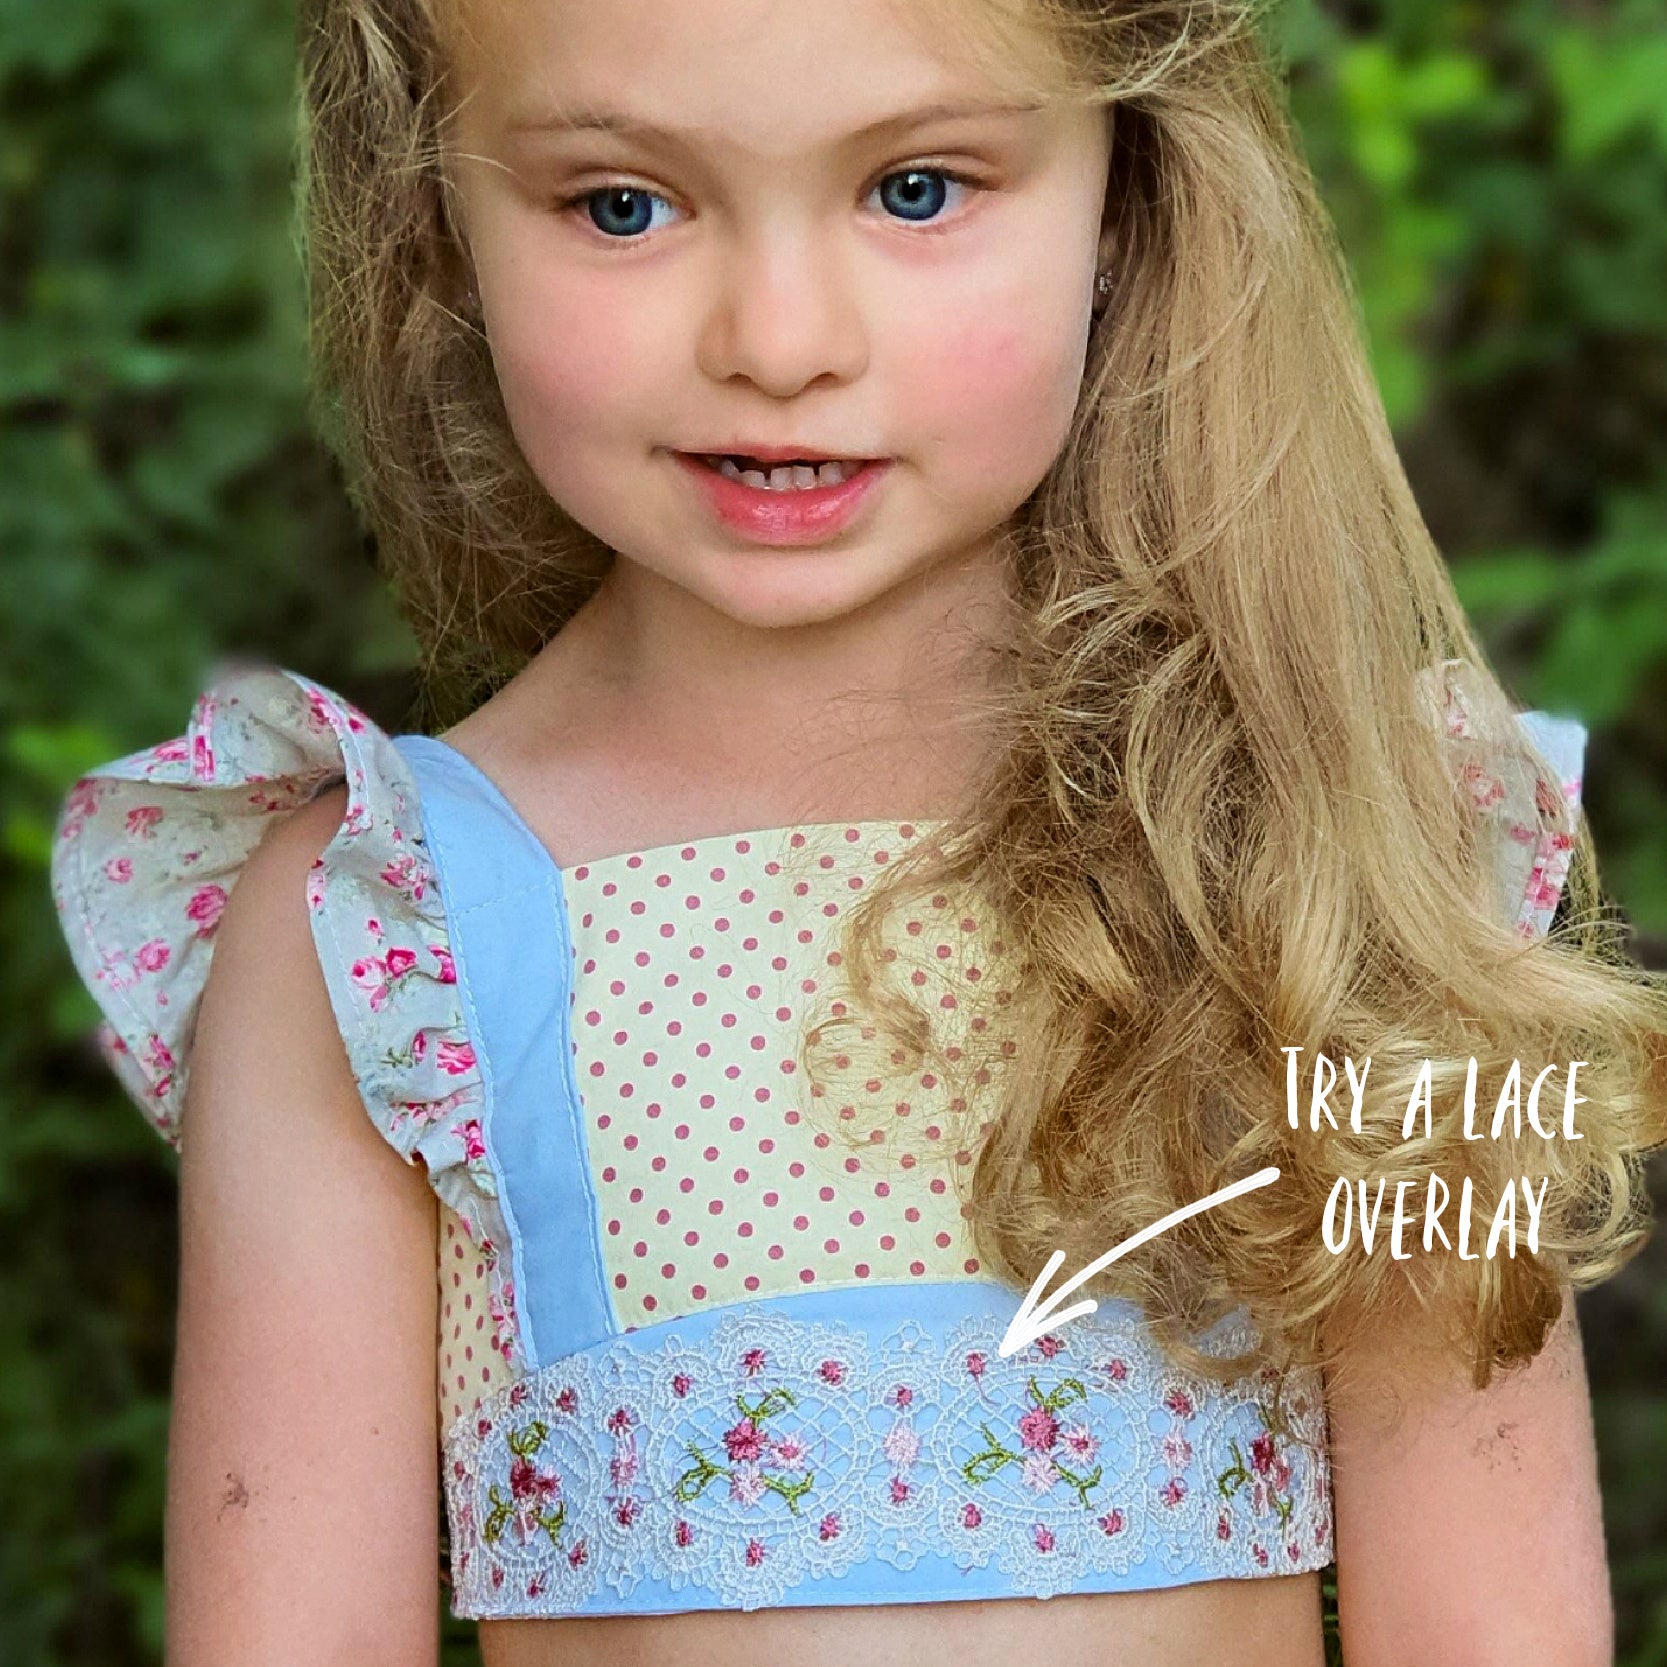
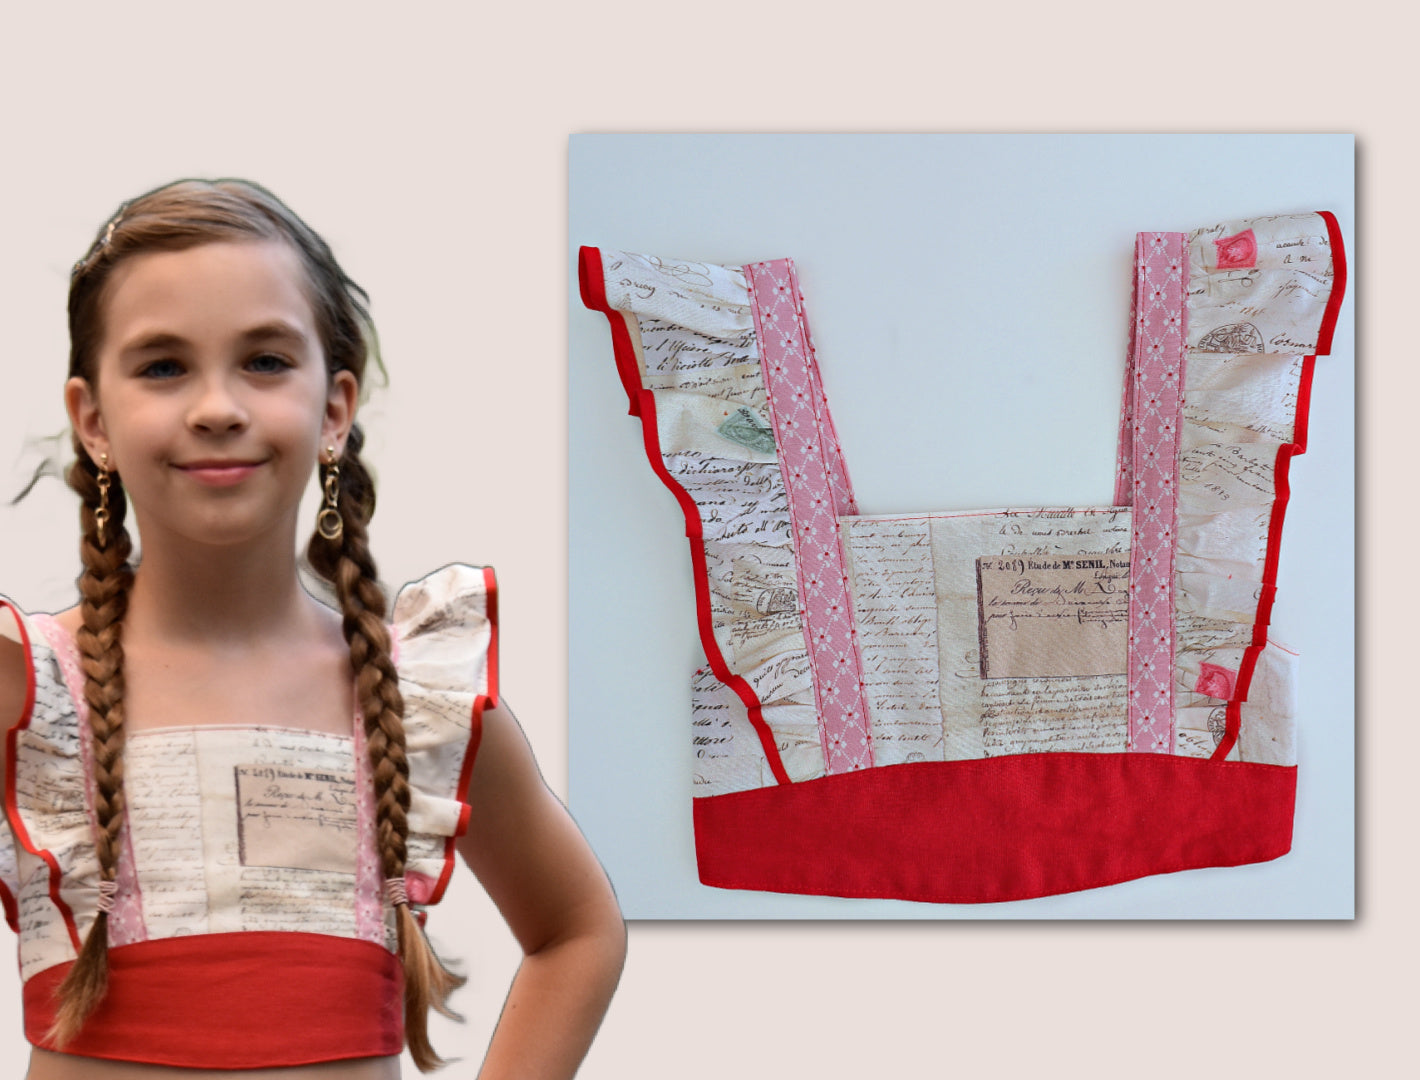
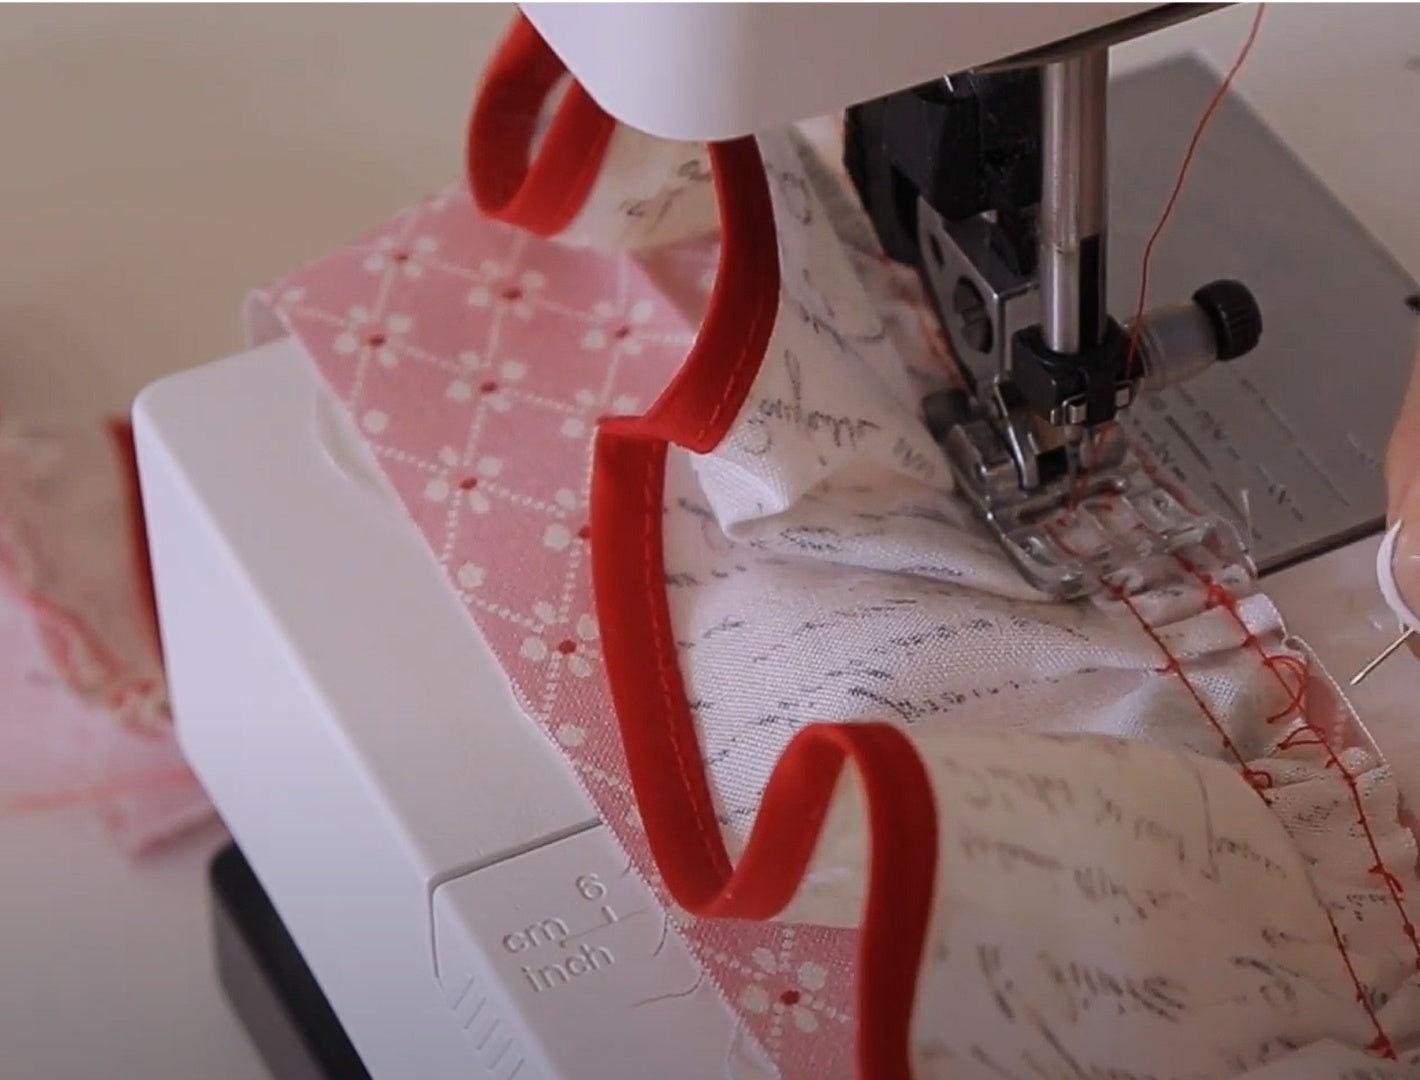
We’re going to kick this off with the flutter sleeves, and instead of hemming the flutter sleeves, I am going to add this beautifully slim bias binding.
Let’s have a look at this real quick. You need to make sure that you have the shorter side of your bias binding facing up when you’re stitching this, and then I’m stitching fairly close to the edge. I very often see that people top stitch almost in the middle of the bias binding, and then the flutter or whatever they’re binding will pull out after a while. So make sure that you are very, very close to the edge.
The bias binding always has a deeper hem on the underside, so it goes in a little bit more anyway. So don’t worry that you won’t catch it. Just put it in with your finger. I’m always using my fingernail just to make it glide in really nicely. There we go, give it a good press, and then we’re on to the next step already, and that is to put our gather threads into the edge.
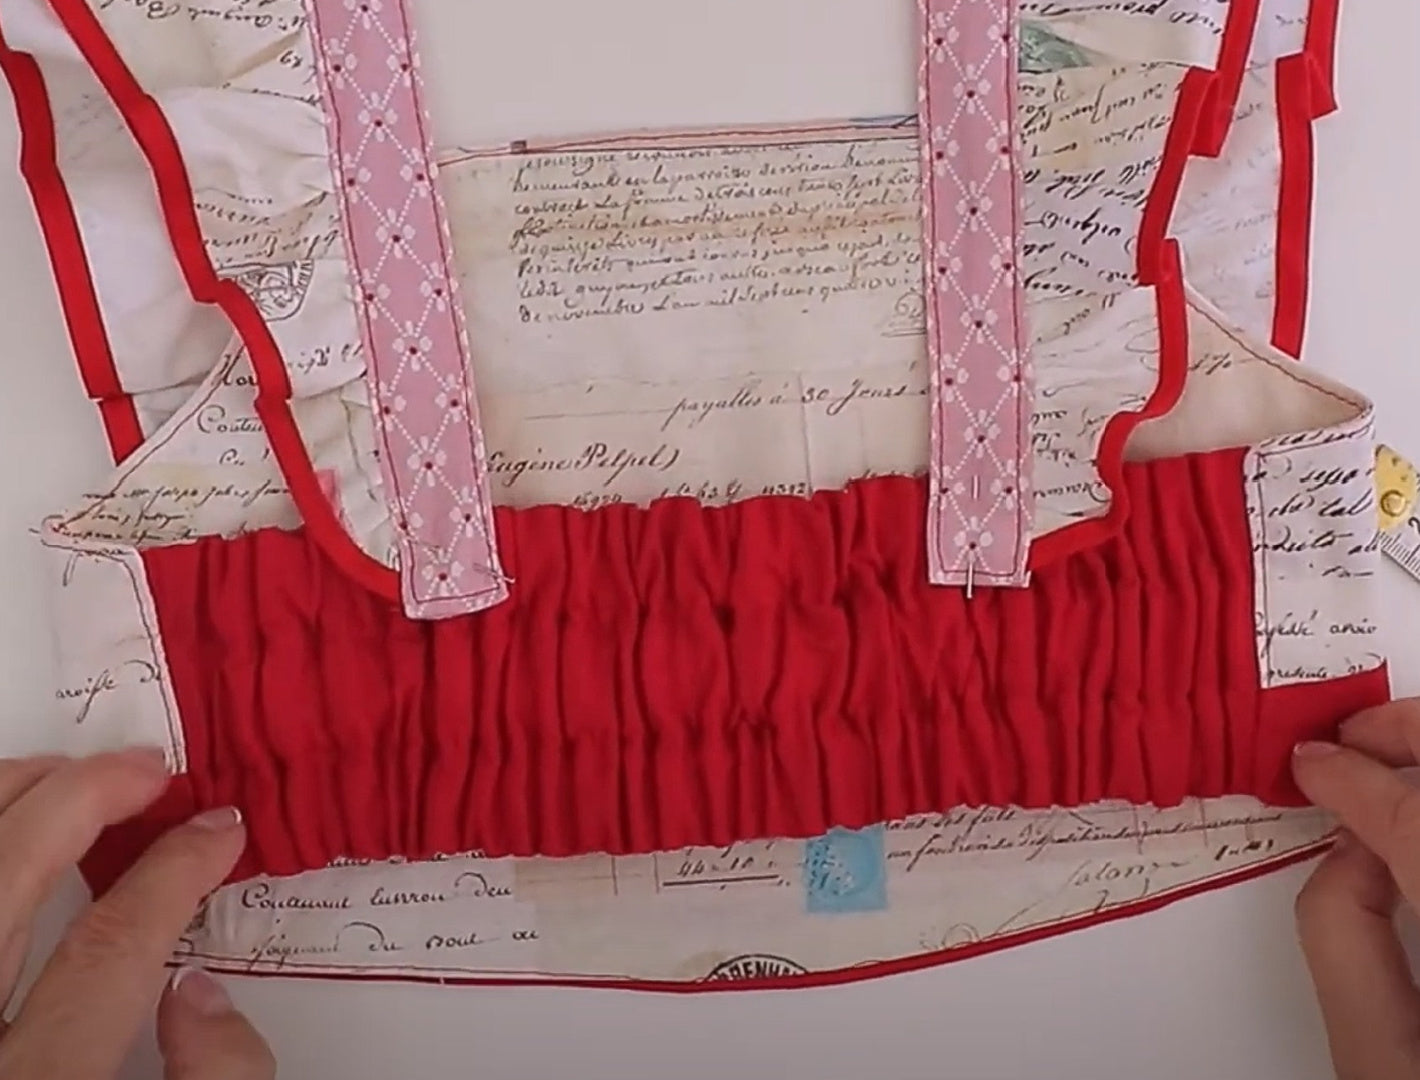
Adding Gather Threads
It looks absolutely beautiful. I love that bias binding. You can get that at Joanne’s here in America. I think slimmer bias binding looks nicer than wider stuff.
You want to put in two stitch lines with a longer stitch available on your sewing machine: one close to the edge, and then the next one we’re going to put a foot width from that so that when we have our centimeter seam allowance, it’ll sit right exactly in the center of that.
We go again, and you will see in a minute I’ve got so many loops underneath it because I didn’t check the tension, and I do have issues with tension on this machine. So flip it over when you do it, and if you have four loops like I do, you should increase the tension a little bit.
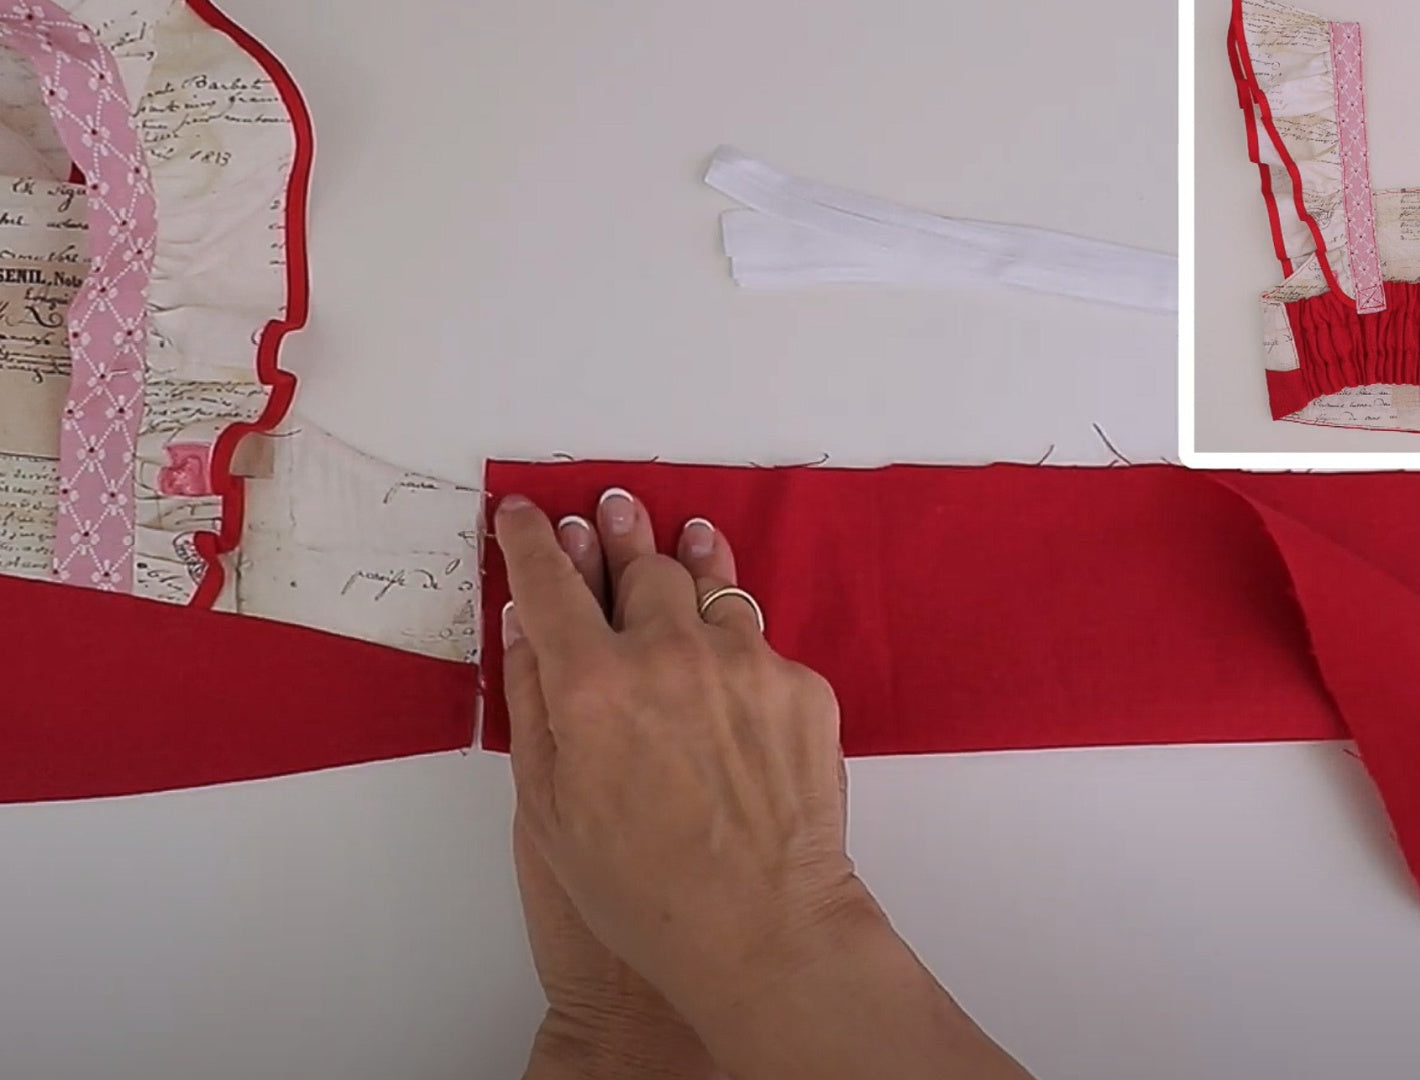
Preparing the Strap
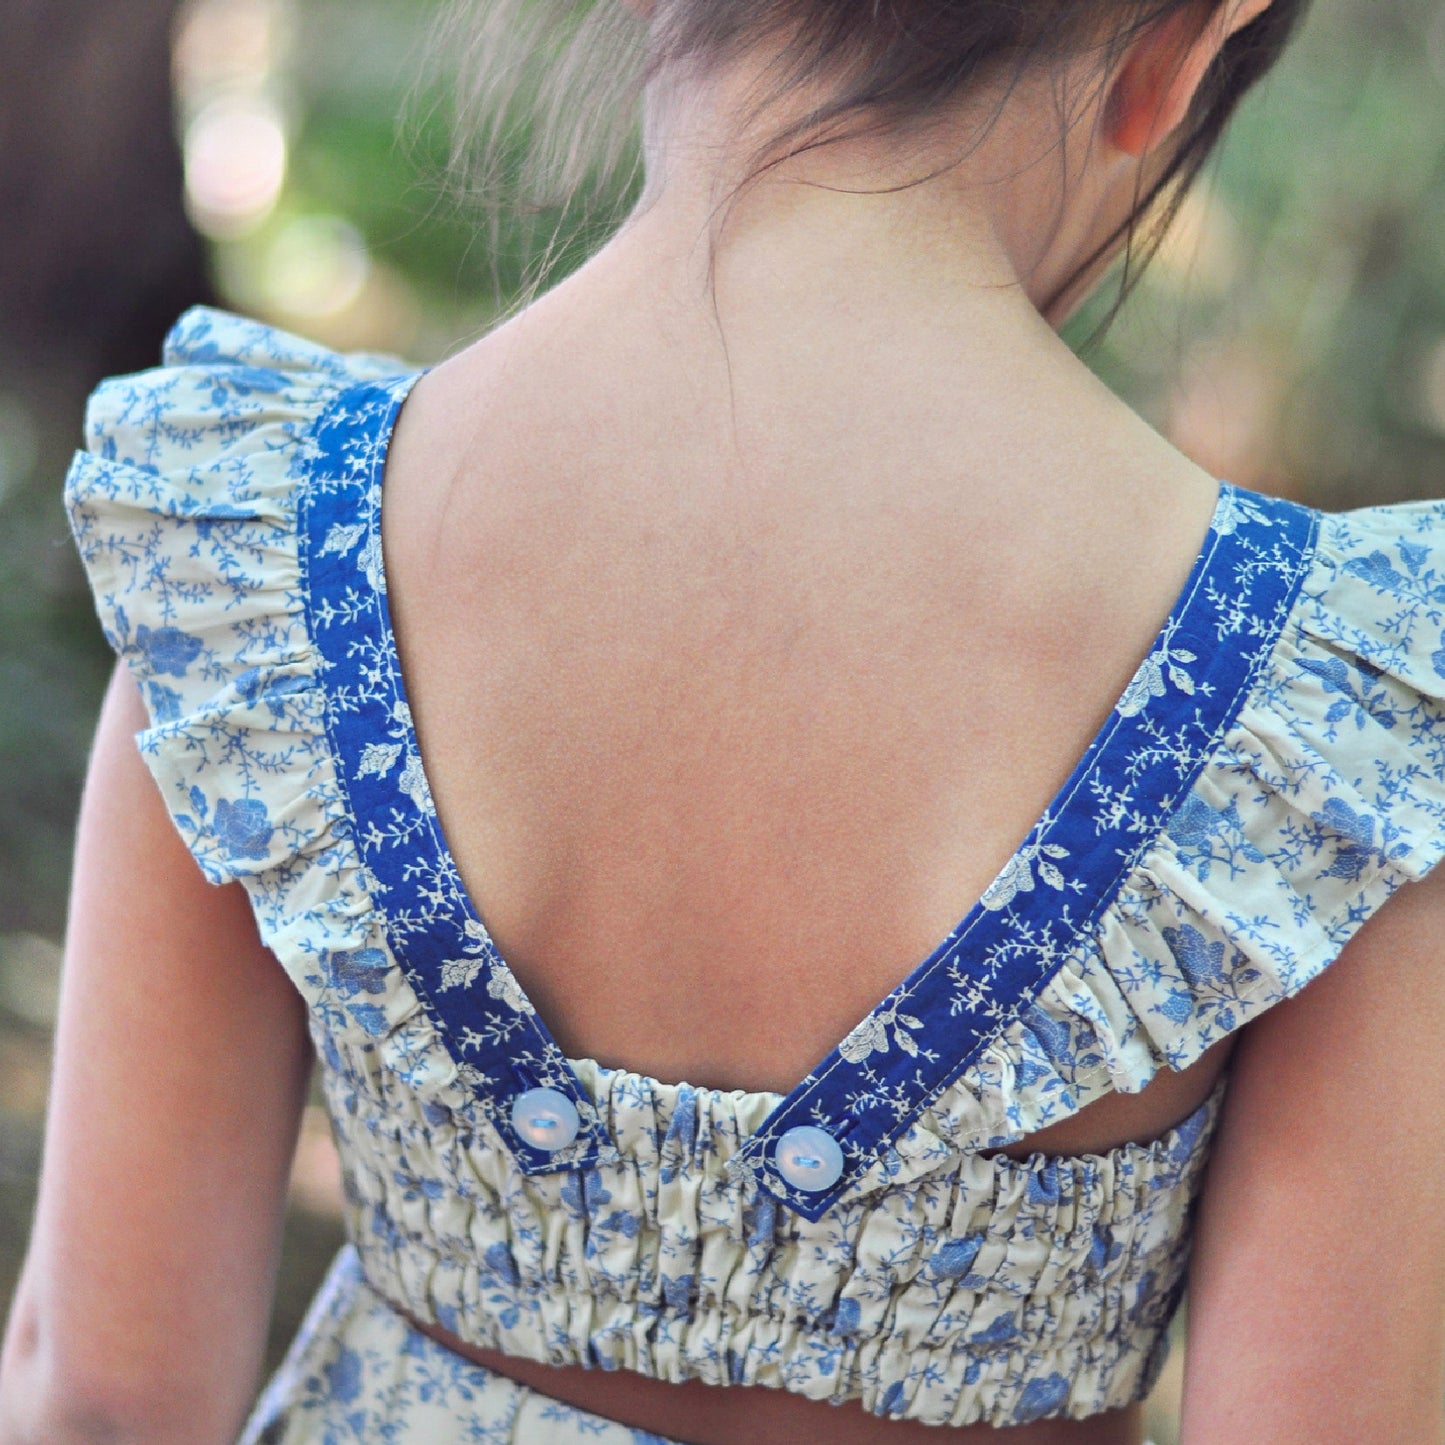
Now I’m going to iron the strap lengthways in half, and on the back we’re going to have a neat edge, so you can iron that over. That’s one option, and then just iron it again lengthways all in, or we can actually sew that shut later on.
I’ll show you both options, of course, so that you can learn something and say, “Oh, I like it like this or like that.”
Attaching the Flutter Sleeves to the Strap
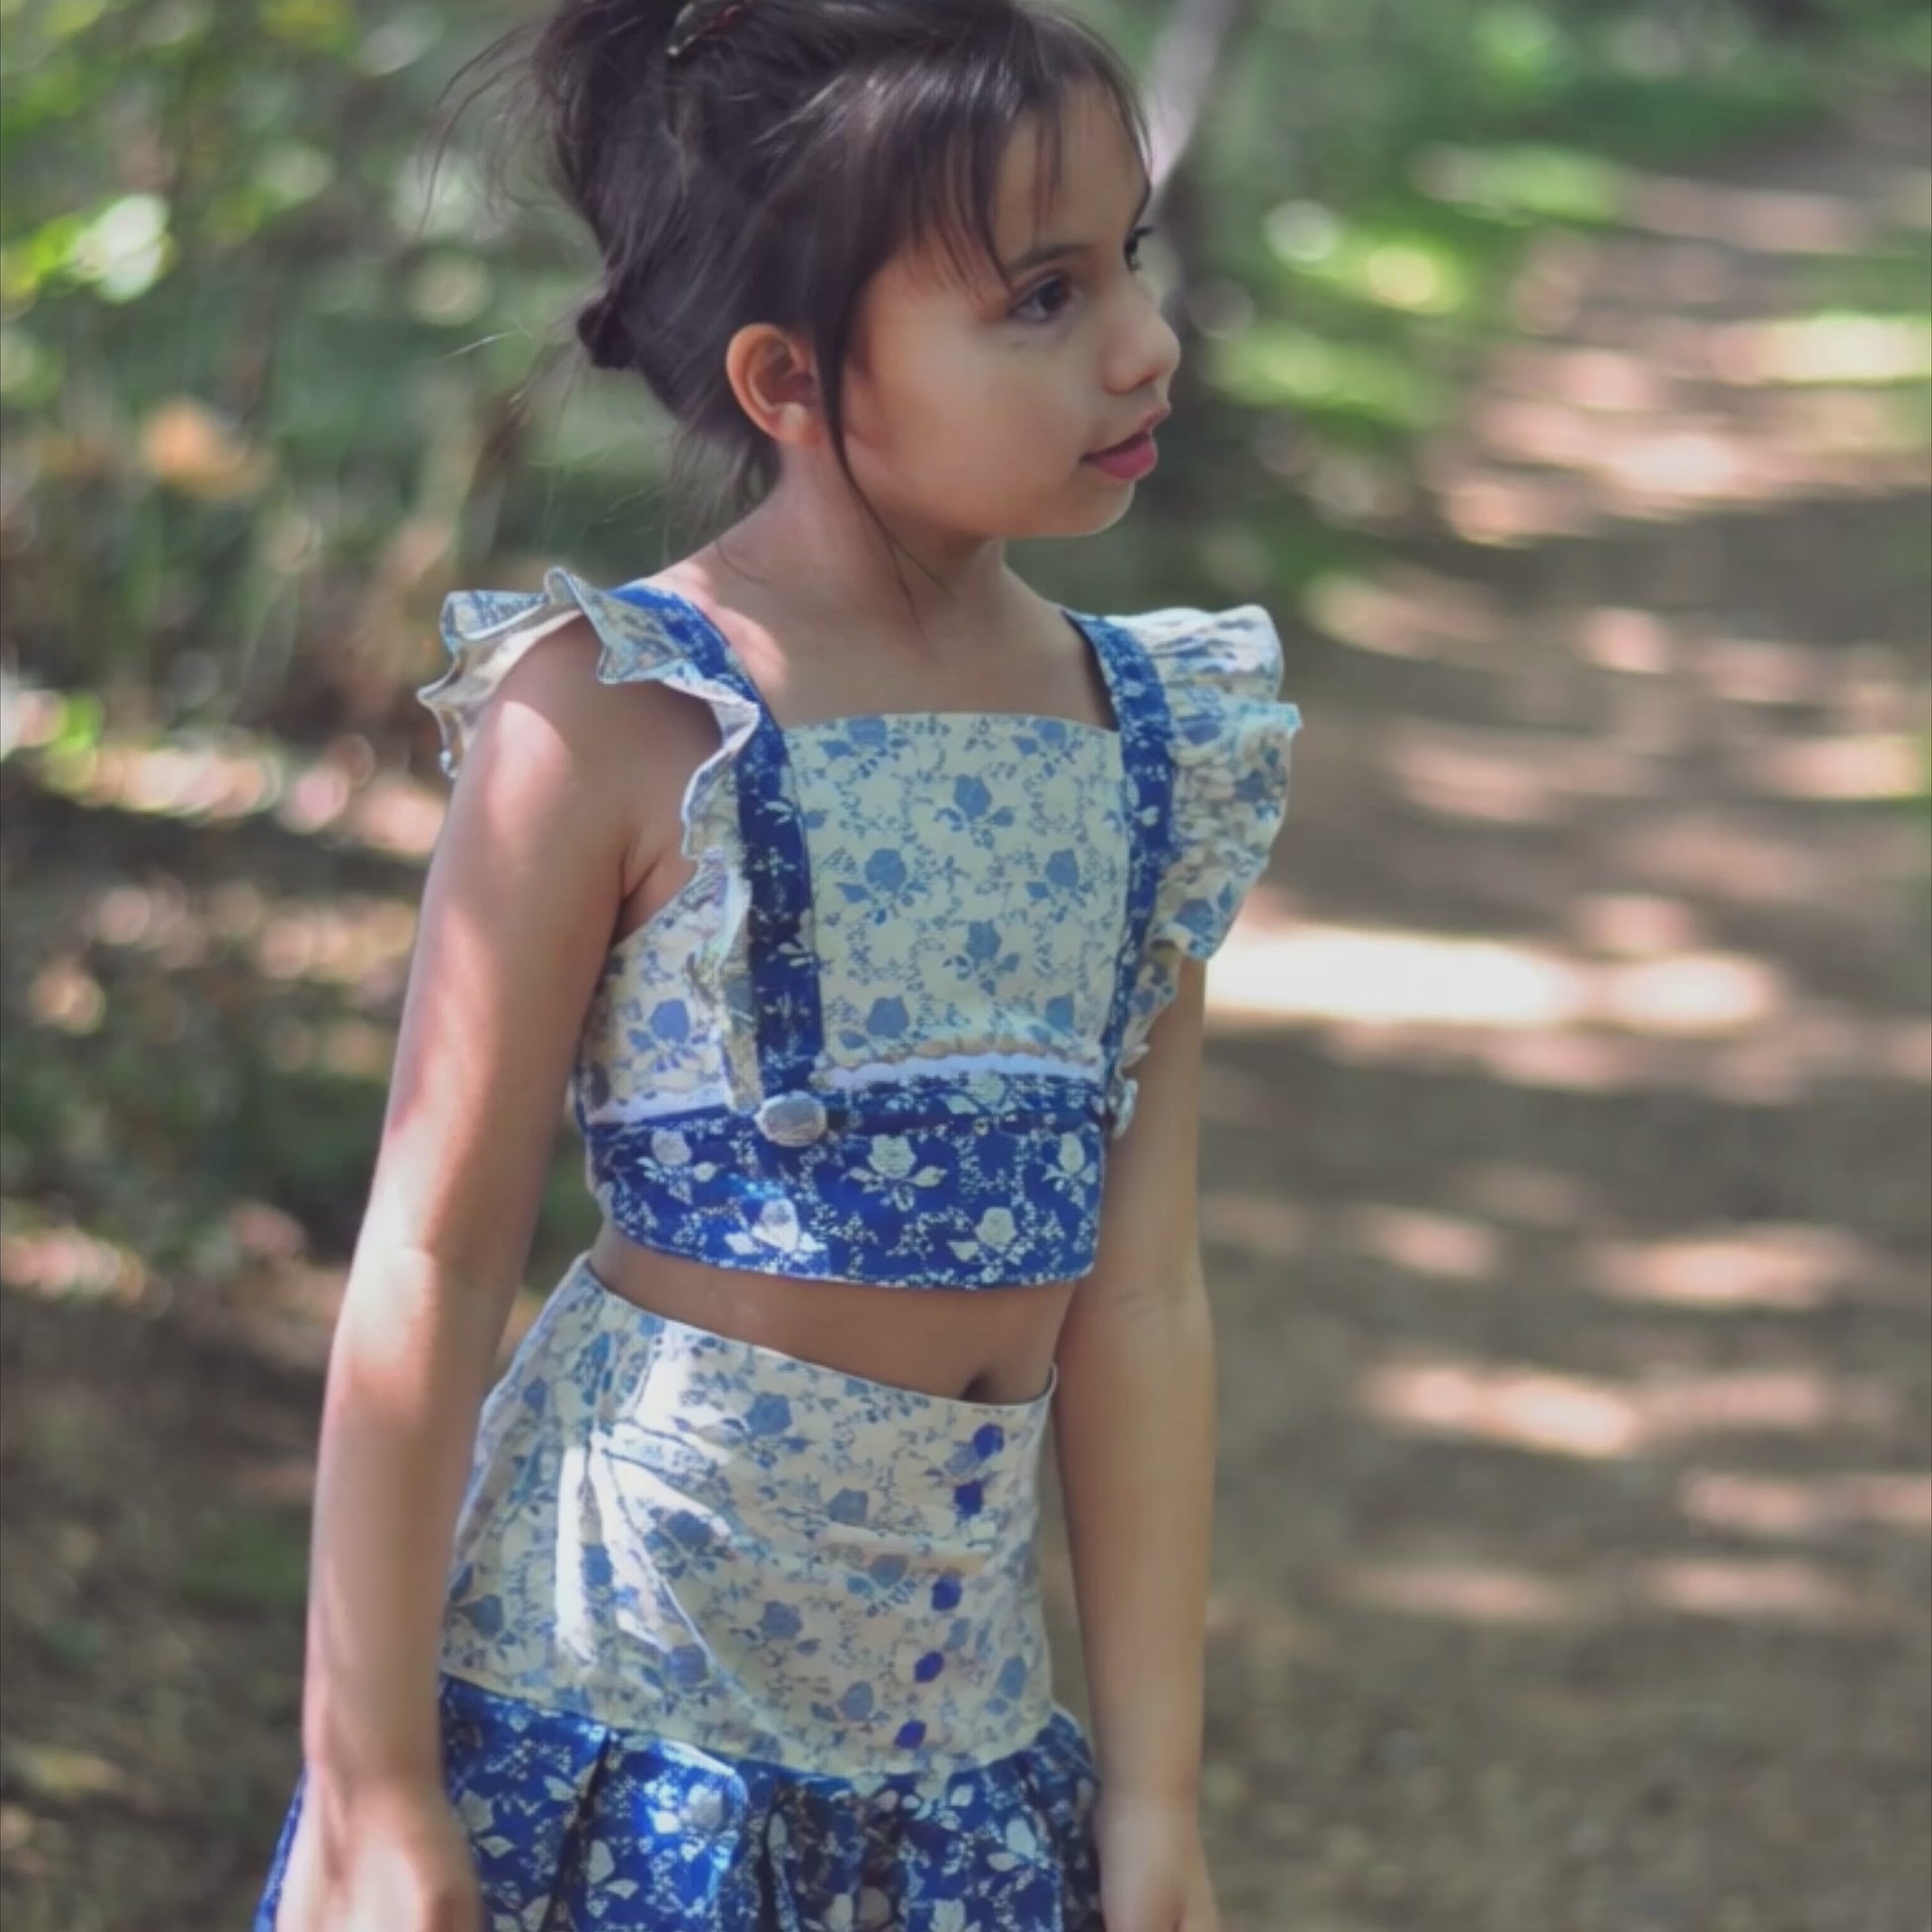
Now I’m going to put my flutter sleeves on, right sides facing each other, and make sure that the front of your flutter sleeve is facing the front of the strap. The front has got this little kink, and it’s also the wider part of your flutter strap, and at the back it’s slimmer.
We’re going to start the back a centimeter in so that we miss out the seam allowance, so that we get a beautiful result. Then we just pull the bobbin threads, which in my case was a little bit difficult to do because I had all these loops, and it wasn’t as tight as I would have liked it.
So when I pulled it, it was a little bit of a nightmare, but okay. You want to put one end around a pin in a figure of eight so those threads can’t go anywhere, and then you just pull your bobbin threads until you’ve got them to approximately the length that you need for the whole thing.
My sort of way I do it is that I pull it so it’s a little bit smaller, and then I put it on the end and pull it to the point where it will look good. Then I put another pin in and wrap my ends around it in a figure of eight yet again, and that will give me exactly the right length it needs to be.
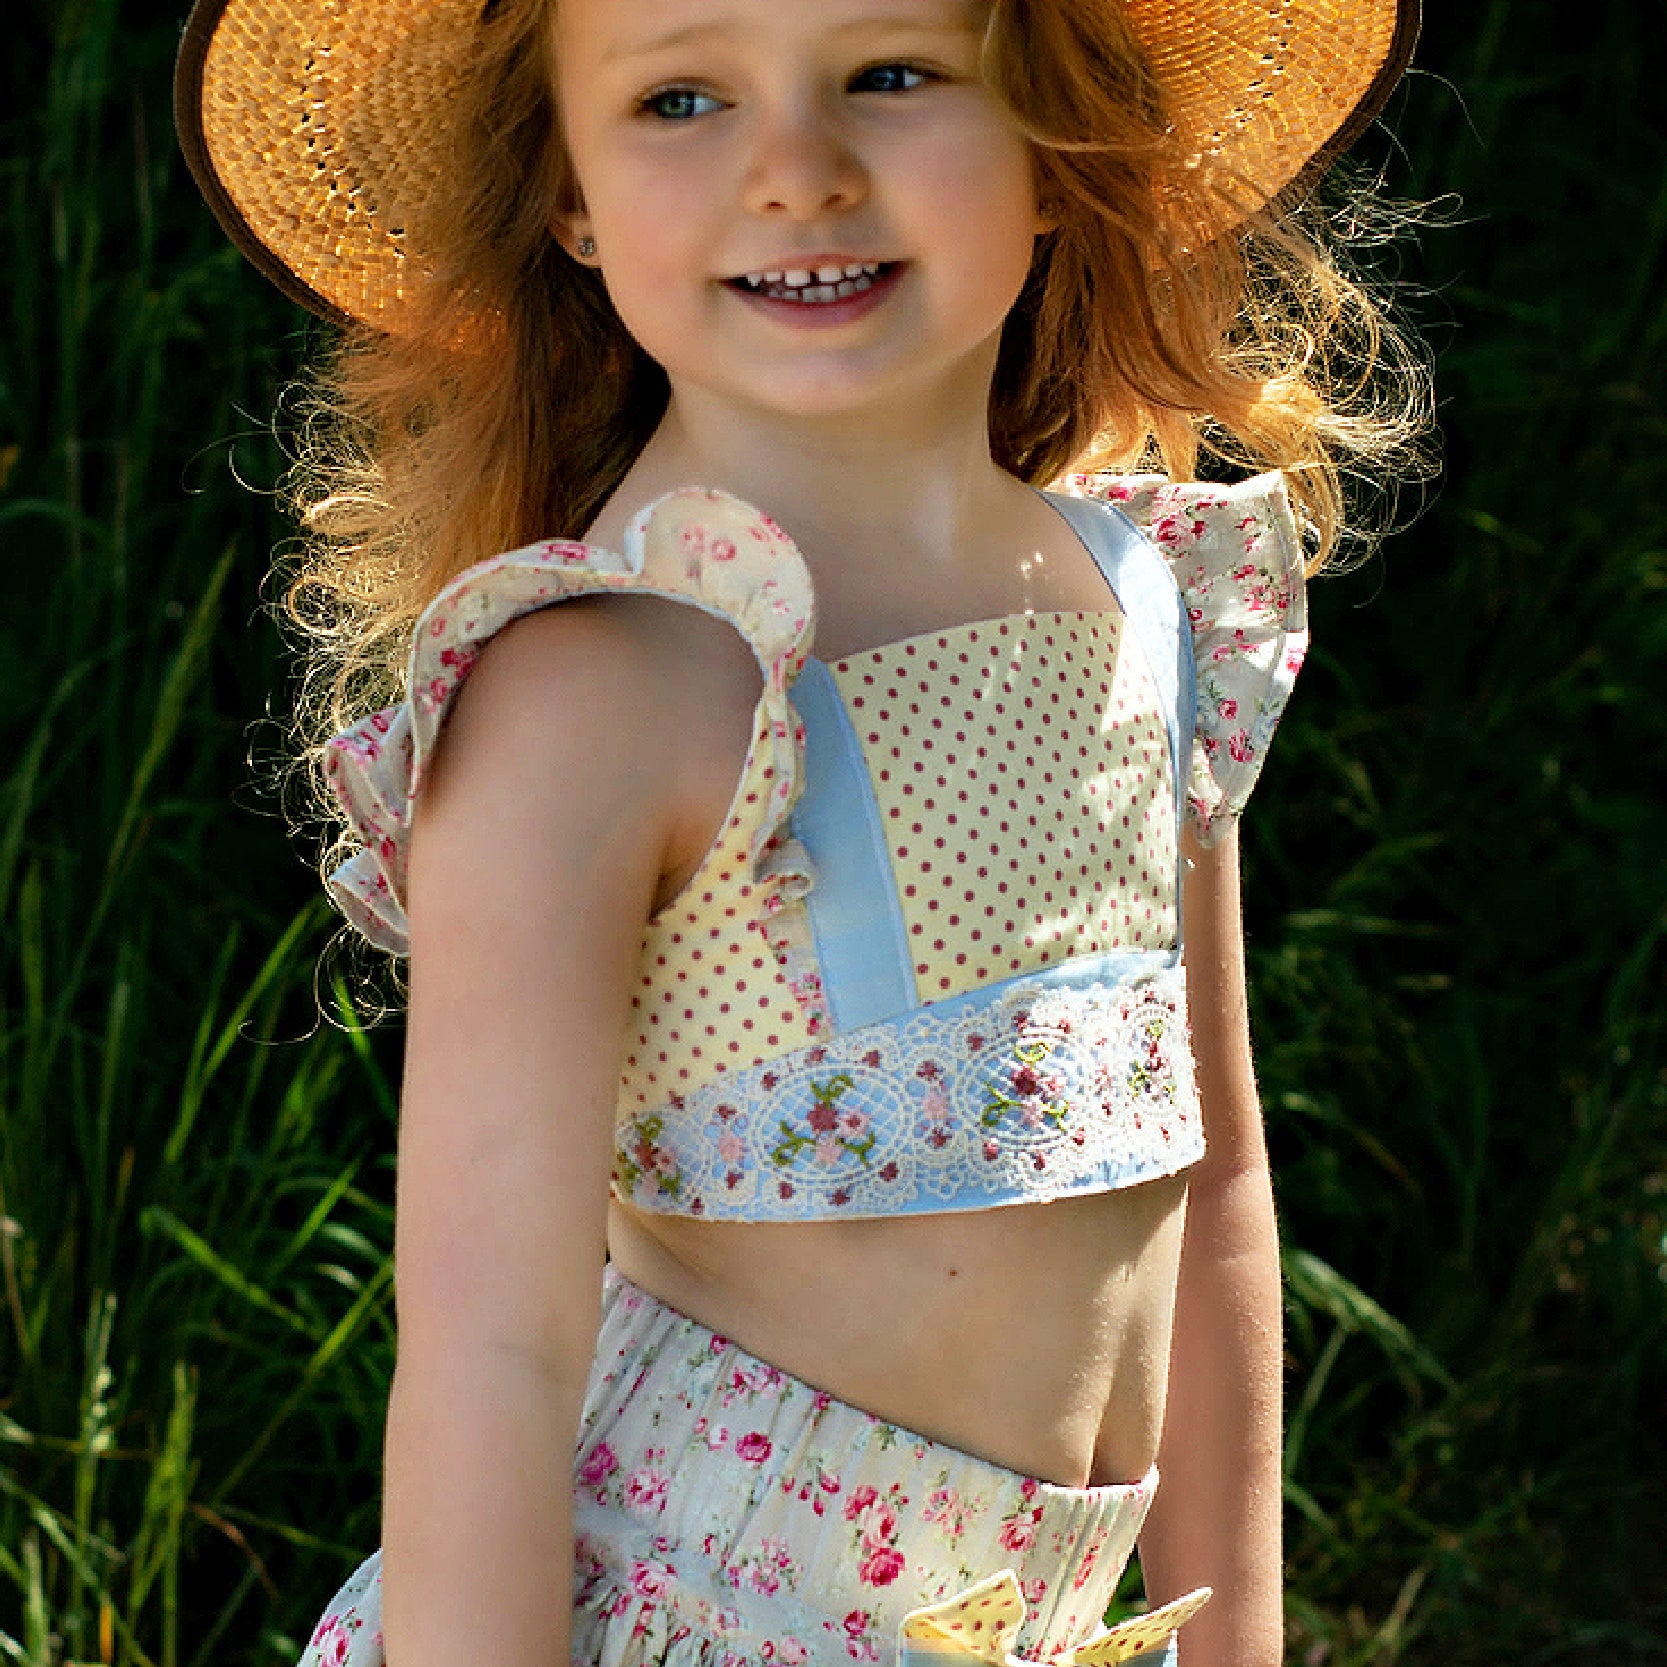
Then I start spreading out my gathers. It’s not overly gathered, and because I’m using the straight edge here to sew on and the curved edge stands out, it gives you a very voluminous flutter anyway. It’s really, really nice.
I think sometimes they overdo it a little bit with the flutters. I think this is perfectly adequate and fine. I think it’s really, really nice. If it’s too much, it just looks homemade, I think.
Sewing the Flutter Sleeve in Place
Now we can sew this in, but we must make sure that we have a clean edge here. That’s what I was just saying to you. You need to put it on a centimeter off so that we don’t have a rough edge of the binding showing.
So make sure that you do that. Just pull it over, that’s perfectly fine. Secure your stitches, and now we’re sewing foot width. Really, on a lot of this stuff I’ve done foot width instead of a centimeter because it makes no difference.
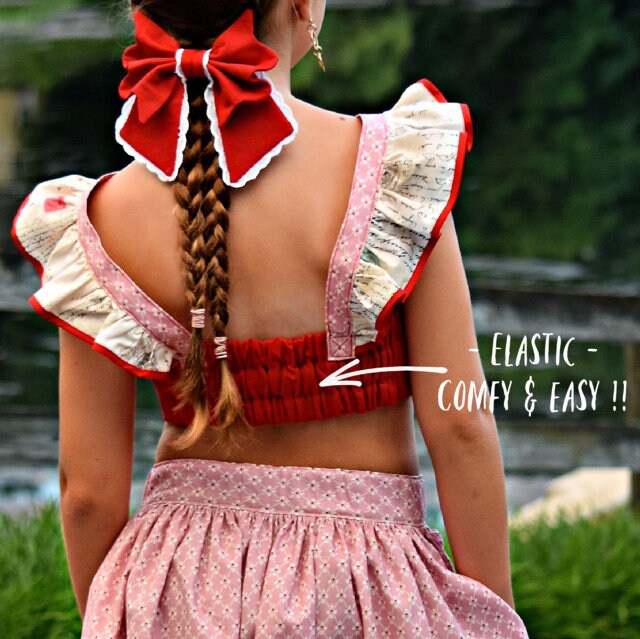
The only time it really makes a difference is if you make a garment that’s a fitted pair of trousers or a dress or something. When you’re making something that has elastic in the back in the first place, whether the strap is a few millimeters wider or less wide, it really doesn’t matter at all.
So you can just use foot width if you like. A lot of people find it easier to line up their fabric with a presser foot, and in fact I do too for stuff like this. When I sew on my own without making instructions, I do notice when I swap.
Then when I do my voice-over like I do now and I look at what I’m doing, I’m thinking, “Yeah, you’re doing it again, Marina. You’re not doing the centimeter you worked this out for.”
But it looks wonderful both ways. Make sure anyway that none of your little ruffles turn in on themselves. That was only an issue for me here because, like I said, I had all those loops underneath it and my top thread wasn’t really as tight as it should be because that holds it together.
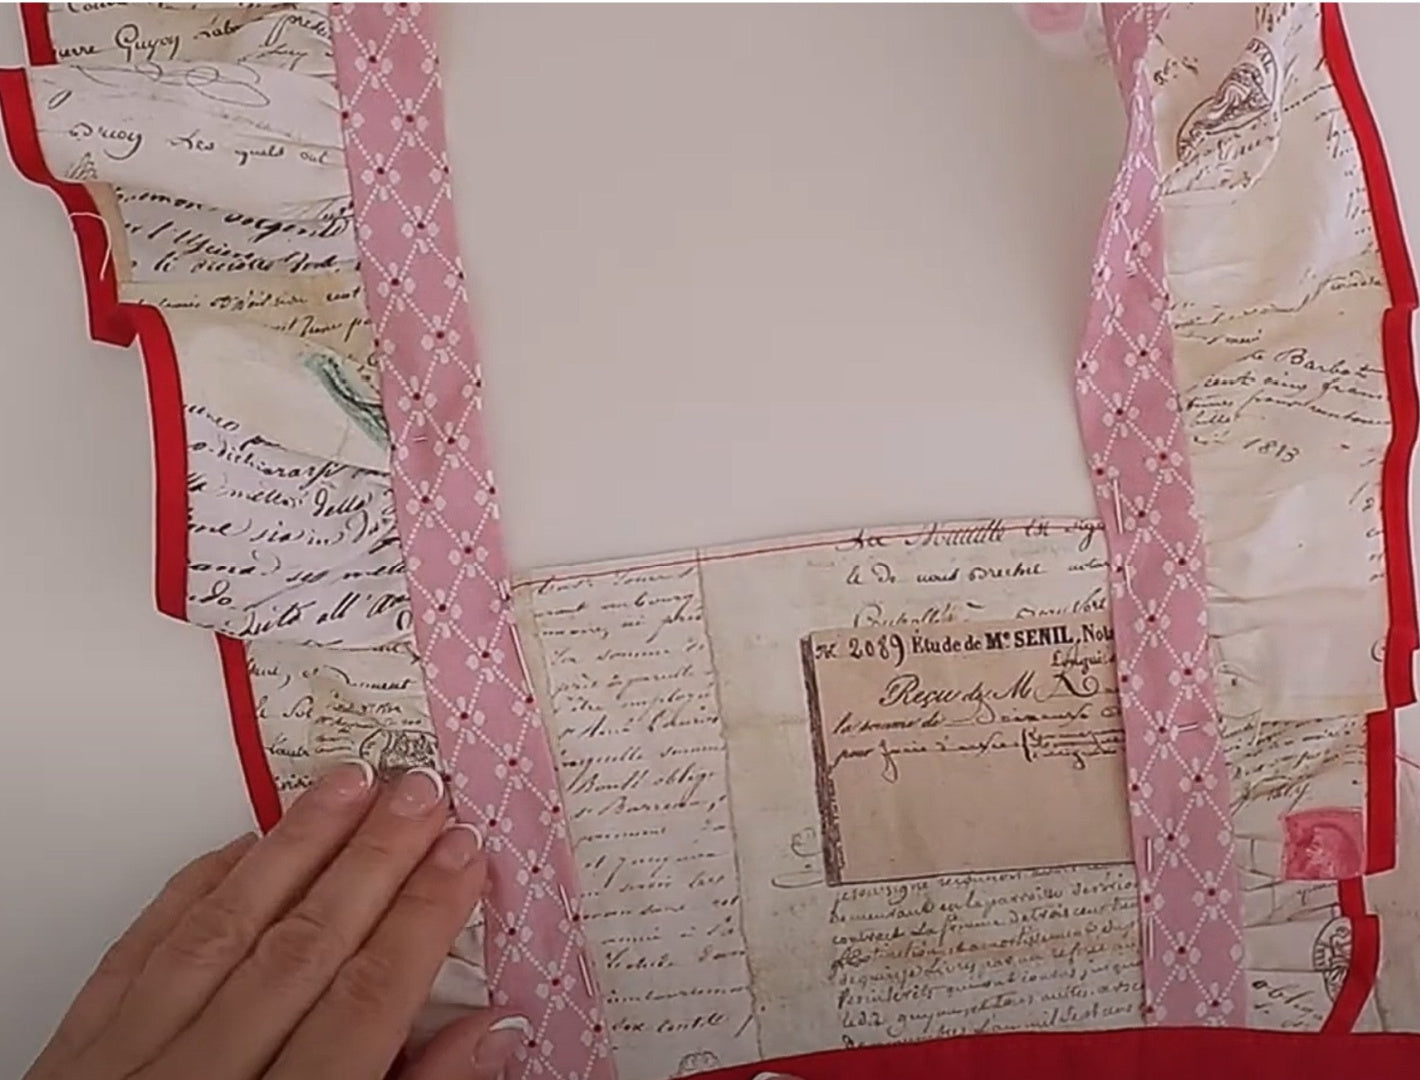
Finishing the Sleeve Edge
The next step is to remove all your gather threads and make it nice and neat. It looks really good now.
Some people will just pick this up now and say, “Oh okay, I’m just going to pin this.” I’m just going to take my fabric and turn it in and pin it. What you will inevitably end up with is an uneven front, which may even have a little bit of excess here.
So don’t skip the ironing. Go over to your ironing board. I tell you, ladies and gentlemen, over to the ironing board. Really pull it out and then give it a jolly good press.
You can do that over your sleeve ironing board so that you maybe don’t iron down your ruffles straight away. We will steam them down because they look nicer, but not at this point.
Make sure that you have a really nice edge there, and now I turn in my seam allowance just so it hits that stitch line that you can see from the seam. You don’t want it to go massively over. You want to be just on that stitch line, otherwise again, from the inside, it won’t look so nice.
Nobody’s going to see the inside either, so I mean I wouldn’t stress myself over it. I wouldn’t have a headache over it. But yes, give it a good press and pin it all the way to the end.
Here at the end we’ve got that clean edge, so you can fold it in and over and pin it, or at this point you could pop over to your sewing machine and sew it in. I’m going to show you that as well.
Alternative Method for a Clean Edge
Make sure it looks pristine and that everything is fine. I’ve done this one now, all looking good.
Now here I want to show you what you could do if you don’t want to do that. Just fold it in on itself and sew down here, and that gives you a really nice edge as well.
I’m just going to quickly do that. It’s preference really. If you’ve got your sewing machine right there, you might as well do that because it will give you a clean edge. I don’t think one is nicer than the other, to be fair.
Next Step
Now we can go on to sewing our front. See you there.
Attaching the Flutter Sleeves to the Front
Transcript for the video: Tilly Blouse - The Front Bodice
Now we’re going to put the front together, and in order to do that we’re going to attach our flutter sleeves first to the front upper piece. We’re doing it exactly where it shows you on your pattern piece to put your flutter sleeve.
So I’m putting the inner edge of my flutter sleeve on that first snip mark I’ve got in there, and then I’m using some pins vertical to the seam so that I don’t need to take them out while I’m sewing and I secure my flutter sleeve. I’ll do the same on the other side.
Then I can attach the lower part of the front, and I’ve marked which is the upper part of it because they’re not exactly the same top and bottom, so you need to make sure that you put the right one to the upper part. I’m going to pin this against first in the center, and then on either side, and then I’m going to pin the rest of it on there. There we go, so it looks really, really nice. What a lovely contrast that is.
We’re going to sew it together with a centimeter seam allowance. Make sure that everything is nice and flat underneath, always very important. All the way around, don’t forget to lock in your stitches at the beginning and at the end.
Fixing and Topstitching the Front
Now I pop on over and I will iron this so that we get a really nice smooth line before I’m going to top stitch it. I don’t know if you can see it already, but there is a little kink in there, and I’m thinking, oh can I get rid of it, can I iron it away? And I found that I couldn’t, so I checked it and I saw that I actually sewed it kink into it.
So I went back to the sewing machine, and it’s very easy now to go slightly too low in an effort to counteract what you’ve really done. So when you have this kind of problem, make sure that you take the exact seam allowance when you’re sewing over it again, and that will keep you nice and straight. So now I fixed it.
Now sometimes it’s just worth doing that. Next I’m going to topstitch it, and we want a rather large stitch length—3.5 is what I use on my pattern, but maybe you need to use a different stitch length, maybe even 3.5.
You also need to work with the markings on your presser foot. I know I say this every time, but the presser feet that have a clear plastic center and little dots on them so you can mark where you want to do top stitching are really fantastic. They’re much better than the solid metal ones.
Don’t forget to secure your stitches at the end. You could also stitch from the other side. Right-handed people often prefer to use the markings on the right-hand side of the presser foot rather than the left. Here you can see the distance that I’m taking to sew this, so I’m not too close to the edge.
Adding the Lining
Next we’re going to put the lining over the top. I want you to just stick these down so they’re not in the way, and we’re placing the lining over the top. Then I’m just going to pin this real quick, and we’re going to stitch from one armhole to the other all the way around.
I’m going to show you in a minute that I’m also going to put stay tape over the top, or I didn’t have stay tape, I made do. But if you find your fabric stretches a lot in the area of the underarms, because that is actually where the fabric is on the diagonal, then you should maybe put that on now at this point.
You’ll see in a minute exactly what I mean. Take your stitch length down as you go into this corner, and then extend it again once you’re round the corner. That will make sure that nothing frays out or rips out or whatever. I always do that as a habit.
Make sure that the needle is down in the fabric when you turn, and there we go. I put the stitch length back up and push the fabric in so that you’re not pulling it as you do this.
Closing the Lower Edge and Leaving a Turning Gap
Next we’re going to stitch in our little flutter sleeves because we also need to close the lower edge of course. You can do it all in one, but sometimes I like to go step by step.
Oh look, I’ve cut into this, but I’ve just got enough seam allowance there to hide it, which is lucky. I need to leave a turning gap in here for later, so I’m leaving the turning gap not in the center, I’m leaving it slightly over to the left side here, because then it’s easier to get a nice round finish with it when you’re done.
There’s my turning gap—not too big—and we’re going to quickly stitch that in as well from here to there and from there to there. Secure your stitch when you get to your turning gap, just lift it over and then go back down the other side, locking your stitches again, and keep to that one centimeter seam allowance, which is rather important because the back needs to fit exactly into this.
If anything, you can make the seam allowance a tiny bit bigger than a centimeter, maybe 1.2, so that the back sits in there very snugly. But what you don’t want to do is have less.
Reinforcing and Turning the Corners
Now I’m going to cut back my seam allowance. You could also snip it and turn it—that’s a preference. I like to cut it.
I can already see that this particular fabric really stretches in that area, and I’m thinking no, I need to put on some stay tape. Since this is during Corona, everything is shut and there is absolutely no stay tape to be had anywhere, so I just cut a sliver off white linen on the straight grain and I’m just going to put that over the top.
Because I can see through what I’d already stitched, I’m just making sure that I go exactly on the stitch line that I have there previously. That way it will absolutely not stretch, and that’s what I want. I do the same on the other side. There we go, and that’s really sturdy now. Look at that—nothing will move.
When we have the pull from the elasticated back, it won’t stretch and look unsightly after a while.
Now I can turn the whole thing inside out, and I want to show you real quick how you get a really beautiful corner. It’s not by cutting it back. If you have a proper corner which is almost a 90 degree angle, what you do is you just fold the seam allowance in from both sides and then turn it. It gives you a beautiful edge.
Let’s do that again on the other side—go in, pull out that corner, and then you turn it in. You turn it in from the top, make sure you hold it with your thumb, and then you turn it while you’re holding it, and you only let go when you’ve pushed it into the corner.
Here I need to lift out a little bit with the pin, and there you go—it’s beautiful.
Pressing and Finishing
Now over to the ironing board, where we’re going to make sure that all the edges are nicely rolled out and we get a beautiful finish. I’m going to give it a press down here as well.
It’s not important that we register on the hem or the lower end of the little top. It’s important that it’s nice and flat. In my case it’s done over a tiny little bit—it doesn’t matter, just like that.
So now we’re ready to work our back. See you there.
Close the Side Seams
Transcript for the video: Tilly Blouse - The Elasticated Back
Now we're going to close the side seams, and you need to make sure that you've overlocked the shorter edge of the front.
I'm going to iron my seams apart, but I have to say, if you guys want to just overlock it all in one go, you could overlock the side seam after you've sewn it, right? That is possible, especially if you have a lighter fabric.
First thing to do though is to put both fronts on top of each other and then pin them in with pins that are vertical to your seam. Then you can either leave them in or take them back out. Then you put the back over it and you pin it down, and so it is gridded effectively now.
Down here you have three layers, so it does get a little bit thick. I like that because also any imperfections are not so visible, so little rolls of something on my belly will not be seen so much if you have got this nicely held in by a double layer of fabric. That's why I quite like wrap dresses; they really do wonders for a figure.
One centimeter seam allowance, wonderful.
Pressing the Seams
Now take it to your ironing board, and now we need most of this seam ironed to the back because it would be way too thick if we didn't do that. But at the top, because I'm going to put my binding on there and since mine is quite a thick one, it's more medium weight, I wanted to iron two parts so that it's not too thick in that area.
You of course could have ironed it into one direction, which is the back; that also would have worked. But why make it easy when you can do it beautifully like that?
Finishing Up
Okay, so side seams done, excellent. We are coming to the end, it's going to go really fast onto the armhole binding.
Sew the Flutter Sleeves to the Top
Transcript for the video: Tilly Blouse - Joining the Flutter Sleeves & Front Bodice
Now we're going to sew our flutter sleeves to the top, and we need to make sure it's the same on both sides. The strap will actually stand a little bit over the edge of the Tilly top. It's not much, just about two or three millimeters. It should sit a little bit over to the right in this case, right? So that you have got a little bit of an opening and it tapers down a little bit.
You can of course also just do that to taste. You could come up a bit straighter. I personally like it; I've made them a little bit slanted so it automatically comes up like that, so I really like that.
This pinning has to be done really, really well. Although I cut loads of it out, I left a lot of my adjustments in because if you just do this really, really quick it probably will be uneven, right? So make sure that you do it, check it. And like here I can see that my right is not quite right. The left side looks really nice, it's got that slight little taper. I'm thinking yep, that's nice. Look at my right and think no, that's not right.
So here we've got it overlapping this much, and when I check on the other side I can clearly see it's nowhere near the same. So check and double-check yourself because this is what everybody will see. Little mistakes people don't really pay attention to, but where it's symmetrical in the front you'll see it. That looks great.
Now they're both the same, I can sew them in. I start at the lower end, and I am not reversing my stitch. I'm going to sew those away because I don't want reverse stitching in that area. If you had a really busy fabric and you can't really see it anyway, then maybe you want to do that. But if you want to work really tidily, and you're making this for your grandkids, I would just do what I do here.
It looks really, really good, and we do the same again. Stitch length 3.5. We're using the same point on our presser foot again to gauge where we're going to stitch. We're not going to go too close to the edge, and we're sewing literally all the way around.
A bit of tension never hurt, so I'm pulling it a little bit. I also find if I sew very, very slowly I actually get a less tidy result than when I sew faster. I like it.
Now I'm going to sew back, same thing again, line it up with that mark on your presser foot. And again, I will just leave a long thread hanging. There we go, and pull it out and do the other side.
Now that it's in, I'm going to pull through all my thread. So you yank on the lower bobbin thread here, then you put a pin into the loop, pull it through. Now I'm going to do a double knot in it, yeah double knot. Then I'm going to get myself a rather large sewing needle because I can't see the little ones anymore — it takes me forever to thread them up.
I'm using this very large needle to put my threads through, and then I'm just going to secure them in the fabric. Go through once, and then I'm going to go through again. This time I'm going to hide them, so I'm going between the two layers and pulling it back out way, way in so that won't come apart. Cut it off, and that's it. Very nice and neat finish.
Attach the Flutter Sleeves to the Back
Next we're going to attach our flutter sleeves to the back of the top. We're just going to take the flutter sleeves here and put them on and stitch them on.
If you want to see how the pattern holds, that was included with the Connie top, and I'm also going to add that part to this course, so you just have to go down to the bonus features and have a look at that.
I'm pinning in five centimeters away from the seam line. That seems to work very well. Of course, if you have got your kid over there then try it on please and put it in the place that you like. You could also stick it to the inside; I rather like it like that.
I've pinned it, and I'm now going to sew a little cross on it because I think that's rather cute. You could put a button on there afterwards just for effect, but then I'm thinking if the kid leans against a chair or lies on its back it's not really going to be very comfortable for them, so I'm leaving it just like that. But you could also use cam snaps, though I think it might be a bit thick and might rip out, and then that's not very nice.
So you go down and across, then you go across and turn it round to the other side, down again, and just go down a little bit here. Secure your stitches and that's basically your top completely finished.
Yeah, I think that's all turned out very, very nice, and I hope you enjoyed this course and you're back for another course with Frocks and Frolics. Thank you all and bye for now.
Great fit. Adorable top
It’s definitely not something for a beginner. I tried even following the YouTube video for the doll top version for this and it still wasn’t easy to follow. I gave up and kinda just winged my own version.
I’d say definitely needs a step by step tutorial for us beginners of an actual toddler size not a doll size for sizing and explanation comparison. I also used a knit fabric and didn’t scrunch the back so i ended up creating my own ways of finishing those
Nicht für Anfänger geeignet, da leider vieles fehlt welches sich Näherinnen ohne Erfahrung nicht denken können. Kundenservice reagierte aber schnell und freundlich auf Nachfrage. Wer das erste Teil geschafft hat wird beim 2. auch Freude beim nähen haben 🙂
The top came out beautifully.
The best thing about this pattern is that each pattern size is in a separate pdf. So no wasted ink on sizes you do not need. Thanks!