Transcript for the video: Scissor Pouch All-in-One Tutorial
Welcome to my beginner's online class, how to sew a scissor pouch.
You may already have made Debbie Call's fantastic boxy bag. Now accessorize your bag with this gorgeous scissor pouch.
My students came up with fantastic ideas for both the pouch and the bag. Rebecca created this charming country look. Beth went mad for crazy patchwork and bunting, while Louise kept it simple and stylish.
You can fasten the pouch by using a headband. It's really easy. Just wrap it around the scissor pouch.
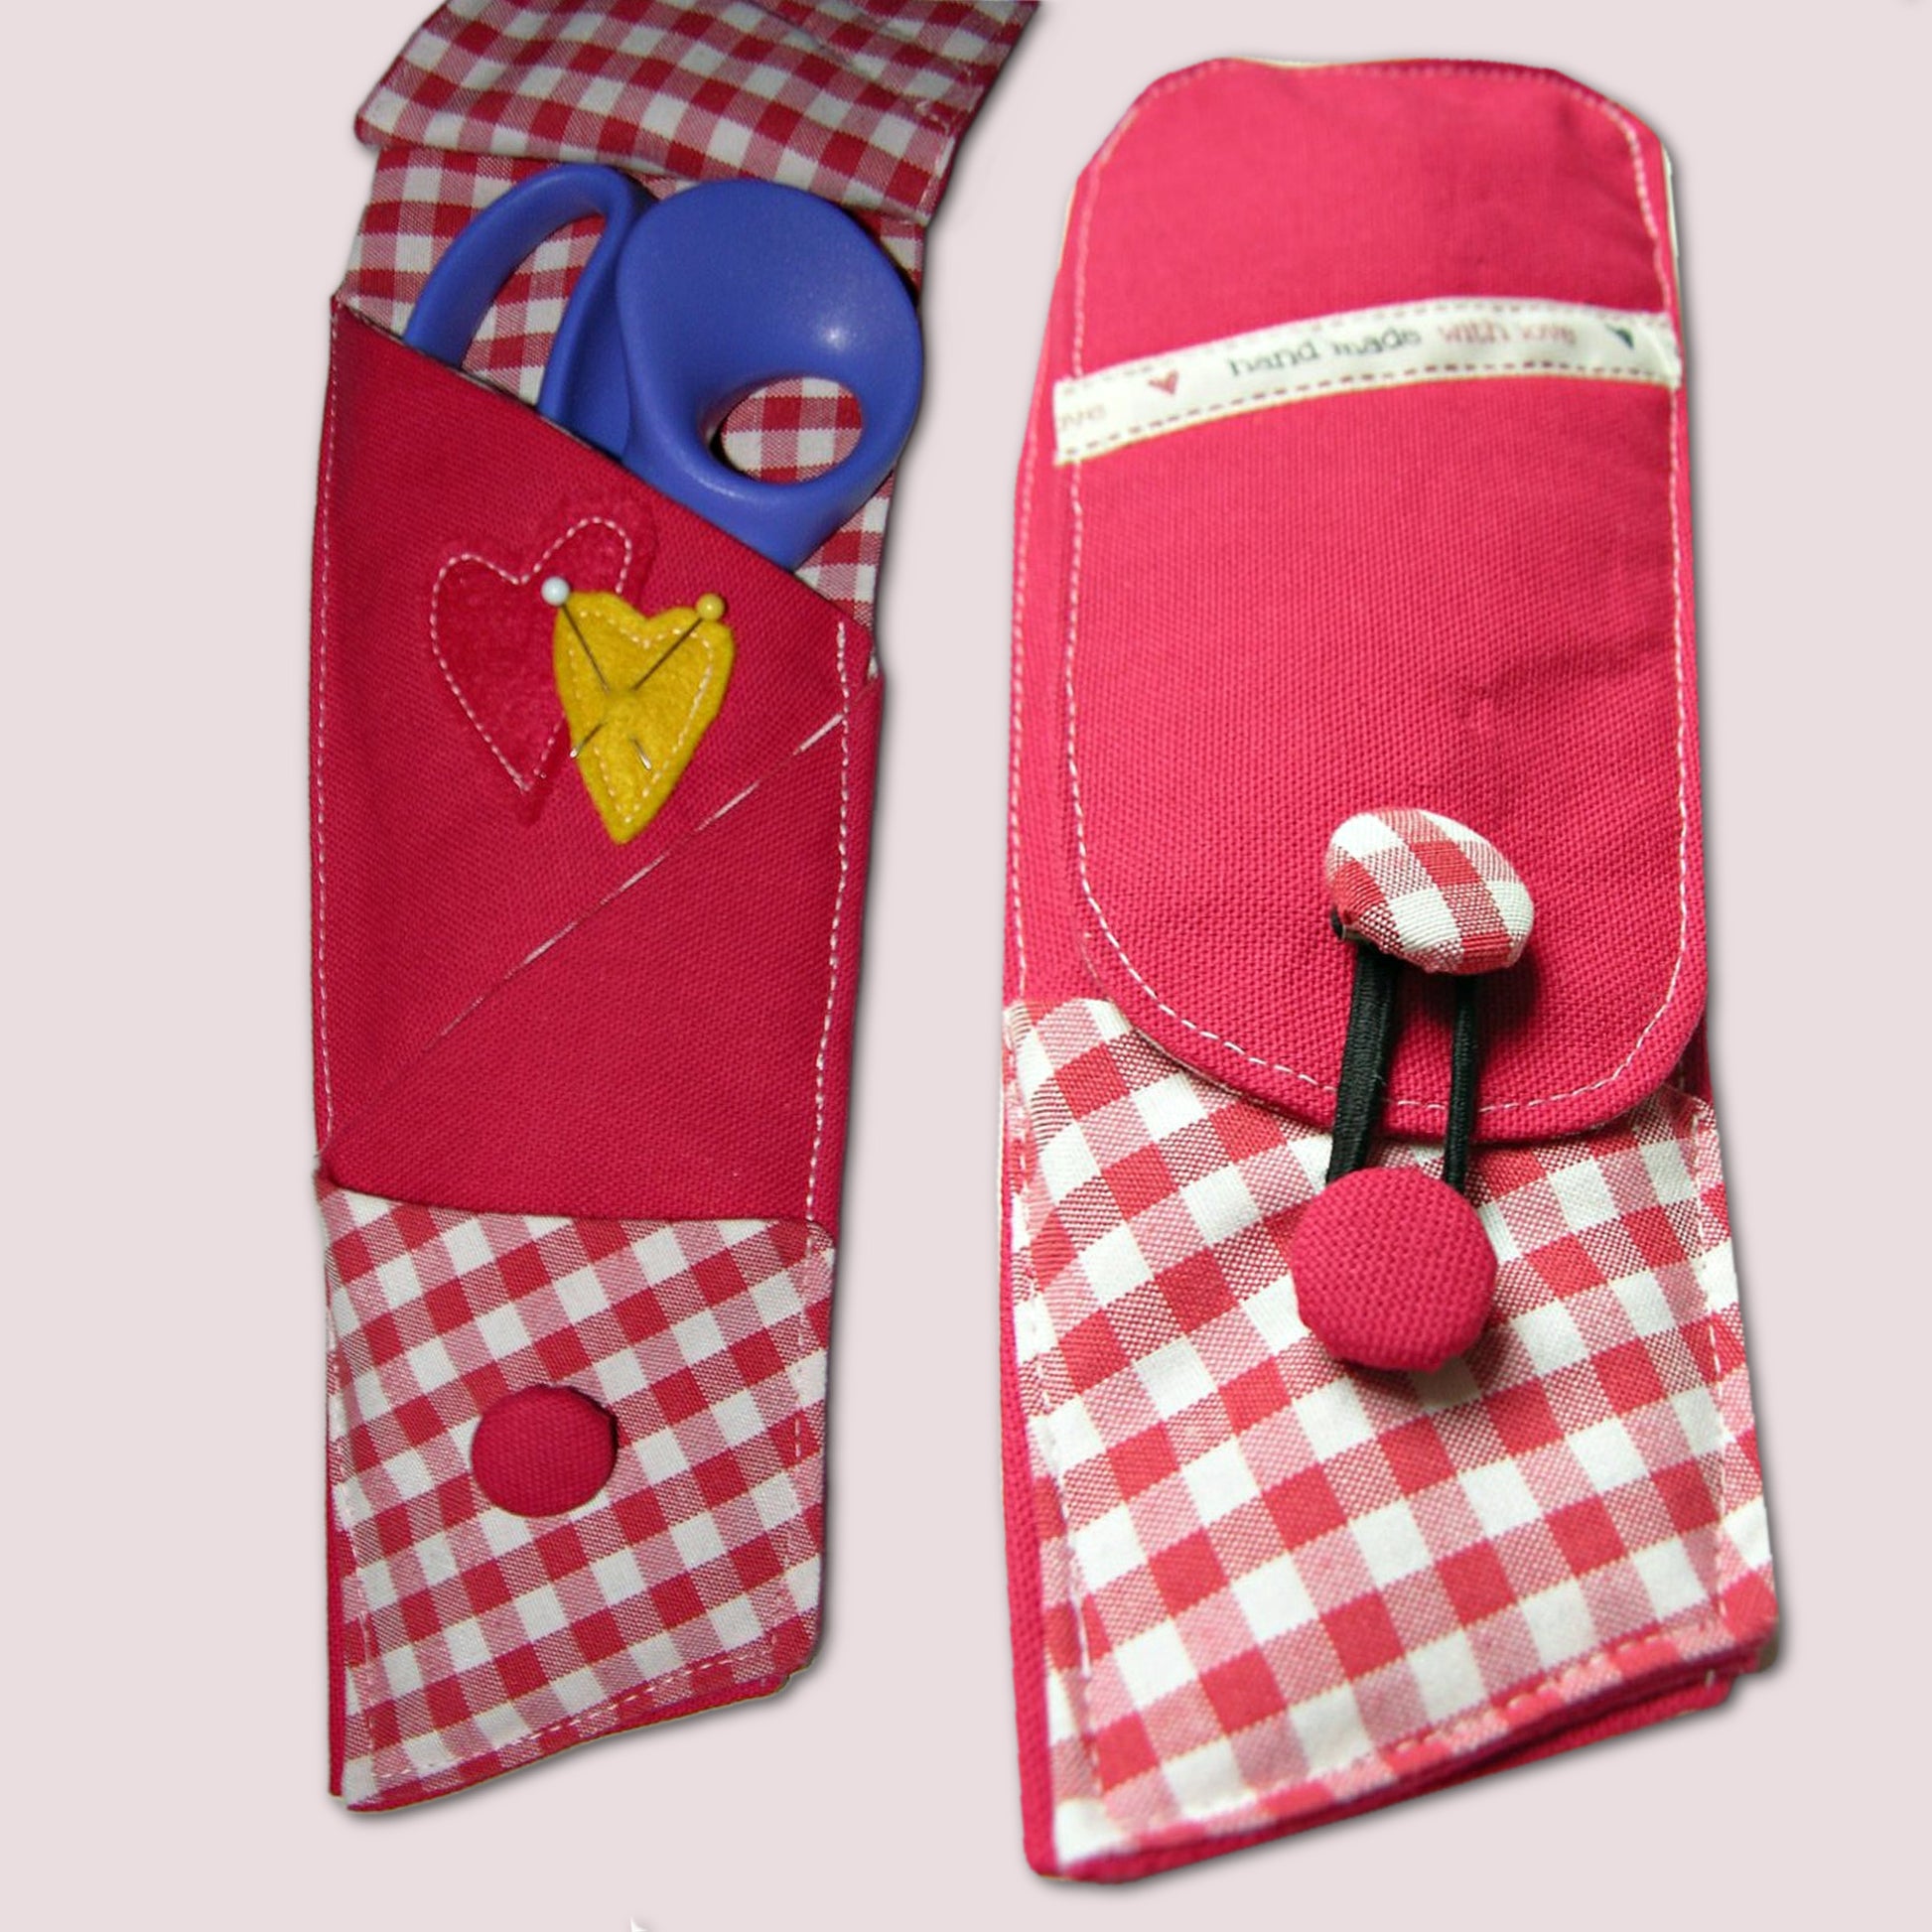
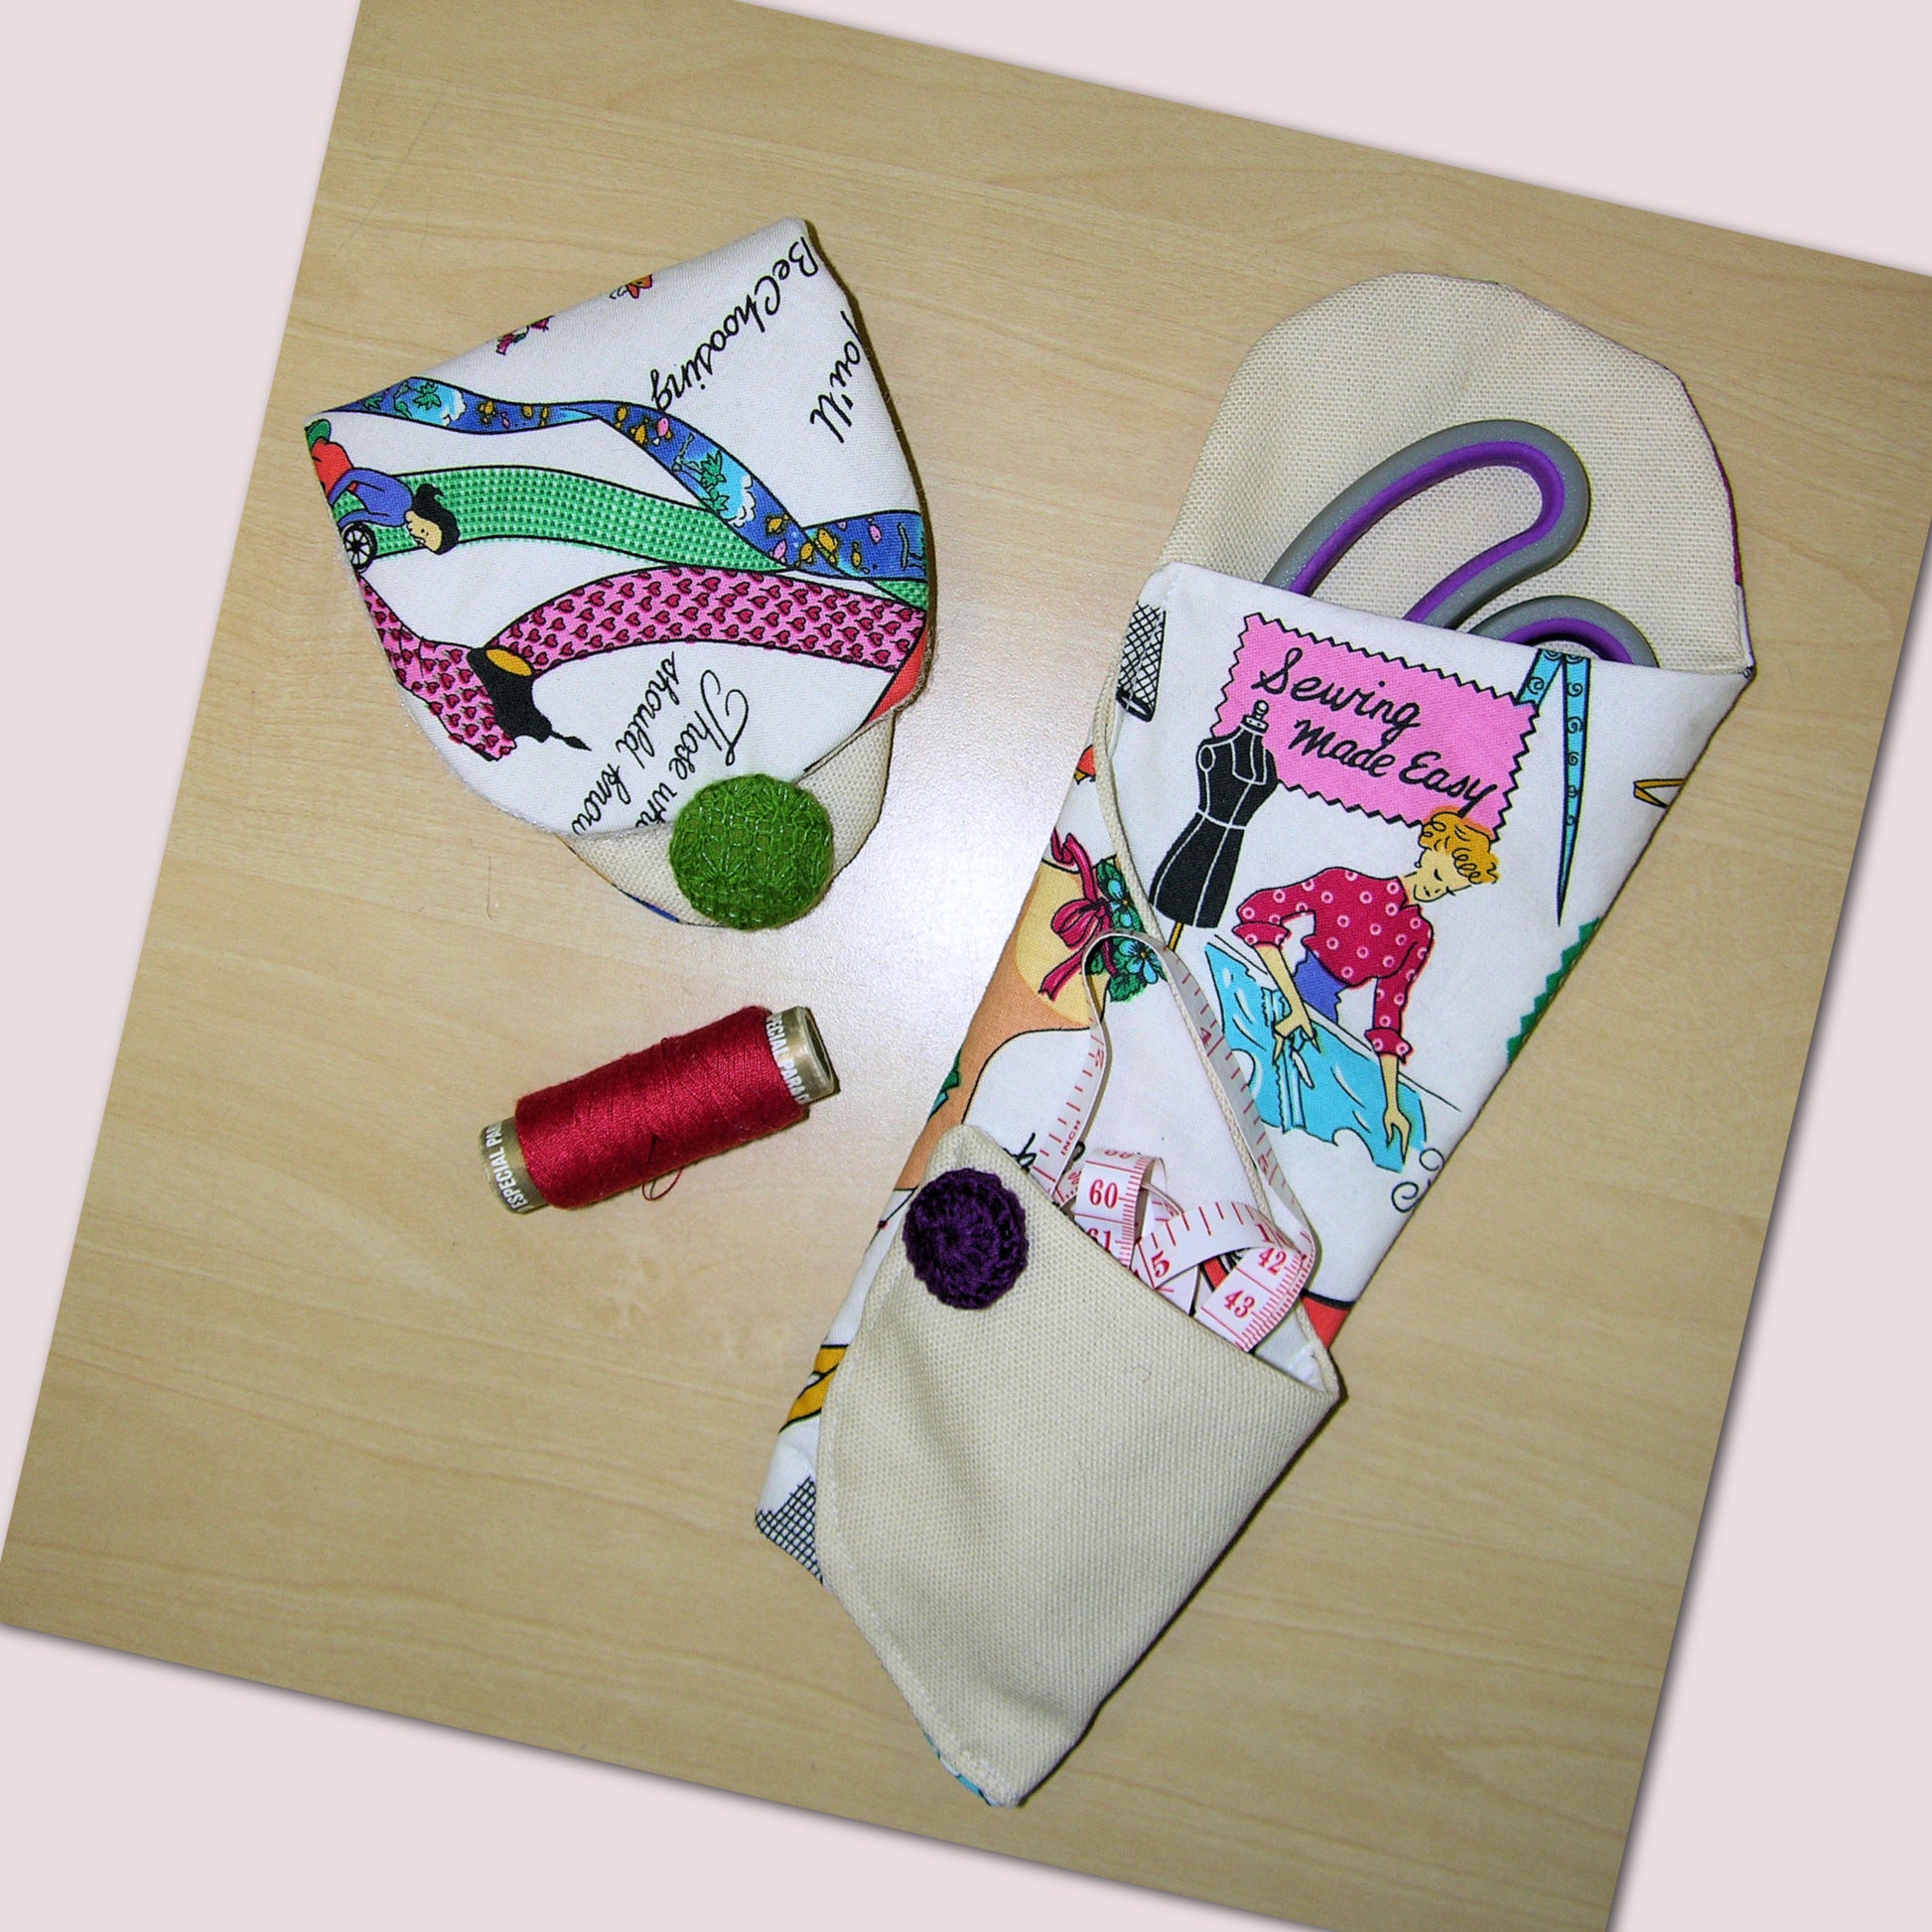
You've got three compartments: one where I keep all my needles for the sewing machine, one for the tape measure, and another one for the scissors.
At the top, you can see I created a curve, but you can leave that off. In fact, Rebecca used the flap to make a little needle pouch where she can keep all her sewing needles.
Looking at the Pattern
Now let's have a look at the pattern.
Here you can see my quite complicated curve, which you can just leave out. When we cut it out, if you cut straight across, there will be no problem whatsoever, so let's get started.
Here is my selection of fabrics that I'm using for my boxy bag and my scissor pouch. The scissor pouch I will be making just with the red and checked fabric, whereas for my boxy bag, I'll also use the yellow and the gorgeous fabric you can see here with the VWs.
The pattern is downloadable from my website. It's a digital pattern, so if you are not very sure about those, then download this for free and maybe you'll really like them.
It's got four parts: A, B, C, and D, which you need to sellotape together. Again, that's quite easy because you've got attachment lines.
Let's look at how we fold this up. You fold from one side, then from the other side, and then backward. That gives you those three pockets, and it's also quite good because now we can have a quick look at what it will actually look like.
Again, you can leave the flap totally off if you like, or you can leave out the curve and just cut it out straight, and that makes your life easier.
Adding the Decorative Hearts and Ribbon
There are also some templates with this pattern included, the hearts for you to pin on your pattern piece with the right sides facing each other.
You can't see my red, but I promise you it's underneath there. Once you've cut it out, you remove the lining and you work with the outer fabric.
Fold it so the right sides are facing out. The flap here would be the wrong side, and we are now going to put on our felt hearts.
Just make sure that you've got enough at the top because there's a 1 cm or presser-foot-width seam allowance, whichever you feel more comfortable with.
Stitch them on.
You also want to put some ribbon on the outside of the flap, like the photograph shows here. I forgot it when I did my bag and had to add it later, but please do it now. It's so much easier.
Adding the Wadding
Now we want to attach some wadding to a few of the parts of the bag.
When I originally made this bag in my class to test it out, we actually put the wadding underneath the whole lot, and that was far too thick. You could hardly sew it and really it didn't look very nice. I felt a bit sorry for my students because I really did get that wrong.
What you want to do is cut the wadding so it fits underneath it. I use any sort of scraps, just so it catches in the seam allowance. It doesn't even have to do that, to be fair. You could tack it all the way around and leave the seam allowance off, and by the time it's finished and topstitched, it'll be securely in there and won't make the seams thick.
I also put the wadding in the far corner, but I only remembered that later, so do that straight away.
Now we are going to pin the whole lot. You need to pin it quite well. Again, if you have that connecting bit where the flap is, if that was straight over, you wouldn't see that curve.
Make sure you leave an opening on the long side. I've put some pins in and I sew all the way around.
Turning and Pressing the Pouch
Right, all done.
I've caught my wadding in some places, which is quite good, but it wouldn't be a problem if it didn't.
What you need to do now is trim around the curves. You also trim across the corners and cut right into the points, as you can see me do here.
It's really important that you go right to the stitching. If your stitch is quite small, and I would suggest around 1.5 as a setting for sewing around curves, then it won't come apart and it will look really, really good.
Go to the furthest point, turn your scissor pouch right side out, and iron it all flat.
Making the Cover Buttons
Next, I'm going to make my cover buttons.
For the cover button, you just cut out a round piece, go around with a running stitch, and then pull that running stitch. Put your button inside and then put the top part on.
It's actually very easy to do. There's nothing to it, unless you have really old buttons like I did. It took me about five minutes to get the top part on because it was so rusty.
Anyway, moving on swiftly, I made two buttons. The one for the top I did with the checked fabric and the lower button I did in the red fabric.
Creating the Pockets
Now you want to fold over fold line one and two, and we are going to stitch across both layers all the way down.
Start at the top and go all the way to the end. Do not sew too close to the edge. That's very important because otherwise it won't catch everything.
Now I've sewn this down, I put down the last fold and I'm actually giving this a little bit of ease there, so you can see it comes out a little bit. I'm just sewing on the check all the way down, across, and back up.
Again, you don't want to be too close to the edge. Here you can see it's finished. It looks like it's all one line, but really it isn't.
Finishing the Flap
Now we're going to finish the flap by topstitching all the way around to the point where the curve starts, or slightly over, as you can see here.
Then I'm going to secure the sides of that curve as well and topstitch those down through both layers, and that finishes your scissor pouch.
Of course, you can leave that step off if you have cut straight across when cutting it out. You can simply tack a stitch in the corner of the flap just to hold it in place, and you're done.
Closing
I hope you've enjoyed this. Let me know how your scissor pouch turns out. I'd love to see it and put it on my website in my gallery.
If you're watching this video before you actually make your boxy bag, then I would pop across and find out how to make that and how to get the pattern.
Thank you for watching and see you next time.