Zu Produktinformationen springen
1 von 13

SCHÜRZE LANDHAUSSTIL

SCHÜRZE LANDHAUSSTIL

Normaler Preis $0.00 USD
Normaler Preis $0.00 USD Verkaufspreis $0.00 USD
Sale Ausverkauft

Nähe dir die niedlichste kurze Schürze mit diesem PDF‑Schnittmuster. Perfekt zum Backen, Basteln und Spielen, ist sie ein schnelles Projekt – ideal auch für Mama‑und‑Ich‑Sets.

Mit Rüsche oder eingefasst mit Schrägband bekommt sie einen herrlichen Vintage‑Look, und das anfängerfreundliche Schritt‑für‑Schritt‑Video‑Tutorial macht das Nähen zu einem fröhlichen kleinen Projekt.

Was ist beim Schnittmuster dabei?

  • Sofort-Download
  • Digitale PDF Schnittmuster
  • DIN A4 Format
  • eBook
  • Schritt für Schritt Video-Anleitungen

Design

  • Praktische Seitentaschen
  • Gefüttert
  • Wahlweise als Halb- oder Vollschürze
  • Süße optionale Rüsche
  • Bonus Weihnachtsschürzen-Video Nähkurs

Stoffverbrauch

STOFFEMPFEHLUNGEN & STOFFVERBRAUCH

Verfügbare Größen

Erwachsene: S/M/L

Kinder: 1 - 12

Bitte beachten

  1. Dies ist ein digitales Schnittmuster oder eine PDF-Datei, kein physisches Produkt. Die Zustellung erfolgt elektronisch über einen Download-Link an die beim Kauf verwendete E-Mail-Adresse. Zusätzlich kann das Schnittmuster von deinem Kundenkonto heruntergeladen werden.
  2. Um sicherzustellen, dass das Schnittmuster in seiner tatsächlichen Größe gedruckt wird, wird die Verwendung von Adobe Acrobat Reader empfohlen.
  3. Kleine Betriebe: Ich freue mich wenn meine Schnittmuster dir helfen, tolle Bekleidung für deine Kunden zu nähen. Industrielle Produktion ist untersagt.

Kunden werden ermutigt, Frocks & Frolics zu verlinken, wenn sie Projekte, die mit meinen Schnittmustern erstellt wurden, in sozialen Medien teilen.

@frocksandfrolics
#frocksandfrolics

Vollständige Details anzeigen

SCHRITT-FÜR-SCHRITT ANLEITUNG

Thumbnail
EINFÜHRUNG IN DAS PROJEKT
Thumbnail
ZUSCHNITT
Thumbnail
DIE SEITENTASCHEN
Thumbnail
DIE KANTEN EINFASSEN
Thumbnail
ZIERBAND ANNÄHEN BANDES
Thumbnail
DIE SCHLEIFENBÄNDER AN DAS BÄNDCHEN NÄHEN
Thumbnail
BONUS: CHEFS-SCHÜRZE

VIDEO TEXT

Country Apron Sewing Tutorial

Transcript for the video: Half Apron - Introduction To The Project

Hi everyone, we are going to have a look at how to make this lovely country apron. It’s very simple, so if you are a beginner, you’re going to love the little ties and the waistband.

Printing and Preparing the Pattern

The first thing to do is to print off your pattern. Make sure it is set to “actual size” or 100% on your printer. Measure the test scale, it should be 5 cm or 1 inch, and then we are ready to go.

Cutting Out the Pattern Pieces

The next step is to cut everything out. Follow the black lines carefully. If you see a dashed line, cut along that too. Take your time here, especially if this is your first time working with a sewing pattern.

When you start laying pieces together, look for matching symbols like flowers or notches. These indicate which pieces belong together. It can look confusing at first, but once matched, it becomes much easier to assemble.

Assembling the Pattern

You will notice guide lines that help you line up each piece correctly. This is especially helpful for beginners, as it prevents mixing up parts when there are many pattern sections.

For example, the back piece is different from the lining because it does not have the pocket indent. The front piece includes the pocket shaping. The facing is sewn to the front and then turned, or you can also finish it with bias binding.

The waistband is a single piece, and the ties are separate. These are also cut and assembled individually.

Understanding the Pattern Layout

One helpful feature of these patterns is that they are labeled in alphabetical order, making it easier to follow the sequence.

As you continue assembling, always make sure dashed lines and notches align properly. This ensures the pieces are correctly matched.

If you are unsure at any point, refer to the assembly plan. This shows exactly which pieces go together, and it may vary slightly depending on the size you are making.

Cutting on the Fold

Some pieces, like the apron front and back, are cut on the fold. This means you place the pattern on folded fabric so you get a full symmetrical piece instead of half.

The waistband is also cut on the fold, while the ties are cut as two separate pieces.

Final Notes

This is a very simple and beginner-friendly project. Take your time with the pattern preparation, and once everything is assembled correctly, you are ready to start sewing.

Cutting Out the Country Apron

Transcript for the video: Half Apron - Cutting Out

Now we're going to put together a lovely little country apron. I’ve got my fabric here that I’m going to use. I’m using a very sturdy checked fabric for the main apron. It’s just a remnant I had. For the ties and lining, I’ve chosen a soft printed cotton. You can really use any fabric you like for this.

I’m also using bias binding for the edges. You don’t have to bind the edges, but I think it gives a really nice finish. This is a particularly lovely bias binding I bought in the UK. I haven’t really found anything quite like it in the US, so I was quite pleased with it.

Positioning the Fabric

First, place the front piece on the fabric and make sure it is perfectly on the grain or fold. Don’t leave any gaps on either side. It’s not overly critical for an apron, but it becomes very important when you progress to more structured garments like shirts or dresses.

I recommend placing a pin in each corner. If you’re more experienced, you can also use pattern weights instead of pins.

Cutting Technique Tip

Here’s a helpful beginner tip: when cutting, use your left hand to hold and guide the fabric slightly, and your right hand to cut. If you are left-handed, simply reverse this. This gives you much more control and accuracy.

Once cut, remove your pins and unfold the piece. This is your apron front cut on the fold. With plain cotton, it doesn’t matter too much whether you cut along the grain or crosswise, as long as you stay consistent and avoid patterned distortion.

Cutting the Lining

Now we cut the lining. Because it is also cut on the fold, you simply flip the pattern piece over to match the fabric direction. Pin it down and cut carefully. Always cut from a controlled direction and remove pins as you go.

Cutting the Pocket

Next is the pocket. I’m also cutting this in the same fabric. The grainline arrow must follow the selvage so the pocket hangs correctly and doesn’t distort.

Generally, fabric is strongest along the selvage and slightly weaker across the weave. For an apron this is not critical, but it is good practice.

Instead of sewing the pocket directly with a seam allowance and turning it under, we will finish it with bias binding for a more decorative result.

Cutting the Ties

Now we cut the ties. You will need two. Fold the fabric and position the pattern efficiently to avoid waste.

For simple cotton fabrics, it doesn’t matter whether you cut lengthwise or crosswise. The key is to be economical with fabric usage and ensure everything is straight.

Cutting the Waistband

Finally, the waistband. You can choose to cut it in the main fabric or in a contrast fabric. In my example, I’m using the checked fabric so you can clearly see how it behaves.

When using checks or stripes, alignment is important. I actually recommend orienting the waistband in the opposite direction to the apron so the lines run differently. This creates a nicer visual contrast and is easier to handle.

Always try to use fabric efficiently. I still do this after many years of sewing because you never know when you might need extra fabric later.

Ready to Sew

And there we go, everything is cut out. Now we are ready to start sewing.

Transcript for the video: Half Apron - Sewing the Side Pockets

Perfectly Bound Western Pocket

Now let’s look at how we’re going to do a perfectly bound Western pocket. Just a quick note here again, I think I’ve mentioned this before, but you could also construct this pocket in a simpler way. You would place it onto your apron, right sides together, sew with a 1 cm seam allowance, snip, turn, and press, and you would be done.

But we want that beautiful bound effect. If you have a really nice bias binding like I do here, then this is a lovely finishing method. I just wish it were easier to find high-quality bias binding everywhere, because the UK really does it best.

Preparing the Pocket

To start, I pin the pocket in place. To make sure everything holds properly and doesn’t shift, especially if you’re still building confidence with sewing, it’s best to stitch it down first. This also adds stability, almost like a stay stitch.

When sewing, gently guide the fabric into the presser foot. Do not pull or stretch it. Let the machine feed it through evenly.

Attaching the Bias Binding

Now take your bias binding. Usually one side is slightly wider than the other, and the wider side should go underneath so it catches properly. In my case, both sides are equal, so I just work carefully and evenly.

Do not start exactly at the edge. Leave about 2 cm hanging over the top. This helps with finishing later and prevents the binding from slipping out. This step is important, especially for beginners.

Slowly feed the fabric into the fold of the bias binding and stitch as close to the edge as possible. You need to take your time here. I always say don’t obsess over the needle, but in this case you do need to watch it closely to stay aligned with the bias edge.

Here you can see the lower part of the bias binding is slightly wider. I’m using a double-fold bias tape from Joann’s. If you are new to this technique, I would recommend using a wider binding first, as it is easier to control.

Finishing the Pocket Shape

Once attached, we place the pocket pieces together and pin them. I was actually very pleased with this technique when I developed it because it makes the process much faster and cleaner.

There is no strict seam allowance here beyond the standard 1 cm, but you don’t need to be exact to the millimeter since it’s a decorative pocket. Just keep everything consistent and neat.

Once pinned, sew around both sides carefully. Turn it through and you’ll already see the pocket take shape. It’s simple, fast, and very effective.

Securing the Pocket

Now we secure the pocket so it doesn’t shift. Place pins vertically to the seam so you don’t have to remove them while sewing. Stitch close to the edge, not with a full seam allowance, just enough to secure it firmly.

If you are using checked fabric, make sure your stitching line follows the pattern evenly so everything stays visually balanced.

In the next step, we will bind the pocket edges properly and finish the construction.

Binding the Apron Edge

Transcript for the video: Half Apron - Applying Binding to the Edges

Now I’m going to show you how to do the binding all the way around the apron. It’s actually very simple, just a few key steps. When it’s done correctly, it gives a really beautiful finish, and it also secures the edges so nothing can move.

Preparing the Edge

Your next step is to trim back the edge slightly. I would do this quite neatly, especially if you are working with checks or patterned fabric. If you trim about 2 mm off the seam line, you know your binding will sit perfectly.

Now take your bias binding again. If you are a beginner, please use a wider binding. The wider side should sit underneath, and the slimmer side should sit on top.

Positioning the Binding

Place the binding at the top of the apron, making sure you leave a small overhang at the beginning. This is very important because it stops the binding from slipping into the machine and getting stuck.

Now take it to the sewing machine. Feed the apron into the fold of the binding, but do not push or force it. If you push too much, the top layer of the binding can shift and you will lose control of the edge.

Sewing Around the Shape

As you sew, keep the binding straight. When you reach curves, gently guide the apron with your left hand while keeping the binding feeding in straight. You may need to slightly angle the fabric so the needle catches the edge properly.

This is where you need to watch carefully. The edge of the binding should sit just to the left of your presser foot so the stitch line stays consistent. I’m using a clear presser foot, which makes this much easier to see.

When you go around curves, the key is to move the apron, not pull the binding. The binding should feed evenly while you adjust the fabric underneath it.

This takes practice, so don’t worry if it doesn’t look perfect the first time. A wider binding is much easier to control if you are new to this technique.

Completing the Edge

Continue all the way around the apron, repeating the same method. Keep the binding flat, guide the curves slowly, and allow the machine to feed evenly.

When you return to the starting point, cut off any excess binding and finish the join neatly.

Now that the binding is complete, the apron is almost finished. The next step is to attach the waistband and ties, and then we are done.

Attaching the Ribbon to the Waistband

Transcript for the video: Half Apron - Adding a Ribbon to the Waistband

So you’re ready to sew your apron. The first thing we need to do is position the ribbon correctly on the waistband.

Finding the Correct Position

First, fold the waistband in half so you can clearly find the center. This gives you an accurate reference point for the front.

Next, remember you already have a 1 cm seam allowance. You can use a ruler or tape measure to mark where that seam line sits. From there, find the exact center of the visible section.

With checked fabric, this becomes much easier because you can simply follow one of the fabric lines. In my case, I can align the ribbon along a blue check line so everything stays straight and balanced.

Pinning the Ribbon

Once you’ve found the correct position, place a pin to hold the ribbon in place. Take your time here because this determines how neat the final waistband will look.

Make sure the ribbon sits evenly and doesn’t twist. Once you’re happy with the placement, you’re ready to stitch.

Topstitching the Ribbon

Now topstitch the ribbon onto the waistband on both sides. Keep your stitching as close to the edge as possible, but don’t go so close that you risk slipping off the fabric.

I’m using Gütermann thread here, which is a very good quality thread. I use it often, especially for topstitching. A good thread makes a noticeable difference in the final look of your sewing.

If you hold thread up to the light and it looks smooth without loose fibers, that usually indicates it is tightly twisted and good quality.

Final Notes

Try to keep your stitching even. You can use contrast thread if you are confident, but if you are still learning, it’s better to match the fabric so small imperfections are less visible.

And that’s it, the ribbon is now attached. We’re ready to move on to assembling the apron.

Finishing the Apron: Waistband, Ties, and Final Topstitching

Transcript for the video: Half Apron - The Waistband and Ties

Now we’re going to do the final step. We’re going to put the waistband and the ties together.

Attaching the Ties

Take your waistband with the ribbon attached and your two ties. Place one tie on each end of the waistband, right sides facing. Pin them in place with a 1 cm seam allowance.

Do the same on the other side. Once both ties are secured, sew them on with a 1 cm seam allowance. Remember to lock your stitches at the beginning and end.

Pressing and Topstitching

After sewing, press the seams to either side. You can also finger-press if needed. Then topstitch on both sides.

For topstitching, increase your stitch length to 3 or 3.5 and keep a consistent distance from the seam line. This gives a clean, professional finish.

Attaching Waistband to Apron

Now turn the waistband down and attach it to the top of the apron, right sides facing together. The edge of the apron should sit neatly inside the bias binding.

If your binding construction differs slightly, don’t force the fabric. Just align everything naturally within the binding edge.

Pin the waistband in place, then sew with a 1 cm seam allowance. If you are working with checks or stripes, use them as a guide to keep everything straight and even.

Once sewn, press the seam well so it sits nicely. Check your work at this stage, because this is where you can still make small adjustments if needed.

Reducing Bulk

Turn the apron over and trim back some of the seam allowance to reduce bulk, especially in thicker areas. This will help the waistband sit flatter and more comfortably.

Preparing the Ties

Now close the ties. Place right sides together and sew with a reduced stitch length of 1.5 around the tip for strength, then return to a longer stitch for the rest.

Sew until you reach the waistband area. Beginners may prefer to stop just before the waistband to keep things controlled. More experienced sewers can continue through in one smooth motion.

Turning the Ties

Cut away excess seam allowance at the ends to make turning easier. Use a pencil, stick, or turning tool to push the fabric through until the tie is fully turned right side out.

Gently shape the corners by rolling the seams outward. Approach corners slightly from the side rather than pulling straight, to avoid damaging the fabric.

Press the ties flat so they sit neatly.

Final Pressing and Inspection

Give the waistband and apron a final press. Check the alignment carefully. Trust your eye here, if it looks balanced and straight, it usually is.

Topstitching the Waistband

Start topstitching somewhere in the middle, not at an edge. Use a guide on your machine to maintain even spacing.

Guide the fabric steadily with your right hand while your left hand supports and directs the fabric flow. Go slowly and consistently.

At corners or thicker sections, increase tension slightly (around 7–8 if needed) to avoid loops, then return it to normal afterward.

Continue all the way around until you meet your starting point. And that’s it. If you’ve reached this point, you’ve made a beautiful country apron. Well done.

Transcript for the video: Half Apron - Full Apron with Frill

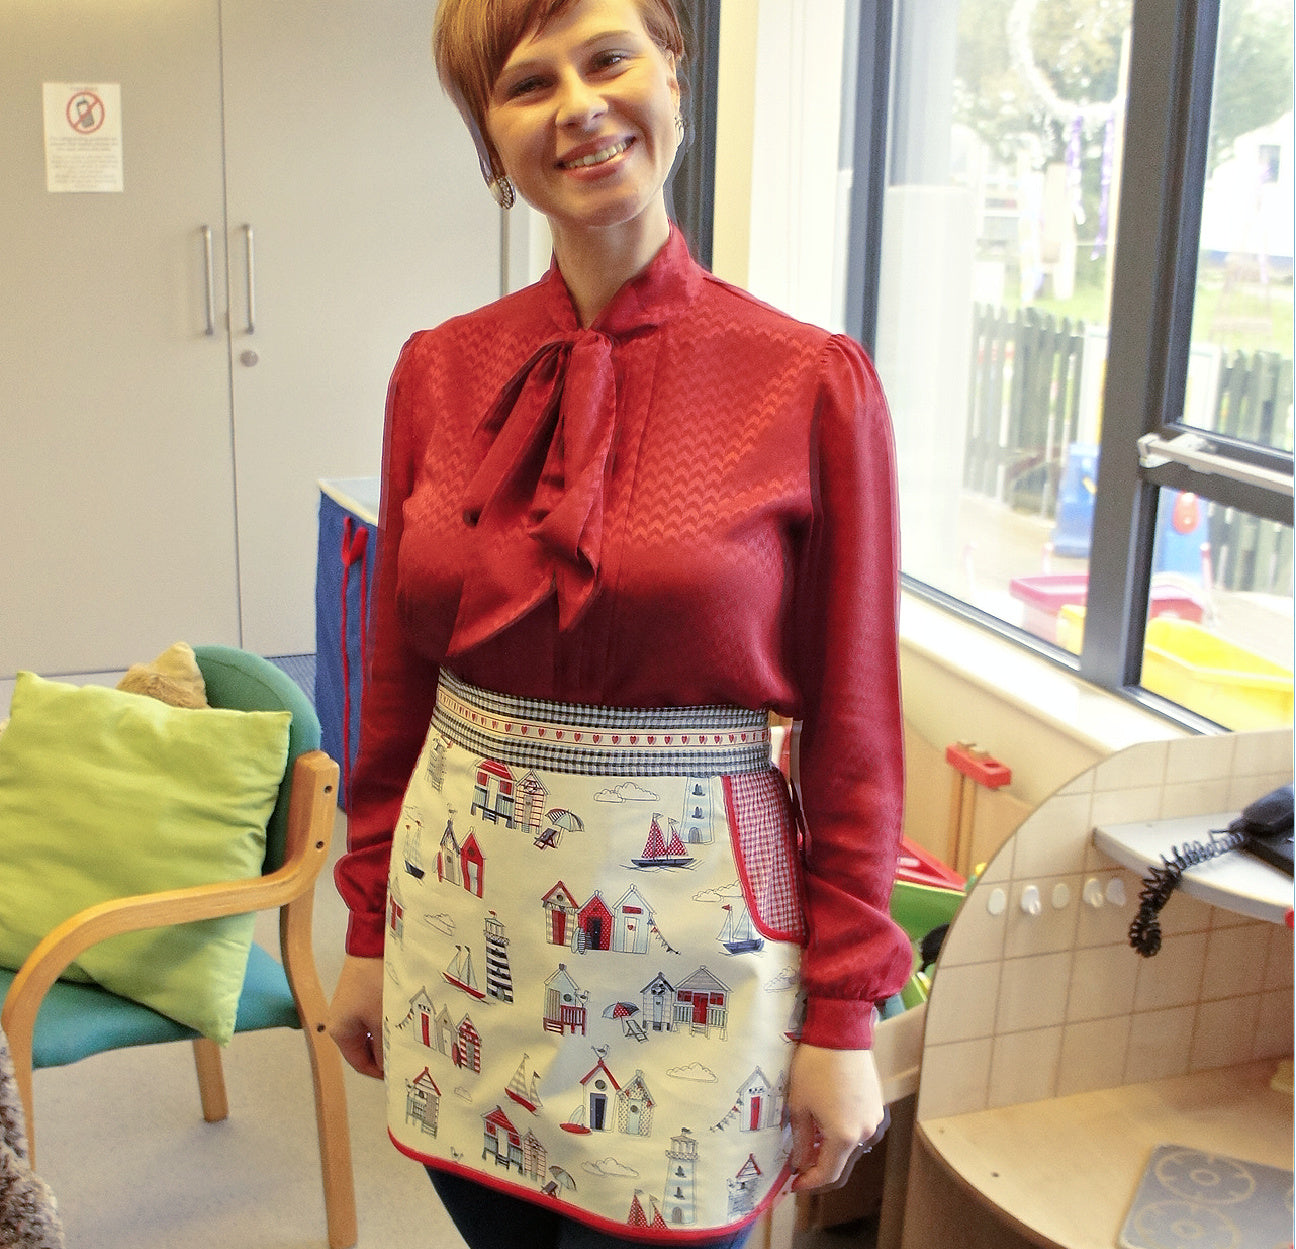
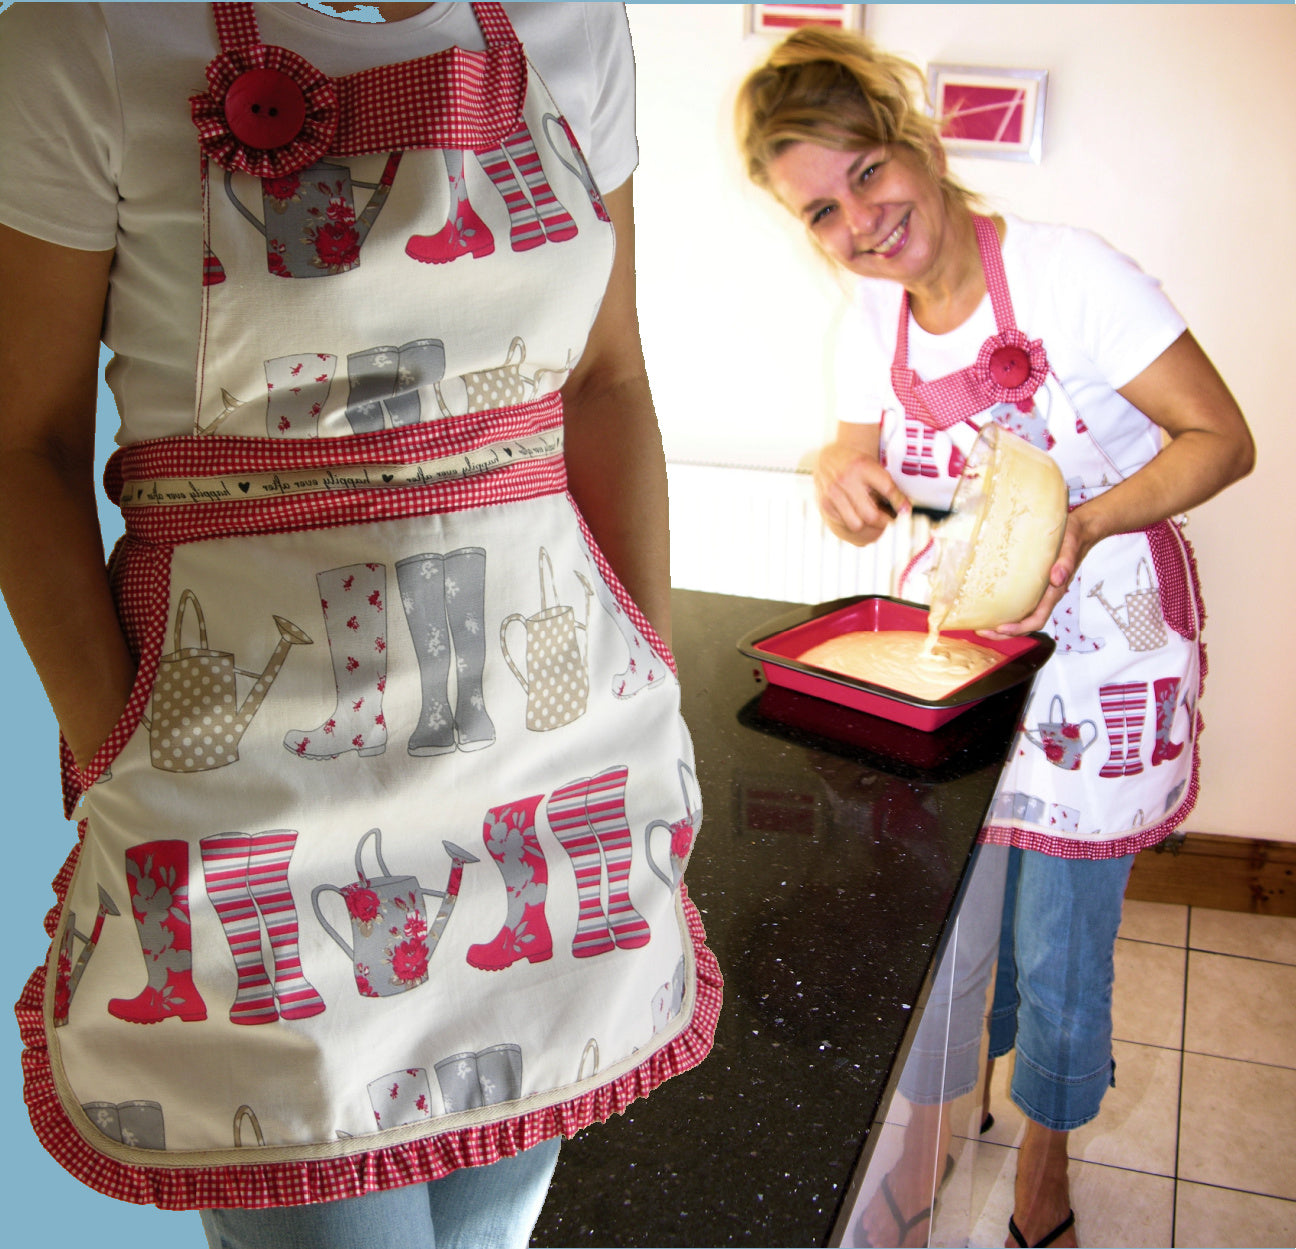
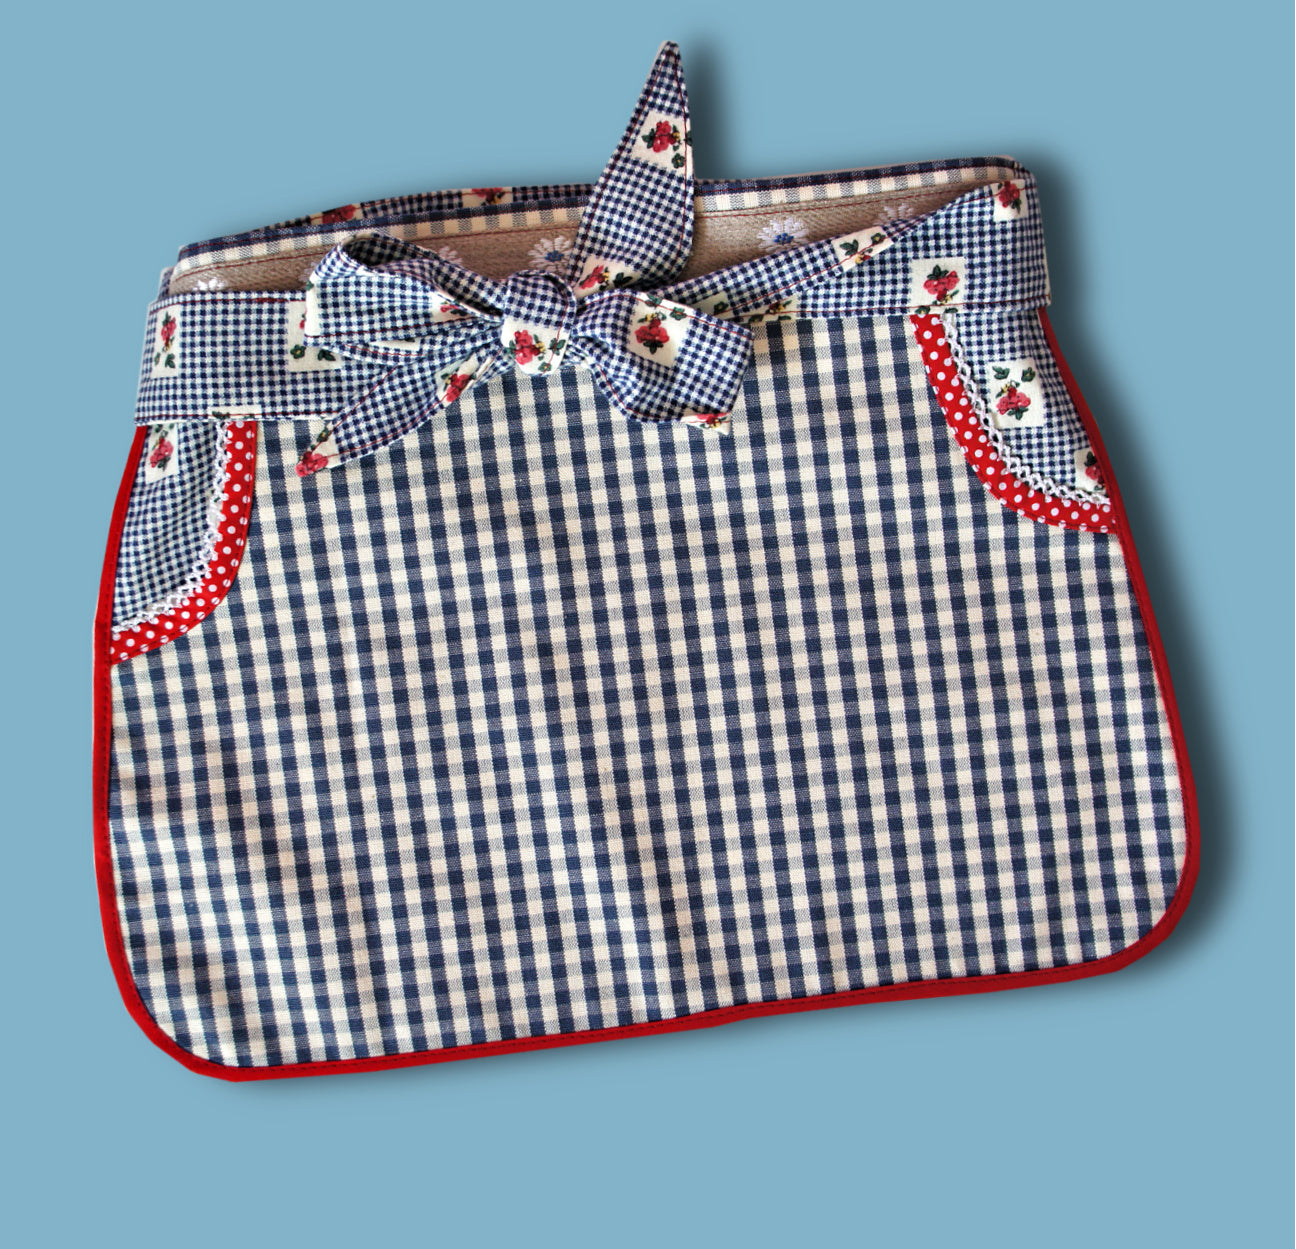
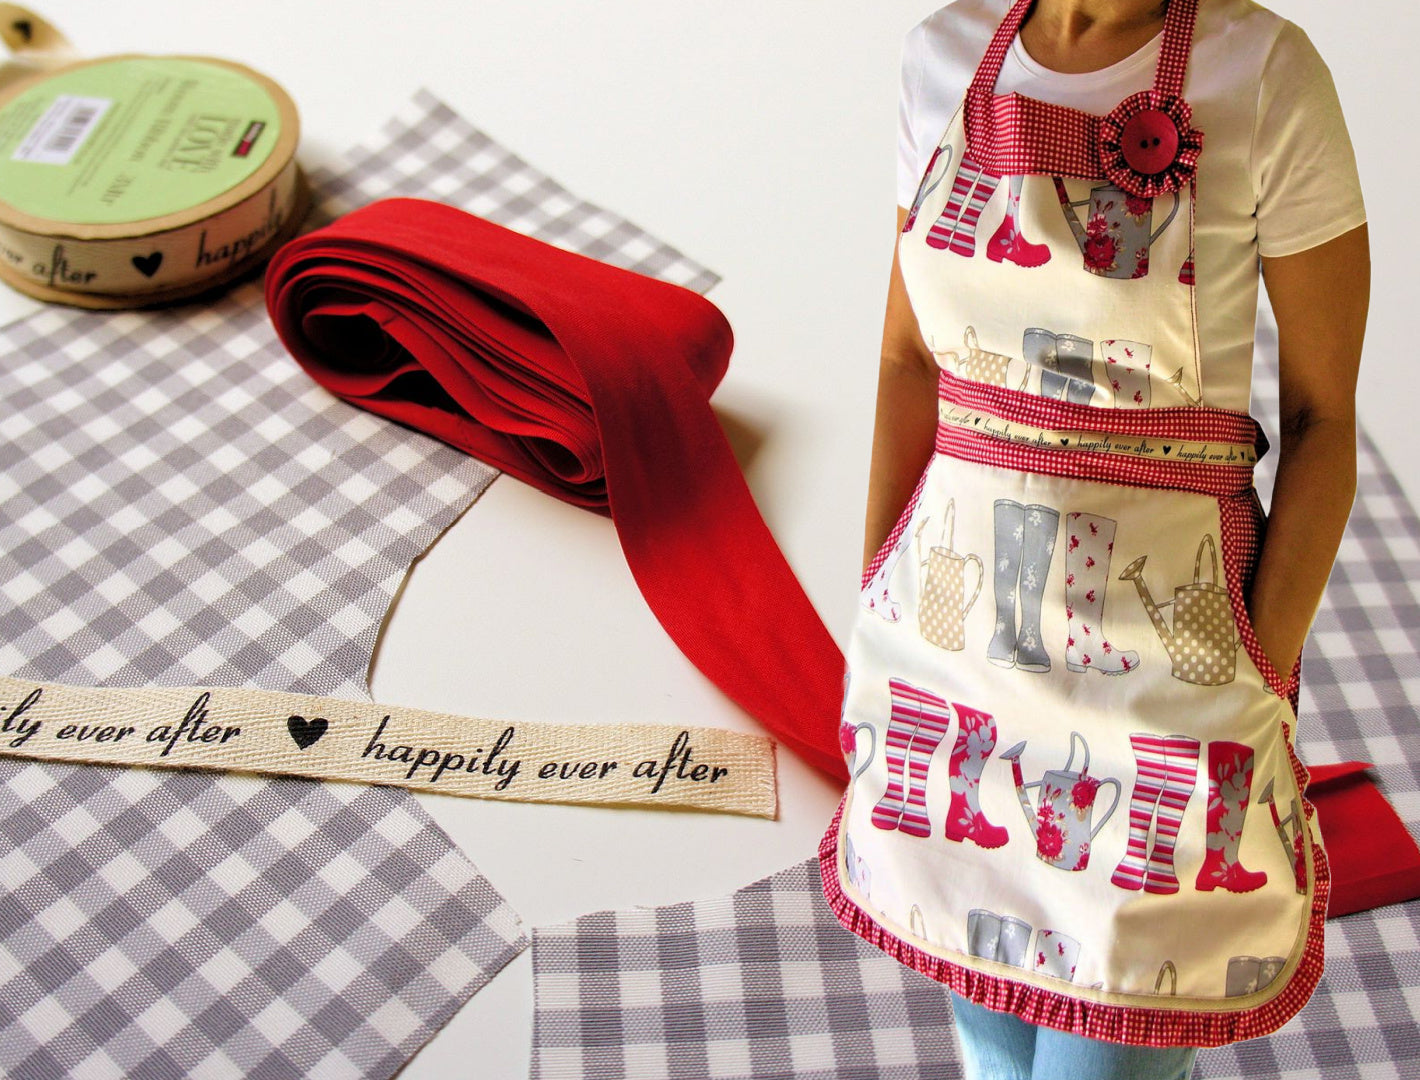
Now we’re going to look at the final apron project, a lovely kitchen apron with a bib.

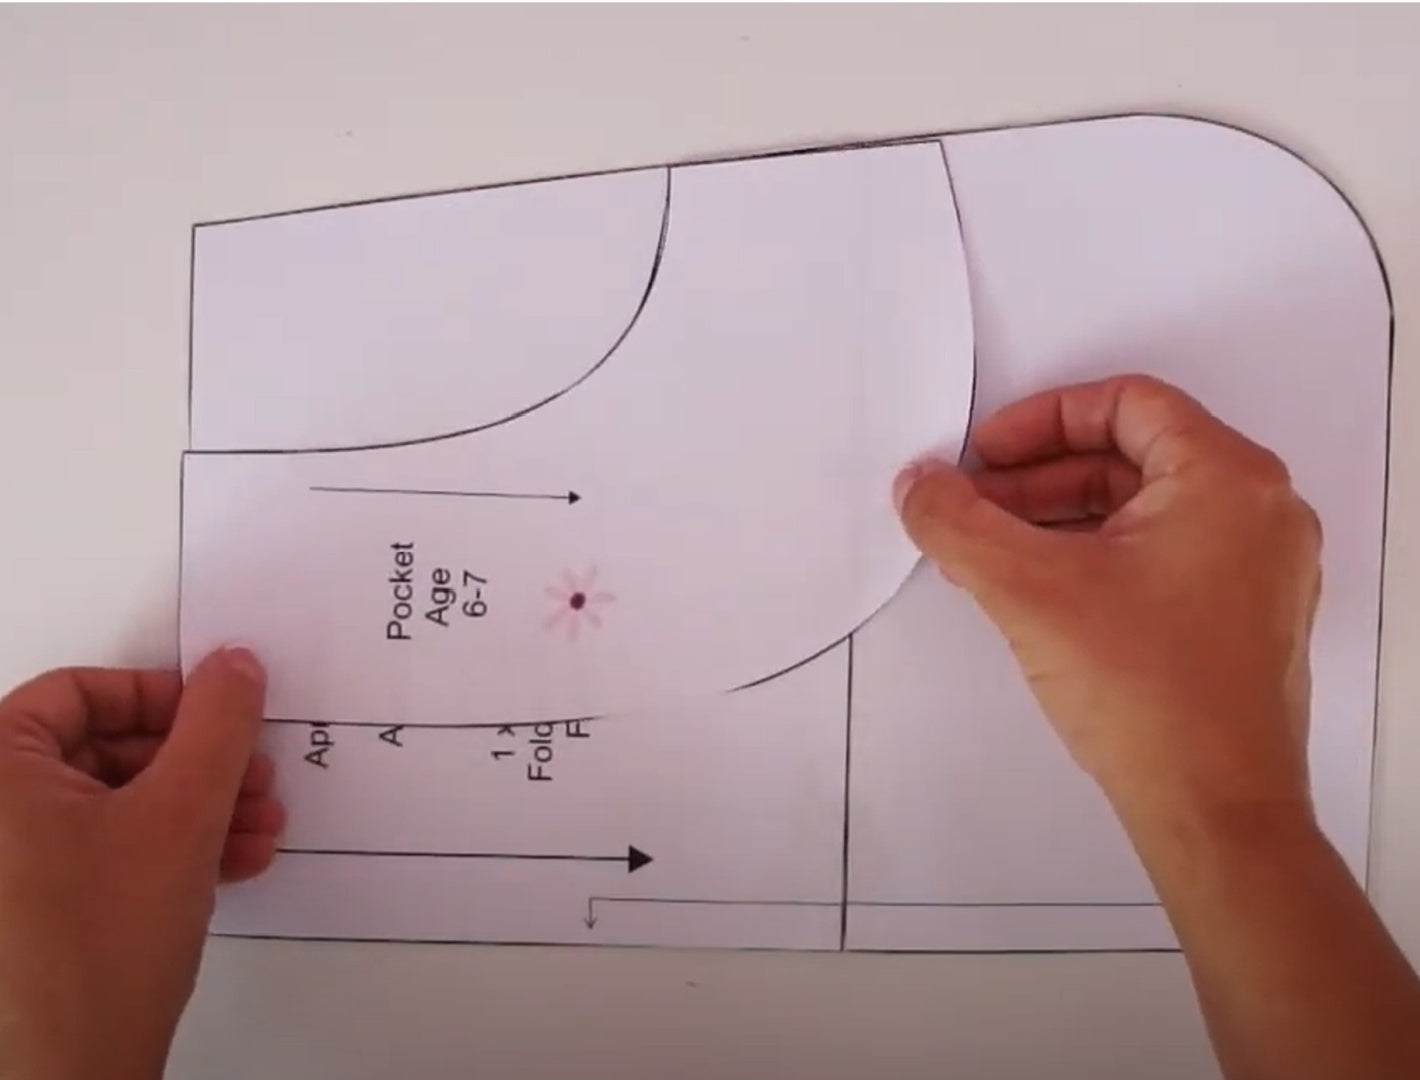
Cutting the Pattern Pieces

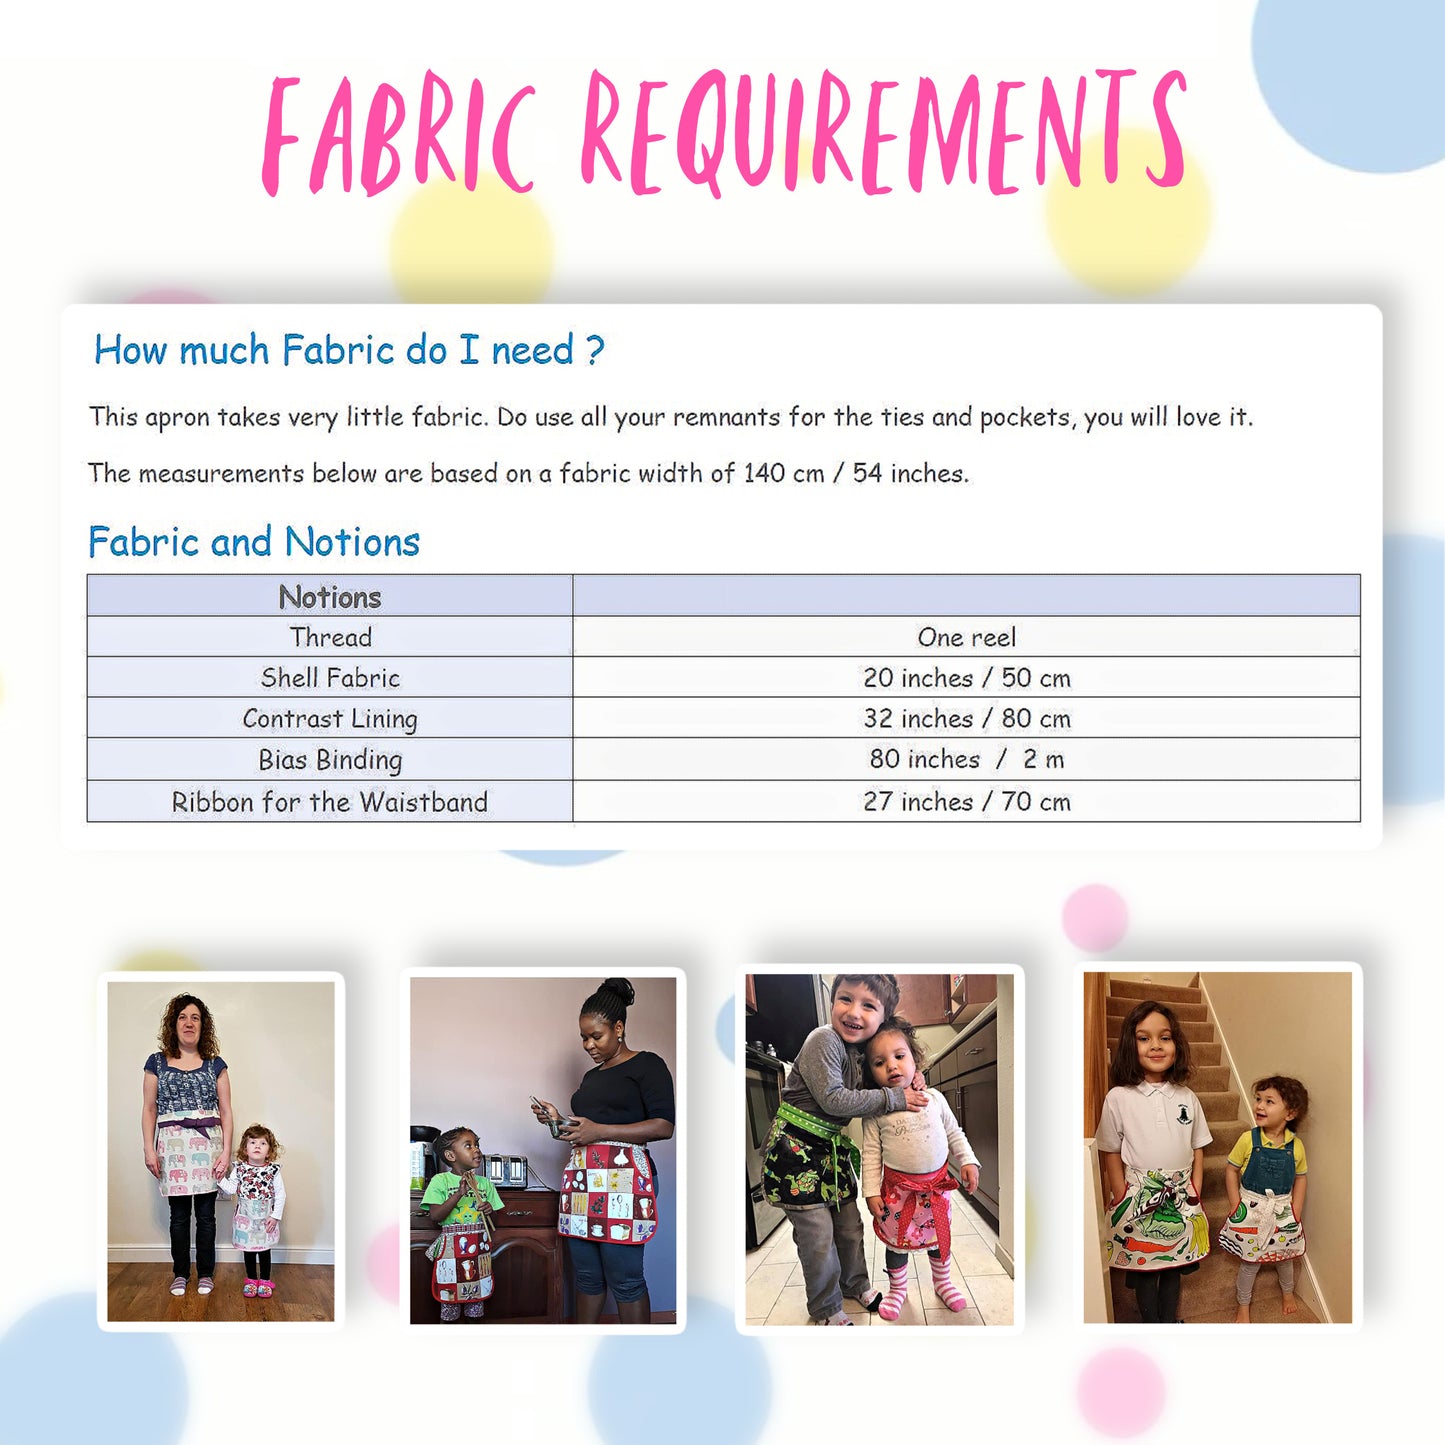
Start by laying out your pattern pieces. You’ll have the lower apron, upper fabric, pocket facing, two waistbands, ties, and the bib. Cut everything carefully according to your pattern markings.

The upper fabric is cut first, then the bib. Make sure to follow the correct fold lines on both the upper and lower sections so the pieces are symmetrical.

The ties and waistband pieces are also cut as usual. Don’t forget the neck tie and any additional strips for frills or decorative elements if your design includes them.

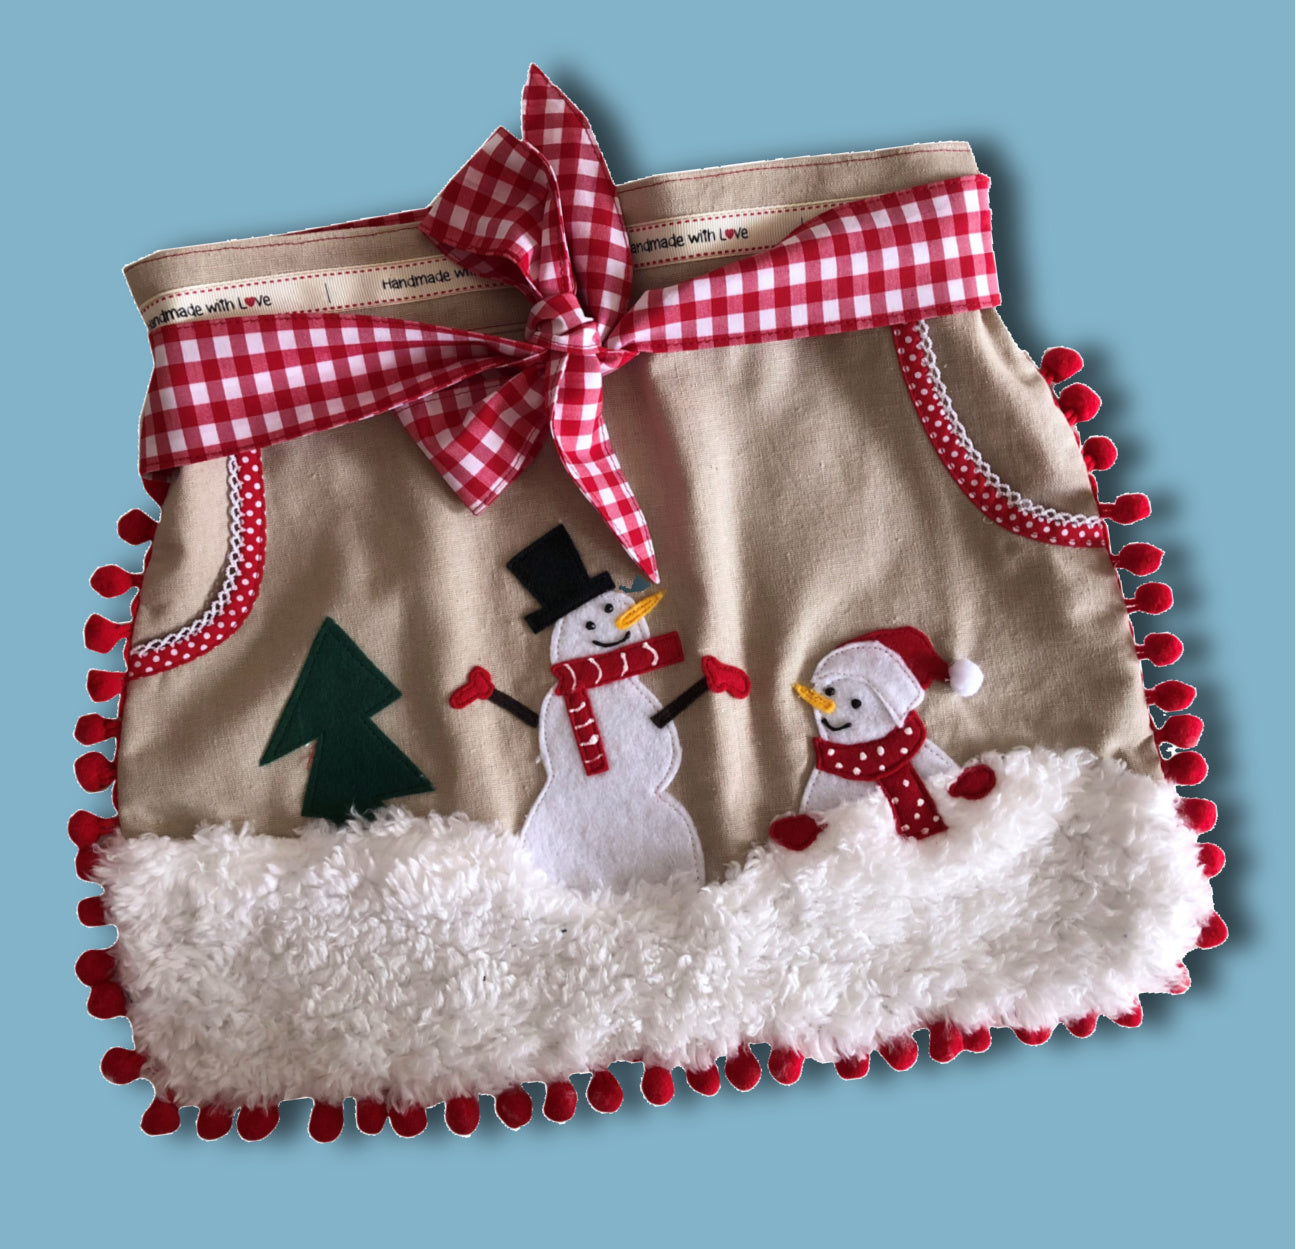
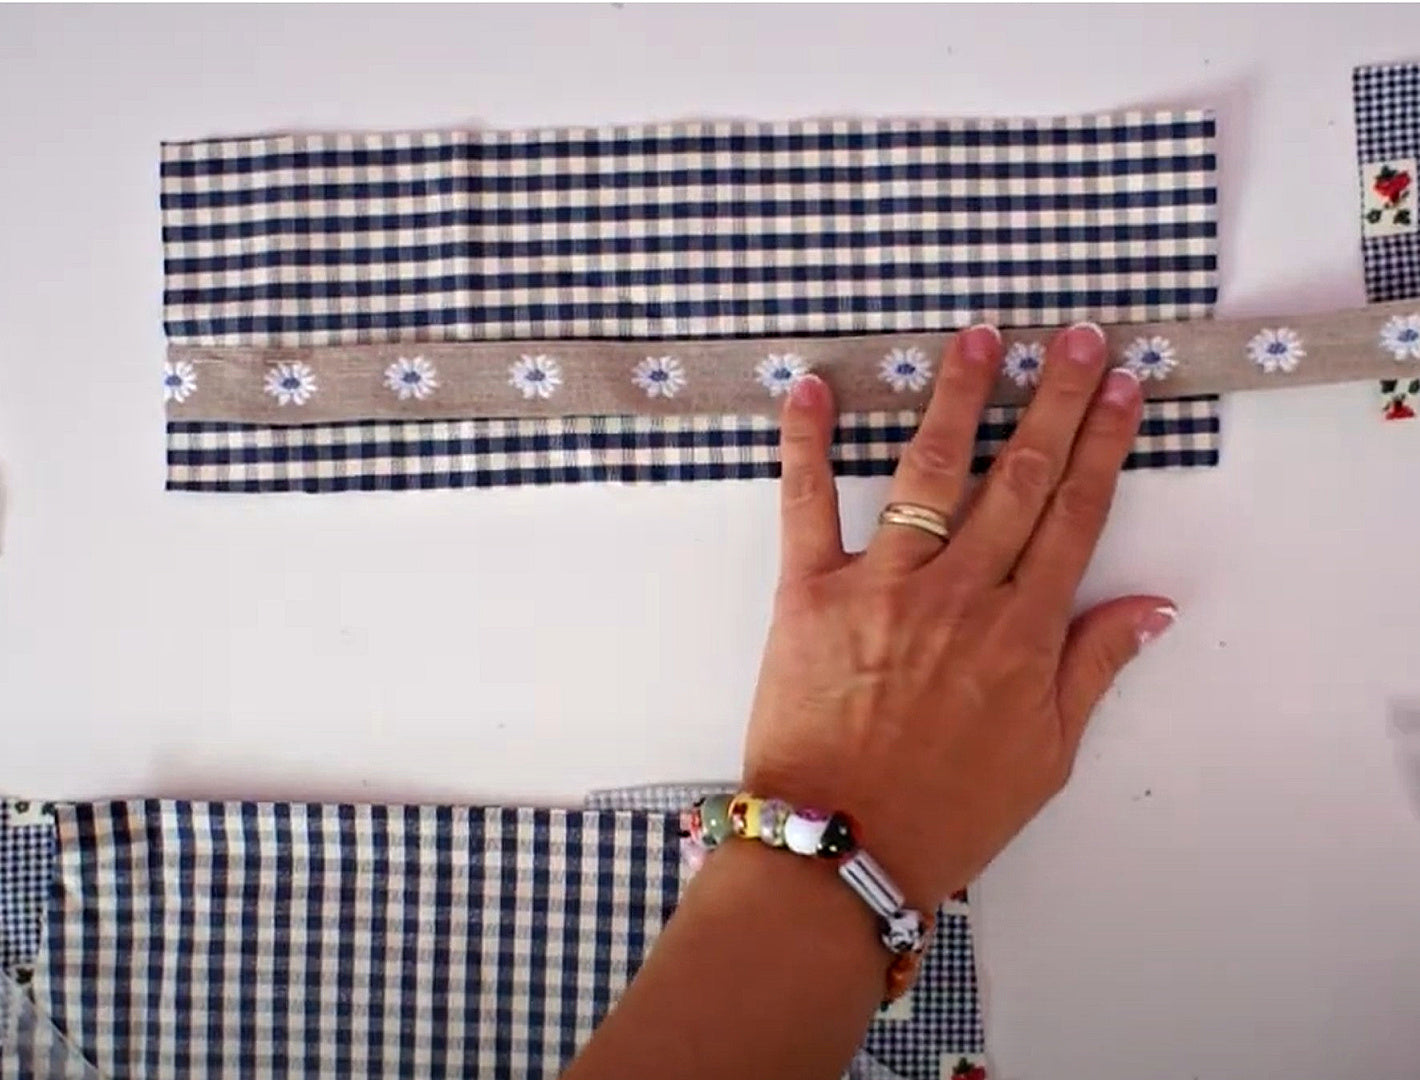
Preparing the Ruffle

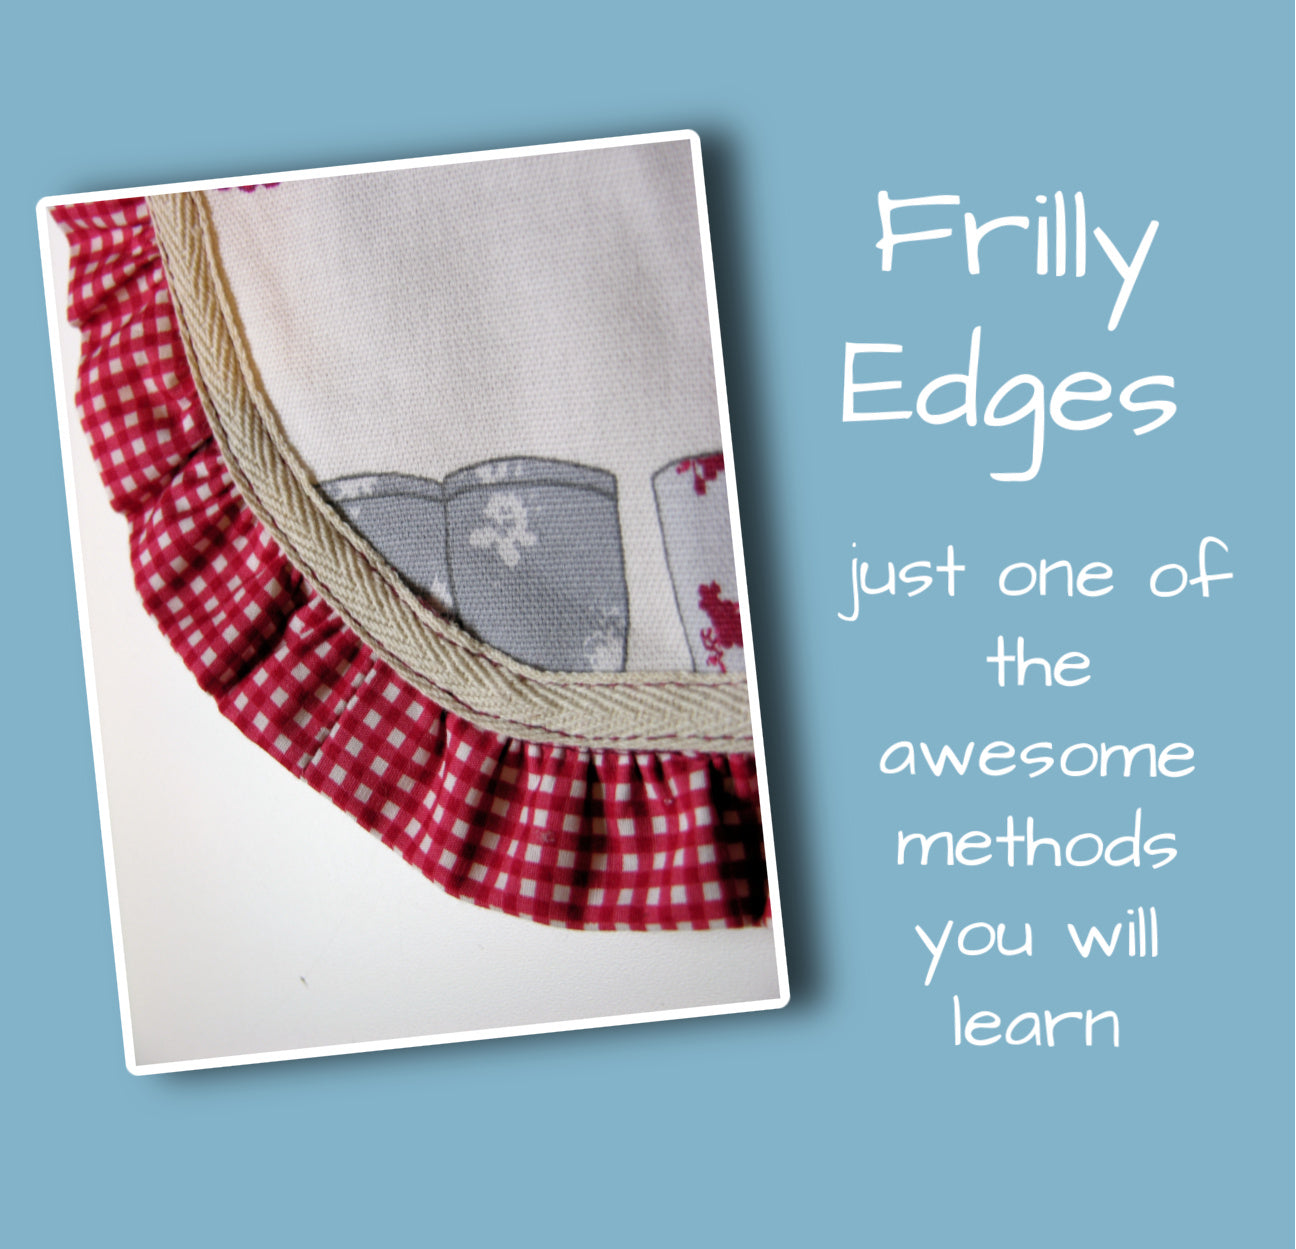
The frill pieces are sewn together first using a long stitch, then pressed with seams open. After that, fold the strip lengthwise and prepare it for gathering or use a ruffler foot if you have one.

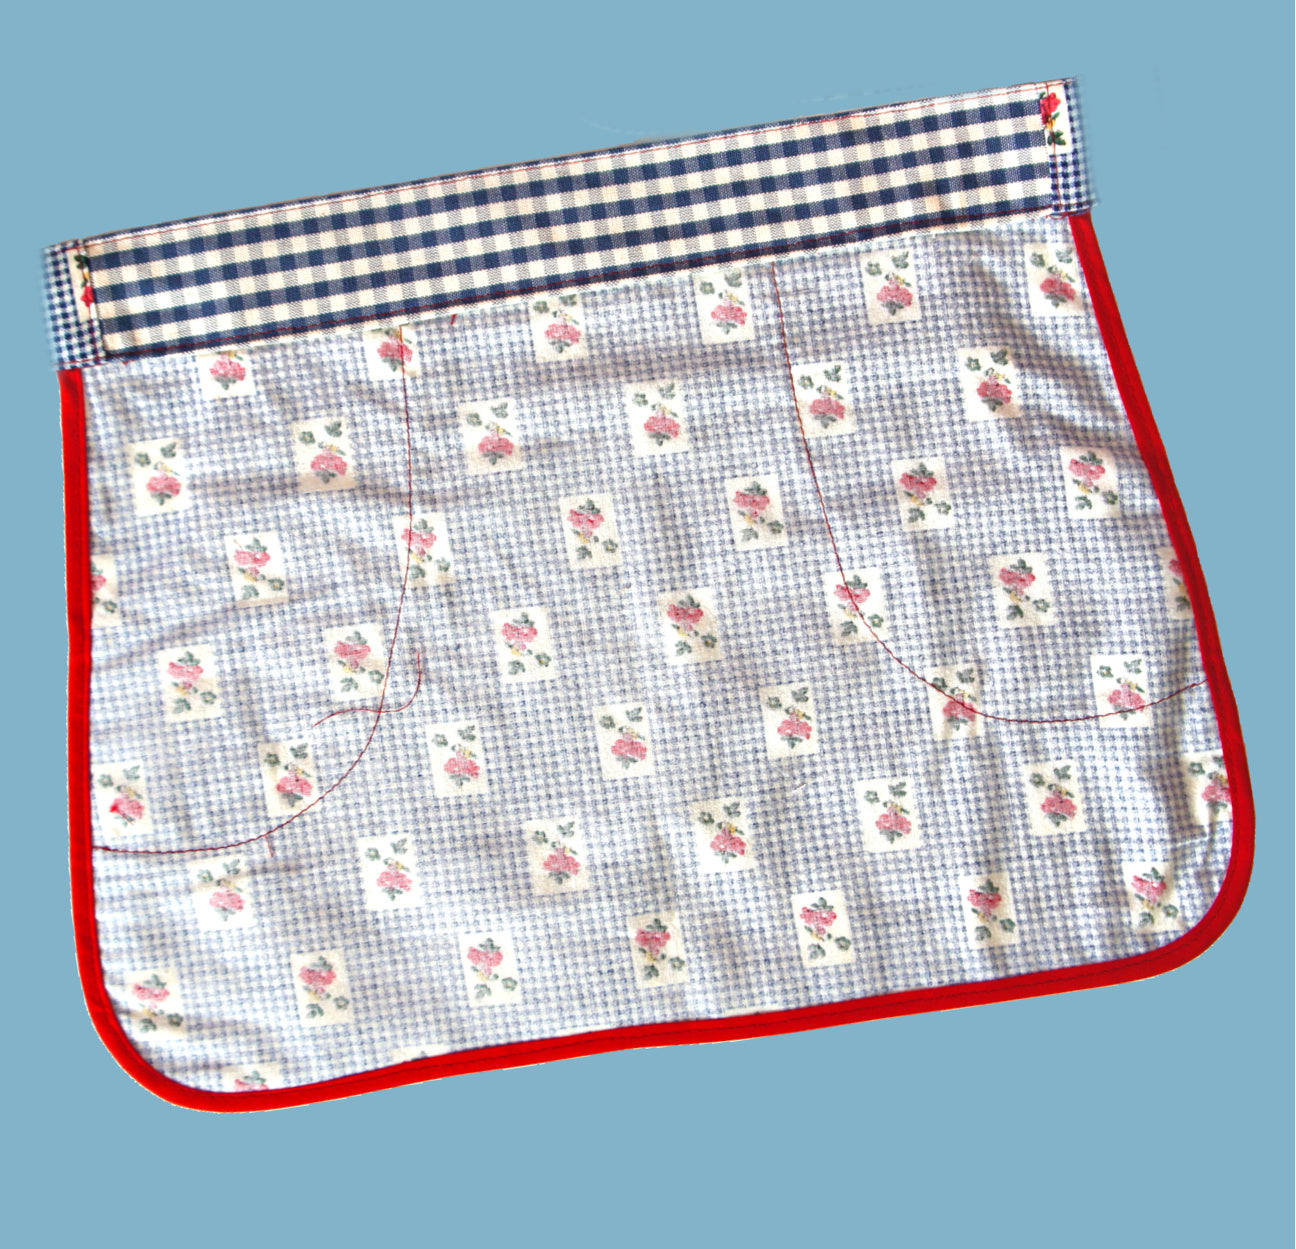
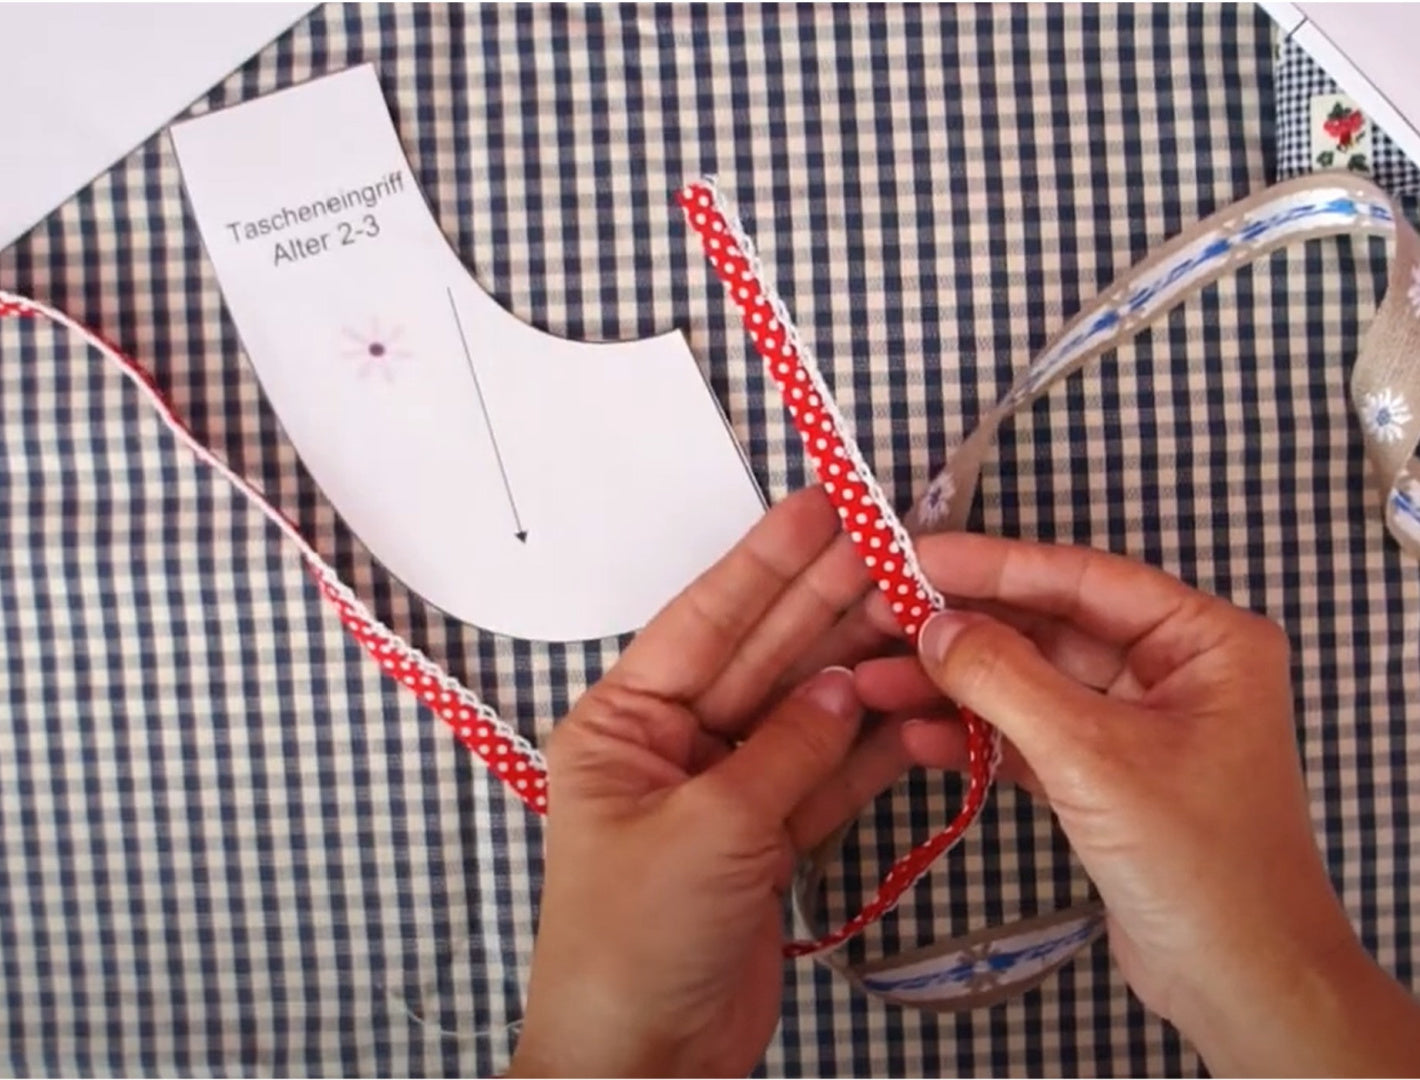
Pocket Construction with Bias Binding

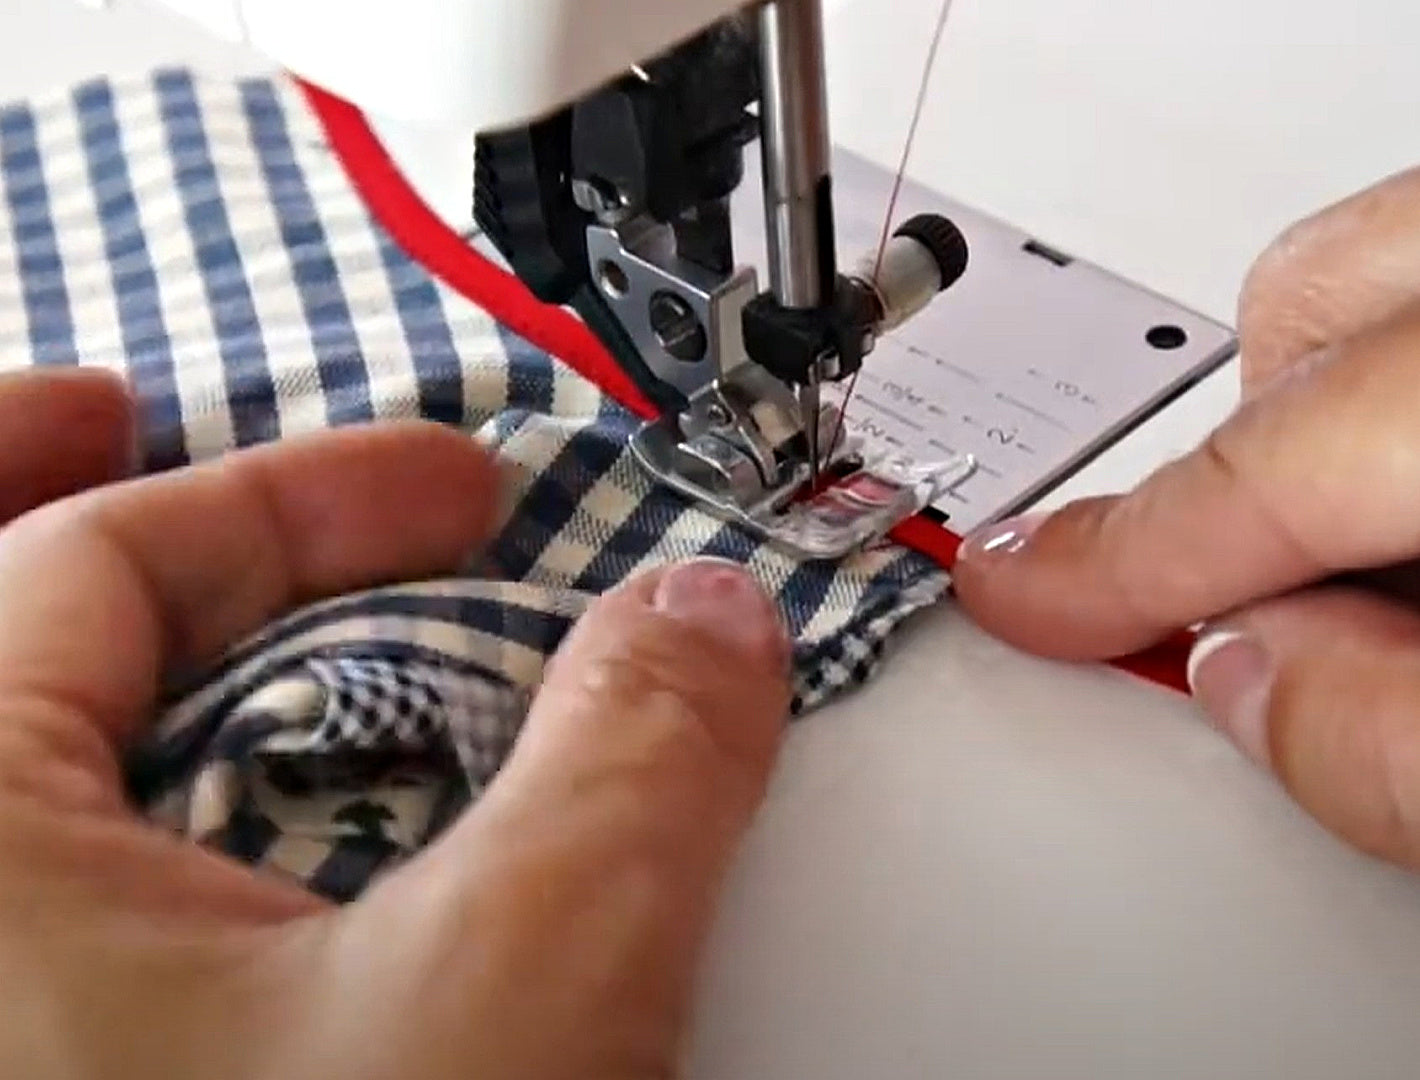
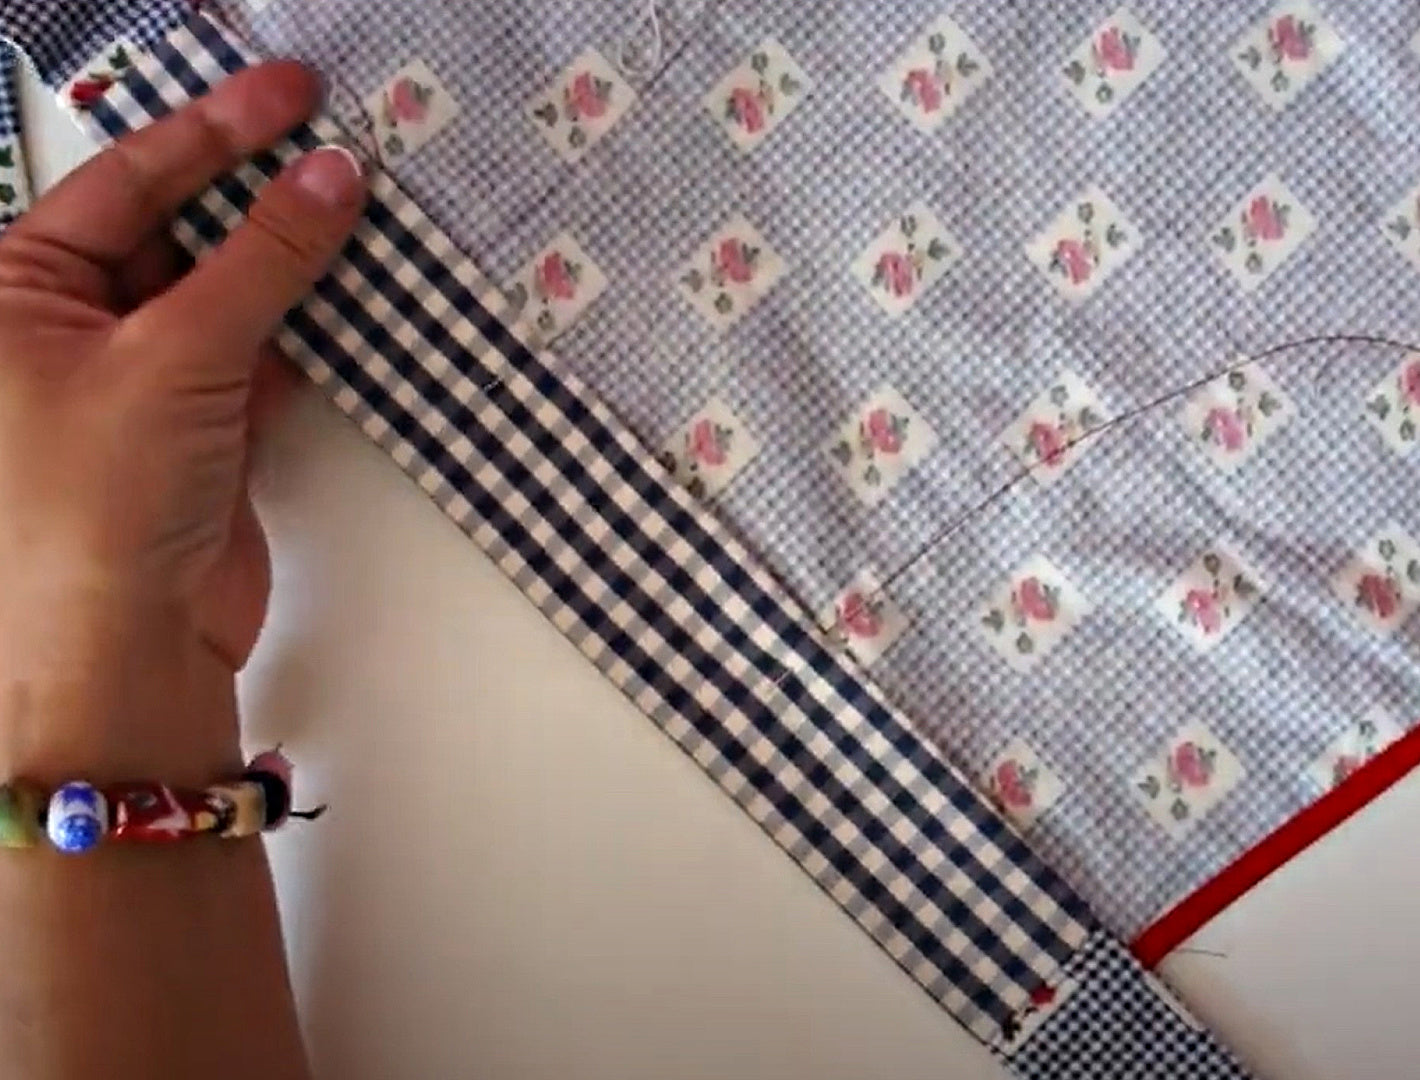
The pocket facing is finished using bias binding. Attach the binding from the wrong side first, keeping it straight as you sew. The fabric underneath will naturally ease into shape.

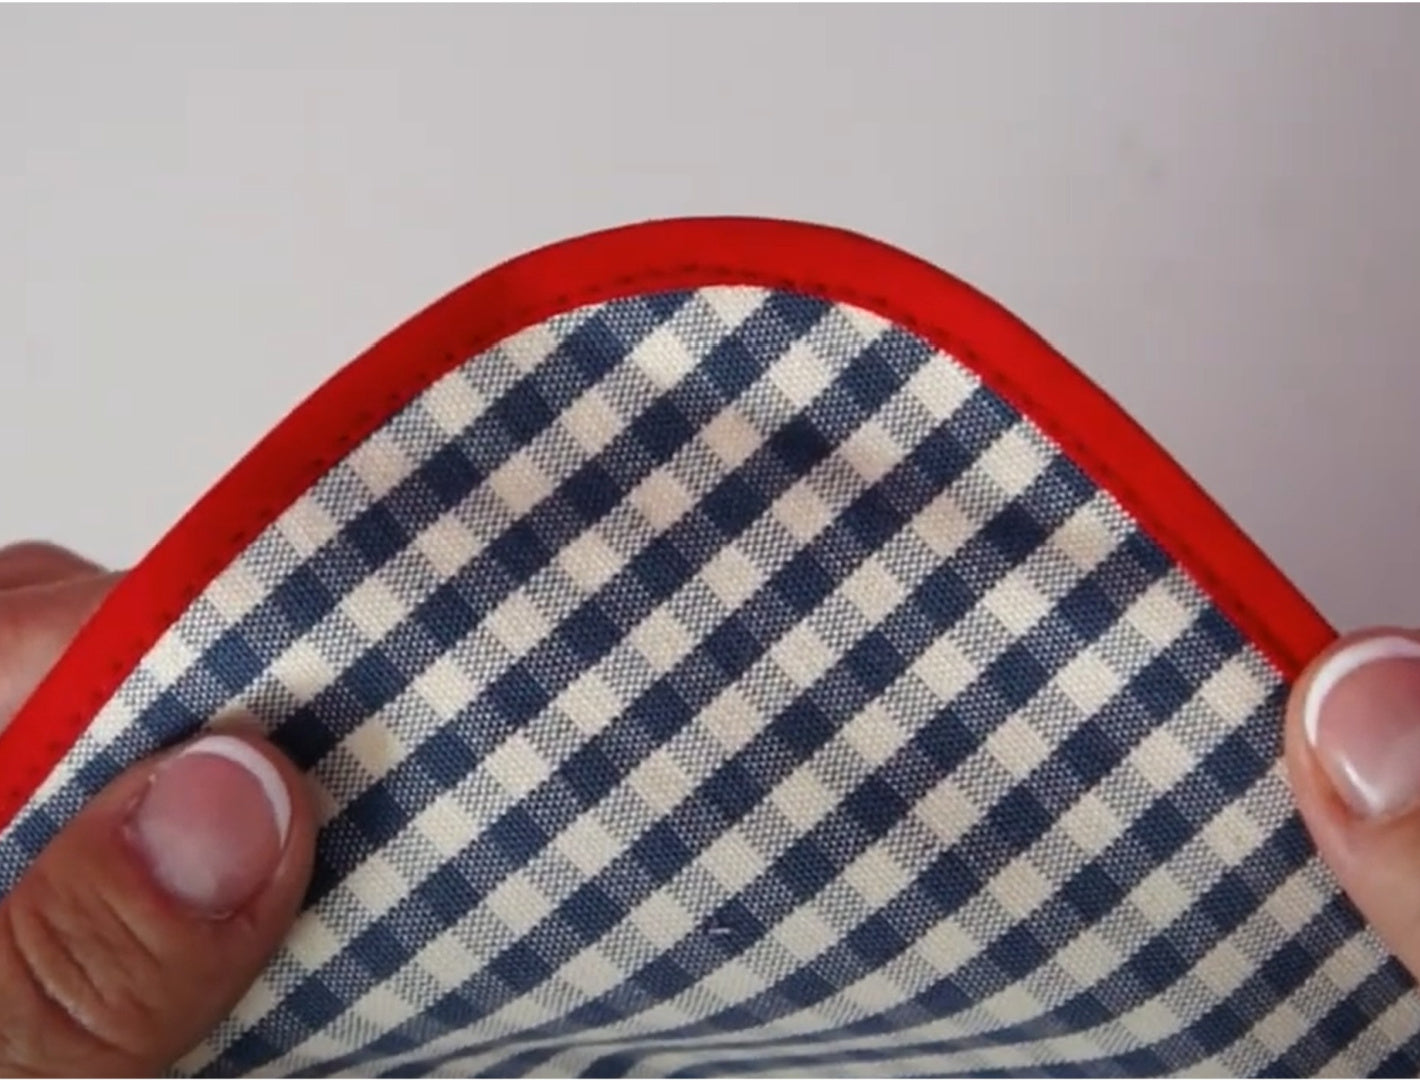
Then fold the binding over to the front, covering the raw edge, and stitch again 1–2 mm from the edge for a clean, professional finish.

Once complete, attach the pocket to the apron front. Pin it in place, keeping it smooth, then stitch it securely around all edges.

Bib Construction

Next, prepare the bib. Fold the top edge and mark where Velcro will be placed. Attach the neck tie to one side of the bib, ensuring the raw edge is enclosed and neatly stitched.

Place the bib front and lining right sides together, stitch around the edges, and leave the lower edge open. Trim seam allowances at curves, then turn the bib right side out and press carefully.

Topstitch using a triple stitch if available for a decorative and durable finish.

Attaching Bib to Waistband

Align the center points of the waistband and bib. Sandwich the bib between the waistband layers and stitch across to secure it in place. Press flat once attached.

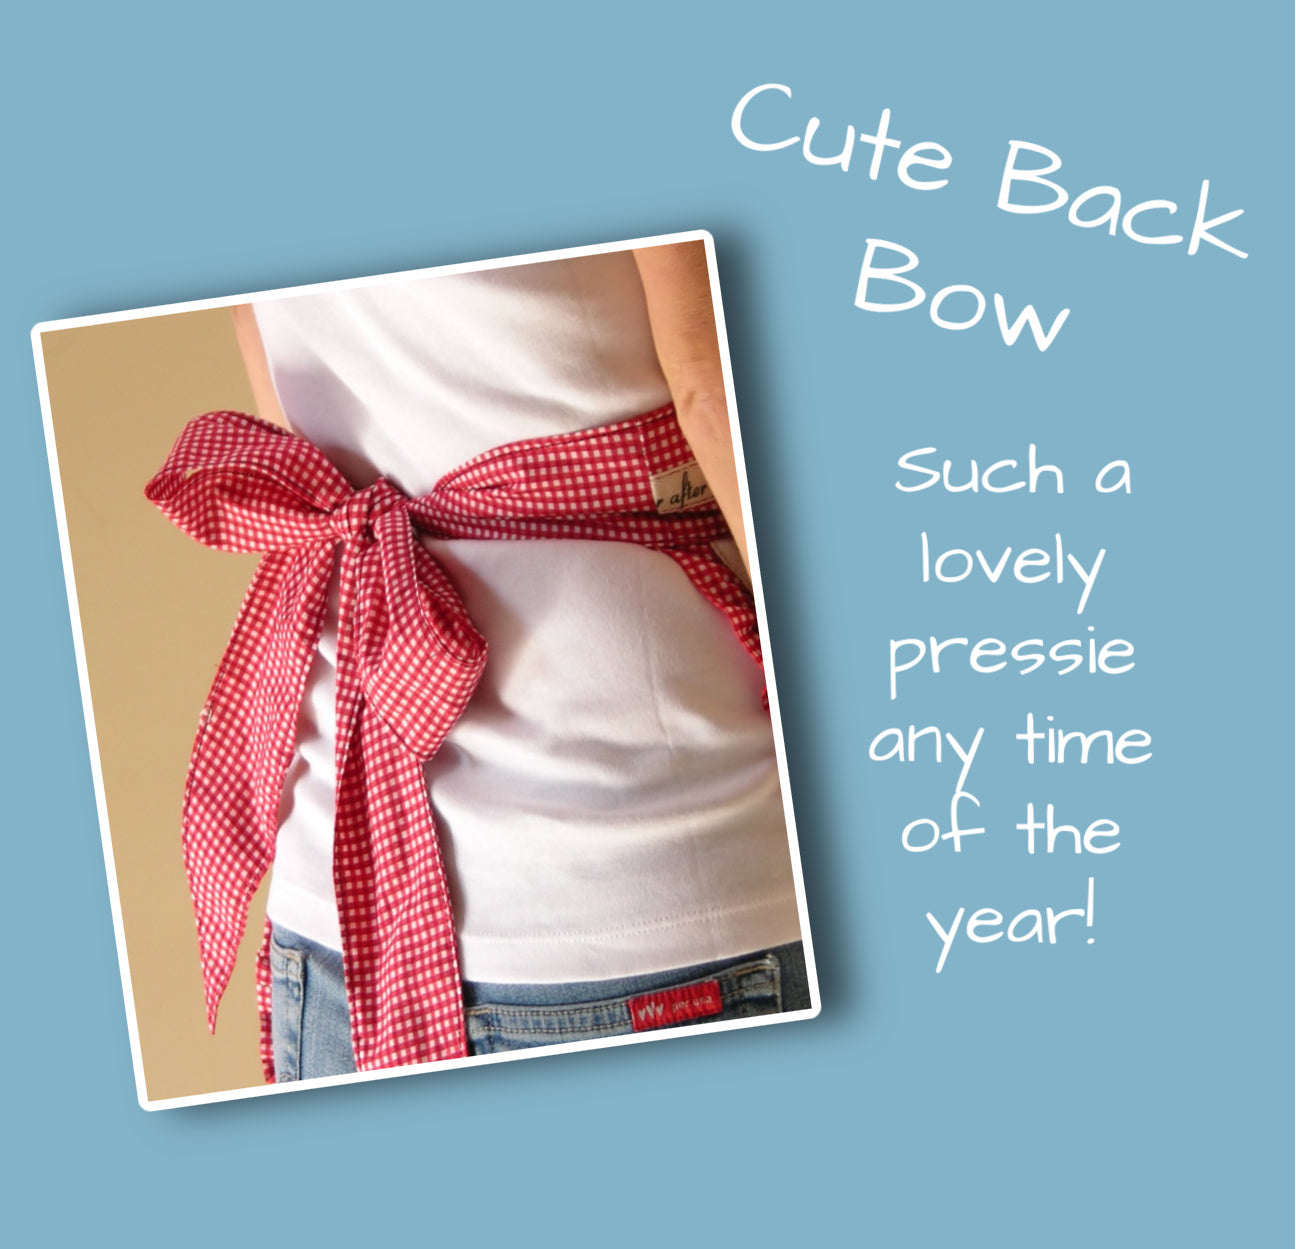
Making and Attaching the Ties

Attach the ties to the waistband ends, right sides together. Trim excess fabric if needed, then sew with a 1 cm seam allowance.

Reduce stitch length at the tips for strength, then turn the ties right side out, carefully pushing out corners and pressing flat.

Gathering and Ruffle Attachment

If using a ruffler foot, gather the strip automatically; otherwise, gather manually. Attach the gathered strip to the apron following your marked stitch line.

Trim seam allowances and reinforce with a second line of stitching to keep everything secure and stable.
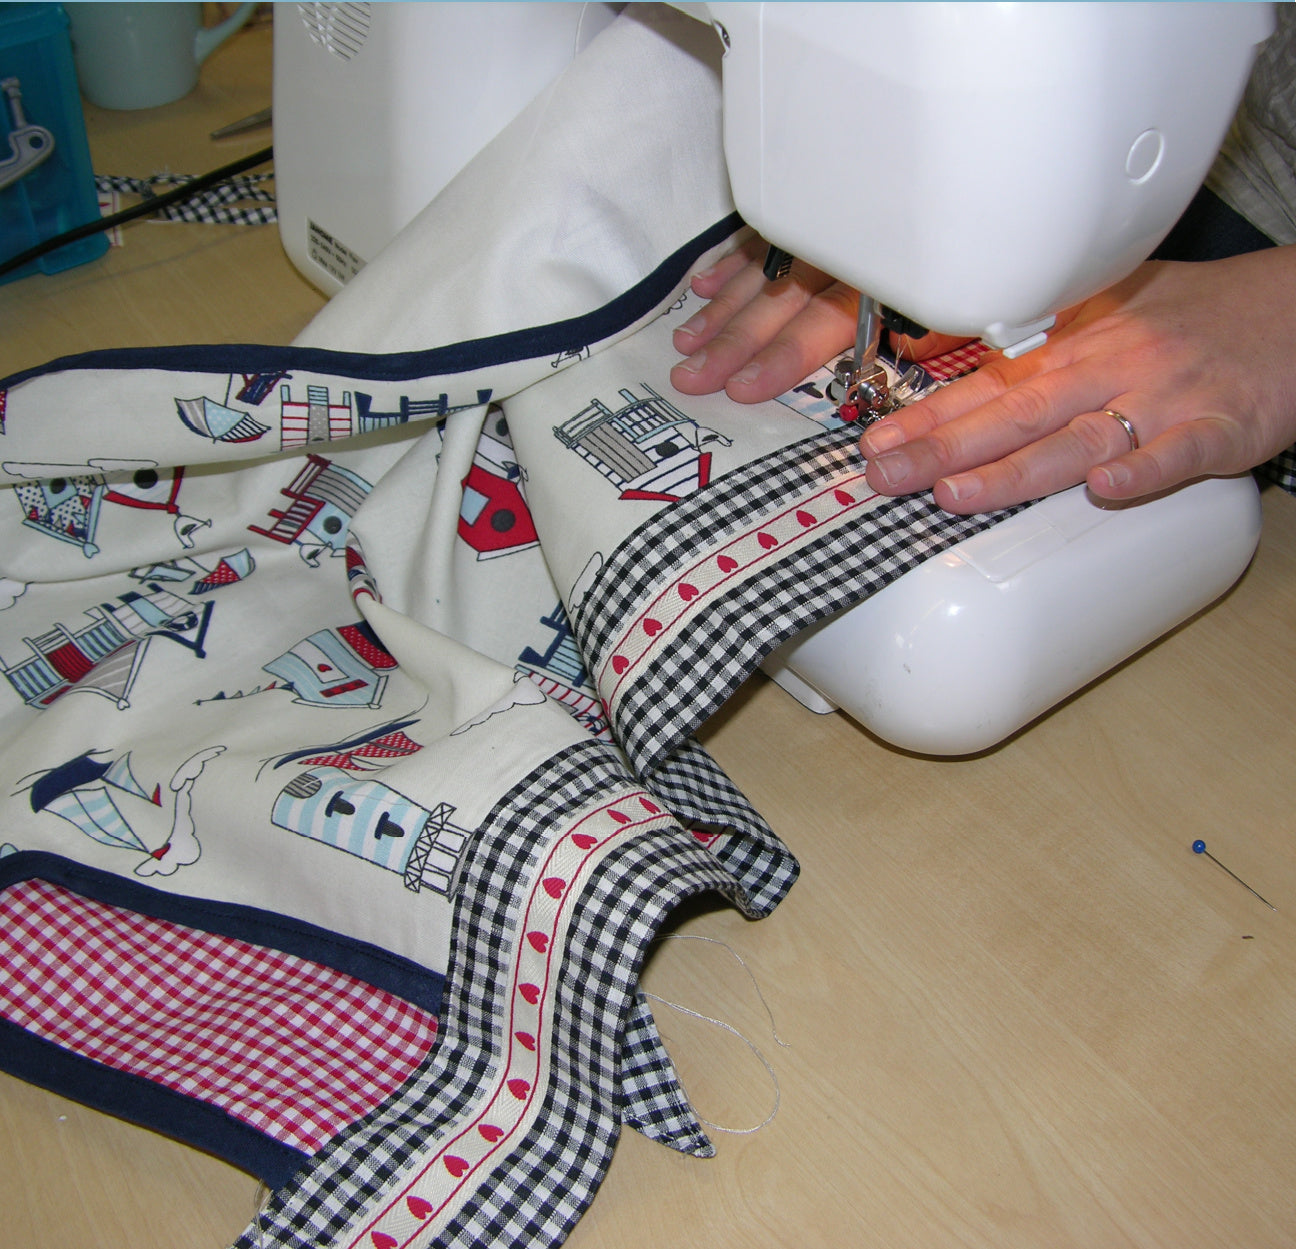
Final Assembly

Attach the lower apron to the waistband, starting from the back so the stitching remains clean on the outside. Fold, pin, and stitch all the way around using a consistent seam allowance.

Use a triple stitch for durability and a decorative finish. Be careful around corners and thicker areas.

Finishing Touches

Check tie length and adjust as needed. Attach Velcro for closure if used. Add any decorative elements such as a rosette or button for detail.

And with that, your bib apron is complete. It’s a more advanced project, but the result is a beautifully finished, professional-looking apron.

Quick Emergency Apron

Transcript for the video: Half Apron Vlog - Chef's Apron

Okay, this has been sprung on me, we suddenly have to make aprons because they need to go out tomorrow. So we are doing the fastest possible version.

If you want a simple apron pattern, you can get one anywhere, or even draw one yourself. You don’t need to overcomplicate it.

Attaching the Top Section

Take your apron piece and attach the top section. Right sides together, sew straight across. I’m not being overly precise here because we are working fast, but try to keep it even.

Once sewn, you can press it open or just finger press it flat. I tend not to pull it down too much because that creates bulk. Instead, I fold it neatly over and keep the edge firm.

Turning and Finishing Edges

Now turn the lower edge in. Don’t sew too close to the edge or it can look a bit homemade. A slightly wider stitch line always looks cleaner.

At this point, everything should already start looking like an apron.

Pocket Construction Trick

Next is the pocket. I turn the edges in first and sew as I go. You cannot really fold and sew at the same time cleanly, so we use a simple trick:

Fold a small section, stitch it down, then continue folding and stitching as you go around the curve. This gives a smooth finish without needing complicated preparation.

Once done, the pocket is secure and looks neat.

Attaching the Pocket

Now place the pocket where you want it. I often mark or snip small notches in the pattern so positioning is easier.

Pin it in place, making sure it sits straight. Then sew close to the edge. You will see a clean line forming around the pocket, almost like a topstitched frame.

You can also stitch around again for extra security so it looks fully locked in.

Decorative Details

For a bit of decoration, you can add trim like rick rack along the top of the pocket. A zigzag stitch holds it in place. You can use contrast colors or keep it simple depending on your style.

Bias Binding Finish

Now we attach the bias binding around the apron edge. The key is to keep slight tension as you sew so it doesn’t ripple or go wavy.

Start at one end, sew steadily, and continue all the way around. When you reach curves, guide the fabric gently but don’t force it.

If something feels awkward, adjust your direction rather than pulling the binding too much. There is always more than one way to complete the edge, so choose what feels stable.

Final Result

Once the binding is on, everything is neatly enclosed and finished. You can add bows, buttons, or decorative trims if you like.

The beauty of this method is that stitching the outside first gives a very clean internal finish. Depending on your fabric and colors, you can create completely different looks from the same base pattern.

And that’s it, a quick apron made for urgent production. Perfect for markets or batch making when time is short.

DAS KÖNNTE DIR AUCH GEFALLEN

Dungies

SHOP NOW

Bobby Dazzler

SHOP NOW

Bubble Gum

SHOP NOW

Lollipop

SHOP NOW

Jelly Bean

SHOP NOW