LONDON HANDTASCHE
LONDON HANDTASCHE
Verfügbarkeit für Abholungen konnte nicht geladen werden
Das London Taschen Schnittmuster begeistert mit sauberem Futter, Taschenfüßchen, zurückgesetztem Reißverschluss, einem separaten Taschen‑Organizer und süßen kurzen Henkeln.
London ist die perfekte Handtasche für jeden Tag – und das Beste: Das PDF‑Schnittmuster kommt mit einem Video‑Tutorial, das sie wunderbar anfängerfreundlich macht und richtig Spaß beim Nähen bringt.
Was ist beim Schnittmuster dabei?
- Sofort-Download
- Digitales PDF Schnittmuster
- DIN A4 Format
- eBook
- Schritt für Schritt Video-Anleitungen
Design
Design
• Innen- und Außentaschen
• Versenkter Reißverschluss
• Komplett gefüttert, anfängerfreundlich
Stoffverbrauch
Stoffverbrauch
STOFFEMPFEHLUNGEN
Die Box Bag kannst du aus Wachstuch oder schweren Leinen/Baumwoll-Mischungen nähen.
Schau am besten in Polsterstoff-Läden vorbei - dort findest du eine tolle Auswahl!
STOFFVERBRAUCH
- Außenstoff: 80 cm (Dekostoff oder Wachstuch)
- Futter: 50 cm
NOTIONS
- Reißverschluss: 33 cm (versenkt),
- Reißverschluss: 28 cm (Paspeltasche)
- Gurtband 4 cm breit: 1,4 m stabiles Gurtband
Verfügbare Größen
Verfügbare Größen
DIMENSIONEN
Breite: 10 cm
Höhe: 25 cm
Länge: 35 cm
Bitte beachten
Bitte beachten
- Dies ist ein digitales Schnittmuster oder eine PDF-Datei, kein physisches Produkt. Die Zustellung erfolgt elektronisch über einen Download-Link an die beim Kauf verwendete E-Mail-Adresse. Zusätzlich kann das Schnittmuster von deinem Kundenkonto heruntergeladen werden.
- Um sicherzustellen, dass das Schnittmuster in seiner tatsächlichen Größe gedruckt wird, wird die Verwendung von Adobe Acrobat Reader empfohlen.
- Kleine Betriebe: Ich freue mich wenn meine Schnittmuster dir helfen, tolle Bekleidung für deine Kunden zu nähen. Industrielle Produktion ist untersagt.
Kunden werden ermutigt, Frocks & Frolics zu verlinken, wenn sie Projekte, die mit meinen Schnittmustern erstellt wurden, in sozialen Medien teilen.
@frocksandfrolics
#frocksandfrolics
Teilen

SCHRITT-FÜR-SCHRITT ANLEITUNG
VIDEO TEXT
Introduction to London Bag
Transcript for the video: London Bag - Introduction to the Project
Hello everyone and welcome to the Out-and-About Bag. This is a quick introduction so you know exactly what this pattern is about before you start sewing.
This bag is shown in a classic version made from the same fabric throughout. It includes a simple front pocket and a rim pattern piece. The design is quite clever: the zip is inserted into this rim section, then sewn together on both sides and slotted into place. This creates a very neat, enclosed finish—secure and structured, and difficult for anything to slip into.
There will also be an extra tutorial on the website showing how to make a small zip tab, which adds a more professional finish and makes the zip easier to use.
Bag Structure Overview
The pattern consists of two main side pieces. The side panel wraps continuously from the base up to the top of the bag, forming the full outer structure.
To create the front pocket, there is an additional pocket piece that attaches to the front panel. This pocket is slightly larger than the base section, which is achieved through a simple construction trick: the pocket is attached in a way that naturally creates depth and space. It is ideal for small items like tissues or everyday essentials.
Lining Construction
The lining pattern is intentionally simplified. Instead of duplicating the full outer structure, the lining uses a quicker construction method where the corners are folded to form a boxed shape that sits neatly inside the bag.
This saves time and avoids repeating complex shaping twice. It is fast, efficient, and beginner-friendly.
In some versions, an interfacing layer is added between fabrics, especially if the outer material is thin or slightly transparent. This prevents darker fabrics from showing through and helps create a cleaner interior finish.
Base Reinforcement
The bag base uses a flexible insert made from plastic cutting board material, which can be purchased from a supermarket. This sits at the bottom of the bag to provide structure and prevent sagging.
For added stability, you can also install purse feet. However, if you prefer not to use purse feet, the bag includes an alternative base cover made from lining fabric. This cover holds the base neatly in place and creates a clean interior finish.
Handles and Strap Options
The bag can be finished with different handle styles. Options include slim handles or wider straps, depending on preference and usage.
Wider straps are easier to wipe clean and maintain, while webbing straps are practical and durable. Both options are included in the pattern so you can choose based on your needs and style preference.
External Pocket Upgrade
An external welt-style pocket is also included in the design. This allows quick access to items from the outside of the bag.
You can line this pocket with matching fabric or a contrasting material depending on the look you want. This version has been improved for easier construction compared to earlier bag designs, making it more beginner-friendly.
Design Variations
The pattern includes multiple themed variations:
- A classic version with clean fabric panels
- A beach-themed version with a wider decorative strip
- A campervan-themed version with a slimmer strip design
These variations allow you to customise the look of the bag using different fabrics, colour combinations, or strip widths. You can also keep everything uniform in one fabric for a simpler finish.
Skill Level and Notes
This project is suitable for beginners with a few months of sewing experience. It is designed to be approachable while still producing a structured, professional-looking bag.
Compared to earlier box bag designs, this version is slightly easier in key construction areas, especially around the zip insertion and pocket assembly.
Closing
That’s your overview of the Out-and-About Bag. All detailed construction steps and individual videos are available on the project page through the website link below the video.
Have fun sewing, and I’ll see you in the next tutorial.
Pattern System
Transcript for the video: London Bag - The Pattern
I want to introduce you to my pattern system. It’s a little different from what other people do, so I’ll walk you through how it works so you can follow everything easily.
Scale Reference
First, you’ll notice a scaler on the pattern. You can print this off, and it should measure 5 cm in length to confirm your print is accurate.
Symbols and Markings
I use several visual guides throughout my patterns to make construction clearer:
- Flower symbols are used to identify front, back, or lining pieces. In this case, I’ve only used the flower for the lining to ensure you don’t accidentally cut it from laminated fabric.
- Balance marks show you exactly where pattern pieces need to align.
- Dashed lines indicate overlap areas where you will tape pieces together.
Each piece is also labeled (A, B, C, D), making assembly more straightforward.
Assembling the Pattern
Let’s look at the front piece as an example. You align the pattern sections, ensure the dashed overlap lines meet correctly, and match the balance marks. Once aligned, tape everything together to form one complete pattern piece.
Colour-Coded Themes
Once you reach the next section, you’ll see themed variations of the bag begin:
- The beach hat version is outlined in turquoise so you can easily identify it.
- The campervan version is shown in dark blue.
This colour-coding system helps prevent cutting or assembling the wrong version of the pattern.
Each theme has its own front piece and handle style, so make sure you follow the correct colour set for your chosen design.
Fabric Requirements
For the full bag:
- Outer fabric: 70 cm (32 inches)
- Width required: 1.3 metres (50 inches)
- Lining: 40 cm
Always check your layout before cutting to ensure efficient fabric use.
Cutting Tips
When cutting the side panel (the section that runs along the front), always cut from the left-hand side for better control.
Instead of moving the fabric repeatedly, rotate the fabric itself so you always cut from a consistent angle. This helps prevent shifting and ensures accuracy.
You can also use clips instead of pins if that makes handling easier.
Be careful with the pocket piece—only cut it once unless you have extra fabric remaining.
Extra Notes and Resources
If you have leftover fabric, you may be able to create an additional small item, such as a wallet.
There are also written instructions available that guide you step-by-step through the entire construction process for those who prefer text-based learning.
Closing
If you’d like to continue learning how this bag is made, just click on one of the links provided. Thank you for watching, and enjoy making your project.
Transcript for the video: London Bag All-in-One Tutorial
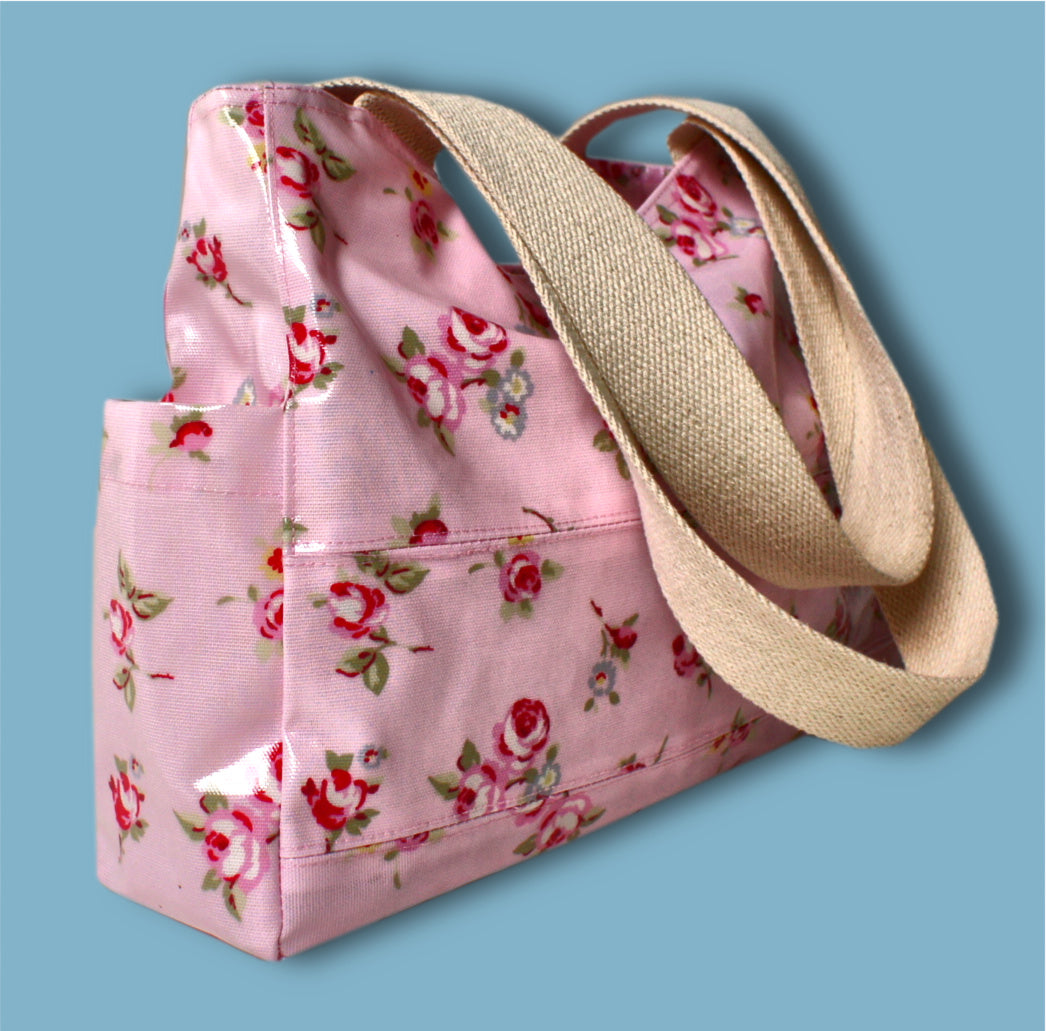
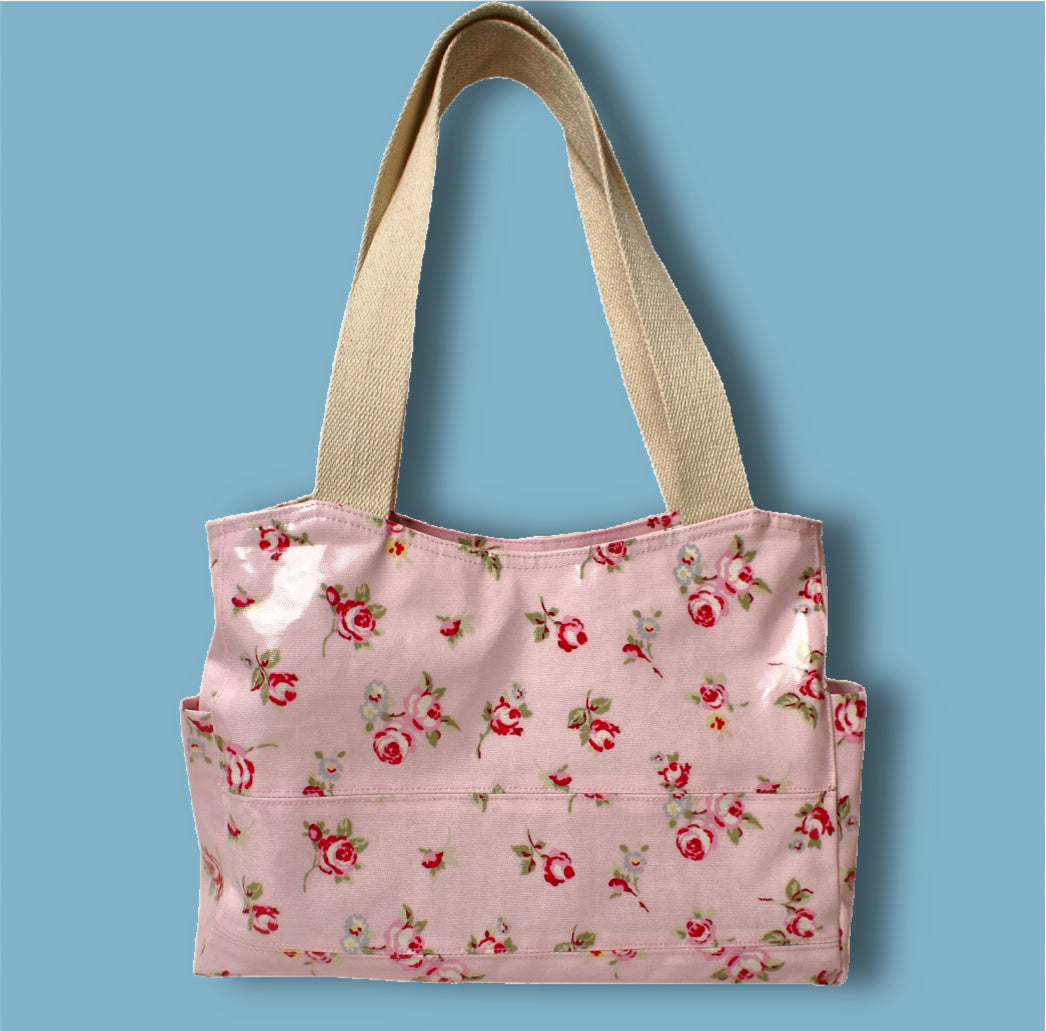
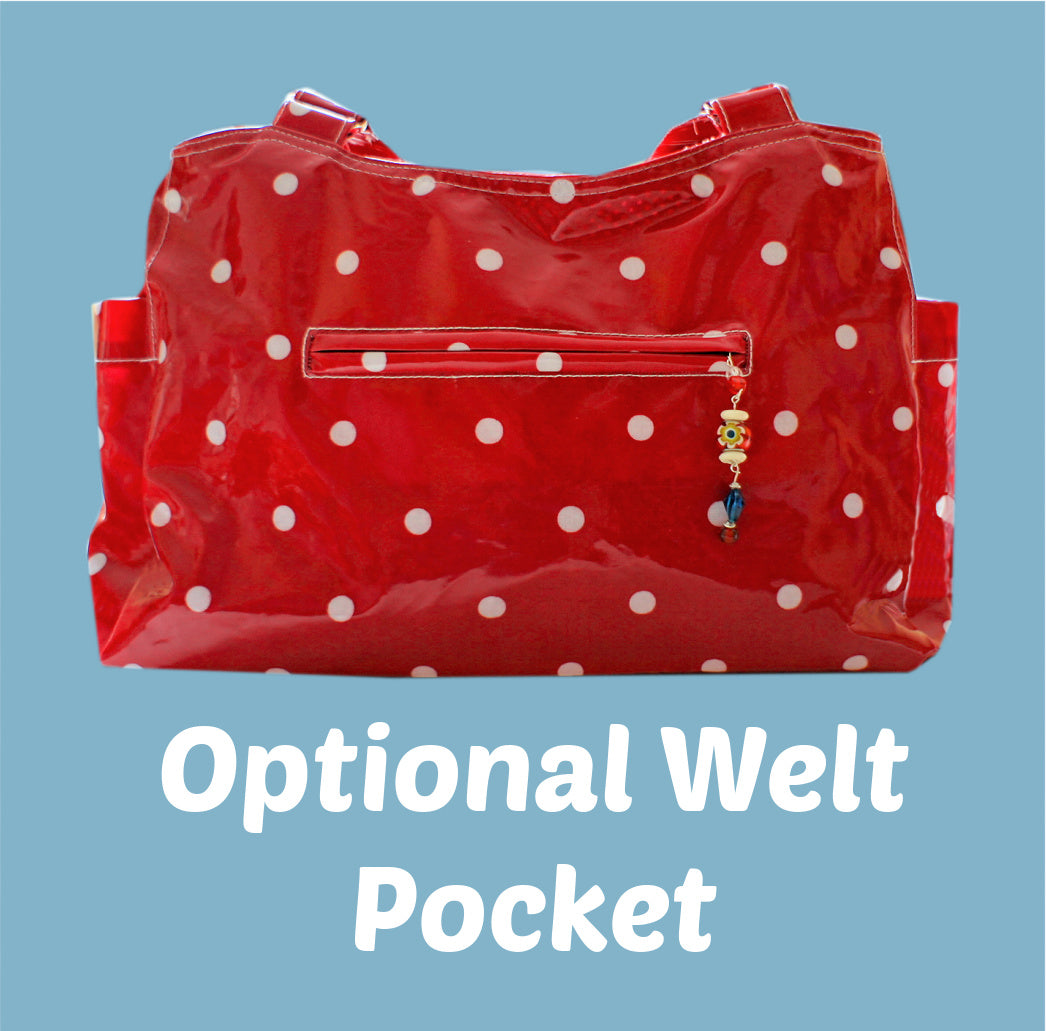
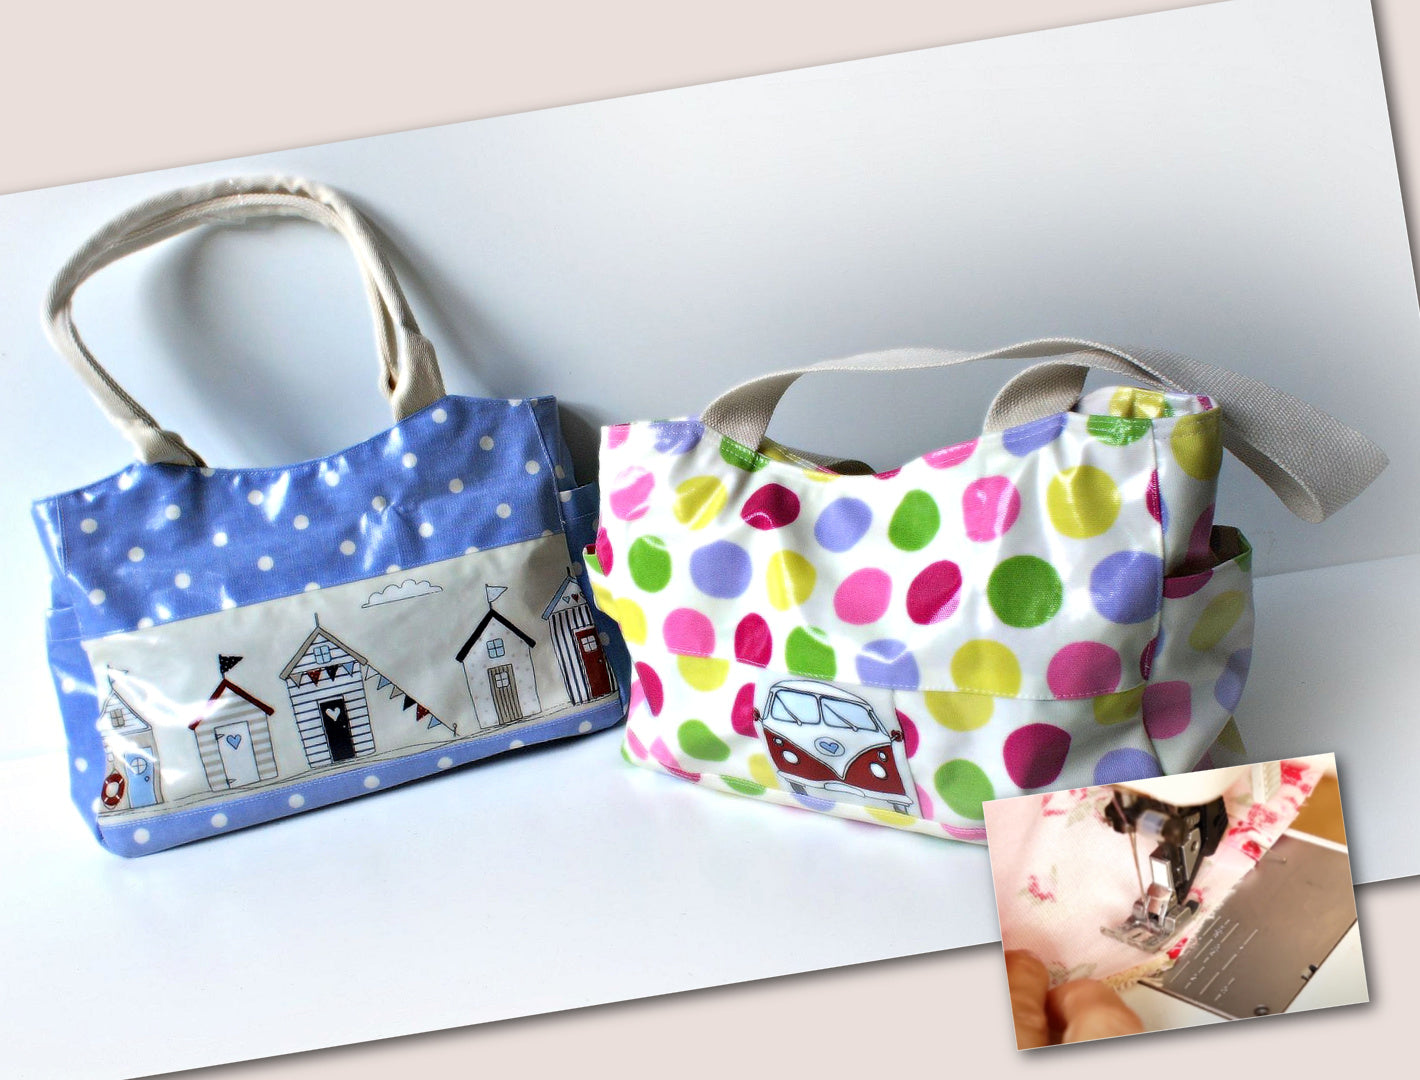
How to sew the Out-and-About Bag. It’s called this because it has a lot of room for you to stash all your shopping in. The bag has a recessed zipper, side pockets, and you can also make this fantastic bag with a lovely front pocket. It’s a welt pocket and I’ll show you exactly how that works too.
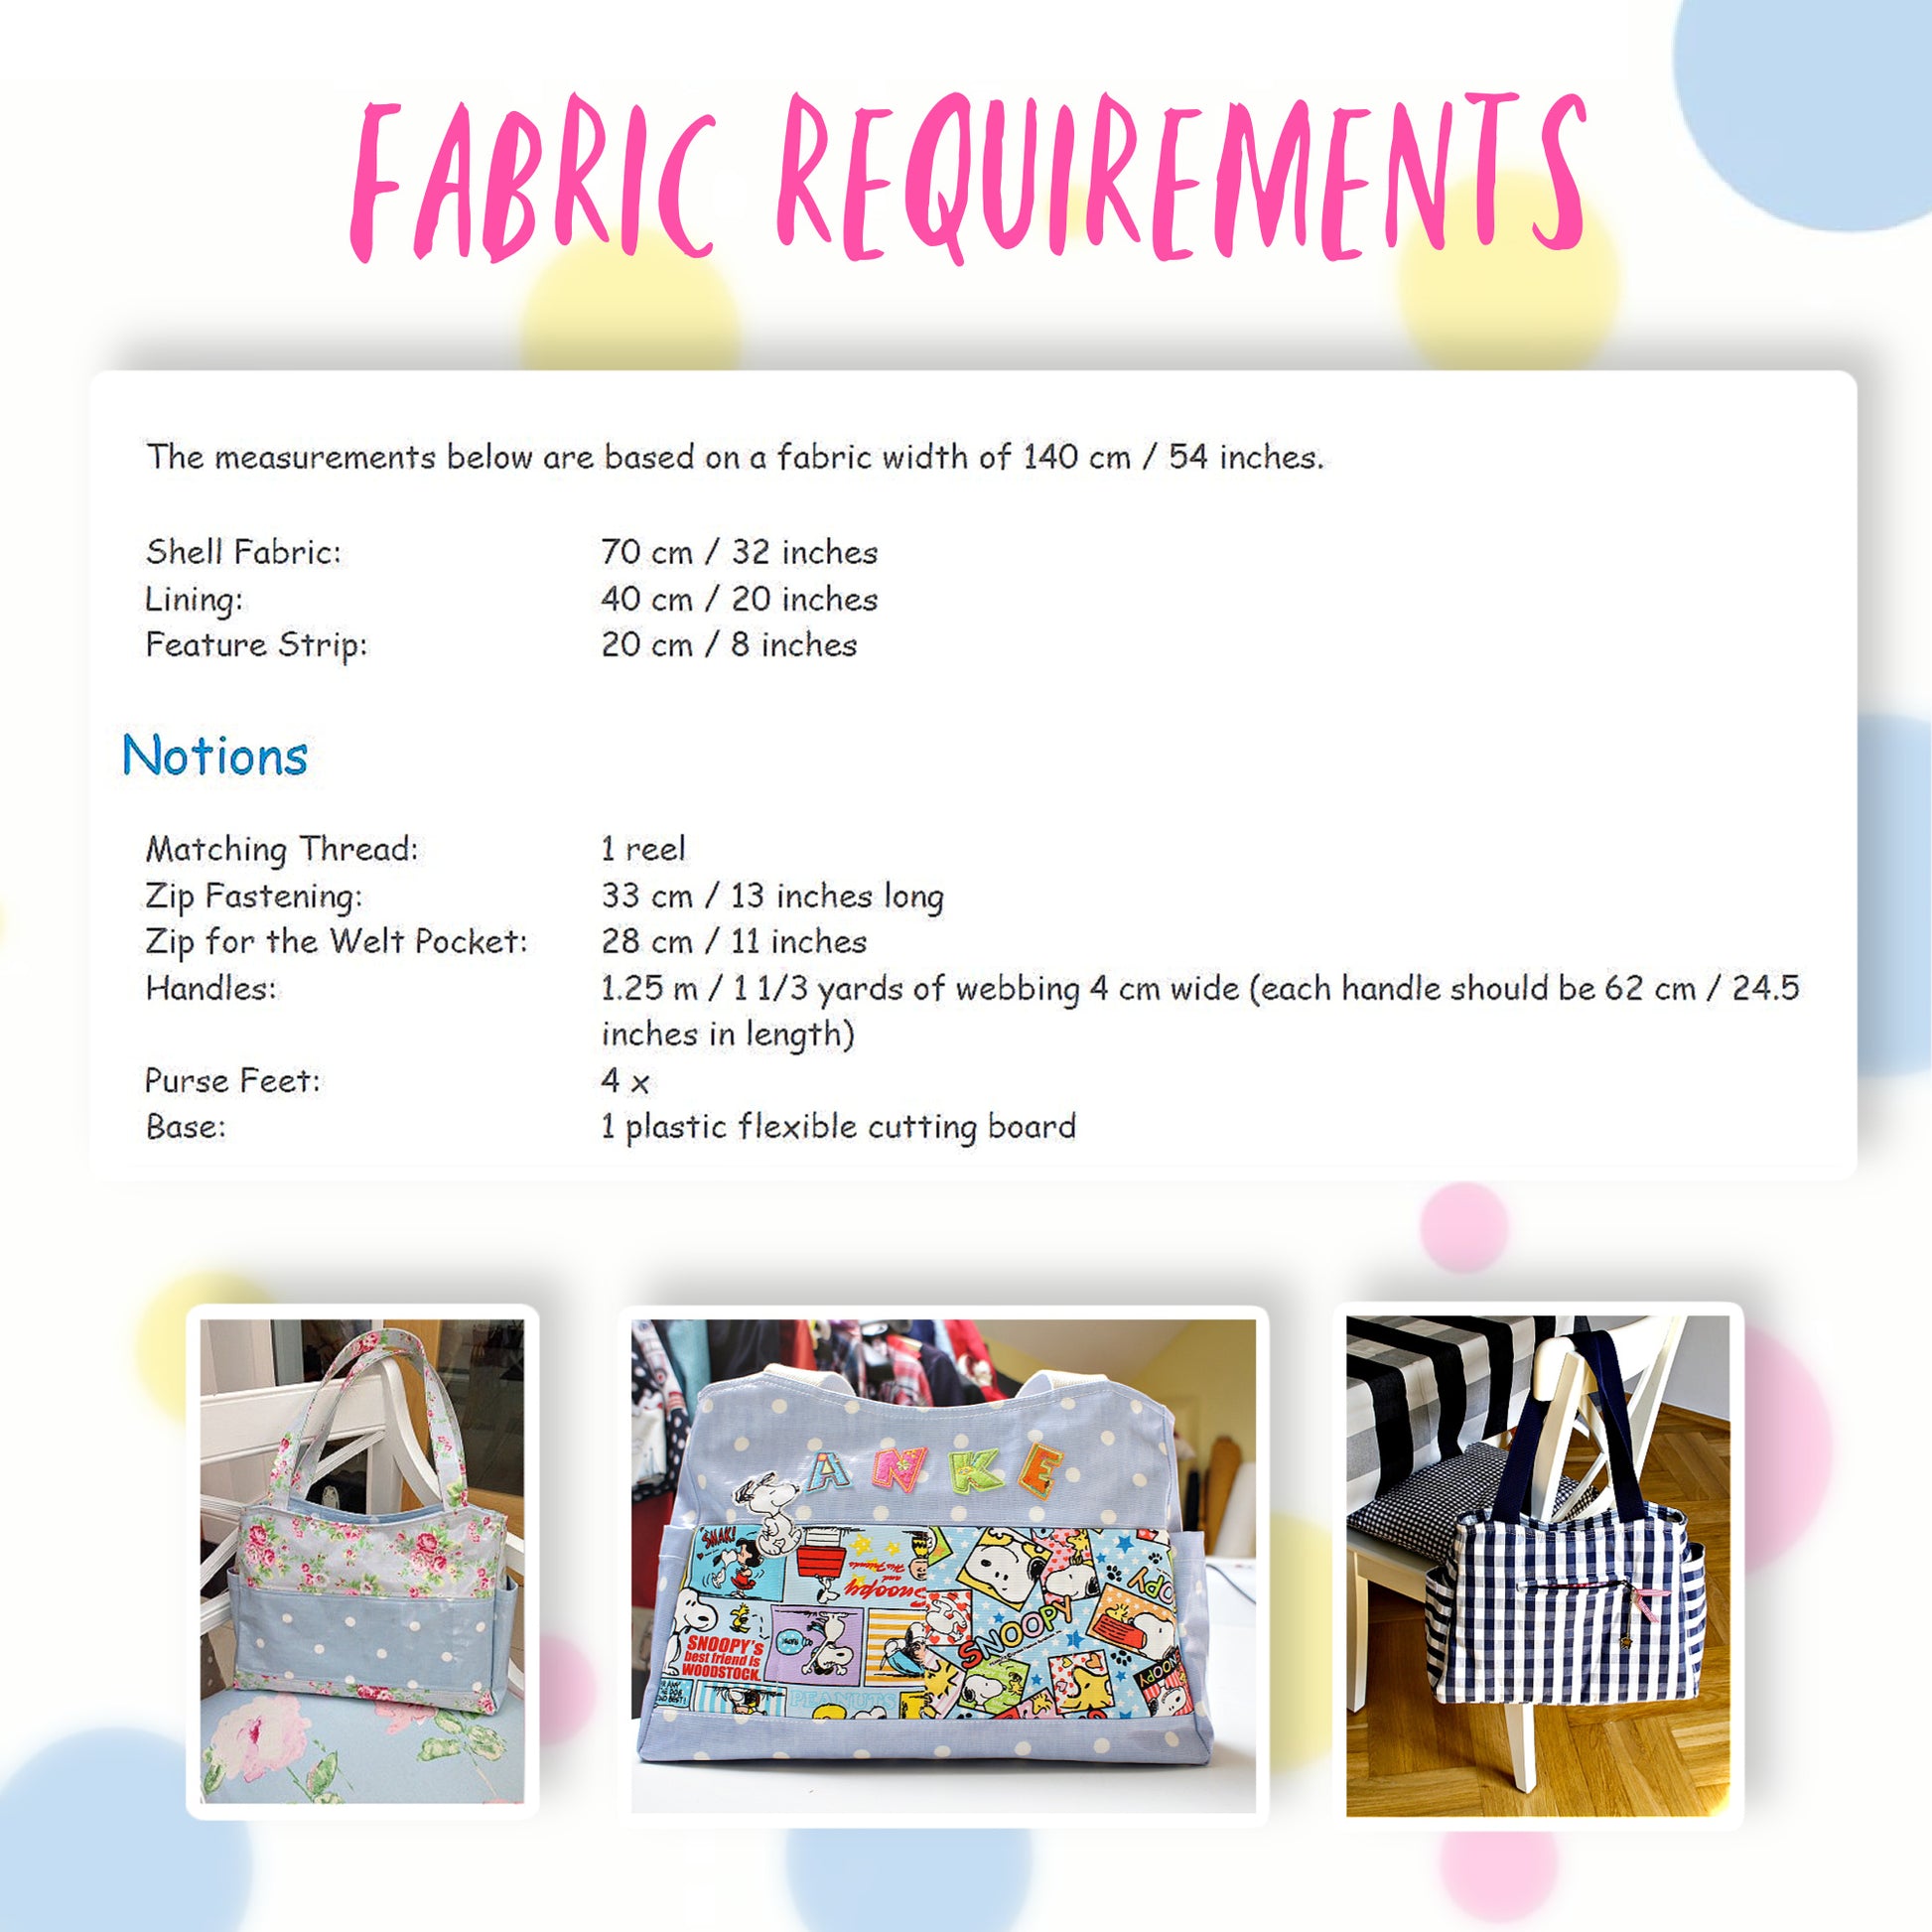
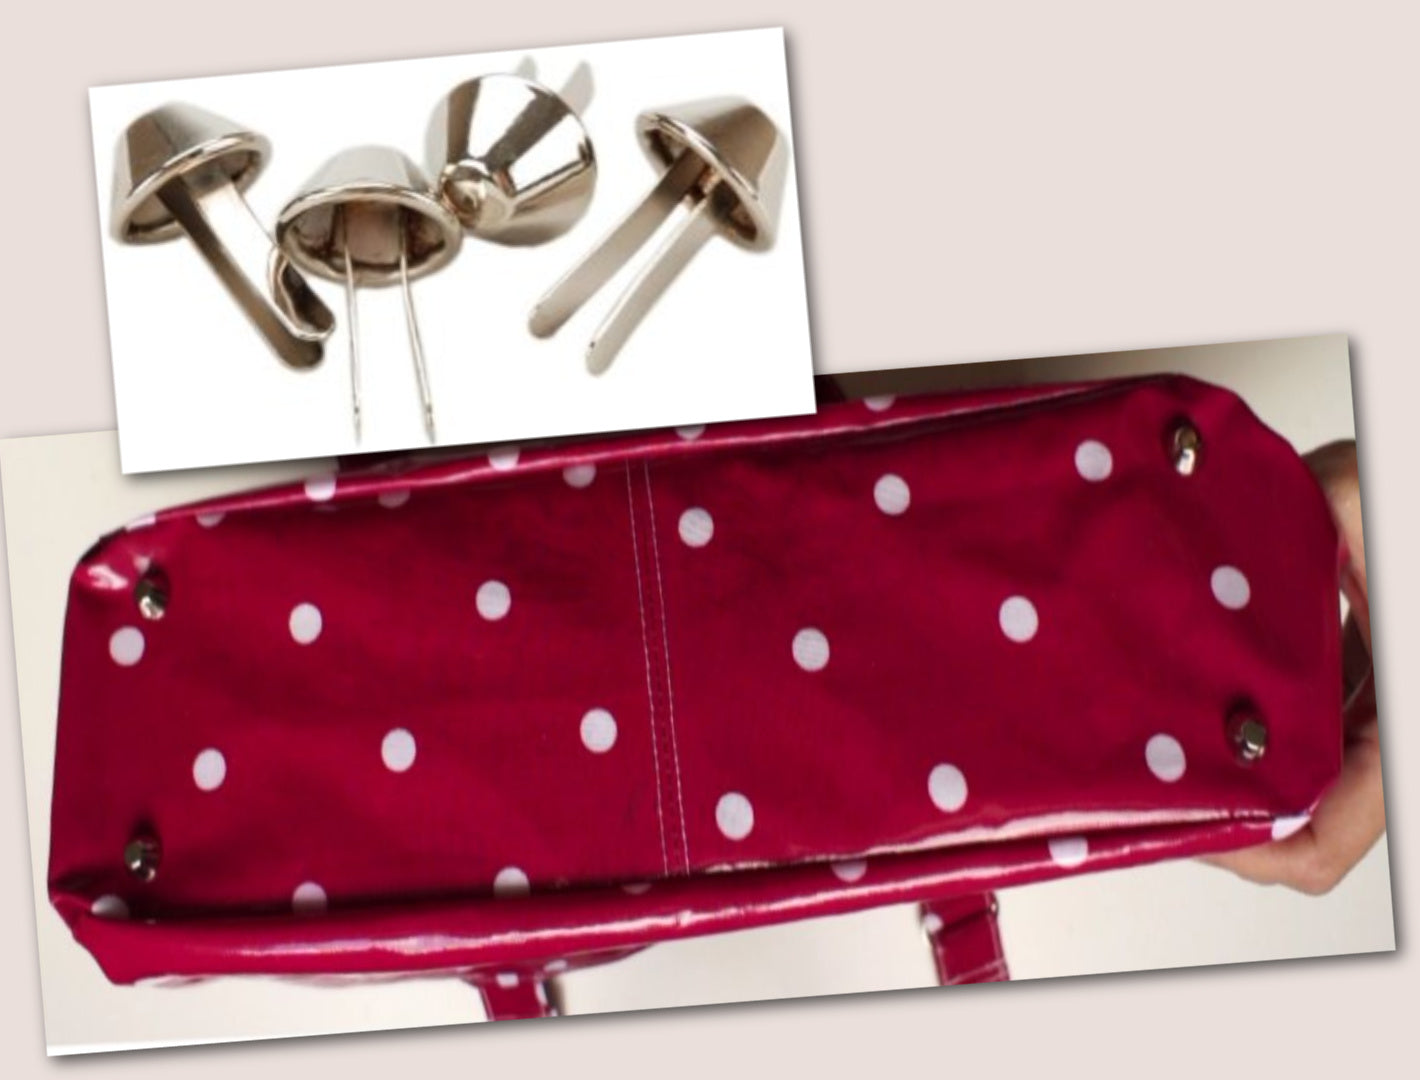
You need: 20 inches of 50-inch wide lining, a 13-inch set for purse feet, matching thread, thick webbing 55 inches long, laminated cotton or linen 32 inches, again the fabric needs to be 50 inches wide, and a plastic base for the bottom of the bag. You need 24.5 inches for the handle, so you cut two of those.
When you’ve got everything together, you’ve got four little bundles: the facing for the rim, the side panels, the lining, and the front. You’re ready to work.
Preparing the Side Seam and Lining
The first thing we want to do is close the side seam with a 1 centimeter seam allowance. Line up the fabric with the markings on your needle plate. Then iron those seams apart.
I’m now going to stick my interlining inside the lining. If you’re using dark fabric you don’t need interlining, but if you do, at this point put those two together and sew them across the top so they can’t move. It just makes working with it a lot easier.
Closing the Base
Next we close the base, but we need to leave a turning gap. We’re not actually turning anything, but we will put our base through it later, so it needs to be wide enough for the plastic base.
Go backwards and forwards as you approach the gap area, then continue on the other side. Again, we have a 1 centimeter seam allowance.
Now open out the sides like a little mouth and pin that. Then sew across, and that gives you a nice shape for the bottom of the bag.
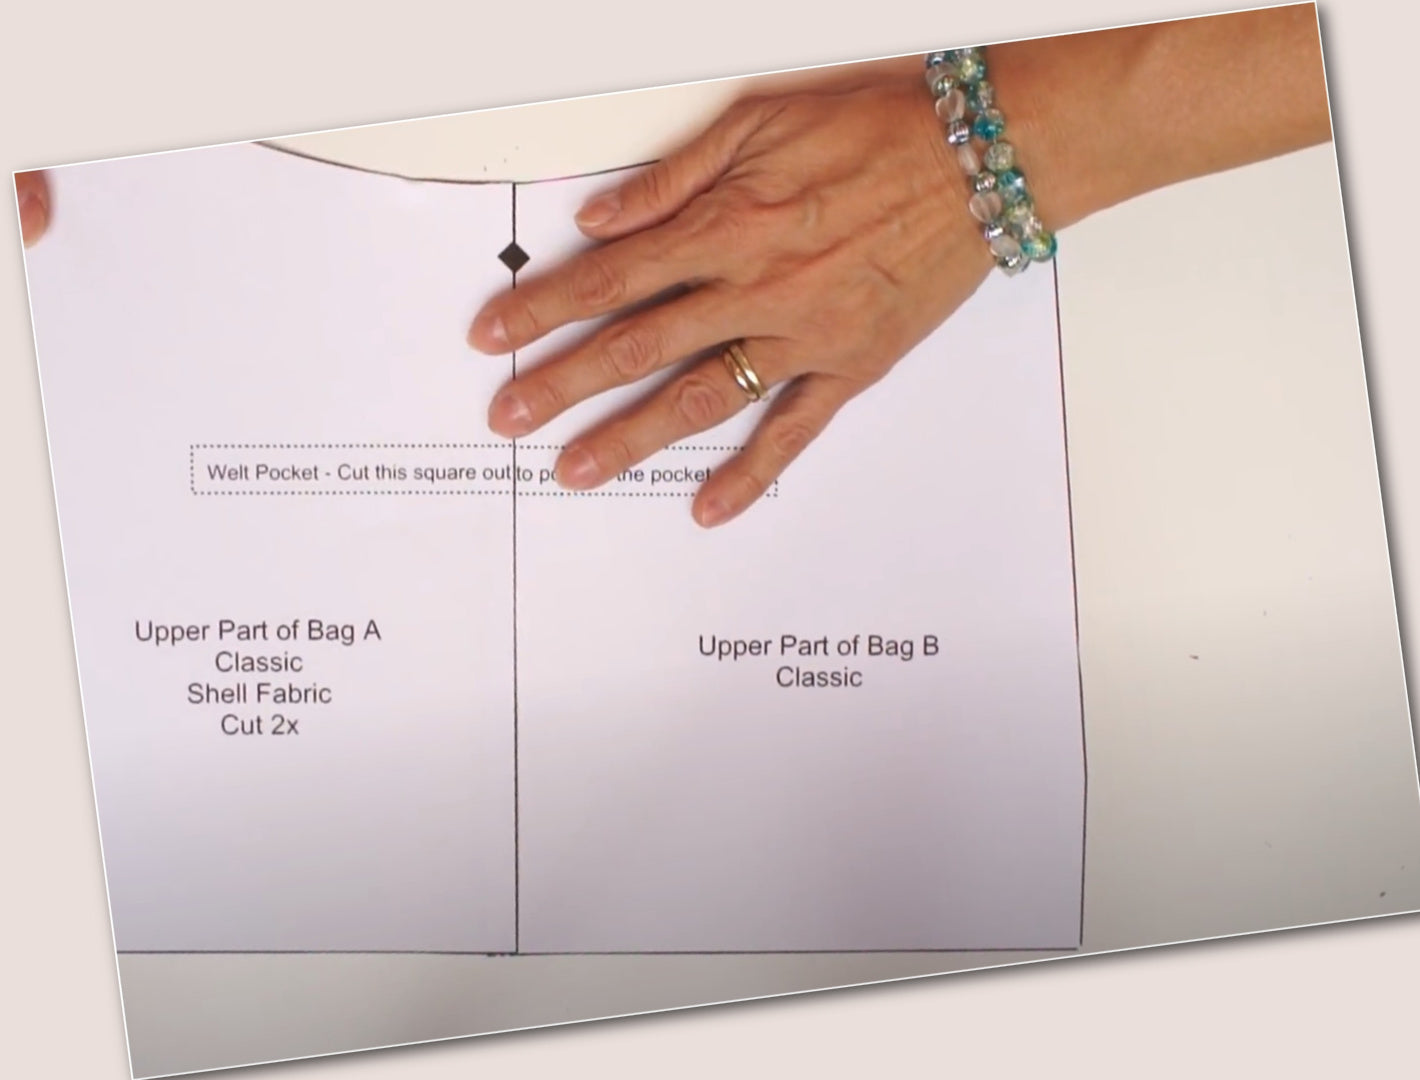
Making the Pockets
Next we prepare pockets. You need two pieces. Fold over 1 centimeter, then another 2.5 centimeters. If you’re working in inches, that’s 1 inch total. Pin it, then sew across.
Find a fixed point on your presser foot. On my machine it’s where the plastic becomes clear and the metal starts, but every machine is different, so find your own reference point.
Base Seam and Top Stitching
Sew the base seam together again with a 1 centimeter seam allowance. If you didn’t have enough fabric like me, I added a seam, so I need to close that.
On the pockets, top stitch either side of the seam using a long stitch—size 3 or 3.5. It does not look good with a small stitch, especially with laminated fabrics, and it won’t feed properly.
Attaching the Pocket to the Side Panel
Now place the pocket on top of the side panel. The pocket is slightly wider, so you’ll have extra ease built in.
Line it up at the top point, then continue down the other side. It should sit straight and smooth. This gives you a really lovely pocket.
Constructing the Front Panels
Next we put together the front. If you had a feature strip, it would be inserted here, but I’m keeping mine in one fabric because I like top stitching.
Pin all three layers together on both front pieces, then sew with a 1 centimeter seam allowance.
Now top stitch from the outside. This is important—you can’t skip it with laminated fabrics.
To make it easier, open the seams with your fingers, then lightly run scissors along to flatten them. Top stitch about 2–3 millimeters from the seam line.
Attaching Front to Side Panels
Now mark the center of the front panel and align it with the side panel. Mark where you will sew because the side panel needs to curve around.
You only sew up to the 1 centimeter seam allowance mark. Reduce your stitch length for control. Sew across, but note the fabric will need to be folded at a 45-degree angle and clipped into the seam line to allow it to turn.
If using fabric instead of laminated material, interface the corners first.
Sewing the Bag Shape
Close the side seam securely. Work with the fabric on the left side of your machine for control. Sew, backstitch, and secure well.
Instead of sewing everything first, we work step by step because laminated fabric is difficult to handle.
Move the seam allowance forward and top stitch the side. Repeat on the other side.
Base and Lining
Now attach the base to the side panel with a 1 centimeter seam allowance. The plastic base will be inserted later.
Add the lining with the right sides facing in. Stitch around the top to hold it in place. Keep your stitching close to the edge so it won’t show later.
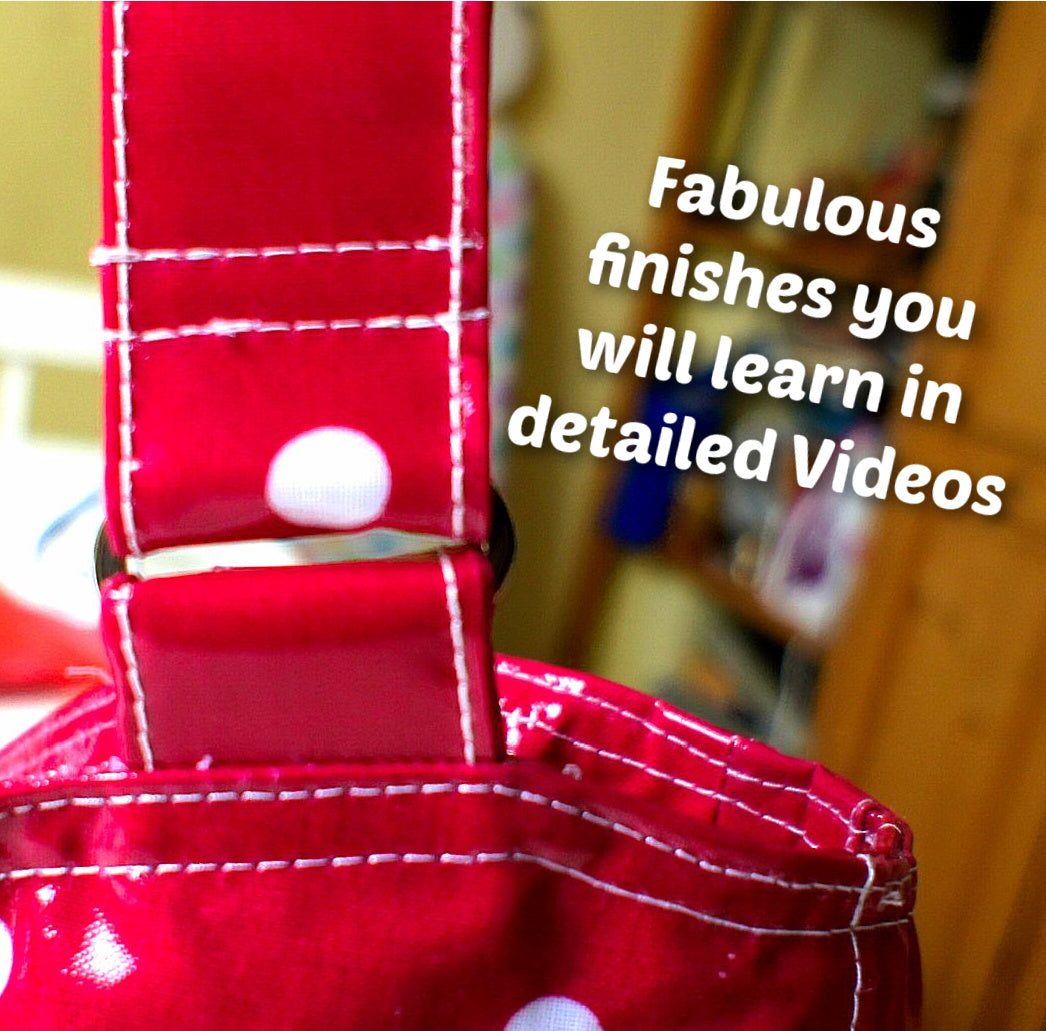
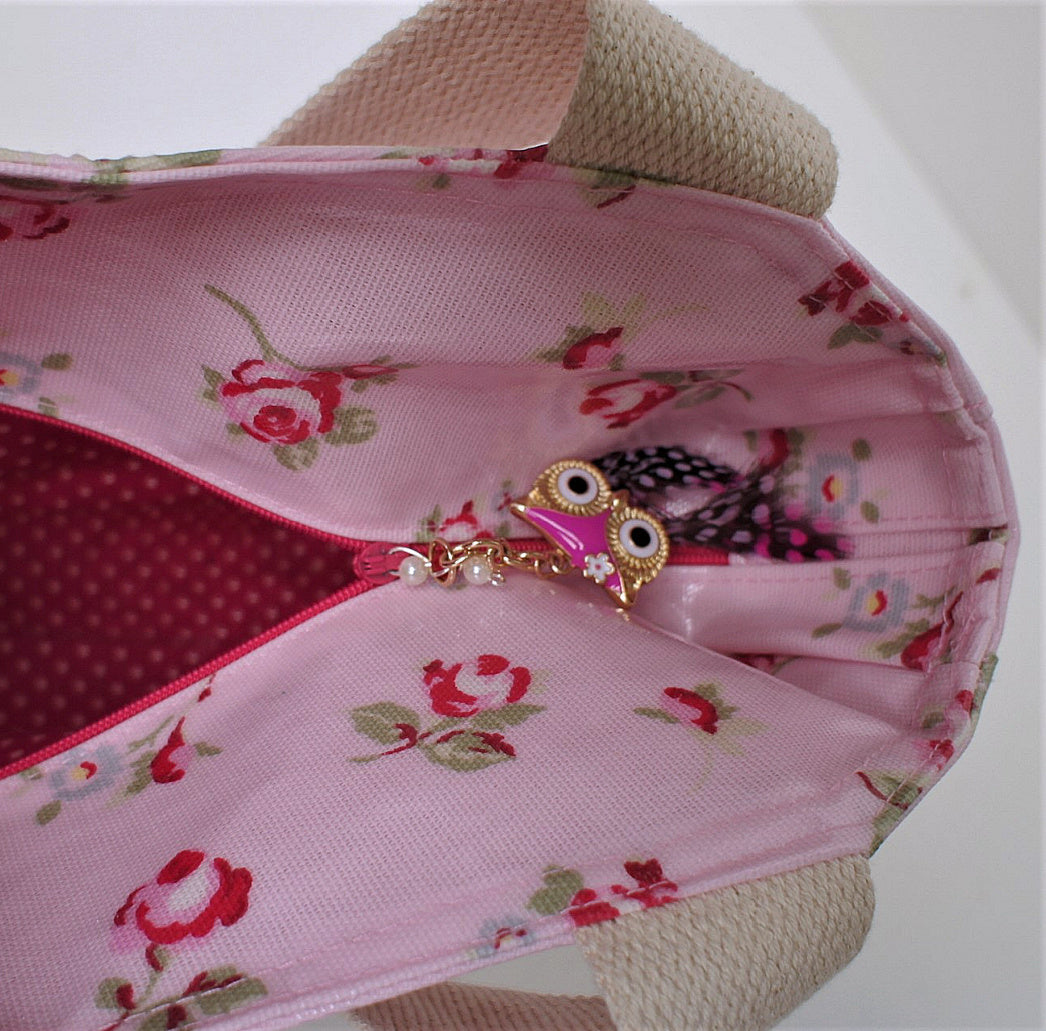
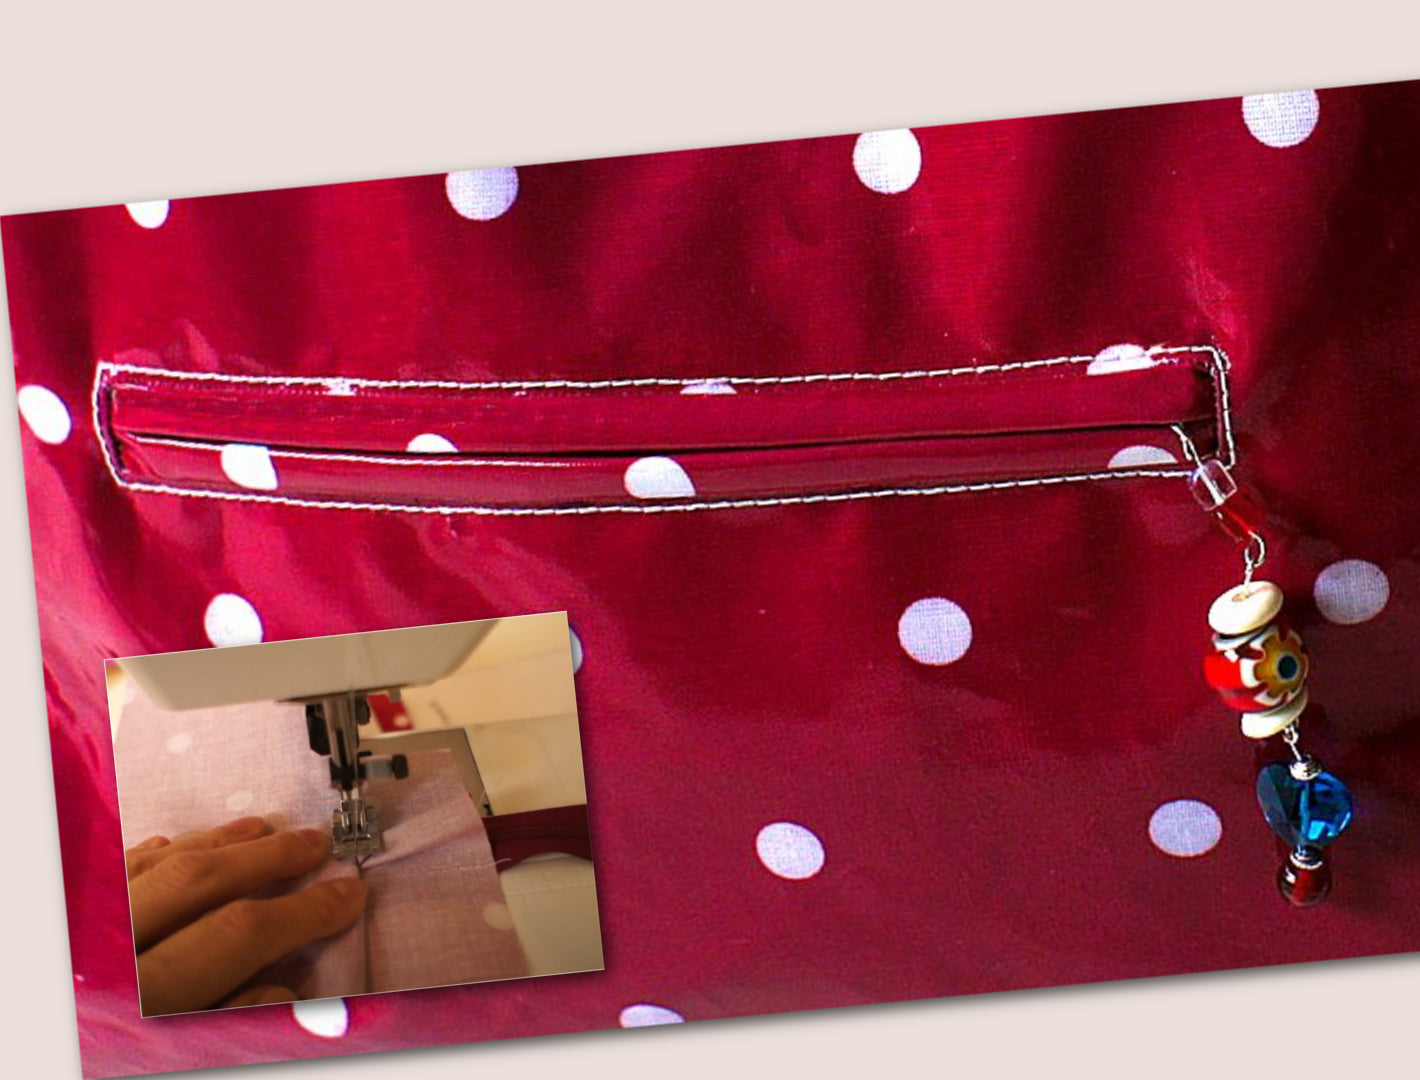
Installing the Zipper
Add the zipper tabs first by folding them over and pinning in place. Make sure the zipper is open before sewing—very important.
Sew with a 1 centimeter seam allowance, trim excess zipper ends, and top stitch. Use your zipper foot or move your needle left so the presser foot runs along the zipper teeth.
Then fold and top stitch about 1 millimeter from the teeth for a clean finish.
Attaching Facing and Final Assembly
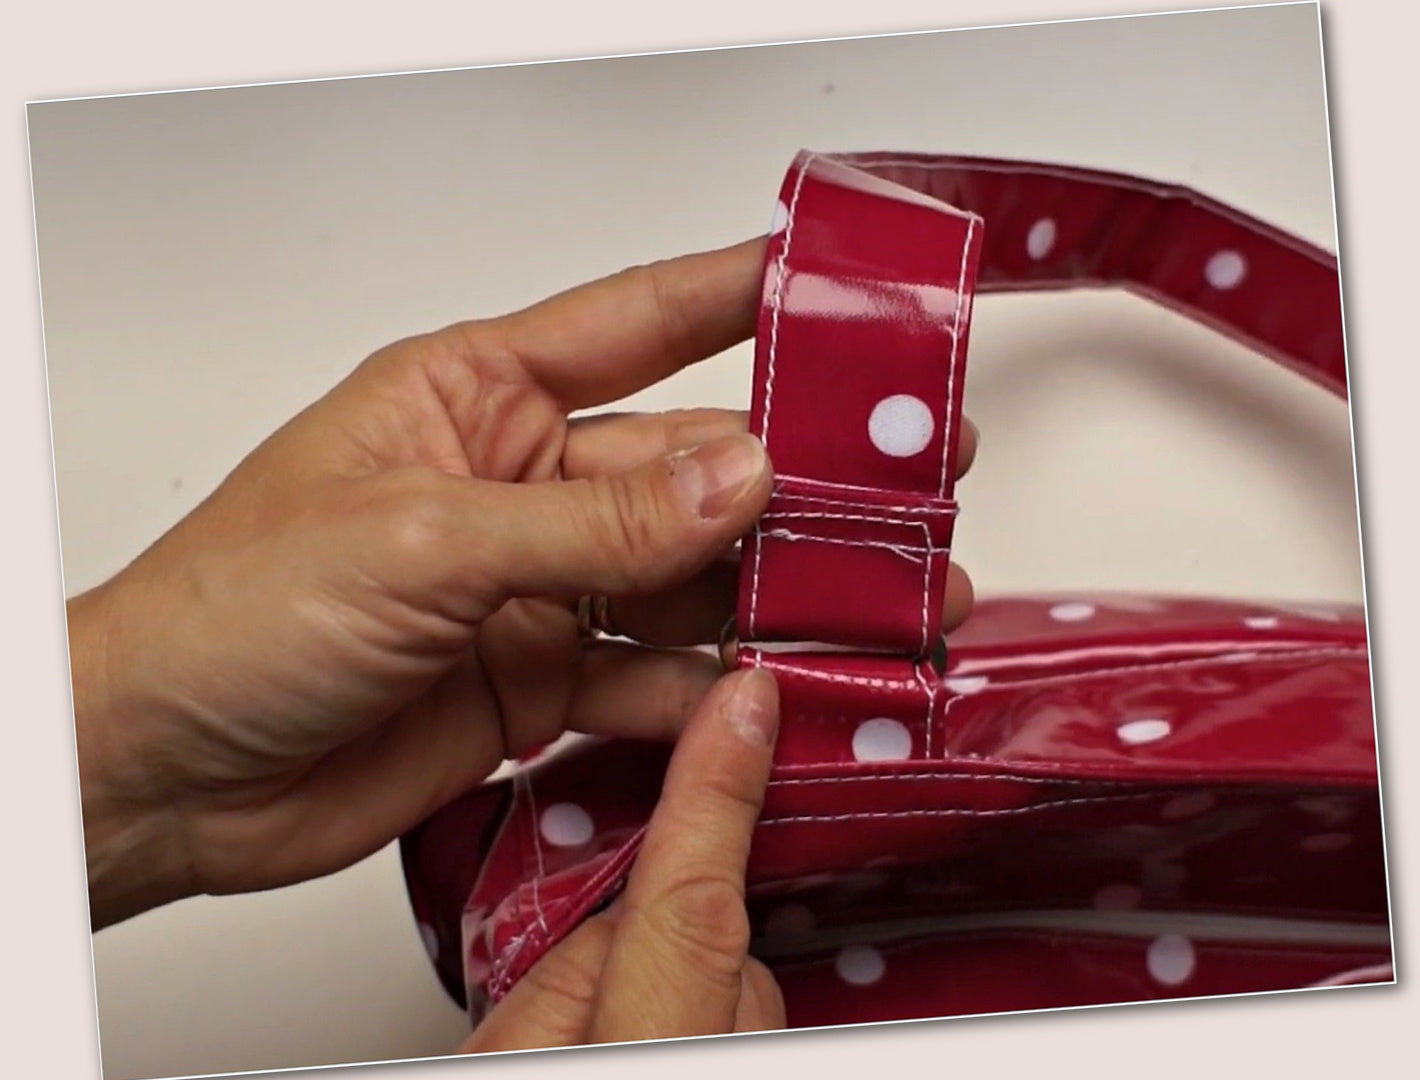
Turn the bag so the lining is outside. Attach the facing inside and pin carefully around the edges, aligning seams and handle points.
Work from the inside of the bag—it makes it much easier because the structure is like a bowl shape.
Sew all the way around carefully, then snip curves before turning.
Top Stitching the Finished Bag
Top stitch through all layers. Increase tension to 8 or 9. Start on the side seam, not the center. Sew about 3 millimeters from the edge.
Then add a second line of top stitching using the presser foot edge as a guide for a professional finish.
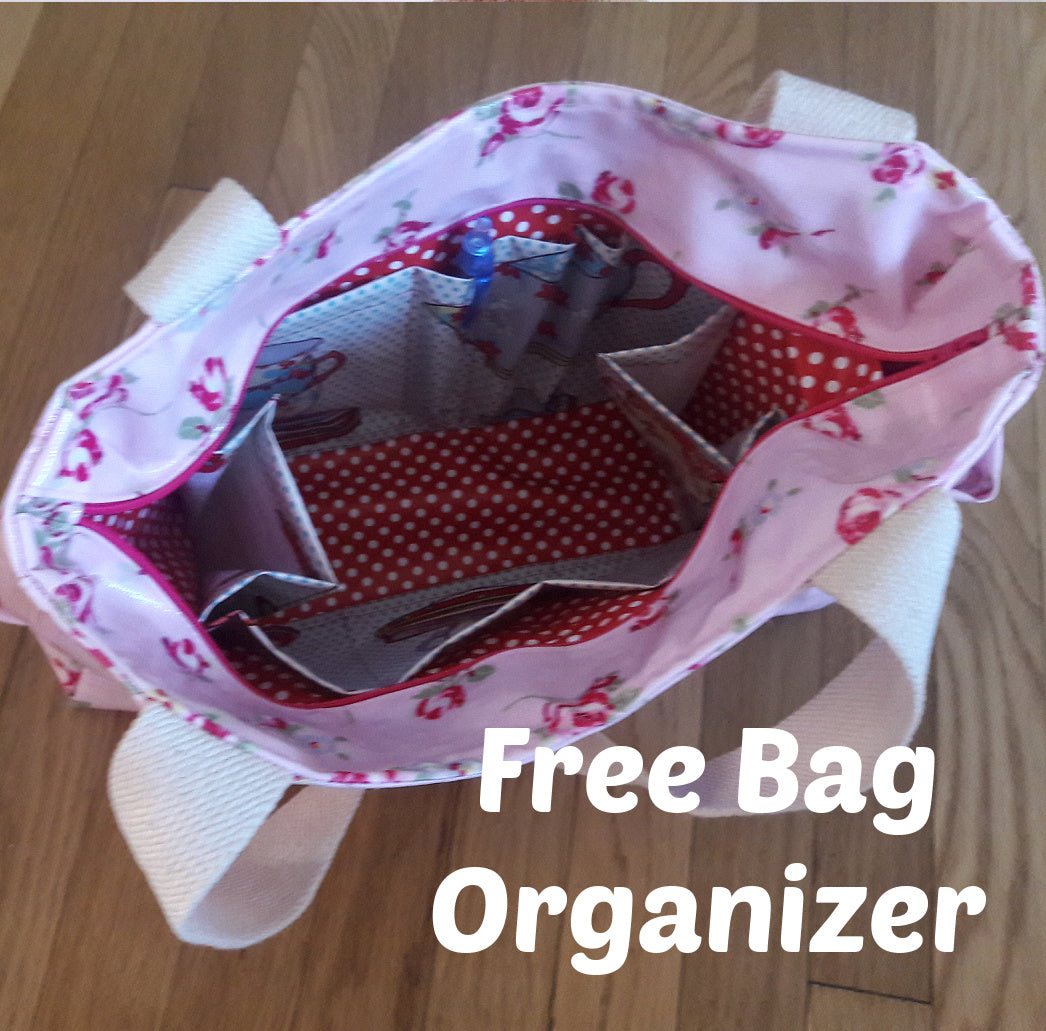
Inserting the Base and Finishing
Now slide the plastic base through the opening at the bottom. It fits securely and won’t move.
Insert the lining fully, pin the edges, and stitch closed.
Closing Notes
And that’s basically it. It is a totally satisfying make. I’ve really worked on this pattern until it was simple enough for beginners.
I love my bag. I’ve also made it as a mini version, and that pattern will be available shortly.
You can find more on my project page at Frocks and Frolics. See examples, tutorials, and get started yourself.
Thank you for watching.
Handle Construction
Transcript for the video: London Bag - Laminated Handle Tipp
This is essentially like the main bag you can see in the main video, but of course we’re not using webbing. So what you want to do is take the handles and fold them in half like this.
Where you have the crease line, it’s not exactly right on the center—don’t align it perfectly edge to edge. You want it slightly offset so it doesn’t stack too thickly in one place.
Press the fold firmly and pre-crease it before you start sewing. This really helps, so don’t skip this step. Run your fingernail along the fold to set it properly.
Once you’ve done that, the handles will already be shaped and ready to sew. You can see why I’m saying “not quite the middle”—if they are exactly aligned, all the bulk sits directly on top of itself and makes it very thick.
Top Stitching the Handles
Now we’re going to top stitch along both sides of the handle. When you’re working with quite a lot of layers of material and top stitching thread, your tension needs to be quite high. I’m going all the way up to level 9.
I’m actually using top stitching thread on the top, and the bobbin also has top stitching thread in it. If you don’t increase the tension properly, you’ll get very loopy stitches underneath.
Sew all the way along without needing to go backwards and forwards the entire length—just secure the start and end properly. Use a long stitch length; otherwise, it will look a bit homemade.
Attaching the Ring
Now you can attach your ring. Fold the fabric back and top stitch it down again.
I’m stitching from the top so the clean stitching is visible. Do not force the fabric under in a bulky fold like that—it will not sew through properly. Household machines will really struggle if it’s too thick (an industrial machine would handle it better).
Position your presser foot right on the edge of the ring and stitch it down carefully.
Remove all loose threads for a clean finish.
Securing the End Piece
Now add another stitching line, again about presser-foot width from the top side of the handle. Backstitch at the beginning and end.
You may notice a few loops at the start if tension isn’t set correctly—this is what happens when the tension is too low.
Take your prepared end tab: cut from any fabric remnant, about 10 centimeters (3 inches) long. You need four of these pieces. Fold them over and stitch them in place at the end.
Final Notes on Handle Placement
Here you can see the difference clearly: when tension is correct, the stitching is clean and tight.
Make sure the distance between the ring and the edge of the bag is not too large—about 1.5 centimeters is just right.
If you want to watch the other videos related to this bag (introduction, purse feet installation, and welt pocket tutorial), click on the links provided or visit the project page on the website.
Thank you for watching.
Pocket Construction Overview
Transcript for the video: London Bag - How to Sew a Welt Pocket With Zip
What you want to do here is quite simple: cut out your pocket positioning piece, pick up your front piece, turn it over, and place your pattern piece on the top like this. Mark the pocket ends like this. Now take a ruler and draw across it, and do the same on the other side. You also want to mark the center of the pocket, which is quite important.
Position your pocket piece on top so that it is centered, with plenty of allowance on either side and at the ends so everything is even. Once that is done, flip it over and insert two pins to hold it in place, one on each side. Everything should now be nicely marked.
Stitching the Pocket Placement
The next step is to stitch around the marked area using a very small stitch length (stitch length 1), going all the way around.
Once both sides are sewn, fold the fabric and cut directly through the center. This is important for achieving the correct opening position. If you need more detail, refer to the messenger bag tutorial where this is explained in full.
Now move to the other end, but very importantly, do not cut all the way to the end. Instead, cut at an angle so the fabric can be folded away later. Cut carefully right into the corner. If you are using a small stitch length, it should hold securely.
Repeat the same process on the other side. Push the lips of the fabric into the opening so they sit inside and are tucked upward. When you turn it over, you should see a clean pocket opening on the outside.
Securing the Pocket Opening
To make sure nothing moves, place pins at key points to hold everything in place. Turn the work over again. This is where it becomes easier.
Place the zipper teeth exactly along the center line and pin it to the pocket lip. At this stage, you are only sewing to the lips, not beyond them.
Move your needle position all the way to the left, place the fabric under the machine, and sew it down.
Once sewn, adjust the lips back into position so they sit correctly facing upward. Because you already positioned the zipper correctly, everything should align properly.
Topstitching and Finishing the Pocket
Next, sew across the top to secure everything firmly in place.
For this pocket, thicker topstitching thread is used, so the tension must be quite high. Otherwise, you may get a loopy finish underneath. On a domestic machine, this requires slower, careful sewing. Even with 25 years of sewing experience, there are times when you need to take your time rather than rush.
Once sewn, pull the threads through to the back side and secure them by hand stitching so there is no visible start or end point. Trim the zipper ends as needed.
Attaching the Lining
Now take the lining and attach it to the pocket. Start by sewing it to the lower part first. Fold it down, then attach it along the top.
After that, sew down both sides to close the pocket completely. Once finished, the pocket is fully enclosed and secure.
If you would like to make a small decorative dangly feature for your bag, you can find a tutorial on the project page on the website. There are also multiple variations of this bag available, as the pattern is very versatile and comes in three different options.
Thank you for watching.
Transcript for the video: London Bag - Purse Feet
Cutting and Preparing the Plastic Base
The first thing you have to do is cut out the plastic base for the bag and then place your pattern piece on top. You will see four dots on the pattern piece; these mark the spots where you need to punch holes.
I’m using my Crop-A-Dile, which is a great little tool. I’m using the larger punch size here because it is simply easier to locate later when the bag is finished. It is very easy to punch the four holes with the Crop-A-Dile, and you do the same on all four marked points.
You can then set this aside until you have finished making your pocket.
Marking and Punching the Base Alignment
When you are ready to attach the base, you first need to know where the center is—this is really important. You can mark the hole positions with a pencil first to make sure everything is aligned correctly.
Once marked, use the Crop-A-Dile again to punch through the center points. This ensures everything lines up properly when the base is installed.
Inserting the Base into the Finished Bag
When the bag is finished, you insert the base through the gap you left in the lining. Then push it into place inside the bag.
If you have used purse feet as well, you can push them through from the outside to the inside and secure them. This makes the base even more stable.
After that, all you need to do is close the remaining opening of the bag, and the construction is complete.
Final Notes
It may seem intimidating at first, but once you try it, it is actually quite simple.
If you want to make the full bag (or an even easier version without the pocket), you can click the links provided or visit my project page on Frocks and Frolics to explore more variations of the Out and About Bag.
Thank you for watching.
I think this is a very good pattern that is very simple to follow and I'm very pleased with the finished make. Very useful bag. Thank you ❤️
I haven't sew 1 yet, good that it has video tutorial with it, as I'm beginner :) Great seller and CS!! She replied every question I asked!
Super cute pattern made a few of these as gifts in 2 days. Loved the video super helpful.
Very well written I can’t wait to make one.