Zu Produktinformationen springen
1 von 14

JELLY BEAN SWEATER

JELLY BEAN SWEATER

Normaler Preis €7,95 EUR
Normaler Preis Verkaufspreis €7,95 EUR
Sale Ausverkauft

Unser Jelly Bean Pullover ist ein zeitloses Raglan-Sweatshirt für Babys – mit optionalen Druckknöpfen an der Schulter, perfekt für sensible Kinder. Du lernst, wie man einen High‑Low‑Saum näht, gemütliche Strick-Bündchen verarbeitet und den Halsausschnitt perfekt ohne ihn auszuleiern hinbekommt.

Marina’s Video Tutorial machen es wunderbar einfach – selbst wenn du ganz neu im Umgang mit Jersey bist. Scroll einfach etwas runter und schau, ob der Jelly Bean Sweater dein nächstes Nähprojekt wird.

Was ist beim Schnittmuster dabei?

  • Sofort-Download
  • Digitale PDF Schnittmuster
  • DIN A4 Format
  • eBook
  • Schritt für Schritt Video-Anleitungen

Design

  • Raglanärmel
  • Verschlussleiste in der Raglanärmelnaht mit KamSnaps (optional)
  • High-Low Saum
  • Strickbündchen

Stoffverbrauch

STOFFEMPFEHLUNGEN

  • Optimal: Mittelschwerer bis schwerer Interlock oder Vierwege-Stretch-Jersey
  • Alternativen: Denim, Chino oder Köperstoffe


STOFFVERBRAUCH

  • Obermaterial: 35-70 cm


BÜNDCHENSTOFFE

  • Jersey mit 3-5% Lycra: 30 cm

ZUTATEN

  • KamSnaps: 3 Sets für die Verschlussleiste (optional)
  • Passendes Garn

Verfügbare Größen

Größe 50 - 92

Bitte beachten

  1. Dies ist ein digitales Schnittmuster oder eine PDF-Datei, kein physisches Produkt. Die Zustellung erfolgt elektronisch über einen Download-Link an die beim Kauf verwendete E-Mail-Adresse. Zusätzlich kann das Schnittmuster von deinem Kundenkonto heruntergeladen werden.
  2. Um sicherzustellen, dass das Schnittmuster in seiner tatsächlichen Größe gedruckt wird, wird die Verwendung von Adobe Acrobat Reader empfohlen.
  3. Kleine Betriebe: Ich freue mich wenn meine Schnittmuster dir helfen, tolle Bekleidung für deine Kunden zu nähen. Industrielle Produktion ist untersagt.

Kunden werden ermutigt, Frocks & Frolics zu verlinken, wenn sie Projekte, die mit meinen Schnittmustern erstellt wurden, in sozialen Medien teilen.

@frocksandfrolics
#frocksandfrolics

Vollständige Details anzeigen

SCHRITT-FÜR-SCHRITT ANLEITUNG

Thumbnail
EINFÜHRUNG IN DAS PROJEKT
Thumbnail
DAS SCHNITTMUSTER VERSTEHEN
Thumbnail
ZUSCHNITT
Thumbnail
EINSETZEN DER ÄRMEL
Thumbnail
DER HALSAUSSCHNITT
Thumbnail
KNOPFLEISTENVERSCHLUß MIT KAMSNAPS
Thumbnail
SCHLIESSEN DER SEITENNÄHTE
Thumbnail
DIE ÄRMELBÜNDCHEN
Thumbnail
DIE SAUMBORTE ANNÄHEN
Thumbnail

VIDEO TEXT

Einführung ins Schnittmuster

Transkript für das Video: Jelly Bean Sweater – Einführung

Hallo ihr Lieben, willkommen zu unserem Jelly Bean Sweater!
Ich zeige euch jetzt alles, was ihr wissen müsst, um diesen wunderschönen kleinen Sweater zu nähen.

Über das Sweatshirt‑Design

Hier habe ich ein Sweatshirt mit einer wunderschönen Schulteröffnung.
Es wird mit KamSnaps geschlossen – super einfach!
Ihr könnt natürlich auch Metall‑Druckknöpfe verwenden, aber ich sage gleich dazu:
Metallknöpfe gehen bei Anfängern gerne mal wieder ab.
Darum empfehle ich wirklich die KamSnaps – die sind perfekt für dieses Projekt.

Unten am Saum gibt es einen Saumbund, der diesen tollen High‑Low‑Effekt erzeugt.
Ich liebe das – es sieht richtig cool aus.

Verwendete Materialien

Ich habe hier drei verschiedene Stoffe verwendet:

  • einen wunderschönen Baumwolljersey mit Lycra
  • dazu ein Michael Miller Baumwolljersey in gelb
  • und noch einen weiteren Kombistoff

Der Sweater wird wirklich traumhaft – und jeder kann ihn nähen, besonders wenn ich euch Schritt für Schritt durch alles durchführe.

Passende Jogginghose

Und nicht zu vergessen:
Es gibt auch eine passende Jogginghose dazu!

Die hat diese fantastischen kleinen Taschen, die aussehen wie aufgesetzte Taschen – sind sie aber nicht.
Sie sind super einfach zu nähen.

Ich habe hier einen breiteren Bund gemacht.
Wenn ihr die Jogginghose auch nähen wollt, schaut euch gerne den kompletten Kurs dazu an – da gibt’s viele Extras.

Designoptionen und Verarbeitung

Der Sweater passt perfekt zur Jogginghose.
Ihr habt zwei Möglichkeiten:

  • mit Schulterverschluss
  • ohne Schulterverschluss

Ich zeige euch gleich im Schnittmuster ganz genau, wie ihr beide Varianten macht.

Für den High-Low Saum könnt ihr:

  • den klassischen Rundum‑Bund verwenden
  • oder wie hier doppelt von außen absteppen
  • oder eine Zwillingsnadel bzw. Coverstitch nutzen

Alles sieht super süß aus.

Los geht’s

Also, legen wir los!
Als Erstes schauen wir uns jetzt euer Schnittmuster an.

Jelly Bean Sweater Pattern

Transcript for the video: Jelly Bean Sweater - The Pattern

So let's get started with our pattern. I have already assembled my pattern so I can talk you through it, but before we start, I want to show you this little bit.

On the very first page of your pattern, you'll find a scale which you need to measure, and it needs to be exactly 5 centimeters or the other test scale, 1 inch. That's really important. It's also important that you use a ruler or a tape measure that you know is accurate because some tape measures are slightly short or a little bit longer, and then you think it doesn't fit. So use a ruler.

Once you've done that, you can cut it all out. You have attachment lines so you can put it together really easily, and you also get an assembly plan. That is absolutely brilliant because it shows you exactly how many pieces are in your pattern. Then you can say, "Yeah, okay, my front has got an A and a B." If this was a size 2 to 3, for example, you would have slightly more pieces because less fits on the page once the pattern piece gets larger.

Hem Trim Options

Once you've put everything together, we can start having a look at what we've got here. Let's have a look at the actual garment as well so you can see what your pattern piece relates to.

This here is the hem trim option B, and that's the plain hem trim that you can see here. It's just the fabric folded over and, of course, closed from one end and then attached here. You could topstitch this like I've done here, or you could use a twin needle. That's also really cool and works very well. Or a cover stitch—yay! One day I will have one myself.

So that's that one.

Then we've also got the alternative hem trim. This hem trim has got a slightly shorter front to the back, so you've got this little high-low effect, which I think is really great. That's what you get when you sew this one on. I think it looks absolutely stunning. It goes a little bit lower and the front stays higher, so that looks really super cute.

Back Pattern Piece

Here I've got my back. The back is cut on the fold, so you get the complete piece and you only need to cut it once.

Front Pattern Piece

Then we've got something that is a little bit different, and that is the front. It's not cut on the fold, it is cut as one piece because we've got the opening here in which we're going to put our Kam snaps. So you have to cut this out with the right side of the fabric facing up.

Sleeve Construction

Then we have two sleeves. One sleeve is for the side where you have no opening, and the other side is for the sleeve where you do have an opening.

When you put this together, we have four lines here and four lines there. Fold it over and then place this on top of each other because that is what's going to happen. What you're going to find is that when it's sewn together, the front is going to be 0.5 centimeters longer than the back, and that's all. It will fit perfectly.

There we go. There is nothing to that really, so don't overthink this. I would say just close it as I'm going to show you in the video up here, then iron it into place, and you will find it's perfect. There is nothing wrong with that—it works great.

Making a Sweatshirt Without the Closure

If you want to make the sweatshirt without the closure, you can. I have got a lot of room here in the neckline, so you don't need to worry that there's not enough room. What you then do is cut a pair of the left sleeve, and then cut the front on the fold.

I have marked the center front, and I've made it really, really big so that you can see it. This is my center front. You can fold this over and then you have a very standard sweatshirt.

So you've got two options: one with a placket and Kam snaps or metal snaps, and one without.

Wrist Cuff and Neck Band

Then finally, we have got the wrist cuff and the neck band. The wrist cuff is just going to be folded over and then folded over sideways here, and that's it. The wrist cuff is a little bit bigger than you would normally have on something that you want to fit really tightly because it's meant to go over other items of clothing, so you don't want that to be super tight.

Finally, the neck band. We have got a little dashed line here. The dashed line is for when you want to make a standard sweatshirt. What you need to do is fold on that line and then cut it like that so that you get rid of the seam allowance that you've obviously got in here where we have the overlap.

So it's very important that you take that off. Two and a half centimeters less will do the trick.

Ready to Start Sewing

And that's it. All my pattern pieces explained. I hope you really enjoy making this, and please share your photos with us when you're done. I can't wait to see them on Facebook and here on the course.

So let's get started with making our sweatshirt.

The next step is cutting out the fabric.

Cutting Out the Pattern

Transcript for the video: Jelly Bean Sweater - Cutting Out

When you're cutting out your pattern and you want to put the closure in, then you're cutting two separate sleeves with the fabric the right way up, along with the front. You can cut the back on the fold, and then all the trims are cut as usual with your fabric folded over.

If you wanted to make a simpler top and you don't want the closure, what you do is fold it over from the left-hand side. You can put your back on the fold there, and you need another fold for the front piece, which you just place on the fold and don't use the part that has the closure on it. That needs the fold as well.

So I fold the fabric over from that side all the way so I can put my sleeve on there. I'm cutting a pair of those, and then the front on the fold so I get a complete front piece without a closure. The trims are cut exactly the same.

Don't worry about the head not going through. It will go through. It's already quite big. It's not a very tight neckline.

Fabric and Materials

That's it. We have cut everything out.

I've used some interfacing to reinforce where I'm going to put my placket. I've used a yellow topstitching thread and then a light blue standard cotton thread for all my seams.

I'm using a really lovely yellow interlock for the hem trim, neckline, and cuffs. It's got some percentage of Lycra in it, which makes it really easy to work with. It jumps back to its original shape. That's called recovery.

I've also used a rib fabric for the sleeve, which is lovely. That light blue one here is really nice. It's a fabric that you would normally use for cuffs, but it didn't have enough stretch, so I just used it for the sleeves.

Then my main fabric is again a cotton-Lycra knit mix.

Preparing the Interfacing

You can see the interfacing that I'm going to put onto the placket, and I'm just quickly going to cut that. I'm going to cut it a little bit shorter so that the top part is not covered.

Whenever you put in Kam Snaps, and I'm sure you've noticed this, if you have too much thickness, they won't stay in properly and won't go through. Because I'm going to have a Kam Snap in there, I want to make sure that I have as little as possible in the seam allowance between the neck band and the actual placket.

That's why I cut it about 1 centimeter short at the top because it doesn't need to be reinforced all the way to the top.

Decorative Options

Now, if you can't find a nice fabric like the one I'm using here, why not use a plain one and then get yourself some stickers that you can put on?

You can use really, really big stickers as well. I've got a separate video for you in the sewing course so you can have a look at that and see how I iron them on and work with those stickers. I think they're really superb.

Applying the Interfacing

Right, let's get started.

The first thing we're going to do is iron on those interfacing pieces that we've just cut. I want to make sure that I put them on the right side because my rib fabric looks exactly the same from either side, and it's really easy to get this wrong.

I'm just putting my fabrics next to each other and then turning it over, making sure I put it on the underside of what I can see here. Again, I trim it at the top.

That little roll of interfacing I got at the market. It was from the Birmingham Rag Market, so it's a good idea if you see that around to buy it.

Kam Snaps and Tools

I'm using Kam Snaps, and this is my Kam Snap equipment that I'm going to use. It's quite simple.

I've used it for our gorgeous dollies. They're also part of the babywear courses, and they work really, really well, especially for beginners. Of course, you could also use the professional type that you would see in stores.

I also have a package here that I got from Amazon, and although they work, sometimes they come back out, especially if the fabric is a little thick. The reason for that is that the teeth are really, really small.

So far, I haven't found any of these metal snaps with longer teeth, although I'm sure I will one day.

Using Amazon Snap Tools

When you buy one of those packages from Amazon, you get basic equipment that isn't great, but it actually works if it's put together the right way.

Here you can see the really short teeth. What you want to do is make sure that you're using lighter-weight fabric for those. I'm not using them on this project because the fabric is quite thick.

What I also noticed about this tool is that it's got a hole in the back, so you can see exactly where you're putting it in. If you've marked it, it's actually really good because you can be very accurate with it.

Then I give it another squeeze with my grip pliers, and that helps it stay in.

I've had no problem with some of the items I made, although I did have problems with others. If you are a beginner, I would recommend using this tool here with your Kam Snaps. That is much easier than the metal snaps that you can also use.

Applying Interfacing and Preparing the Edge

Transcript for the video: Jelly Bean Sweater - Inserting the Sleeves

Interfacing—you don’t need any steam for that. My iron is one of these miraculous American irons that never turns off the steam, so normally you would do it without steam. I iron that on both sides so that I can have it nicely supported.

There we go. Just do the other side.

Then what I need to do is overlock that little edge at the top, or serge if you're in America. It's the same thing. Done. Let's move over to the overlocker and get that done.

Attaching the Sleeves to the Front

Now I'm going to sew the sleeves to the front. I have marked my front with a snip, and therefore the front sleeve.

I just fold that over and place it on. On the left-hand side that you can see here, we're obviously closing it all the way. On the other side, we are only closing it up to where the placket is—we're going 1 centimeter higher than where the placket starts. That will give me just the right height. If you go a little bit higher, it doesn't really matter too much.

You can mark it for yourself if you want to with your centimeter seam allowance or just put a cross there—however you feel you’ll hit that spot.

Then I'm going to place the back on as well like this. All I have to do now is flip the back over, put it on, and I can pin the other seams for the sleeve.

There we go. Just one pin. I just want to make sure I don’t get this wrong and put the wrong bits in. But really, once the front is on, you can’t really go wrong.

Sewing the Seams

Now I'm going to sew those in. Again, with most of my stuff, we have a 1 centimeter seam allowance.

If you wanted to seam and serge at the same time, you can do that. Obviously not where the opening is—we can’t do that in one go. Generally speaking, you could just serge that.

So now let's start doing this opening here. I'm just going to go backwards and forwards securing my stitches, then sew a 1 centimeter seam allowance all the way down to the end. That’s it.

Lovely, all done.

Overlocking and Preparing for Topstitching

With all my seams now closed, I need to overlock them. I'm going to overlock them so the nice side is facing up. This time you should actually do it from the sleeve side.

You can see me here doing it from the other side, but I actually want all the seams ironed towards the front and the back so we can topstitch it. So you want to do it exactly the other way around.

Now I fold over my placket so that I can see clearly the overlocking. If you do that and make sure you can see the overlocking, the topstitching is going to be so much easier—you won’t even have to move anything out of the way.

So make sure you do that. Then we're just overlocking this edge. Pull it around a bit and make sure that you don’t cut into it. Of course, that is a real risk. You might want to turn off your knife if you're not sure.

Then we can proceed to iron all our sleeves into the front.

Topstitching the Placket

I move around and then we’re going to topstitch it on the front itself. I'm going to use that really nice topstitching thread, which is a little bit thicker than what you would normally use.

Here where I’ve got my opening, I can now fold it over where it needs to be. We do have a marking for that on the pattern piece, but it will be quite intuitive. It will be about 2.5 on the blue and really 3 centimeters on the front, so that it overlaps while leaving a little bit of the front piece showing.

And here is my thread—it looks really nice. You could use a contrast thread as well, but I like this yellow. I think it’s beautiful.

So I move over to my sewing machine.

A really good tip is to check first whether it actually works without loops on the bottom of whatever you're sewing. If you have loops on the other side, which easily happens, it means your tension needs to be higher. So just move the tension up to about 7 to begin with and see if that works.

If you need it tighter, adjust it depending on your machine.

Now I'm going to sew this down. Lengthen your stitch length—make sure it's 3.5 or even 4.

On your presser foot, find any fixed point to guide you down. That is what you line up—you do not look at your needle. Just look at that fixed point on your presser foot and line it up with the seam. That will give you a very even stitch on the side.

Neckband Construction

Transcript for the video: Jelly Bean Sweater - Attaching the Neckband

Now we're going to do the neckband and we're going to close the short sides first, 1 centimeter seam allowance down here on both sides. Off to the sewing machine, there we go.

You can see now I finally worked out how to get my camera to work lighter. This is a new camera and it was really dark before.

Cut off your seam allowances so it's nice and small because we are going to put a Kam Snap in there. If it's really thick where the Kam Snap is gripping, it will come off or will not go in. So cut it really short.

Then iron the whole thing lengthwise in half so it's nicely done.

Attaching the Neckband

The first thing to do is to half your sweatshirt, and you will see that it's actually exactly on the seam there.

We're going to start the neckband where the placket starts here. I'm just going to put my back onto the center back, which is obviously not the center back but the center when it’s folded in half.

Here you can see it goes just where the placket starts. I stretch this slightly and work my fingers to the middle, and I'm going to put the pins all the way around.

You will have to adjust your pins very lightly. What I do is check not just “did I pin it right,” but does it look right when I'm done, because you can get this slightly wrong. I felt this wasn't quite as tight, and I had no idea why, so I took it back out, fiddled with it, and then put it back in.

This time I used pins horizontally across the seam because I was going to really over-pin this and I wanted to make sure I can see exactly what I'm sewing. Horizontal pins are sometimes the right choice because, like putting a sleeve in, you need to see what it's actually going to look like. Vertical pins don't quite do that.

Once we've sewn it in, we're going to sew across here to stitch in the placket as well. If you did that in one go and just folded it over, it would give a really ugly result and it won't work as well. It will always move.

So check that there is the same gather across the length, and then pin it in.

It sounds more complicated than it is. The main idea is make sure it's even, then sew it in.

I'm using a foot-width seam allowance here, not a centimeter. I prefer foot width for Kam Snaps because most of you are using Kam Snaps.

Sewing the Neckband

I'm working my way around and there we go, beautiful, to the end.

I make sure nothing slips out here at the front. It always wants to do that, so I make sure it ends exactly where the placket starts.

Beautiful.

Finishing the Placket Area

Now the next step is to fold over the placket really tightly and I can pin this.

I'm turning it over to the other side because I can already see what I've stitched. It's much easier to hit the sweet spot if you sew from the underside so you follow the same stitching line. That gives an absolutely beautiful result.

Do the same on the other side. Fold it very tightly where it meets the neckband, turn it over, and stitch it in.

Excellent.

When I turn this, both sides should be the same length. It is worth checking quickly just in case.

Overlocking and Trimming

Now we are going to overlock it.

Here we may have a Kam Snap coming a little higher, especially on smaller sizes, so make sure you cut the seam allowance back only where the placket covers it. Don’t cut further in.

I sometimes go into autopilot and cut too far, this is what you don’t want.

My placket starts here, so I stop there. That’s what you want, so when you turn it you’ve got a nice overlocked edge. You don’t want it too skinny.

Overlocker Setup

Now I go back to the overlocker, lining it up with a point on my machine. This is a Brother 1034D. It’s a very cheap machine, but it’s done me for years. I’ve recommended it for school because it’s cheap and cheerful but works.

If you can’t afford a fancy overlocker, I’d recommend finding this one on Amazon and waiting for a deal. I got mine for about £130 or maybe $150.

Pressing the Neckline

Now I'm going to press this over my ironing board. Make sure a lot of steam goes into the fabric and you hold in anything that may have stretched.

Stretch necklines slightly. I'm holding this nicely round, steaming it, and giving it a good press.

And that's it, done. Neckline finished, absolutely beautiful.

Topstitching the Placket

Next step is topstitching the opening.

We start at the lower end and stitch up. Because the front placket is slightly wider than the back, you shouldn't have an issue.

I move my sleeve out of the way here, but it shouldn't really be necessary if everything is positioned correctly.

Put a pin where you want to stop stitching.

I'm starting on the underarm seam. Stitch length 3.5 to 4, or even 4.5 depending on your machine.

Use the same fixed point as before, just on the other side. Go up to the point where you want that 90-degree angle for the placket.

Once I reach that point, I put the needle down, turn, and stitch across. I can feel the edge, it’s right there.

Because there’s a bit more structure here, it should be fine to stitch upwards without moving everything out of the way, but I’m being careful and moving it aside.

I can see the 1 inch or 2.5 centimeter marking on my needle plate, and I guide along that.

You could also mark this with a textile pen if you're unsure.

Secure your stitches. If it’s not feeding well, don’t secure, pull it through and hide the threads in the seam.

I also do a second stitching line to see what it looks like. It’s not really necessary, but you can do it if you like. You could also have two topstitching lines on the sleeve as well.

Closing the Side Seams

Transcript for the video: Jelly Bean Sweater - Closing the Side Seams

Now we can move on to the next bit. We are going to close the side seams. It’s very simple, we’re doing it in one go and it gives us another little look at our placket. Isn’t that fantastic, it came out so well.

Place the underarm seams on top of each other. Put one pin vertically to the seam so you can sew over it. You don’t necessarily need to take it out when you’re sewing.

Then you don’t really need anything else. I would normally just go without pinning, but I’m showing you the pinned version here.

We’re going from the lower end all the way up to the top on one side, and exactly the other way on the other side. One centimeter seam allowance, back to that standard.

You don’t need to pull anything or use a special stitch. It automatically has a bit of stretch anyway, that’s just how the fabric behaves.

Make sure nothing shifts. I remove the pin there because it’s a bit thick and I only have one needle left, and if it breaks, it breaks. I thought I better take it out.

Then stitch all the way down to the other side. Do the same on the other side as well.

Overlocking the Seams

Now you can move over to your overlocker and overlock or serge it.

I always cut a little bit off because if you’re sewing the seam in one go, what you don’t want is tension on the underarm. The wider the seam, the more tension. So trimming it down a bit is a good idea.

You could overlock and sew in one step if your machine allows it. This machine actually does, but I’m never fully happy with doing both at once. It’s a cheaper machine, but it does the job and I use it every time I sew.

Pressing the Seams

Now we’re going to iron the seams. The rule is always iron seams towards the center back.

If you can’t get the sleeve onto your sleeve ironing board because it’s small, just open it out and lay it over the edge so you don’t get a crease in it. Mine is small, so it doesn’t really matter if a crease happens sometimes.

Press it well and do that on both sides.

Cut off any loose threads so everything looks neat.

Turn it over and give the neckline a little press as well, just to tidy it up and check how it looks.

And then we’re done here.

Now the next thing is, guess what, we’re going to do the cuffs.

Attaching the Cuffs

Transcript for the video: Jelly Bean Sweater - How to Sew the Cuffs

Now we're going to do the cuffs. We just need to place the ends on top of each other, so we have our cuff, and then give it a quick press across the fold.

Now we're going to put them in, and the trick to putting them in is to first turn your top inside out. Then have the cuff on the inside. Never have it on the outside, it’s actually way easier to stretch it if the cuff sits on the inside. It’s a habit to get into.

Now I can see here that my seam allowances are really thick again. I forgot to cut them back, so I'm taking my scissors and cutting this down. Now it’s a little bit flatter. Make sure nothing folded over.

Now I’m placing the seam onto the underarm seam again, using a vertical pin. I stretch it to the other side and pin it in place.

Then I go over to my sewing machine and stitch it in.

Sewing the Cuffs

The key to stitching it in well is to always work from the inside, as you can see me doing here. Secure your stitches, and then you can move the sleeve around freely. That’s much easier than trying to wrestle with it the other way around.

I’ve seen people do it the harder way in sewing classes, and they always say, “Oh no, this is so much simpler.” Once you know how, it really is the key.

Now that’s sewn in, I go over to my overlocker and finish it. Overlock all the way around.

Please get into the habit of checking for pins. It’s so easy to leave one in and damage your knife, so always double-check before you serge.

And that is it. We have finished our sweatshirt. The cuffs are on, all we need to do is give them a gentle press and we are done.

I hope you really enjoyed this. This is one of my favorite makes because it wasn’t difficult and it looks really, really cool.

Attaching the Cuffs and Hem Trim

Transcript for the video: Jelly Bean Sweater - How to Attach the Trim

Now we're going to do the cuffs and the hem trim. The hem trim has a front and a back, twice each. What we're going to do is find a front piece and a back piece and sew them together at the side seam with the right sides facing each other. There we go, that’s my first one.

You don’t really need to pin both sides, one side is perfectly adequate. I do the other side as well. The front is shorter than the back. I always love that detail, it looks really nice on a shirt, so I added it here too.

It’s also tapered in a little more than the piece I’m working with here. I finished this and thought I’d taper it in a bit so it looks more fitted and polished.

I’m also doing the wrist cuffs while I’m at it. No point going back to the machine later when I can do it all now. If you’ve got nice thread, you don’t want to waste it, so keep things moving and feed the next piece straight under.

Secure your stitches and continue.

I’m also doing the side seams of the hem trim. I just fold it around, pick it up again, and continue. Then cut the threads. This saves a lot of thread, especially if you’re making multiple pieces for something like an Etsy shop. It really does add up, so it’s good to minimise waste.

Preparing the Hem Trim

Now we iron all the seam allowances apart, and then we move on. We put the cuffs aside for a moment and come back to them after the hem trim.

With the hem trim, I’m using a different technique. I also show the standard method in another video, but here we’re doing a cleaner finish that helps reduce bulk.

Take the hem trims and place them inside each other, right sides facing. Now we close the lower edge, the one that dips down, while the back rises slightly at the front.

So if you’re sewing the straight edge, that’s wrong. You want the curved edge. We sew that with a 1 centimeter seam allowance, or foot width, it really doesn’t matter here.

Go all the way around using a standard stitch. It doesn’t need stretch. You could also use woven fabric for this.

Pressing and Turning

Now I cut back the seam allowances to reduce bulk, then press the seam open. I’m not under-stitching here, although you could. I just wanted a slightly different finish.

Then I turn it and roll the edge out, pressing it all the way around so it sits nice and flat. I really like this fabric, it presses beautifully.

Attaching the Hem Trim

Now I place the hem trim and attach only one side first. That’s what keeps it flat. The upper part is overlocked, and the lower part is pinned and sewn on.

I’m not stretching anything here. Just keeping it smooth and flat as I go.

If you follow the steps, it works really well. You could use woven fabric too, that’s fine.

Now I overlock the edge. Again, no stretching.

Before you start, it’s a good idea to trim back the seam allowance so nothing sticks out. I didn’t do it at first, and had to fix it later. That little step makes a big difference.

Now I pin everything in. I use vertical pins so I can sew over them, but depending on fabric thickness, I sometimes remove them before stitching to avoid issues.

Topstitching the Hem Trim

Don’t sew too close to the seam. Keep a slightly wider distance. You could also use a twin needle. I’m matching the distance I used on the front and armhole so everything looks consistent.

Check your tension so you don’t get loops underneath. That’s important for a clean finish.

You can see me removing pins as I go. This gives a really professional look, almost like ready-to-wear. People won’t immediately tell it’s handmade.

Now I press everything well. Lots of steam to smooth out any waviness.

And we’ve arrived at the final part.

Jelly Bean Sweatshirt: All-in-One-Video

Transkript für das Video: Jelly Bean - All-in-One-Video

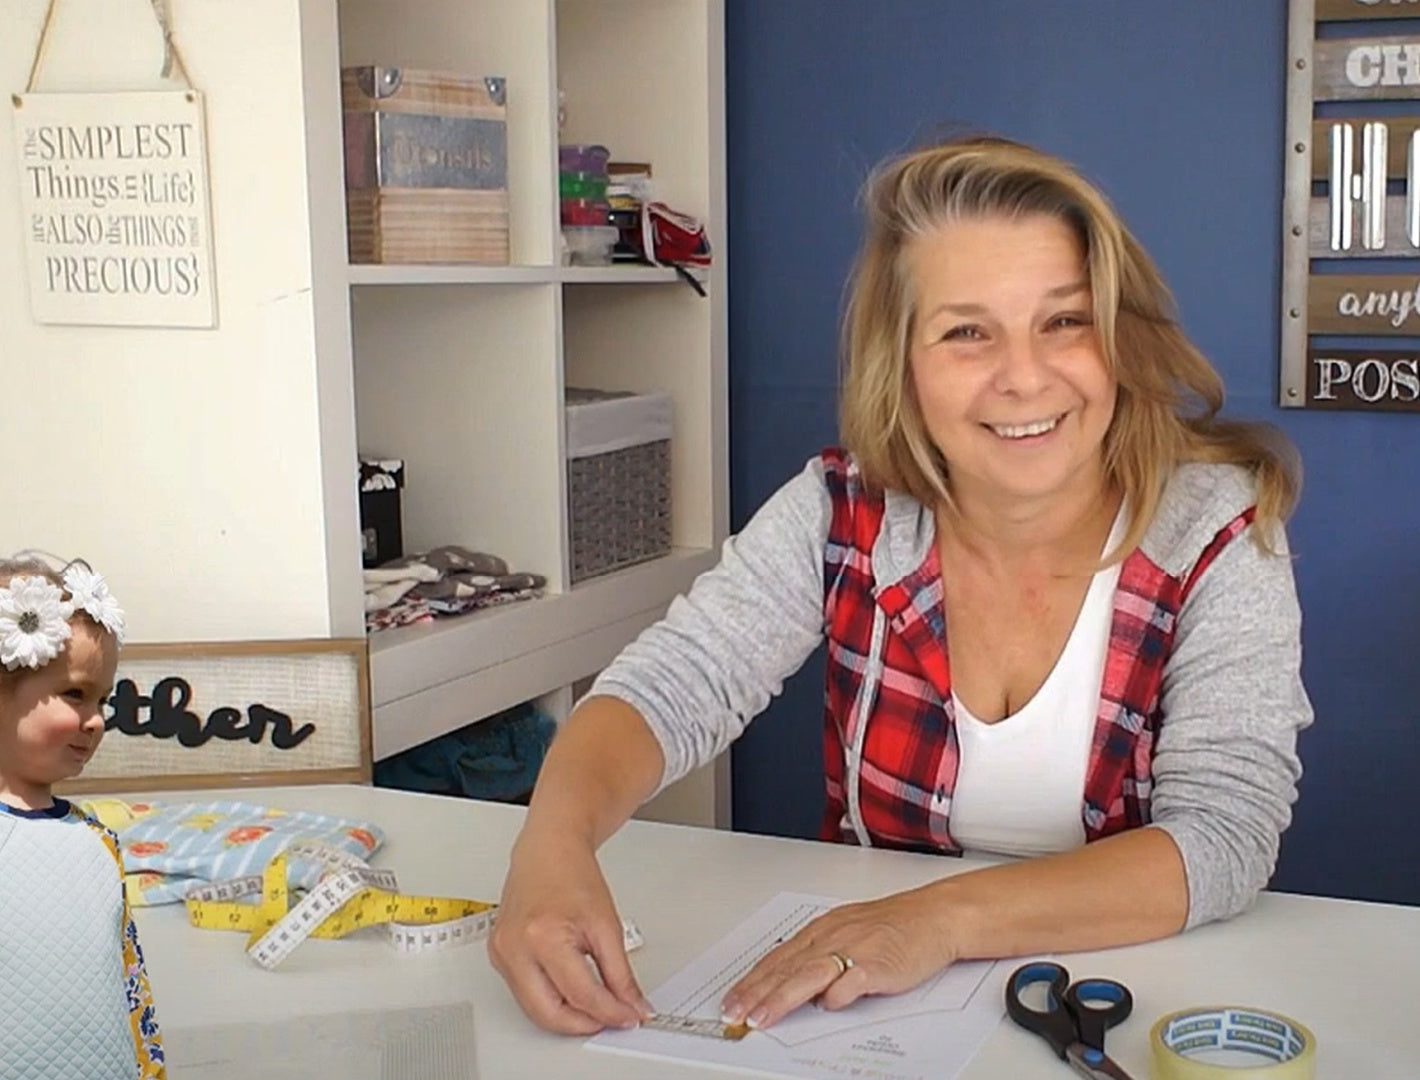
Hallo ihr Lieben, willkommen bei einem neuen Kurs von Frocks & Frolics.
Hier werde ich euch zeigen, wie man das Jelly Bean Sweatshirt näht, und ich hoffe, dass euch das viel Spaß machen wird.

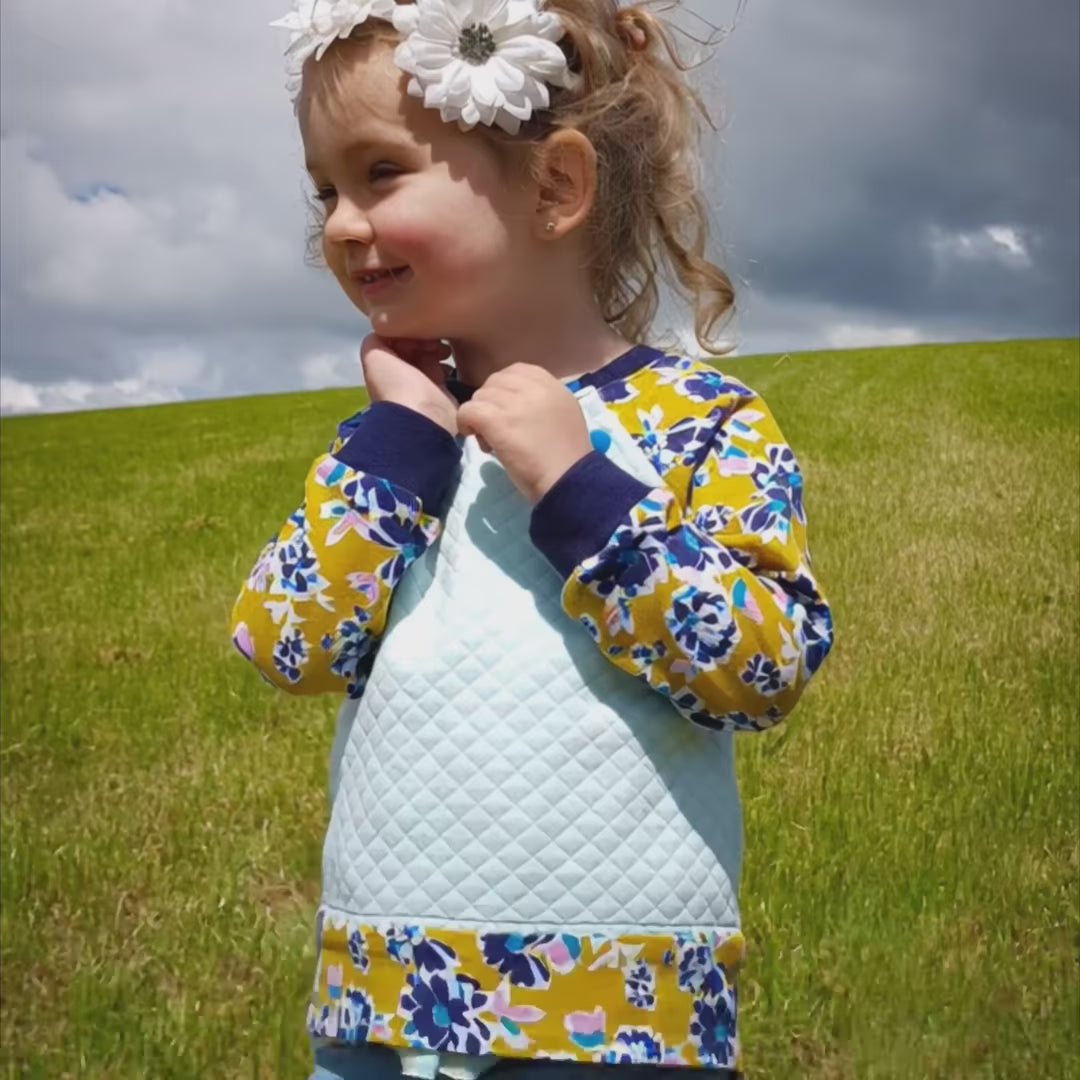
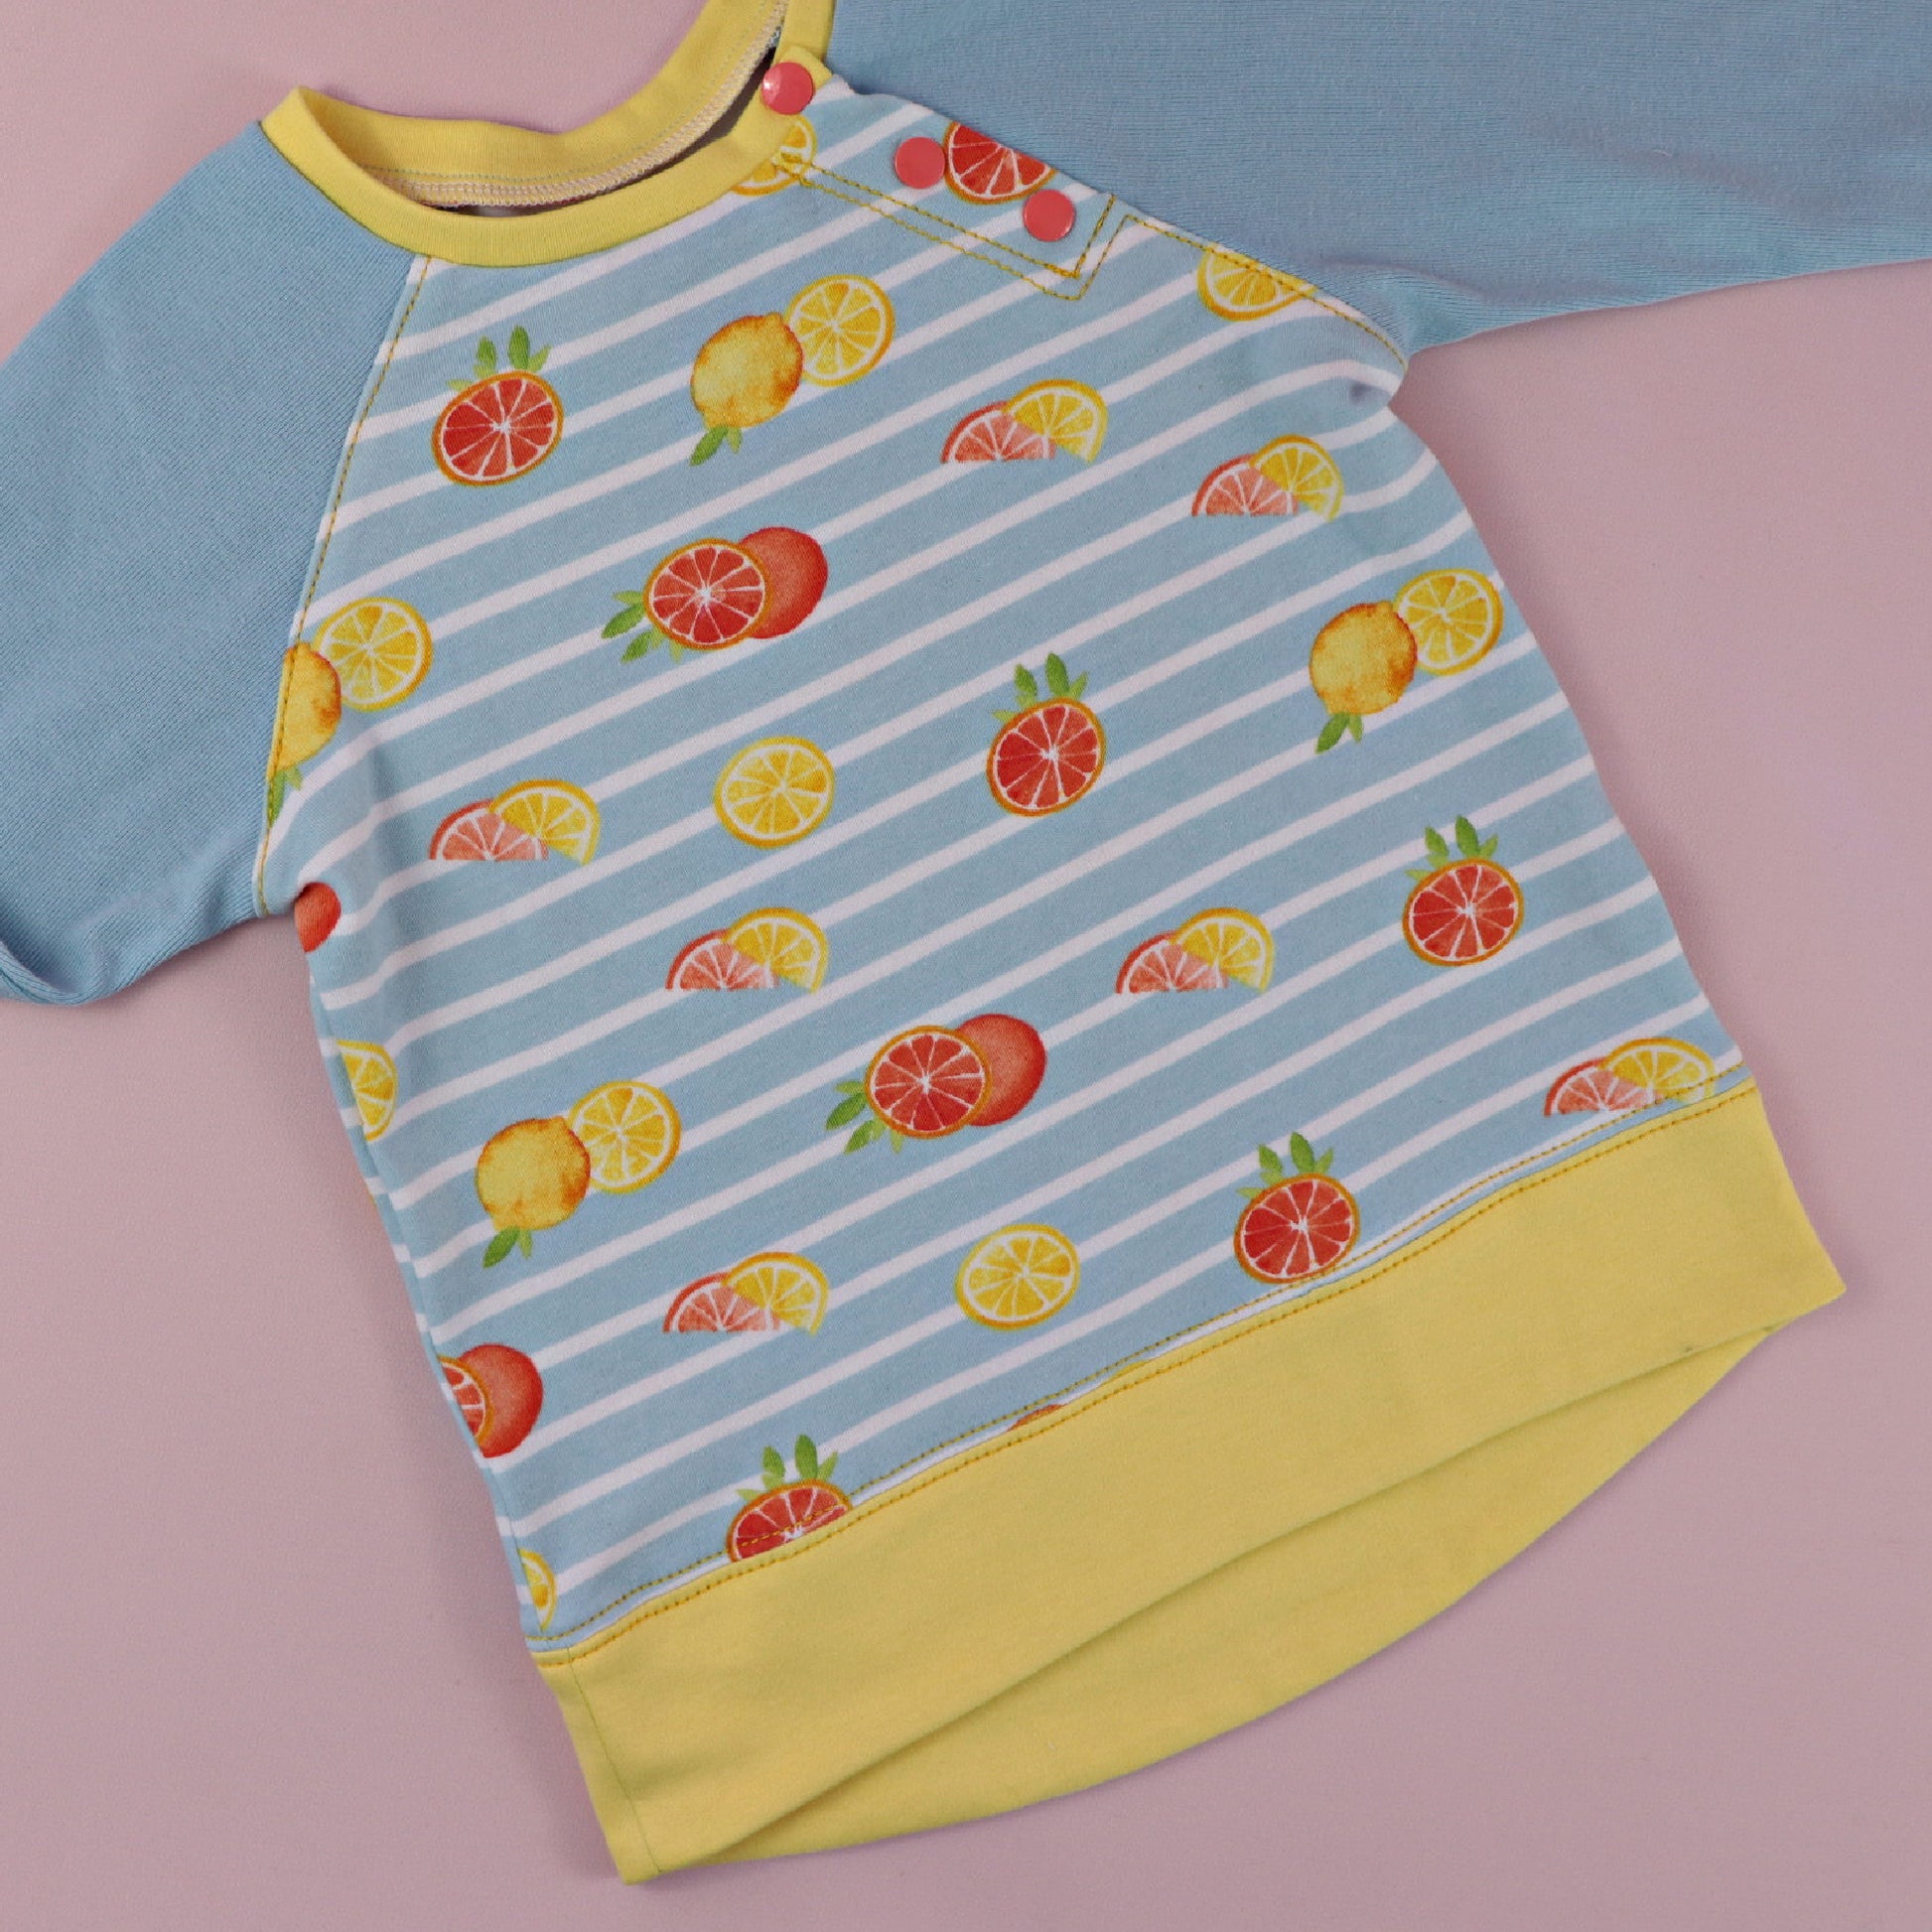
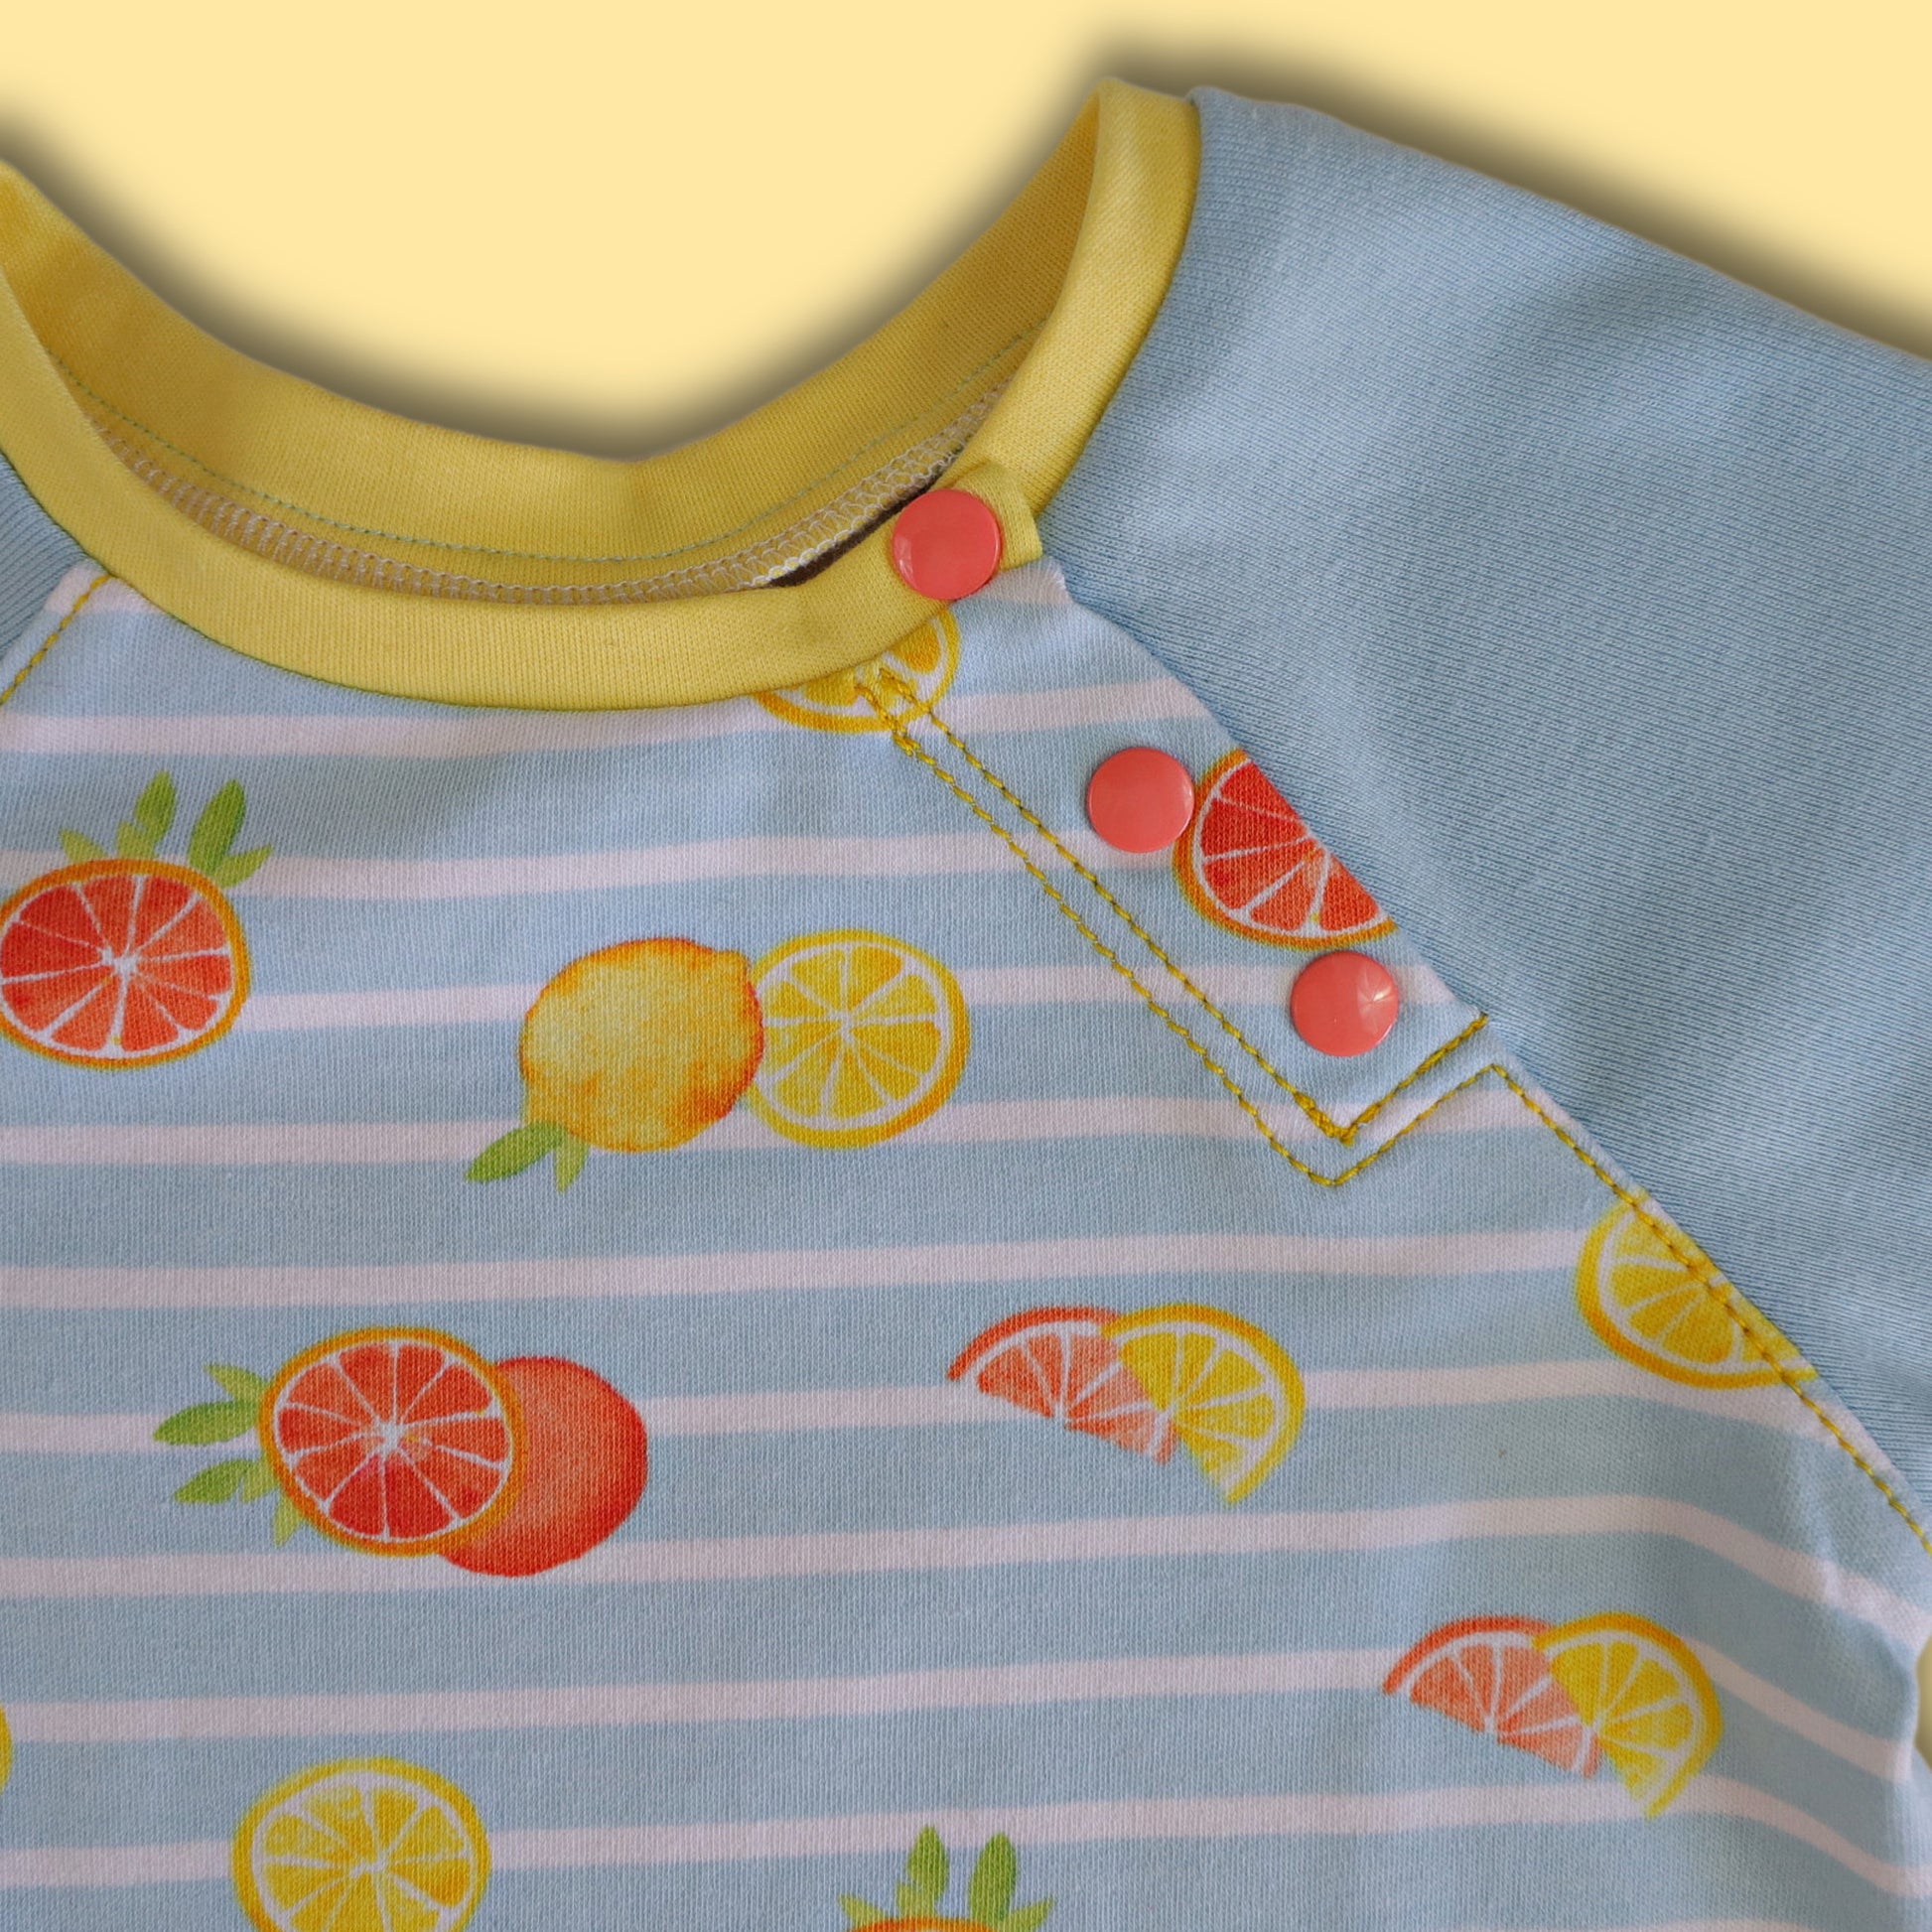
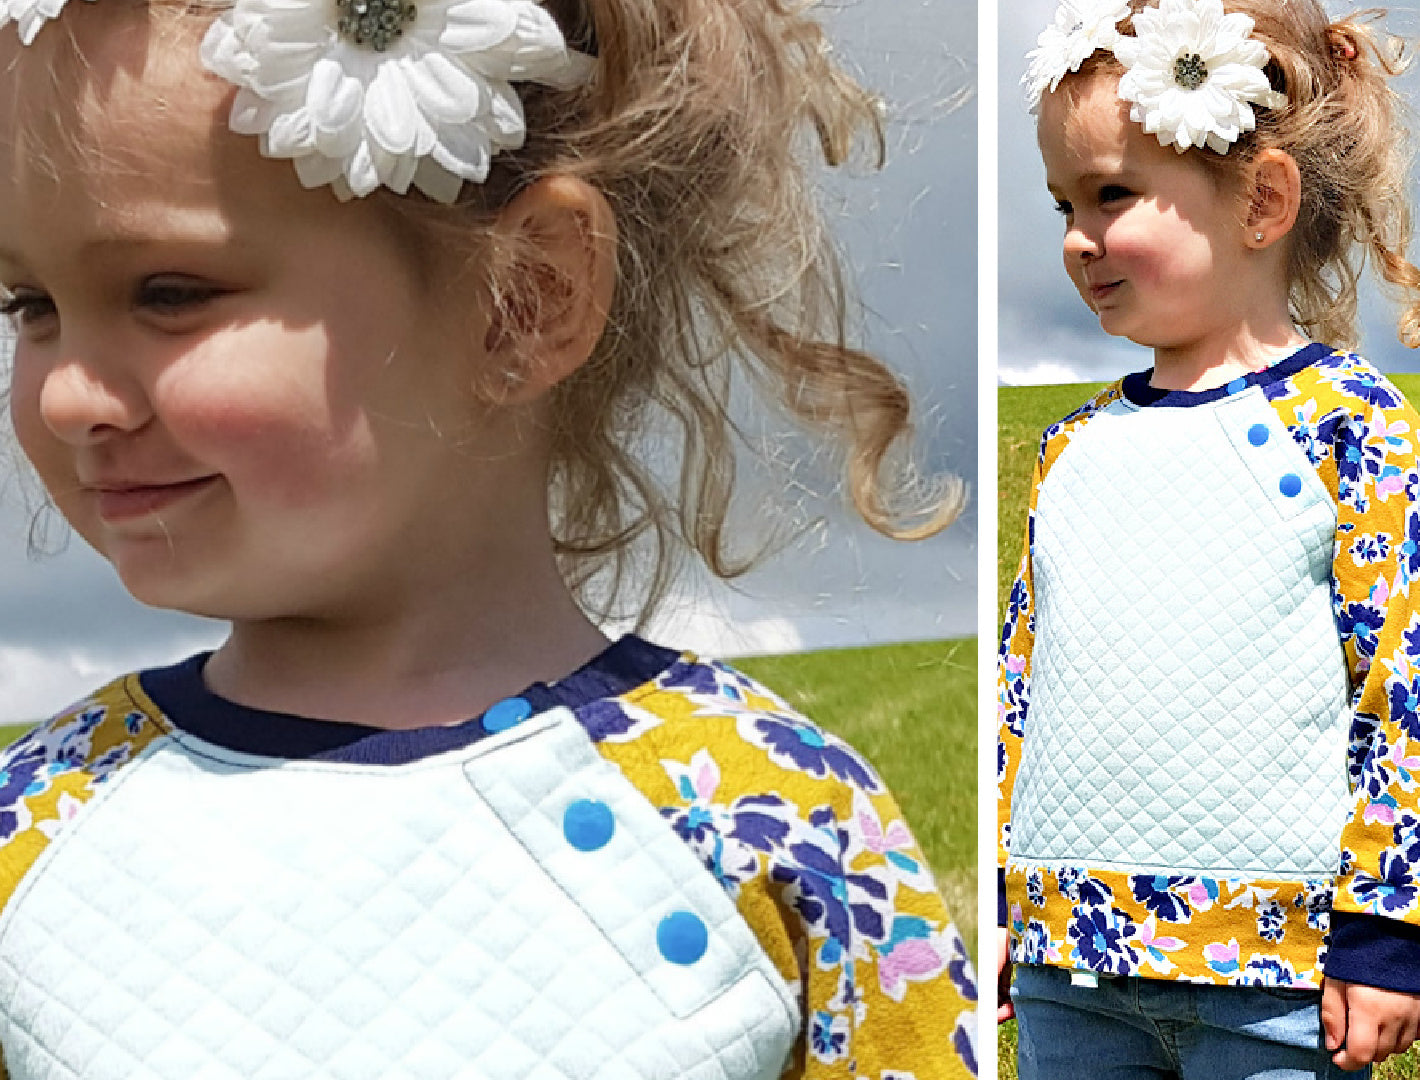
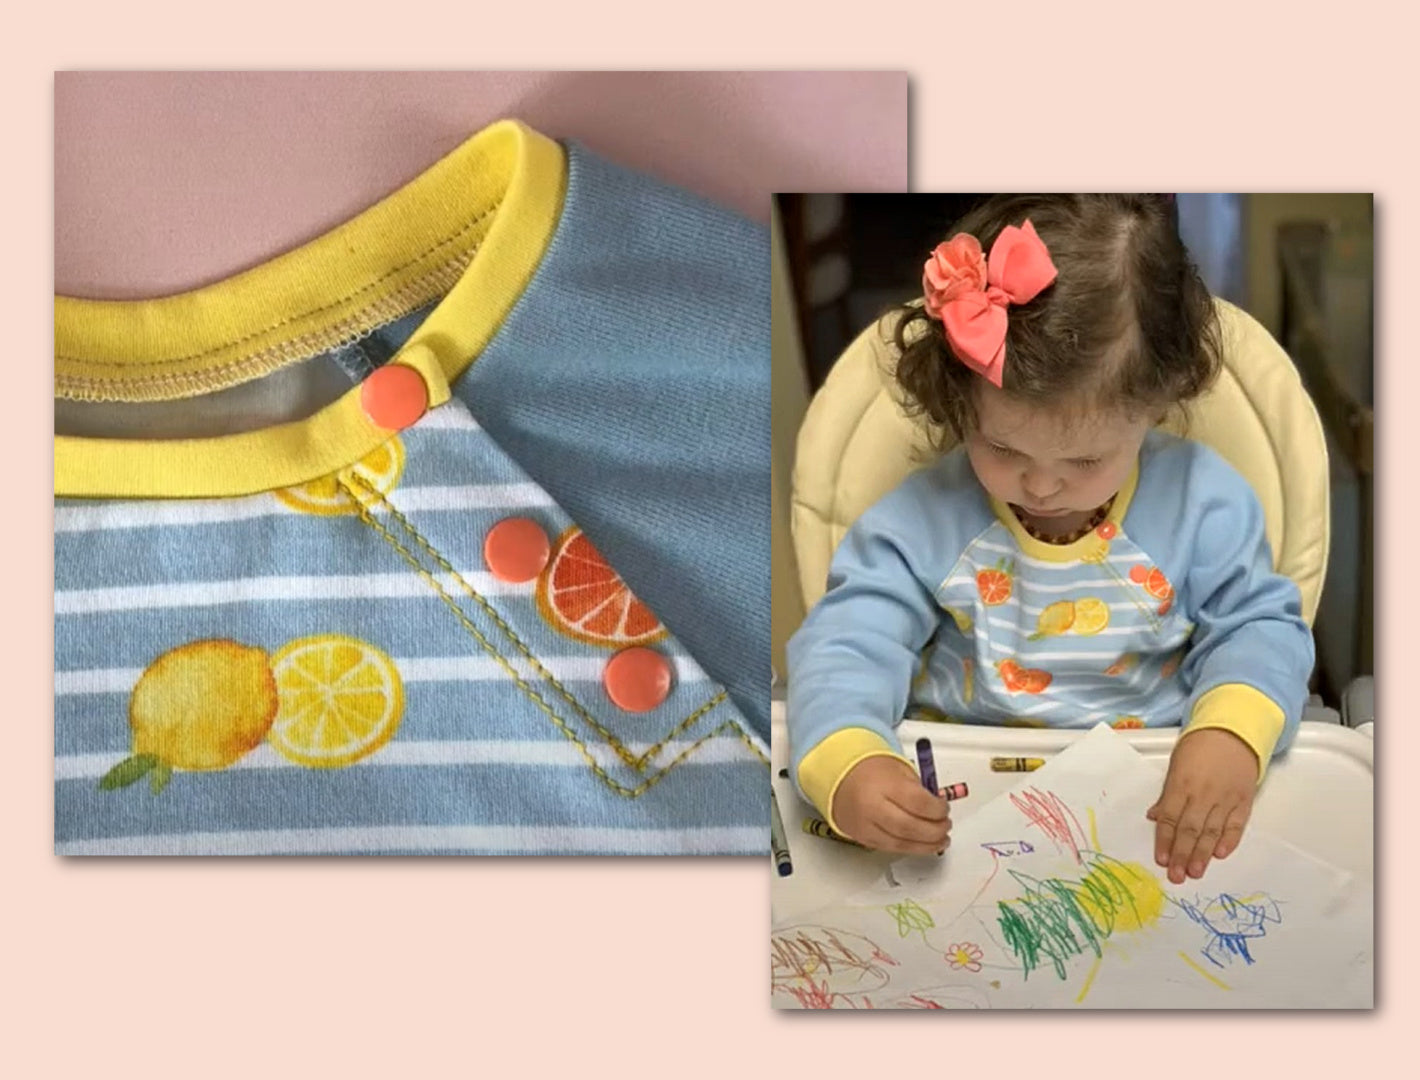
Wir haben hier einen ganz tollen Verschluss. Es ist einfach nur ein angeschnittener Besatz und eine Knopfleiste, die dadurch entsteht. Ich habe hier KamSnaps benutzt. KamSnaps sind für alle Anfänger immer eine gute Methode und es ist auch nicht so schwierig, dieses hier einzuarbeiten. Die Schwierigkeit war für mich, das Schnittmuster für euch zu zeichnen – das Nähen ist eigentlich gar nicht so schwer.

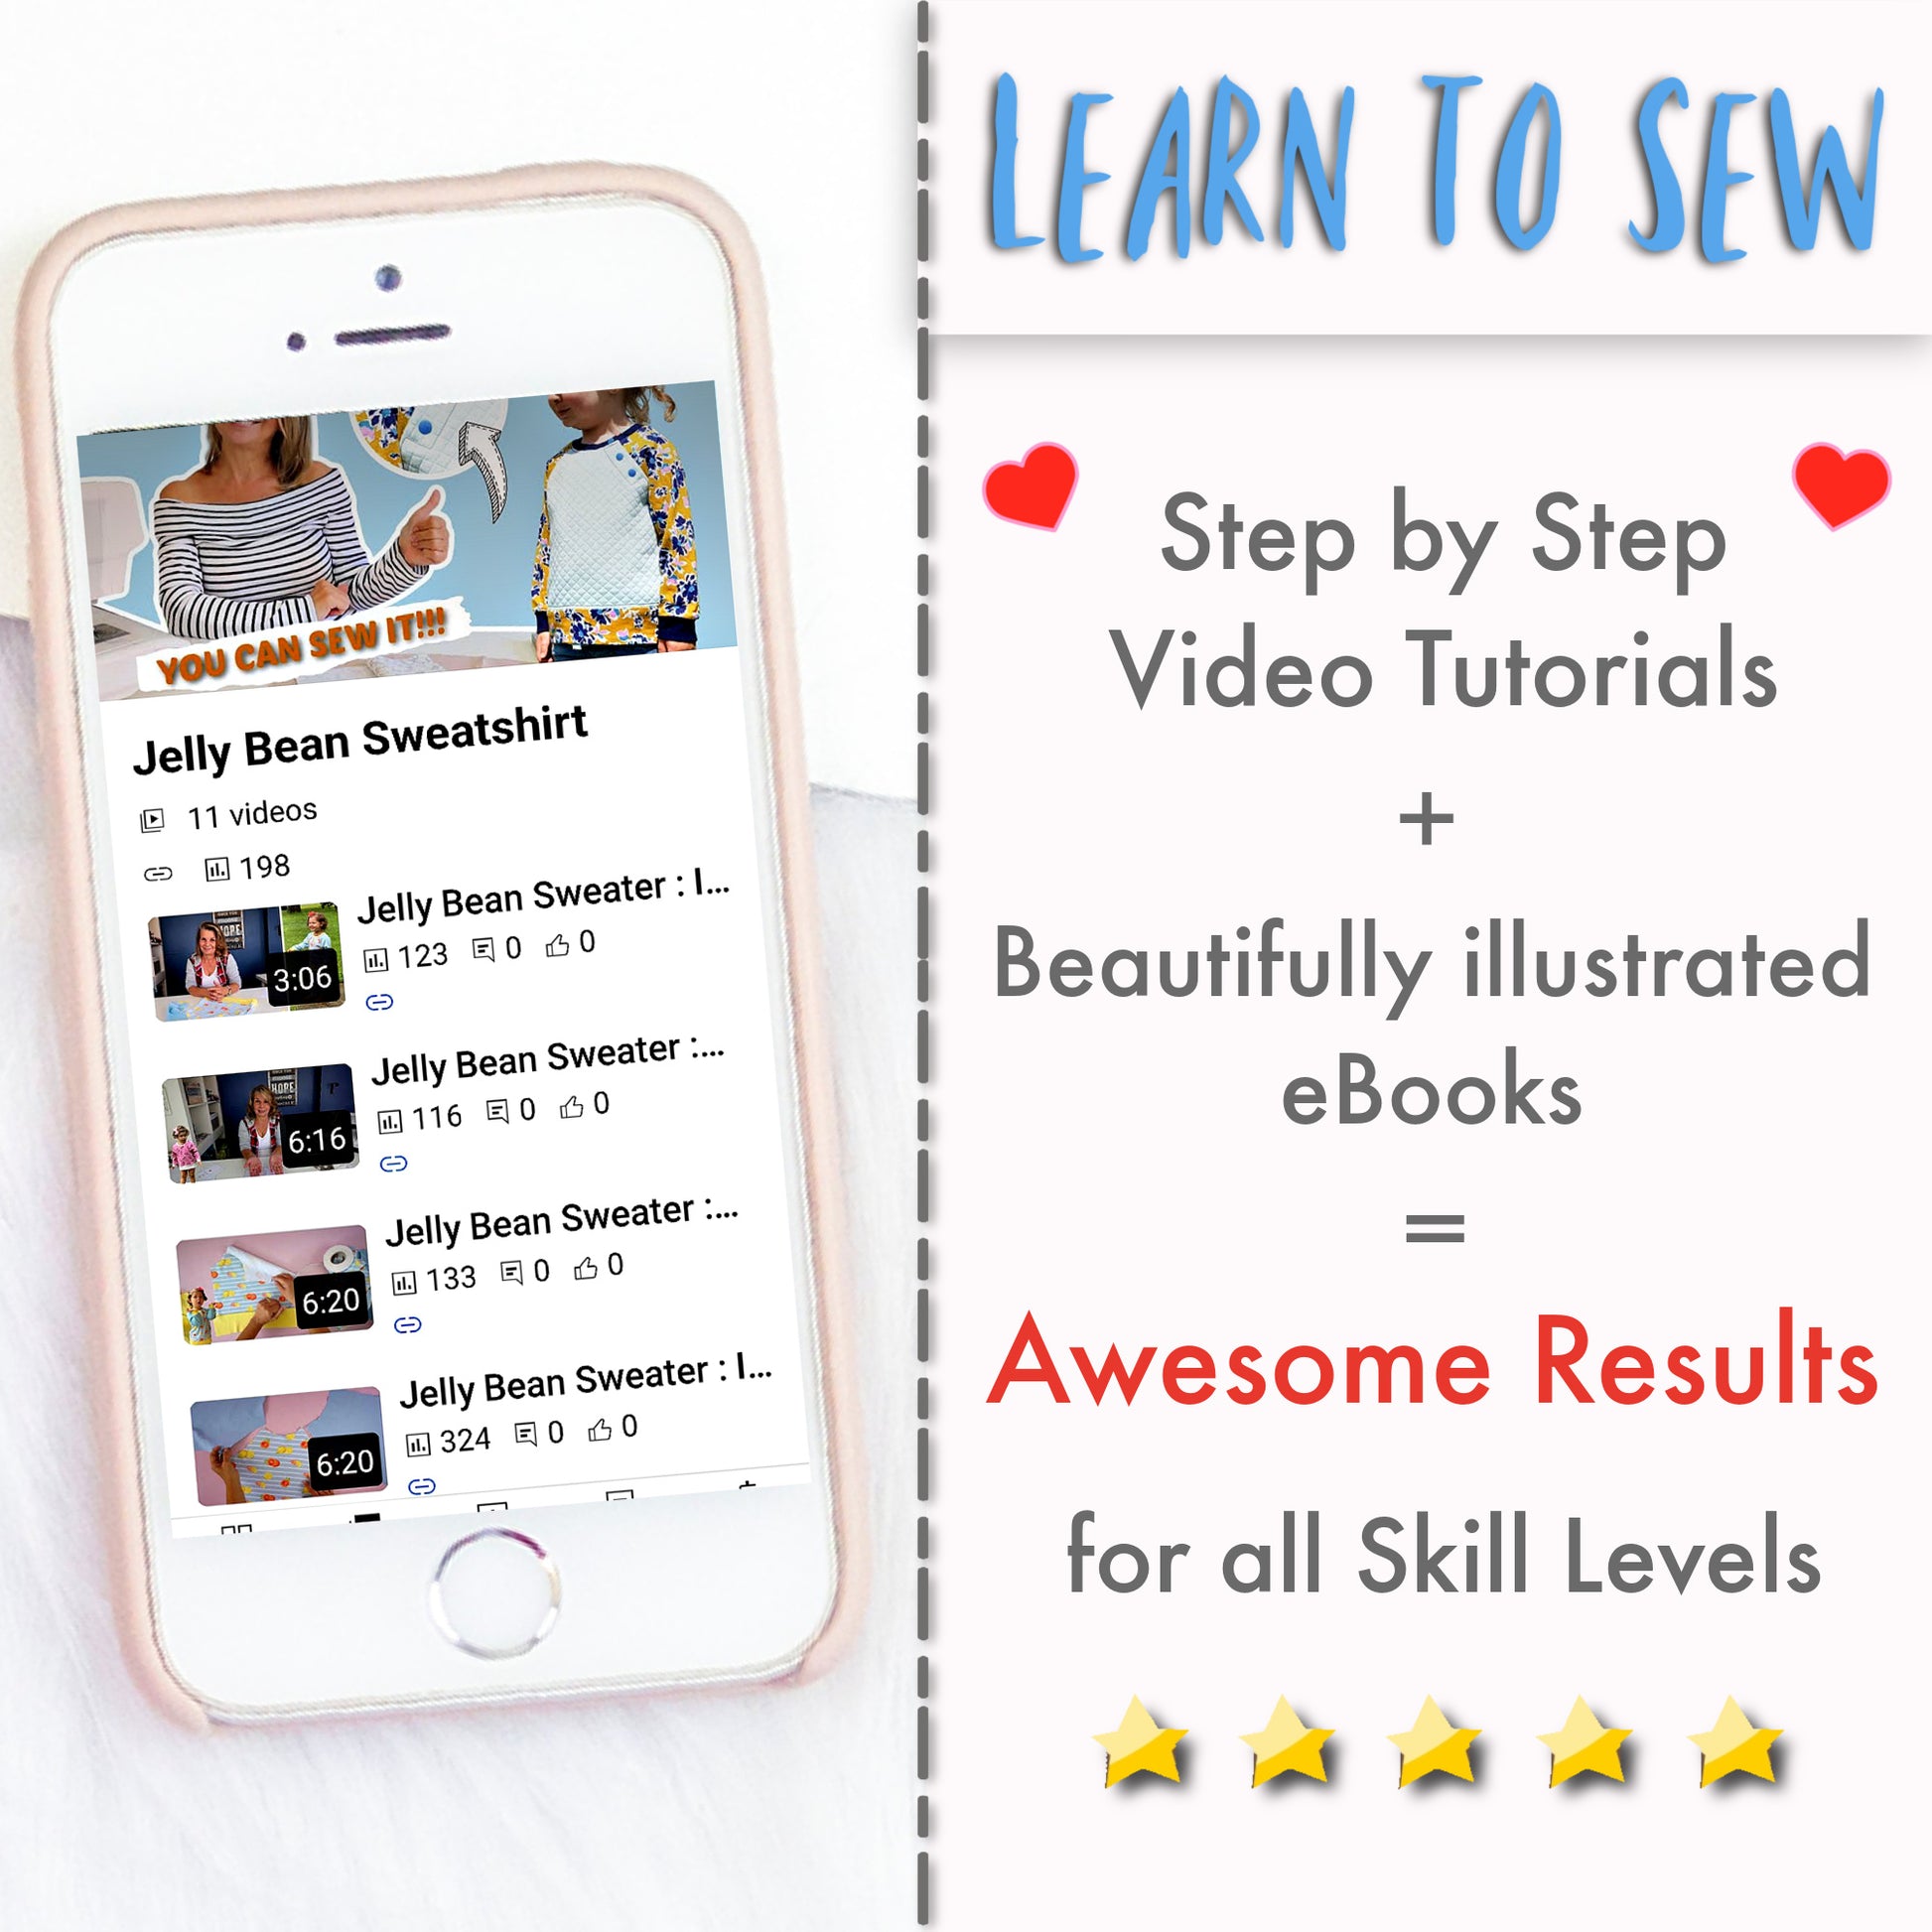
Ich zeige euch das hier einmal auf YouTube und wenn ihr dann richtig Geschmack daran gefunden habt, könnt ihr euch natürlich für den Kurs eintragen auf akademie.dortforbes.com oder auf frocksandfrolics.com, und ich trage dich dann in die Akademie ein.

Hinweise zur Kursanmeldung

In der Akademie ist es so, dass du nur mit PayPal bezahlen kannst.
Wenn dir das nicht recht ist, kannst du das Ganze auch auf frocksandfrolics.com machen und dann trage ich dich ein. Dann kann es sofort losgehen.

In der Regel geht das ziemlich schnell. Aber wie ihr vielleicht wisst: Ich lebe in L.A. – also wenn ich schlafe, seid ihr wach. Bei meinen deutschen Kunden dauert es dann manchmal ein paar Stunden länger. Wenn ich am Schreibtisch sitze, ist es natürlich sofort erledigt.

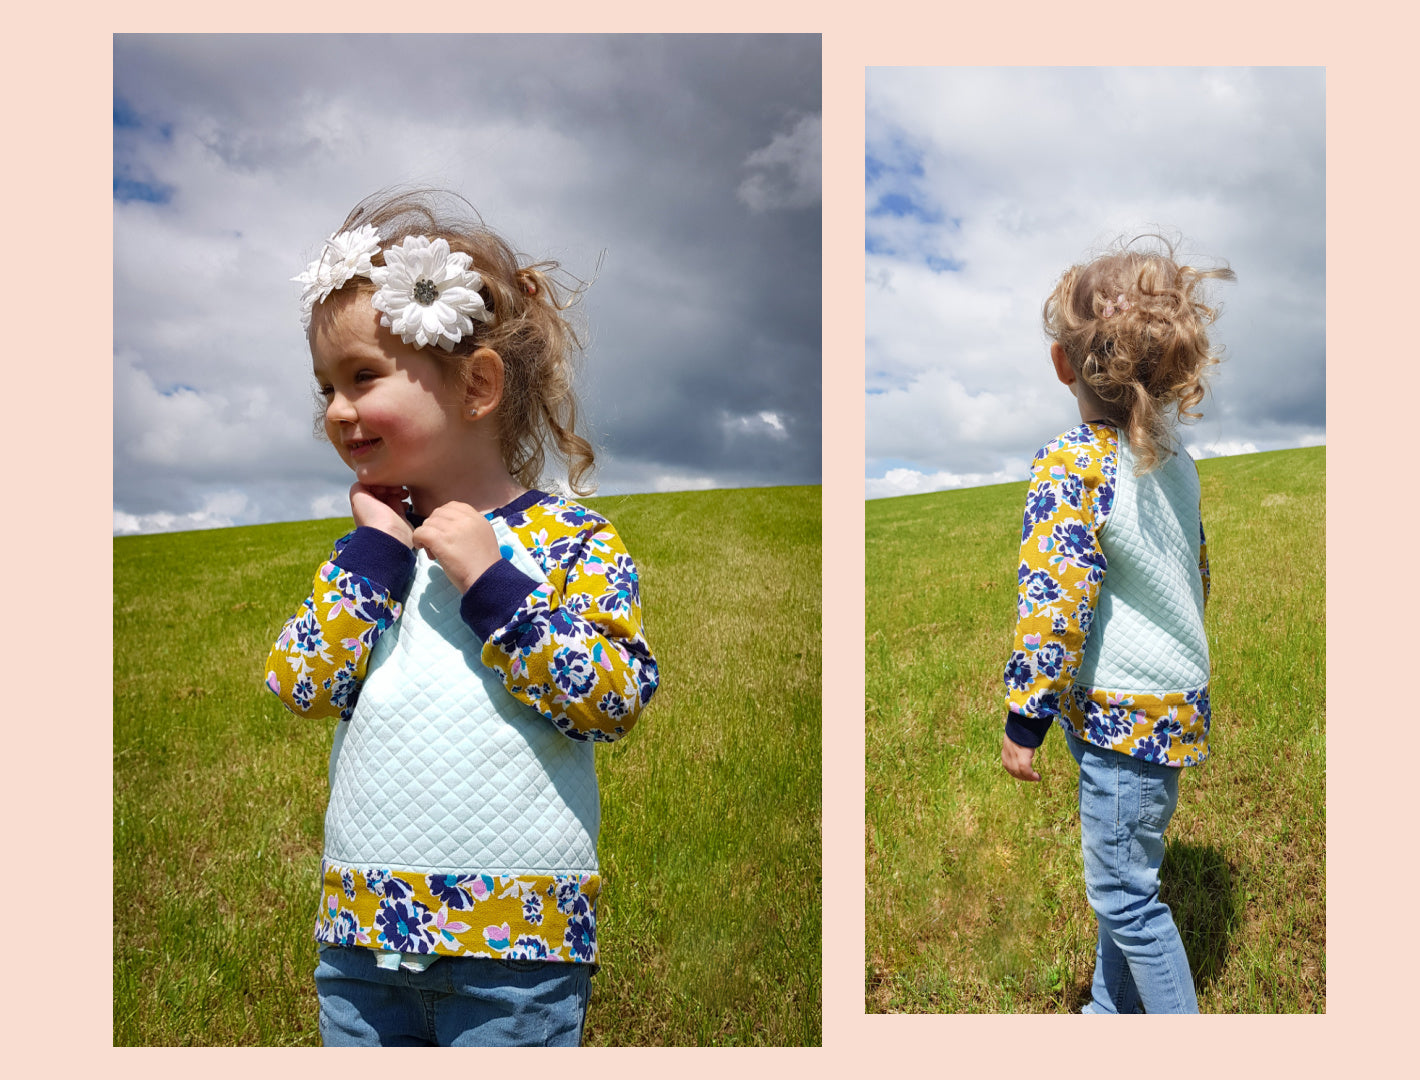
Vorstellung des Sets

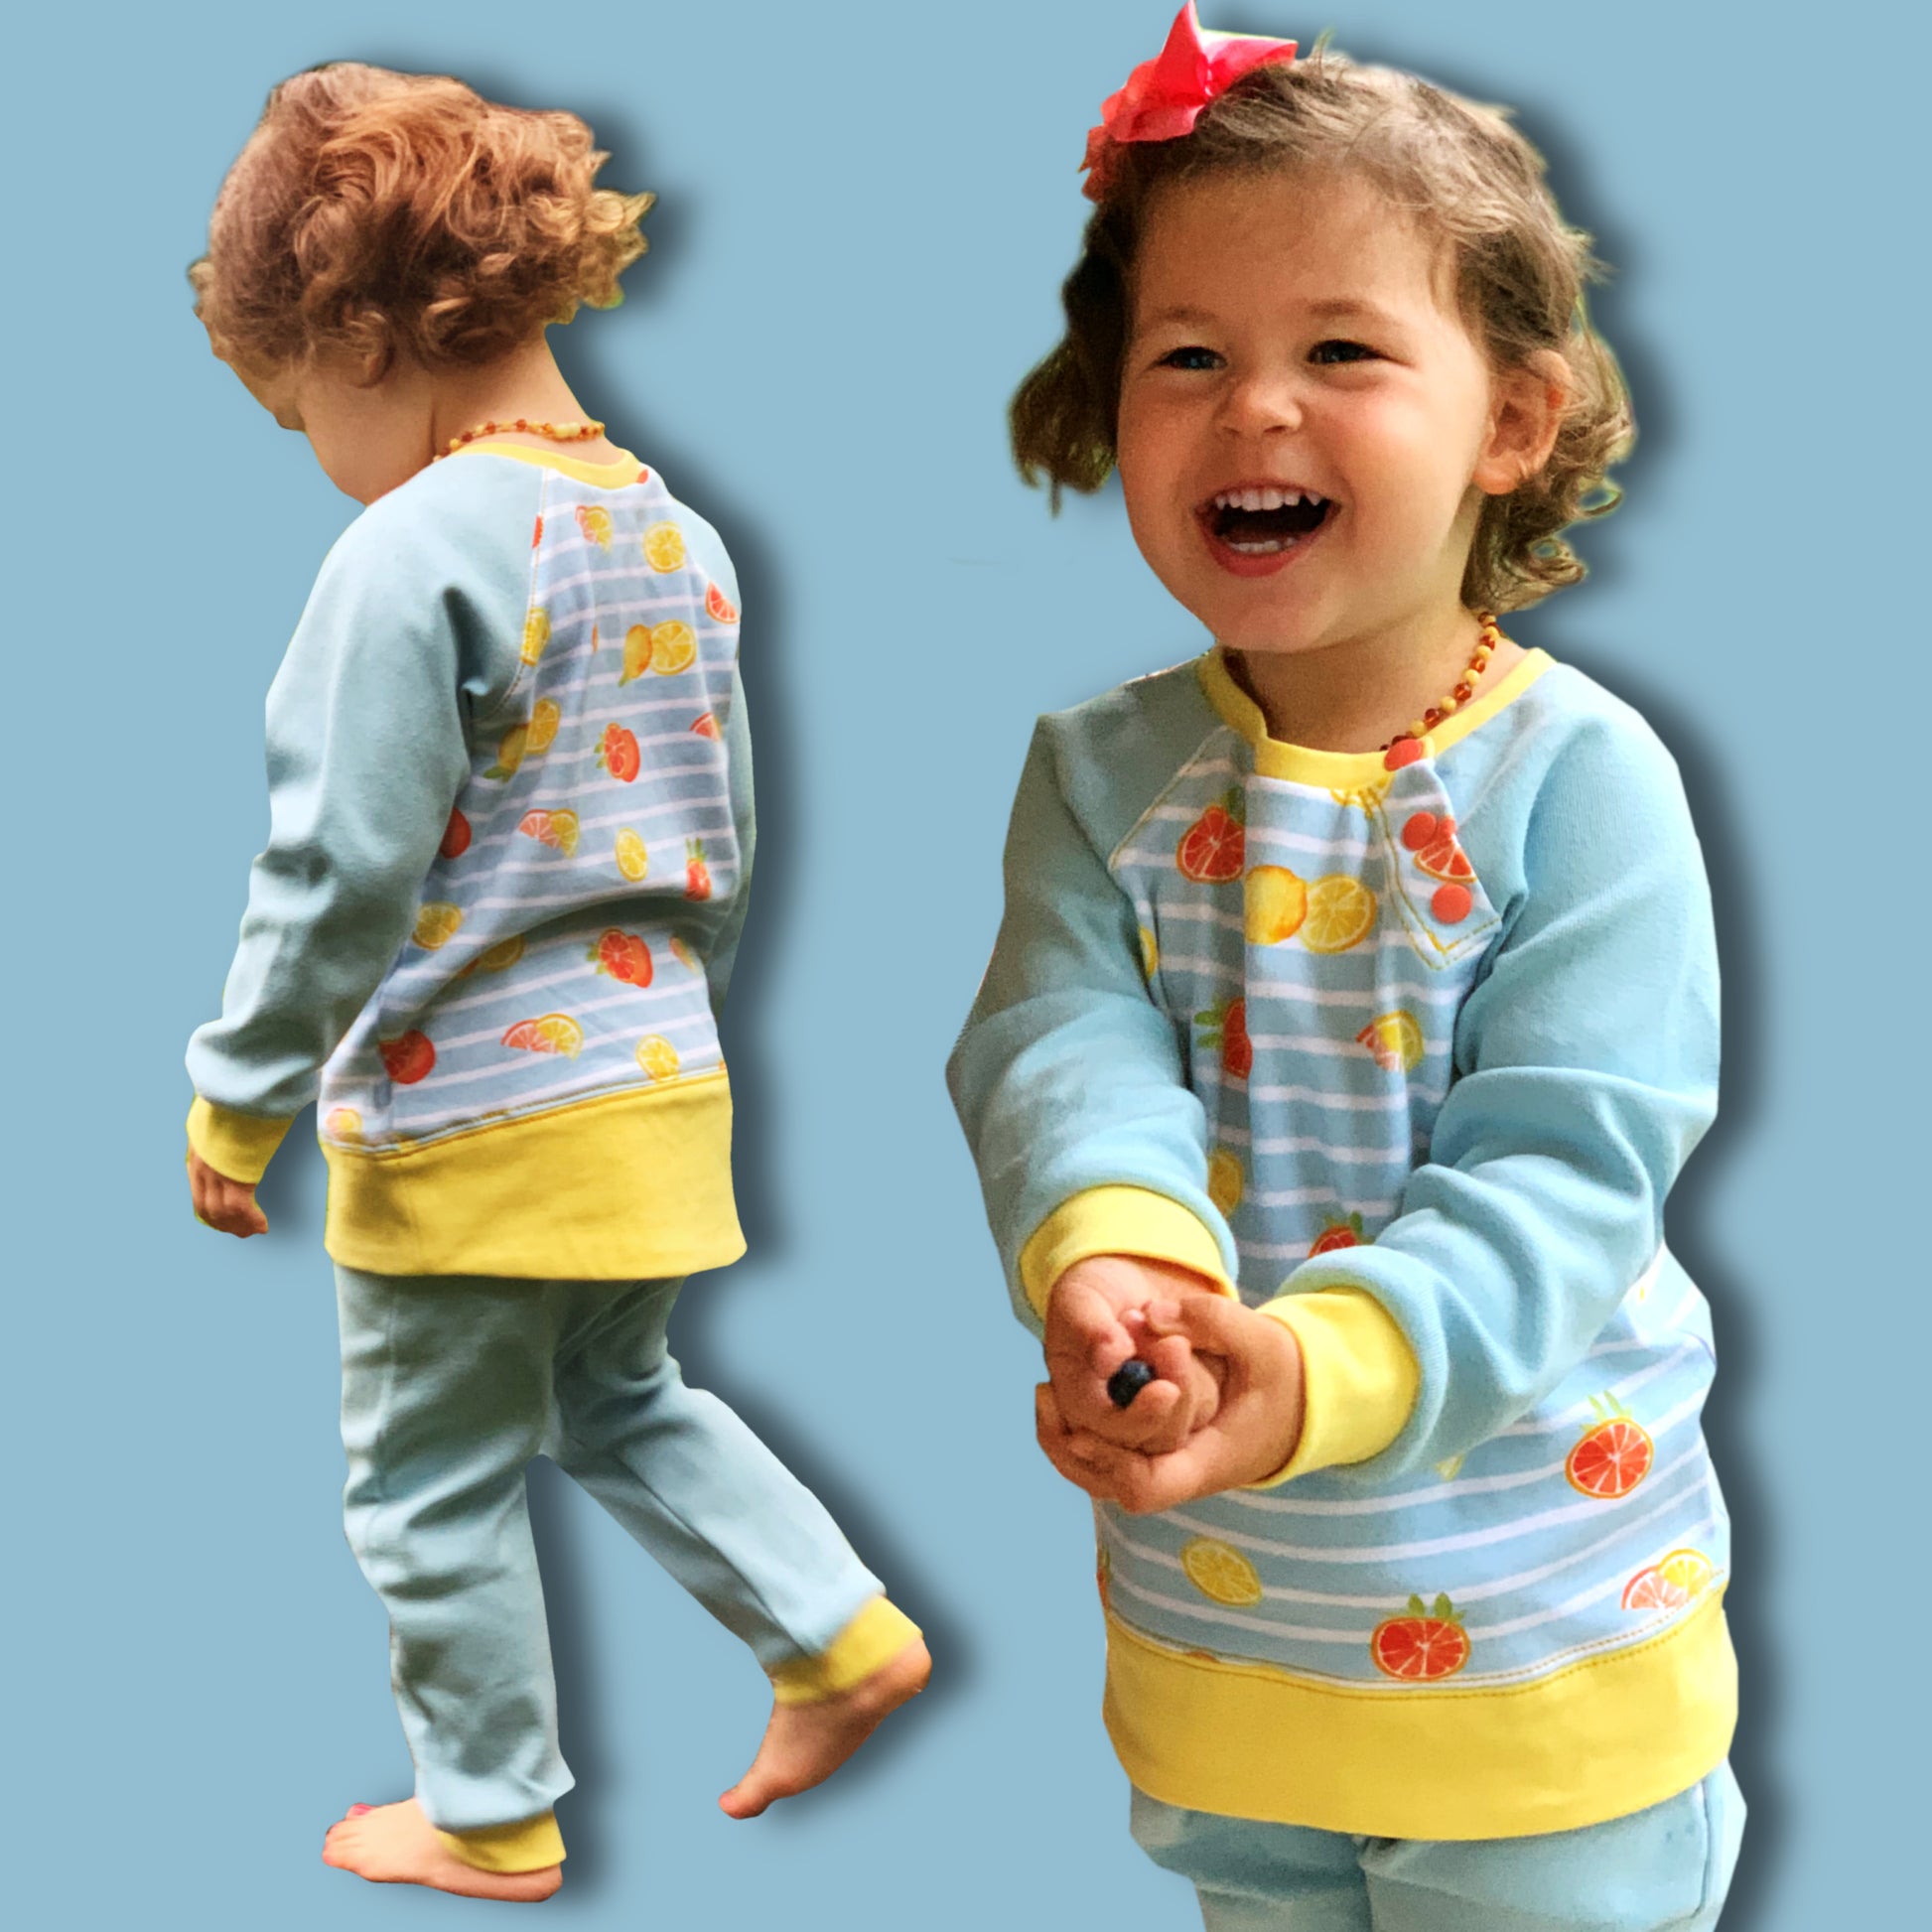
Dieses kleine Sweatshirt kommt auch mit einer Jogginghose. Die gibt es ja mittlerweile auch schon.
Hier haben wir ein bisschen Knopflöcher eingearbeitet, ganz tolle Taschen, Zwickel und so – braucht man nicht weiter zu erklären. Es ist also eine ganz tolle Jogginghose oder „Pumphose“, wie man in Deutschland, habe ich mir sagen lassen, lieber sagt.

Bei unserem Special haben wir die Möglichkeit, entweder ein Hailo‑Saumbündchen anzubringen oder einfach einen ganz normalen Saum zu nähen.

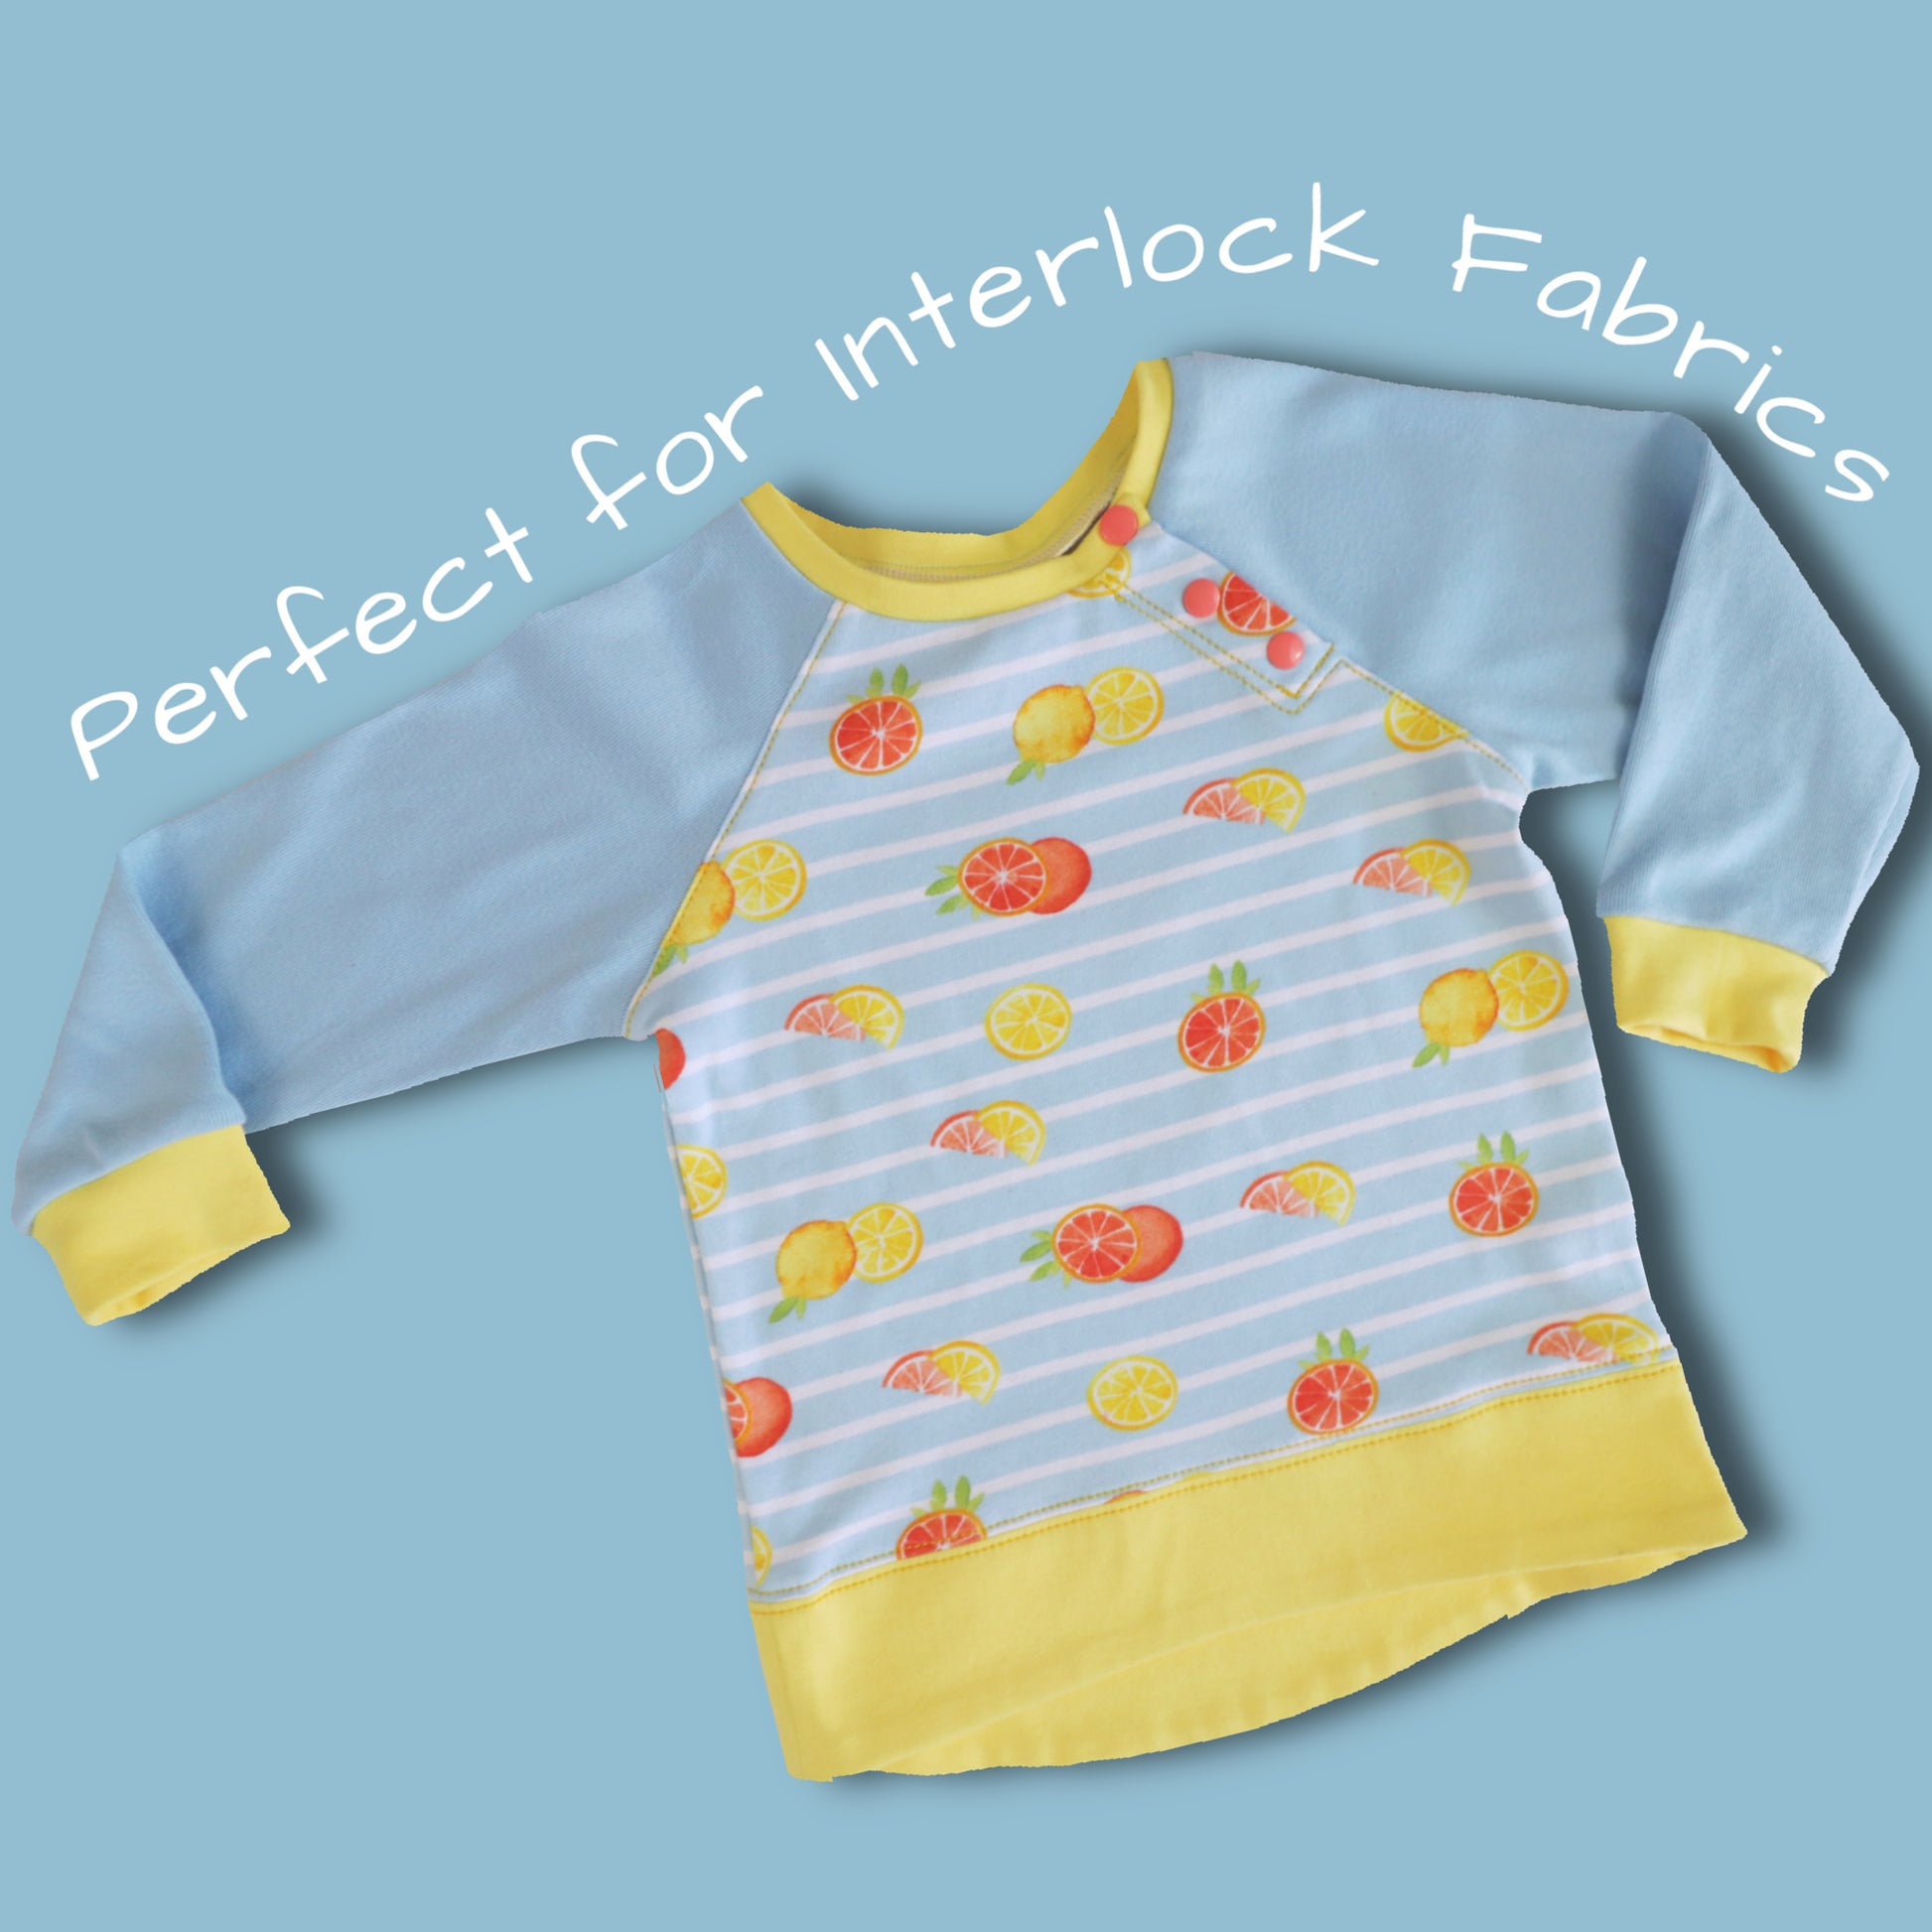
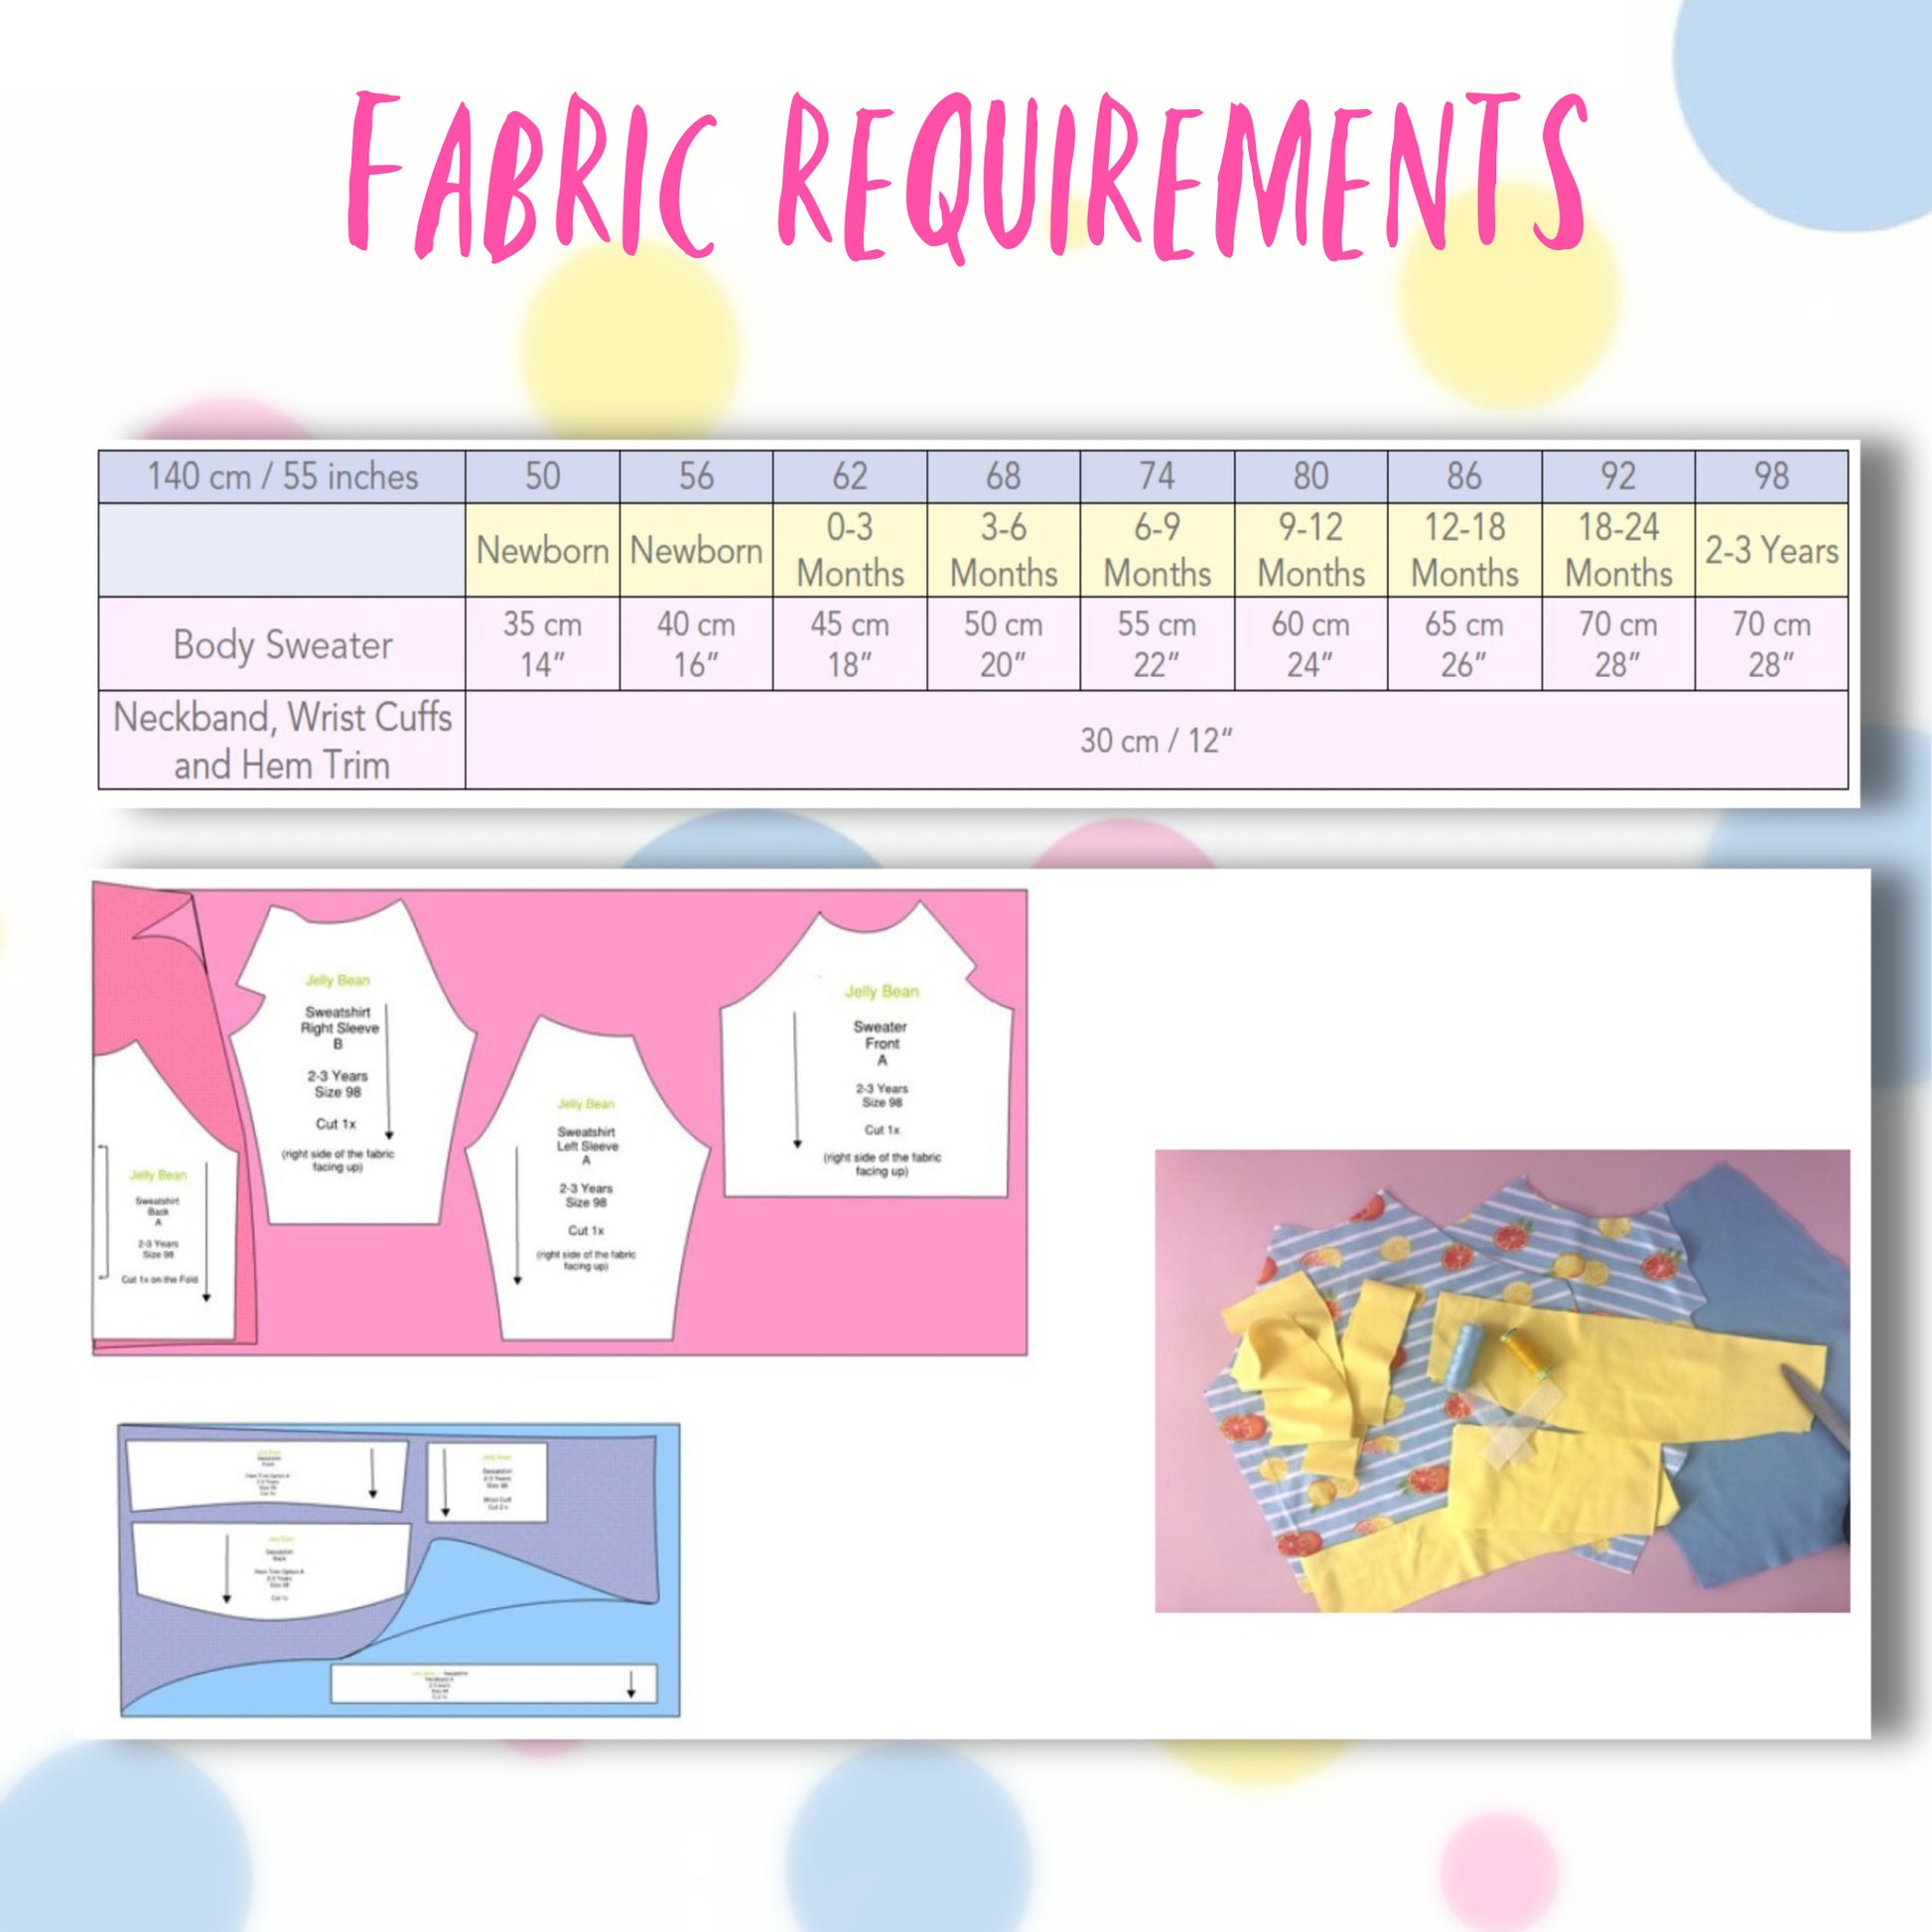
Für die Stoffauswahl würde ich euch einen festeren Sweatshirtstoff empfehlen, wenn ihr den finden könnt, oder auch einen festeren einfachen Strick. Jersey geht auch.
Für euren Halsausschnitt würde ich entweder Interlock mit etwas Lycra oder Elasthan nehmen oder eben einen Rippenstrick – der passt dann auch ganz gut.

Hinweis zu meinen Schnittmustern

Noch eine Anmerkung zu meinen Schnittmustern, falls du hier zum ersten Mal vorbeischaust:

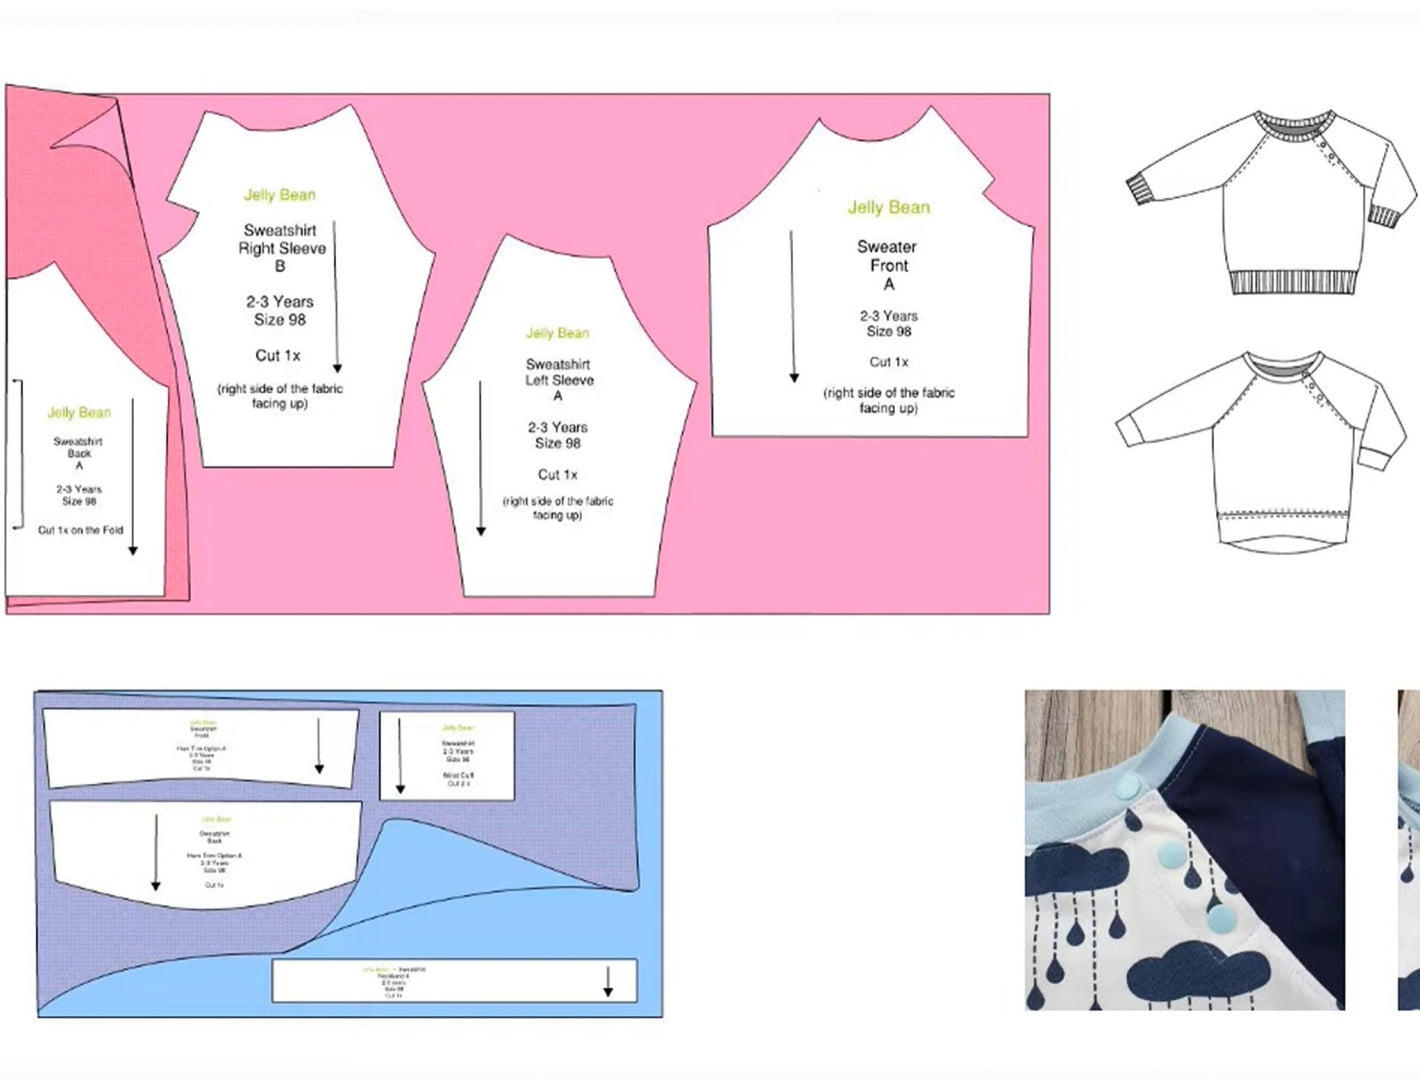
Meine Schnittmuster haben für jede Größe ein einzelnes Dokument.
Ich werde immer wieder gefragt: „Bekomme ich denn alle Größen?“
Klar bekommst du alle Größen – aber jede Größe ist eine eigene Datei.

Das bedeutet:

  • Ich kann die Teile viel besser auf dem Papier arrangieren
  • Du hast weniger Papierverbrauch
  • Es ist viel einfacher zusammenzusetzen
  • Du musst nicht riesige Bögen puzzeln
  • Und du hast nicht das Problem, dass der Drucker schief einzieht und plötzlich nichts mehr passt

Alle Infos findest du entweder oben im Infobutton oder in der Infobox.
Der Kurs ist natürlich wesentlich detaillierter und enthält Dinge, die du hier nicht bekommst.
Aber für alle, die reinschnuppern wollen, ist das eine tolle Sache.

Stoffauswahl für das Beispiel

Für mein Beispiel habe ich einen schön bedruckten Jersey ausgesucht und für die Bündchen einen gelben Interlock.
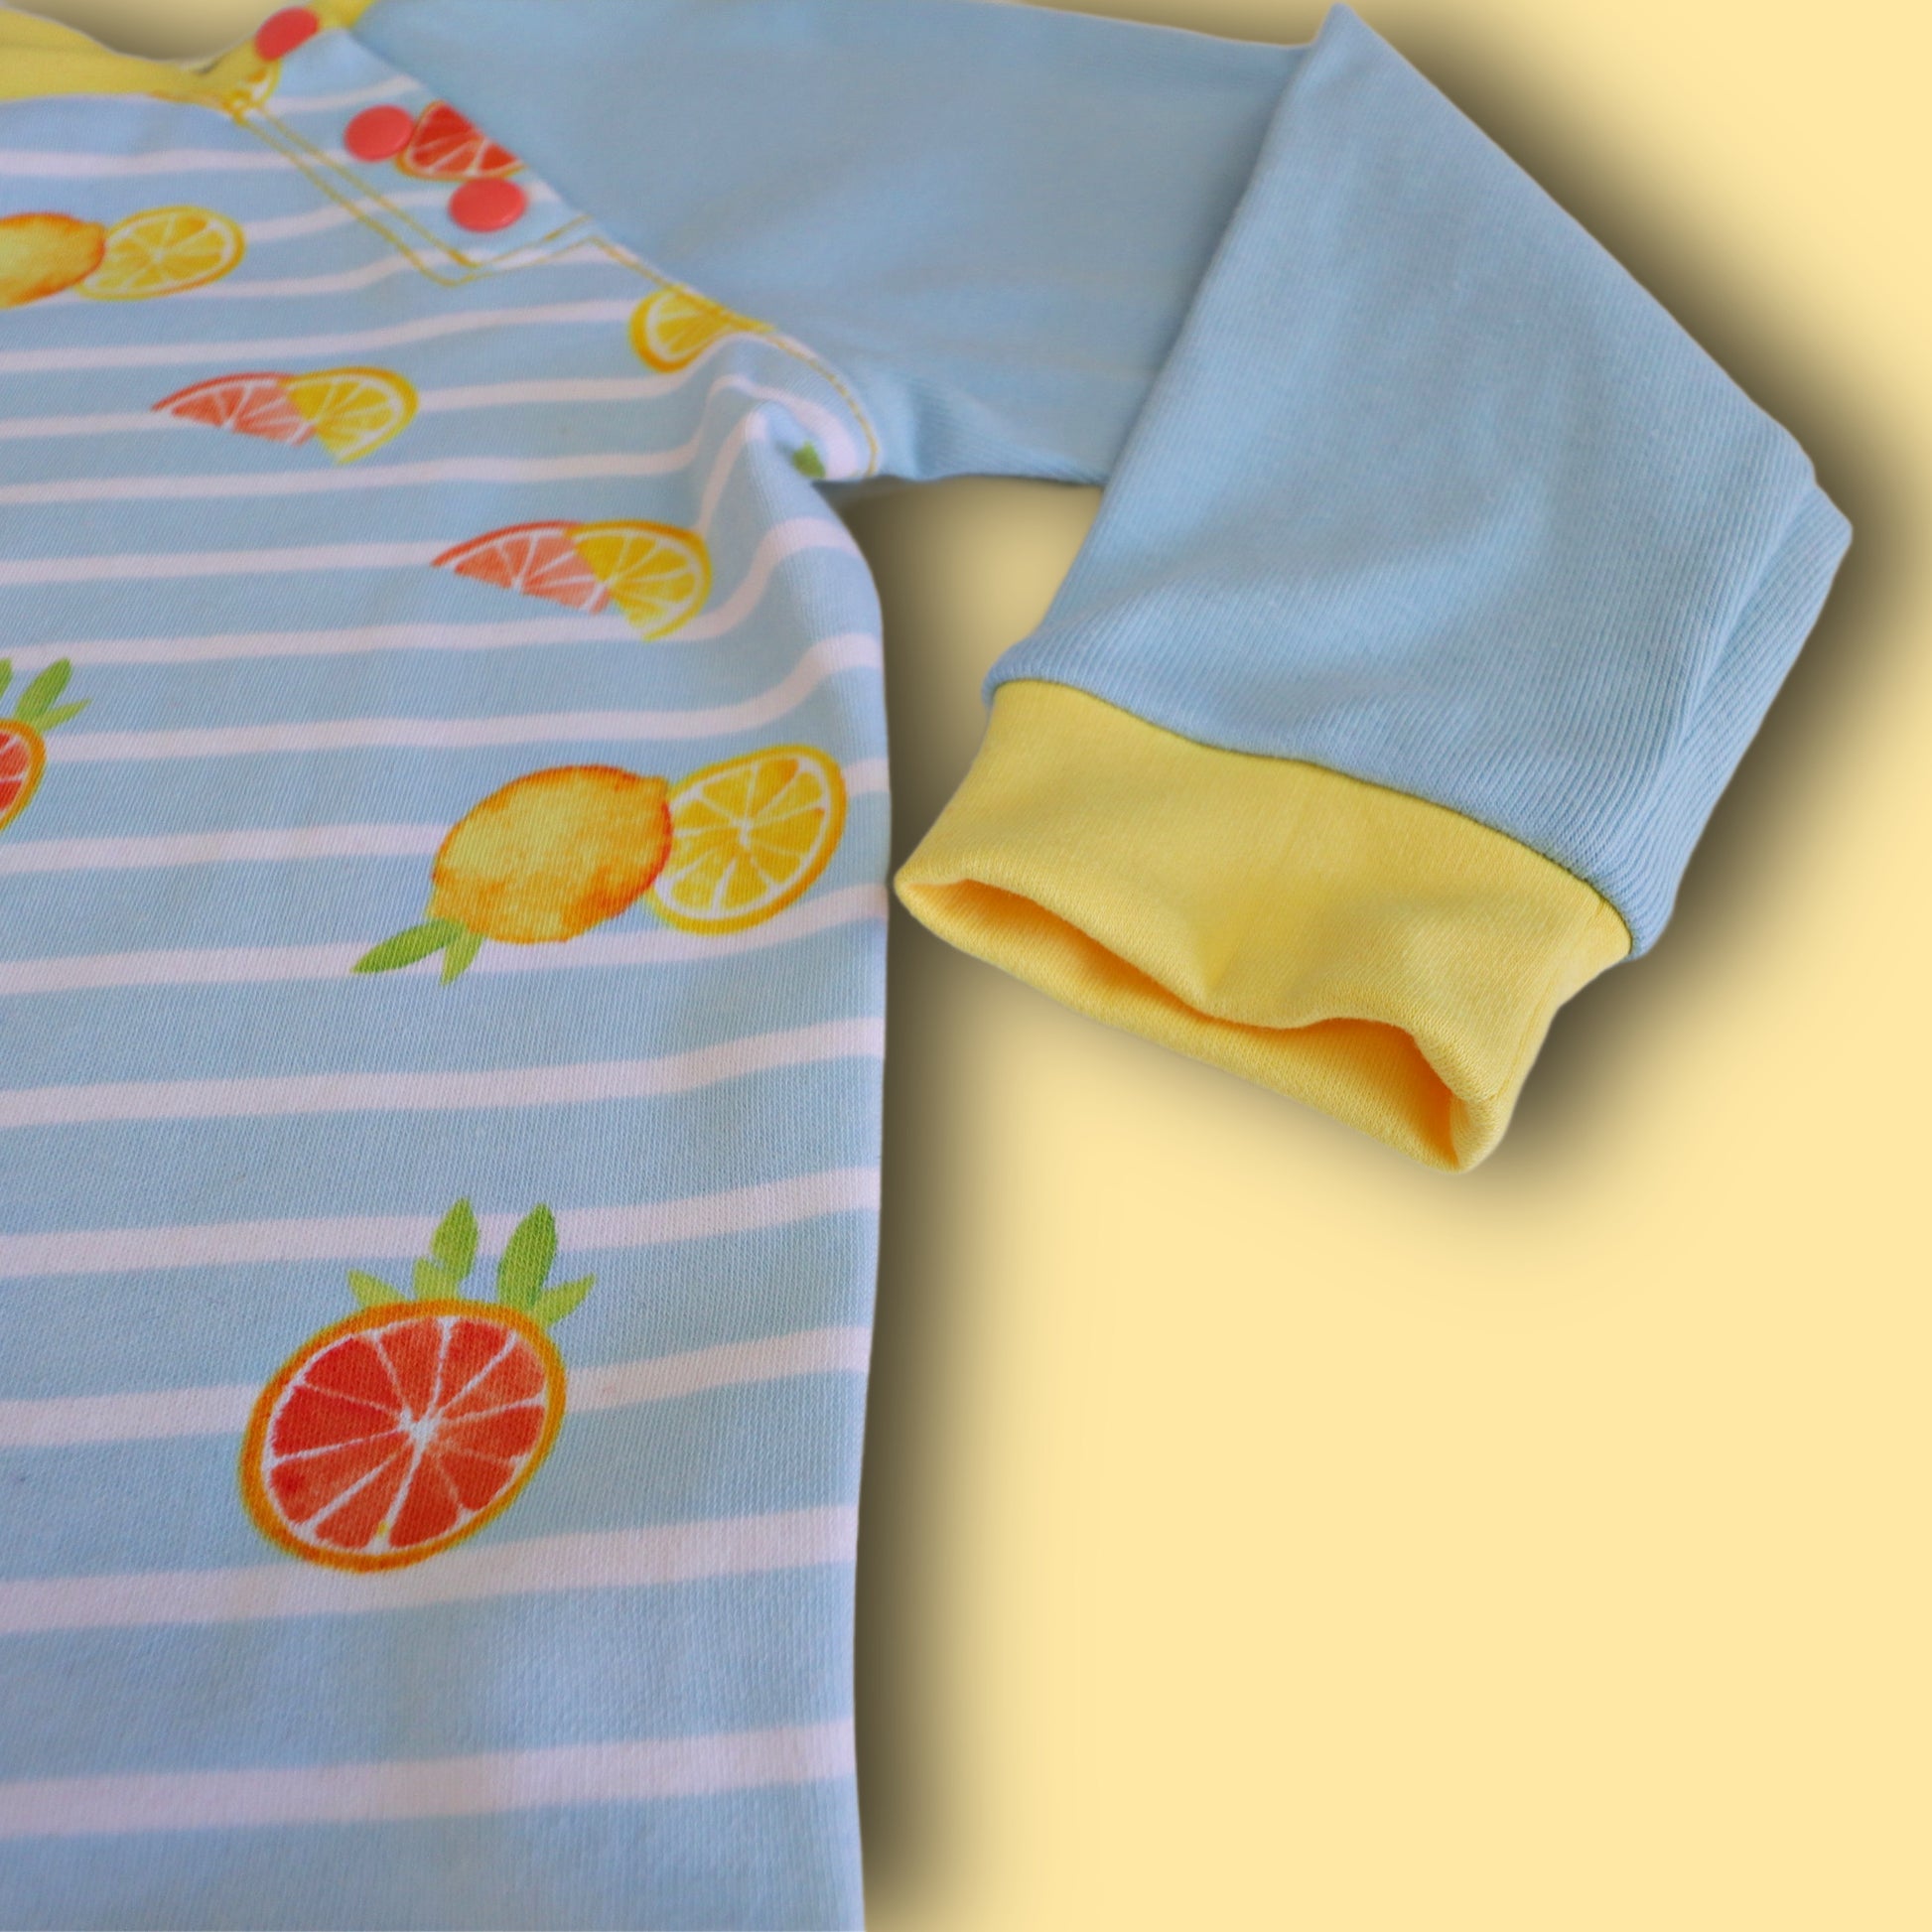
Dann haben wir natürlich das tolle Hailo‑Bündchen in der Methode, die ich euch hier zeigen möchte, damit es schön flach wird.

Die KamSnaps hier oben sind in diesem Fall orange.
Alles ist schon zugeschnitten.

Mein gelber Interlock hat etwas Elasthan drin, dadurch springt er gut zurück und ist sehr geeignet. Den nehme ich für alle Bündchen und auch für den Halsausschnitt.

Für die Ärmel habe ich einen Rippenstrick genommen. Der ist nicht so gut zurückgesprungen. Da habe ich mir gedacht: „Mensch, ich nehme den für die Ärmel – für die Bündchen hat er nicht gereicht.“

Du brauchst außerdem etwas Vlieseline für die Stabilisierung der Knopfleiste.
Und dann haben wir hier ein schönes Garn zum Absteppen von Gütermann, in diesem Fall in Gelb.

Vorbereitung der Knopfleiste

Jetzt schneiden wir erst einmal die Streifen zu, die wir zur Stabilisierung unserer Knopfleiste brauchen.
Dann kann es endlich losgehen.

Wir fangen an, indem wir die Vlieseline auf die Stoffunterseite im Bereich der Knopfleiste aufbügeln.
Das mache ich am Ärmel und auch am Vorderteil.
Dann muss ich diese Kante, die ich aufgebügelt habe, beidseitig abketteln.

Raglanärmel einsetzen

Jetzt arbeiten wir den Raglanärmel ein.
Du kannst das Vorderteil markieren, damit du weißt: Das gehört aufeinander.

Das wird dann mit 1 cm Nahtzugabe zusammengenäht.
Dort, wo wir die Knopfleiste einnähen, nähen wir nur 1 cm höher als unsere Knopfleiste.
Du kannst dir das gerne markieren.

Jetzt muss ich noch das Rückenteil an die Ärmel anstecken – und das war’s auch schon.
Wir können an die Nähmaschine und alles mit 1 cm Nahtzugabe zusammennähen.
Im Anschluss wird alles abgekettelt.

Knopfleistenbereich nähen

Jetzt schauen wir uns die Stelle der Knopfleiste genau an.
Erst einmal zurücknähen, gut verriegeln und dann bis zum Ende nähen.

Jetzt wird alles abgekettelt.

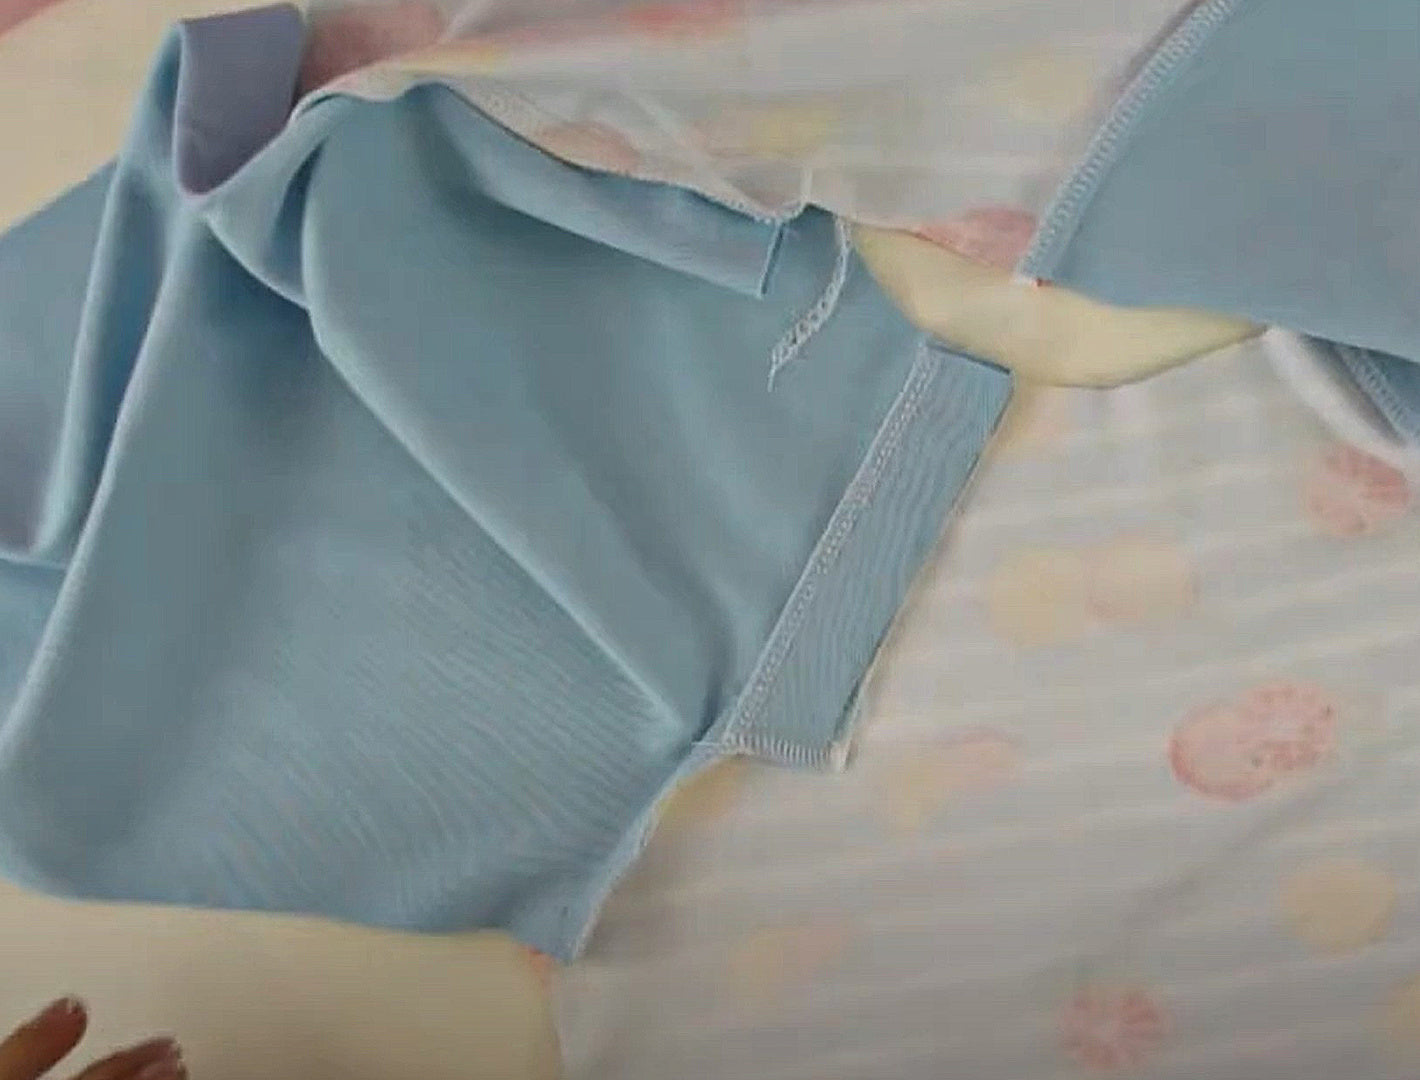
Hier kommen wir an die Knopfleiste, die wir umgefaltet haben.
Das sind jetzt 2,5 cm, damit wir die Kettelnaht vom Vorderteil noch sehen können.
Dann wird es ganz einfach nur abgekettelt.
Man muss nur wissen, wo die Kettelnaht sitzt, damit man später beim Absteppen keine Schwierigkeiten hat.

Nähte bügeln und absteppen

Dann wird die Naht ins Vorderteil gebügelt.
Ich kann jetzt auch meine Knopfleiste gut durchbügeln.
Dann sitzt das schon sehr schön.

Jetzt kann ich meine Nähte absteppen – auf dem Vorderteil oder Rückenteil.
Aber dort, wo die Knopfleiste eingearbeitet ist, lassen wir das erst einmal stehen.
Das machen wir später.

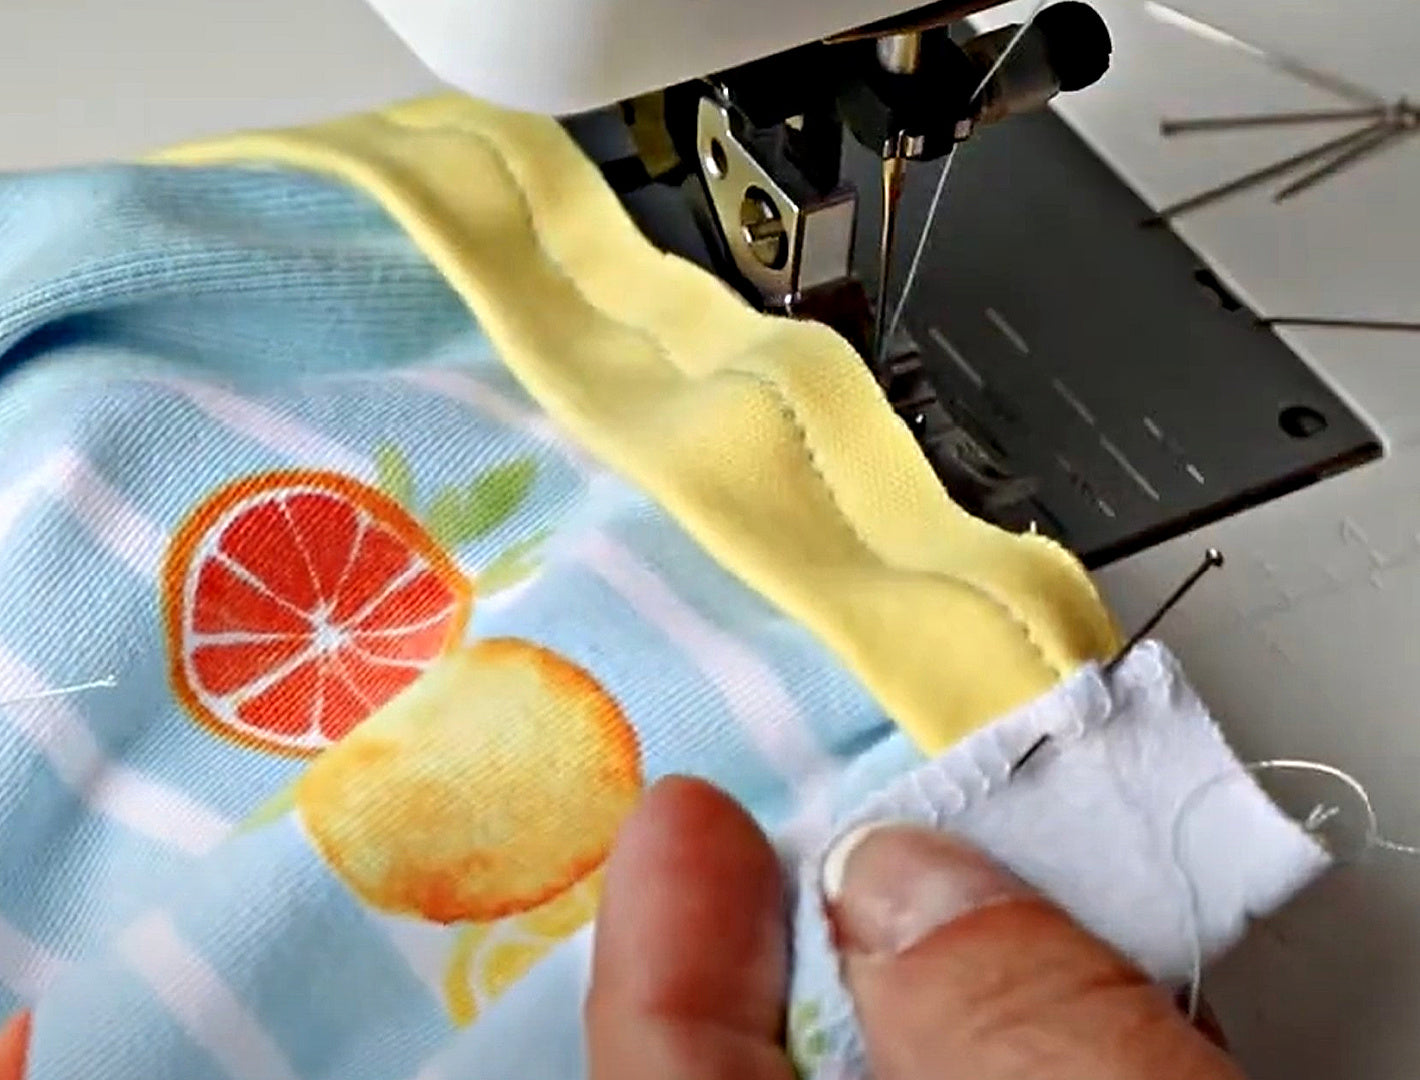
Halsausschnitt vorbereiten

Jetzt wird der Halsausschnitt gemacht.
Dazu wird das Streifenband an der kurzen Seite geschlossen und die Nahtzugabe zurückgeschnitten.
Dann wird das Streifenband längs auf die Hälfte gebügelt.

Jetzt können wir es in den Halsausschnitt einsetzen.

Wir markieren:

  • die Mitte des Streifenbands
  • die Mitte des Halsausschnitts (gegenüber der Knopfleiste)

Diese beiden Punkte müssen aufeinanderliegen.

Der Anfang und das Ende des Streifenbands kommen an die Bügelfalte der Knopfleiste.
Dann wird alles gleichmäßig rundherum angesteckt.

Halsausschnitt annähen

Jetzt wird angenäht.
Im Anschluss wird der Besatz umgeschlagen und noch einmal angenäht.

Wenn man das in einem Schritt macht, hat man fast immer eine kleine Falte drin.
Deshalb:

  1. erst annähen
  2. dann umschlagen
  3. dann absteppen

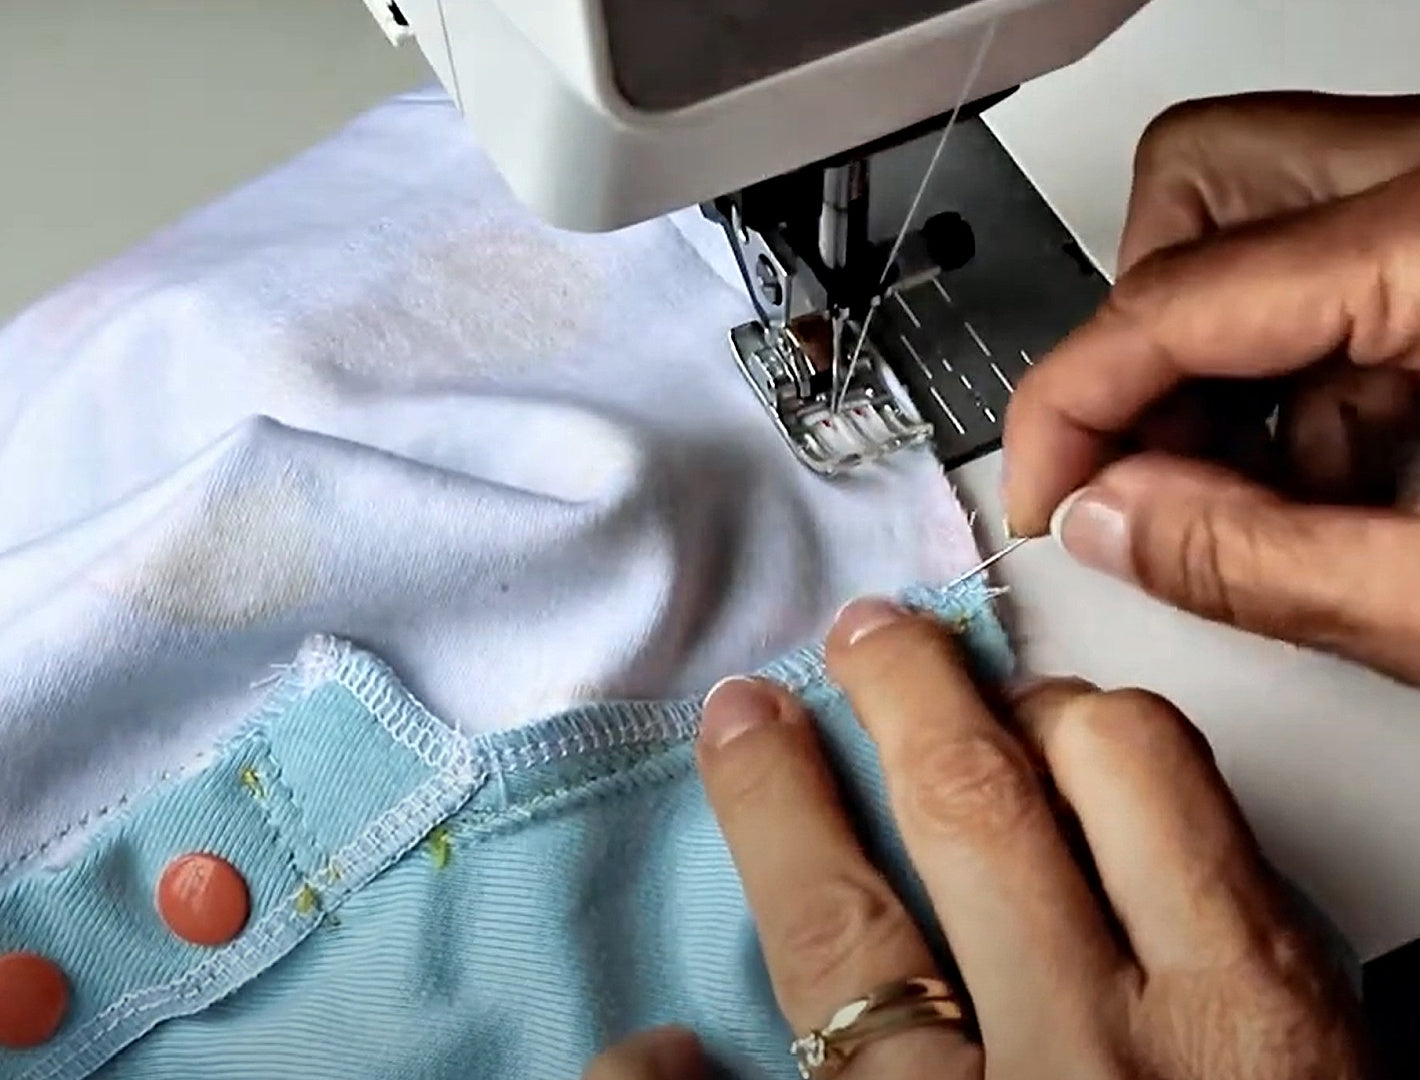
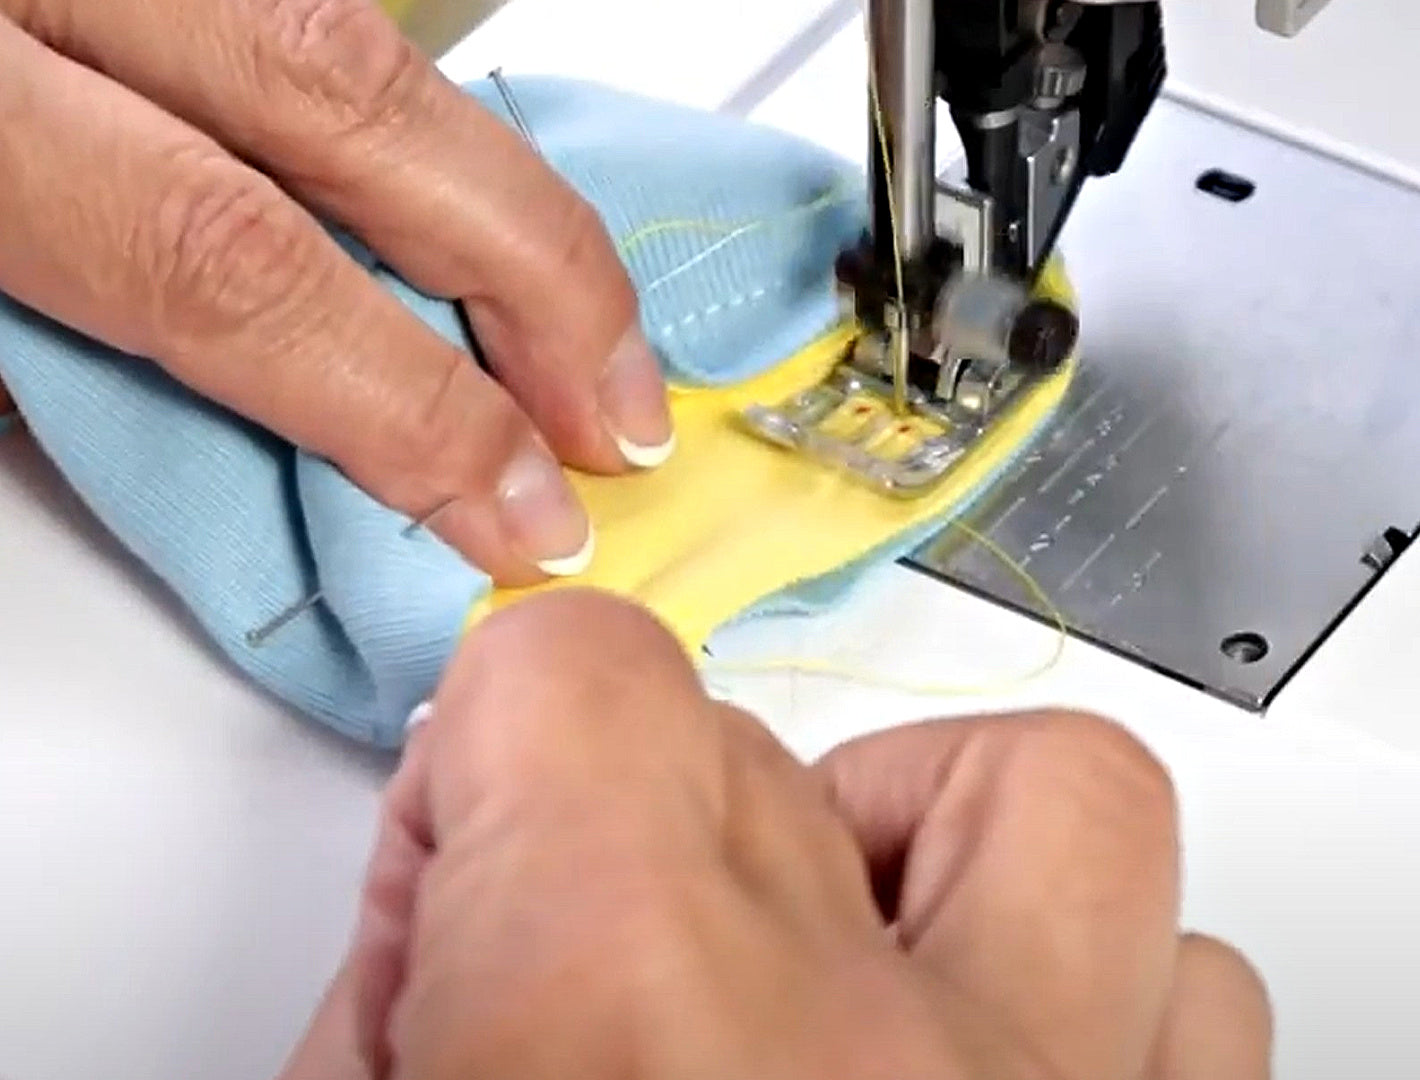
Absteppen der Knopfleiste

Ich nähe hier nur füßchenbreit, damit es mit den KamSnaps gut klappt.

Jetzt wird der Besatz eingeschlagen – richtig eng, damit keine Falte entsteht.
Ich stecke eine Nadel senkrecht zur Naht und steppe dann genau auf der Linie.

Das Ergebnis sieht wunderbar aus.

KamSnaps anbringen

Jetzt kommen die KamSnaps.

Du kannst sie anzeichnen oder einfach eindrücken.
Dann nimmst du die Ahle und stichst durch alle Lagen.

KamSnaps bestehen aus:

  • zwei flachen Caps
  • einem Socket (mit Wulstrand)
  • einem Stud (mit scharfer Kante)

Zuerst kommt der flache Cap unten durch den Stoff.
Dann wird der Socket oben aufgesetzt und mit der Zange zusammengedrückt.

Dann kommt der nächste Cap durch und oben der Stud.
Wieder zusammendrücken – fertig.

Das machst du für alle vier KamSnaps.

Seitennähte schließen

Als Nächstes werden die Seitennähte geschlossen – in einem Rutsch.

Dazu wenden wir das Sweatshirt, legen die Unterarmnaht aufeinander und nähen mit 1 cm Nahtzugabe.
Dann wird alles abgekettelt.

Die Seitennähte sind geschlossen – jetzt wird gebügelt.
Immer zur rückwärtigen Mitte hin.

Saumband vorbereiten

Jetzt machen wir das Saumband.

Dazu haben wir zwei Vorderteile und zwei Rückenteile, die jeweils zusammengenäht werden.
Ich mache auch gleich meine Bündchen für die Ärmel, damit ich alles in einem Durchgang nähen kann.

Jetzt wird das Saumband auseinandergebügelt.

Ein Teil wird auf rechts gezogen und in das andere hineingesteckt.
Dann wird rundherum mit 1 cm Nahtzugabe zusammengenäht.

Die Nahtzugaben werden zurückgeschnitten und auseinandergebügelt.
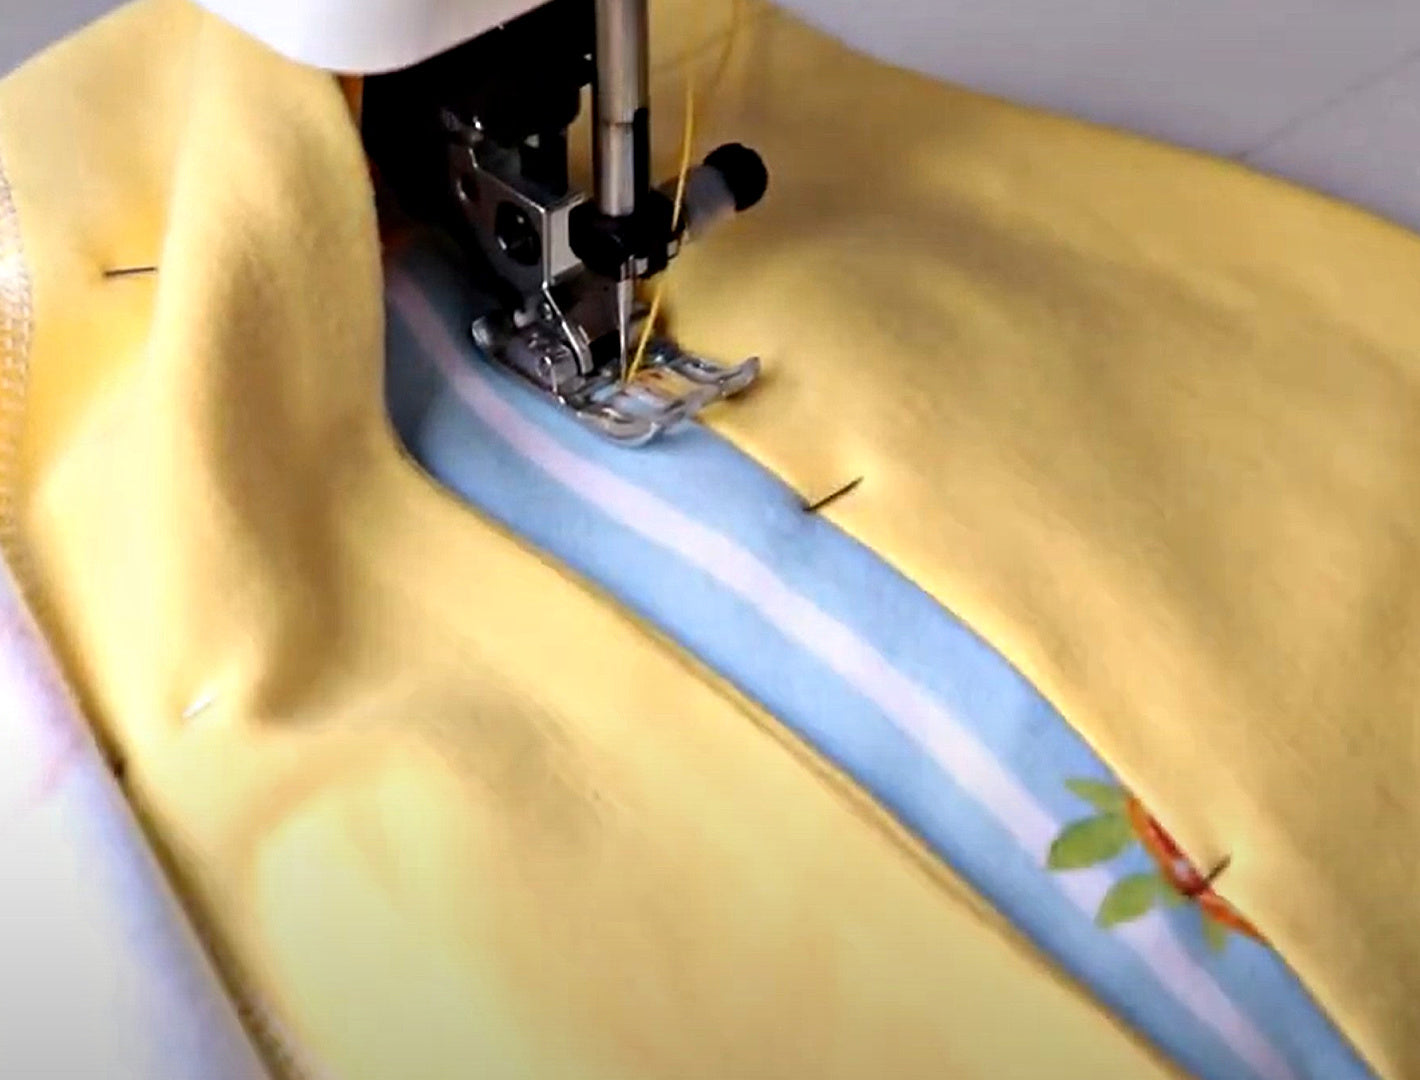
Saumband annähen

Jetzt stecken wir das Sweatshirt rechts auf rechts in das Saumband.
Unten wird mit 1 cm Nahtzugabe zusammengenäht.
Die Oberkante wird abgekettelt.

Dann wird die Kettelnaht aufgelegt und rundherum angesteckt.
Ich stecke oberhalb und unterhalb der Naht.

Die Stichlänge sollte lang sein – 3,5 oder 4.

Dann wird abgesteppt.

Ärmelbündchen annähen

Jetzt machen wir die Ärmelbündchen.

Die Bündchen werden zur Hälfte gefaltet und gebügelt.
Am einfachsten ist es, das Sweatshirt auf links zu drehen und das Bündchen innen einzusetzen.

Naht auf Naht stecken und rundherum annähen.
Dann abketteln.

Zum Schluss wird das Bündchen noch einmal gebügelt.

Abschluss

Transcript for the video: Jelly Bean Sweater - Bonus Tutorial English Only

Hi everyone now we're going to do a super quick version of the sweatshirt without the closure.

I've already cut everything out. I've got the hem trim, the sleeves, and the main pieces. For this version, I decided to remove the closure, so I just trimmed that off the front pieces. If you change your mind at this stage, you can simply cut it away.

Make sure you mark which is the front and which is the back because they will look very similar. I've marked my center front so I don't get confused later.

Attaching the Sleeves

First thing to do is to put the sleeves on.

Take the front piece and match it with the sleeve. Do this on both sides, one sleeve on each front.

Then take the back and place it onto the sleeves as well. Do the same on the other side.

This goes together really fast.

Topstitching the Seams

Now I'm going to topstitch the seams towards the front.

When topstitching, make sure your stitch length is really long.

My machine has a support at the back, but honestly it's not as good as I thought for feeding thick fabric, especially since I've overlocked everything together.

So it's slightly bulky, but for a quick make it's fine.

Now I continue and attach the other side in the same way all the way around the back.

Side Seams

Now I'm going to sew this together as per usual, closing the side seams.

One centimeter seam allowance.

Go from the lower end all the way up on one side, and the same on the other side.

Cuffs

Now I'm quickly going to do the cuffs.

I'm doing them on the sewing machine without overlocking first because I want to press the seams apart later.

I just stretch it slightly to fit, no easing, no gathering.

And I sew it in.

Now the cuffs are on.

Hem Trim

Now I can do my hem band.

We have a front and a back for this piece. I sew them together on the side seams and press them open quickly.

What I'm going to do differently here is a faster method. Instead of attaching the top edge separately, I'm going to do it in one go and overlap it.

Take the hem trims and place them inside each other, right sides facing.

We close the lower curved edge with a one centimeter seam allowance.

Understitching / Clean Edge Method

Now I'm going to under stitch.

Under stitching gives a really nice firm edge. You push the seam allowance to one side and stitch it down.

This means you don't have to struggle with heavy ironing later, it's much easier.

Now I'm just going to press it quickly so it sits nicely.

Attaching Hem Trim

Now I'm attaching the hem trim to the lower edge of the sweatshirt.

I place front into front. This is important so it lines up correctly.

This can get quite thick, so take your time here. You don't always need pins, but sometimes it helps.

Now I overlock all of this together.

Topstitching Hem

Now I'm going to topstitch from the top. Use a longer stitch length, about four.

Make sure you are not sewing too close to the seam. Keep it slightly further out for a cleaner finish.

This gives a really nice professional look.

Neckband

Now I can put in my neckband. I always recommend ironing it lengthways in half before you start. I should have done that earlier, it makes it much easier.

I place the center front and center back first, then stretch it evenly around the neckline.

You will feel like there is a lot there, but that is correct.

If needed, you can stretch the neckline slightly before attaching it to help it go on more easily.

Sewing Neckband

Now I stitch this in. It is easier if you sew from the inside because you can stretch it more easily.

One centimeter seam allowance all the way around.

Make sure to take out your pins as you go.

Topstitching Neckline

Now I topstitch the neckline. Use a long stitch length again. Turn it so you don't start on the front.

And that's the neckline done. It sits nicely and is quite a relaxed fit, so you can easily wear a layer underneath.

Iron-On Design

Now I'm adding my iron-on design.

I trim around it slightly because there is quite a lot of backing. I leave a small border so I don't cut into the design.

Now I press it on.

I can't find my pressing cloth, so I'm using a light scarf over it just to protect the fabric.

And it works really well.

I love it.

Final Topstitching Detail

Now I'm going to topstitch around the design with black thread so it doesn't come off later.

This is optional, but I think it looks really nice.

I go around carefully, turning with the needle down at corners.

Finished Sweatshirt

And that's it. We are done.

It was a really quick make, even while filming, which normally takes longer.

It came out really nice and I really love this version.

DAS KÖNNTE DIR AUCH GEFALLEN

Dungies

SHOP NOW

Lollipop

SHOP NOW

Bobby Dazzler

SHOP NOW

Jelly Bean

SHOP NOW

Bubble Gum

SHOP NOW