


GRACE LANDHAUSBLUSE
GRACE LANDHAUSBLUSE

Normaler Preis
€7,95 EUR
Normaler Preis
Verkaufspreis
€7,95 EUR
Grundpreis
pro
Verfügbarkeit für Abholungen konnte nicht geladen werden
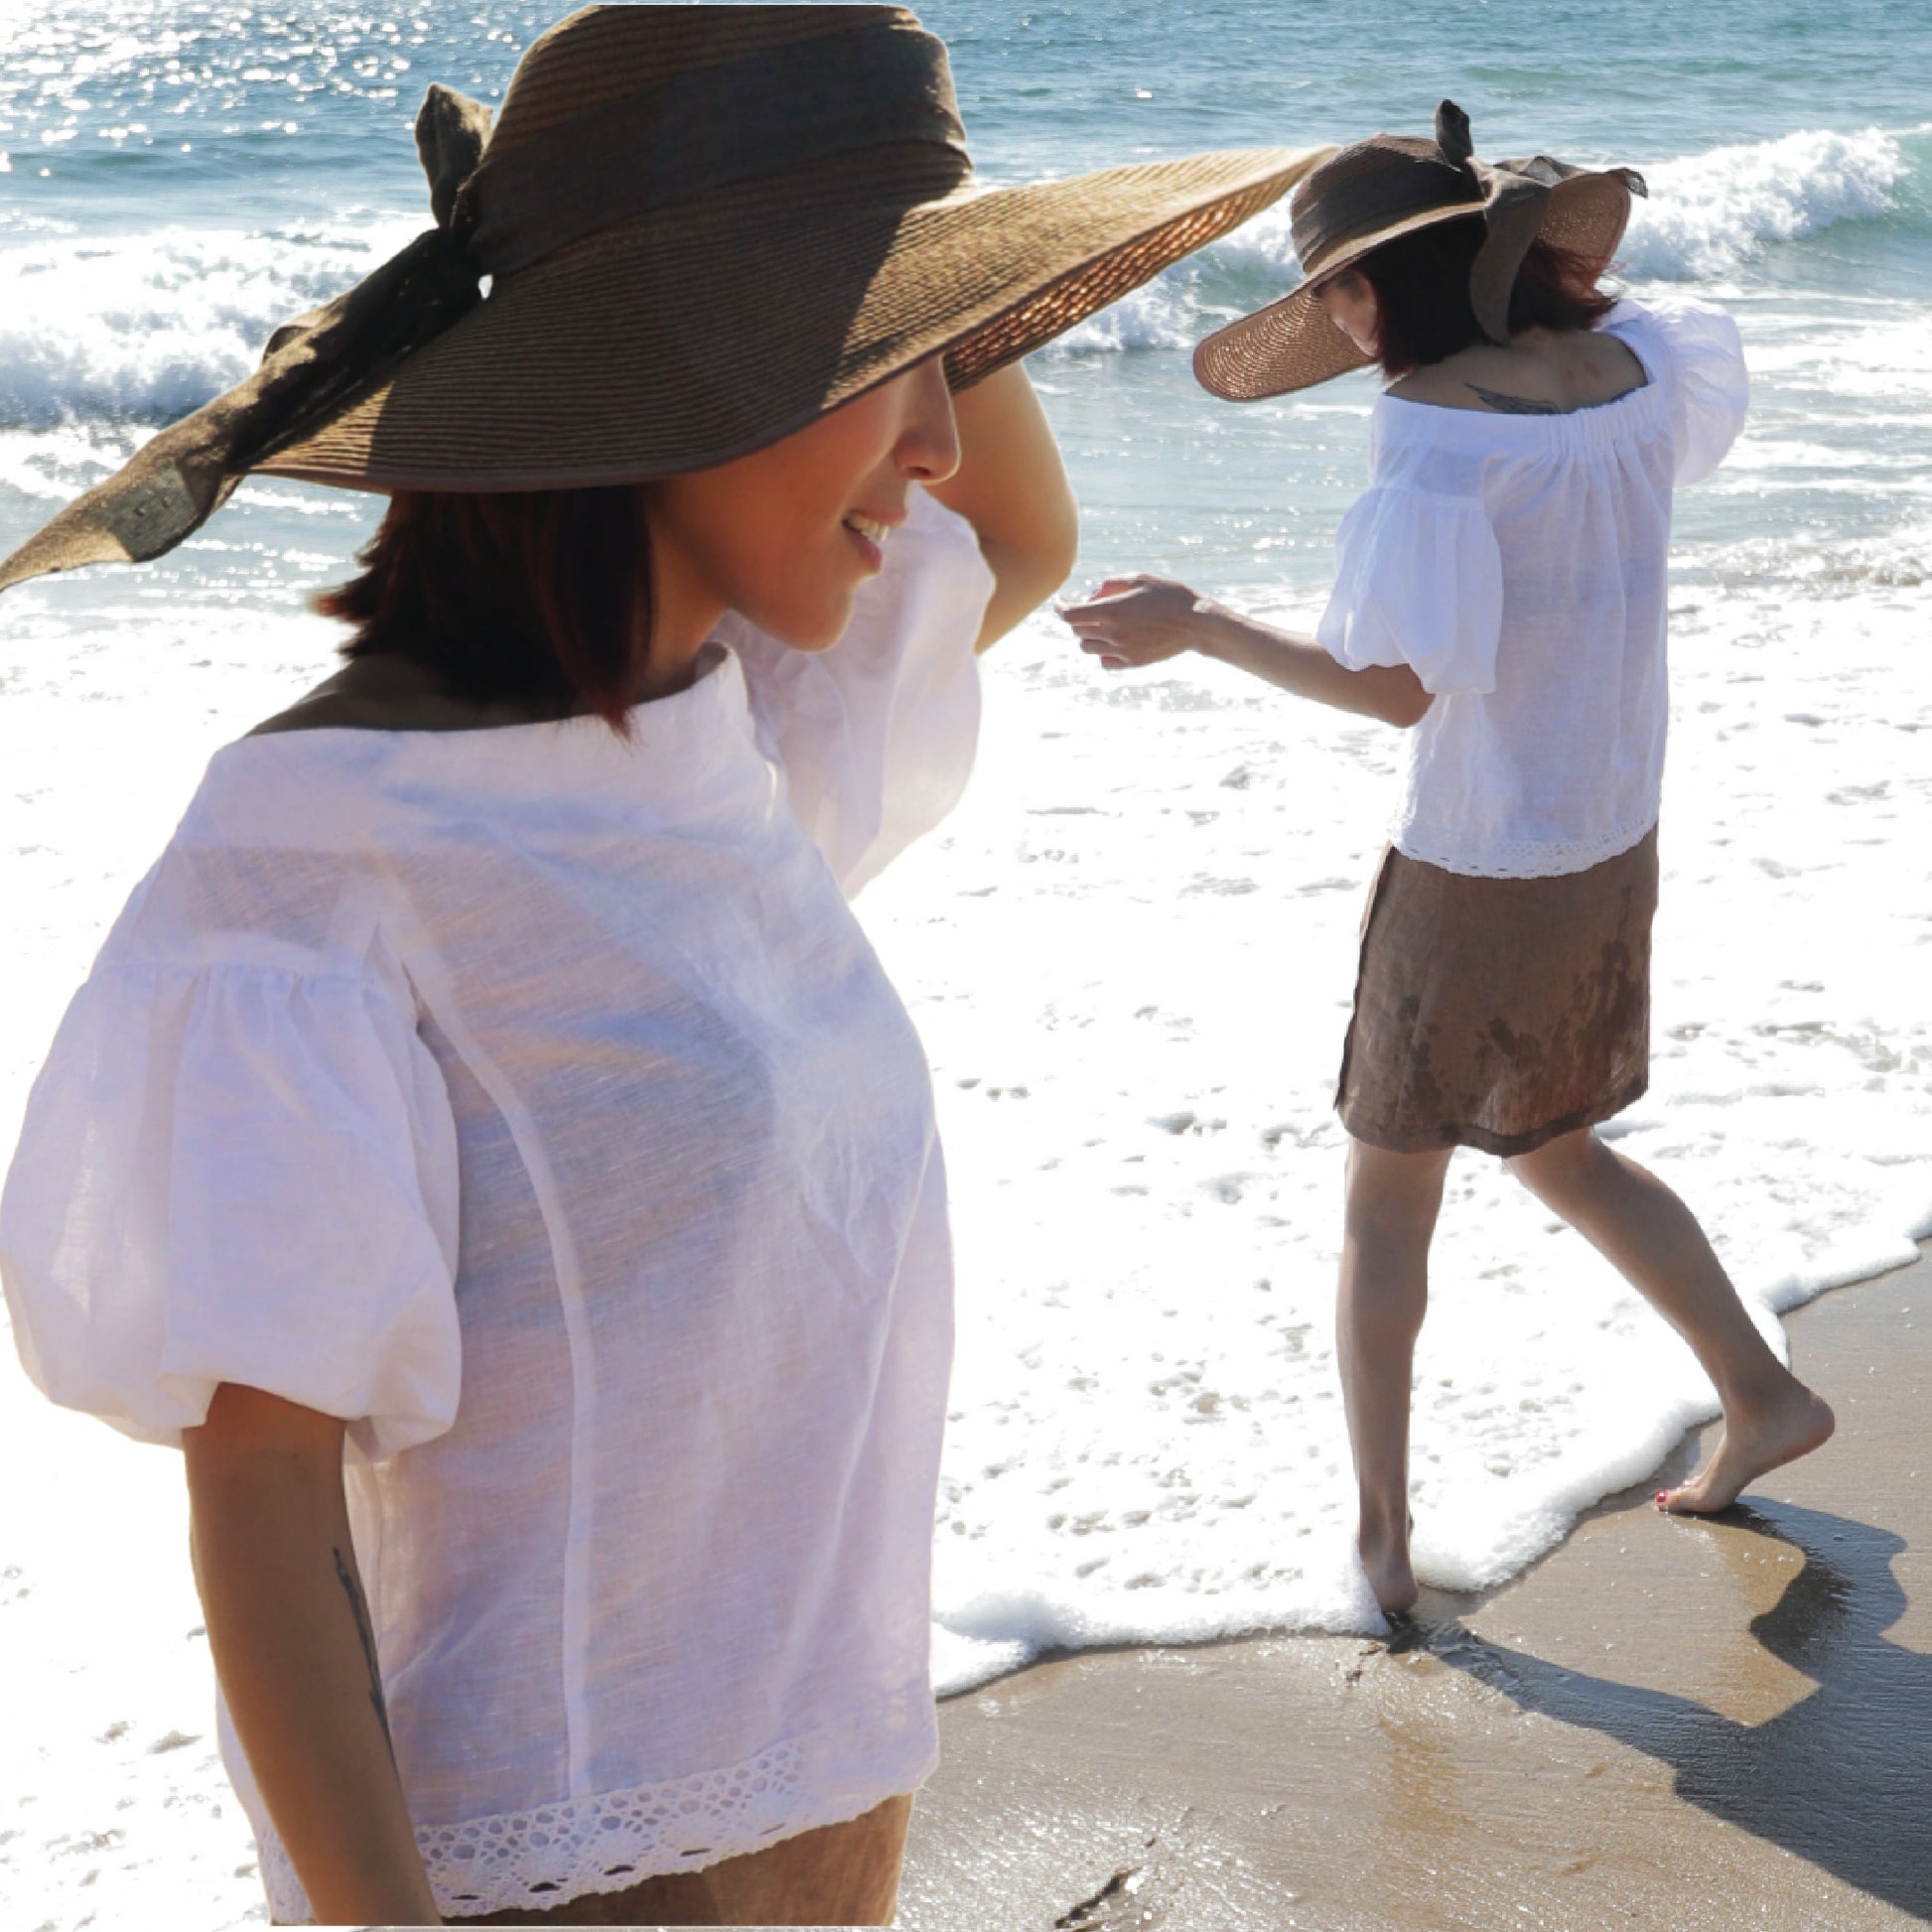
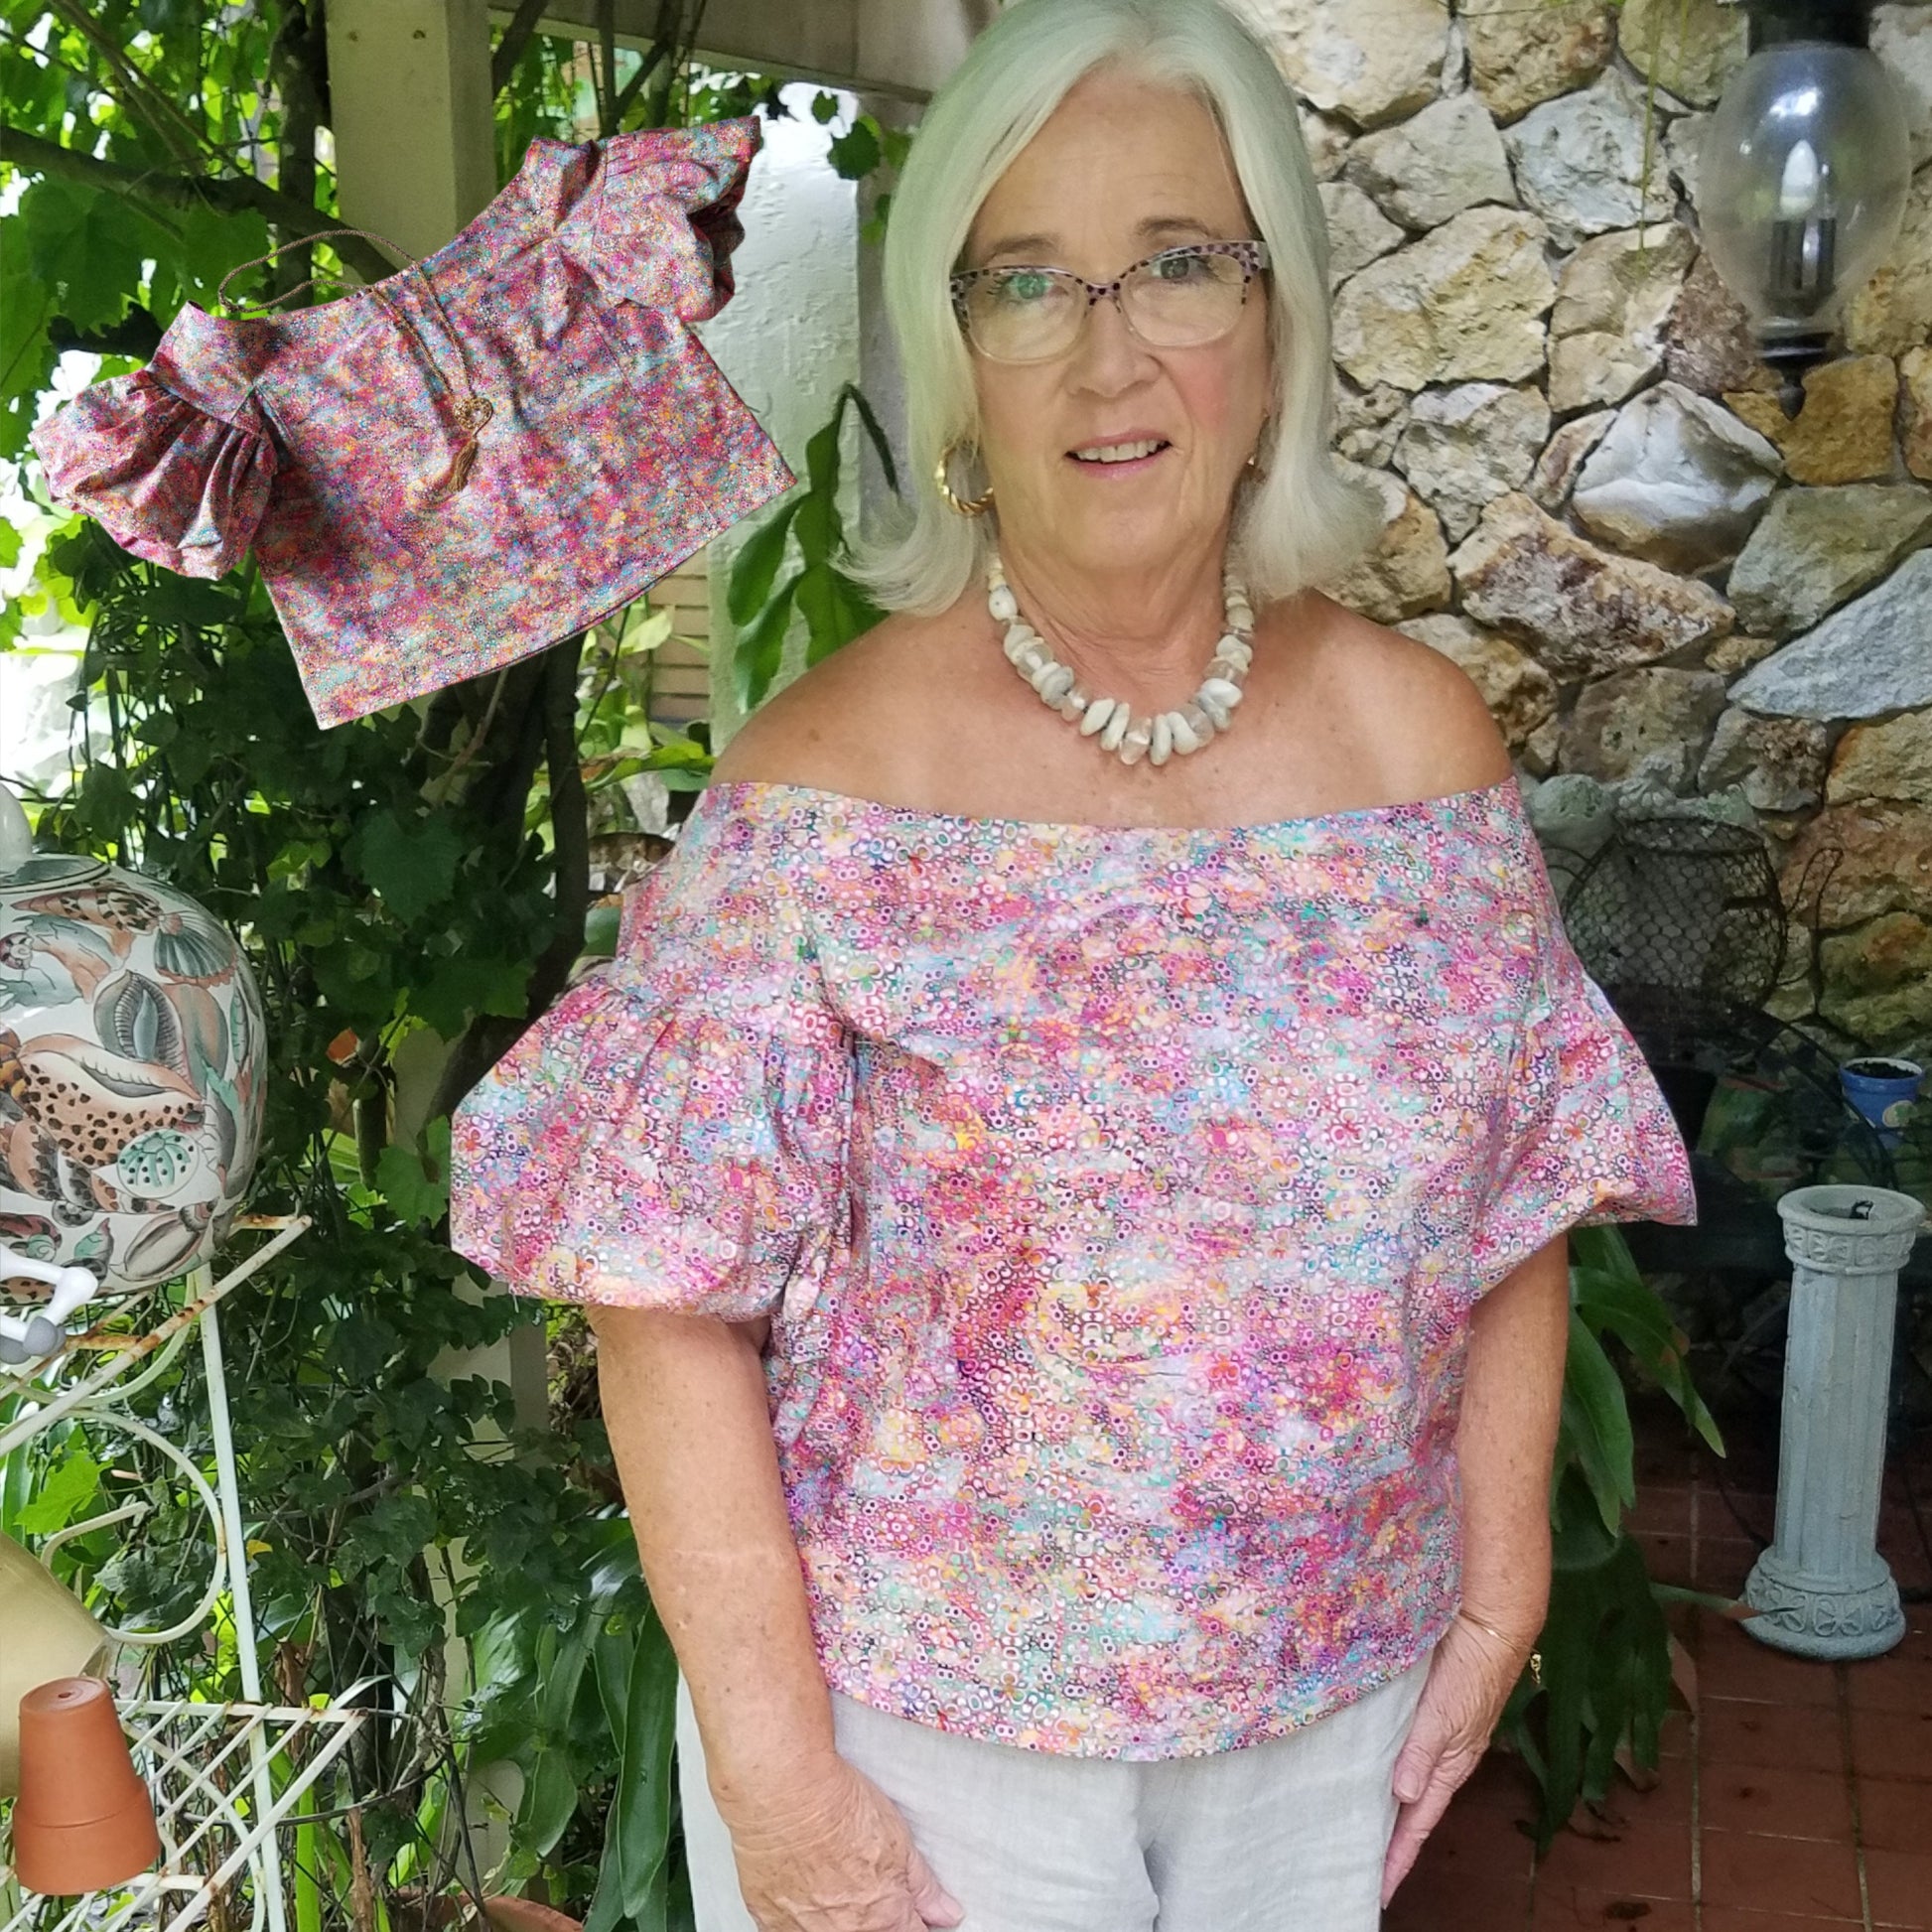
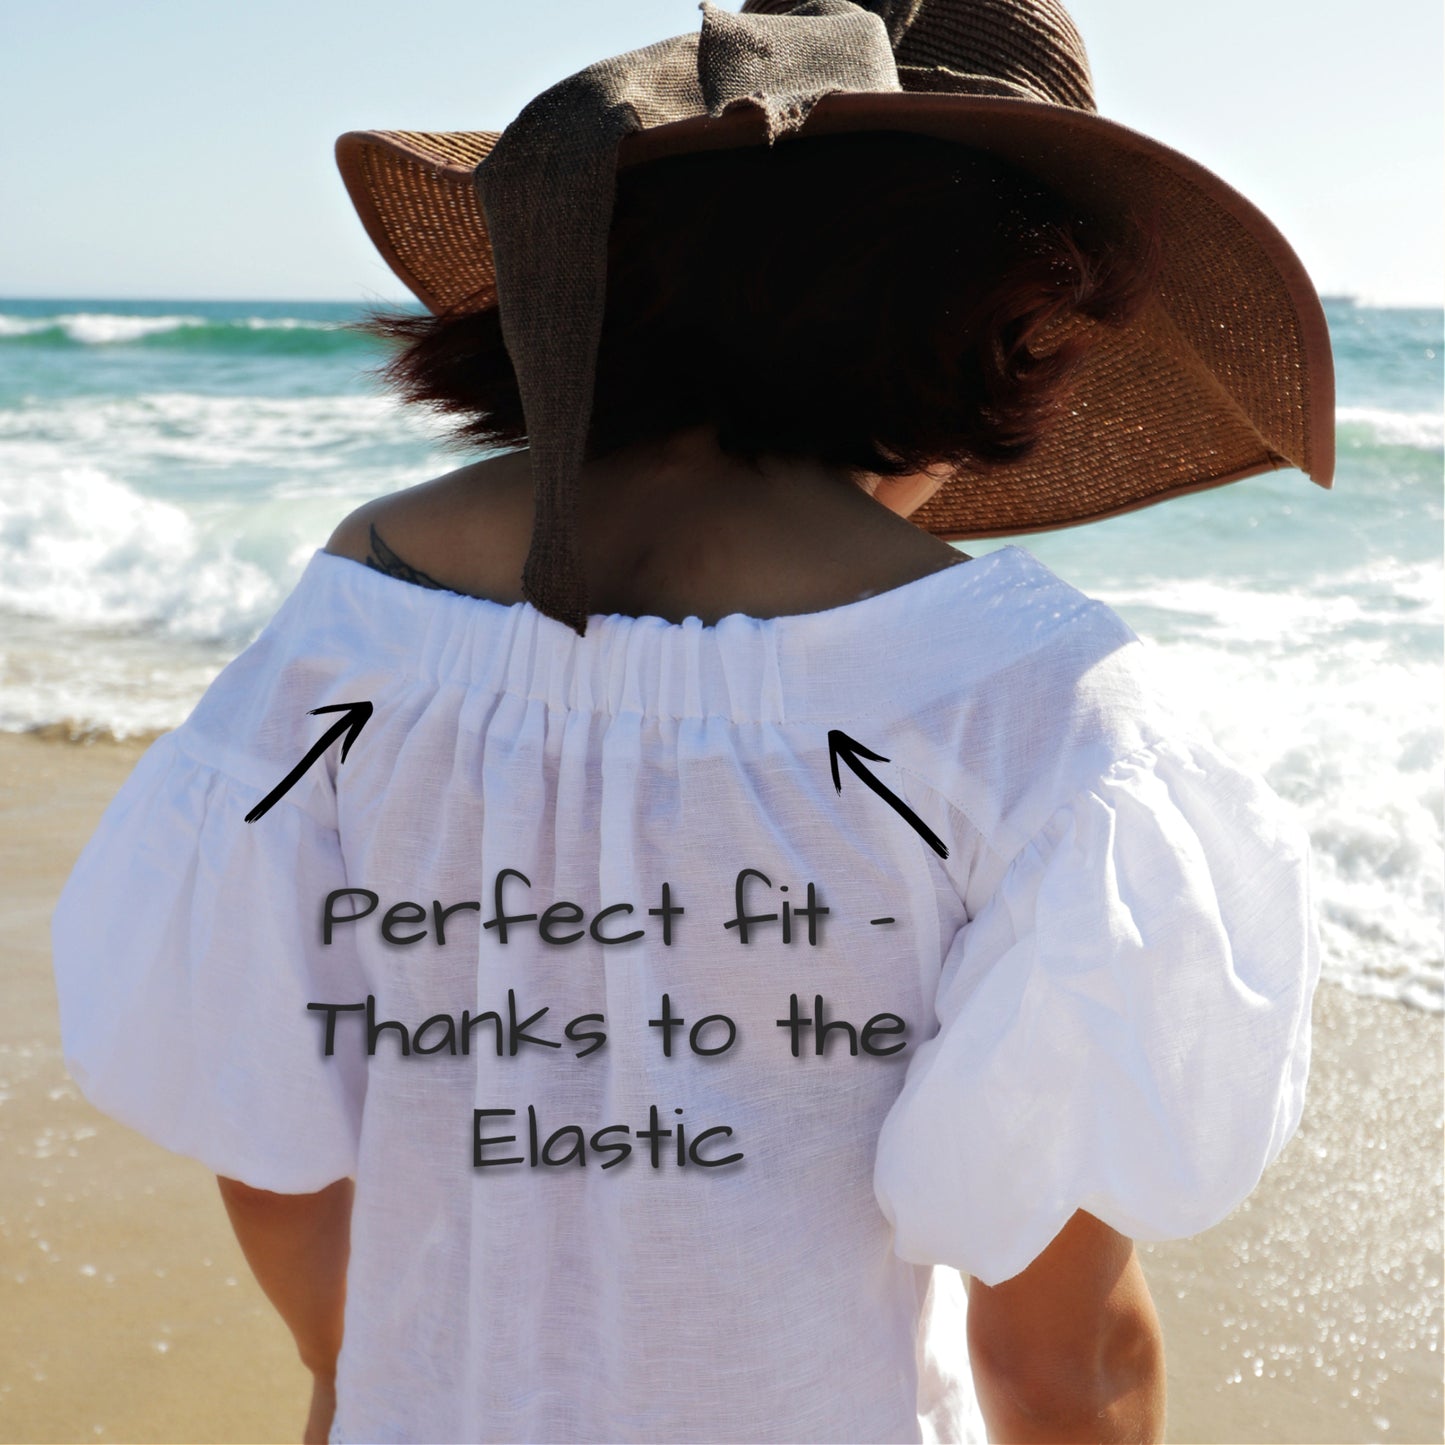
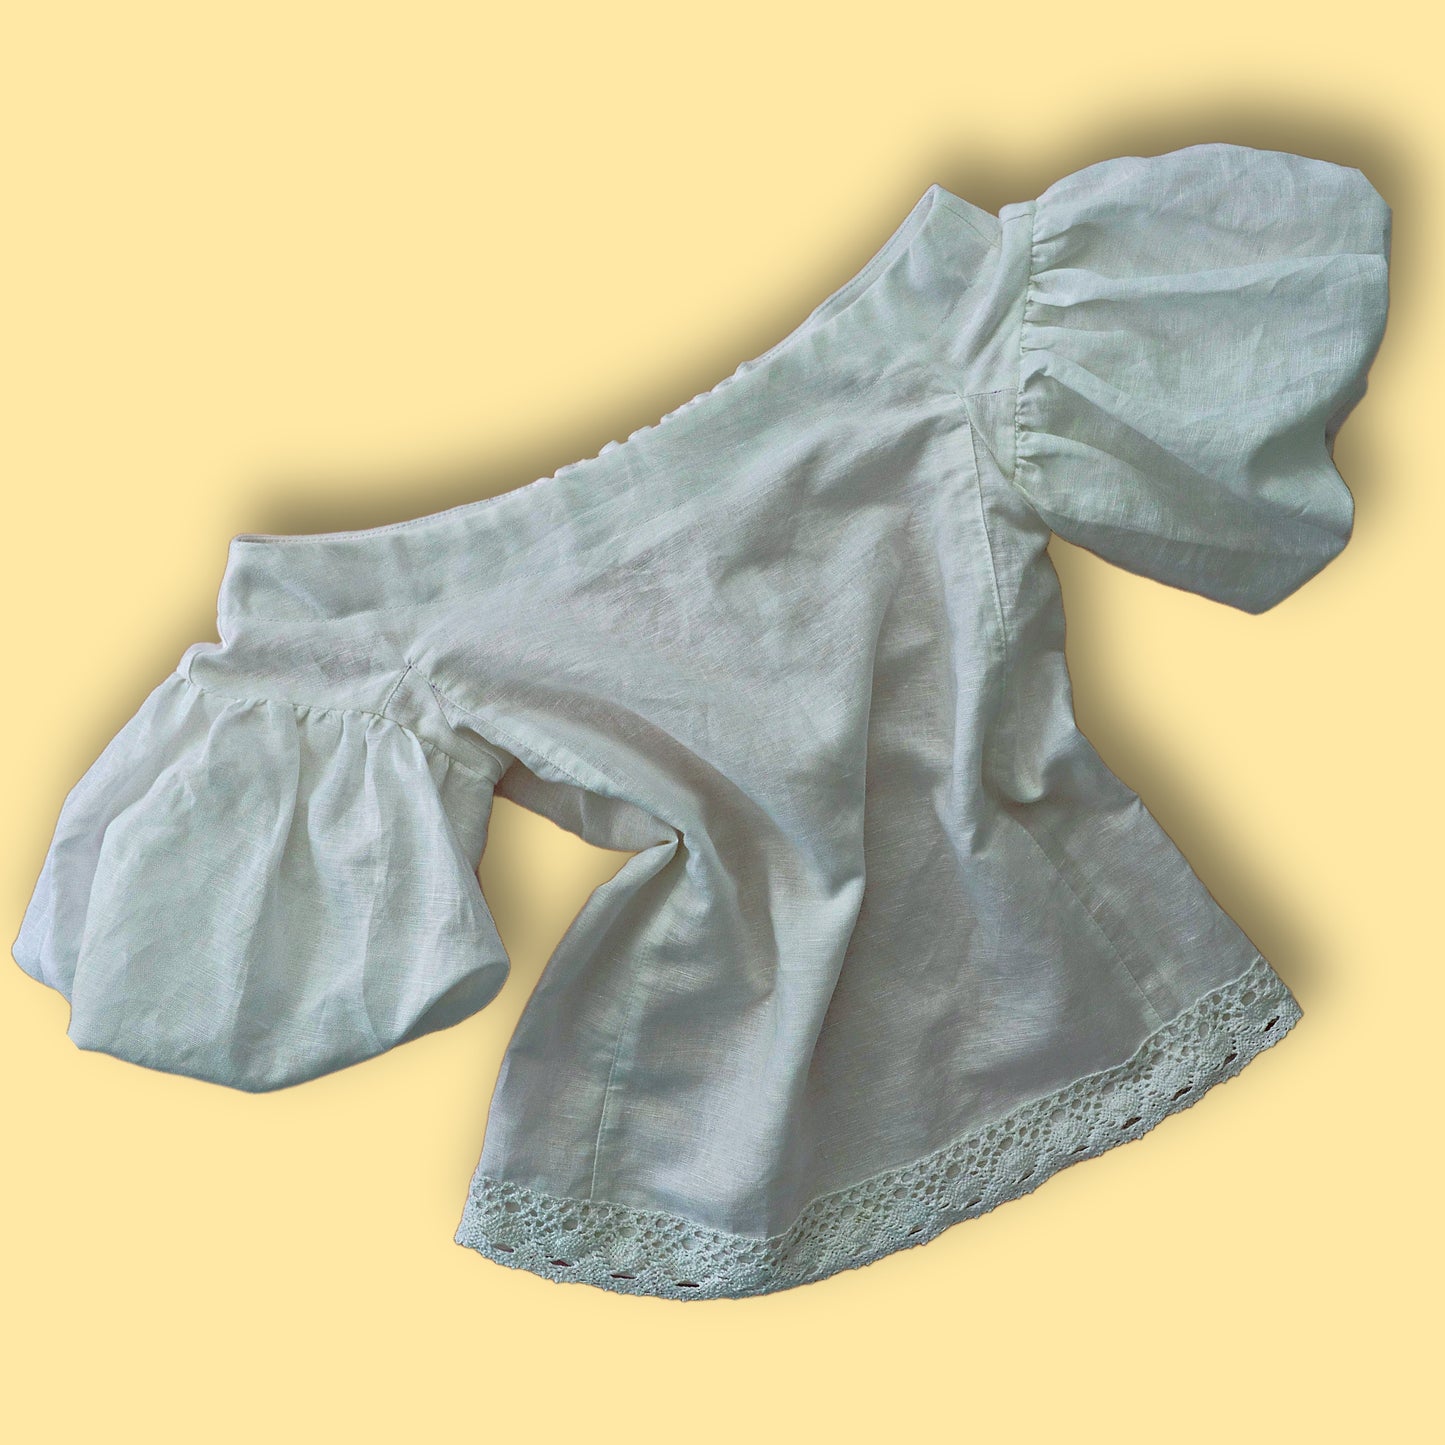
Grace ist ein Schnittmuster für eine romantische Trachtenbluse im Cottagecore‑Look. Als Teen‑ und Damen‑Schnittmuster steht sie wirklich jedem: der gerade Schnitt, der weite Ausschnitt und die traumhaft weiten Puffärmel setzen Akzente und machen unsere Grace Bluse für alle Figuren geeignet.
Grace ist ein etwas anspruchsvolles Projekt und etwas kniffelig, aber keine Sorge: Direkt unter diesem Listing warten Marinas Videoanleitungen darauf, dich Schritt für Schritt zu begleiten.
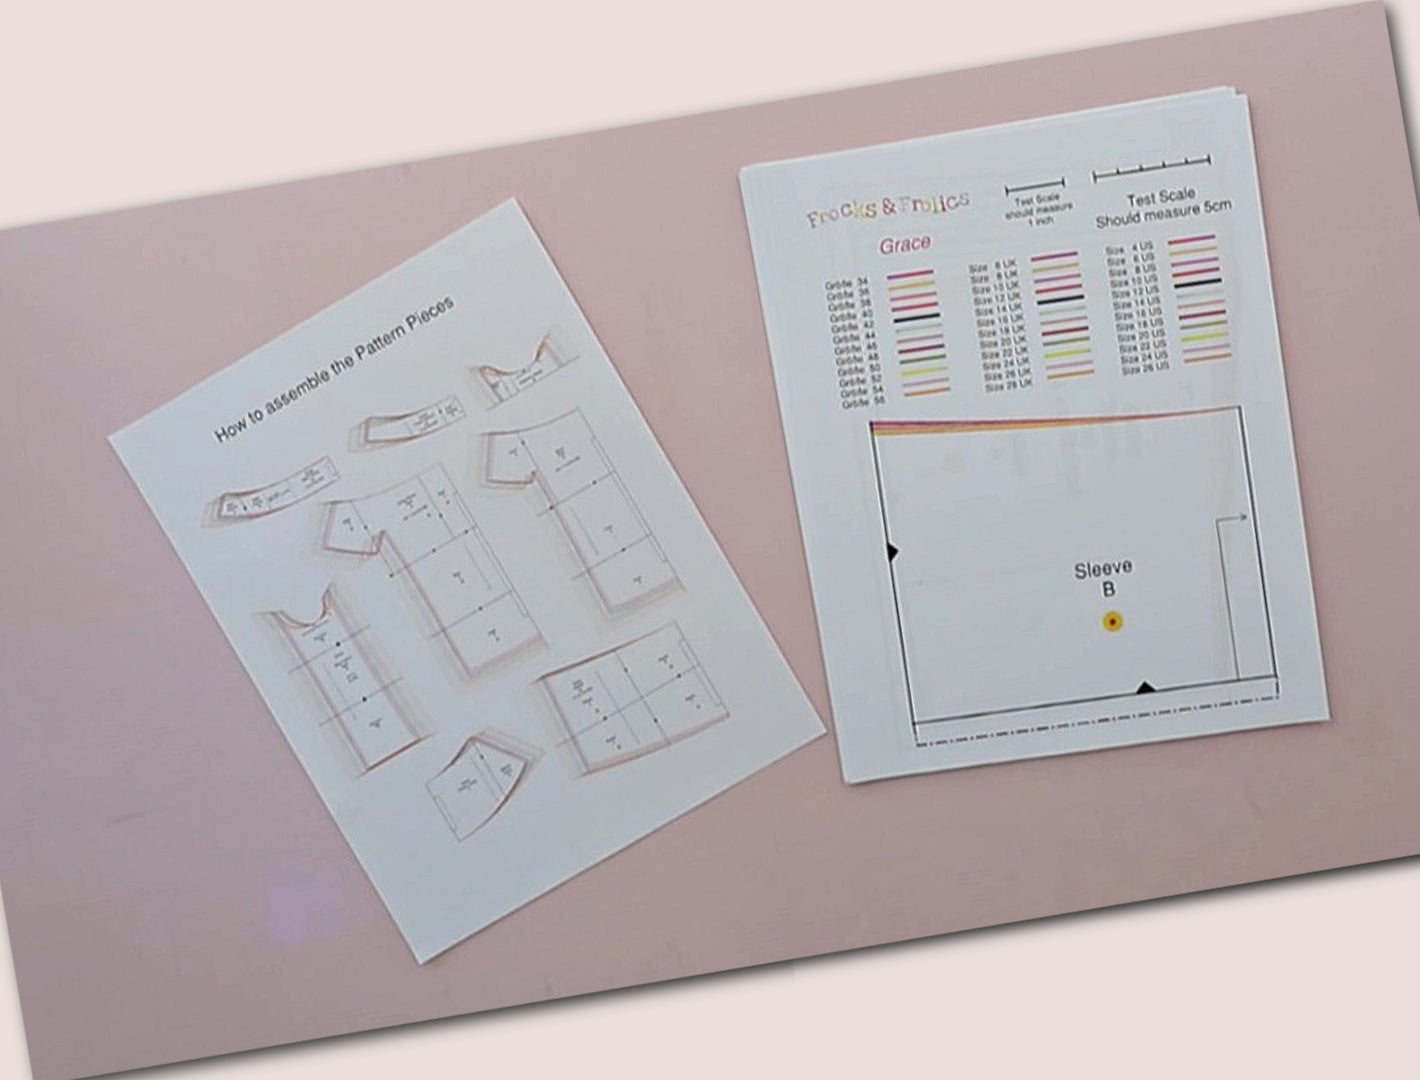
Was ist beim Schnittmuster dabei?
Was ist beim Schnittmuster dabei?
Design
Design
Stoffverbrauch
Stoffverbrauch
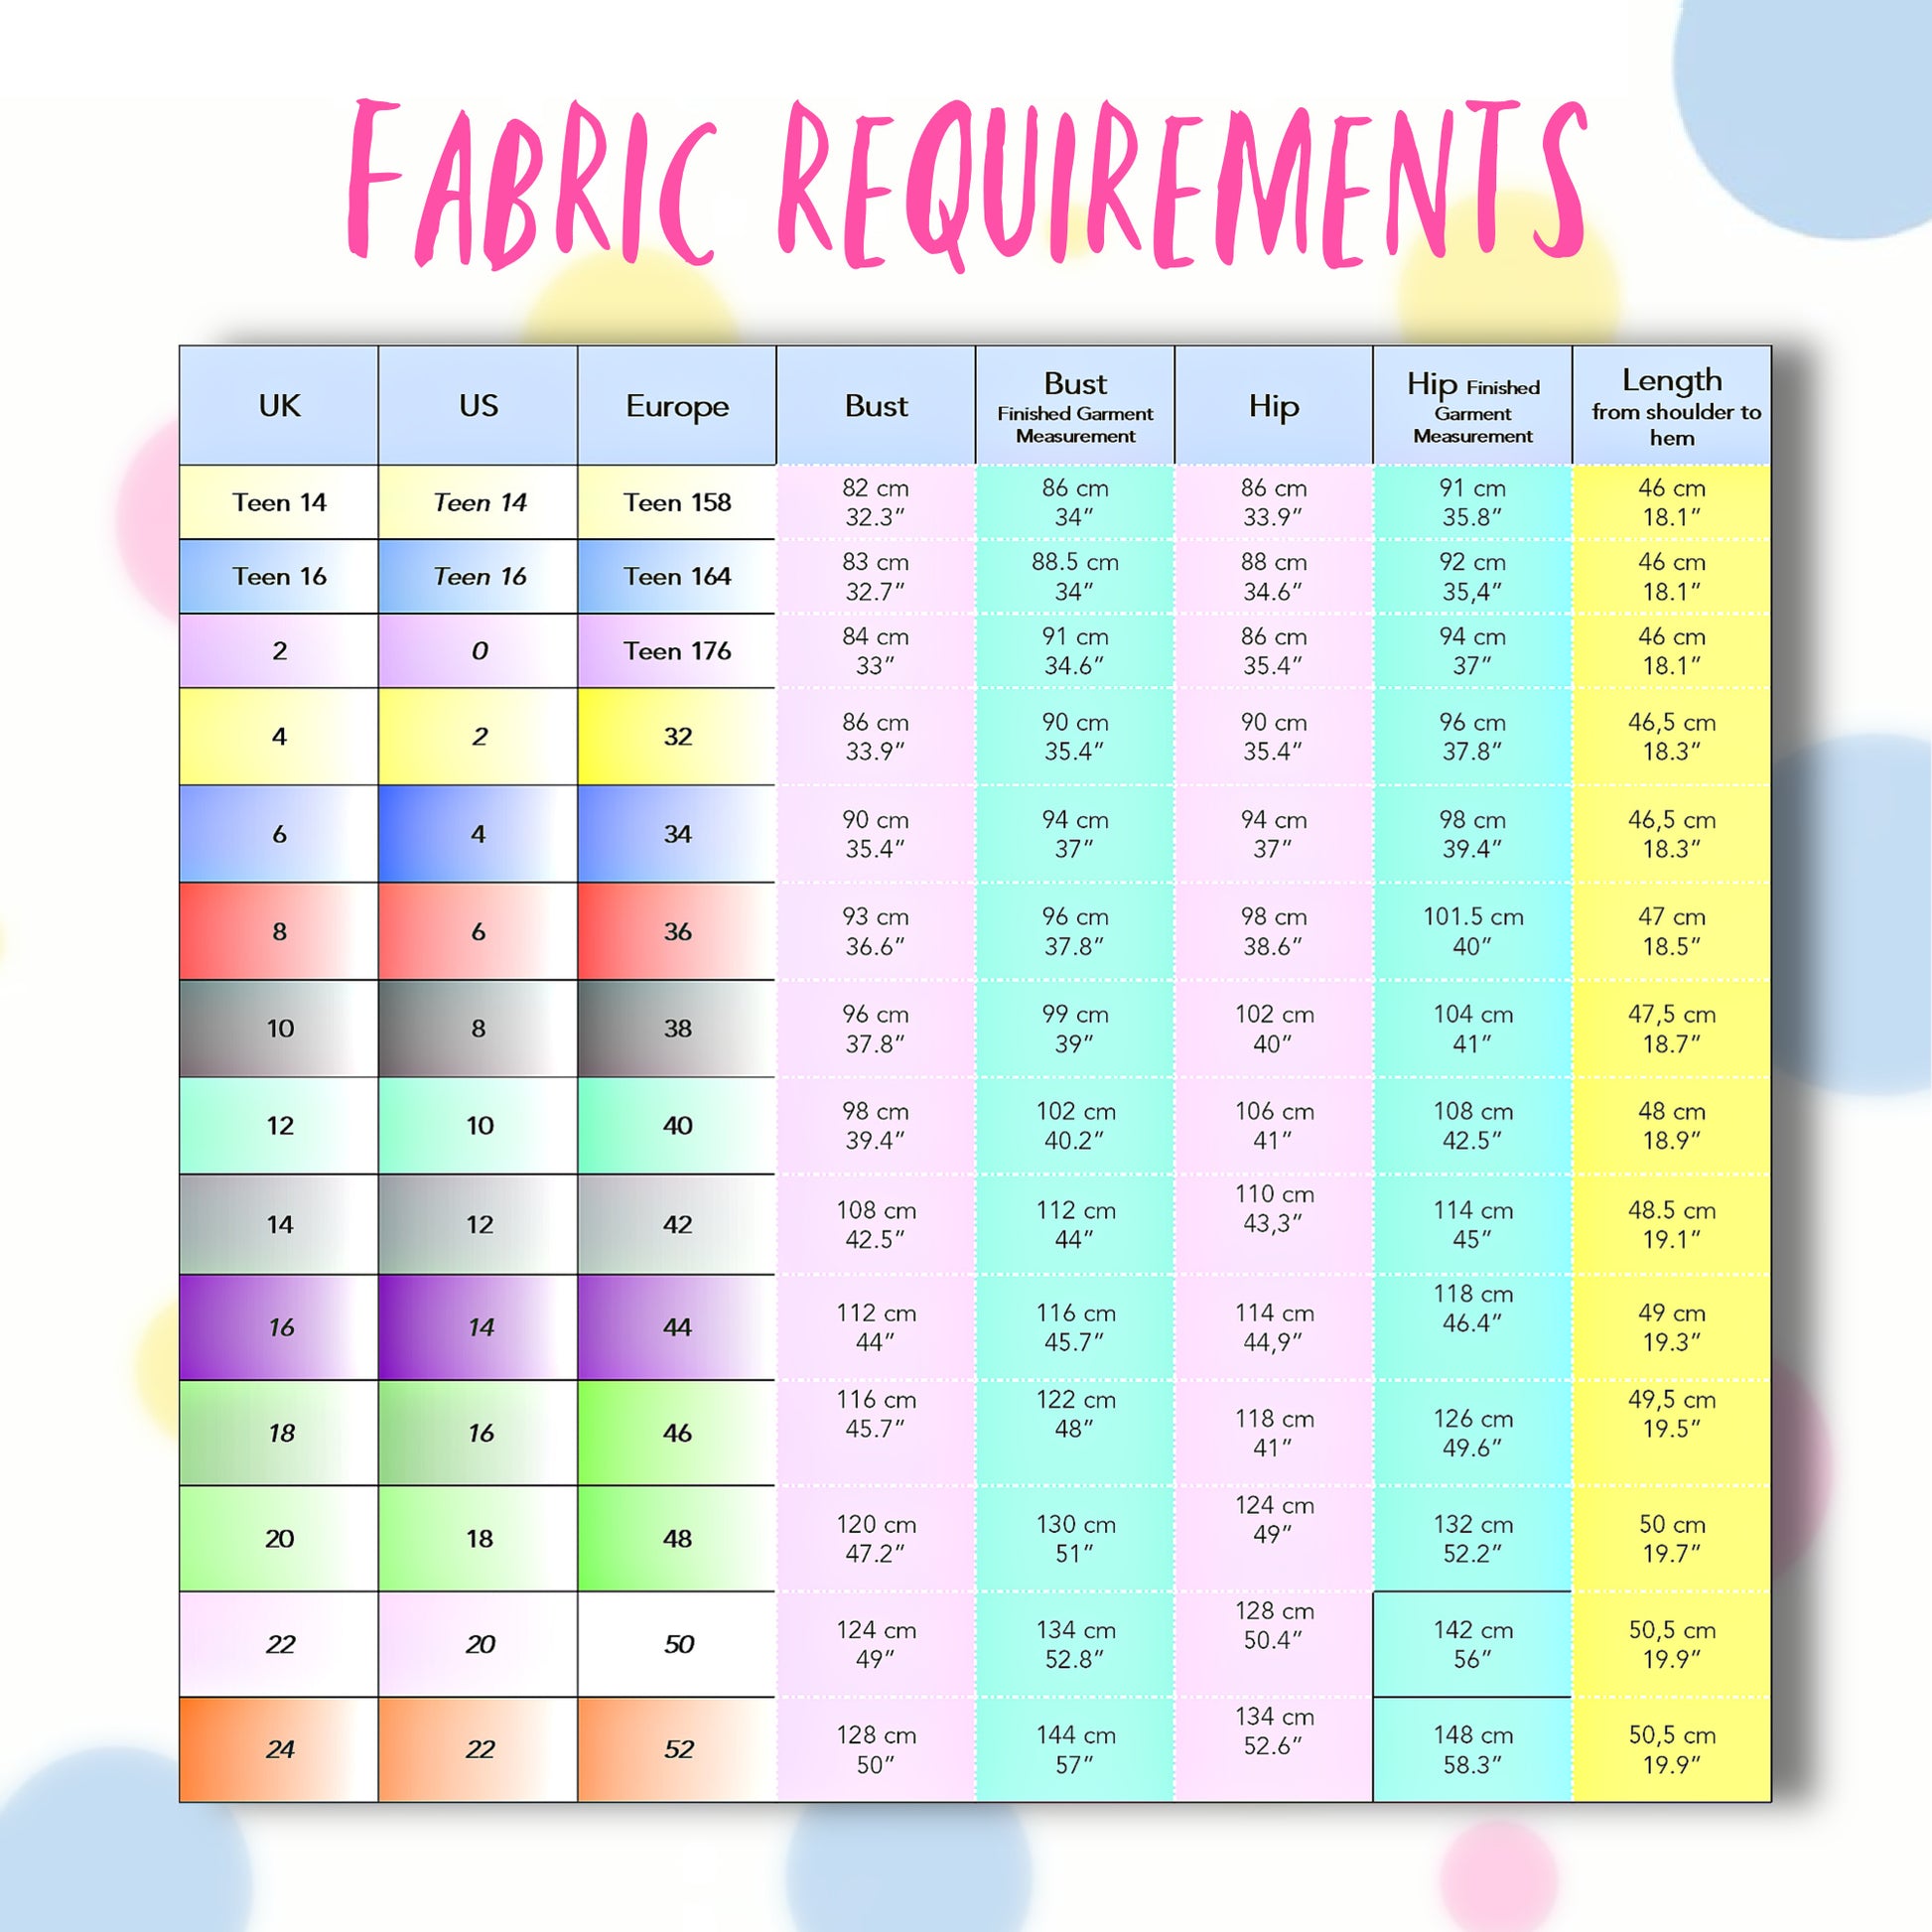
Verfügbare Größen
Verfügbare Größen
Bitte beachten
Bitte beachten


SCHRITT-FÜR-SCHRITT ANLEITUNG

EINFÜHRUNG IN DAS PROJEKT
DAS SCHNITTMUSTER IM DETAIL
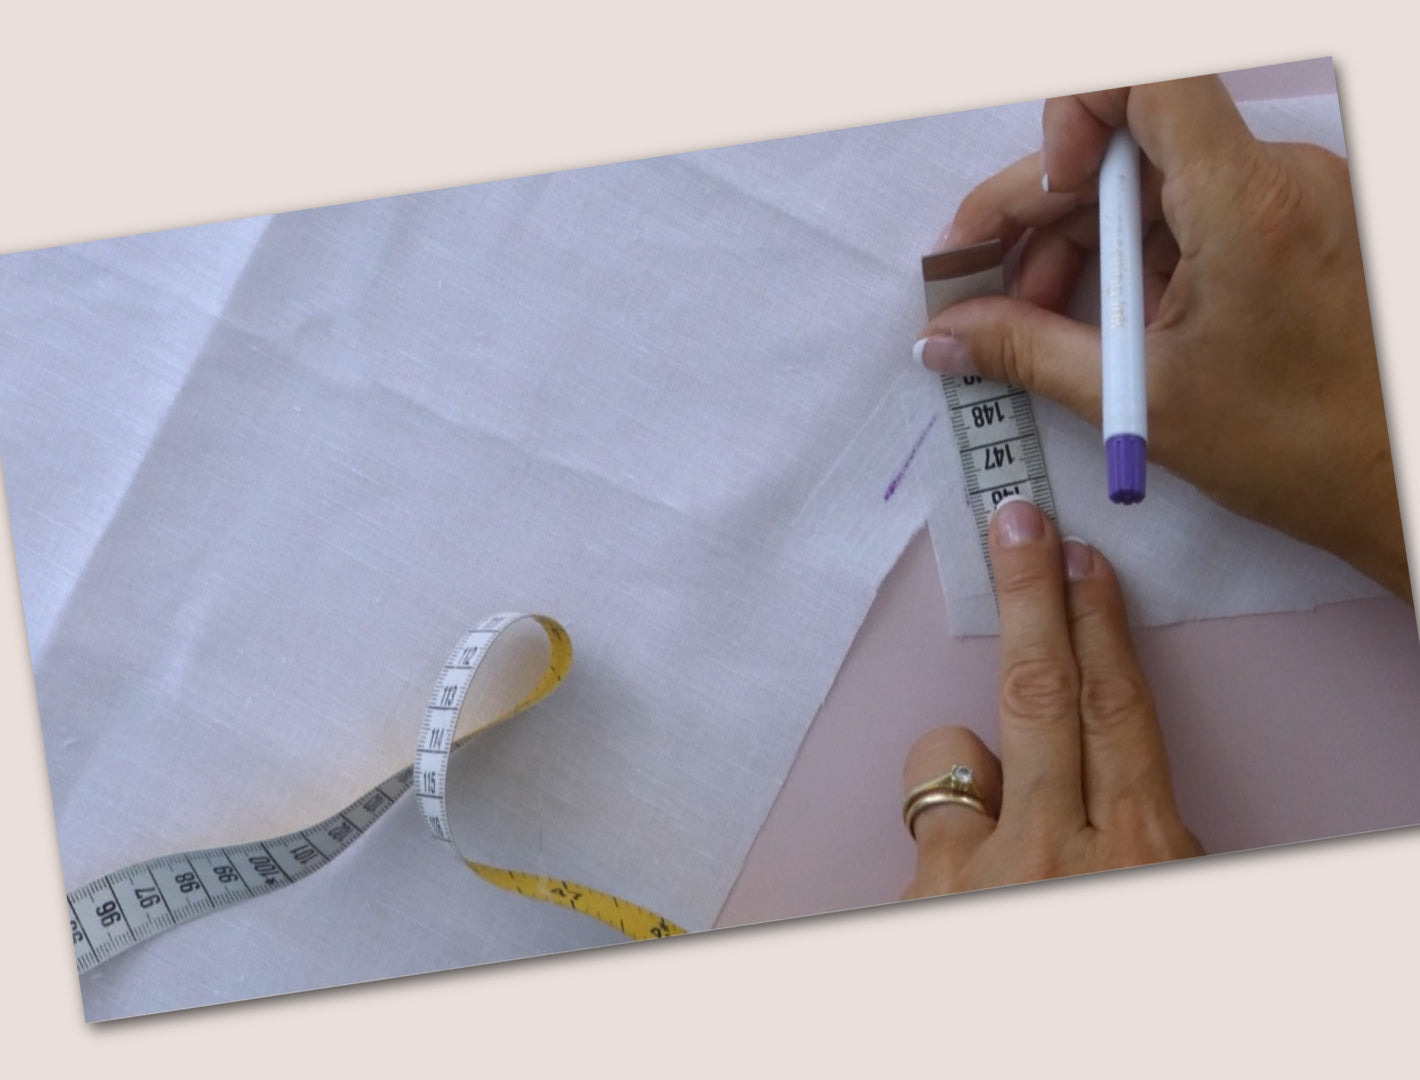
VORBEREITUNGEN ZUM NÄHEN

DEN UNTERÄRMEL ANNÄHEN
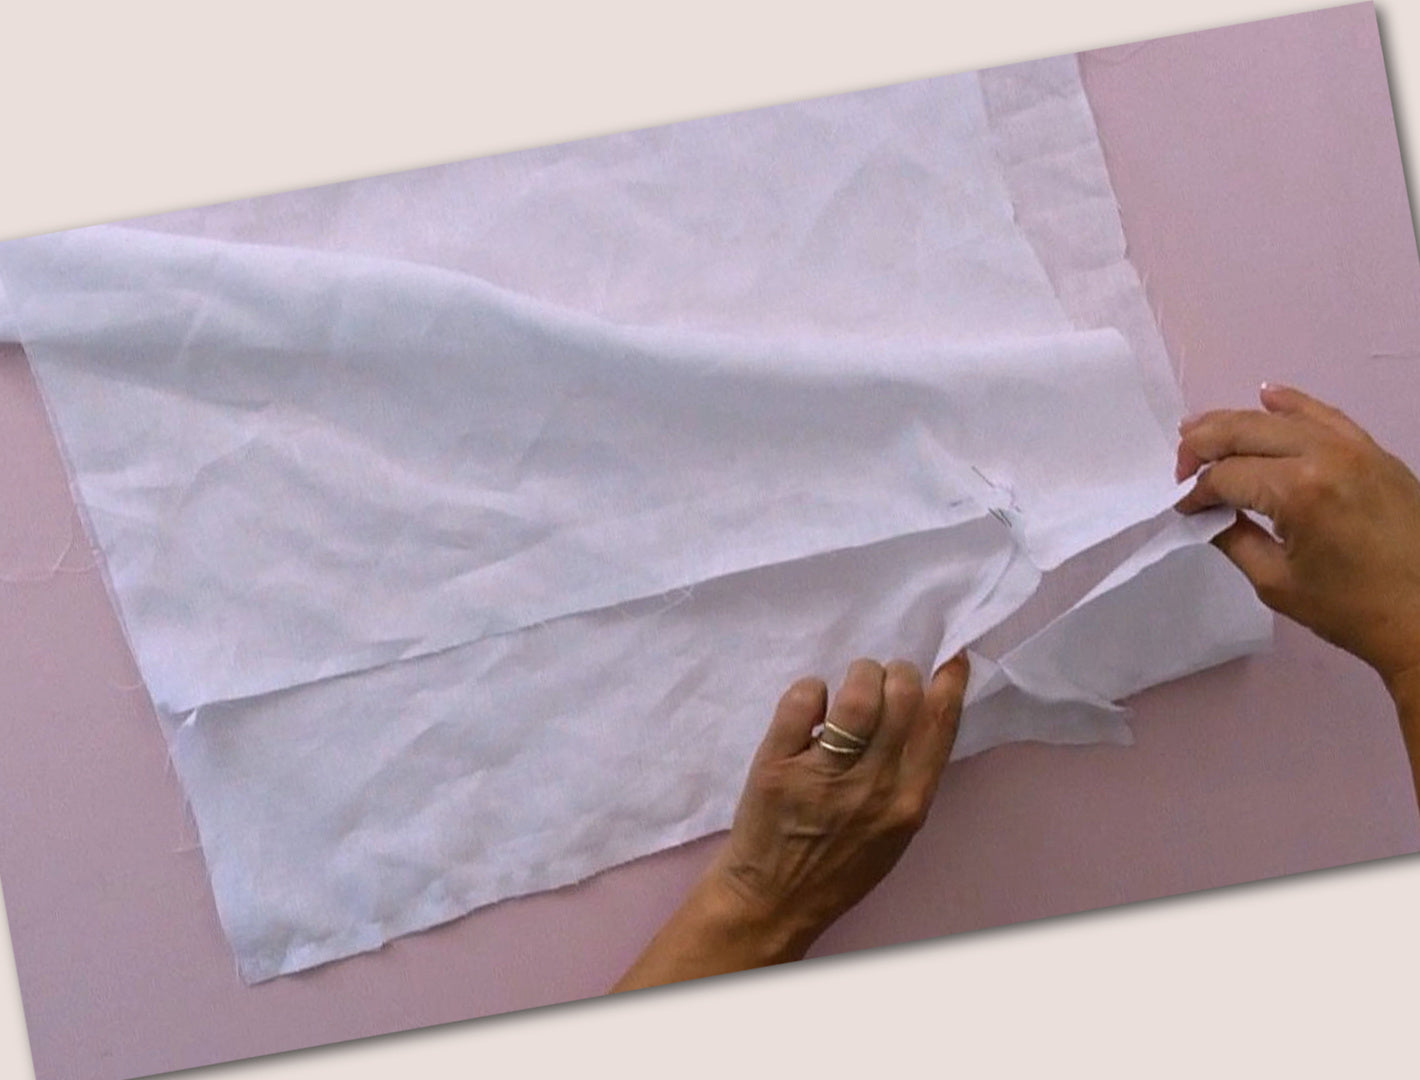
DAS SEITENTEIL ANNÄHEN
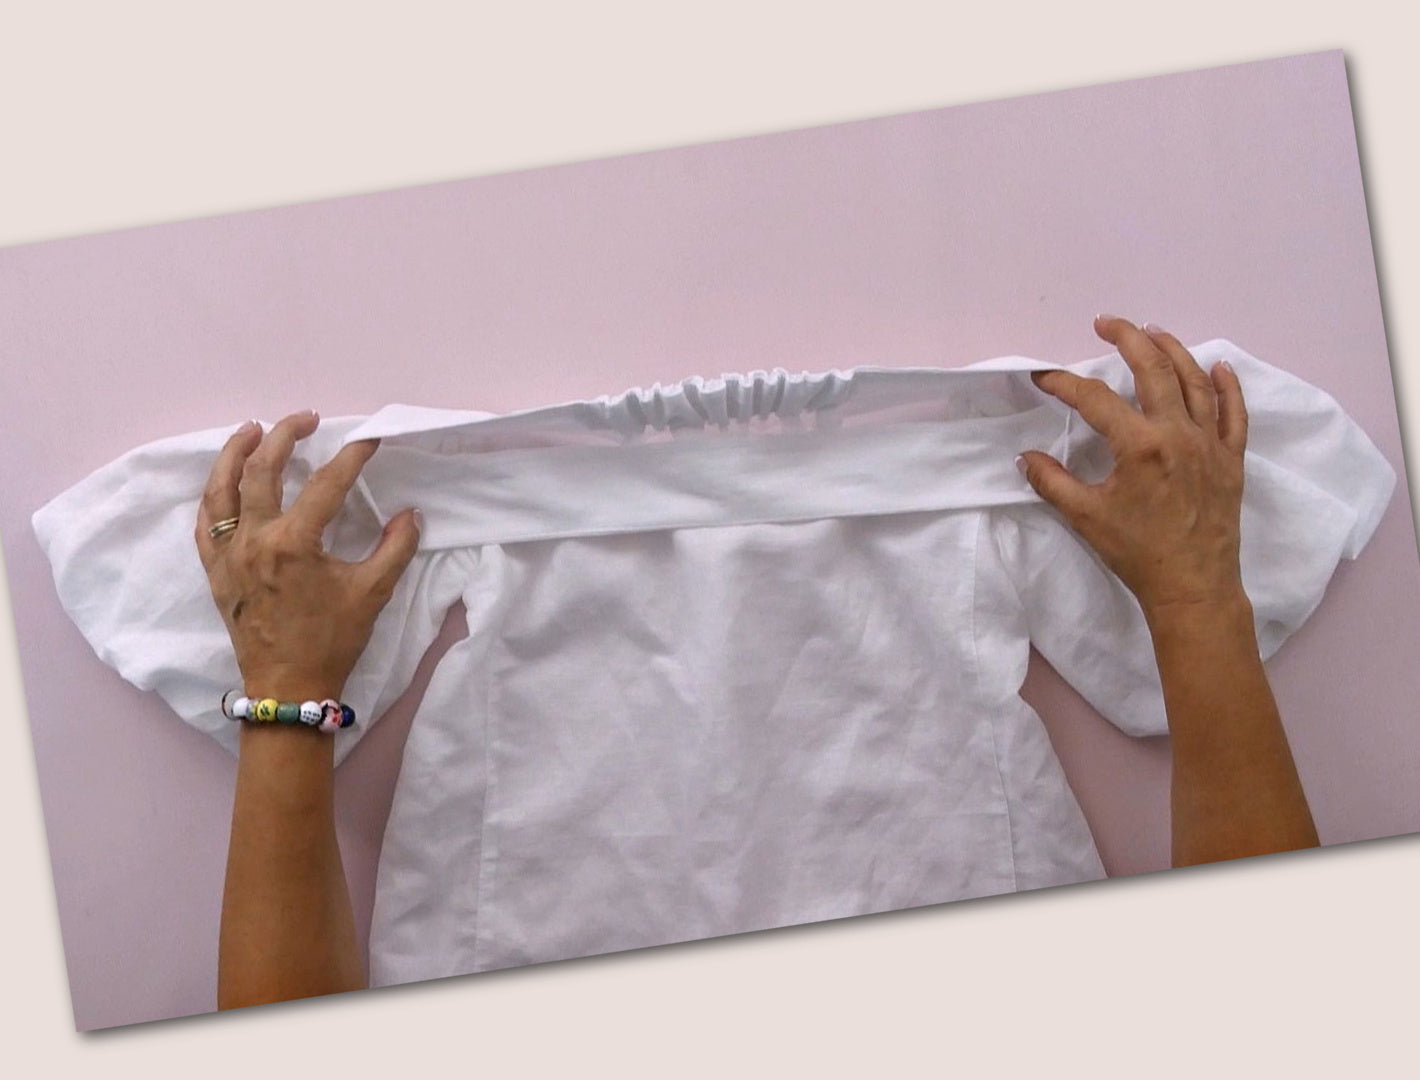
BESATZ AN DEN AUSSCHNITT NÄHEN
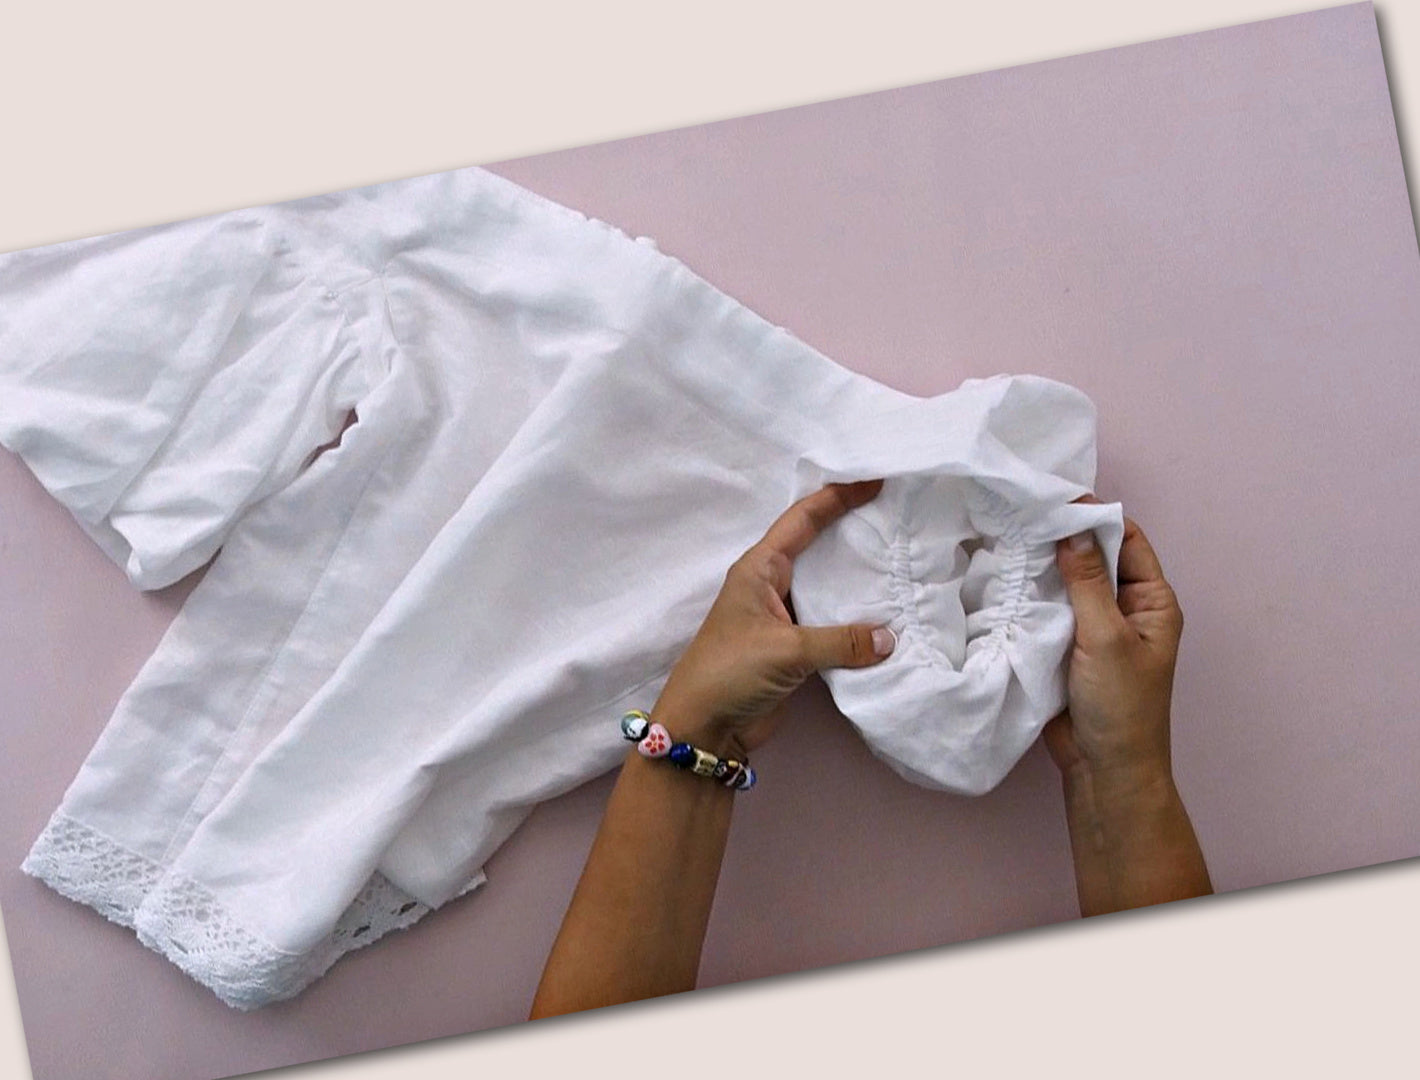
DIE ÄRMEL NÄHEN
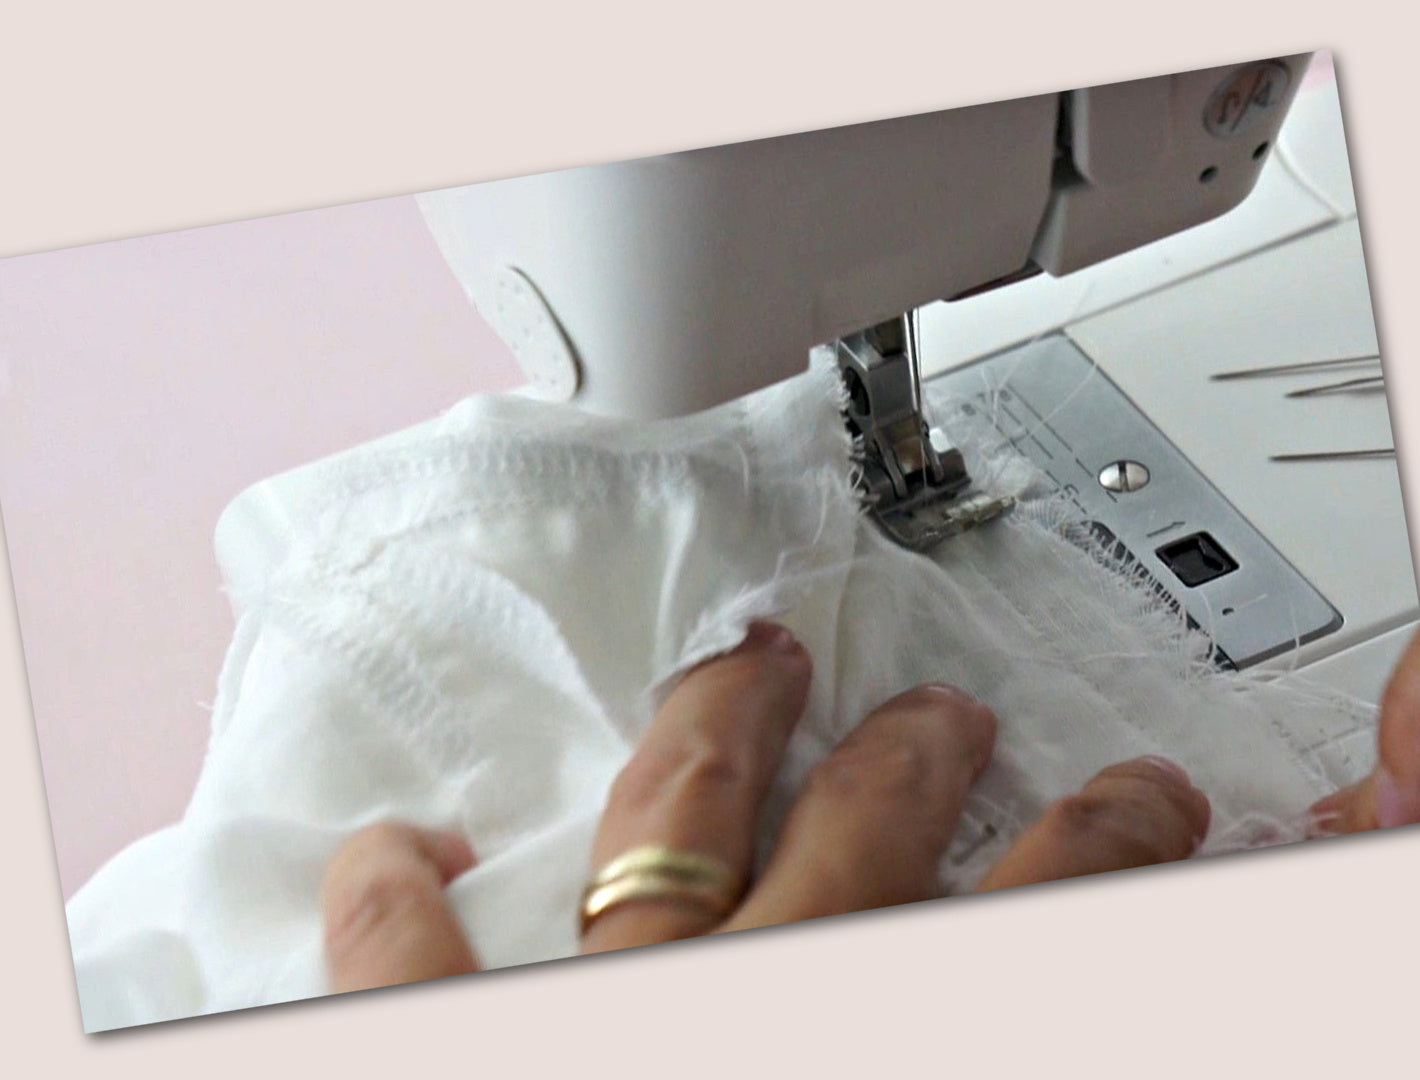
DIE ÄRMEL EINSETZEN
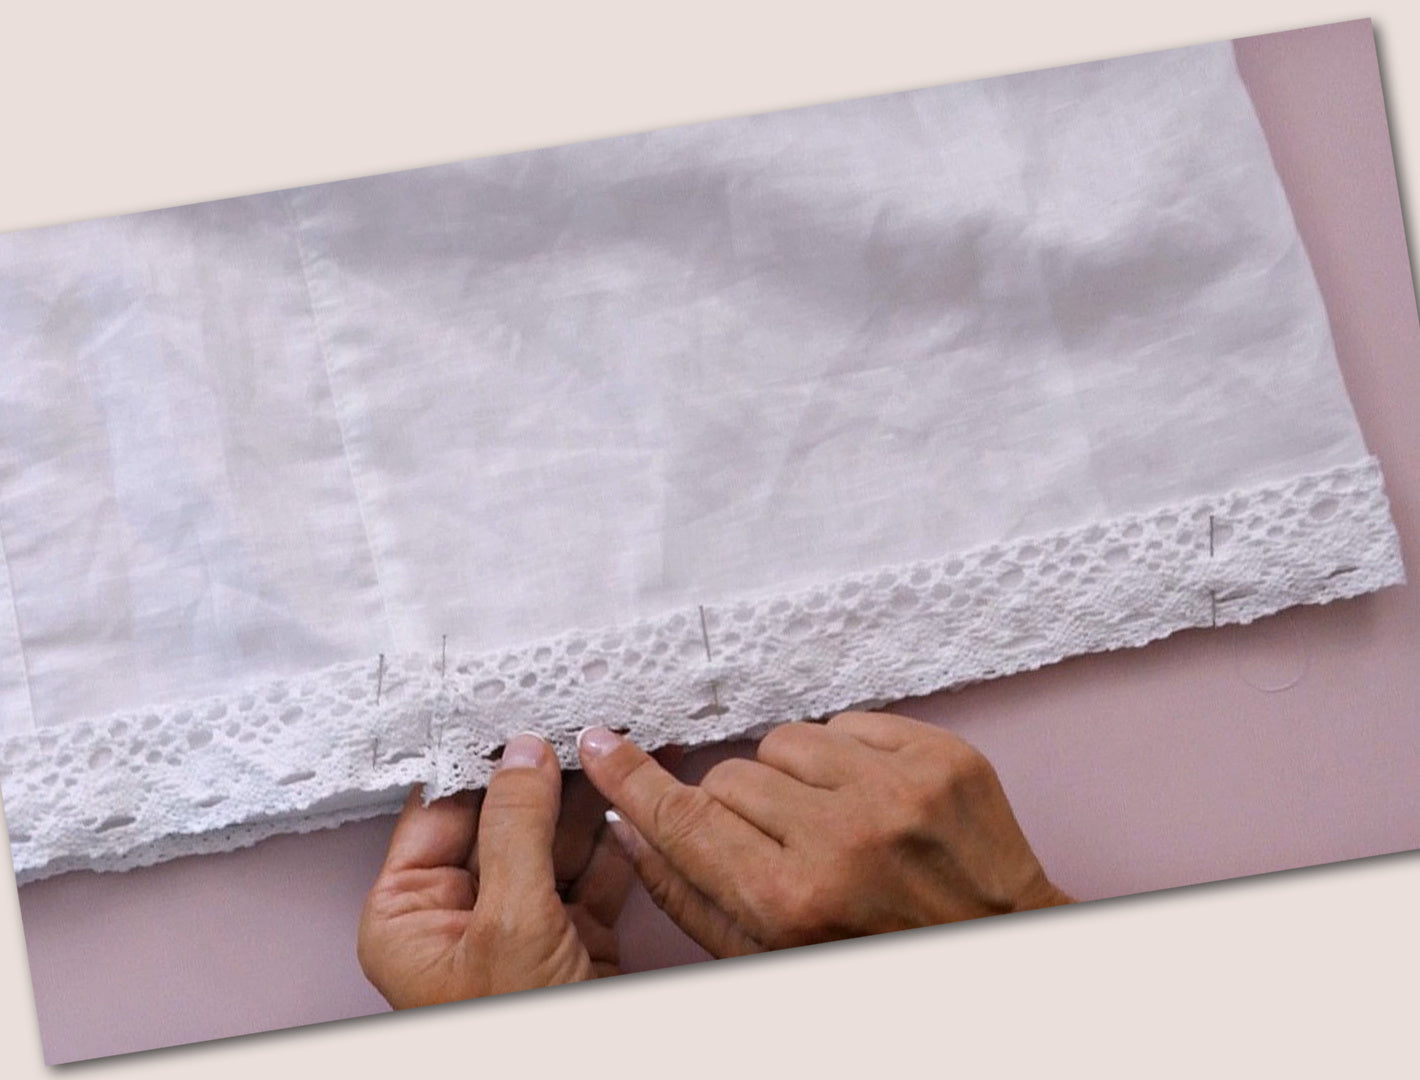
DER SAUM