DAISY TUNIKA
DAISY TUNIKA
Verfügbarkeit für Abholungen konnte nicht geladen werden
Daisy ist ein gemütliches Schnittmuster für ein Kleid mit Raglanärmeln, perfekt für Jersey und andere Stretchstoffe. Das Kleid hat lange oder kurze schmale Ärmel, eine entspannte ausgestellte Passform mit breiter Saumblende.
Marinas Video‑Tutorial führt dich Schritt für Schritt durch den gesamten Nähprozess – ein echter Bonus, besonders wenn du gerade erst mit dem Nähen begonnen hast.
Was ist beim Schnittmuster dabei?
- Sofort-Download
- Digitale PDF Schnittmuster
- DIN A4 Format
- eBook
- Video-Anleitungen
- Bonus Schnittmuster: Amelie
Design
Design
- Raglanärmel, kurz oder lang
- Saumborte
- Kam-Snap Verschluss
- Rundhalsausschnitt mit Besatz
- Kombinationsmöglichkeiten Daisy & Amelie
Stoffverbrauch
Stoffverbrauch
STOFFEMPFEHLUNG
Hier sind Stretchstoffe angesagt. Ob ein toller Interlock, Sweatshirtstoff oder Jersey, die Hauptsache ist er ist dehnbar.
STOFFVERBRAUCH
- Obermaterial: 60cm-1m
KURZWAREN
- Passendes Garn
- Vlieseline: 30 cm
- KamSnaps: 1 Paar
Verfügbare Größen
Verfügbare Größen
Größe: 92-116, Alter 1-6
Bitte beachten
Bitte beachten
- Dies ist ein digitales Schnittmuster oder eine PDF-Datei, kein physisches Produkt. Die Zustellung erfolgt elektronisch über einen Download-Link an die beim Kauf verwendete E-Mail-Adresse. Zusätzlich kann das Schnittmuster von deinem Kundenkonto heruntergeladen werden.
- Um sicherzustellen, dass das Schnittmuster in seiner tatsächlichen Größe gedruckt wird, wird die Verwendung von Adobe Acrobat Reader empfohlen.
- Kleine Betriebe: Ich freue mich wenn meine Schnittmuster dir helfen, tolle Bekleidung für deine Kunden zu nähen. Industrielle Produktion ist untersagt.
Kunden werden ermutigt, Frocks & Frolics zu verlinken, wenn sie Projekte, die mit meinen Schnittmustern erstellt wurden, in sozialen Medien teilen.
@frocksandfrolics
#frocksandfrolics
Teilen

SCHRITT-FÜR-SCHRITT ANLEITUNG
VIDEO TEXT
Introduction to Daisy Knit Dress
Transcript for the video: Daisy Knit Dress - Introduction to the Project
This is going to be a very quick introduction to the Amelie and Daisy dresses.
The Amelie dress is the one you see on the pattern cover. I’m showing it with one tier, but you can actually make it with two tiers, with both layers gathered. That gives it more of a dress-like appearance, whereas the single-tier version is more like a shorter tunic.
The Daisy pattern features a turned-up sleeve. It’s simply turned up and then folded again, giving you a really clean finish without any of the inside fabric showing. It works beautifully with trim, which wraps from the inside to the outside, creating a very neat finish.
The fabric I used for both sample dresses comes from Fabfab, a German company based in Pinneberg. They have websites throughout Europe, and their English website is MyFabrics.co.uk. The fabric is fantastic because it has great stretch and recovery—it stretches easily and then returns to shape, making it very durable.
I also used circular appliqués on the lower half of the dress. There is so much you can do with this pattern, and I show all of that in the complete video.
Daisy Dress with Ladybird Appliqué
Moving on to another Daisy dress variation, this one features ladybirds rather than butterflies. I know I talk about butterflies in the video, but they are actually ladybirds.
The ladybird detail is included with the pattern. If you purchased the pattern very early on, you may not have received it, but I will make it available on the project page as a download.
I also added bows to this version. Looking back, I’m not sure I would use them again, but that’s entirely personal preference and you can leave them off if you like.
This version also uses trim at the hem. Rather than rolling it to the outside, I attached it and turned it up. I wanted to demonstrate a different technique, but you could certainly finish it the same way as the previous version.
The snap fasteners from Kam Snaps or Snaply are beautiful and very easy to install.
A Simple Daisy Dress
Of course, you can also make the Daisy dress completely plain. I think it looks lovely without additional trims or embellishments, especially if you have chosen an interesting fabric.
On the back of this version, I covered the Kam Snap with fabric, which creates a very neat finish and is surprisingly easy to do.
Daisy Dress with Long Sleeves
Here we have the Daisy dress with long sleeves. The pattern includes both short and long sleeve options.
This is one of my earlier samples where I made the trim slightly wider. I think it works quite nicely. I used contrast snap fasteners and a different fabric for the sleeves, which creates a lovely coordinated look.
Christmas Dress Variations
Now moving on to some Christmas dresses, which are actually combinations of both patterns.
For these versions, I used the top portion of the Daisy dress so that I could include the fastening, while the lower portion comes from the Amelie dress. You simply cut underneath the armhole and combine the two patterns, as shown in the diagram.
This version uses the gathered Amelie sleeve with elastic inserted into the cuff. There is a full video tutorial available for this dress. It also features a beautiful velvet ribbon finish with a decorative bow.
I also created another version with long sleeves. Here, I added binding, which is not included in the pattern itself, but I explain how to do it in the accompanying video. I also demonstrate a different method for attaching the skirt. The purpose is to show a variety of techniques so you can choose the approach that works best for you.
Daisy Dress with Amelie Sleeves
This variation combines the Daisy dress with the Amelie sleeves.
The Amelie sleeves are technically a little shorter because the Amelie neckline is slightly larger. However, the difference is so small that when I made these samples, I barely noticed it. If necessary, you can simply trim a tiny amount to make everything fit perfectly.
Alternative Back Closure
For anyone who doesn’t like facings or more complicated fastenings, there is a very simple alternative.
For this version, I bound the edge and added a tie at the back. It’s quick, easy, and looks lovely. Add a ribbon and a bow, choose an interesting fabric, and you have a beautiful dress with minimal effort.
Final Thoughts
I can’t wait to see the combinations you come up with. Honestly, I often find other people’s creations even more inspiring than my own.
My next production will be coming from sunny California.
Thank you for watching. Bye!
Daisy Tunic Introduction
Transcript for the video: Daisy Knit Dress - Daisy Tutorial
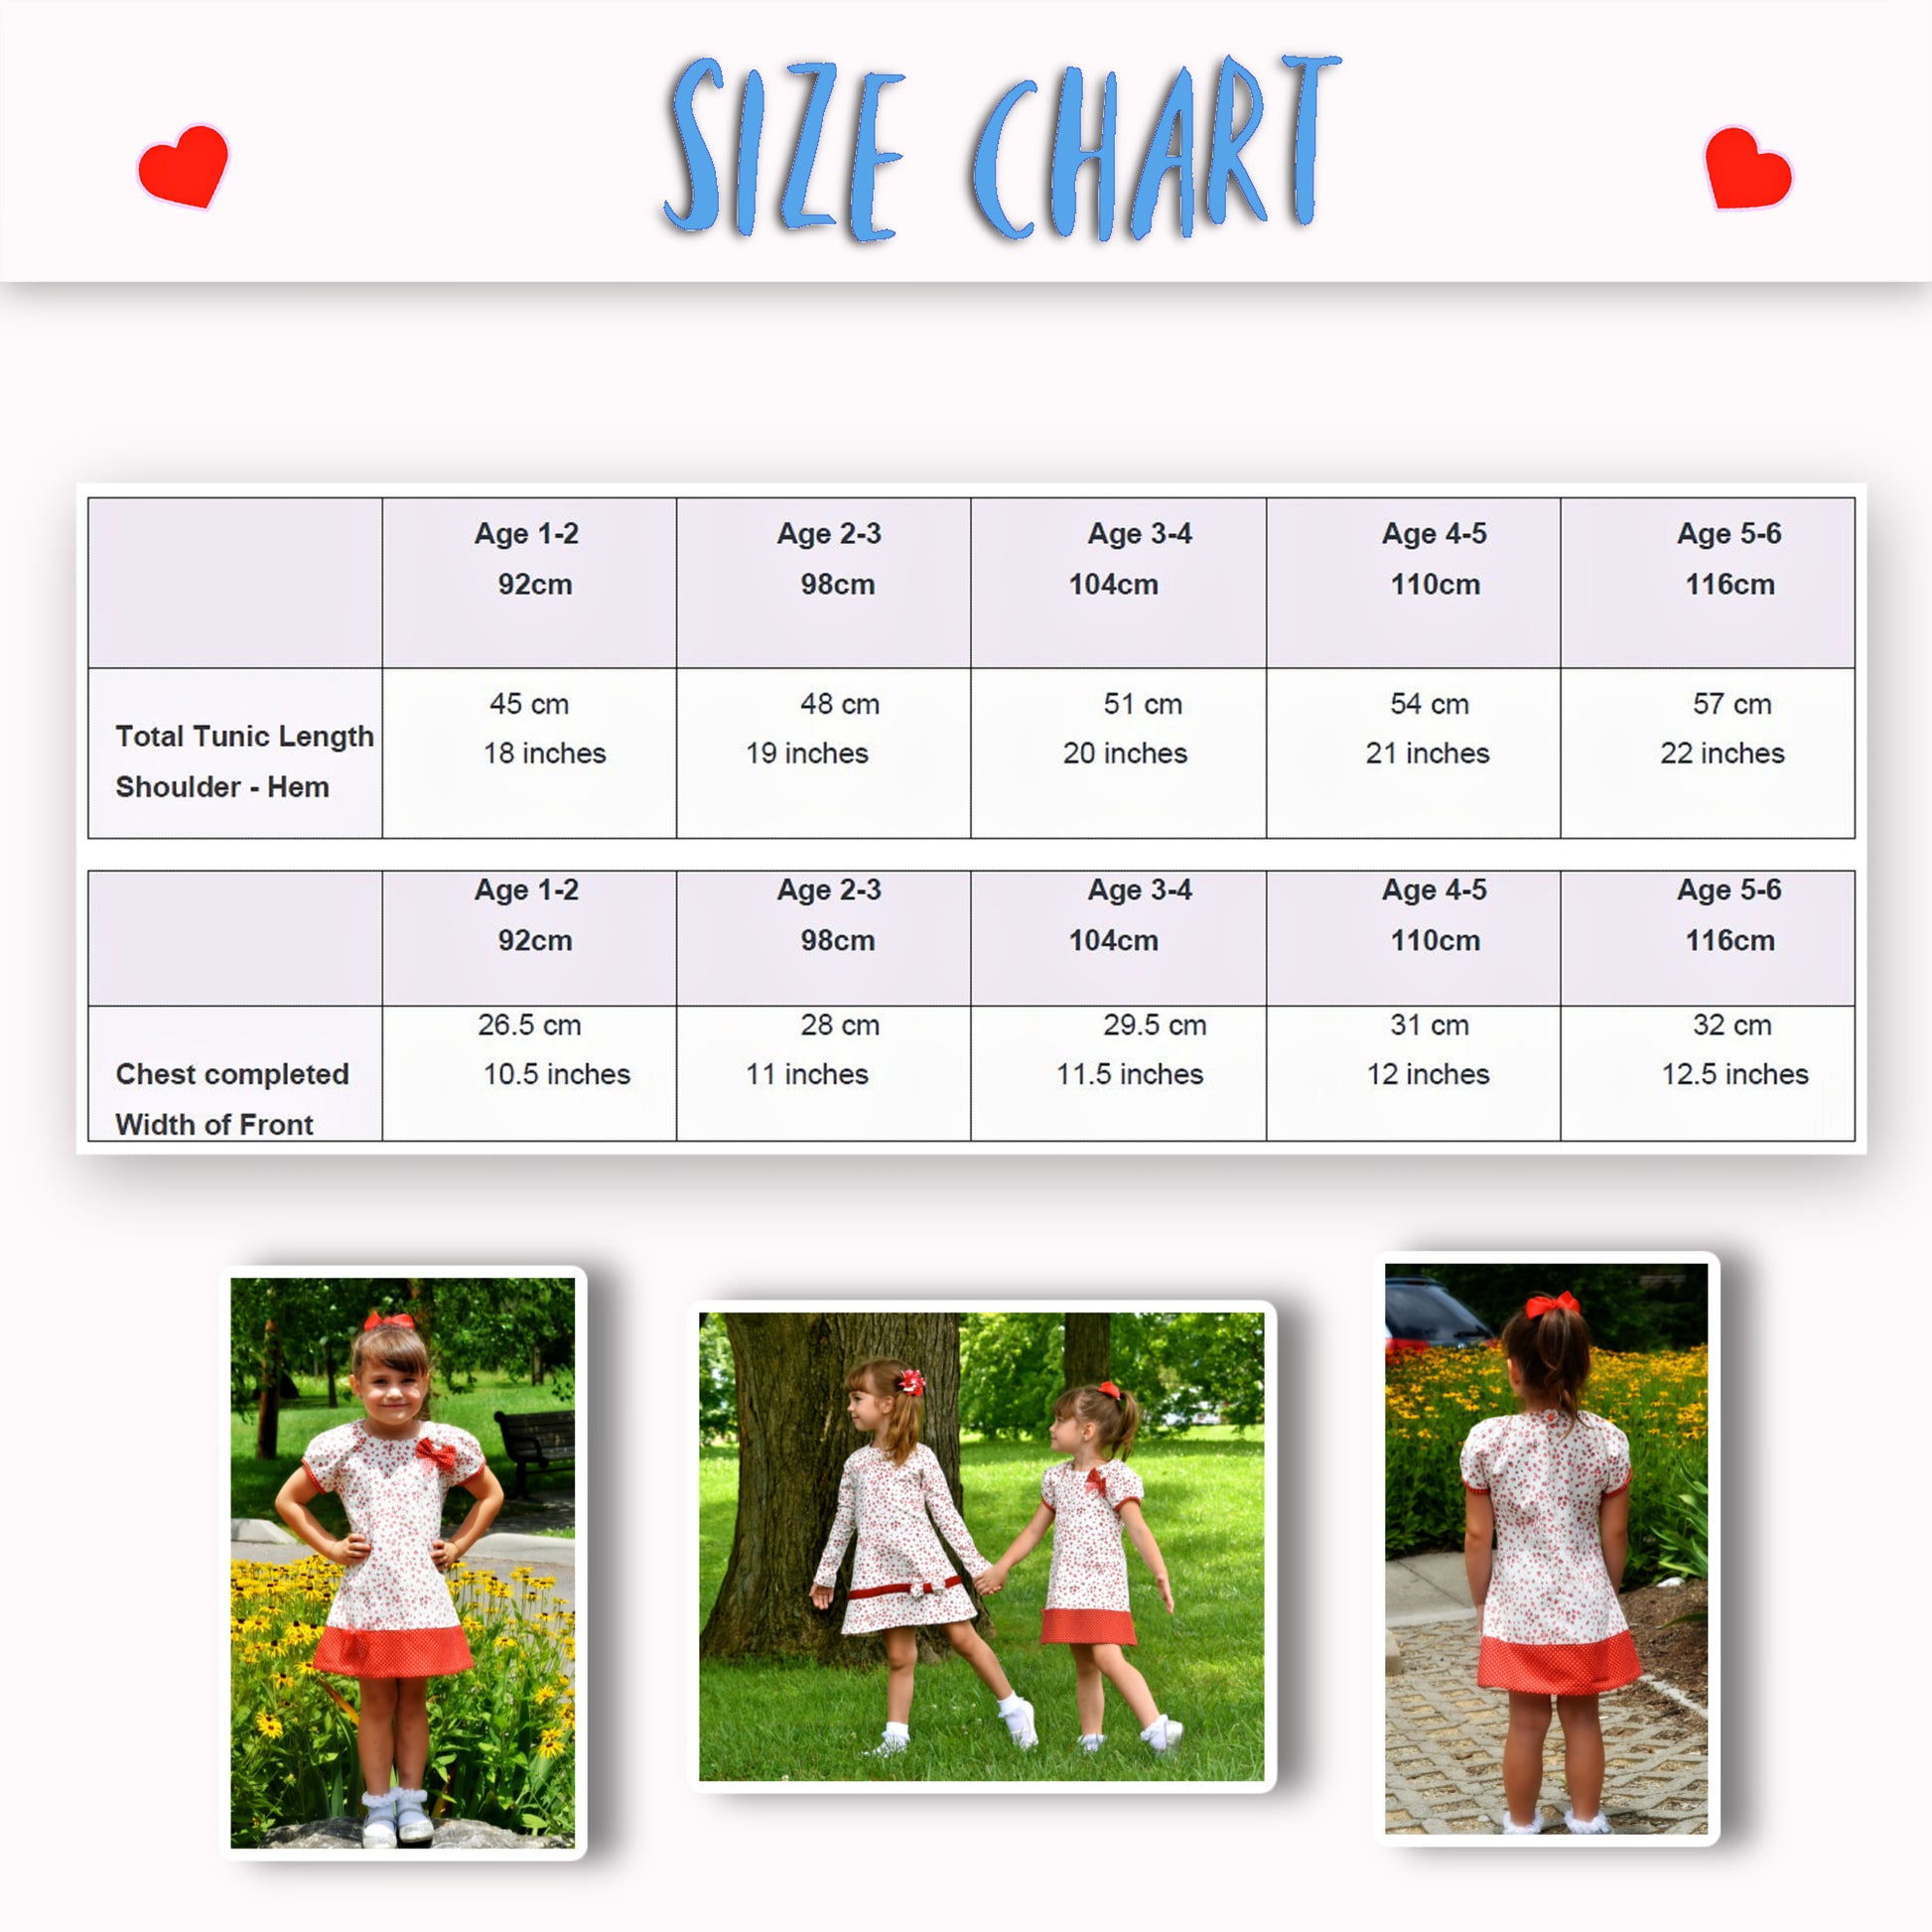
Hello and welcome to the Daisy Tunic, the second in the series of raglan tunics with long and short sleeves, made with fabric provided by MyFabrics.co.uk.
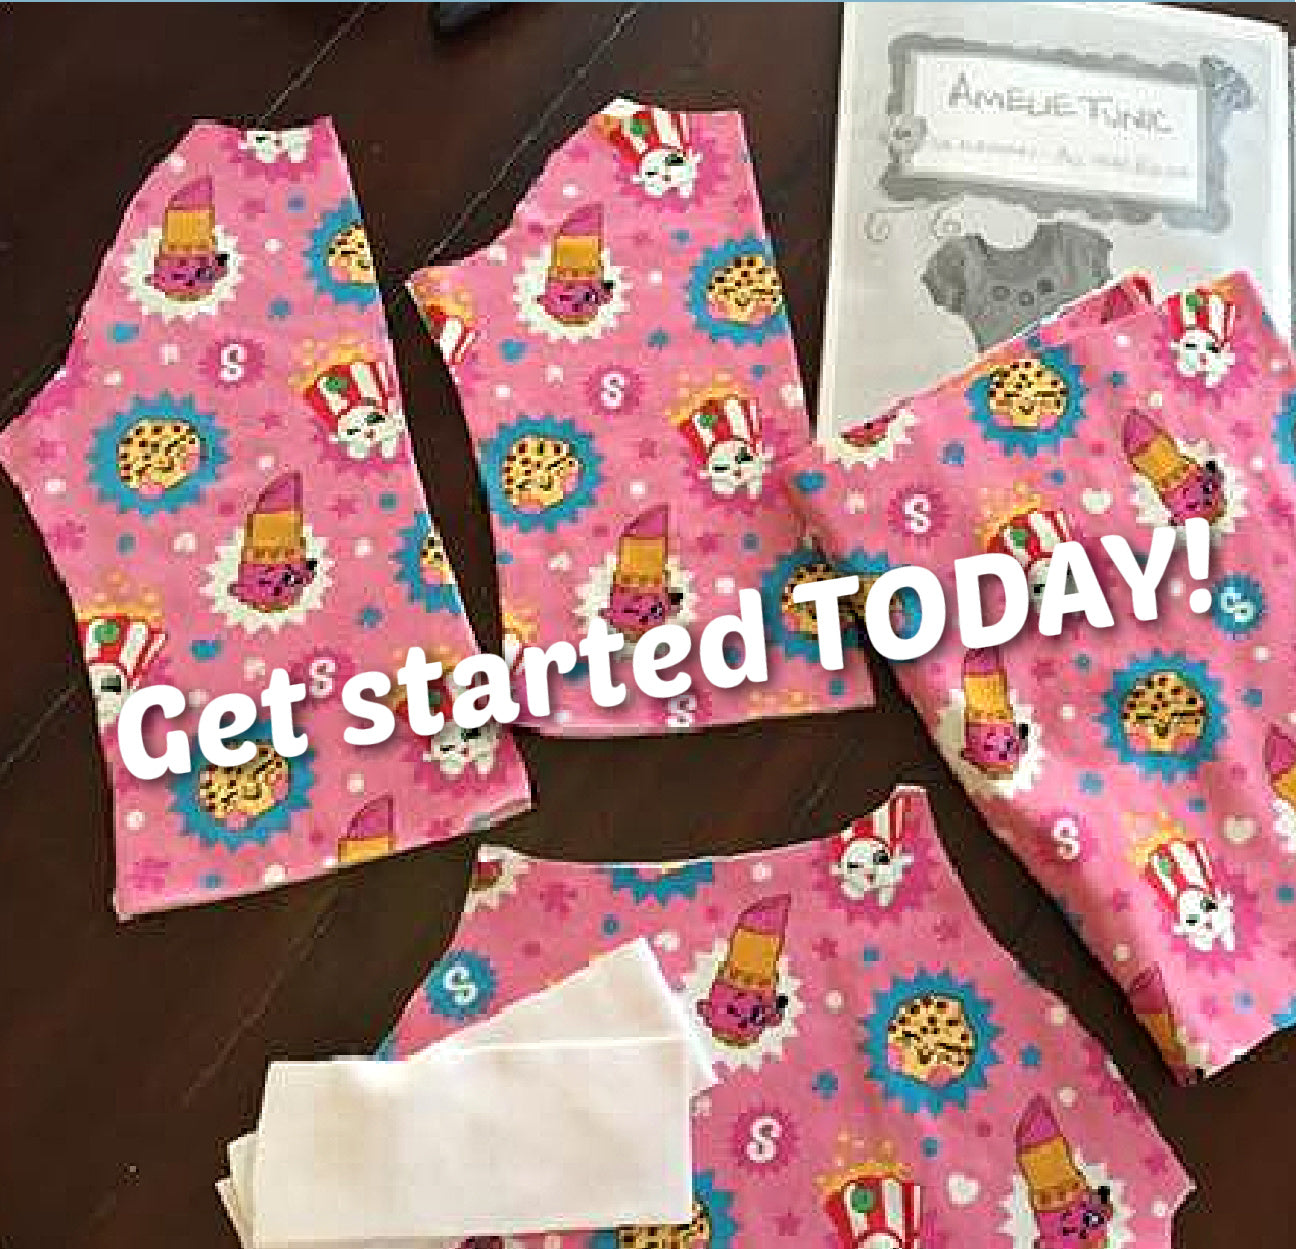
First of all, you need the pattern. Each size comes as an individual file, so 2–3 years, 3–4 years, and so on. Cut around all the lines, including the dashed line. Check the test scale and make sure it measures 5 cm so you can be certain your pattern has printed correctly.
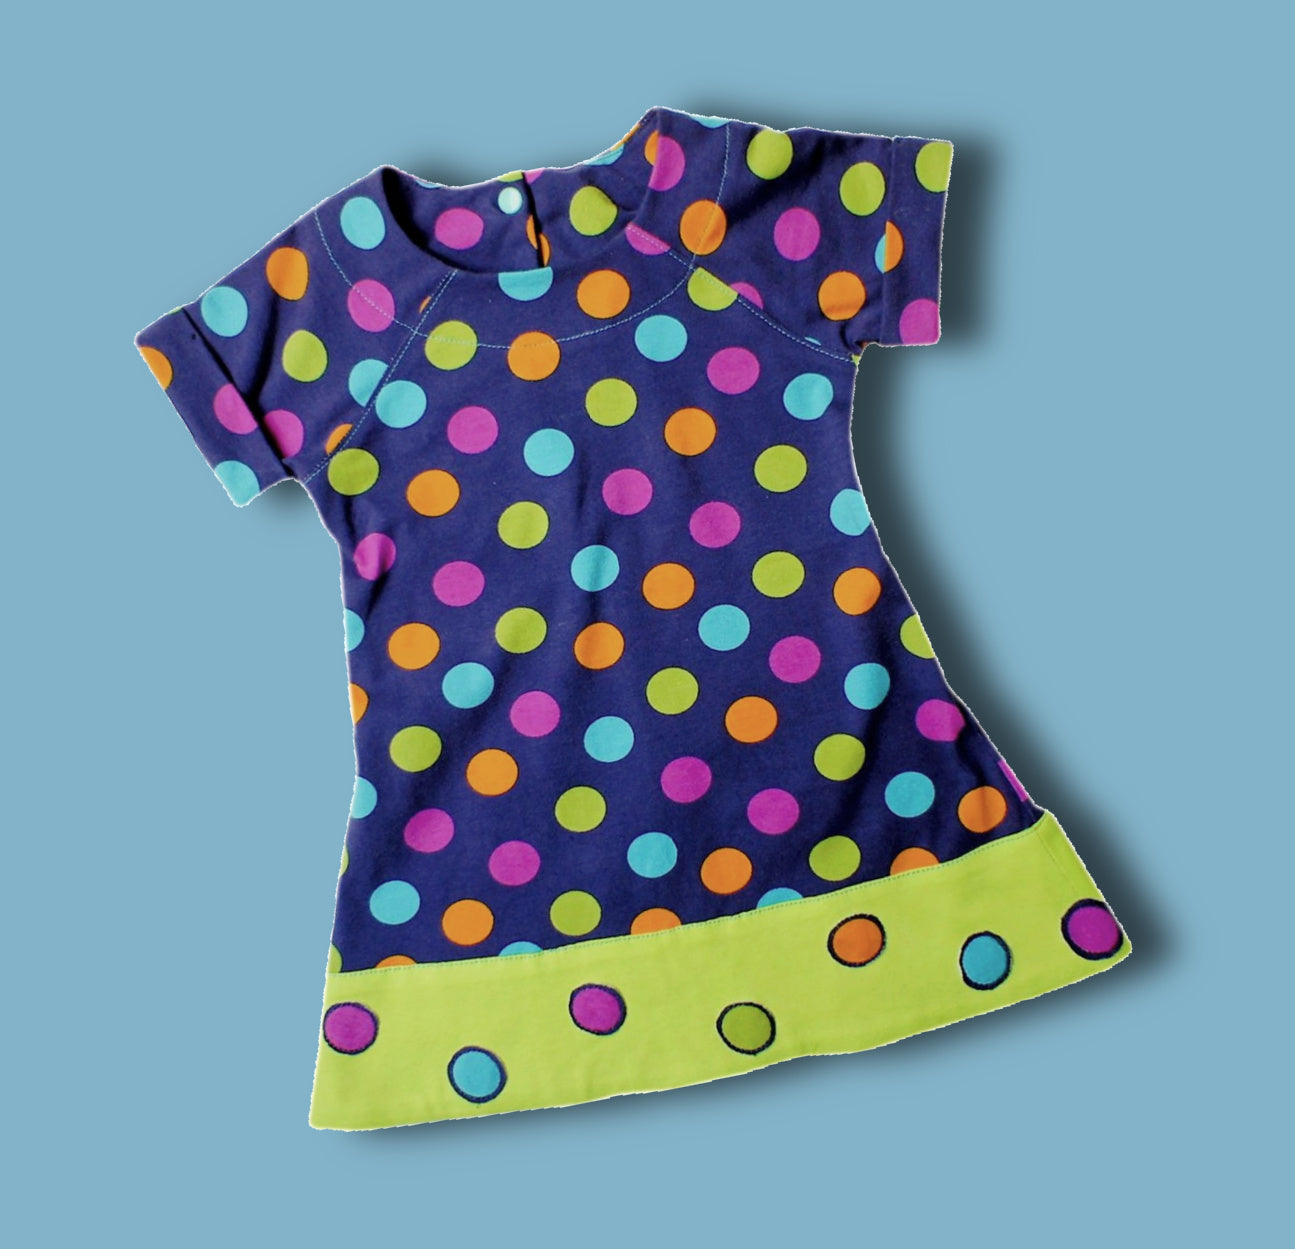
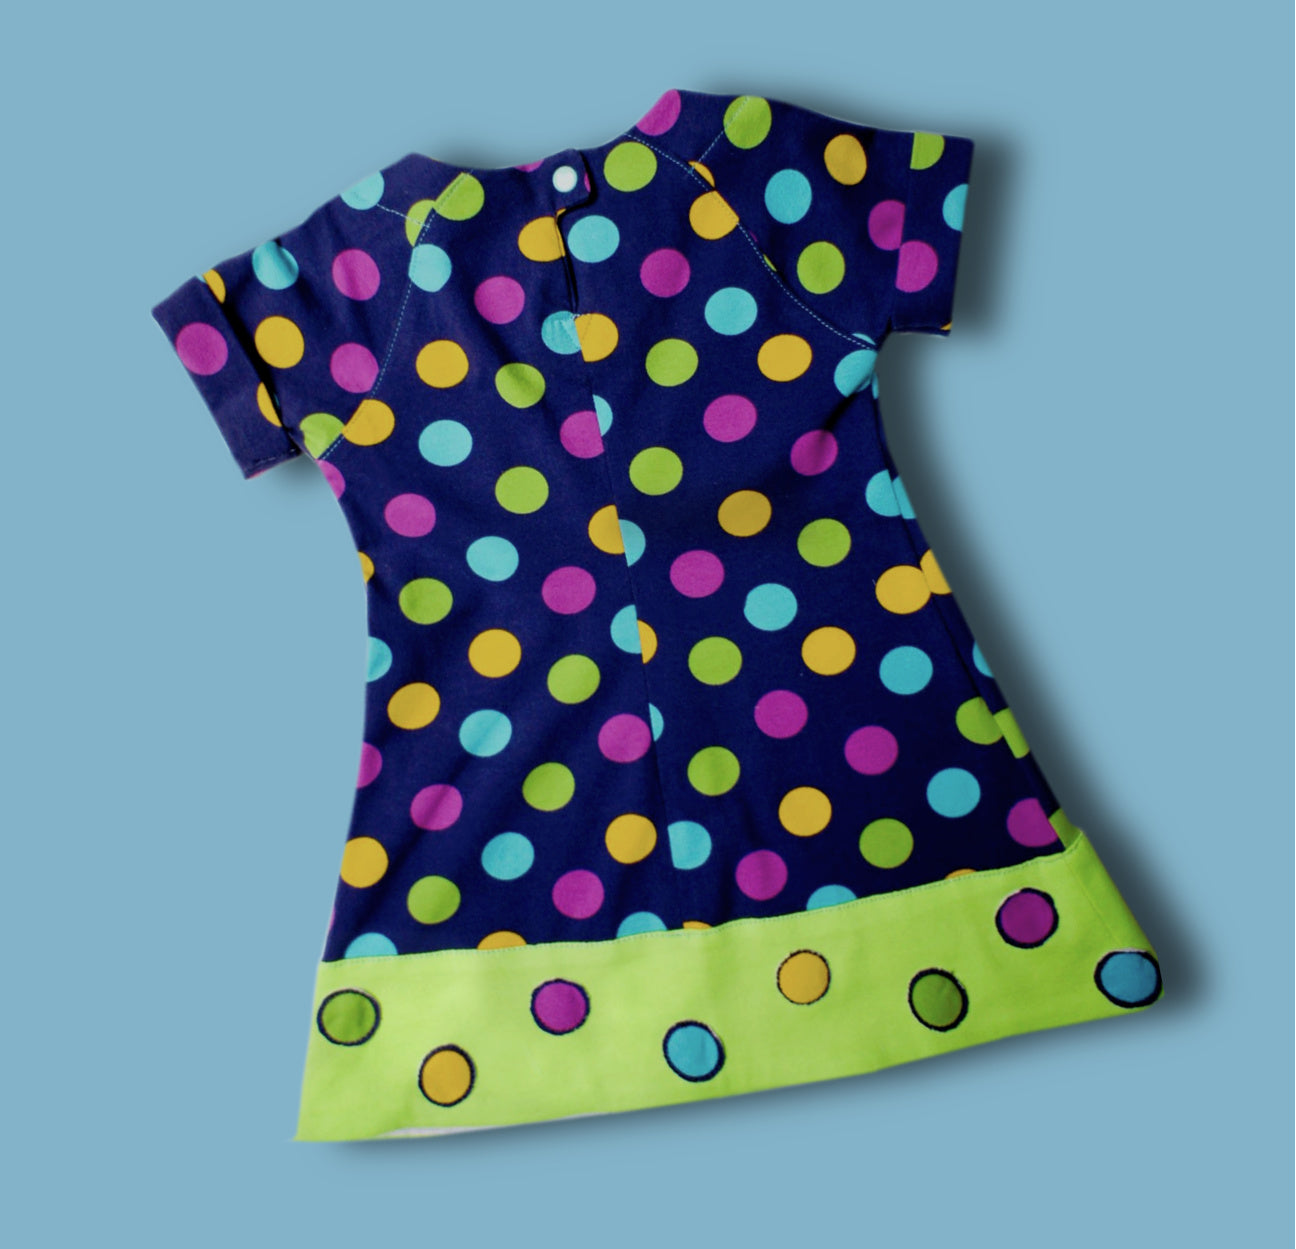
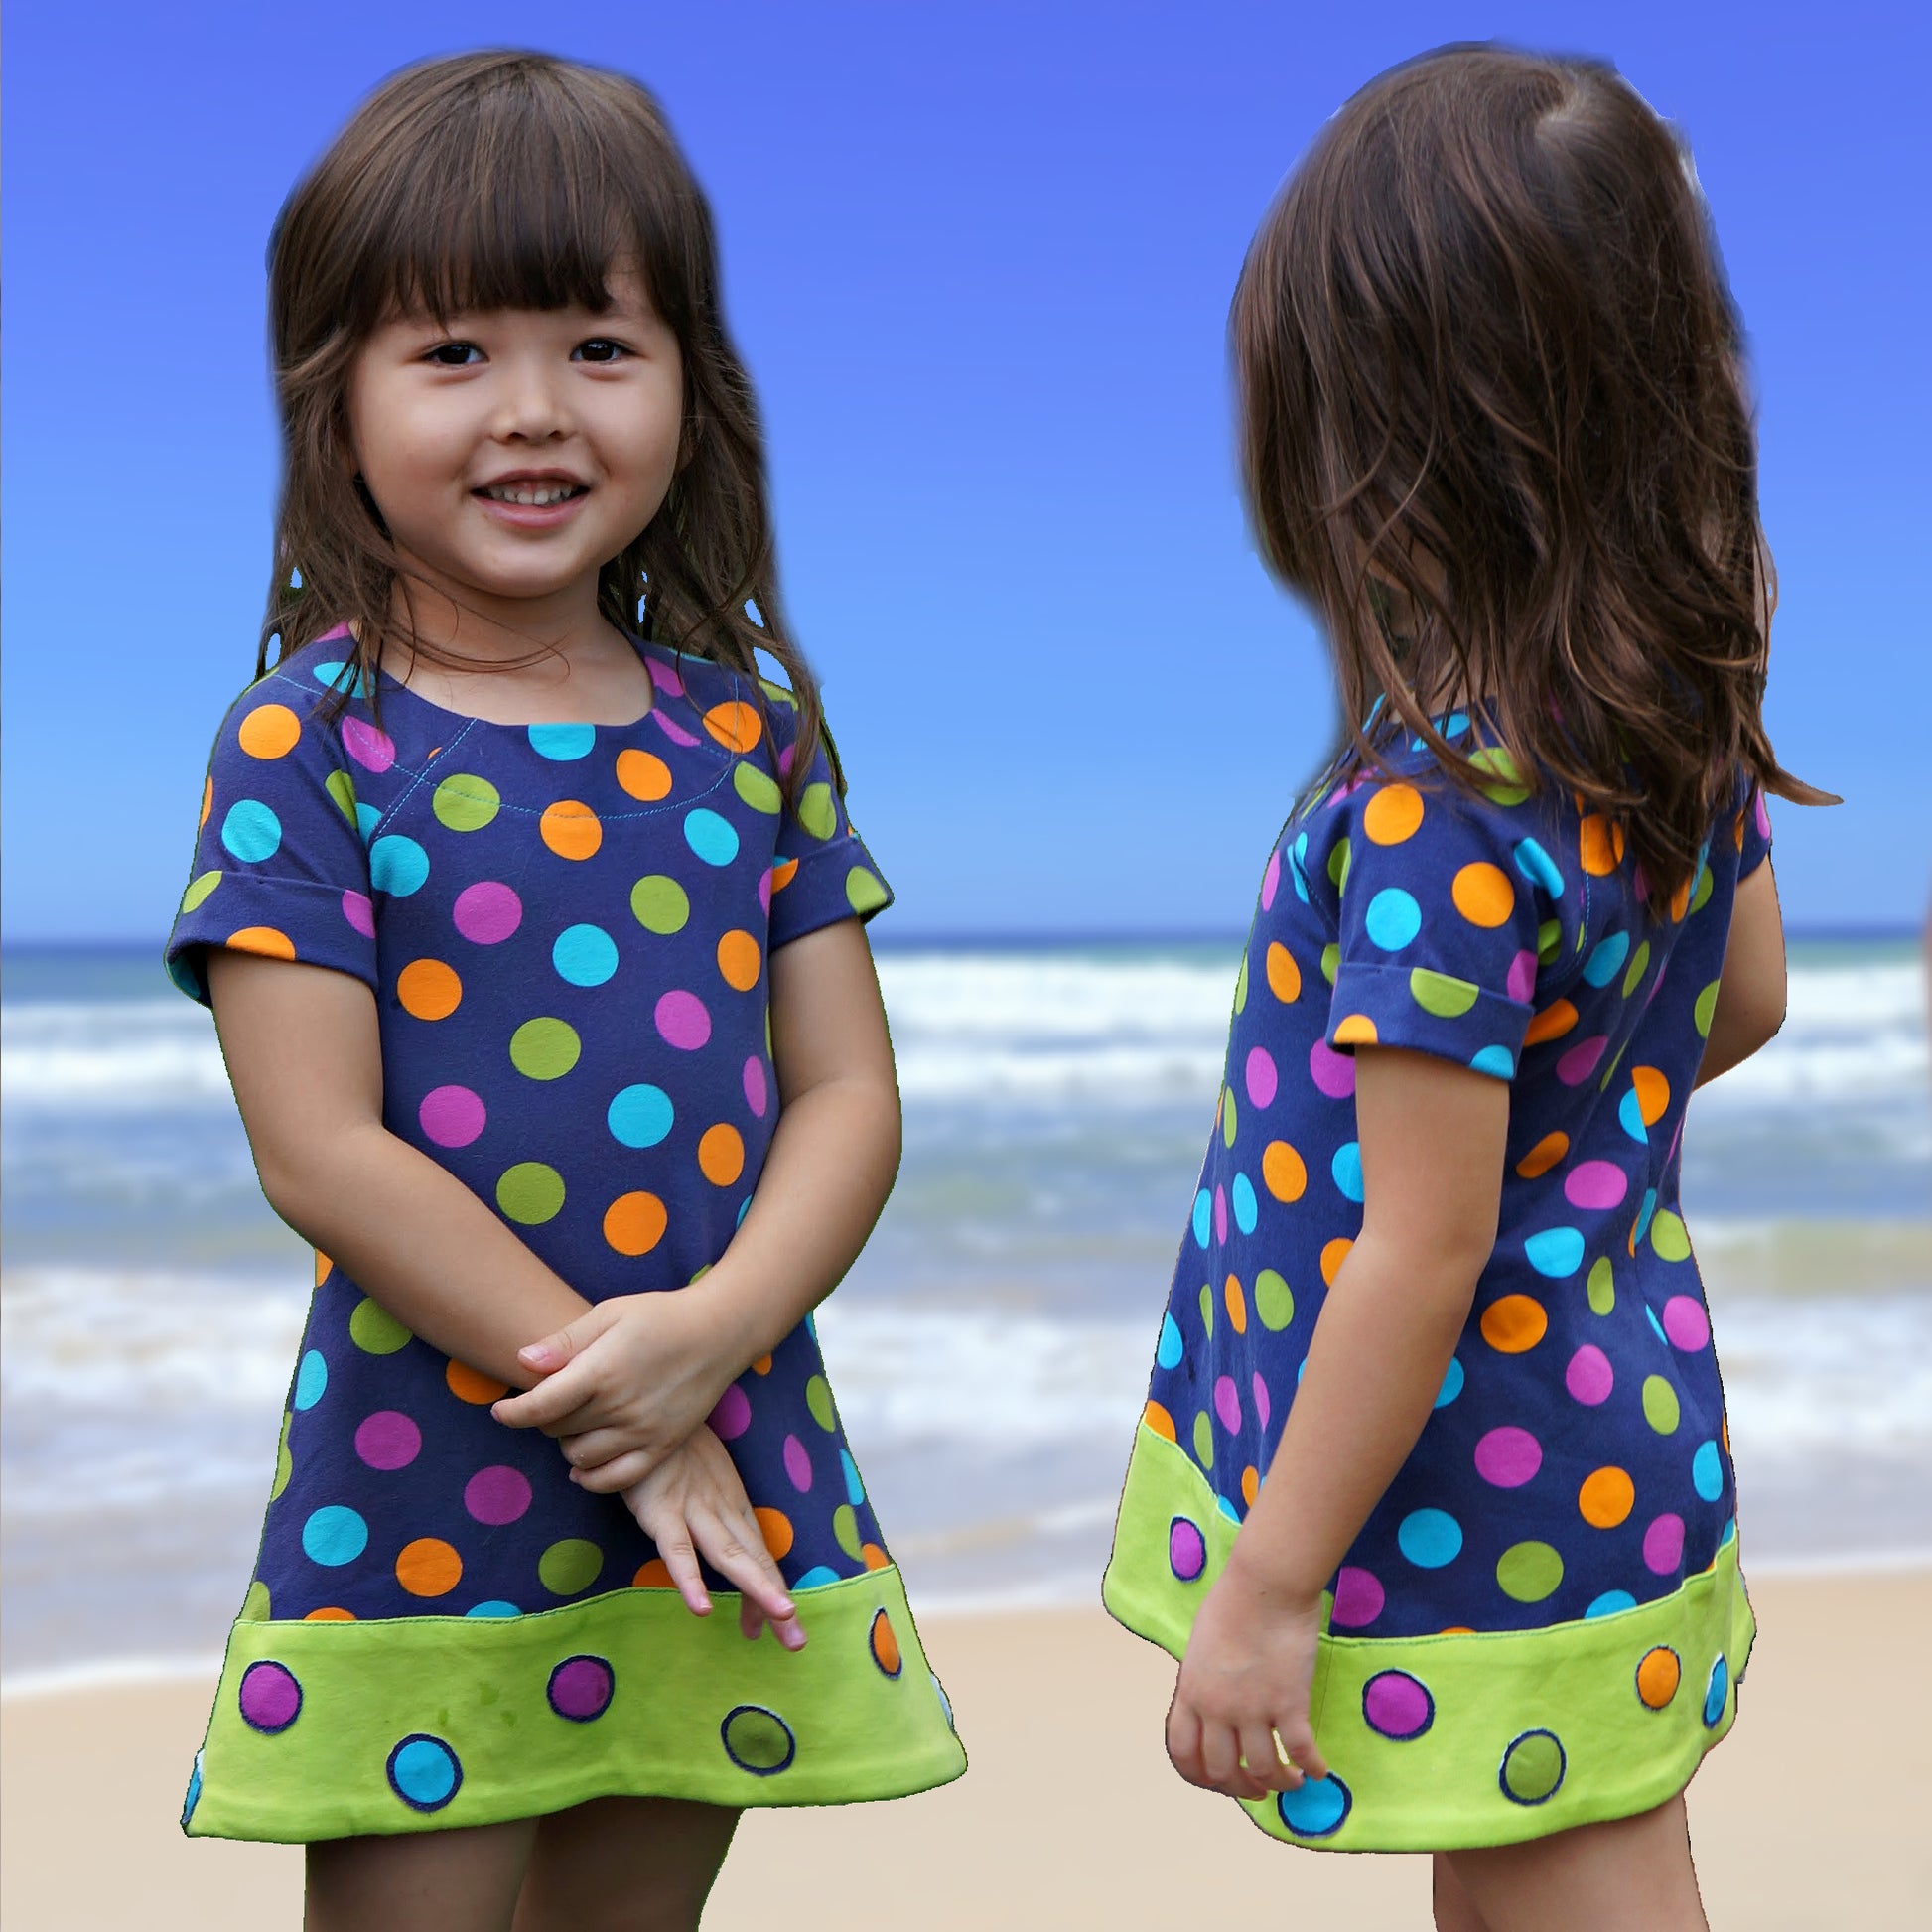
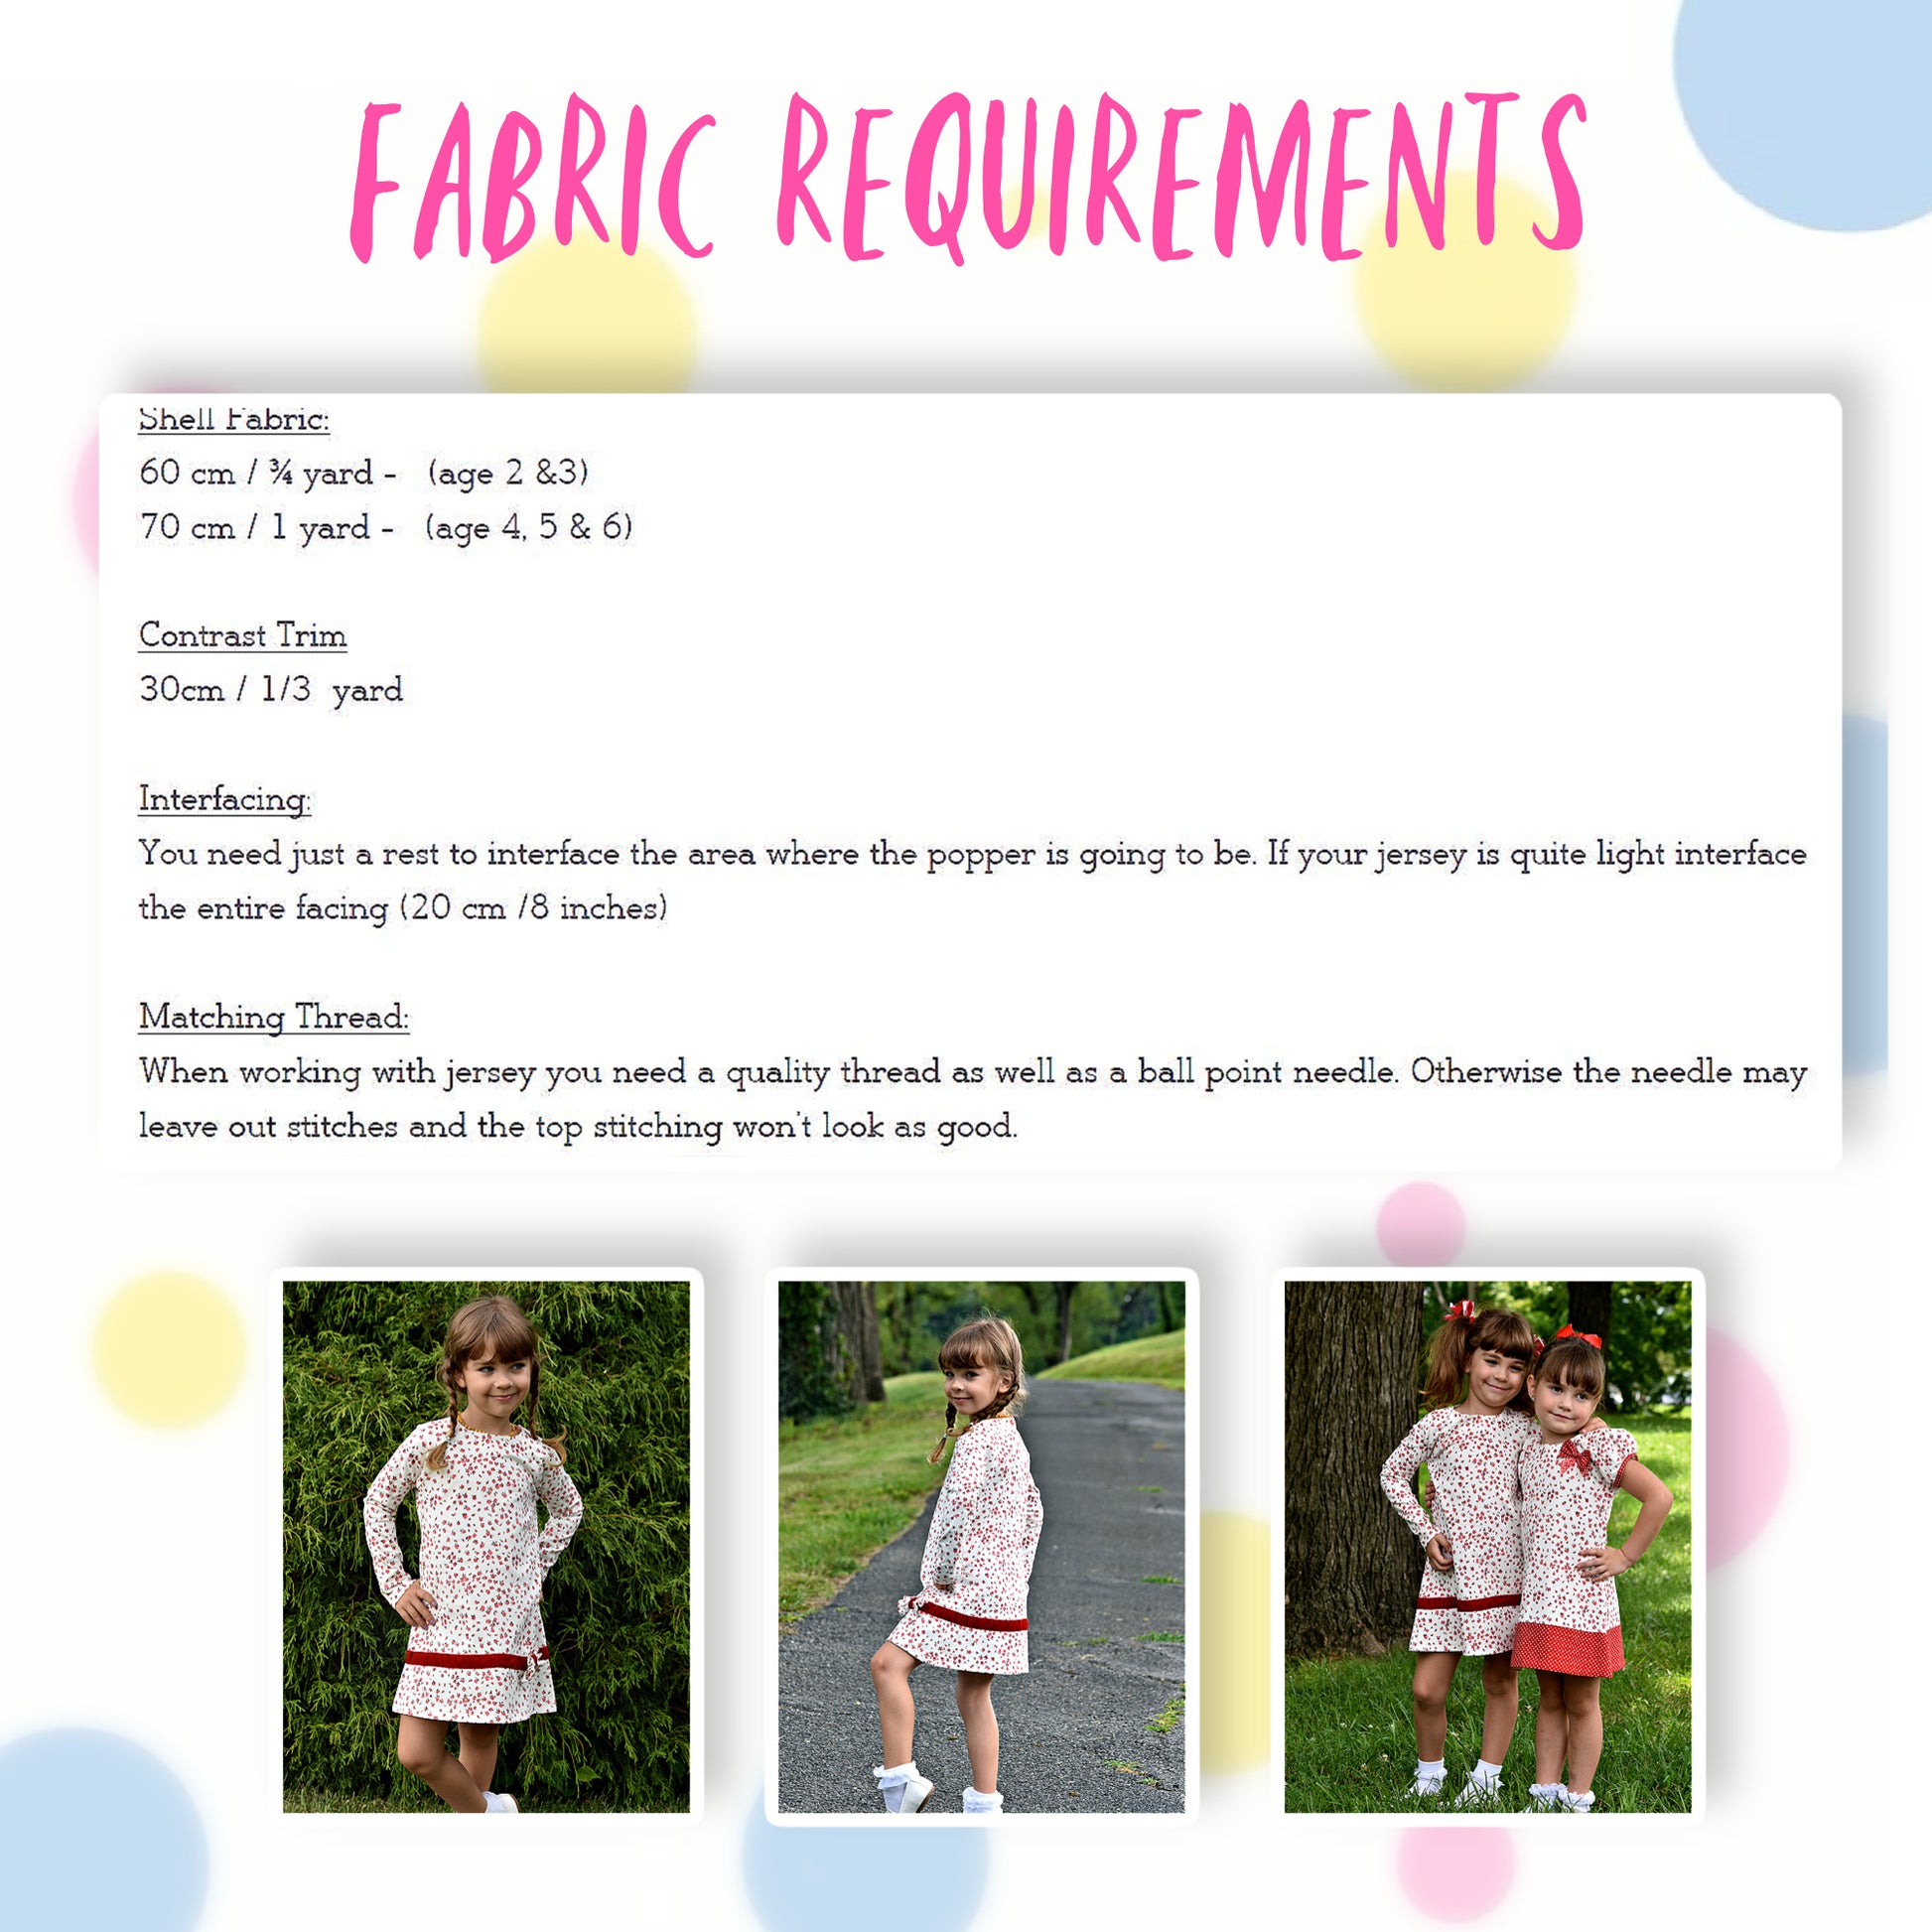
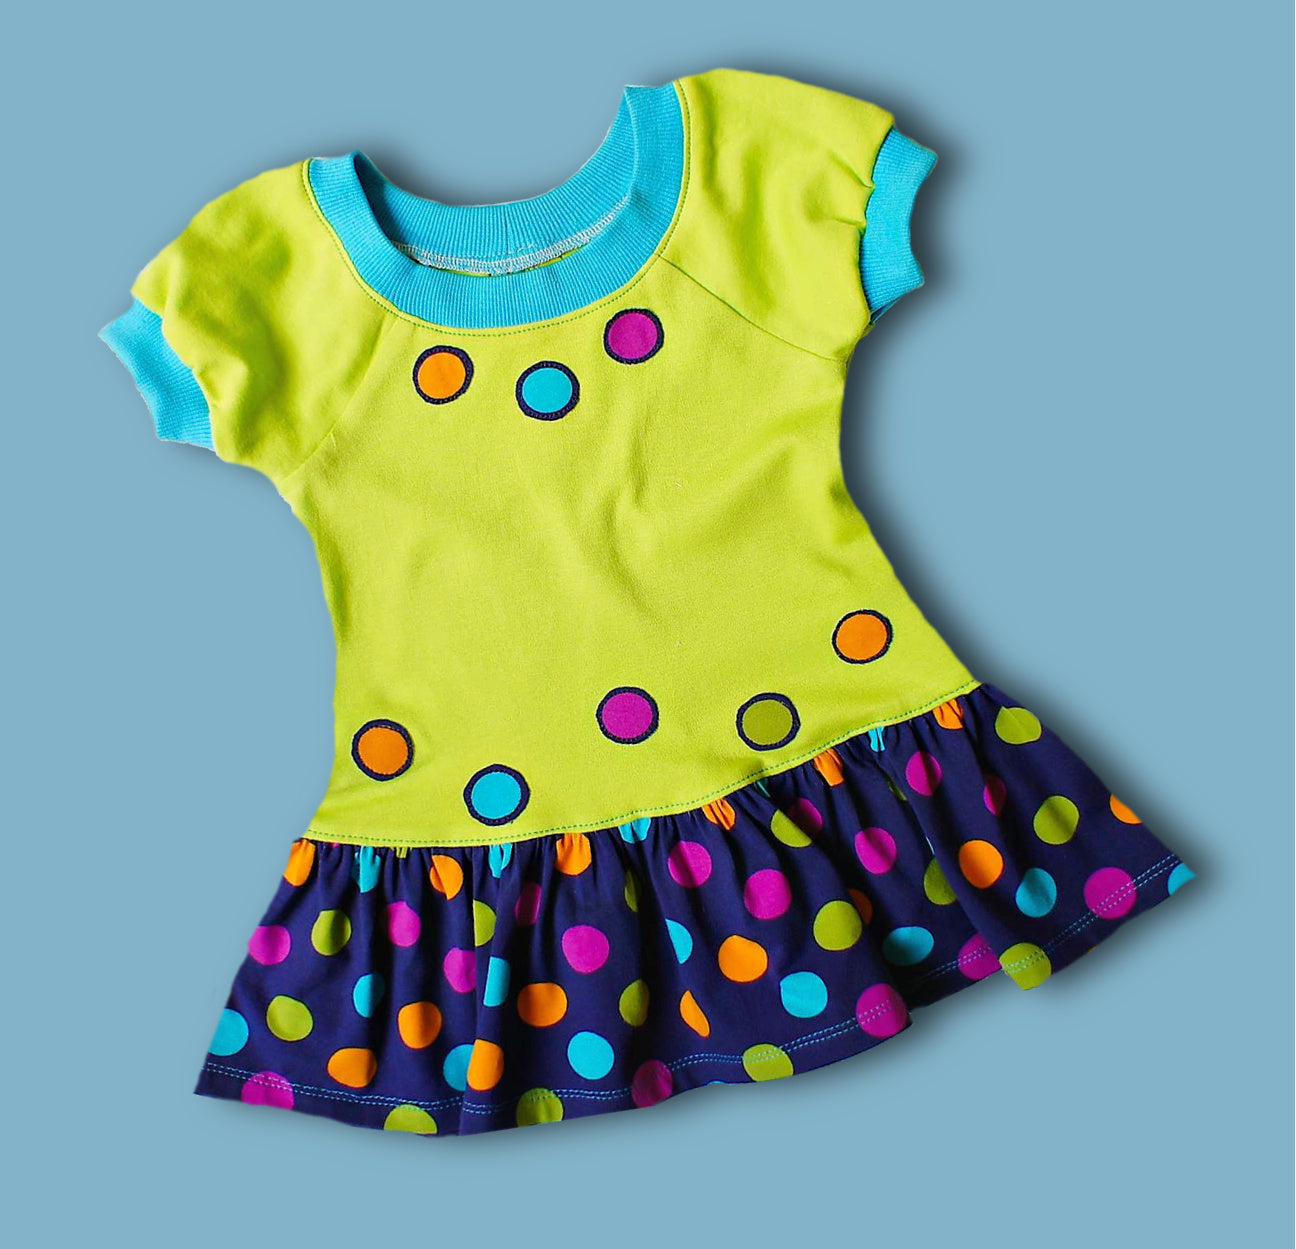
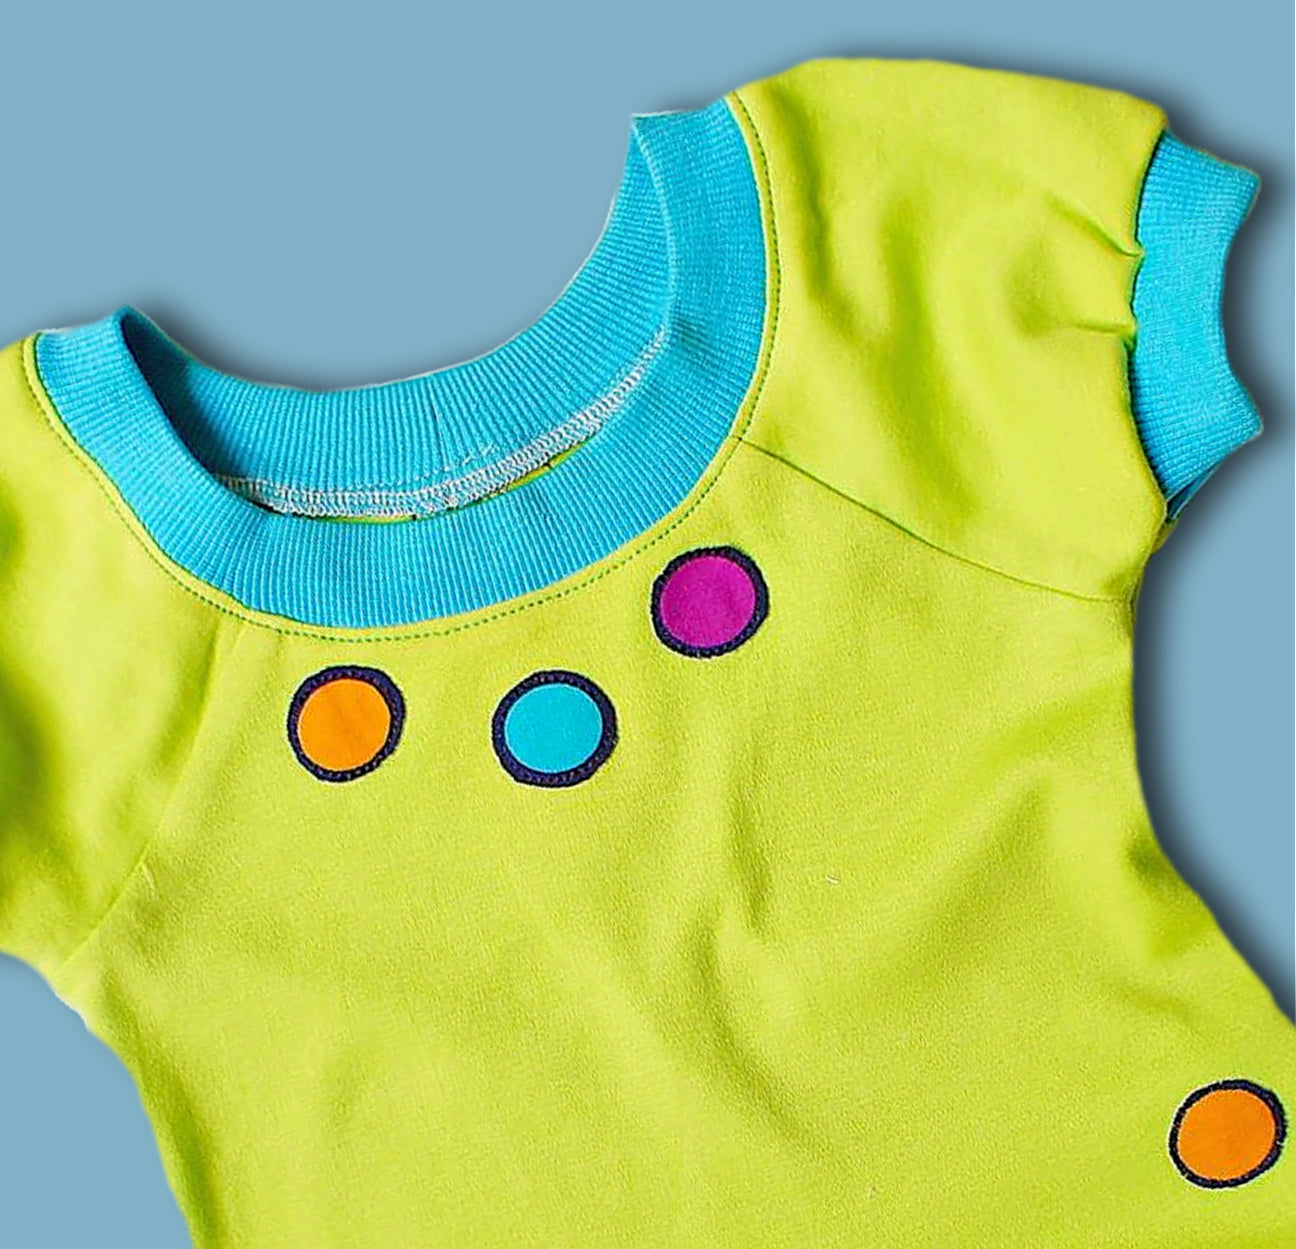
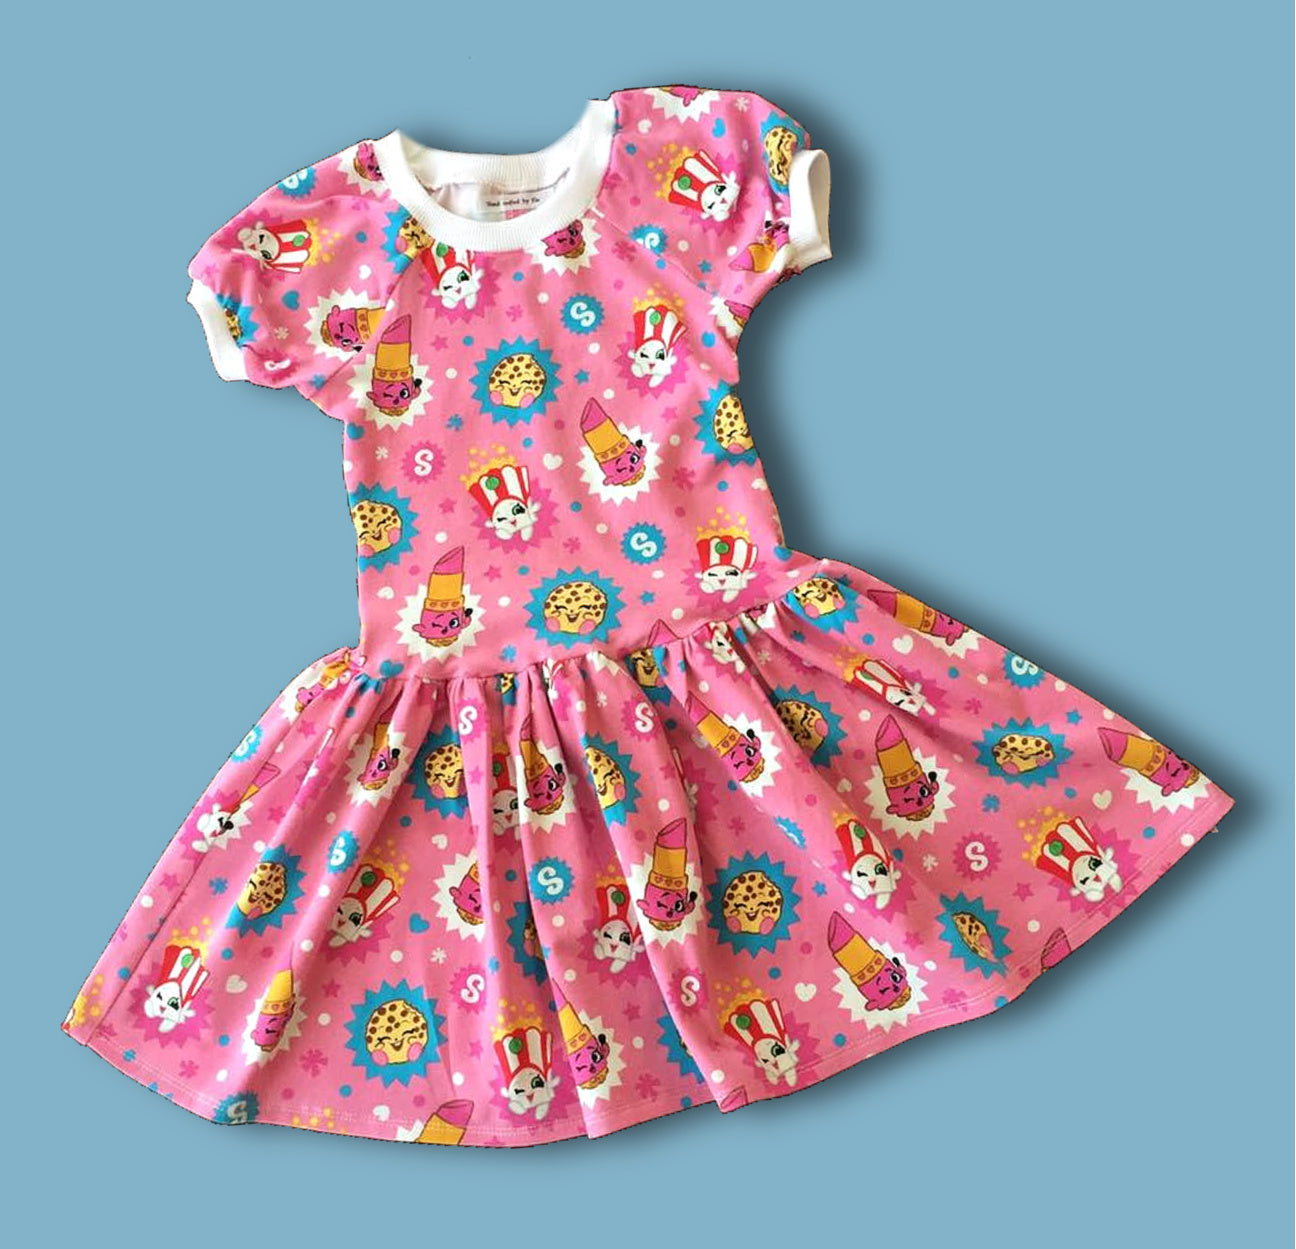
For this sample, I used a two-way stretch jersey for both the top and lower part of the dress, but you can use any fabric you like. I also appliquéd some circles using the top fabric and used heavy topstitching to make them stand out. The hem trim rolls from the inside to the outside, which is very easy to do and gives a neat finish.
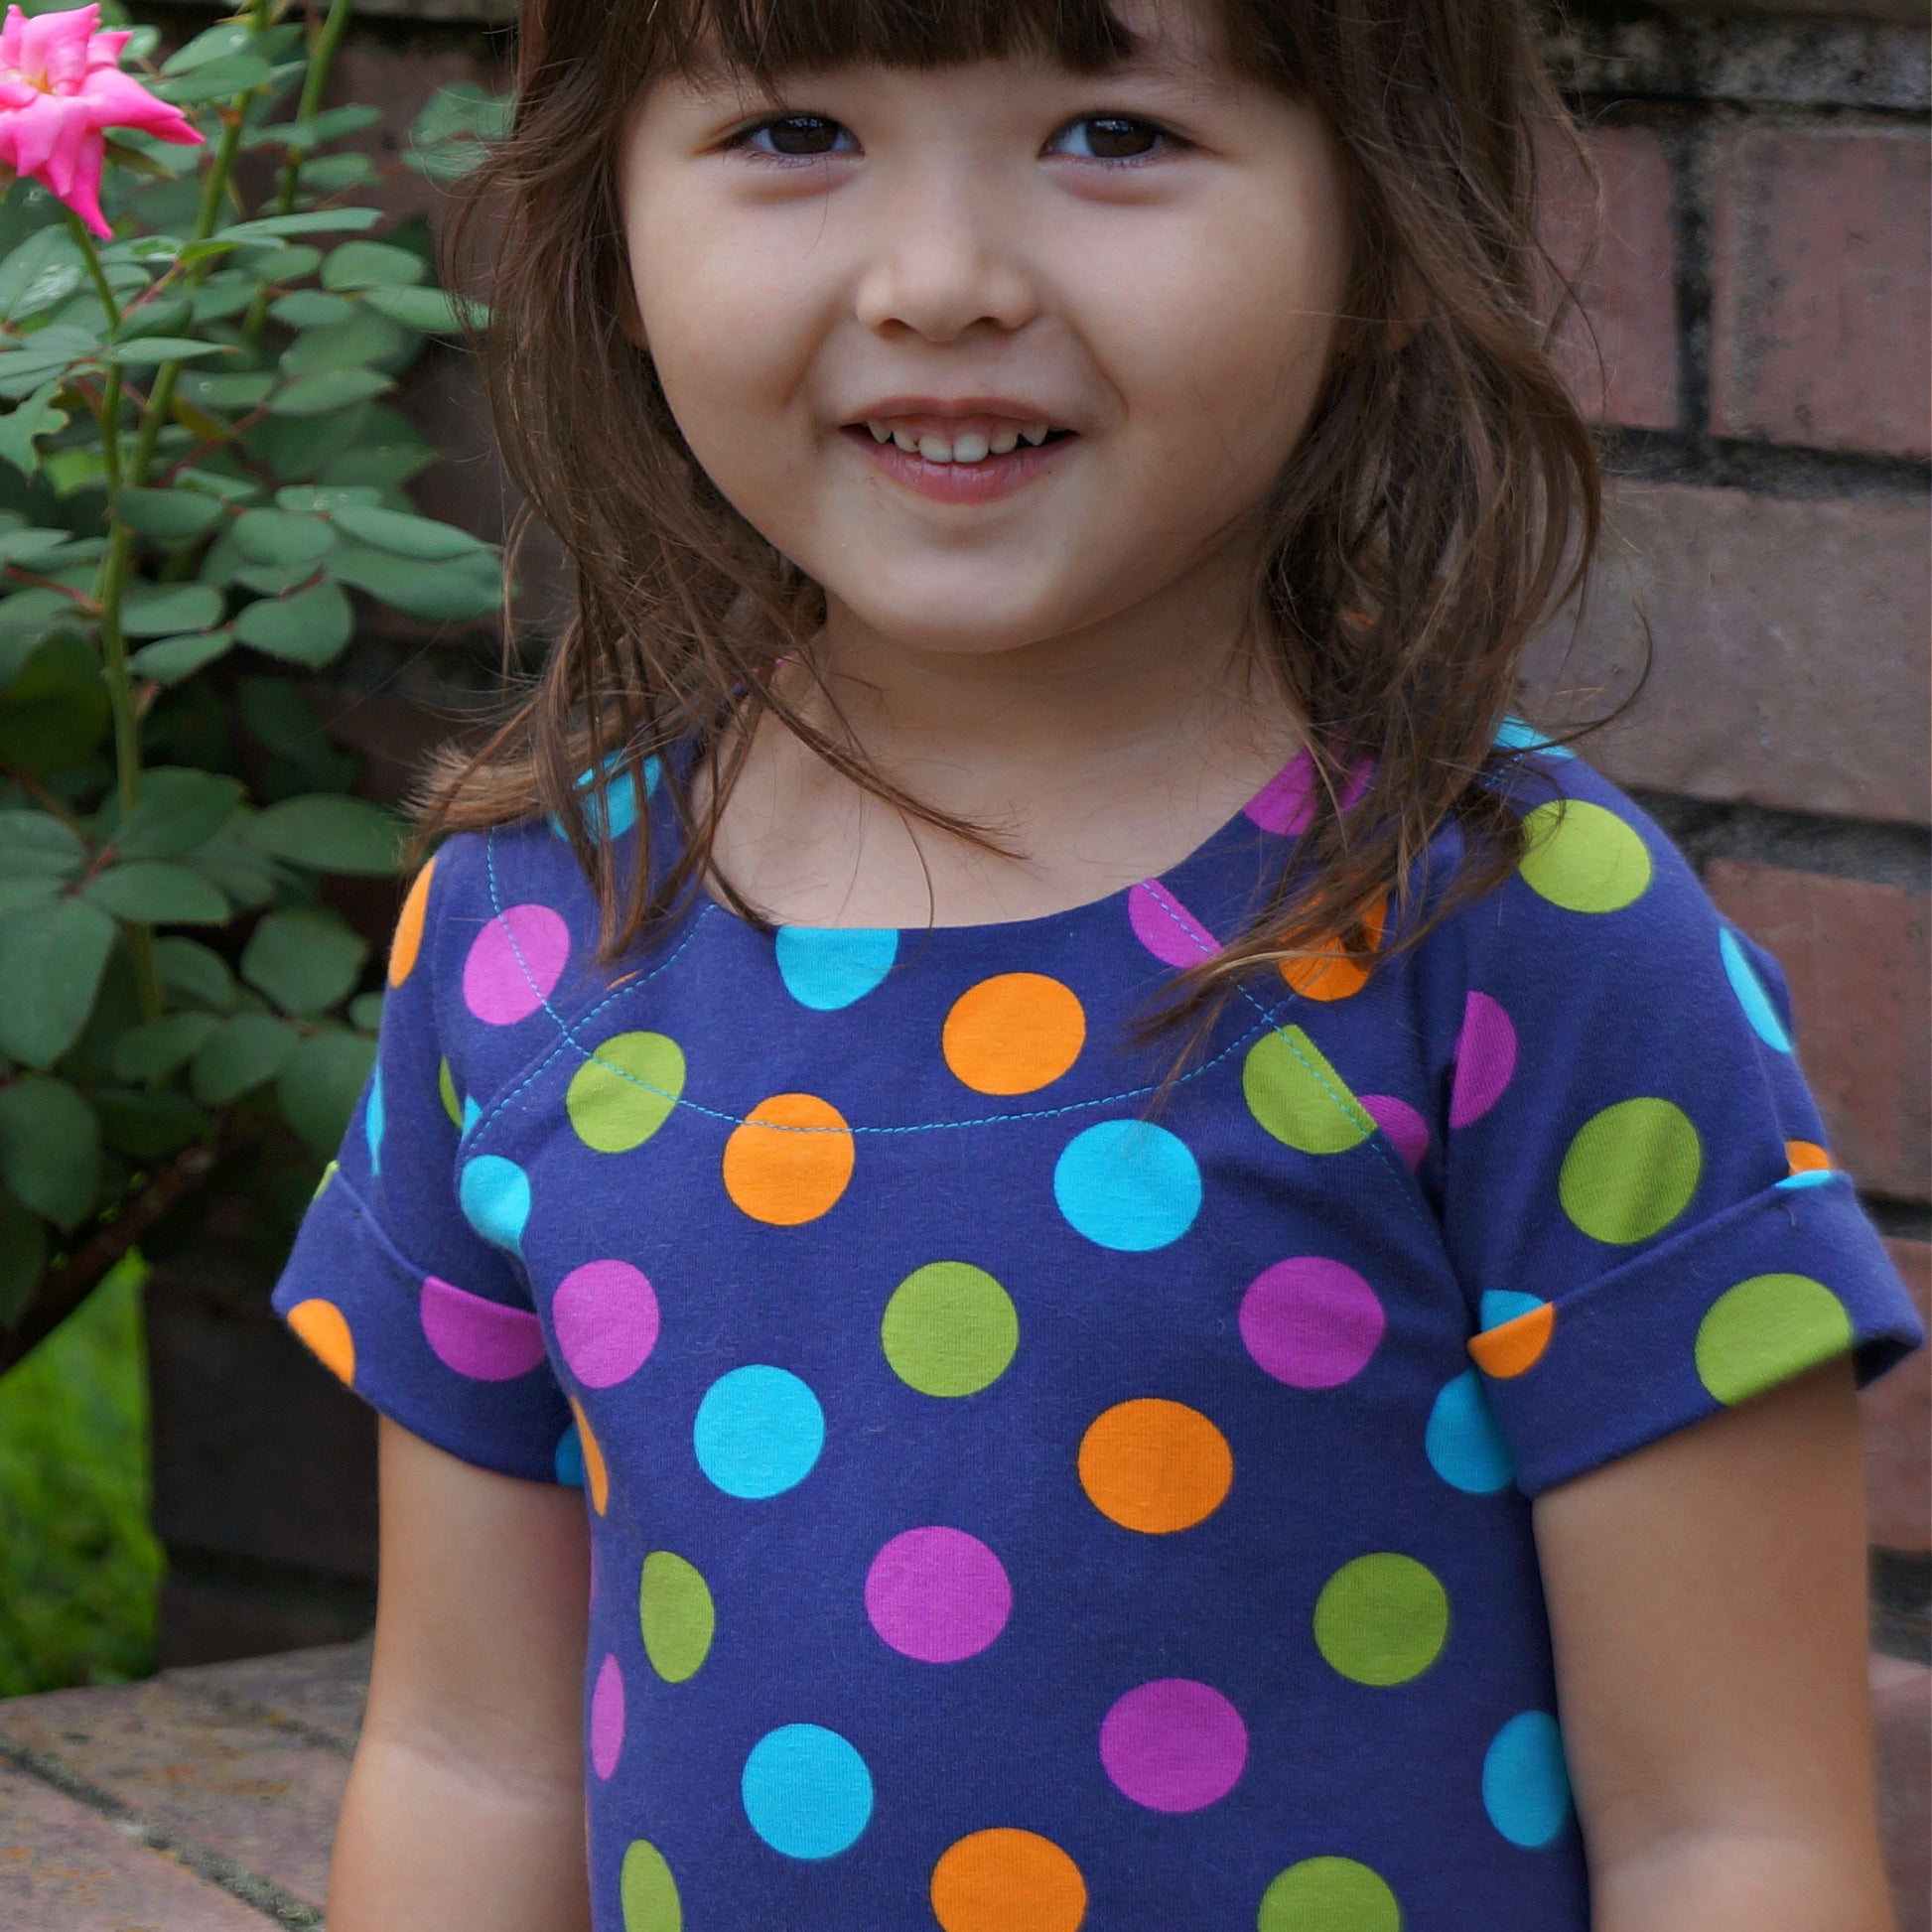
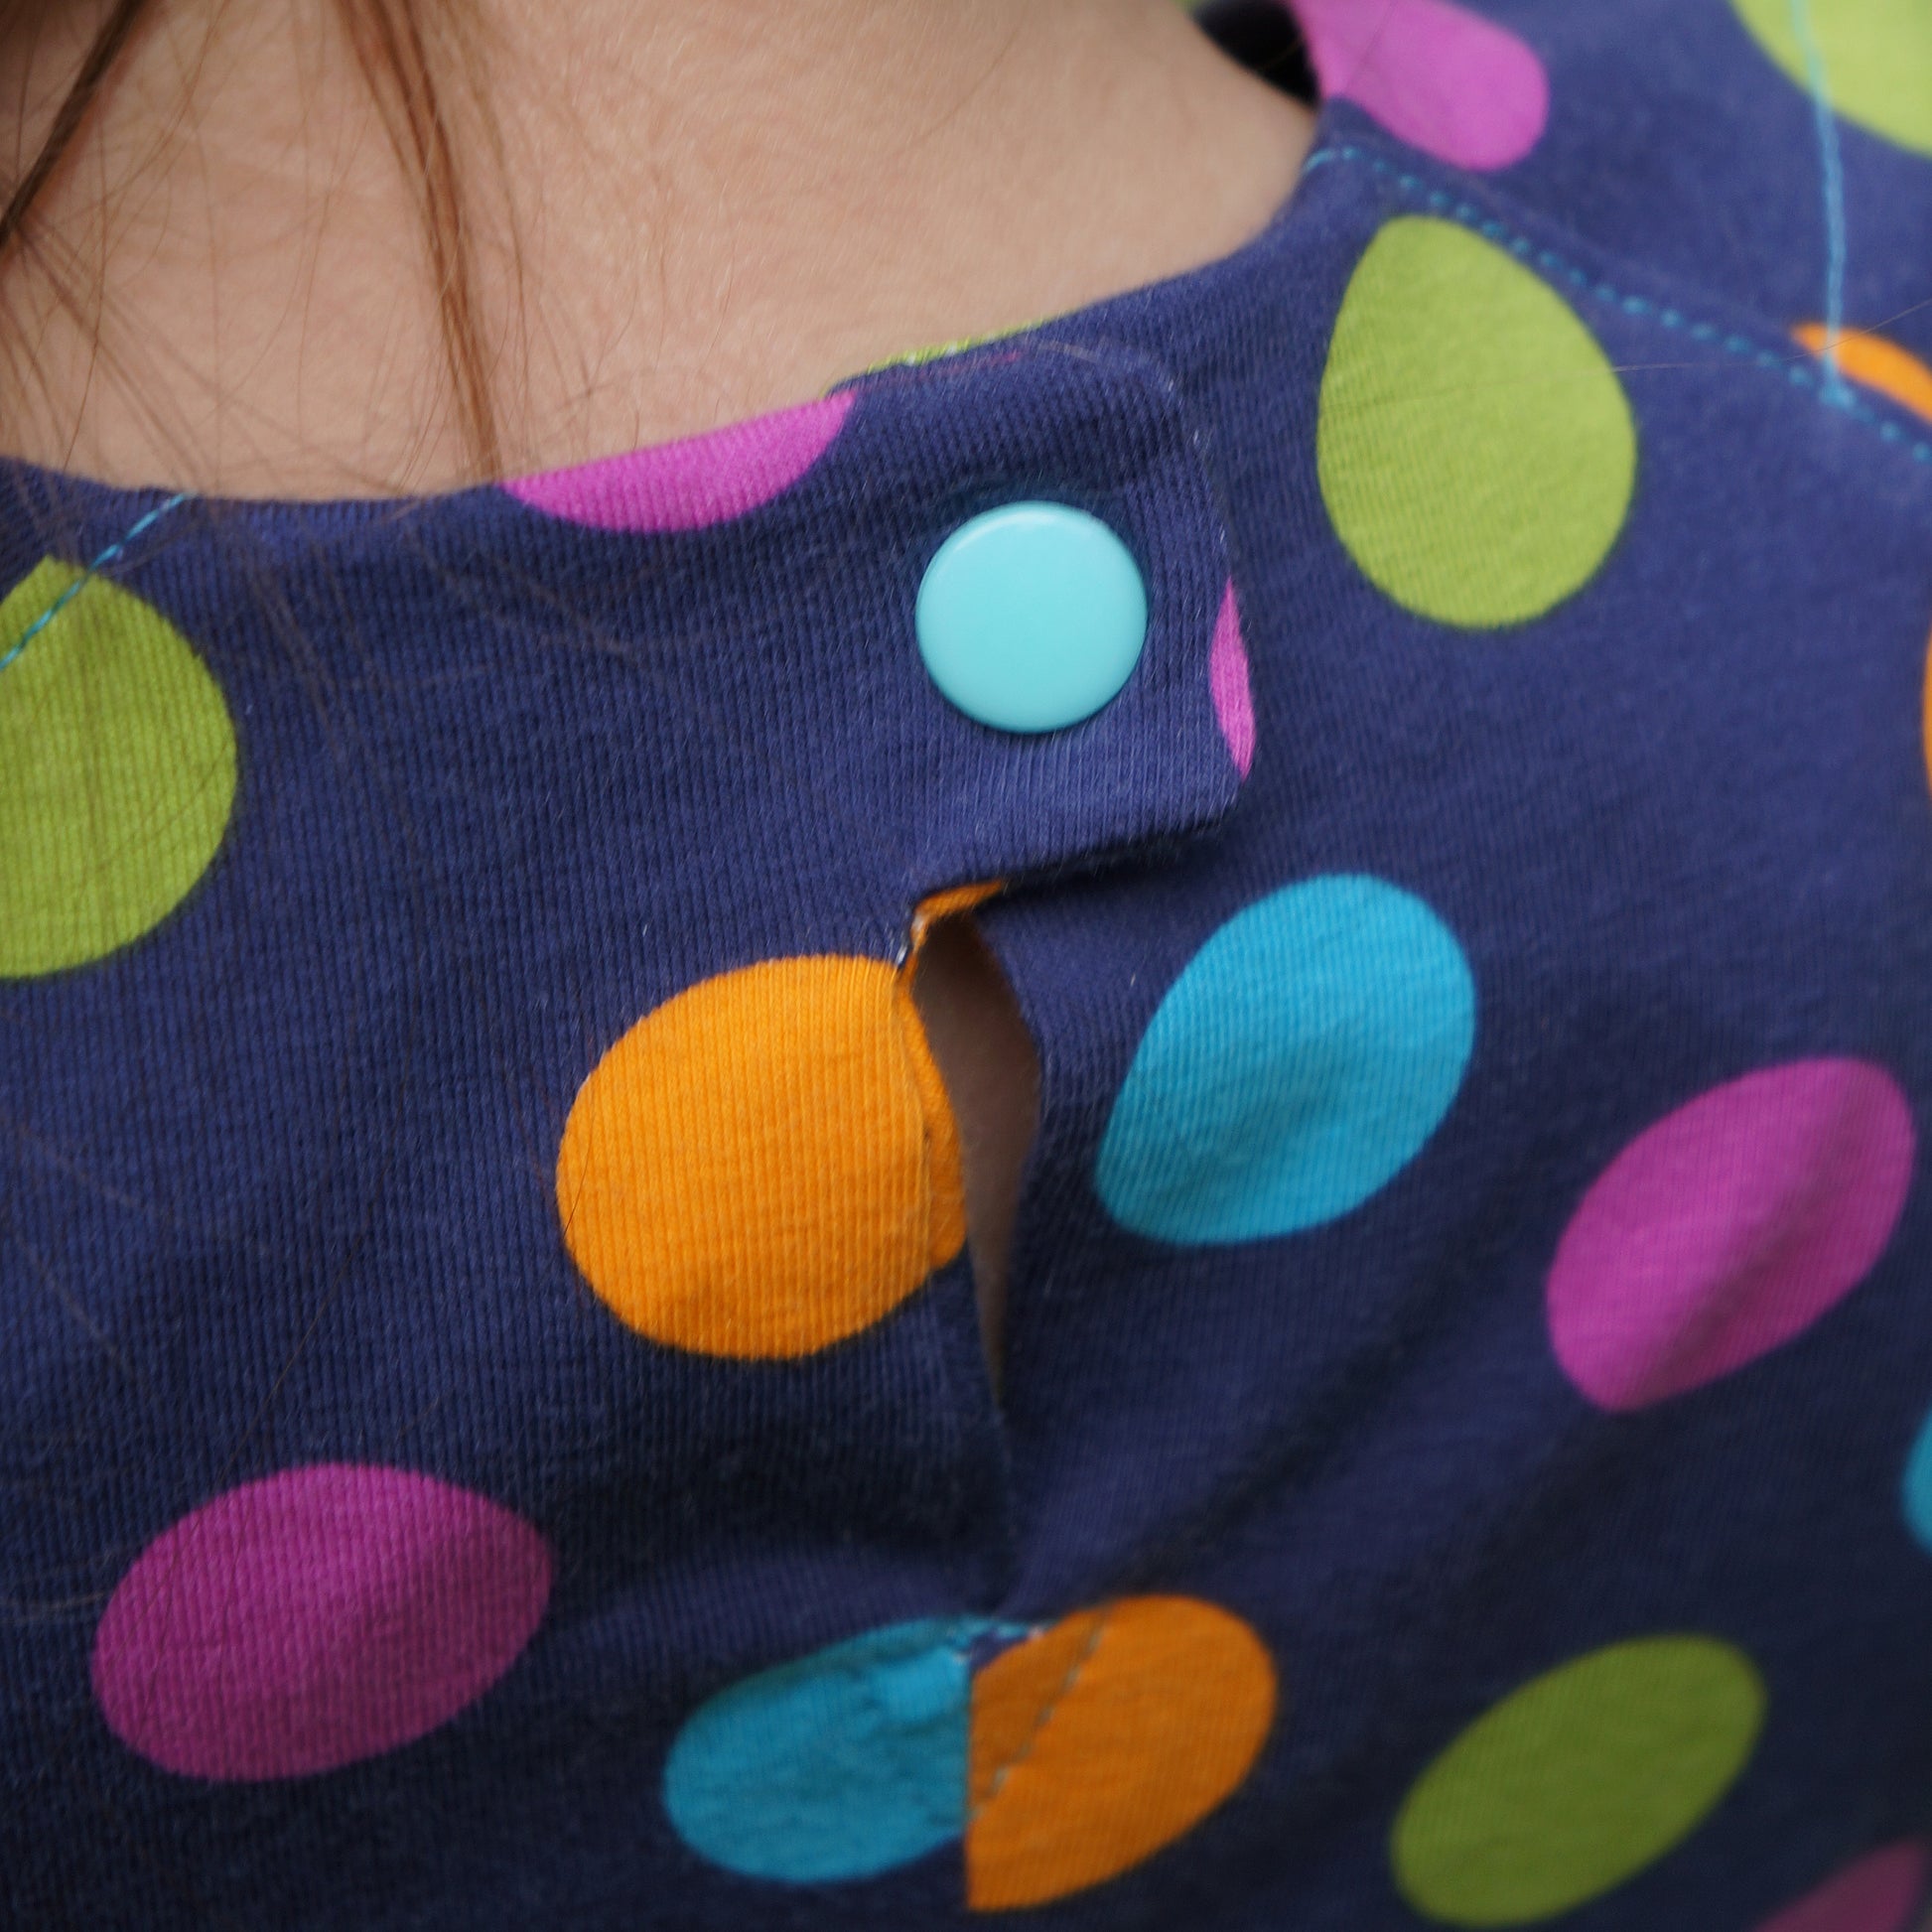
The sleeves are rolled-up sleeves, and I'll show you a simple industry trick to achieve a really clean finish. I've used Kam Snaps (also called Babyville poppers) from Snaply. They come with a special tool and are very easy to apply. I also used iron-on Vilene interfacing on the inside of the facing where the poppers are attached.
Pattern Pieces
The pattern pack includes:
- Short sleeves (used in this tutorial)
- Long sleeves with an elastic casing at the bottom
- Front bodice
- Back bodice
- Facing
- Hem trim
The back has a curve, so it is cut in two pieces rather than on the fold. The front and hem trim are cut on the fold.
Cutting Out the Fabric
When cutting out your dress, fold over only as much fabric as necessary. This helps avoid waste, especially when working with more expensive fabrics.
Make sure the grainline arrow runs parallel to the selvage edge. Place any fold lines directly on the fabric fold and cut with the fabric positioned on the left side of your scissors for easier cutting.
Mark:
- Centre front
- Centre back opening
- Front and back sleeve notches
- Hem trim centers
I mark the front with one snip and the back with two snips.
For the facing, the grainline is not particularly important because the fabric stretches in both directions. Simply place it on the fold and cut it out as efficiently as possible.
Appliqué Circles
For the appliqué circles, I applied Vilene interfacing, although Bondaweb would work even better because it allows you to peel off the backing paper and iron the shapes directly into place.
Pin the circles where desired and place tissue paper underneath to stabilize the fabric while sewing.
Using a triple stitch creates a decorative embroidered effect because the machine stitches forwards and backwards repeatedly, producing a thicker line.
Once finished, tear away the stabilizer and press the fabric. Then close the side seams and press them open.
Preparing the Back Opening
Trim away the overlap on the right-hand side of the back opening.
Place the facing right sides together with the back to identify exactly where to trim. It is much easier and safer to do this after construction has started rather than during cutting.
Overlock:
- Centre back seam allowance
- Facing edges
- Lower sleeve edges
Make sure you retain the stretch of the fabric while overlocking.
Sewing the Centre Back Seam
Match the notches on the centre back seam and pin at the marked point.
Sew using a 1 cm seam allowance. I generally do not pin the entire seam, but simply align the edges as I sew.
Secure the stitches at the end.
Attaching the Raglan Sleeves
The raglan sleeve sits between the front and back pieces.
Match the sleeve edges to the bodice edges and place a pin at the lower edge of each seam. Continue until all sleeve seams are attached.
Sew the seams and overlock them. Press all seam allowances toward the body.
Topstitch along the front raglan seams for a professional finish.
Attaching the Facing
Match the facing to the neckline, aligning the shoulder seam notches.
Pin all the way around the neckline. Beginners should pin thoroughly, as the neckline curve can shift while sewing.
Sew around the neckline, taking care around the curved section. Keep the stitching smooth and even.
Trimming and Under-stitching
Trim the curved seam allowance very closely—around 3 mm from the stitching line.
Leave slightly more seam allowance at the corners and clip into the curves where necessary.
Turn the facing to the inside and under-stitch approximately 2 mm from the seam line, sewing through the facing and seam allowance together.
This helps the neckline roll neatly inward and prevents the facing from showing.
Press thoroughly.
Topstitching the Neckline
Topstitch around the neckline from the raglan seam rather than starting at the center back opening.
Sew evenly around the neckline and secure your stitches.
The fastening section can be hand-stitched with a simple triangle of stitching if preferred.
Installing the Cam Snaps
Use a pointed tool to create a small opening for the snap.
Install:
- Flat component on one side
- Raised component on the other
Press the snap into place using the Cam snap tool.
You can also cover the snap with matching fabric for a decorative finish.
Sewing the Side Seams
Sew the side seams and sleeve seams in one continuous seam using an overlocker.
Do not use pins when overlocking, as the knife can hit the pins and become damaged.
Simply align the fabric edges carefully and guide them through the machine.
Creating the Rolled Sleeve
Turn the sleeve edge inward and stitch around it.
Then fold the sleeve up to create the turn-up effect.
Secure the cuff with a small stitch at the seam and another holding stitch on the inside of the sleeve to keep the cuff permanently in place.
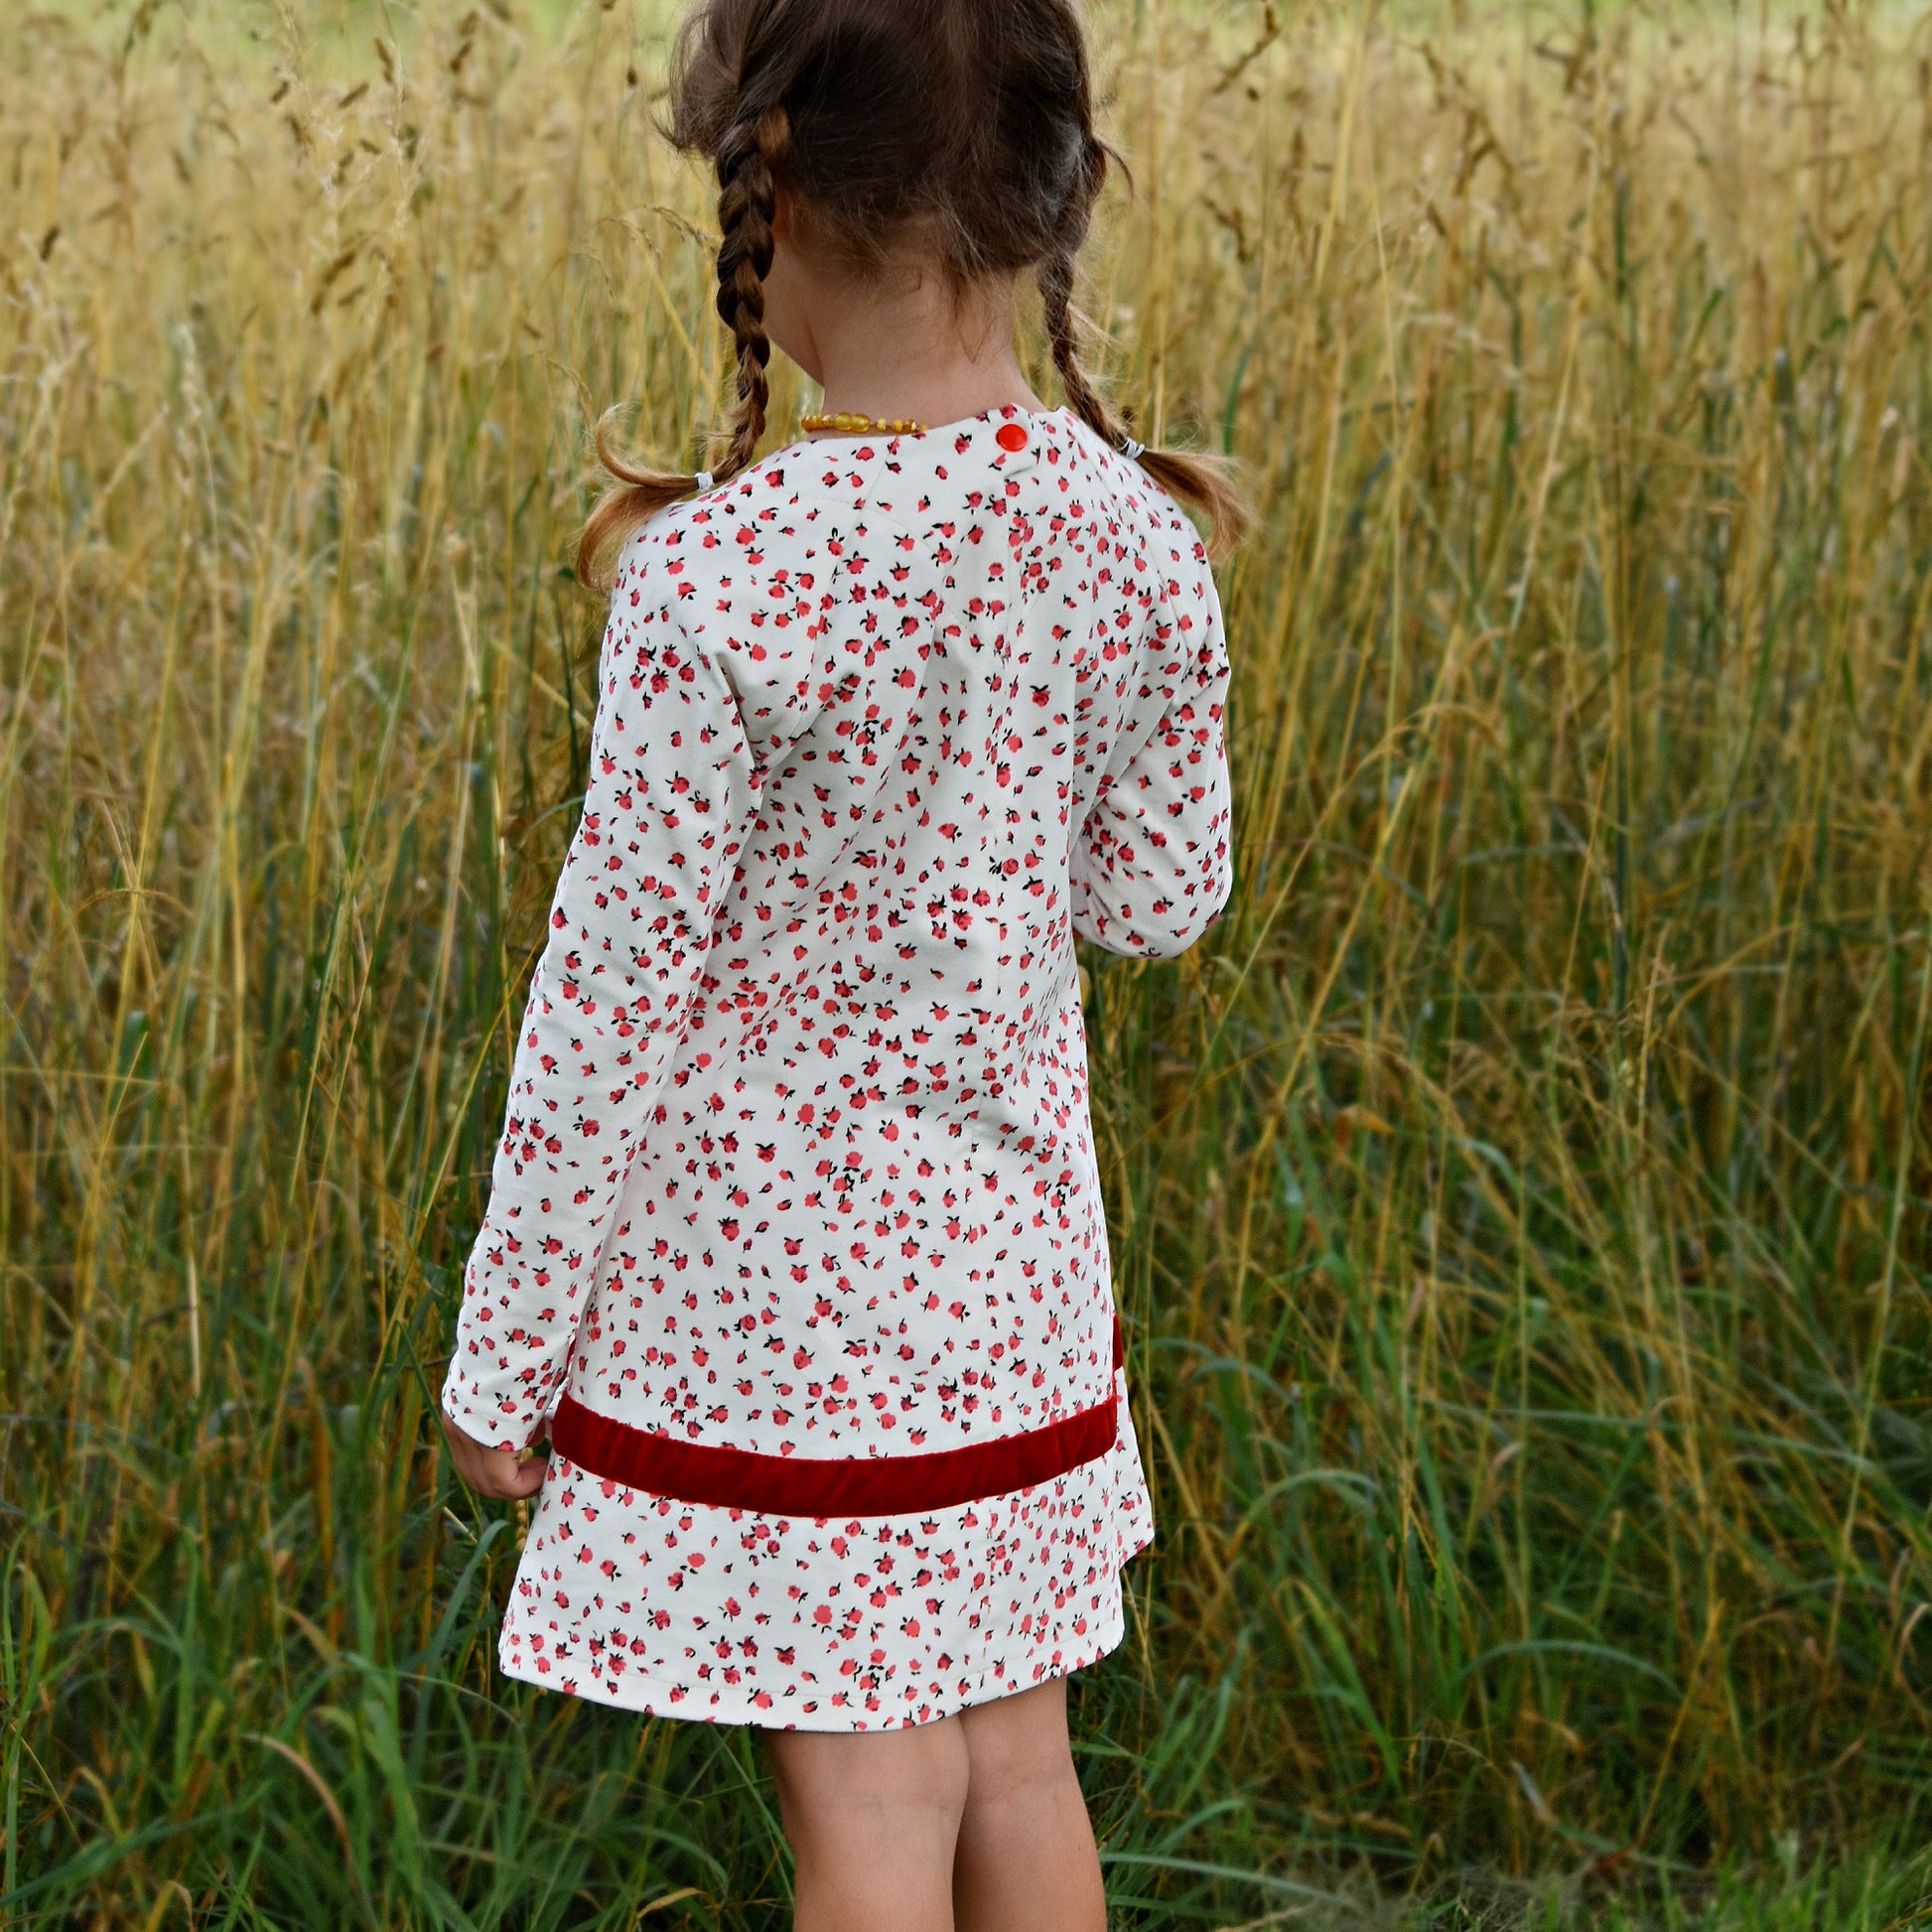
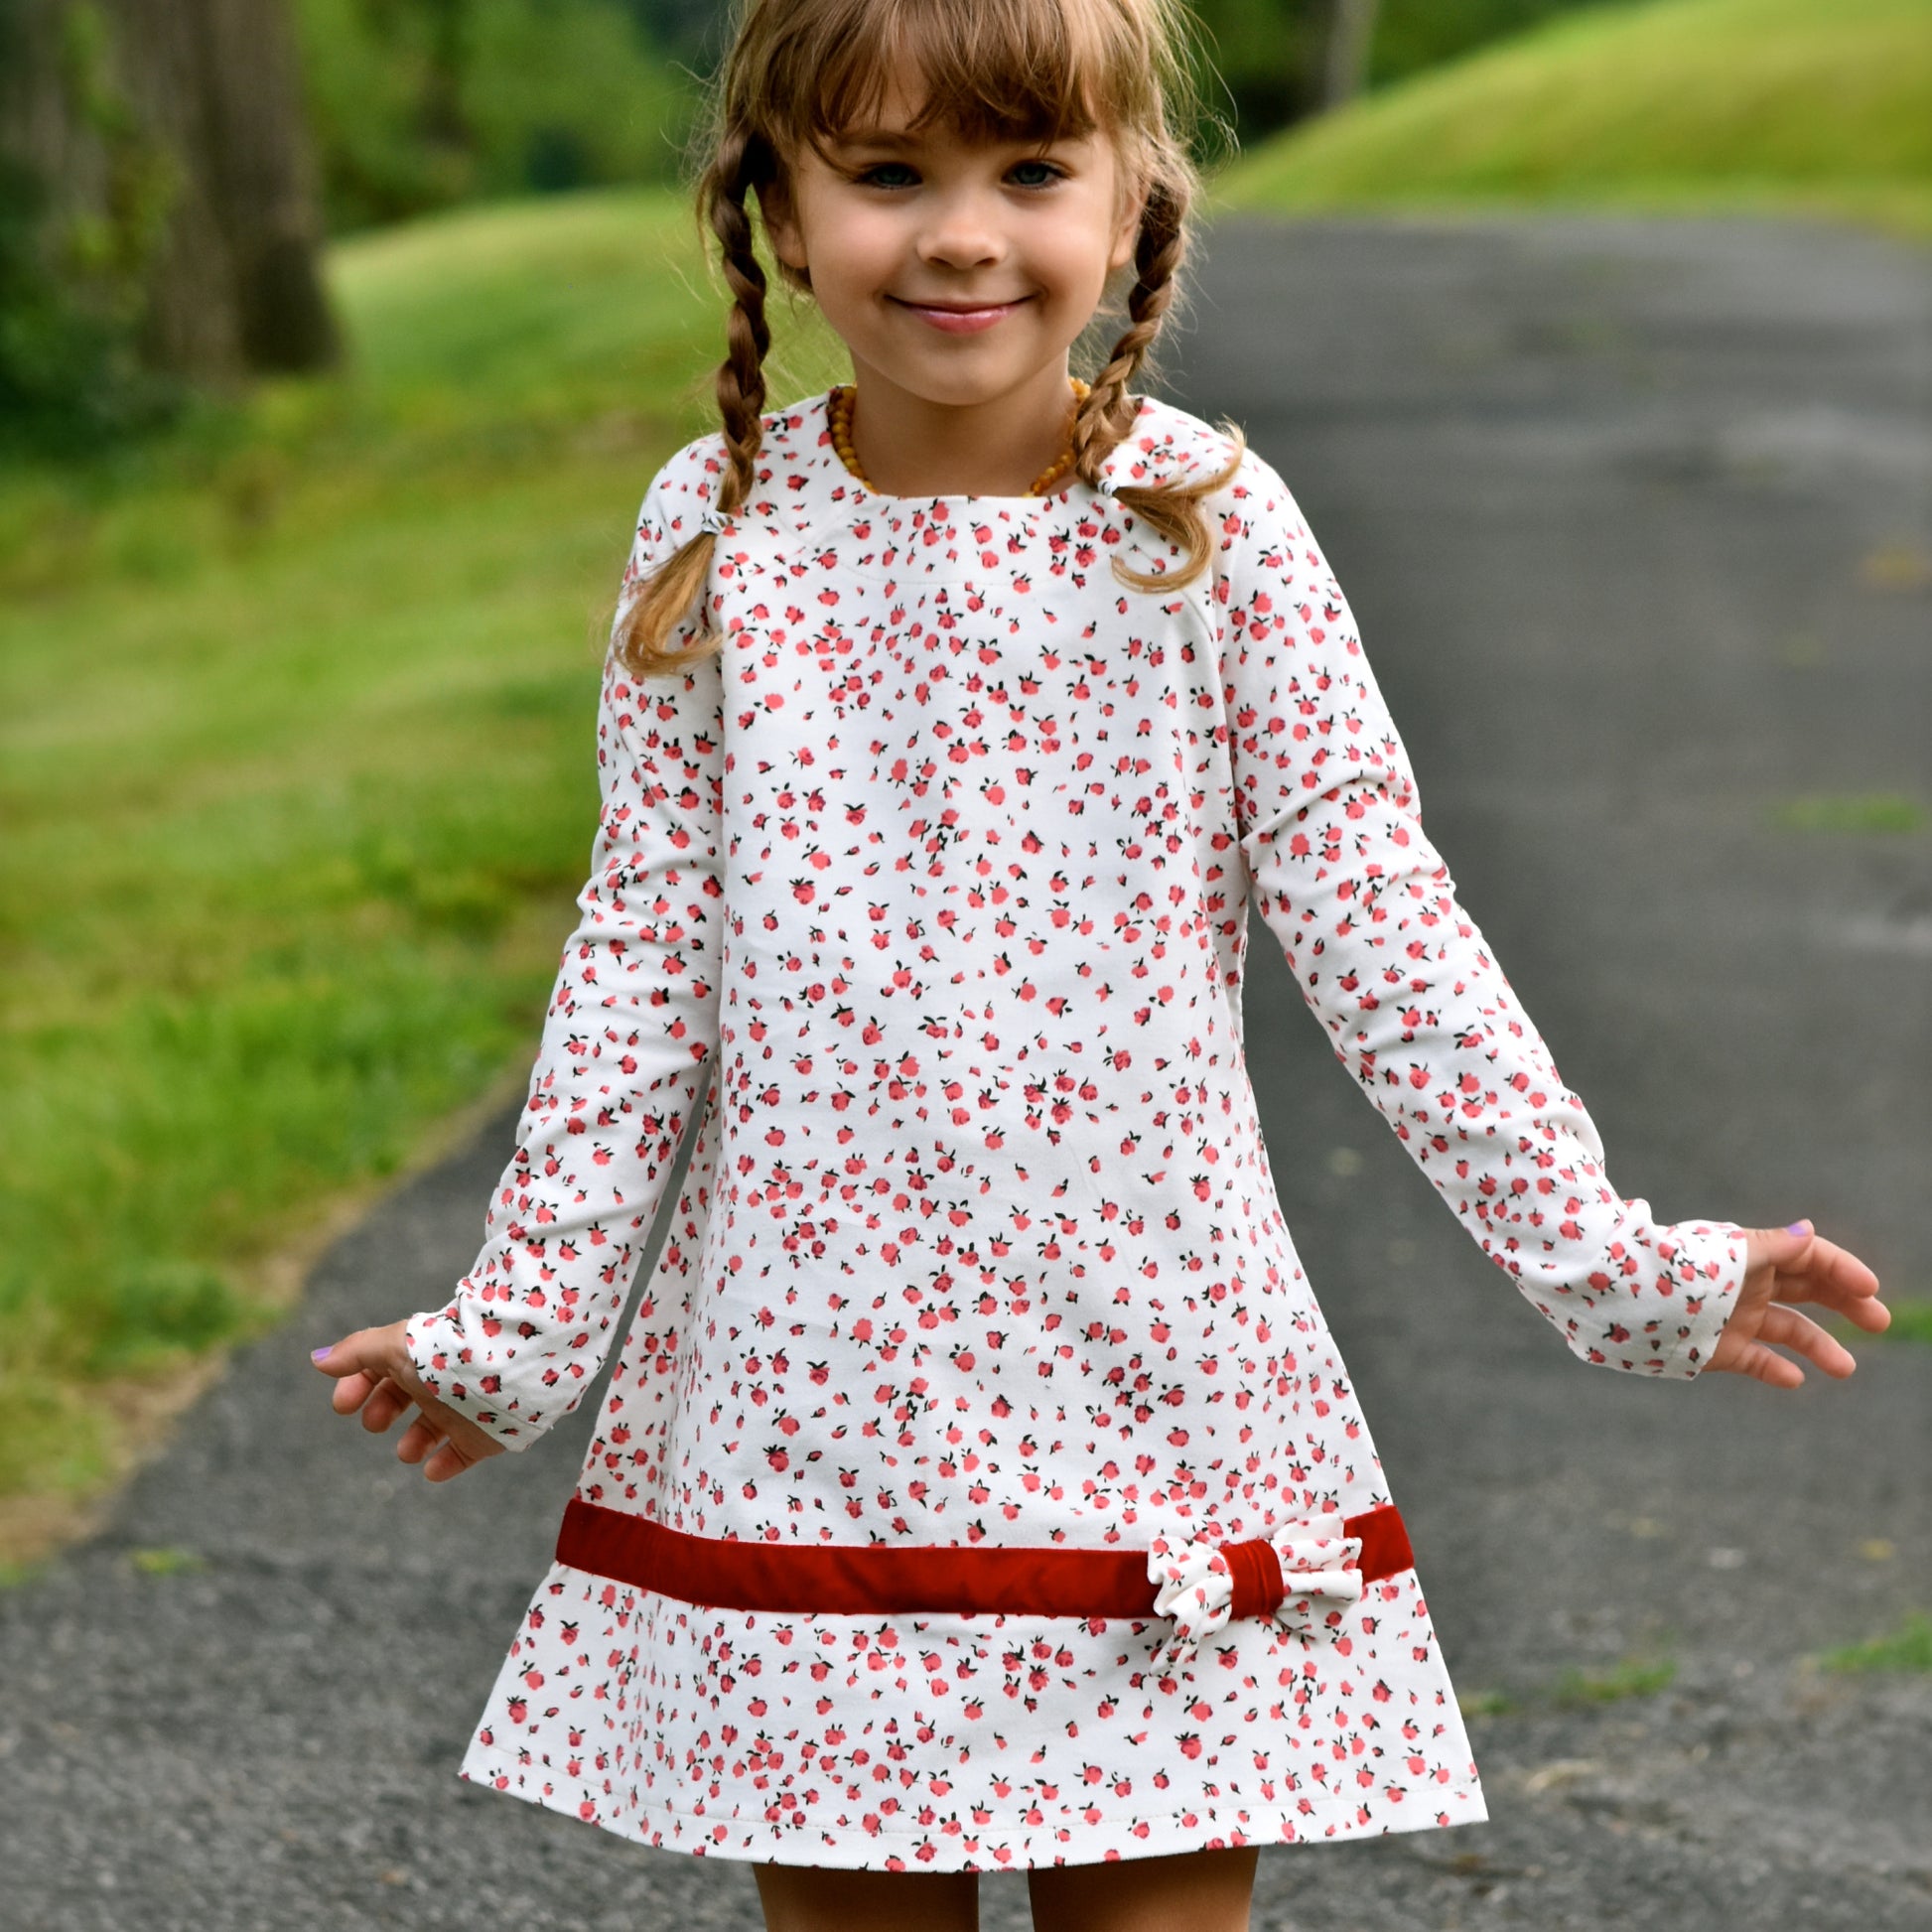
Attaching the Hem Trim
With right sides together, attach the hem trim to the dress.
After sewing, under-stitch the seam allowance toward the dress to help the trim roll neatly outward.
Press thoroughly.
Turn in the top edge of the trim and topstitch it in place.
Alternatively, you could decorate the trim with:
- Ric-rac
- Ribbon
- Decorative braid
For this dress, I chose a cleaner finish without additional embellishments.
Finishing the Dress
Fasten the snaps, turn the dress right side out, and give everything a final press.
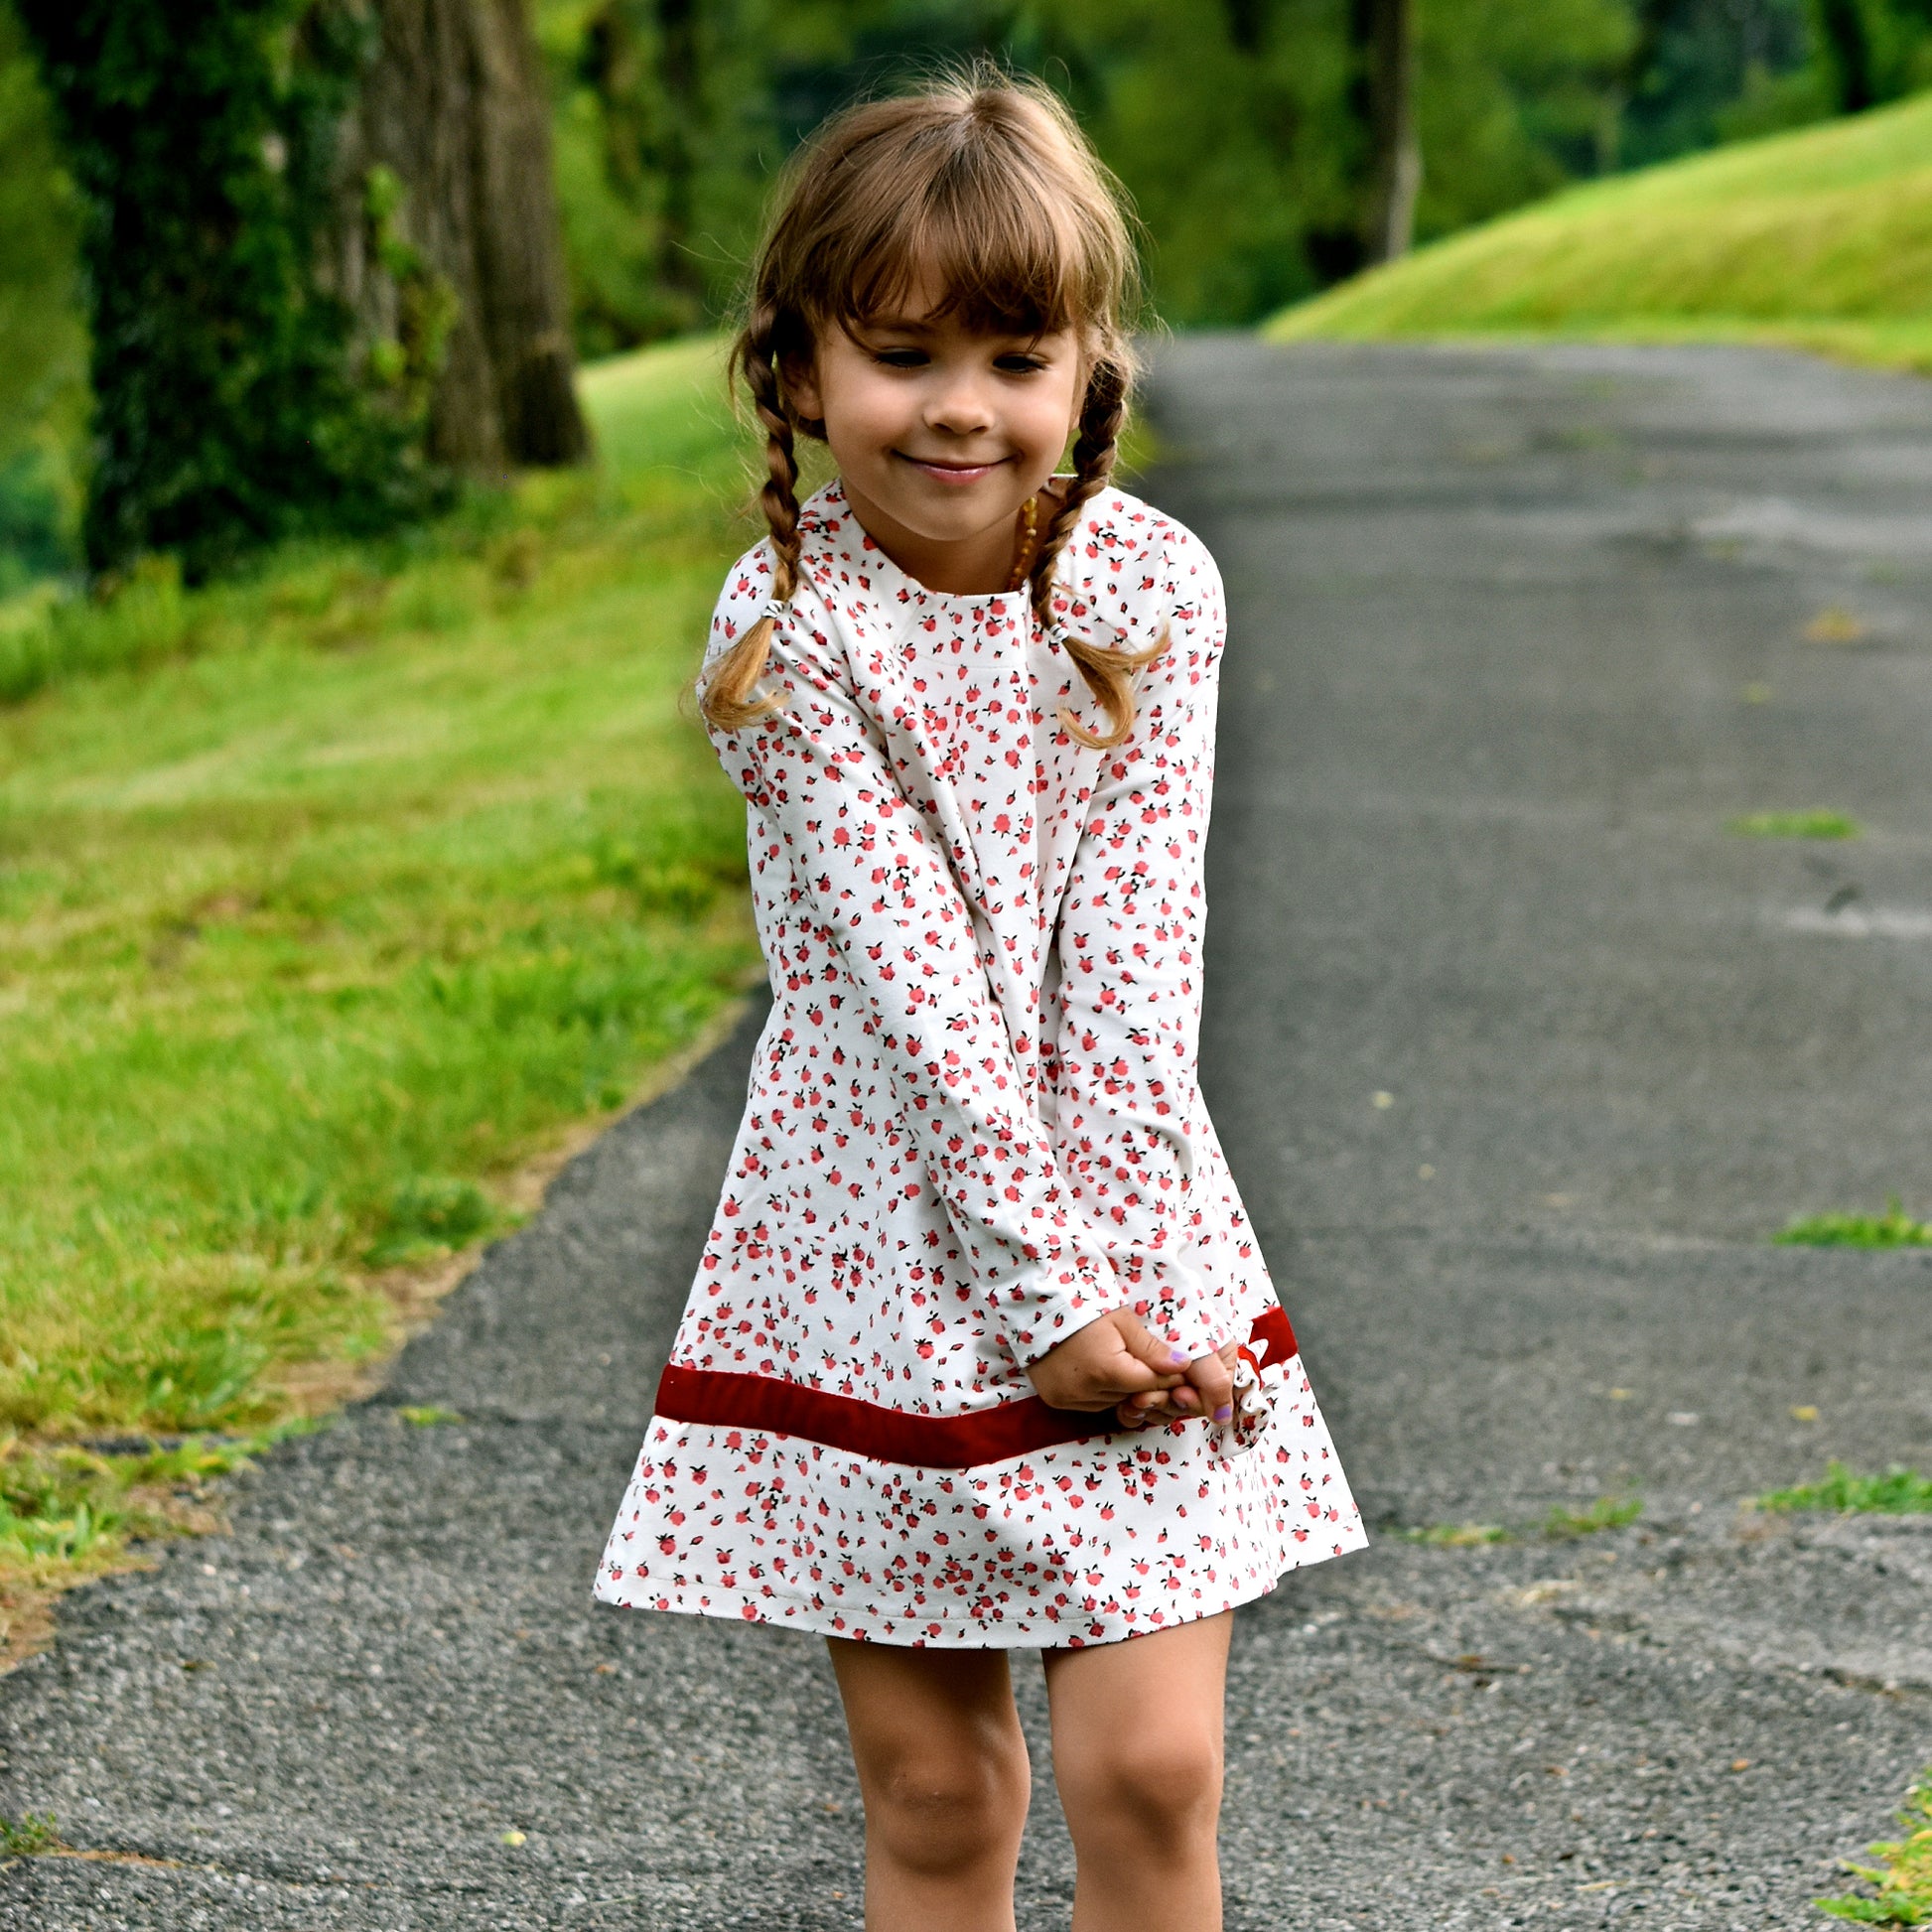
Your Daisy Tunic is now complete.
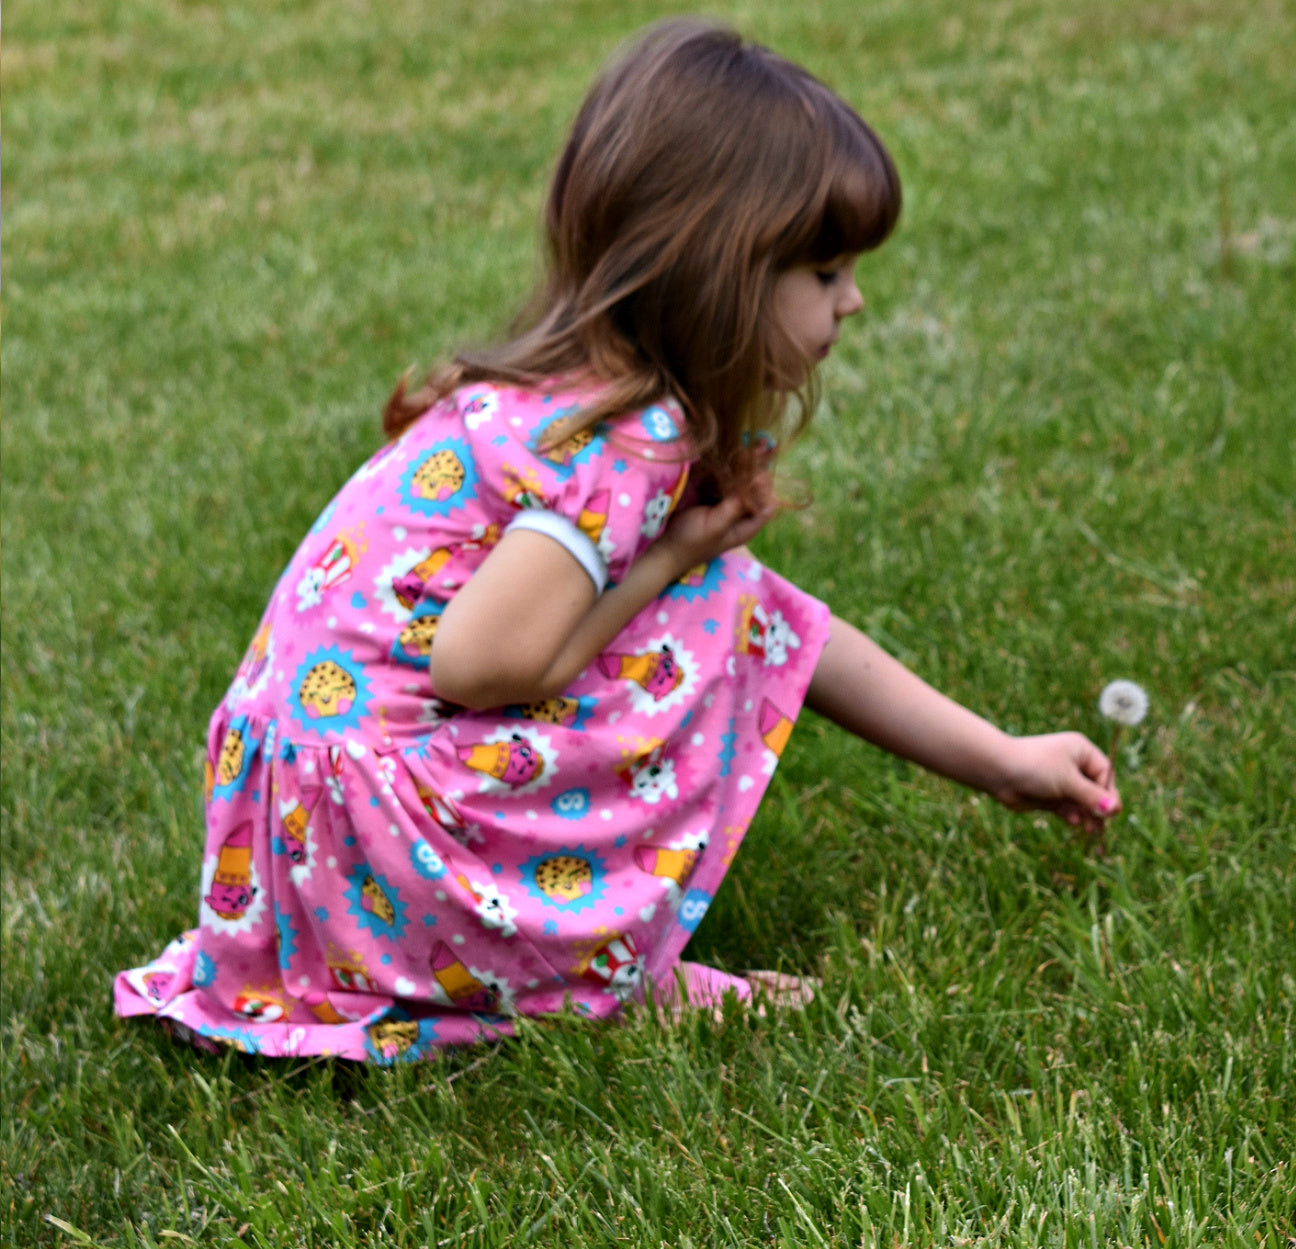
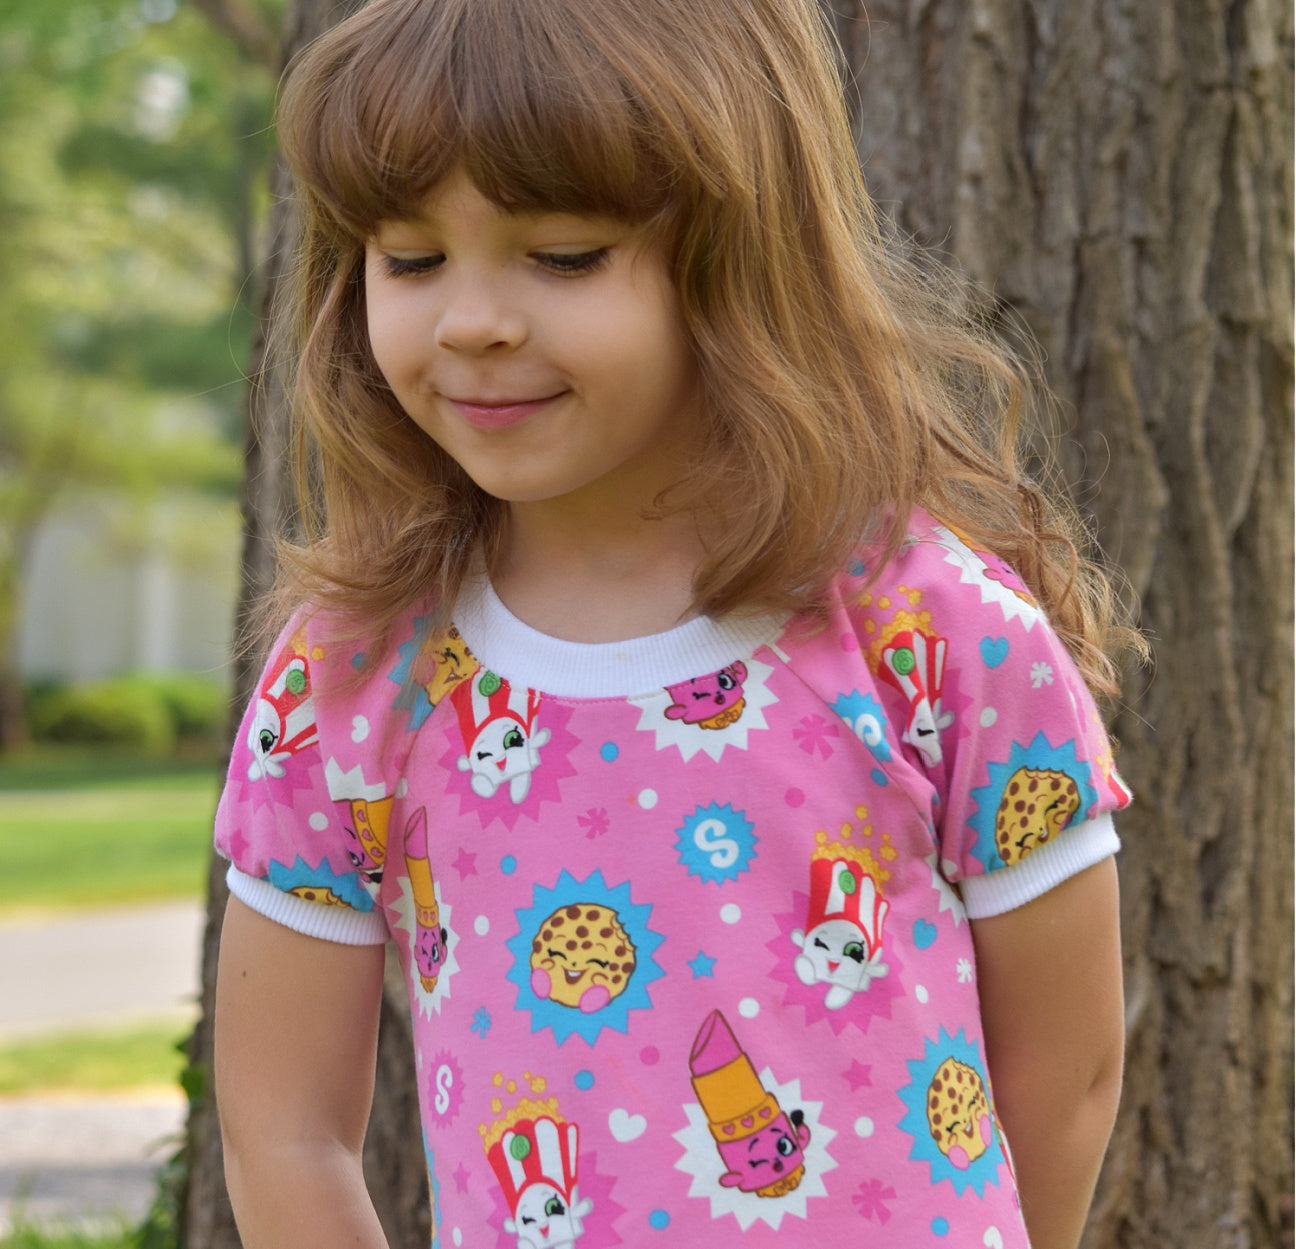
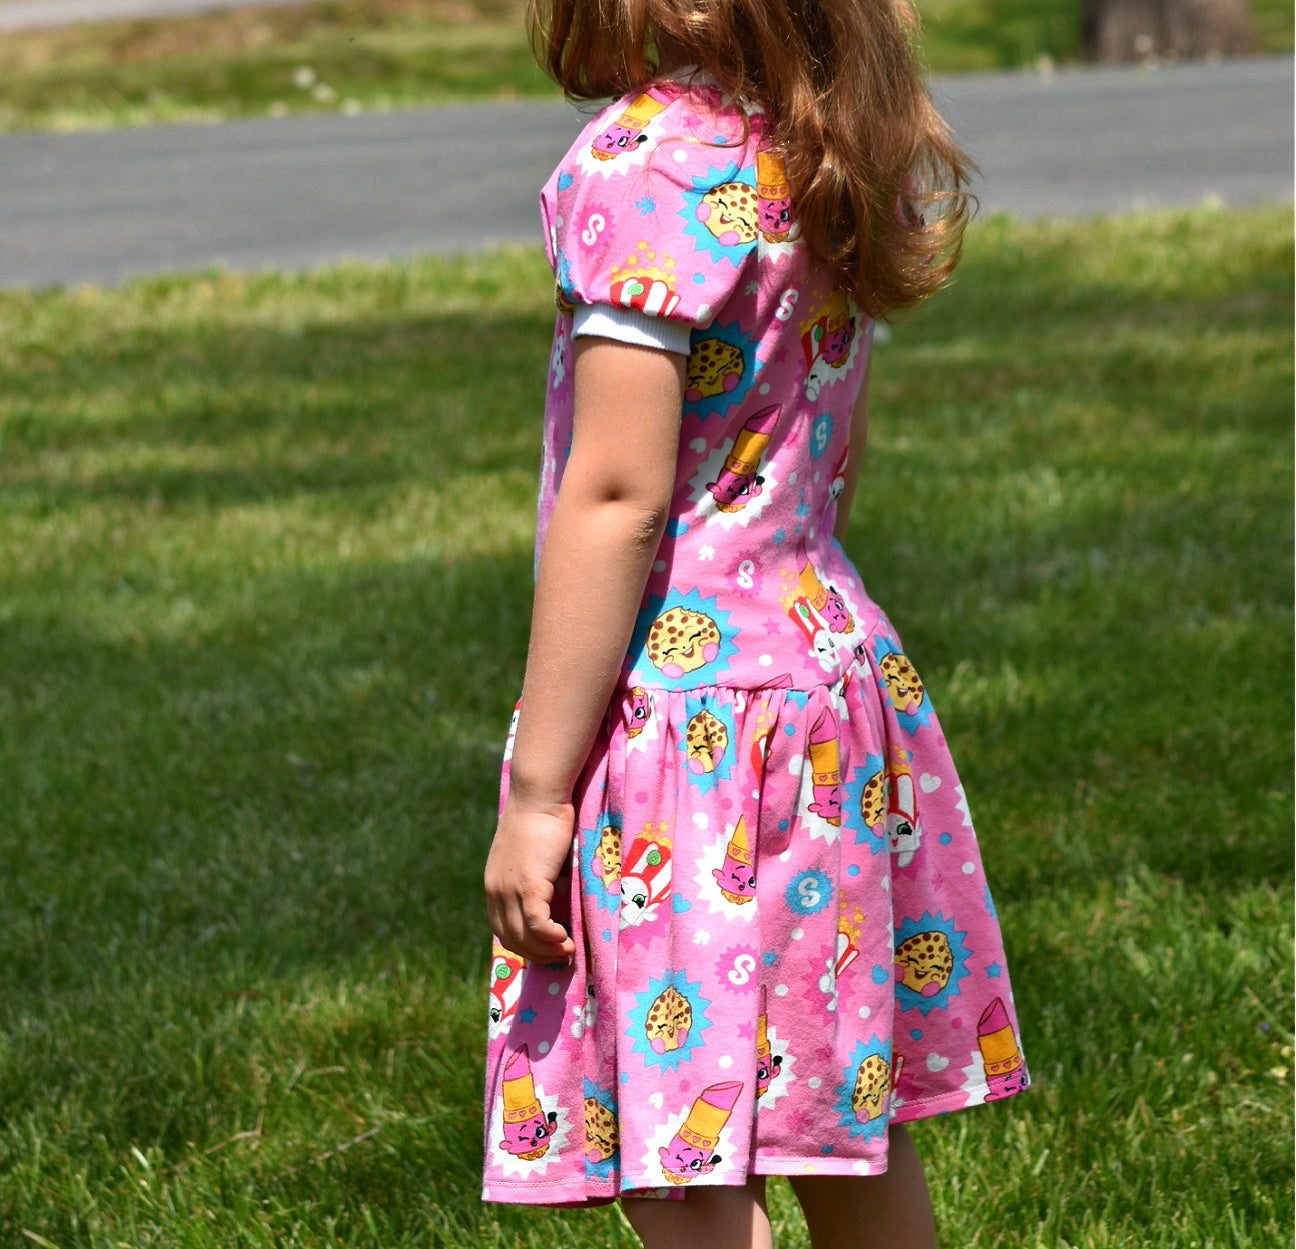
You can also make the Amelie Dress, which features a dropped waist and gathered skirt. The sleeves from both patterns can be mixed and matched, allowing you to create Christmas dresses, princess dresses, and many other variations.
Thank you very much for watching Frocks and Frolics.
Daisy Dress with Appliqué Butterflies
Transcript for the video: Daisy Knit Dress - Ladybird Applique
Materials & Preparation
In this video I’m going to show you a dress made with the Daisy pattern and we’re going to applique some butterflies onto it. You need some border tissue paper, some kind of pattern paper. I’ve also used some pink ribbon, some pink ric rac, some bows, and of course I have got the main fabric and a contrast onto which I will put the ric rac. I’m also straight away going to put some ribbon onto it.
What you do is you fold over the ribbon to form a bow and then that bow is going to go underneath the ric rac. I’m cutting it about 4 inches in length, so cut yourself four of those and then fold them over. You can stitch them through the middle first if you like or just pin them onto the edge of the dress so no need to turn in anything. You go straight over the top.
Attaching Ribbon, Bows & Ric Rac
Then you pin the ric rac over the top and I’m going to zigzag that on. On the back you first overlock the center back and then sew it together so that you can put the trim on the bottom as you have done on the front. Place the trim on—that’s all we’re doing here.
Then again do the same as on the front: put the bows on and then the ric rac over the top. I’m using a fairly small ric rac and placing it so it’s right on the center of the trim so that we can catch it and it doesn’t slip out. All the way across.
Once you’ve done that to both front and back, we can carry on with doing our little butterflies.
Creating and Placing the Butterfly Appliqué
You trace out your butterflies eight times. Yes, eight. Then we’re going to take all our traced butterflies and position them on the front and the back. Once you’ve got your position how you want it, you take the middle two off again simply because the paper gets in the way if you do too many at the same time.
I’m going to pin my first one on here in the right position and then I’m doing the other one that’s furthest to the side. I can use all sorts of different colors to do that. I can do the antennas in a different color to the body.
I’m using the triple stitch to do this and simply stitch over it. The important thing is that you always have the needle down when you turn the fabric to go all the way around. If you’re using different colors, especially on a dark fabric, it really makes it pop. Choose what you like in terms of color and then take your time.
Now when you’ve done all of this in all the different colors, you can rip off the paper, which is really easy to do, and it’s in exactly the right position.
Adding the Wings
Next I’m going to do my wings. Get all your scraps out that match and cut yourself some wings. The wings overlap, so I start with just one side of the wings and take the other side back off.
I would also suggest you use Bondaweb for this and iron them on. Then I’m going to put my machine on a zigzag stitch and fairly low tension. Stitch around the butterfly wings.
Then you do the other side as well. Put the next one on and go all the way around. I’ve used different colors so on the polka dots I used white and on the other one I used pink.
Sleeves
Now I can do my sleeves. You can do them as turn-up sleeves as per the original Daisy pattern, but if you want elastic at the bottom then you should cut some off. I would suggest you cut about 3 inches off.
Then you overlock the edge. My elastic here is 8 inches, but it is advisable to check it around your child to get the correct length.
Put your sleeves in first, right sides facing each other, and pin them edge to edge. Do that on all sides of the sleeve.
Once they are in, it should look like this. Now we top stitch the edge as well. Your overlocked seam has to go towards the body and be ironed.
Facing & Neckline Finishing
Next we overlock our facing and pin the facing all the way around. I’ve put Vilene in the area of the fastening only.
Once I’ve sewn all this on, I cut it back to the curve so that you can turn it properly. Then you do the under stitching again—about 2 mm from the edge—with the seam allowance rolling into the facing.
Now you can see the stitch on the inside and it’s only on the facing so the seam allowance is held in place.
Top Stitching & Fastening
Next we pin the facing down so we can top stitch it from the beginning of the sleeve at the back to the end on the other side. Do not go all the way to the end because of the fastening area.
Reverse stitch to lock your stitches. You can put a bow on or a small triangle stitch to hold it in place. I actually prefer hand stitching the facing.
Kam Snaps
Now we put in our Kam snaps. Go through all layers once you’ve positioned them. Flat side on the underneath, and the one with the rim goes on top first. Use your tool and press it in.
On the other side, the flat one goes on top and the rimmed one goes underneath. Press it in and you’ve got your popper done.
Side Seam, Hem & Elastic
Now we close our side seam in one go and overlock it. Then we turn in our sleeve hem where we already ironed it and stitch it, leaving a gap to insert the elastic.
Use a safety pin to feed the elastic through. Sew the elastic ends together overlapping them so it’s flat.
Overlock the hem and pin it up. Then sew it from the outside. At the seam, you can snip slightly to reduce bulk and fold seam allowances in opposite directions.
Finished Dress
And we’re finished with another Daisy dress. If you want to make the Daisy dress with a proper puff sleeve, you can use the puff sleeve from the Amelie dress and combine them.
I hope you enjoyed this and I’ll see you next time.
Amelie and Daisy for Frocks and Frolics
Transcript for the video: Hack - Daisy Bodice & Amelie Puff Sleeves + Skirt
This is going to be a very quick introduction to the Amelie and Daisy dress. The Amelie dress is what you see on your pattern cover. I’m showing it with one tier, but in fact you can make it with two tiers—two layers both gathered—to make it more like a dress. As it stands, it’s more like a tunic and slightly shorter.
The Daisy pattern has a turned-up sleeve, basically a simple cuff that is turned up again. This gives a really clean edge with no inside fabric showing. It also works with trim that comes from the inside to the outside, keeping everything neat.
Fabric and Materials
The fabric used for both sample dresses is from FabFab, a German company with websites across Europe. Their English site is myfabrics.co.uk.
The jersey used is two-way stretch, which is very forgiving—it stretches and returns to shape well. You can also use applique details such as circles on the lower half for decoration.
Design Features and Variations
On one version, applique circles are added to the skirt. There are also decorative bows, though these can be optional depending on preference.
Fastenings used are Kam Snaps (Snaply Babyville-style). These are easy to use and very beginner-friendly. The back of the dress can also be finished by covering the snap with fabric for a cleaner look.
Sleeves and Options
The Daisy pattern includes both short and long sleeves. The long sleeve version includes a channel for elastic at the wrist, which can also be replaced with bias binding.
For the Amelie sleeve option, there is a puff sleeve with elastic. You can also modify sleeve length depending on preference.
Combining Daisy and Amelie Patterns (Hack Dress)
For this hack dress, we combine the Daisy bodice with the Amelie skirt and sleeve elements.
Pattern adjustments:
- Draw a line at the underarm
- Cut along that line
- Join the lower Amelie section with the upper Daisy bodice
- Repeat this for both front and back pieces
The back includes a snap opening, which indicates how far the seam should be sewn.
The facing can be interfaced with iron-on Vilene, or only reinforced at the closure area. Always mark sleeve start and end points clearly on the pattern.
Bias Binding and Construction
Bias binding is cut on a 45-degree angle. A strip of about 5 cm works well for most elastic channels.
Construction steps:
- Insert sleeves first, right sides together
- Overlock seams and press toward the body
- Topstitch for a clean finish
- Attach bias binding or elastic channel on the inside, leaving an opening for the side seam later
- Sew gather stitches using the longest stitch setting
Gathering and Facing
Pin facing in place using notches as guides:
- Mark where sleeve begins and ends
- Secure one side and adjust gathers to fit
Sew around the facing using a smaller stitch length around curves, then lengthen on straight sections.
After sewing:
- Clip curves carefully
- Clip corners near fastening areas
- Understitch seam allowance into facing (about 2 mm from edge)
Finishing Details
Turn the facing and press well for a clean edge. Topstitch from sleeve edge around the neckline.
Close the center back seam with a 1 cm seam allowance. Attach facings neatly by hand if preferred.
Kam snaps are then installed by pushing through all layers:
- Flat snap piece on one side
- Raised ring piece on the other
Always ensure alignment before pressing into place.
Side Seams and Sleeves
Close side seams in one go and overlock carefully.
For sleeves:
- Turn up cuff and stitch in place
- Leave gap for elastic insertion if used
- Insert elastic using a safety pin
- Join elastic ends securely
Hem and Skirt Construction
Overlock hem edge and pin in place before sewing.
For patterned fabric like checks:
- Always sew hems from the outside to maintain alignment
Gather skirt using two rows of stitching and distribute evenly before attaching.
Attach skirt with right sides facing outward, adjusting gathers to fit bodice.
Finishing Touches
Cover raw seam edges with ribbon for a clean finish. This also reduces bulk and improves stretch stability.
Add decorative bow:
- Cut bias strip
- Wrap and secure in the center
- Stitch in place over ribbon seam
Final Result
A seasonal dress suitable for Christmas or year-round wear depending on fabric choice. The combination of Daisy and Amelie elements allows flexibility in design, sleeve style, and silhouette.
If you’d like more variations or combinations of these patterns, you can explore the project page for Amelie and Daisy on frocksandfrolics.com
Transcript for the video: Hack - Daisy Bodice & Long Amelie Puff Sleeves
For this super cute dress, we are combining the Amelie and Daisy patterns. You can see the back of the Daisy tunic and the Amelie tunic, and they are not the same. When you place them on top of each other, the Amelie back (red version) is clearly different.
What we do is cut both patterns at the underarm line and then join the pieces together. This creates a new hybrid pattern: the Amelie lower section combined with the Daisy upper bodice. Repeat the same process for the front piece.
For the sleeve, add a 5 cm slit positioned about one-third from the back of the sleeve. We also use the facing, and you can include both short and long ruffle options for the skirt.
Pattern Preparation
Start by identifying the notch on the back pattern that shows how far the back seam is sewn up. The facing includes both curved edges, but one side will be trimmed because only one overlap side is needed for the closure.
You can interface the entire facing or just the area where the closure will be attached, depending on your preference.
Cutting and Joining the Pattern
Cut off the left side first, following the video exactly. The facing then sits underneath the back piece.
You may also trim the curved section on the opposite side of the back if needed.
We use bias binding, ironed in half, with the following lengths:
- Two long pieces: 22 inches each
- Two short pieces: 6 inches each
Bias Binding for Sleeve Slit
Attach the bias binding to the wrong side of the sleeve, keeping a 1 cm seam allowance and shaping it around the slit opening.
This is similar to the method used on the Natalie dress closure.
Fold the bias binding over, pin it in place, and topstitch carefully.
Make sure your stitching is close to the edge (about 1–1.5 mm). Avoid sewing too far in, as this may expose the seam underneath and create an untidy finish.
Sleeves
Once the slit is finished, press it neatly. You can leave the edge slightly rounded for a soft finish if preferred.
Then attach the sleeves right sides together. Pin at the front and back first, then ease the rest in.
Sew, then overlock all seams and press them toward the body.
Topstitch from the right side for a professional finish.
Facing and Neckline
Overlock the facing and the center back seam.
Next, prepare gather stitches on the sleeve and neckline area:
- First line: along the edge of the fabric using the longest stitch
- Second line: parallel to the first, also using the longest stitch
Attach the facing starting about 2 cm above the edge. Use the notches at the sleeve start and end to guide placement.
Secure one end of the threads, then pull the gathers evenly to fit the neckline opening.
Pin carefully all the way around before sewing.
Sewing the Facing
When sewing around curves, reduce stitch length slightly for better control.
Keep the fabric flat and aligned as you sew.
Once stitched, trim and notch curves carefully:
- Cut closely at tight curves (about 2–3 mm)
- Do not overcut stretch areas
Understitching and Finishing Neckline
Under-stitch the seam allowance toward the facing, about 2 mm from the seam. This helps the edge roll neatly to the inside.
Press well.
Then topstitch from the outside, stopping at appropriate points (do not sew into the fastening area).
Side Seam and Closure
Close the center back seam with a 1 cm seam allowance and press open.
Finish the facing ends neatly by hand stitching them down.
Add Cam snaps or poppers through all layers, ensuring correct alignment:
- Flat side on one part
- Raised rim on the opposite part
Sleeves Finishing
Close the side seam in one continuous seam and overlock.
Insert elastic into the sleeve hem if required:
- Leave a small opening
- Use a safety pin to thread elastic through
- Sew elastic ends together securely
- Close the opening
Skirt Construction
If using check fabric, always sew the hem from the outside for a clean finish.
Close side seams first, then prepare gather stitches:
- Two rows of gathering stitches between side seams
Attach skirt to bodice:
- Right sides facing outward (special construction method)
- Match center front, center back, and side seams
Distribute gathers evenly before sewing.
Waist Finishing
Cover seam allowance with bias tape or ribbon to reduce bulk and improve stretch handling.
Sew ribbon neatly over the seam line, ensuring even tension.
Bow Detail
Create a bow from leftover fabric or bias strips:
- Fold and stitch center
- Wrap center band around bow
- Attach securely to front or waistband
Final Assembly
Finish all hand stitching where needed, especially at facings and closures.
Press the entire garment thoroughly.
Add decorative bows or trims if desired.
Conclusion
This Amelie–Daisy hybrid dress creates a flexible design that can be adapted with different sleeves, skirts, and trims.
For more variations and styling ideas, refer to the project page for Amelie and Daisy on Frocks and Frolics.
Recommend this shop fully! You get so much for the price. Easy to use patterns with thorough instructions. YouTube tutorials with step by step. I am coming here first anytime I have an idea for something to make before I shop somewhere else. Very professional setup!
I really love her patterns.
It was a down load that came quickly
Grand daughter looks lovely in this little dress