CARLOTTE MANTEL
CARLOTTE MANTEL
Verfügbarkeit für Abholungen konnte nicht geladen werden
Zur kälteren Jahreszeit ist Charlotte mein Dauerbrenner!
Zeitlos, mit jeder Menge Vintage Charme ist das Mäntelchen perfekt für Kleinkinder bis Pre-Teens. Der breite Kragen, Ärmel mit Riegeln und großen Knöpfen, dieses Schnittmuster ist von mir mit viel Sorgfalt und Liebe zum Detail entworfen.
Was ist beim Schnittmuster dabei?
- Sofort-Download
- Digitale PDF Schnittmuster
- DIN A4 Format
- eBook
- Video-Anleitung
Design
Design
- Komplett gefüttert
- Peter Pan Kragen
- Oberteil mit eingereihtem Rockschößchen
- Integrierter vorderer Besatz
- Puffärmel (langer Arm)
- Riegel auf den Manschetten
- Riegel auf der rückwärtigen Taille
- Aufgesetzte Taschen
- Eingriffstaschen in der Seitennaht
Stoffverbrauch
Stoffverbrauch
STOFFEMPFEHLUNG
Mittelschwere bis schwere Stoffe aus Acryl, Baumwolle und Wolle.
Für das Futter eignet sich glatte Baumwolle oder seidiger Futtersatin.
STOFFVERBRAUCH
- Oberstoff: 1,2m–1,6m
- Futterstoff: 1m
KURZWAREN
- Passendes Garn
- Knöpfe: 3-4
- Vlieseline: 50cm
Verfügbare Größen
Verfügbare Größen
Größe: 92-152
Bitte beachten
Bitte beachten
- Dies ist ein digitales Schnittmuster oder eine PDF-Datei, kein physisches Produkt. Die Zustellung erfolgt elektronisch über einen Download-Link an die beim Kauf verwendete E-Mail-Adresse. Zusätzlich kann das Schnittmuster von deinem Kundenkonto heruntergeladen werden.
- Um sicherzustellen, dass das Schnittmuster in seiner tatsächlichen Größe gedruckt wird, wird die Verwendung von Adobe Acrobat Reader empfohlen.
- Kleine Betriebe: Ich freue mich wenn meine Schnittmuster dir helfen, tolle Bekleidung für deine Kunden zu nähen. Industrielle Produktion ist untersagt.
Kunden werden ermutigt, Frocks & Frolics zu verlinken, wenn sie Projekte, die mit meinen Schnittmustern erstellt wurden, in sozialen Medien teilen.
@frocksandfrolics
#frocksandfrolics
Teilen

SCHRITT-FÜR-SCHRITT ANLEITUNG
VIDEO TEXT
Das Schnittmuster zusammensetzen
Transcript für das Video: Charlotte - Das Schnittmuster
Jetzt schauen wir uns das Schnittmuster für unsere Charlotte einmal ganz genau an. Wie immer beginnen wir damit, die richtige Größe auszuwählen. Auf deinem Schnittmuster findest du alle Angaben, die du brauchst, aber ich erkläre dir Schritt für Schritt, wie du sicherstellst, dass du wirklich die passende Größe für dein Kind oder dich selbst auswählst.
Größe bestimmen
Als Erstes suchst du in der Tabelle die Körperhöhe, die am besten passt. Das ist immer der wichtigste Ausgangspunkt.
Dann misst du einmal locker unter den Achseln rundherum den Oberkörperumfang. Dieses Maß vergleichst du anschließend mit den Fertigmaßen im Schnittmuster.
Für Charlotte gilt wie bei deinen anderen Schnitten auch:
Der Oberkörperumfang sollte 3–4 cm kleiner sein als das Fertigmaß.
So sitzt das Kleidungsstück schön anliegend, aber nicht zu eng.
Wenn du dir unsicher bist, kannst du das Fertigmaß auch mit einem Kleidungsstück vergleichen, das gut passt. So bekommst du ein gutes Gefühl dafür, wie Charlotte später sitzen wird.
Schnittmuster ausdrucken
Das Schnittmuster druckst du bitte immer mit Adobe Acrobat Reader aus.
Nur so stellst du sicher, dass die Größe wirklich stimmt.
Beim Drucken unbedingt einstellen:
- 100 % oder „Tatsächliche Größe“ / „Actual Size“
- Papierformat DIN A4
- Ausrichtung automatisch (nicht Hochformat erzwingen)
Drucke zuerst nur die erste Seite aus und miss die Testskala nach.
Sie muss 5 cm betragen.
Wenn das stimmt, kannst du den Rest ausdrucken.
Schnittmuster zusammensetzen
Auf der letzten Seite findest du wie immer einen kleinen Plan, der dir zeigt, wie die einzelnen Blätter zusammengehören.
Ich habe das System so aufgebaut, dass du:
- weiße Blume = Vorderteil
- rosane Blume = Rückenteil
sofort erkennst, was wohin gehört.
Die gestrichelten Linien zeigen dir, wo die Blätter überlappen.
Eine Seite liegt Kante auf Kante, die andere hat einen kleinen Untertritt — so kannst du alles ganz einfach mit Klebestreifen zusammensetzen.
Schnittteile im Überblick
Für Charlotte hast du folgende Teile:
- Vorderteil
- Rückenteil (oft im Stoffbruch)
- Ärmel (je nach Modell)
- eventuelle Taschen oder dekorative Elemente
- Belege oder Bündchen, falls vorgesehen
Alle Teile sind klar beschriftet, und die Fadenläufe sind eingezeichnet, damit du den Stoff richtig auflegen kannst.
Varianten und Passform
Charlotte ist so aufgebaut, dass du verschiedene Varianten nähen kannst — je nach Stoffwahl und Anlass wirkt das Modell ganz unterschiedlich:
- aus Baumwolle eher verspielt und alltagstauglich
- aus Leinen klassisch und edel
- aus Jersey bequem und sportlich
- aus Popeline oder Musselin luftig und sommerlich
Achte darauf, dass du die richtige Linie ausschneidest, falls mehrere Größen auf einem Bogen liegen.
Wenn du zwischen zwei Größen liegst, kannst du problemlos zwischen den Linien sanft hin und her graden.
Vorbereitung für den Zuschnitt
Bevor du zuschneidest:
- alle Markierungen übertragen
- Knipse setzen
- Fadenlauf beachten
- entscheiden, ob du Taschen oder andere Extras einarbeiten möchtest
Wenn du Charlotte als Wende‑Version nähen möchtest, brauchst du natürlich alle Teile doppelt.
Weiter geht’s
Wie man das Schnittmuster zusammensetzt & den Stoff zuschneidet
Transkript für das Video: Charlotte - Schnittmuster & Zuschnitt
Willkommen zum ersten Teil der Serie, wie man einen Mädchenmantel näht.
Zunächst einmal schauen wir uns das Schnittmuster an. Das hat Anstoßlinien, an denen du die Teile zusammenkleben kannst. Außerdem haben die Teile kleine Blumen drauf – alles, was dieselbe Blume trägt, gehört zusammen. Das macht es viel einfacher, wenn du die Teile später zusammensetzt.
Du solltest außerdem prüfen, ob das Schnittmuster richtig ausgedruckt wurde und nicht zu groß oder zu klein ist, damit später alles passt. Dann würde ich dir vorschlagen, alle Teile auszuschneiden und jeweils dort, wo du dieselbe Blume hast, zusammenzulegen. Und dann hast du hier ganz schön viel Papier liegen.
Überblick über die Futterteile
Wir fangen mit dem Futter an.
Das Vorderfutter hat zwei Teile, A und B. Dazu gehört ein seitliches Oberteil, das wir gleich sehen – kurz eingeblendet – und natürlich dasselbe auch für den Rücken.
Das untere rückwärtige Futterteil besteht aus A, B und C, die wir ebenfalls zusammenkleben müssen. Die kleinen Seitenteile müssen nicht zusammengesetzt werden.
Vorderteil und Unterteil
Dies ist das obere Vorderteil. Es hat den Besatz gleich angeschnitten und besteht aus A und B.
Dann haben wir das untere Vorderteil:
Zuerst A und B zusammenkleben, dann C und D, und anschließend alles zusammenstecken. Es ist natürlich unheimlich viel zusammenzukleben, aber wenn du fertig bist, hast du ein tolles Schnittmuster.
Das untere Vorderteil ist etwas weiter, weil wir dort eine Falte einlegen wollen. Dadurch passt es später sehr schön zusammen und gibt dem Mantel mehr Weite.
Ärmel und Rückenteil
Der Ärmel hat drei Teile: A, B und C.
Das untere Rückenteil hat ebenfalls A, B und C.
Vlieseline und Kleinteile
Für die Vlieseline haben wir die Teile A, B und C, die auf den Besatz aufgebügelt werden.
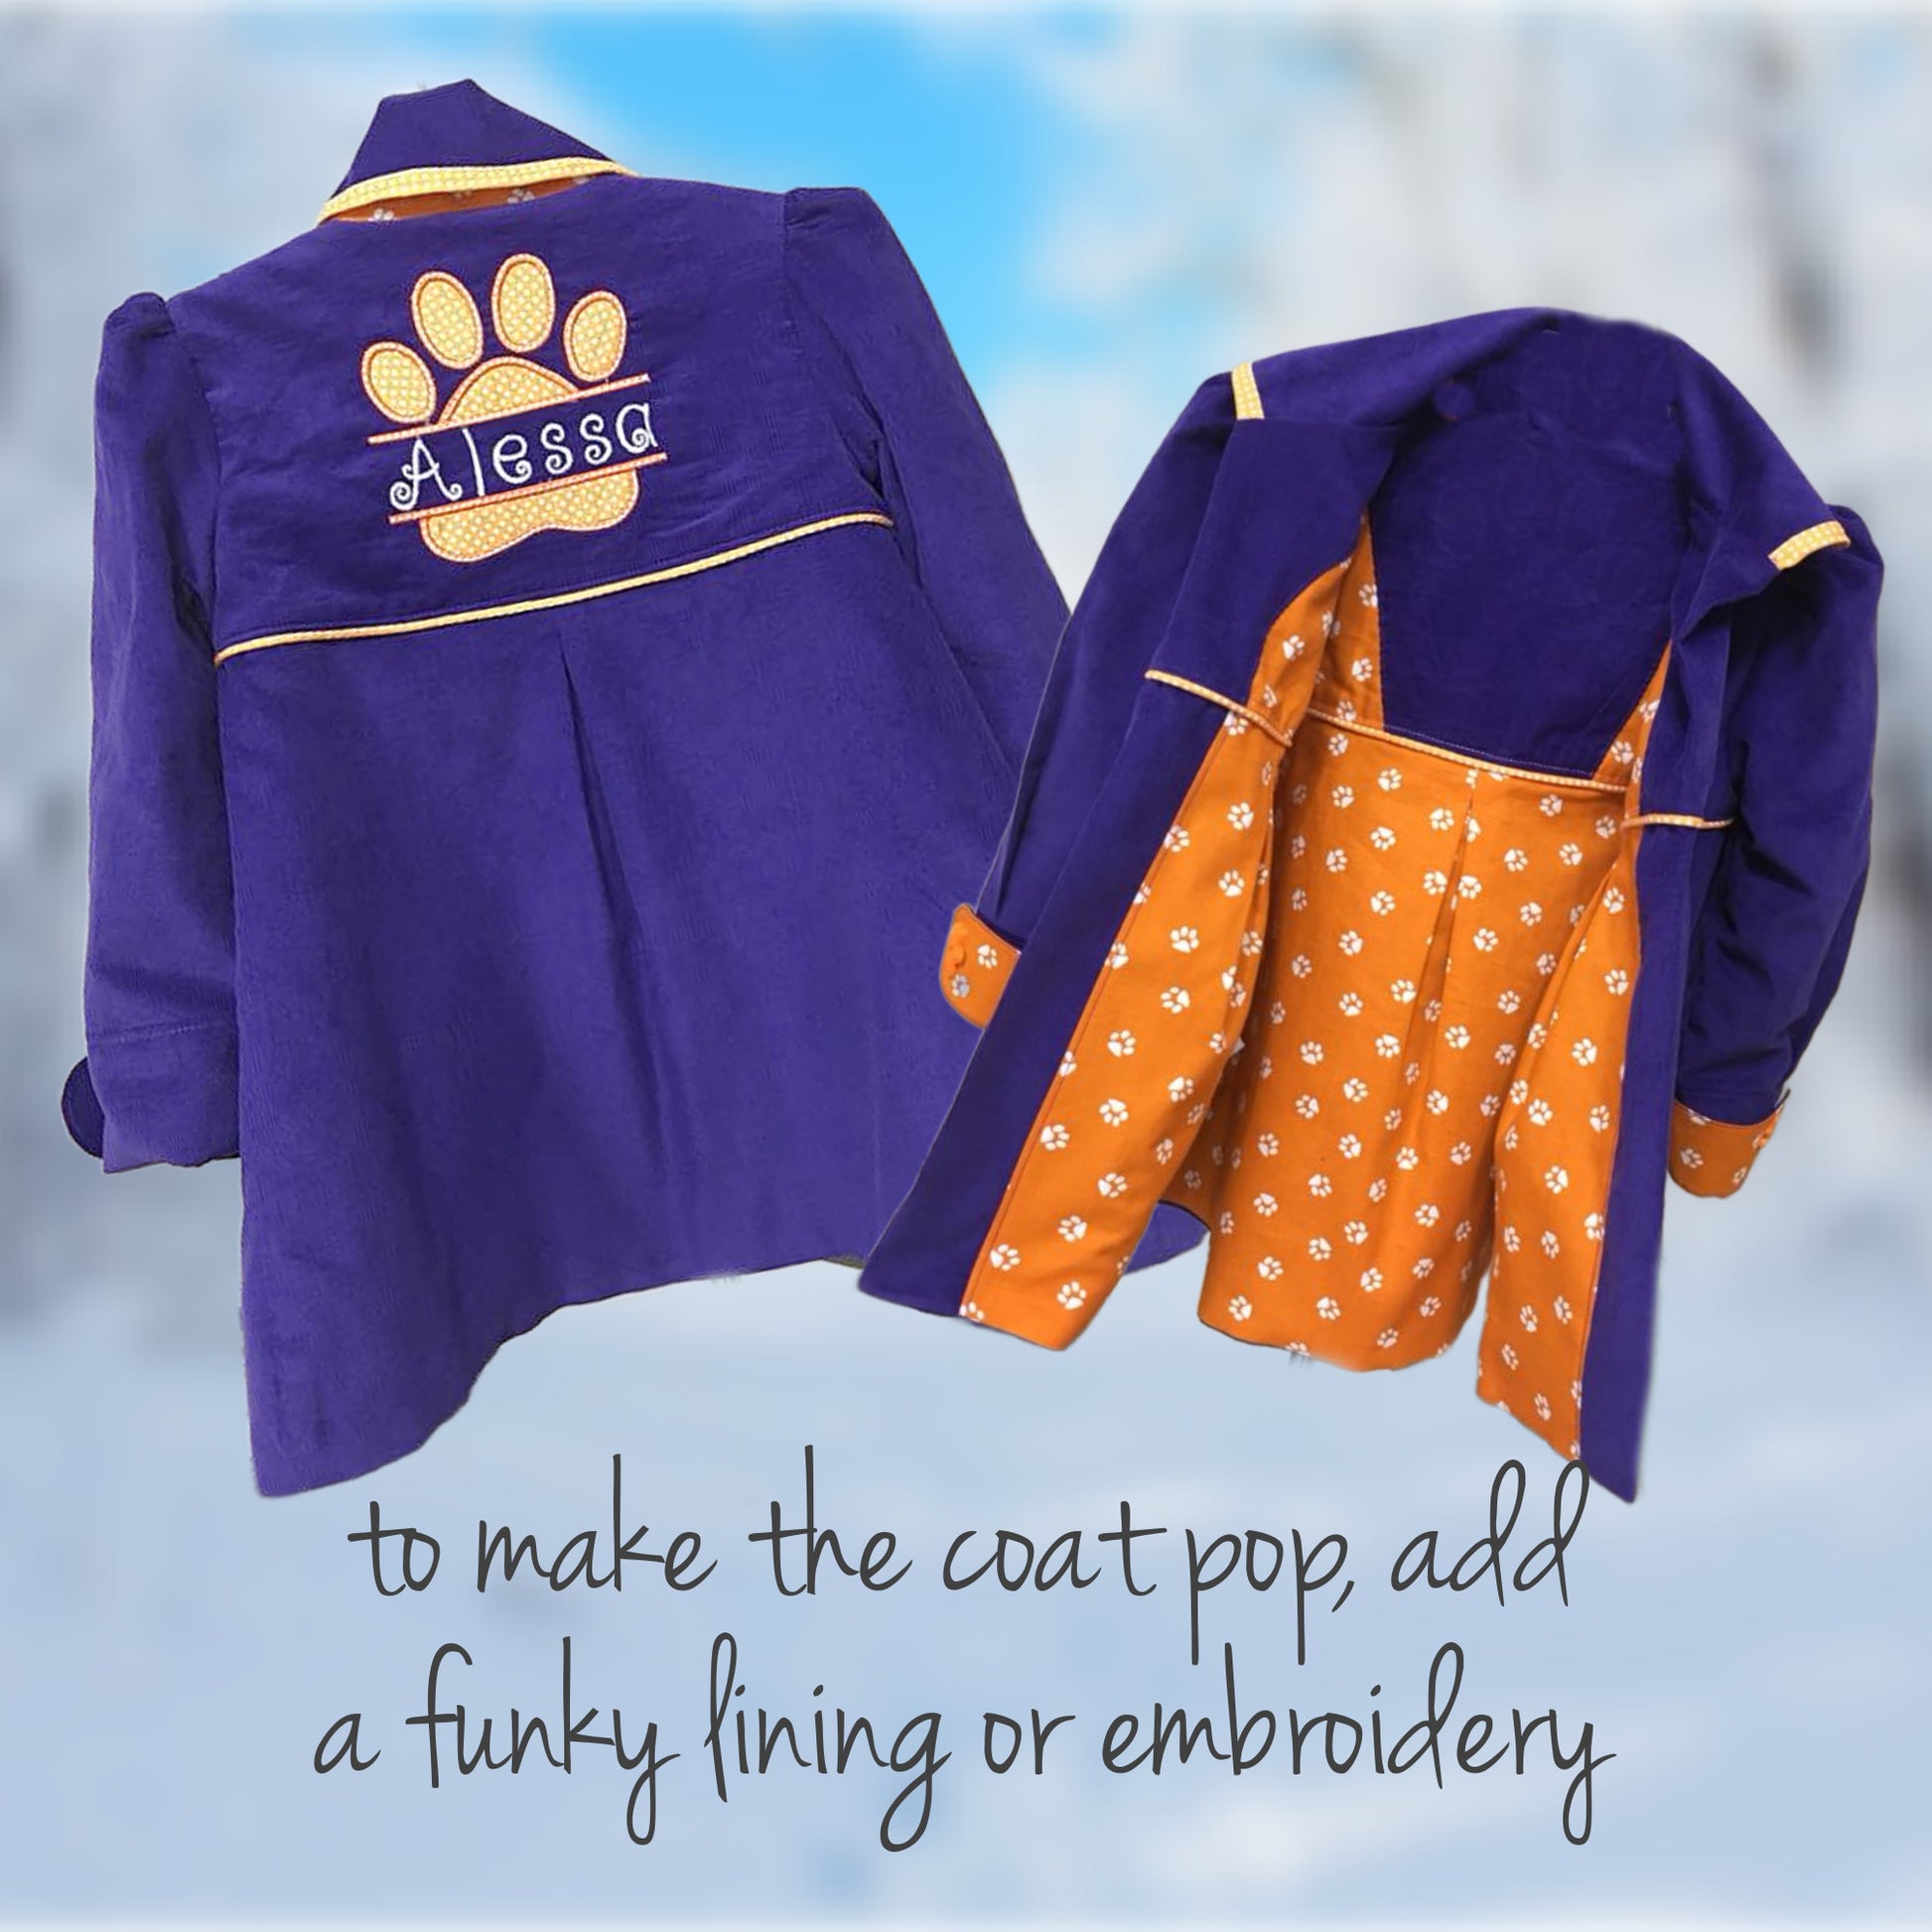
Für unsere Klappe oder den Riegel – du kannst mir gern sagen, wie du es auf Deutsch nennen möchtest – haben wir die Vlieseline kleiner zugeschnitten. Das macht das Nähen später viel einfacher.
Der schmale Schrägstreifen wird als Paspel oder als Schrägband genutzt.
Der breite Schrägstreifen ist dafür da, die Tasche am Eingriff zu versäubern.
Vlieseline zuschneiden
Wir schneiden jetzt die Vlieseline zu:
- vorderer Besatz: 2×
- Kragen: 1×
- Manschetten: 2×
- Riegel: 2×
Kontraststoff zuschneiden
Jetzt müssen wir den Stoff in der Kontrastfarbe zuschneiden.
Dazu schlägst du eine Ecke so um, dass du alles im schrägen Fadenlauf zuschneiden kannst. Lege erst alles auf und prüfe, ob du genug Stoff hast. Wenn du weißt, dass es reicht, kannst du durch die Mitte schneiden.
Dann faltest du die Ecke so um, dass du nicht so lange Strecken schneiden musst – das ist einfacher.
In diesem Fall hätte man eigentlich gar keine Schnittmuster gebraucht, aber es macht es für dich vielleicht leichter.
Das schmale Schrägband würde ich vier- bis fünfmal zuschneiden. Es ist sehr ärgerlich, wenn man am Ende nicht genug hat und noch einmal zuschneiden muss.
Schrägbänder vorbereiten
Im Anschluss nähen wir die Schrägbänder gleich zusammen, damit sie vorbereitet sind. Wenn wir dann an der Nähmaschine sitzen, können wir alles in einem Rutsch nähen – das macht die Arbeit viel einfacher.
Hier schneide ich auch das breitere Schrägband zu. Das ist für die kleine Tasche vorne mit der Schleife. Ich schneide es auf die Hälfte und lege das Schnittmuster noch einmal auf, um zu prüfen, ob es lang genug ist. Jawohl – passt.
Obermaterial zuschneiden
Jetzt schneiden wir die restlichen Teile aus.
Den Stoff würde ich nicht komplett doppelt legen, sondern immer nur so viel umklappen, wie du tatsächlich brauchst.
Wir schneiden zu:
- Kragen im Stoffbruch
- kleine Tasche (2×) oder Seitentasche, je nach Variante
- Schleife
- Schleifenmitte
- Riegel
- rückwärtiges Besatzteil
Wenn alles ausgeschnitten ist, müssen wir markieren:
- Falte an der Tasche
- Schulter am Kragen
- Kragenmitte
- rückwärtige Mitte
Dann sind alle Teile aus dem Kontraststoff fertig.
Falten und Markierungen
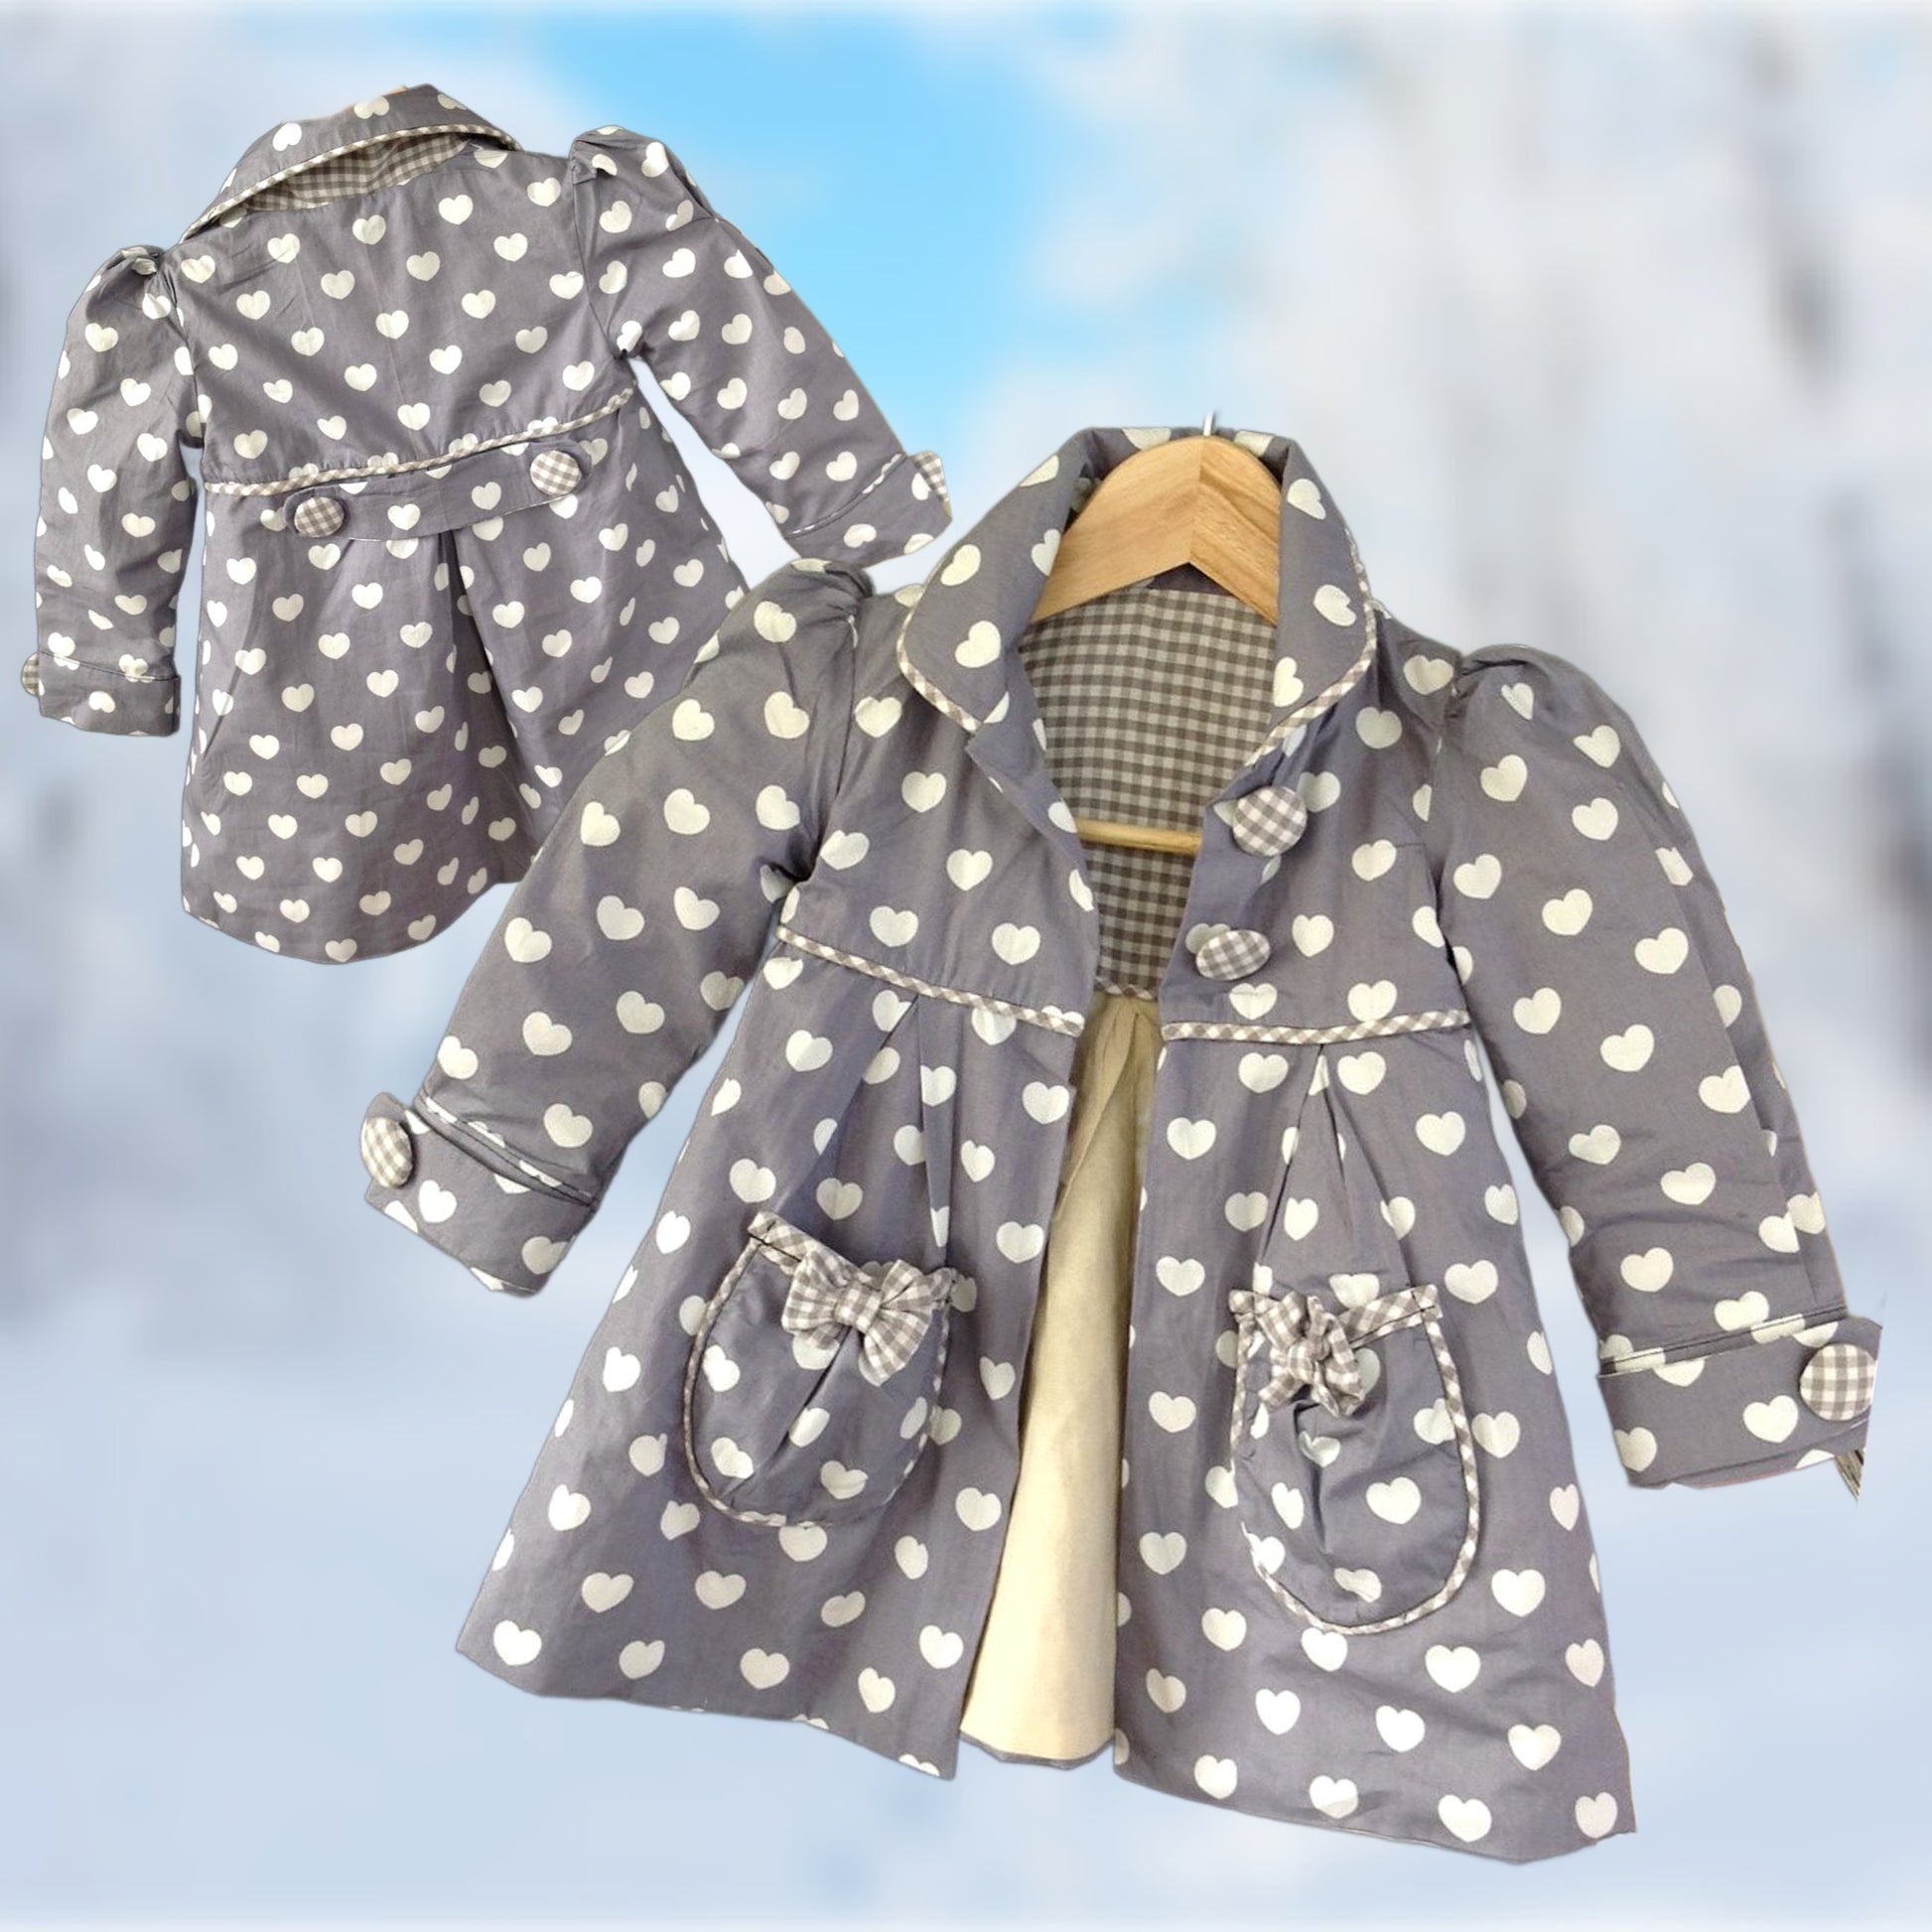
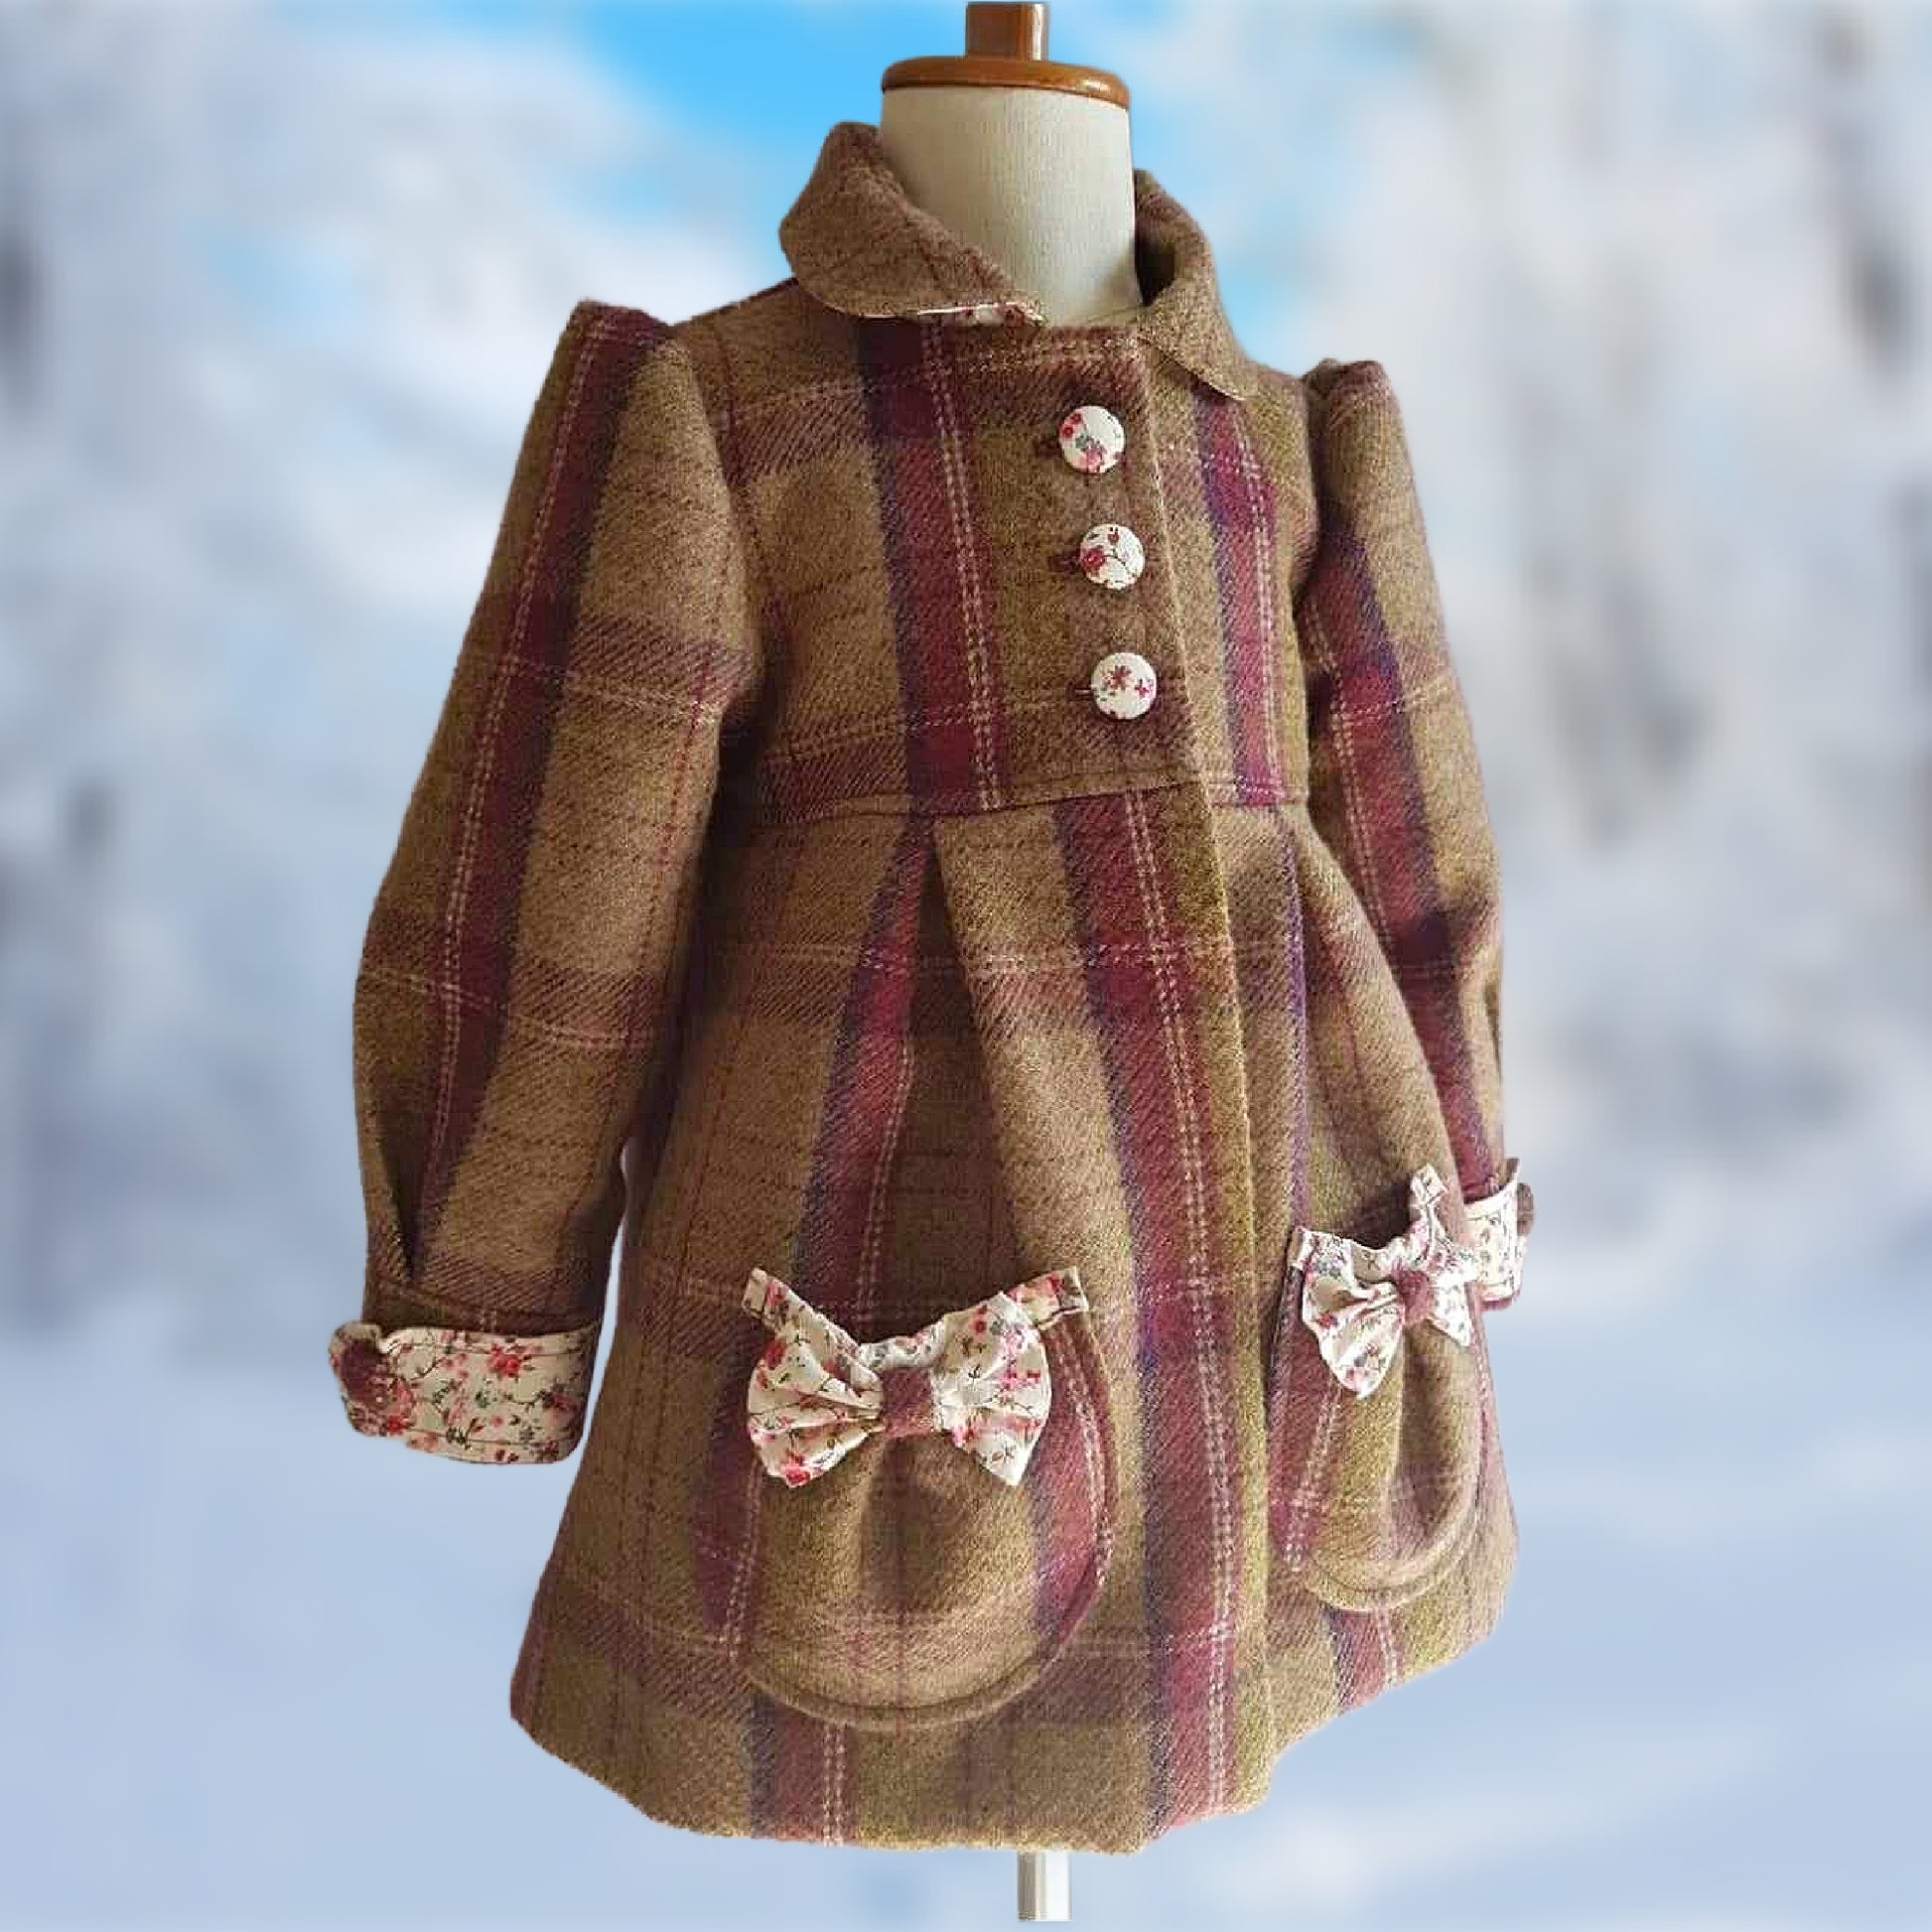
Der Schnitt ist hinten etwas breiter, weil dort eine Falte hineinkommt.
Vorne ist es genauso, aber mit einer größeren Falte – das sieht einfach schön aus.
Im Obermaterial brauchen wir:
- Tasche
- Riegel
- Kragen
- Manschetten
Du kannst die Teile so platzieren, dass kaum Stoff verloren geht. Wenn du aber ein Muster hast, musst du natürlich alles in derselben Richtung zuschneiden.
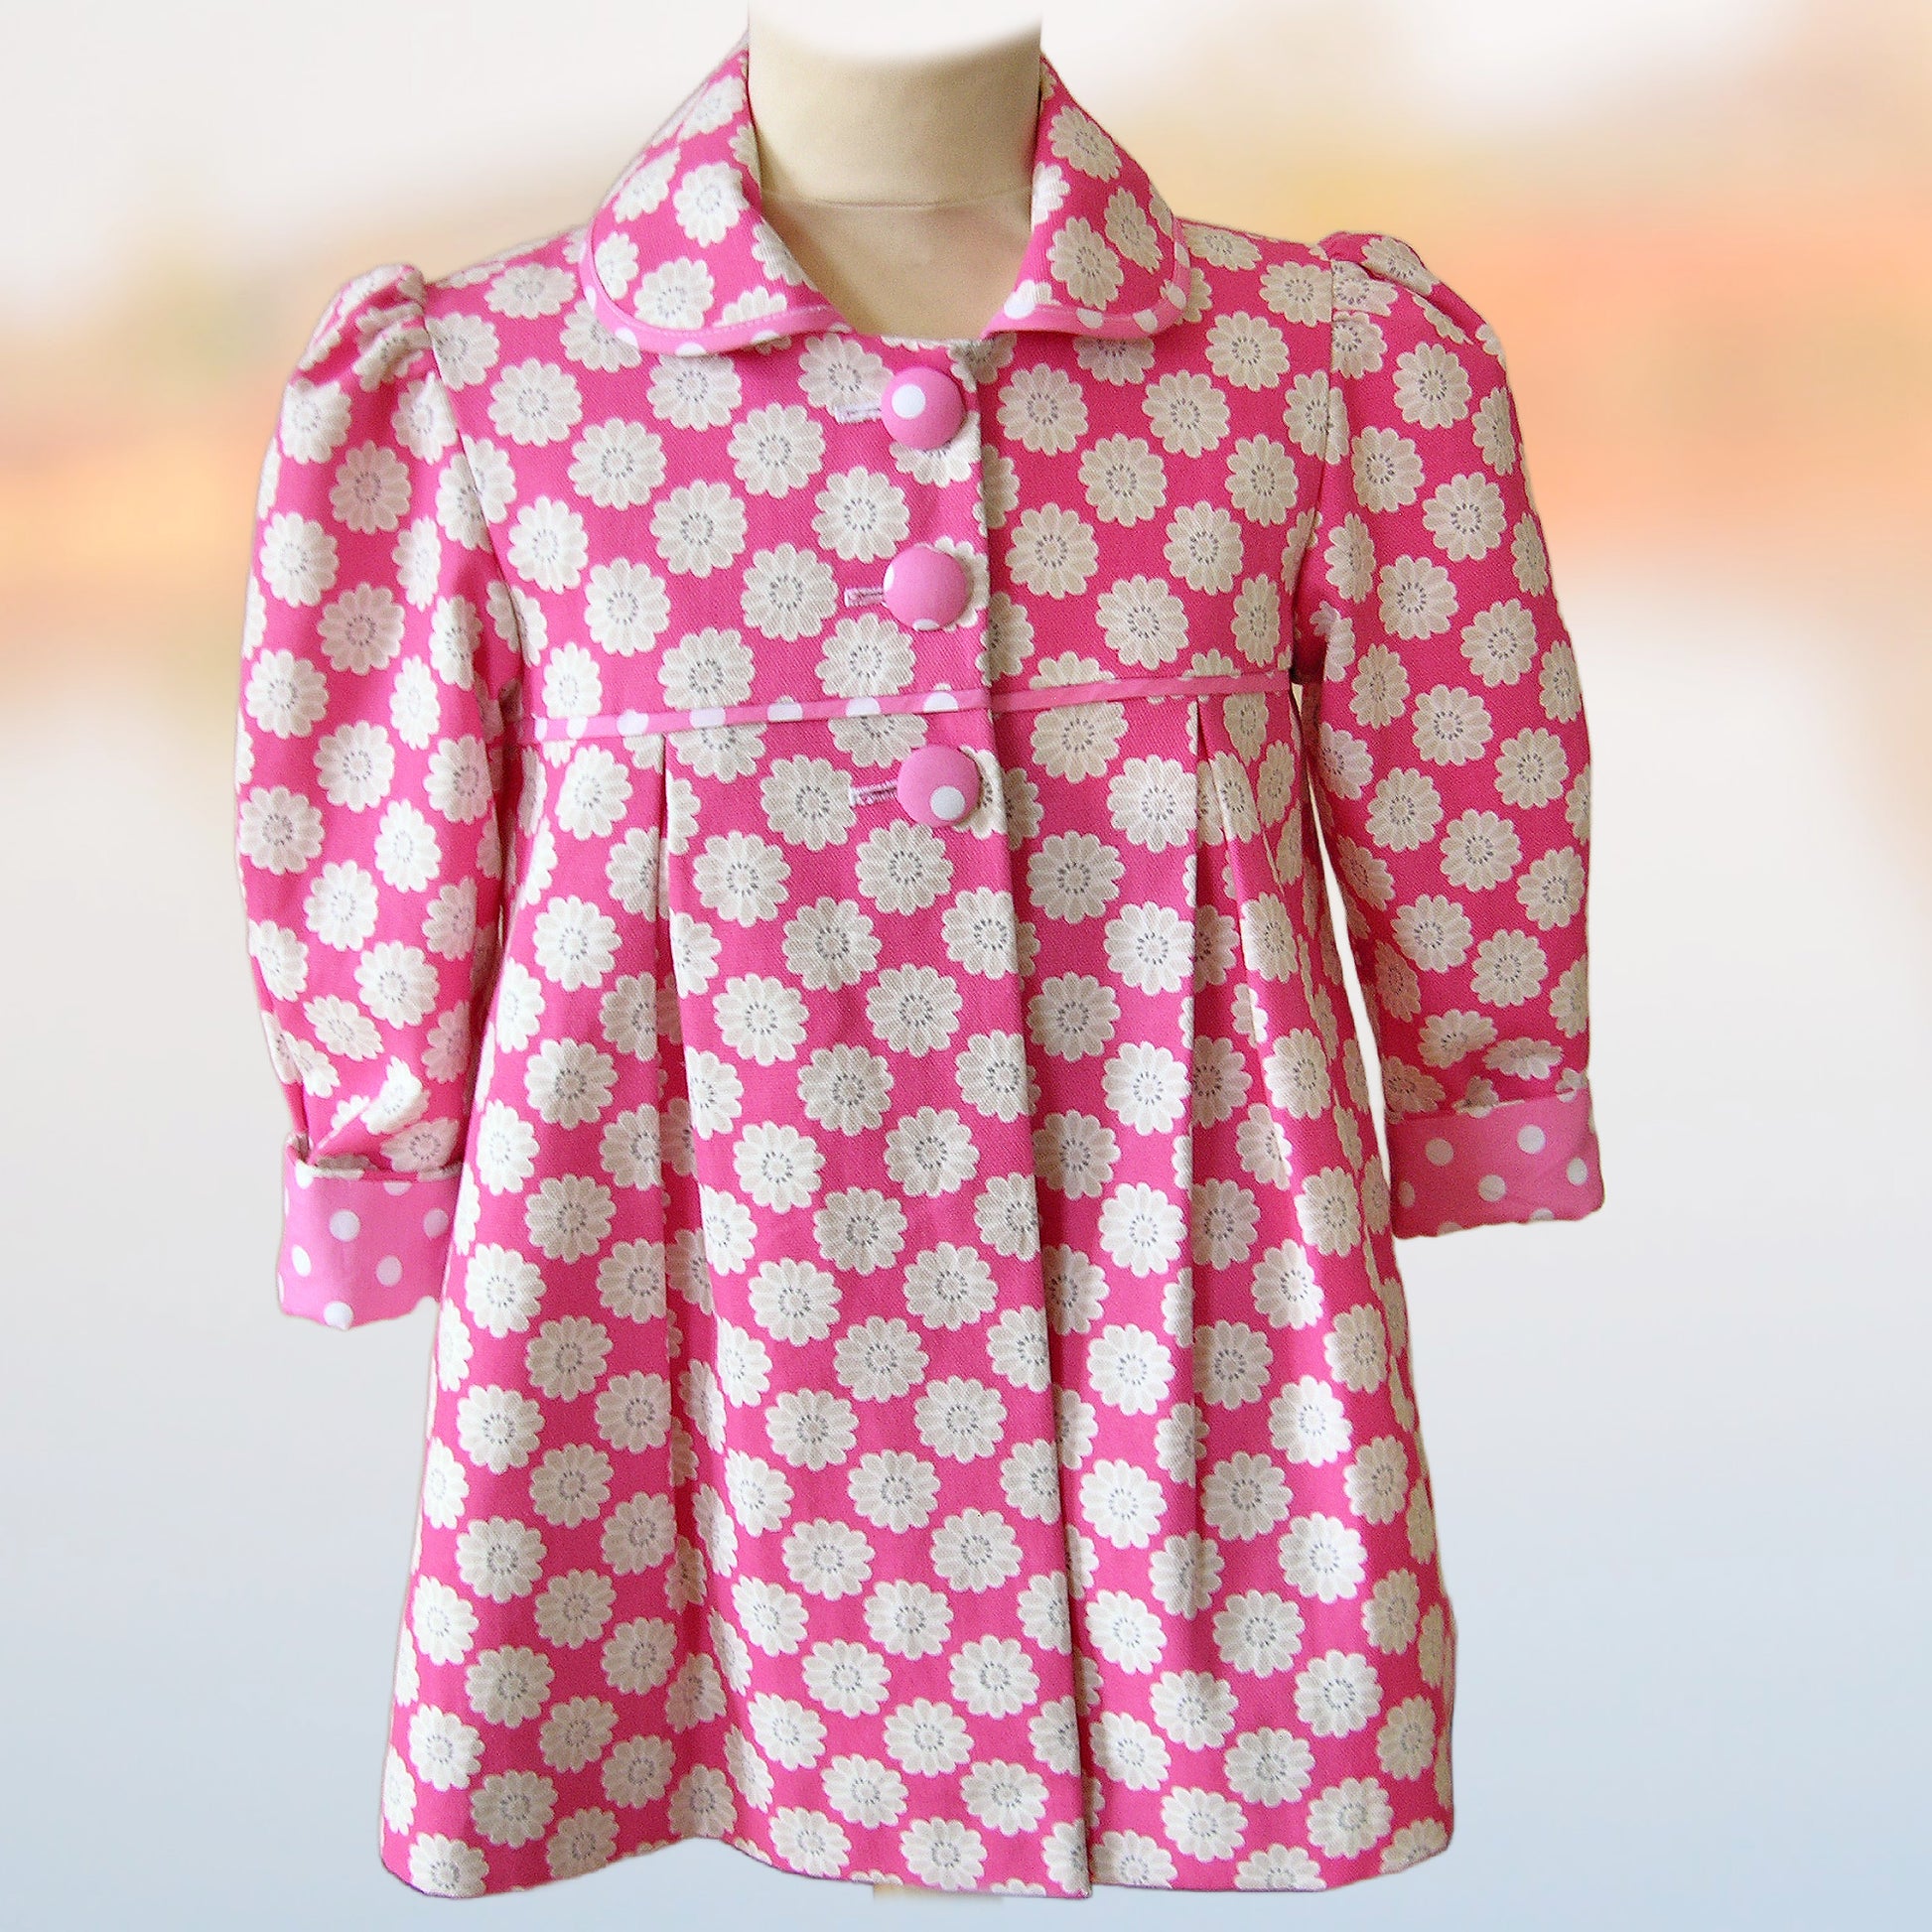
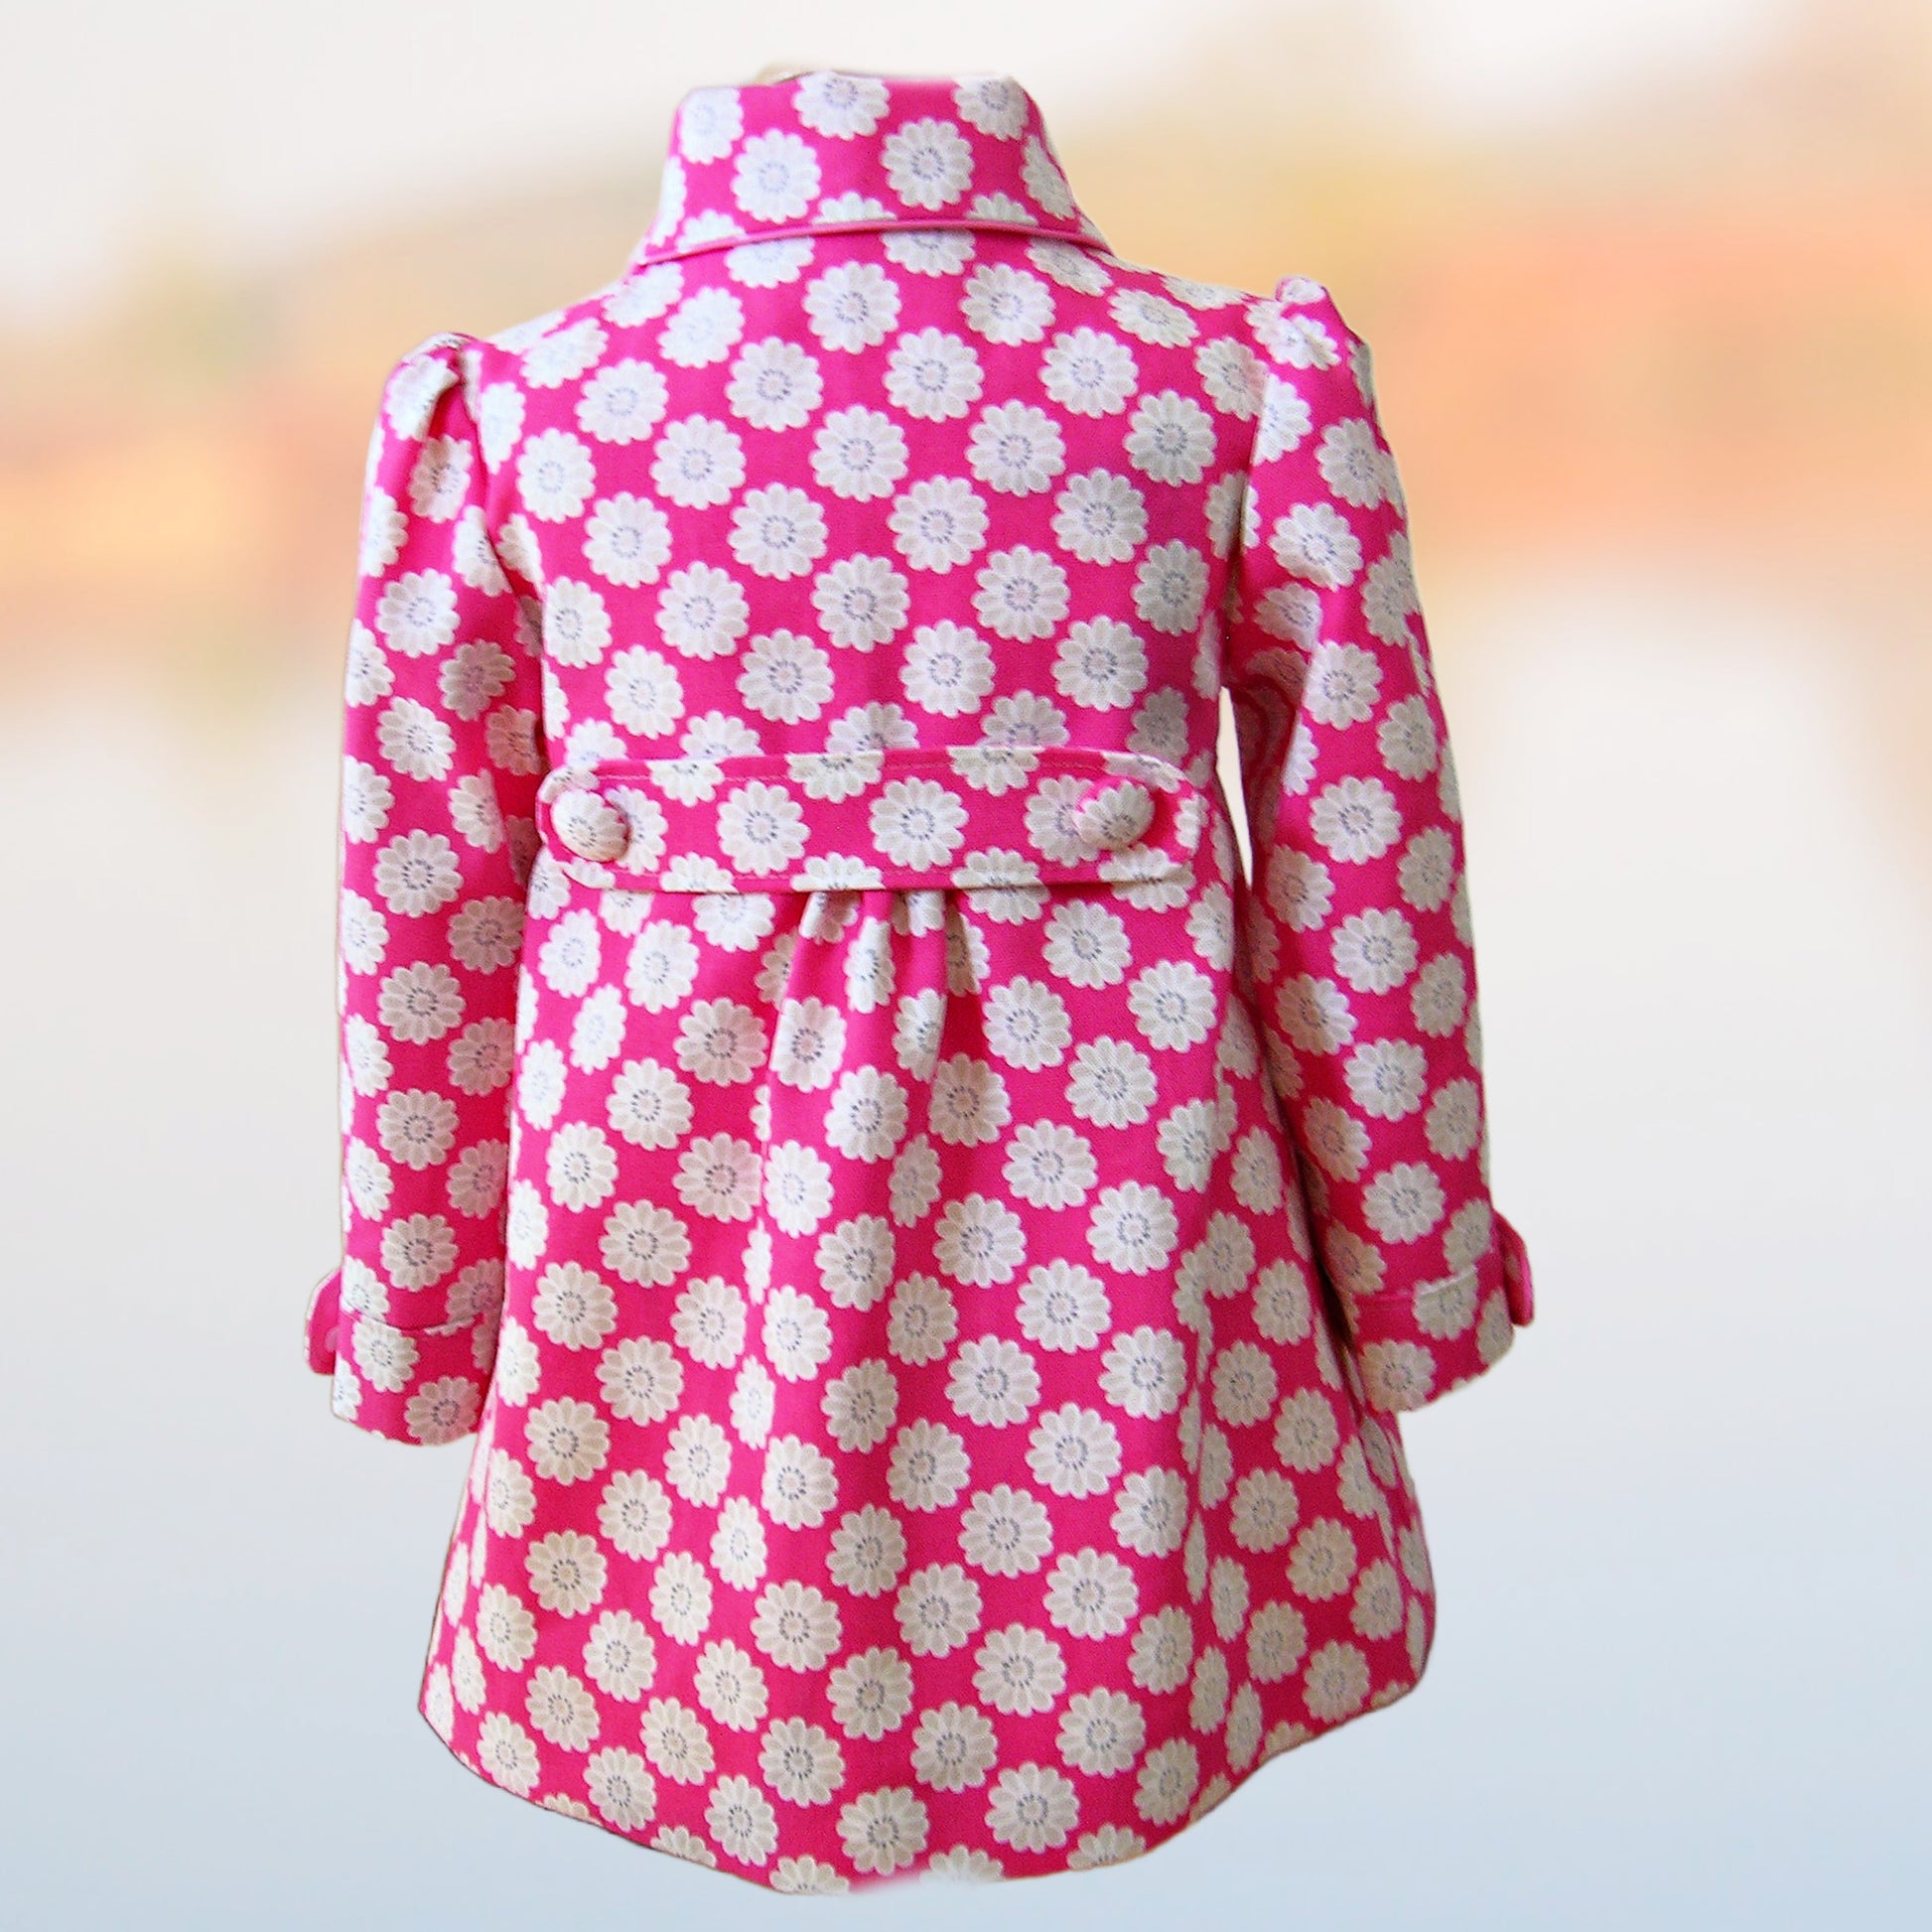
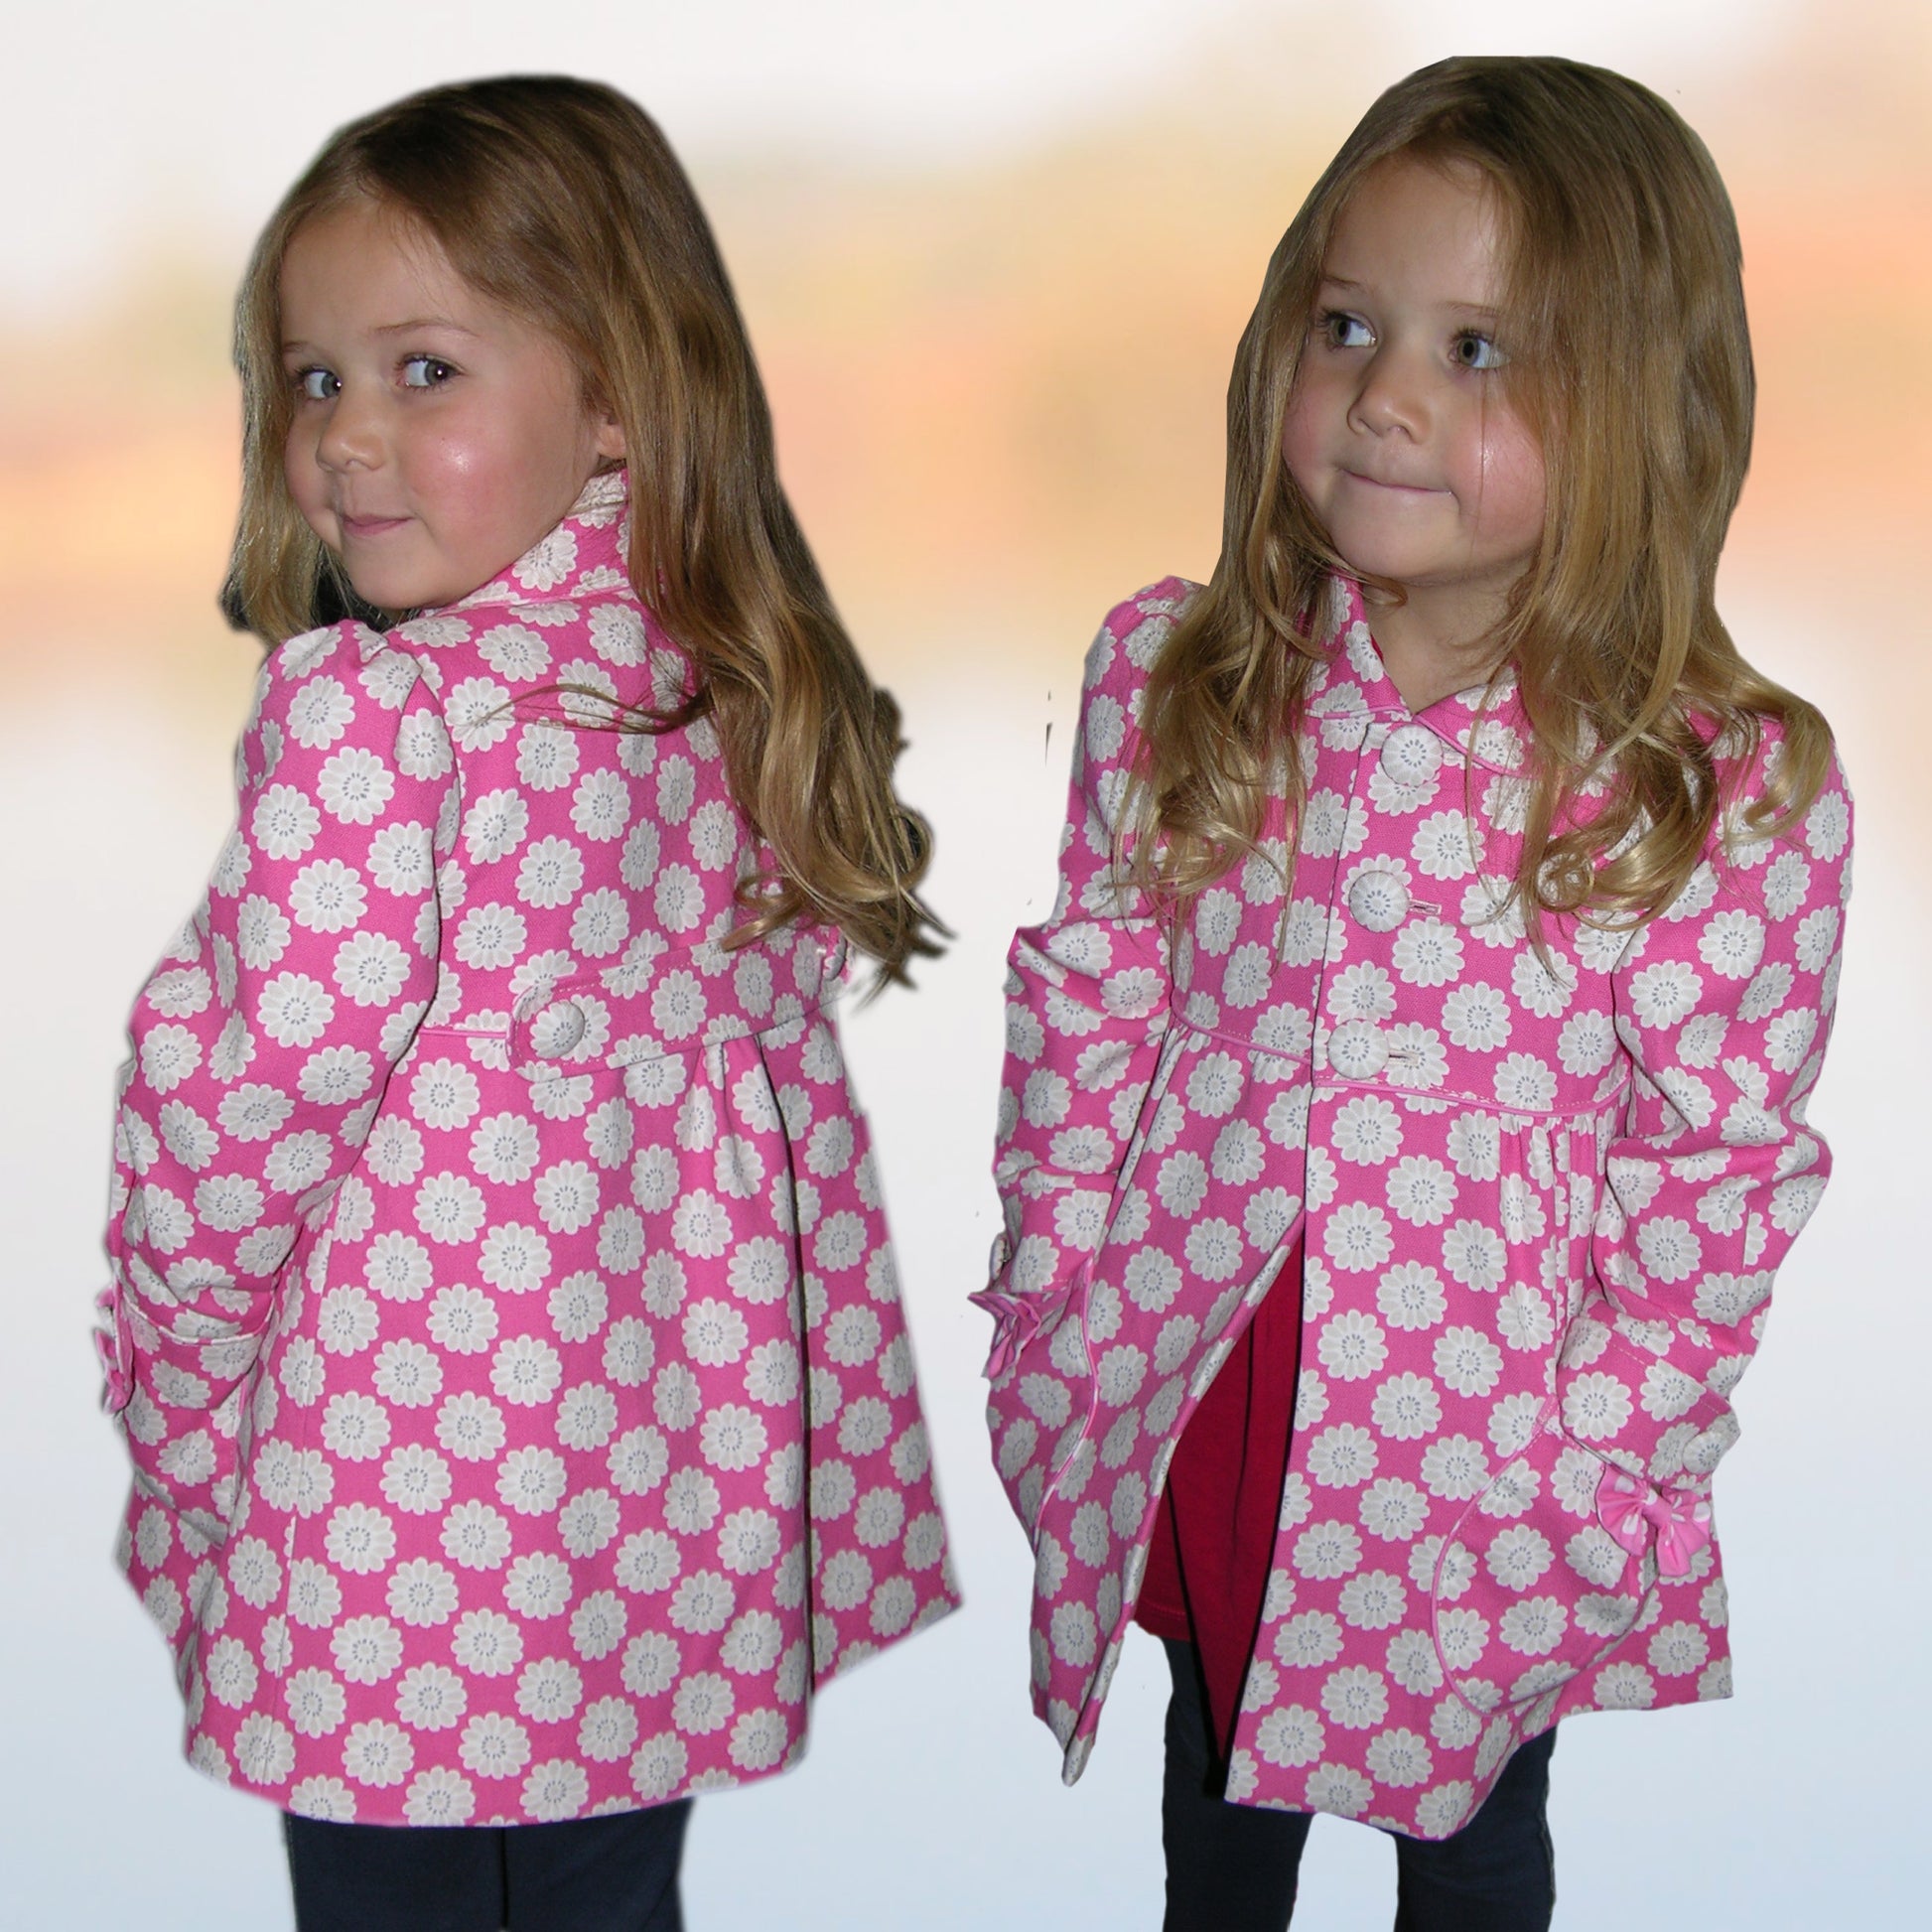
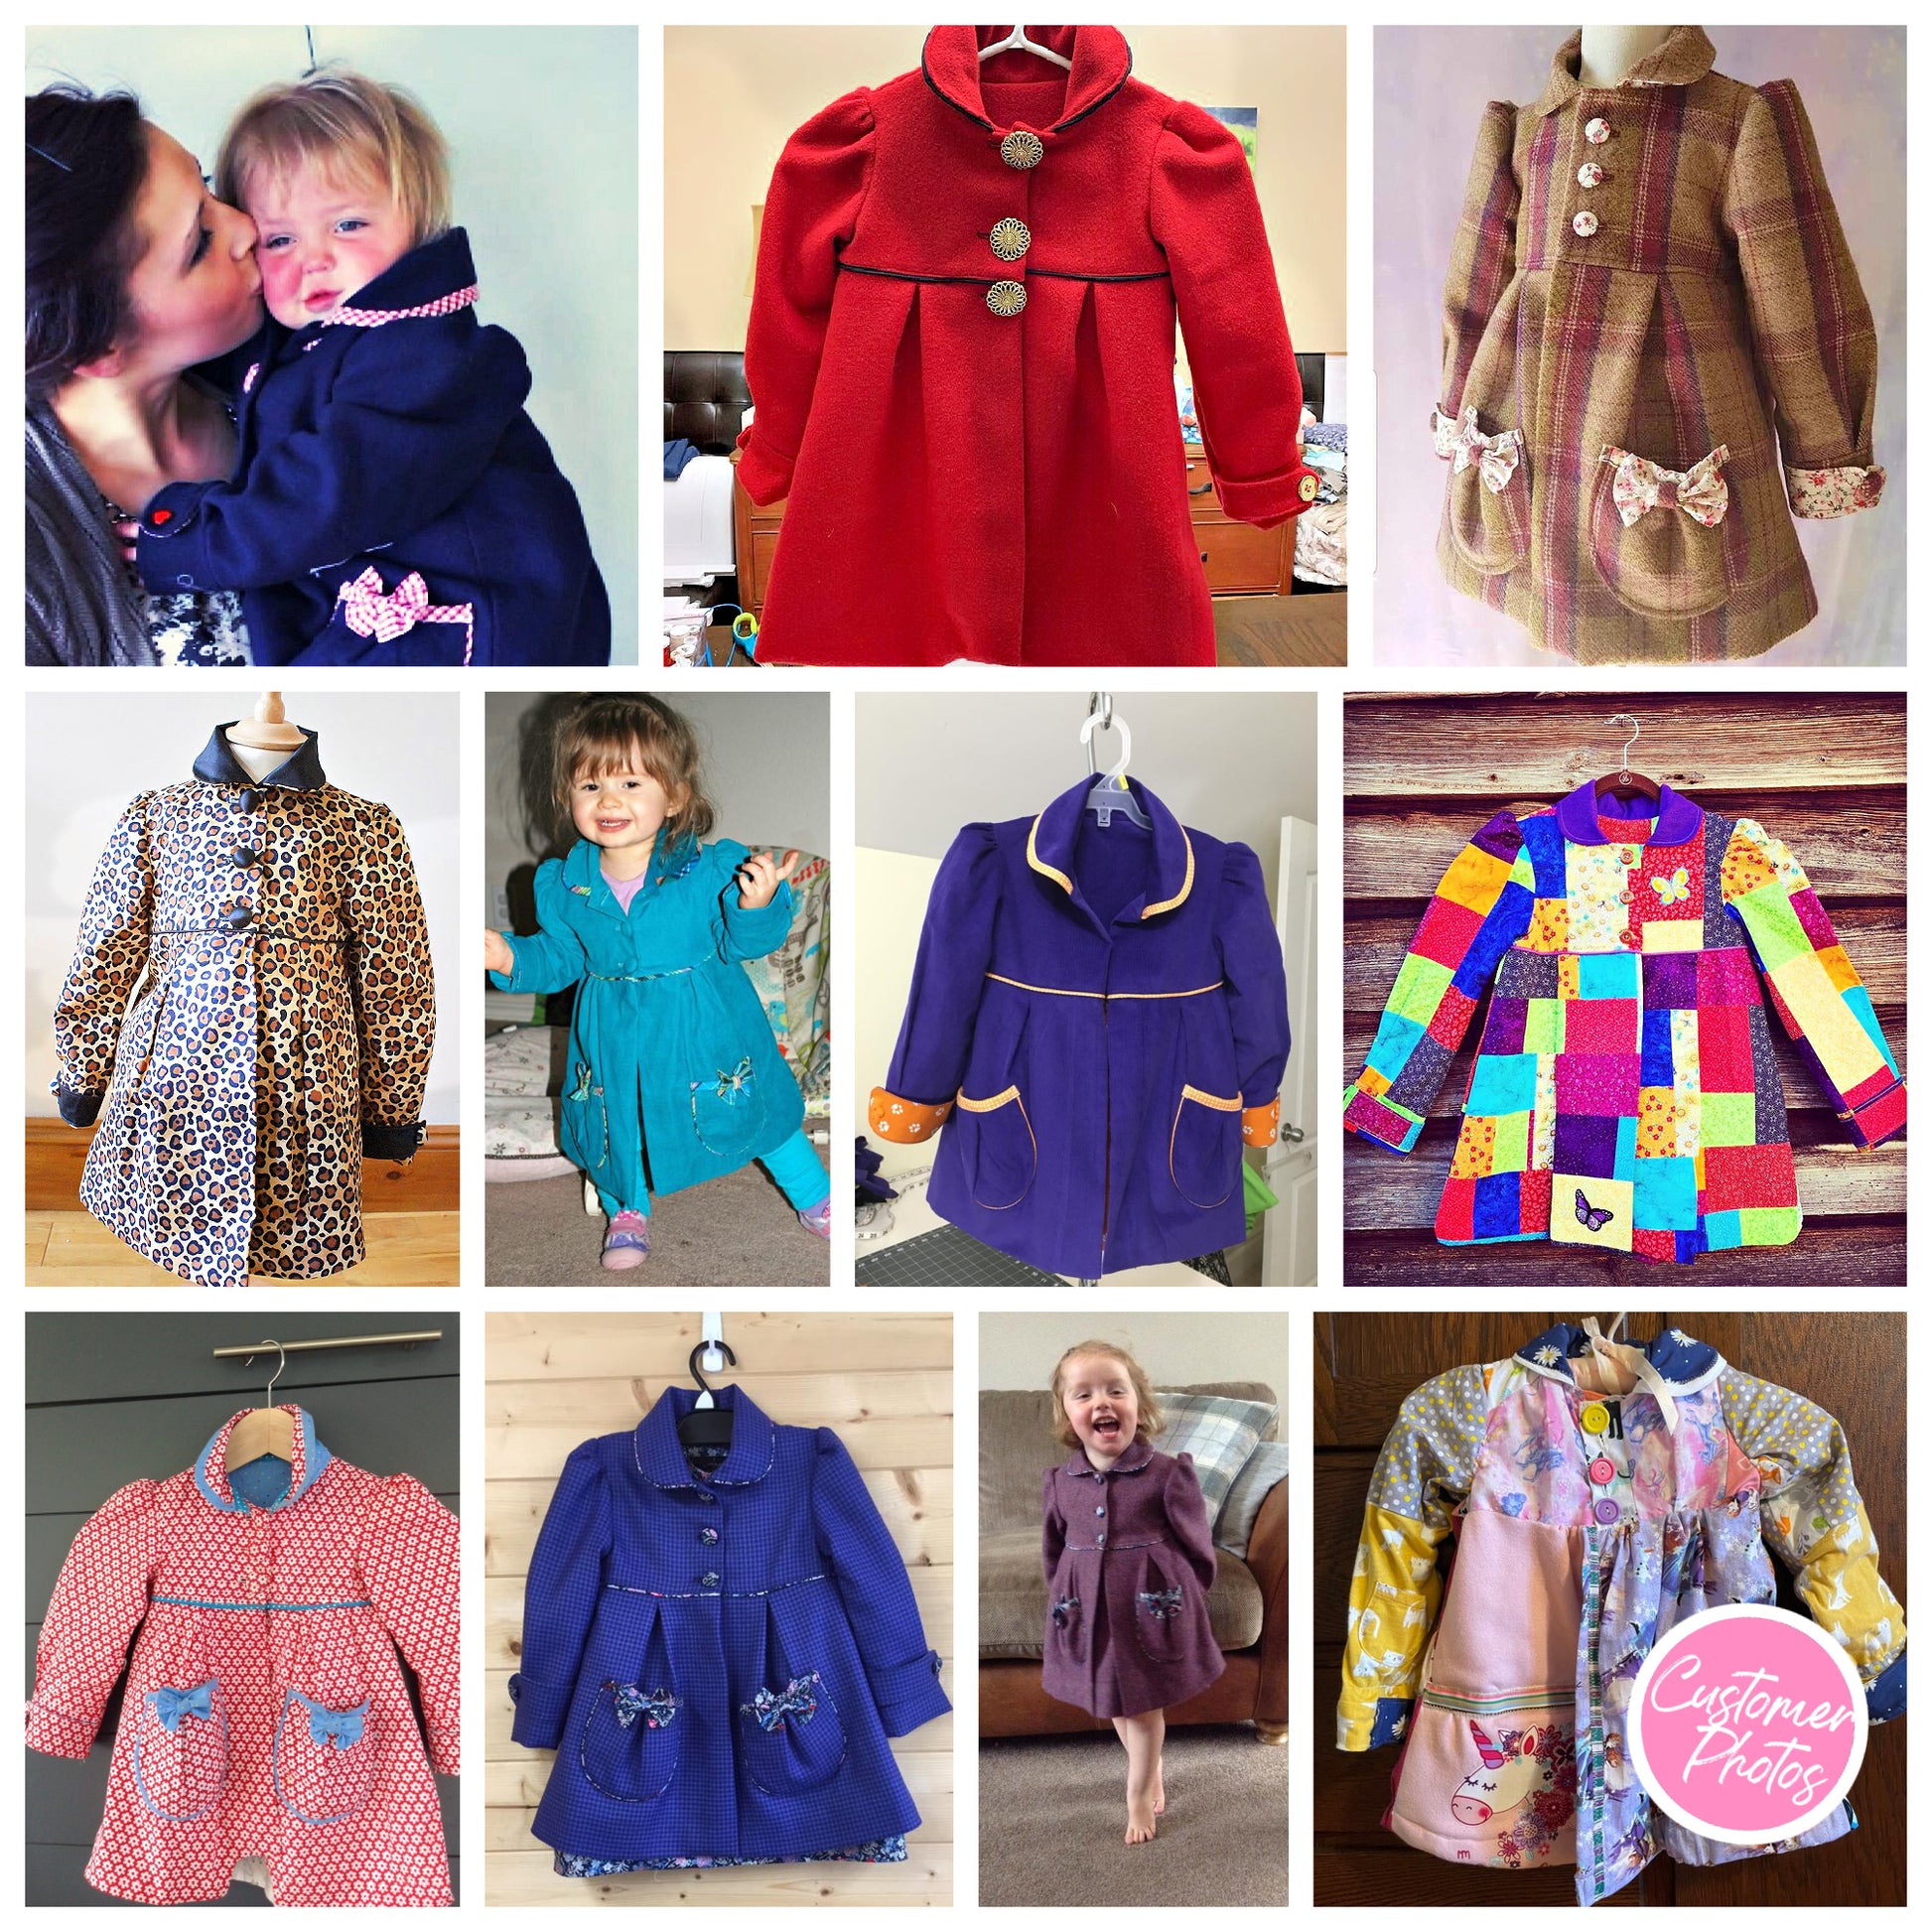
Hier siehst du ein Beispiel: Keyla trägt das Mäntelchen mit Seitentaschen – ab einem gewissen Alter ist das oft praktischer.
Vergiss nicht, die vordere Mitte, hintere Mitte und alle Falten zu markieren. Es ist sehr ärgerlich, wenn man das vergisst und später das Schnittmuster wieder heraussuchen muss.
Futter zuschneiden
Jetzt schneiden wir das Futter zu.
Ich benutze hier Gardinenfutter – eine tolle Sache. Es ist in Köperbindung gewebt, dicht, wärmend und aus Baumwolle.
Wir brauchen:
- rückwärtiges Futterteil
- vorderes Futterteil
- oberes seitliches Besatzteil
- oberes rückwärtiges Besatzteil
- Ärmel (aus Reststücken)
Auch hier alles markieren – genau wie beim Obermaterial.
Vlieseline aufbügeln
Zum Schluss bügeln wir die Vlieseline auf:
- Kragen und Manschetten: gleiche Größe wie das Schnittteil
- Riegel: Vlieseline etwas schmaler (Nahtzugabe fehlt)
- vorderer Besatz: Vlieseline in einem Stück, nach Bedarf zugeschnitten
Abschluss
Wenn du jetzt richtig Lust hast loszulegen, kannst du das Schnittmuster bei Etsy in meinem Shop „Sew Pro“ herunterladen – und dann geht’s schon los.
Viel Spaß beim Nähen!
Preparation: Pinning
Transcript for Video: Coat Construction – Preparing Pattern Pieces
We begin by preparing all the pieces needed for the sewing process so everything is ready before construction starts.
Preparing the Sleeve
First, we start with the sleeve. The sleeve has two snips at the lower edge, which attach to the cuff, and one snip at the top, which indicates the front of the sleeve.
Align the lower snips together and pin them in place. Make sure you have a matching pair of sleeves prepared in the same way.
Preparing the Cuff
Next, prepare the cuff. The longer edge of the cuff attaches to the sleeve, while the shorter edge has two small snips that indicate where the lining will be attached.
Pin the cuff in place, ensuring all notches align correctly. This will be sewn later using a 1 cm seam allowance.
Preparing Front Panels
Now take the front piece and the front lining and place them right sides together. Carefully match the curved edges, making sure everything aligns smoothly around the shape.
Pin along the edges to hold the layers in place.
Preparing Back Panels
Repeat the same process for the back. Take the back piece and back facing or lining, place them together, and pin along the edges using a 1 cm seam allowance.
Preparing Front Lining Assembly
Next, prepare the lower front lining pieces by aligning and pinning them together. Ensure all curves and edges match correctly before sewing.
Preparing Tabs
Now prepare the tabs. Place the contrast fabric right sides together, align the edges, and pin through the center to secure them.
These will be sewn all the way around to complete the preparation stage.
Conclusion
All major components are now prepared and pinned, ready for sewing in the next stage of construction.
Preparation: Ironing
Transcript for the Video: Charlotte Coat - Pressing and Bias Binding Preparation
Now that the pieces are prepared, we move on to pressing and shaping the garment so everything sits correctly before final construction.
Pressing the Sleeve into the Cuff
Start by pressing the sleeve downwards into the cuff. Press from both sides so the seam lies flat and the transition between sleeve and cuff is smooth and even.
This helps the cuff sit cleanly and improves the overall structure of the sleeve.
Pressing Seams in Bias Binding and Linings
Next, press open the seam on the bias binding so it lies flat and stable.
For the lining and facing areas, press the seam allowance toward the body of the garment. This helps the inner structure sit neatly against the outer fabric.
Shaping the Front and Back Areas
At the front, guide the seam allowance toward the side instead of forcing it open or flat. The fabric naturally wants to fall in this direction because the front section is heavier.
Follow the natural movement of the fabric rather than forcing it into place, as this creates a cleaner and more stable shape.
Shaping Corners and Edges
Use your fingers to carefully push out corners and curved edges. This helps define the shape and ensures smooth, rounded transitions.
Once shaped properly, the tabs and edges should sit cleanly and evenly.
Preparing Bias Binding
Now prepare the bias binding for the collar and bow pocket.
Take the narrow center strip and press both long edges toward the middle. This creates a folded binding that is ready for attachment.
Conclusion
With all pressing and shaping complete, the garment pieces are now structured and ready for final assembly.
Sewing the Coat
Transcript for Video: Charlotte Coat - Sewing Components and Turning Tabs
Now you’re ready to start sewing. At this stage, it’s best to work continuously through all prepared pieces instead of stopping frequently to press each seam individually.
Efficient Sewing Workflow
Begin by sewing all pinned pieces in sequence. This keeps the workflow smooth and efficient.
As you finish one section, simply place the next piece under the presser foot and continue sewing without interruption.
Attach the bias binding together as part of this continuous process.
Then move on to the back lining and continue sewing through the prepared components in the same manner.
Sewing the Tabs
Now sew around the tabs. This step requires more care and precision.
Sew slowly, stitch by stitch, lifting the presser foot as needed and repositioning the fabric as you follow the curve.
Take your time around the rounded sections to maintain accuracy.
Be sure to leave a small gap on the long edge of the tab. This opening will be used later to turn the piece right side out.
Sewing Front Panels
Next, sew the front and front lining together using the same continuous workflow.
Keep moving from one prepared piece to the next to maintain efficiency and consistency in your sewing.
Trimming and Turning Tabs
Once sewn, trim back the seam allowances on the tabs to reduce bulk.
Then turn the tabs right side out carefully. Use a pin or similar tool to push out the corners and edges so they are fully shaped.
Make sure all edges are smooth and properly defined before pressing.
Preparation for Pressing
Now the pieces are ready for pressing. Once turned, ensure everything is neatly shaped and aligned so the iron can set the structure properly in the next step.
Topstitching
Transcript for Video: Charlotte Coat - Top Stitching Tabs and Cuffs
Now we’re going to do the top stitching. Top stitching is an important step in sewing because it creates a clean, professional finish and helps define the shape of the garment.
When top stitching, use a longer stitch length than normal. This helps create a smoother and more polished look.
Avoid stitching too close to the edge. Depending on the piece, a distance of up to 3 mm from the edge works well, especially for tabs and cuffs.
Choose a guide line on your presser foot that allows you to keep a consistent distance from the edge of the fabric as you sew.
Top Stitching the Tabs
Begin top stitching around the tabs.
Follow the edge carefully, keeping the spacing consistent as you sew. Lift the presser foot as needed to adjust direction, especially around curves.
Take your time to maintain a smooth, even edge all the way around.
Sewing Technique Notes
Although the process is shown at speed, actual sewing should be done slowly and carefully to maintain accuracy and control.
Consistent spacing is key to achieving a professional finish.
Conclusion
Continue sewing around each tab in the same manner until all top stitching is complete. This step significantly improves the overall look and structure of the garment.
The Patch Pocket
Transcript for Video: Charlotte Coat - Piped Pocket, Bias Binding, and Bow Placement
We begin by preparing the binding and constructing the piped pocket details.
Start by inserting the piping cord into the center of the bias binding. This creates the finished piping edge used for the pocket.
Move the needle position slightly to the left so the stitch line sits close to the piping cord. This ensures a tight, clean finish.
Attaching the Piping to the Pocket
Take the prepared piping and place it onto the right side of the pocket fabric.
Place the lining over the top, then flip the pocket over so you can work from the side where the previous stitching line is visible. This allows for more accurate sewing.
Pin everything in place carefully.
Turning and Finishing the Pocket Edge
After stitching, cut back the seam allowance to reduce bulk.
Turn the pocket right side out and shape the piping. The edge should now be clean and well-defined.
Press the pocket carefully on both sides to set the shape.
Creating the Box Pleat or Gathers
Depending on your pattern, you can either gather the top edge or form a mini box pleat.
If using the box pleat method, align the two snips and fold them together to create the pleat. Stitch about 1 cm to secure it, then open and shape it evenly.
Pin if needed to hold the structure in place.
Attaching the Bias Binding to the Pocket
Attach the wider bias strip as indicated in the pattern.
Sew it first to the wrong side (lining side) of the pocket using a 1 cm seam allowance.
Trim back seam allowance if necessary so it sits neatly.
Fold the ends inward and pin them so they cover the previous stitch line. This ensures a clean finish on both sides.
Top stitch close to the edge so the binding is secured neatly and the stitching is hidden on the reverse side.
Completing the Bow
Construct the bow separately according to the pattern instructions. This will be attached later with the pocket placement.
Positioning the Pocket on the Front Piece
Fold the front piece so the lining side is on top of the shell fabric.
Position the pocket where desired, along with the bow placement.
Flip the piece over to confirm correct positioning, then pin securely.
Adjust slightly so the pocket has a natural outward shape and is not sitting completely flat.
Final Attachment
Pin both sides of the pocket in place to secure positioning.
You can either stitch directly on the pocket or sew between the piping and the outer fabric for a more discreet finish.
Conclusion
The piped pocket and bow elements are now ready and securely positioned, completing this decorative construction stage before final assembly.
Sewing the Upper Coat
Transcript for the Video: Charlotte Coat - Assembling the Upper Coat
Now we’re going to assemble the upper coat. At this stage, we start bringing all the main sections together into a full circular structure that includes both the shell and the lining.
Closing the Side Seams
First, close all side seams on the lining.
Then repeat the same process on the outer shell fabric.
What you are effectively doing here is forming one continuous circle from both the lining and the outer fabric, which will later be joined together as a complete coat structure.
Sewing the Side Seams
Move to the sewing machine and sew all side seams using a 1 cm seam allowance.
Keep the workflow continuous by feeding each next section directly under the machine as you finish the previous one.
Attaching the Piping
Now attach the piping to the upper part of the coat.
Do not start directly at the edge. Instead, begin about 3 cm in from the joining point. This allows for a cleaner finish when the piping is completed around the coat.
Continue attaching the piping all the way around, stopping about 3–4 cm before the final join.
Keep the piping flat and evenly tensioned as you sew.
Trim excess piping as needed, then join the ends carefully. If the fit is tight, it may be necessary to unpick a small section and adjust for a smoother alignment.
Once correctly positioned, the join should sit cleanly and become visually neat when pressed flat.
Closing the Shoulder Seams
Next, close the shoulder seams on the shell fabric.
Repeat the same process on the lining fabric.
All seams are sewn using a 1 cm seam allowance.
Pressing Seams
Press all seams after sewing to set the structure.
For best results, press seams in different directions depending on the layer:
- Shell fabric shoulder seams are pressed toward the back
- Lining shoulder seams are pressed toward the front
This helps reduce bulk and improves the overall shape of the coat.
Workflow Efficiency Tip
To maintain efficiency, continue feeding the next piece under the machine immediately after finishing each seam. This reduces interruptions and keeps the construction process consistent.
Conclusion
The upper coat structure is now complete, with side seams, piping, and shoulder seams all assembled. The garment is ready to move on to the lower section construction.
I love the patterns, ease and helpful
easy to print and put together pattern
Meets all expectations and was as described
I have previously made the Dakota Coat and am now moving own, the expert tutortial and easy to follow instructions a big success for me. After finishing my grandaughters coat, I stepped back and felt like a seamstress. Thanks for the the great instructions, I love your patterns.