


JOANNA BOLERO
JOANNA BOLERO


Normaler Preis
€6,95 EUR
Normaler Preis
Verkaufspreis
€6,95 EUR
Grundpreis
pro
Verfügbarkeit für Abholungen konnte nicht geladen werden
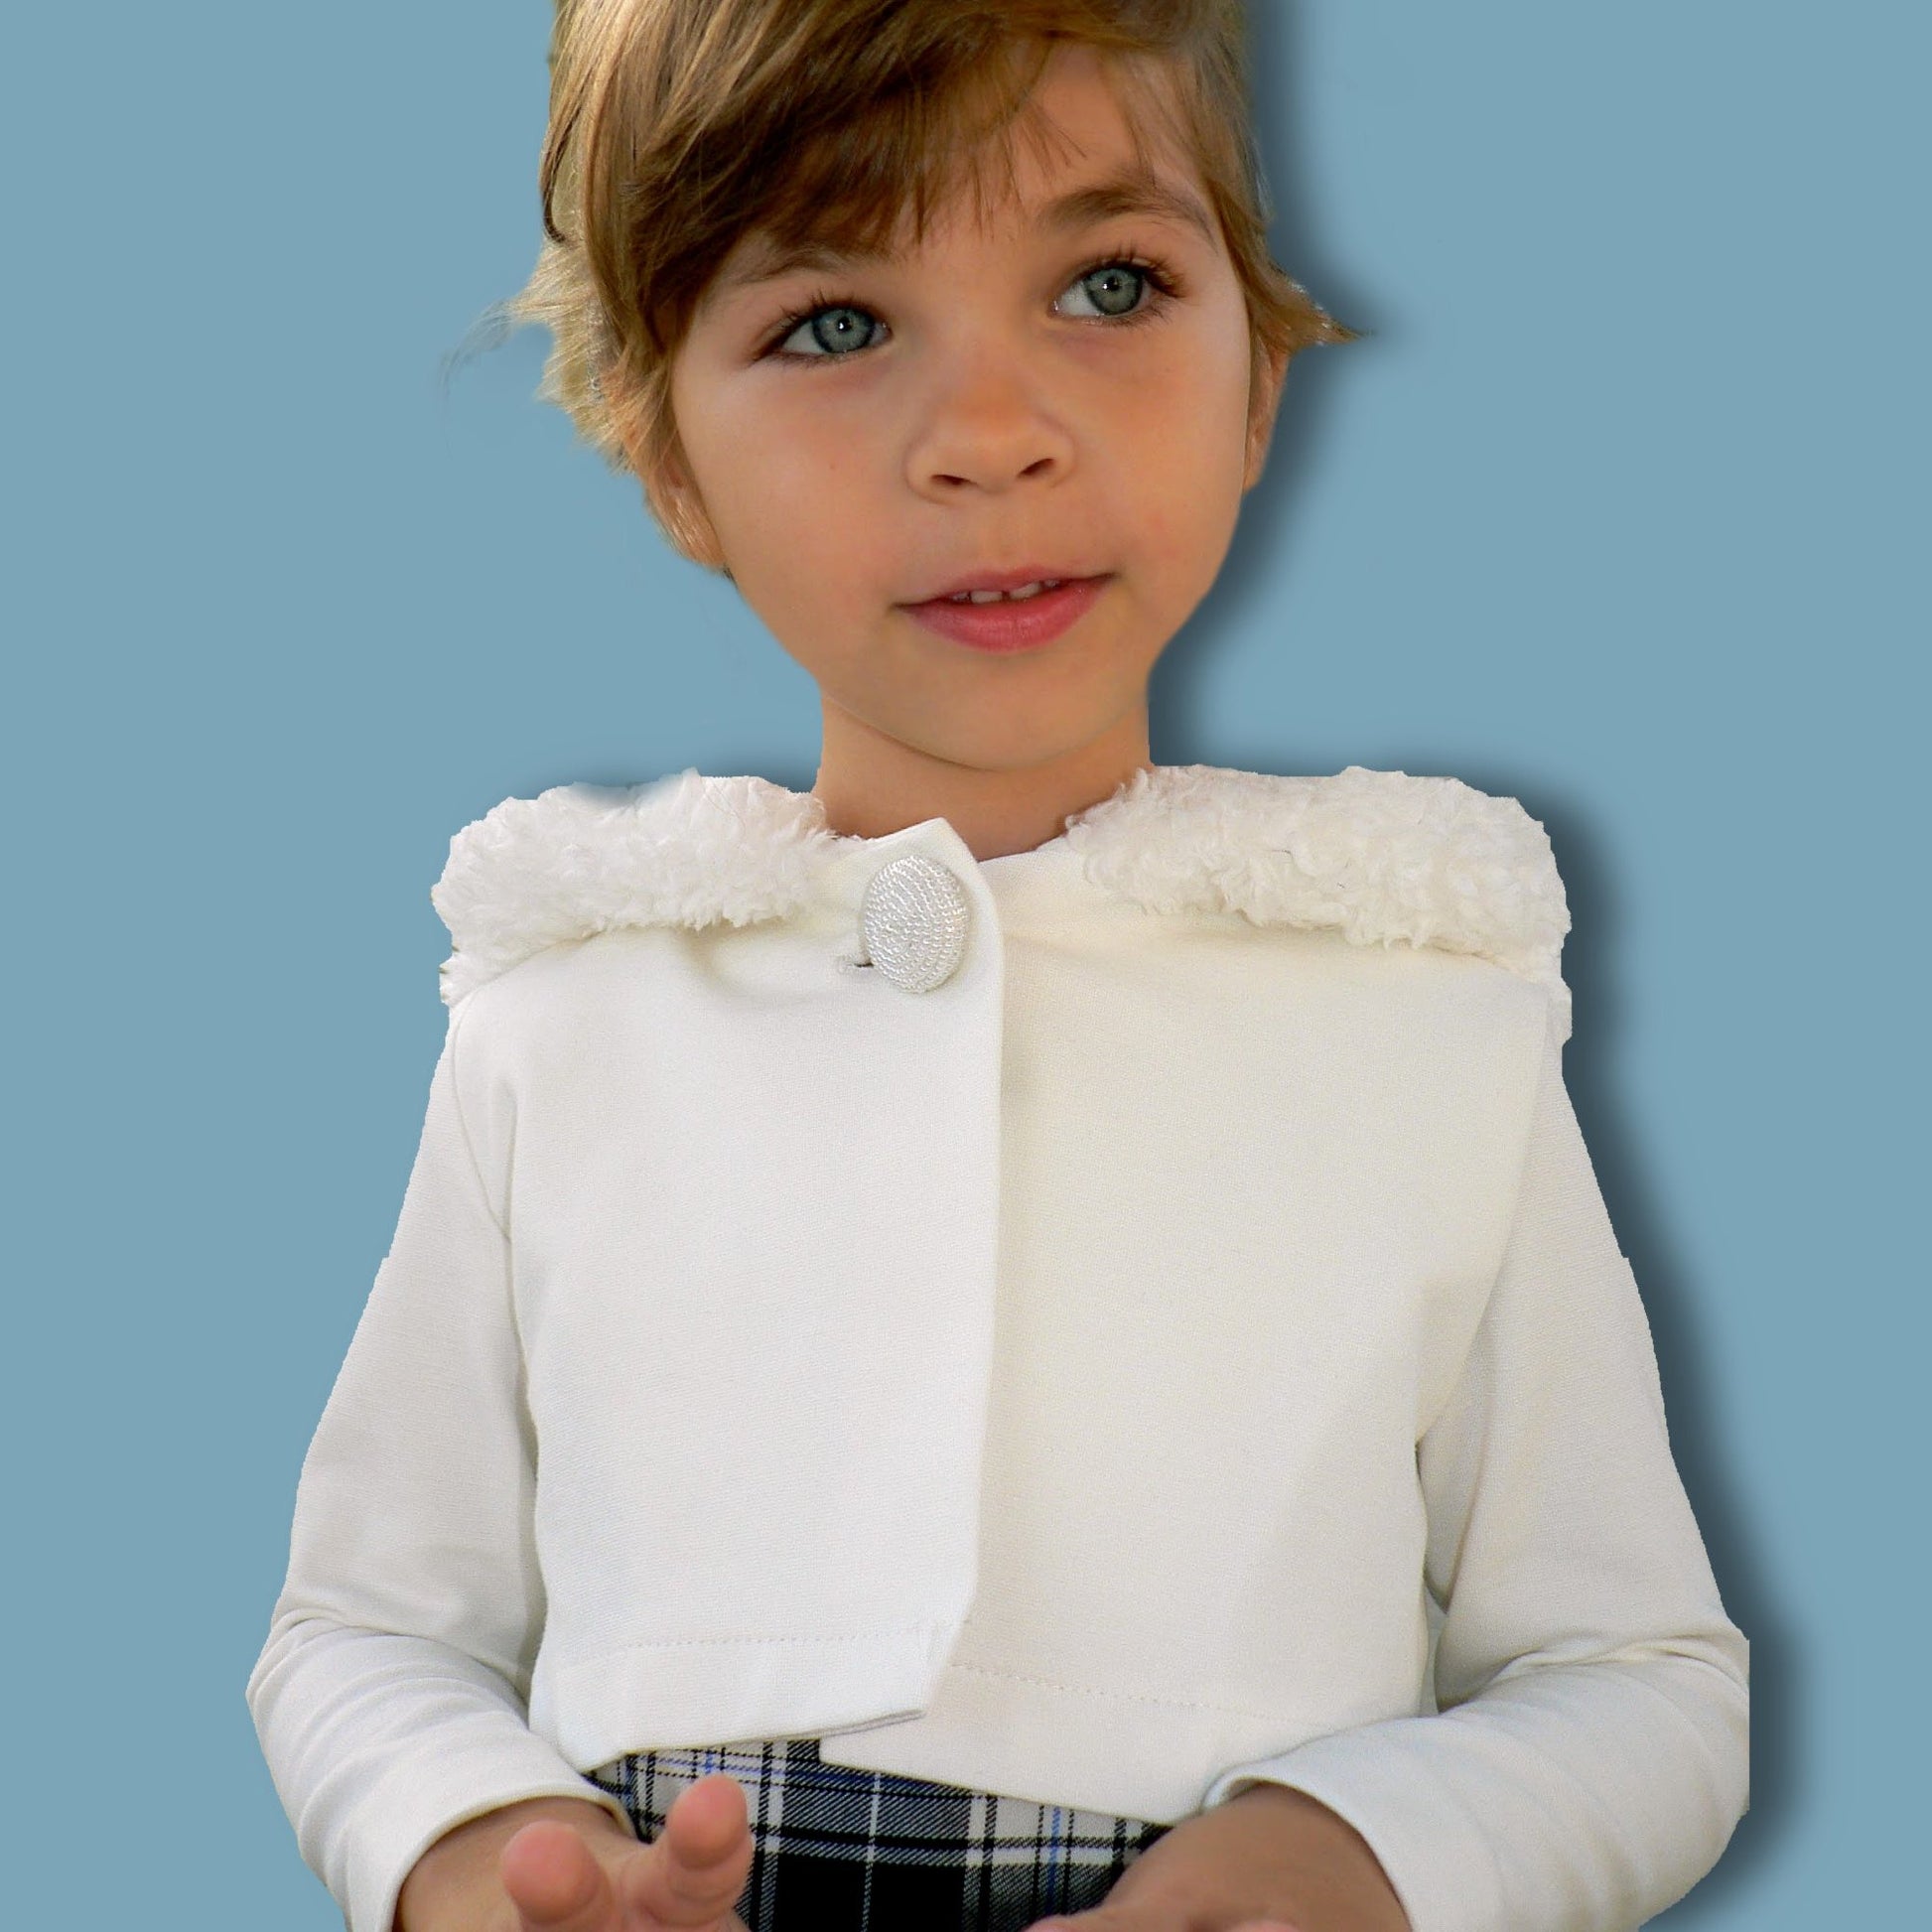
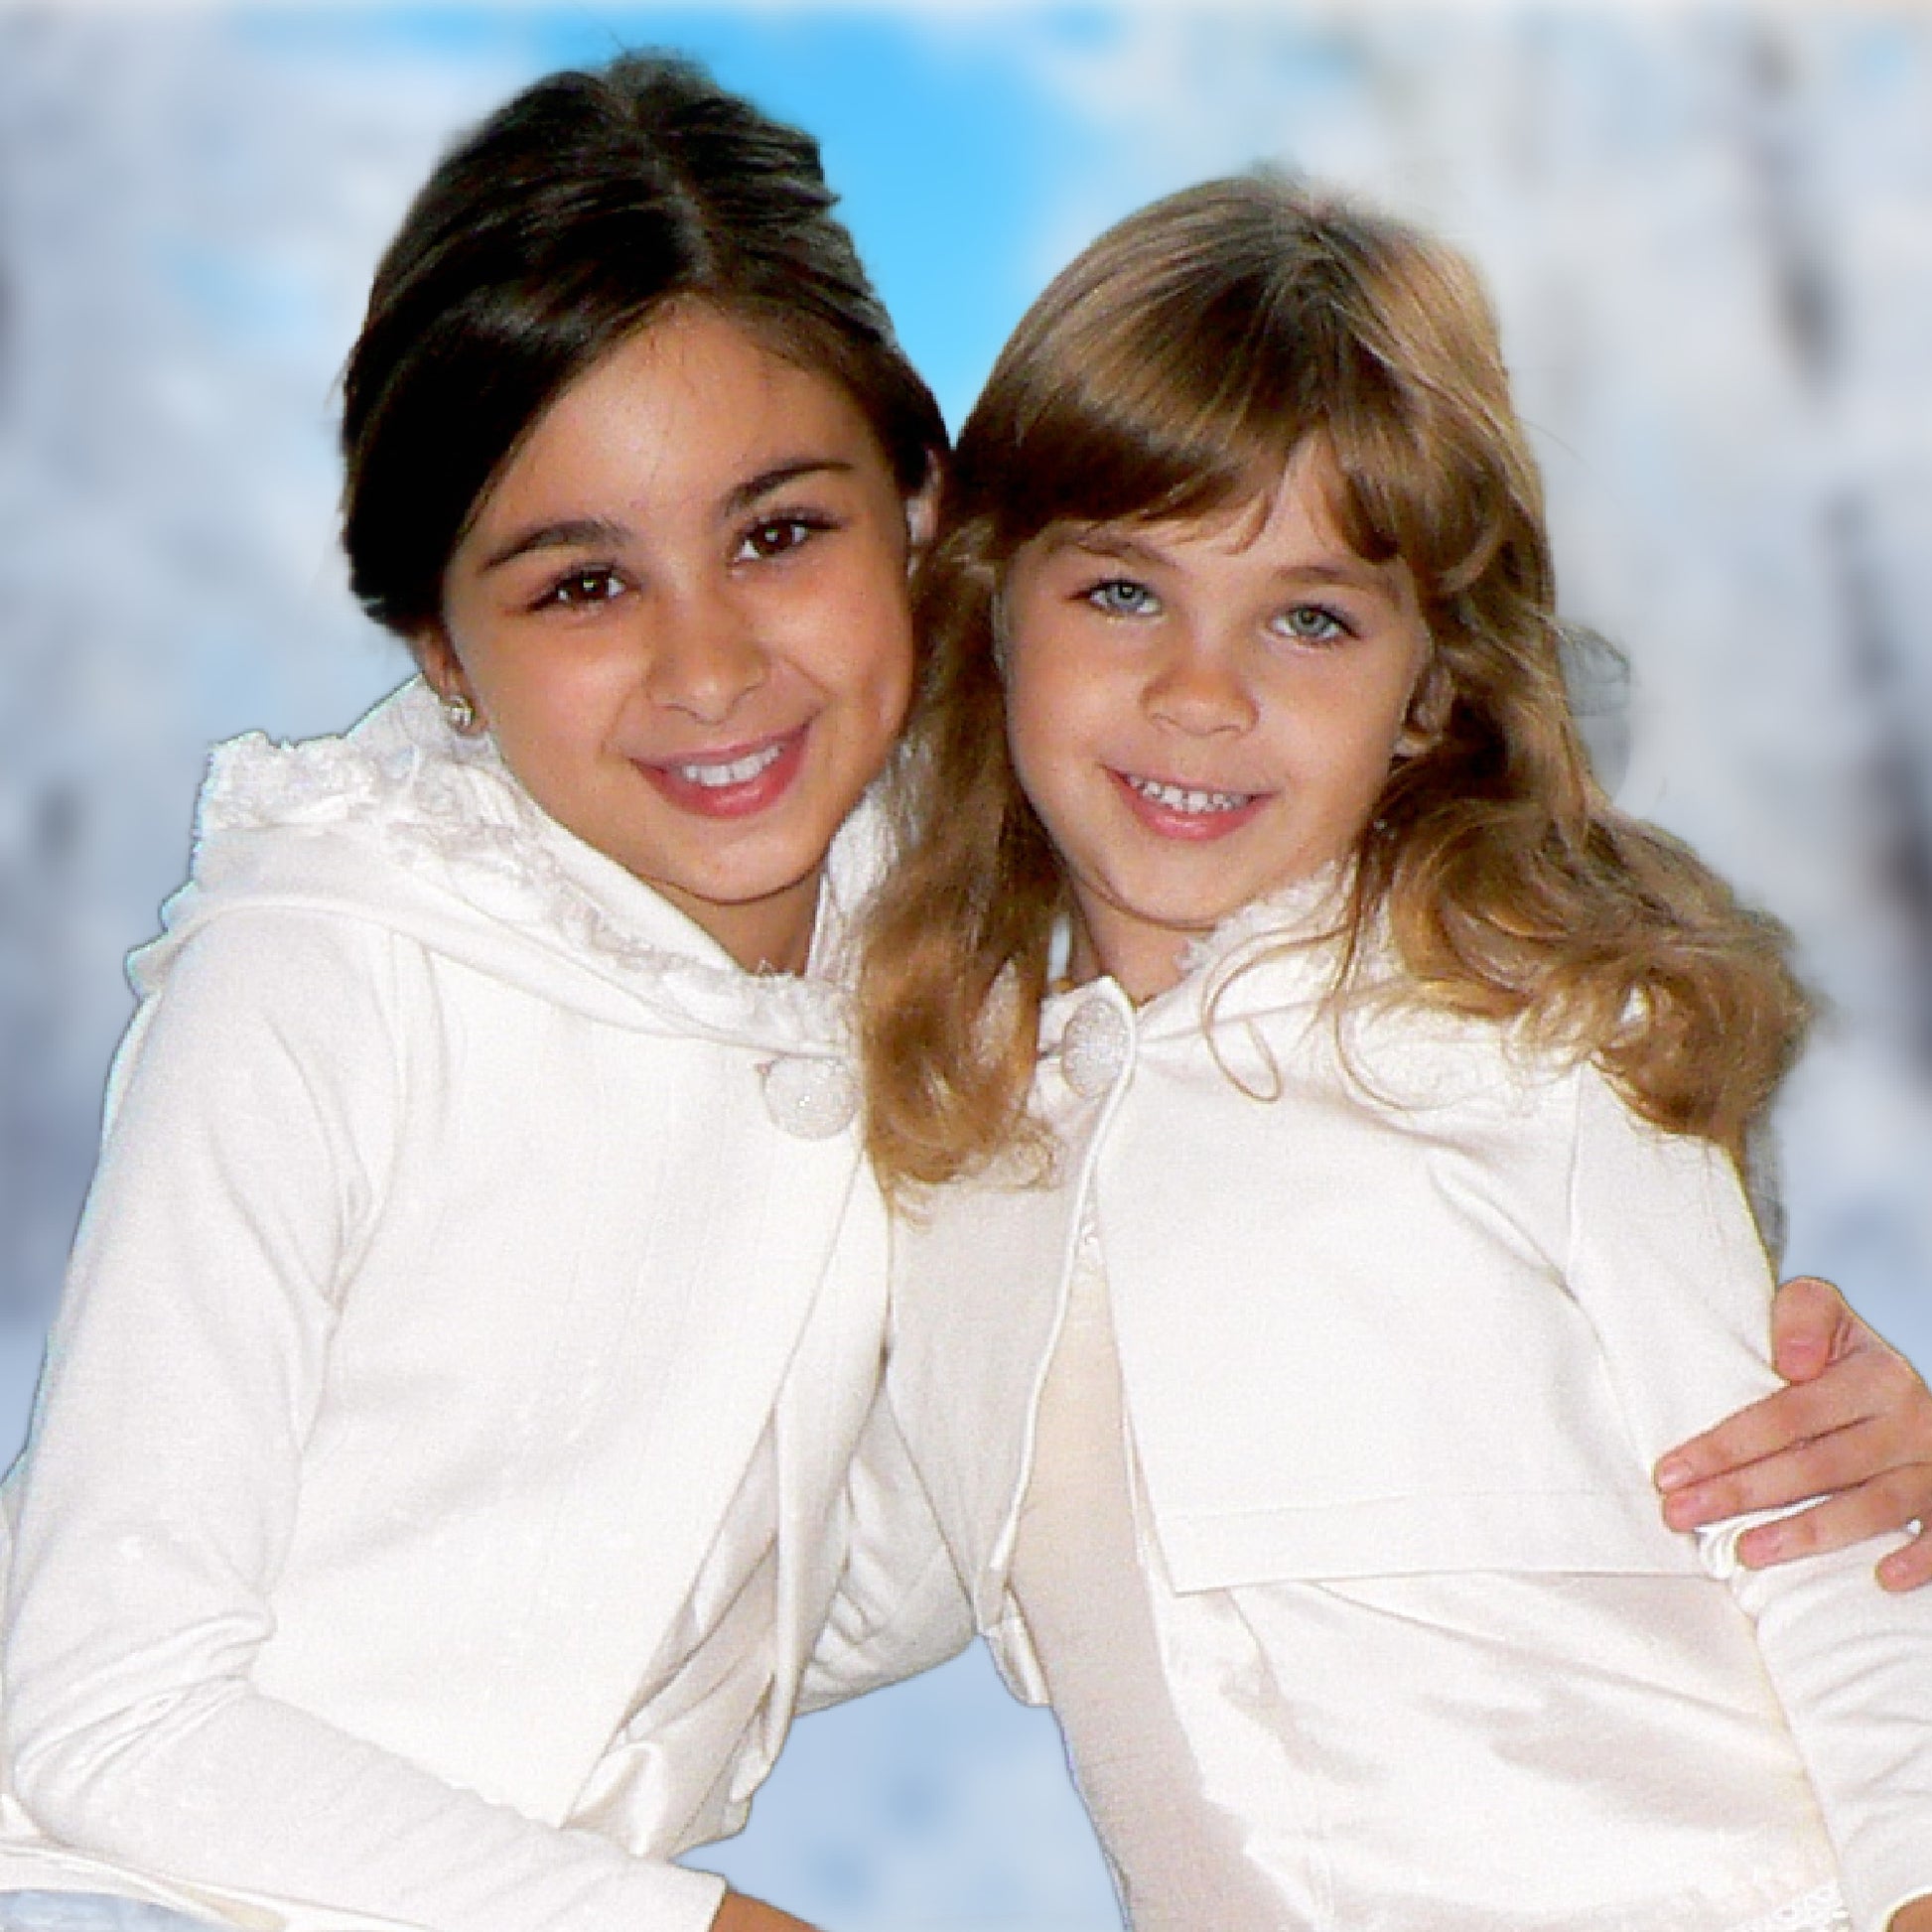
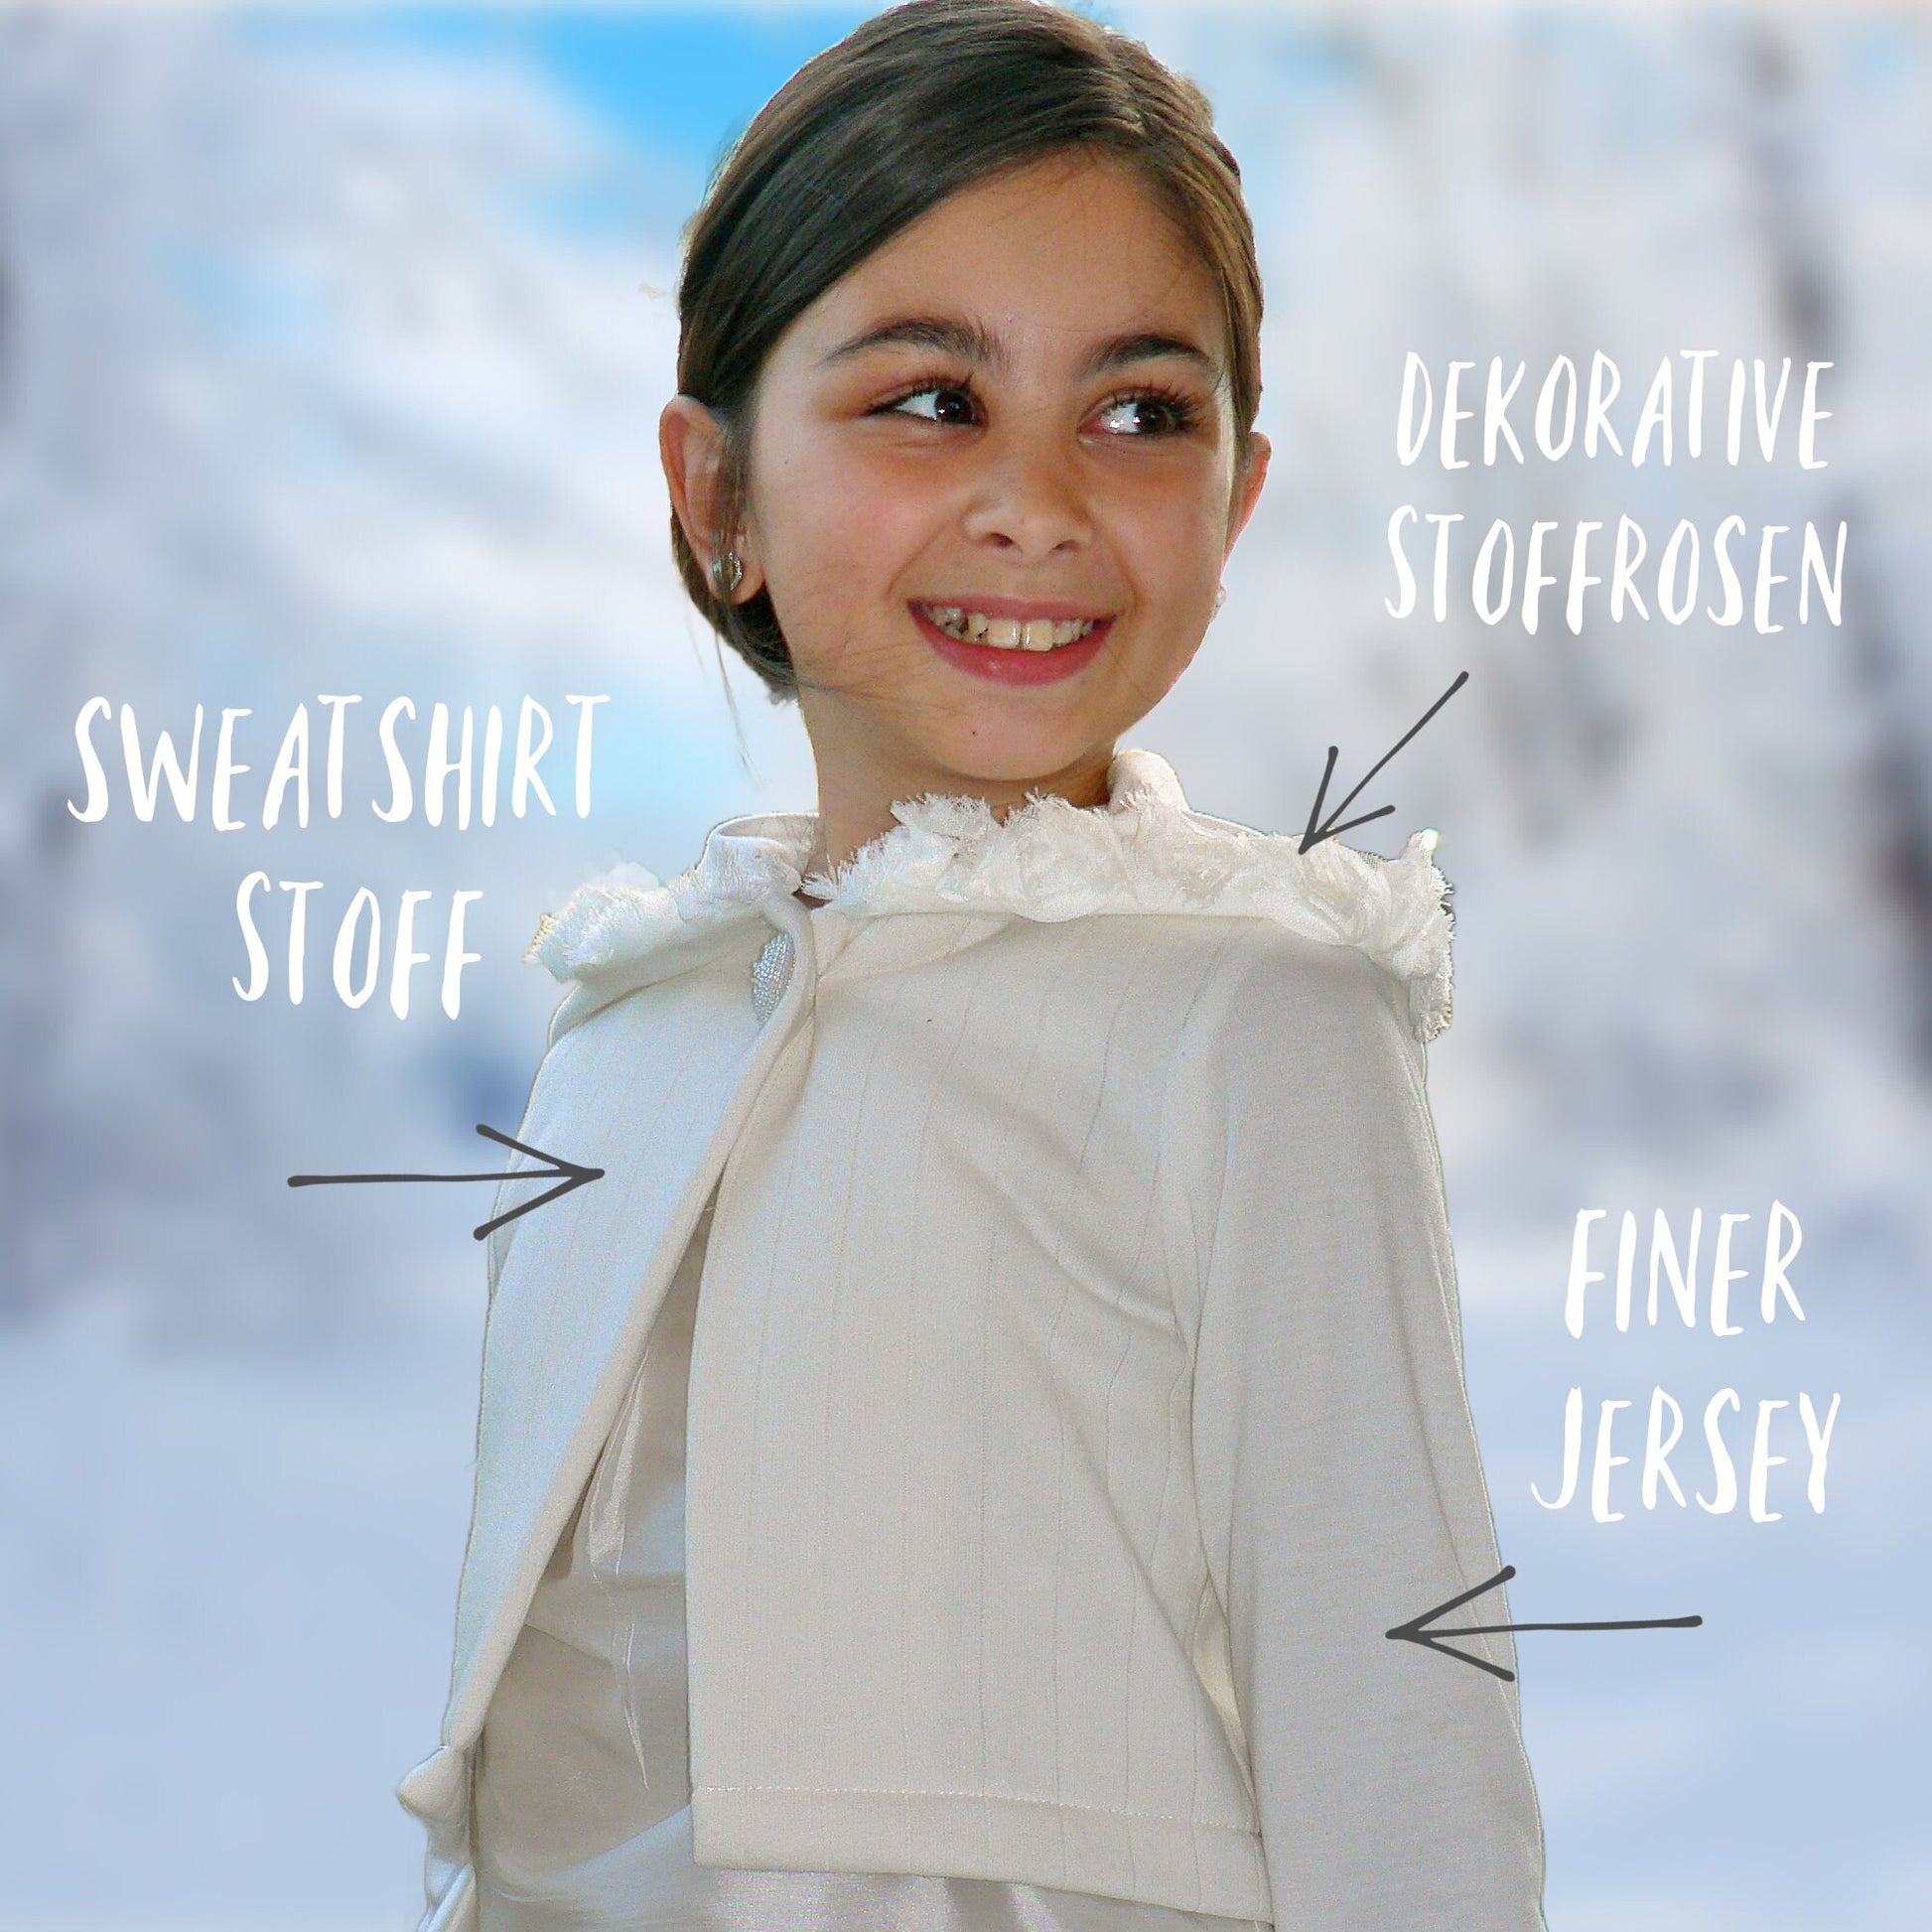
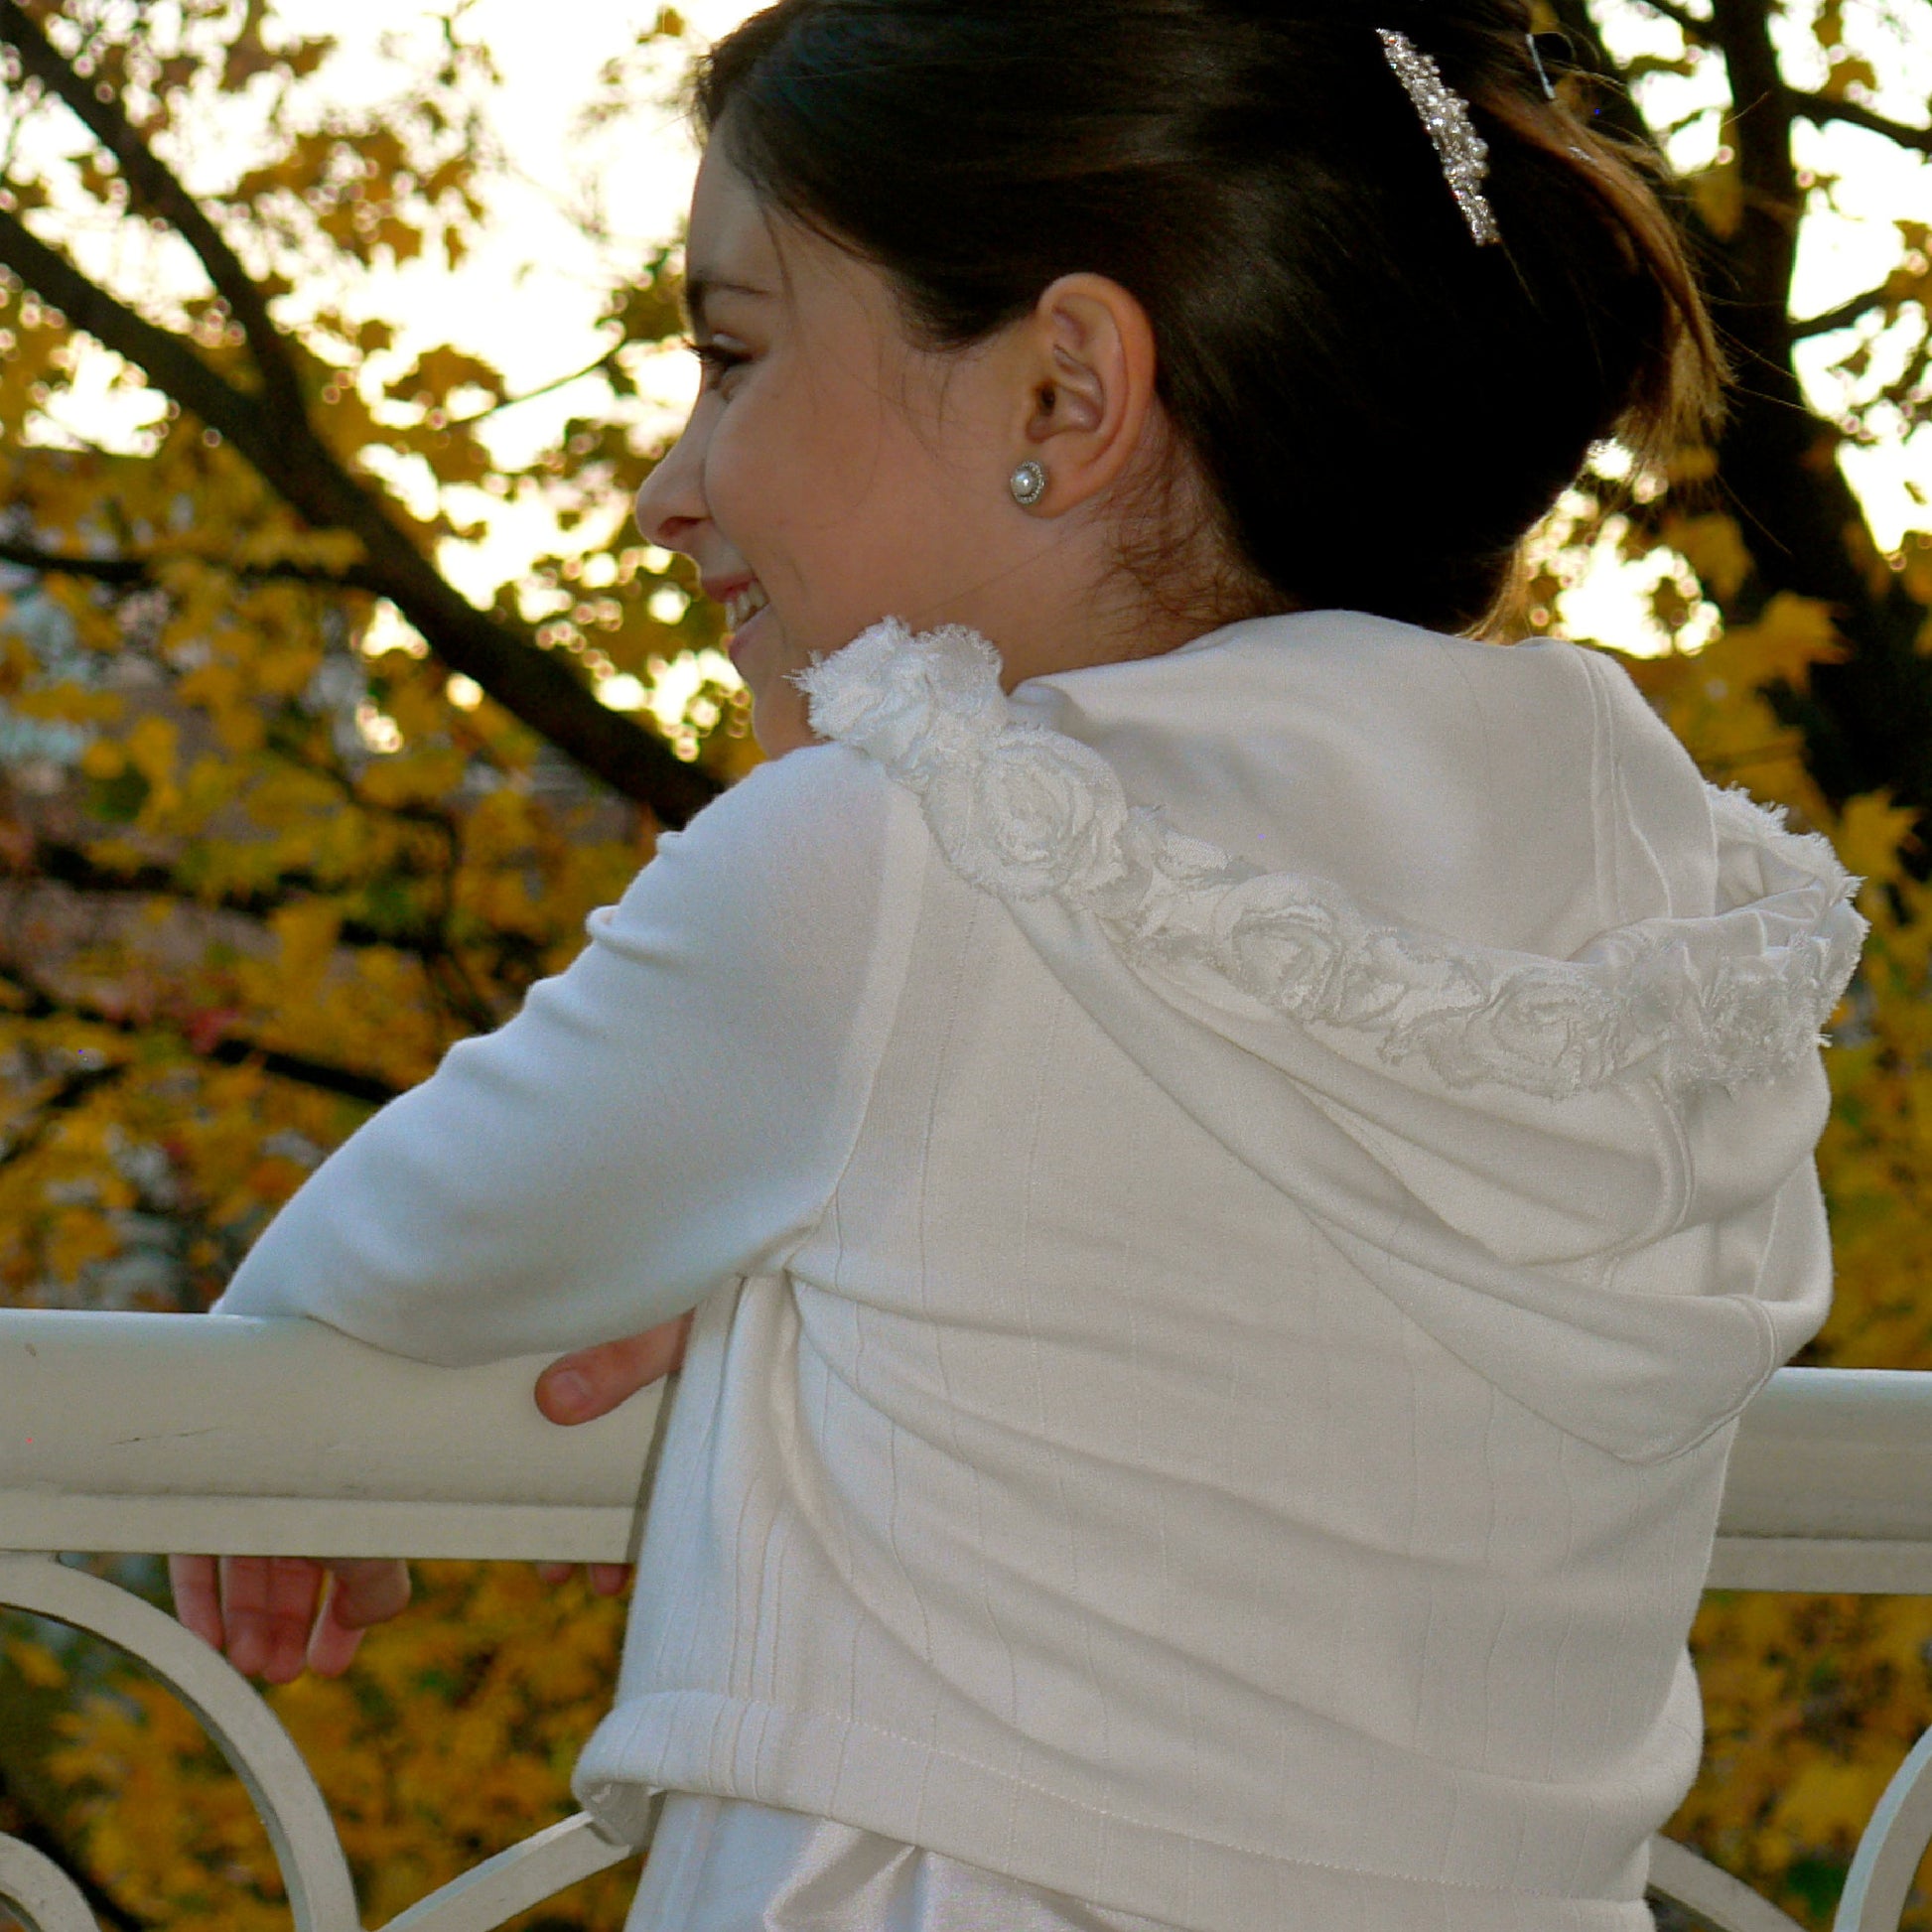
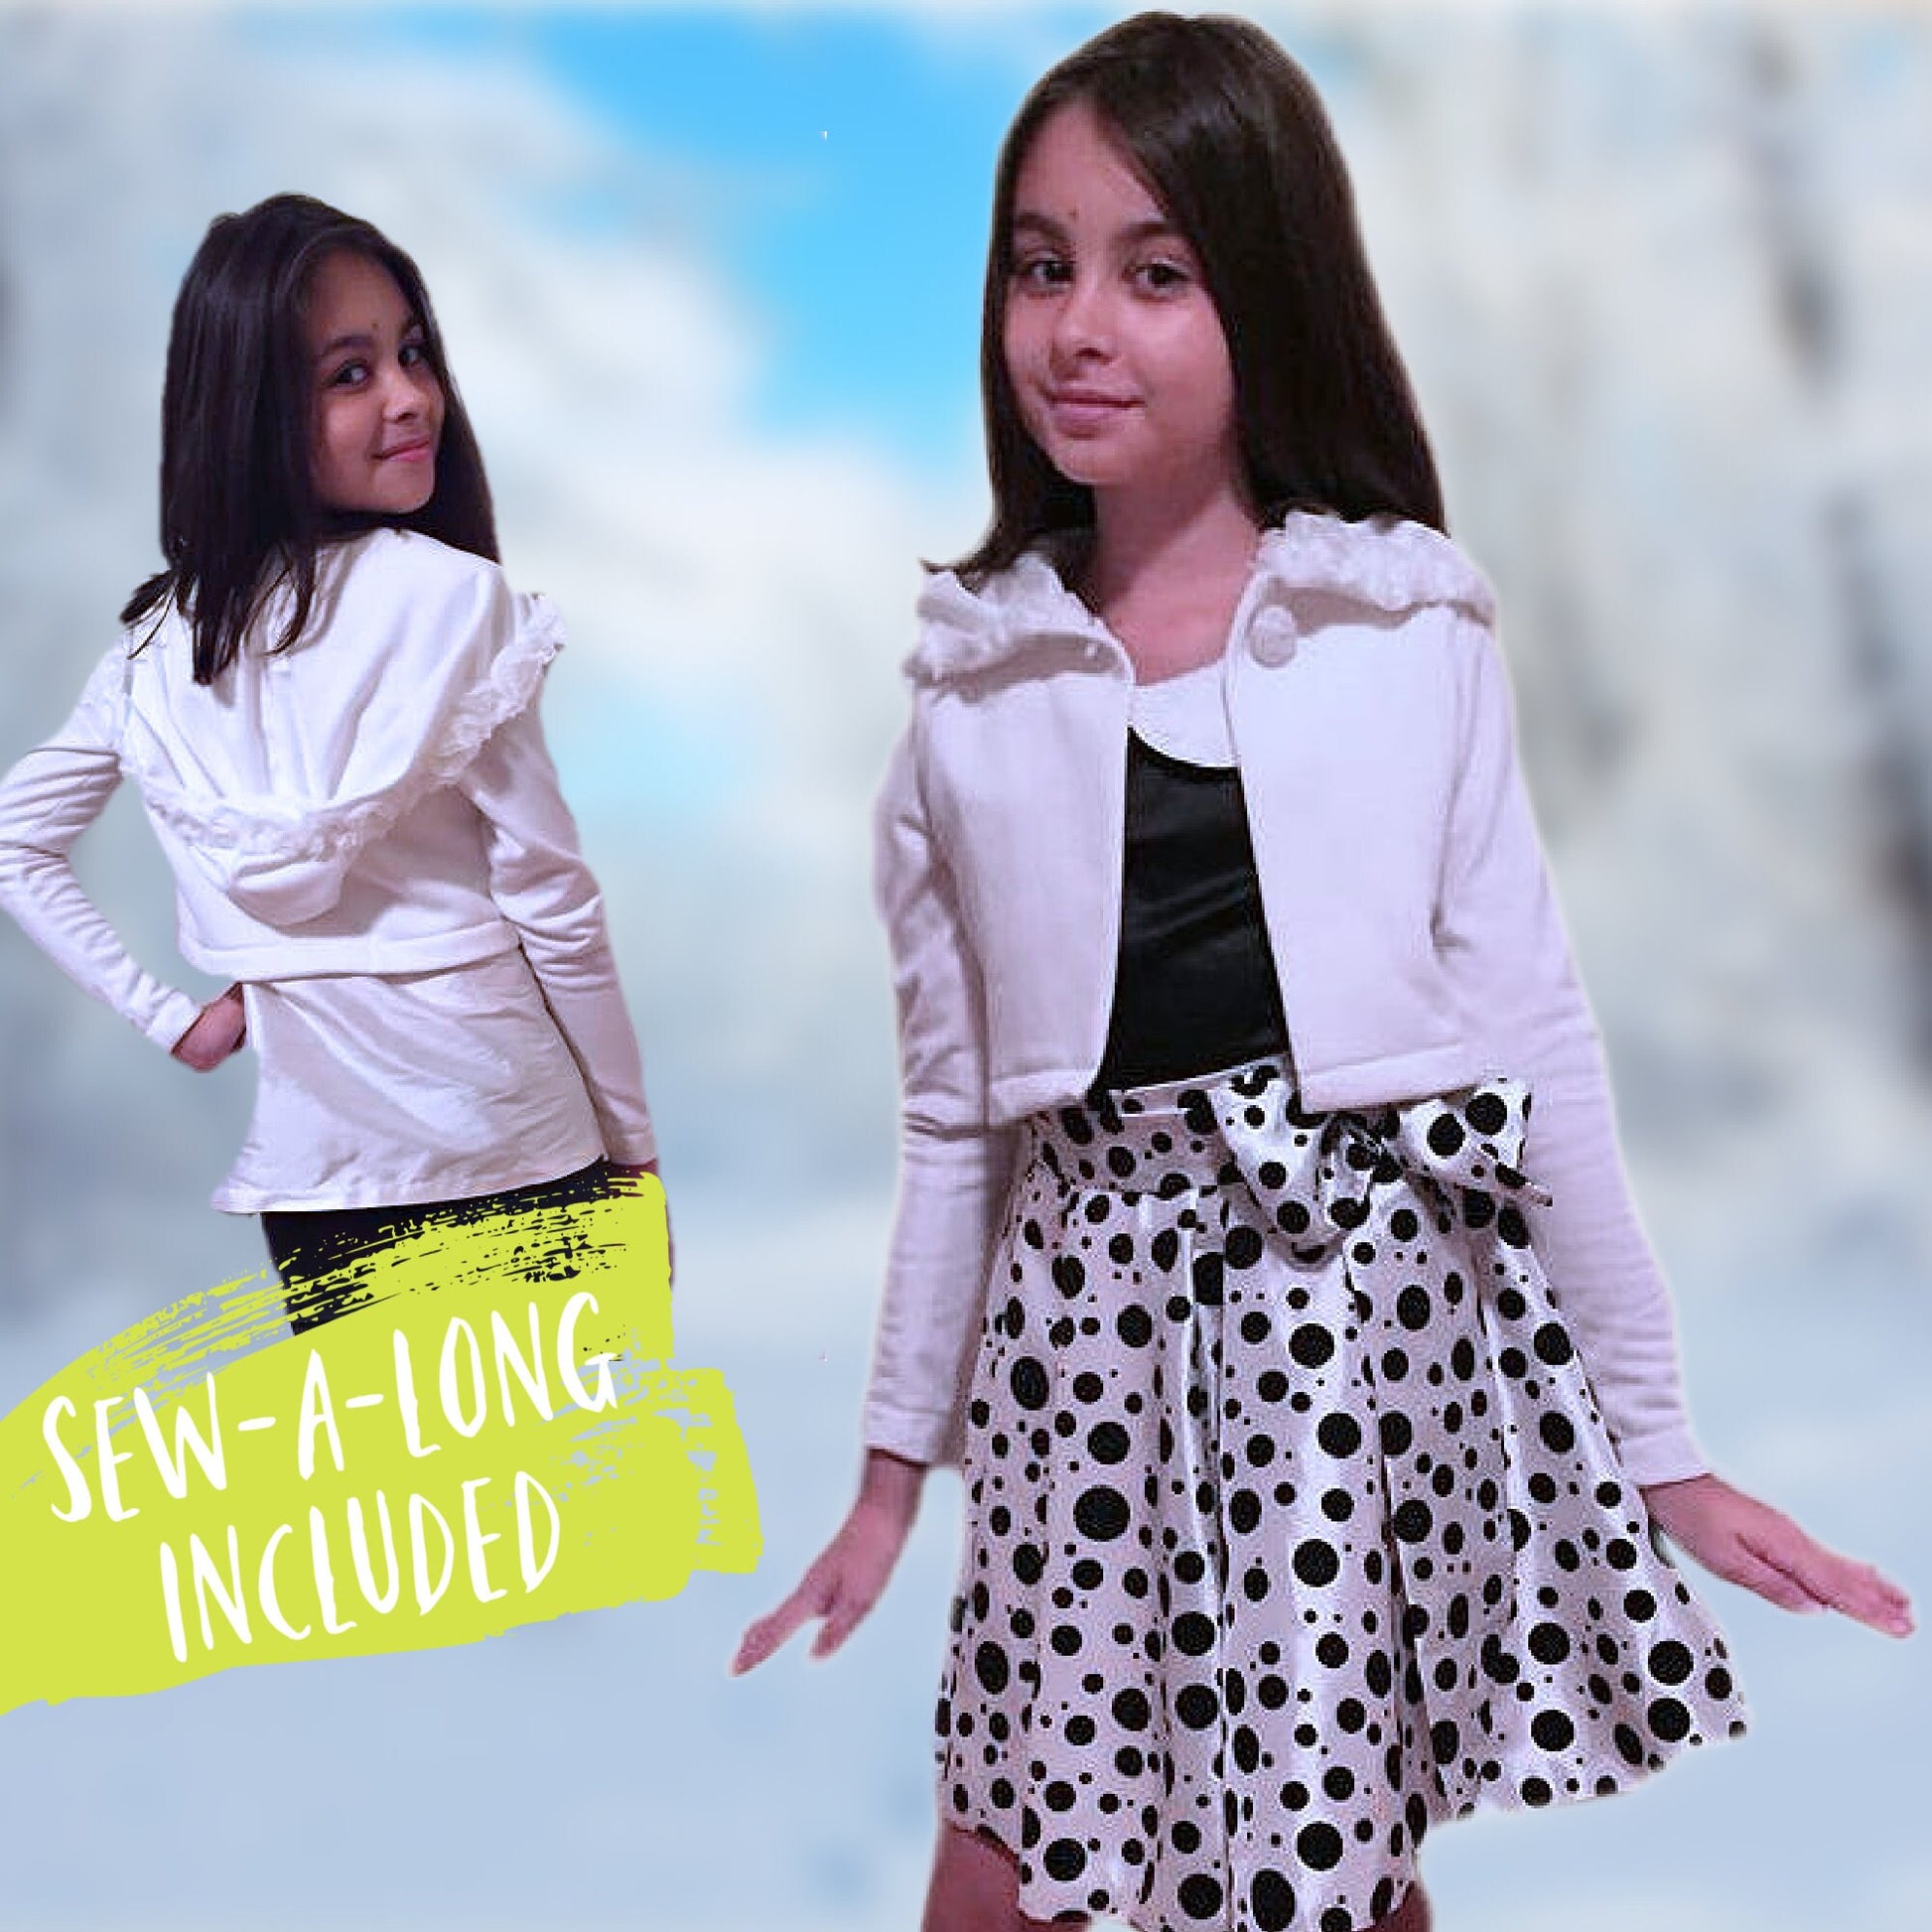
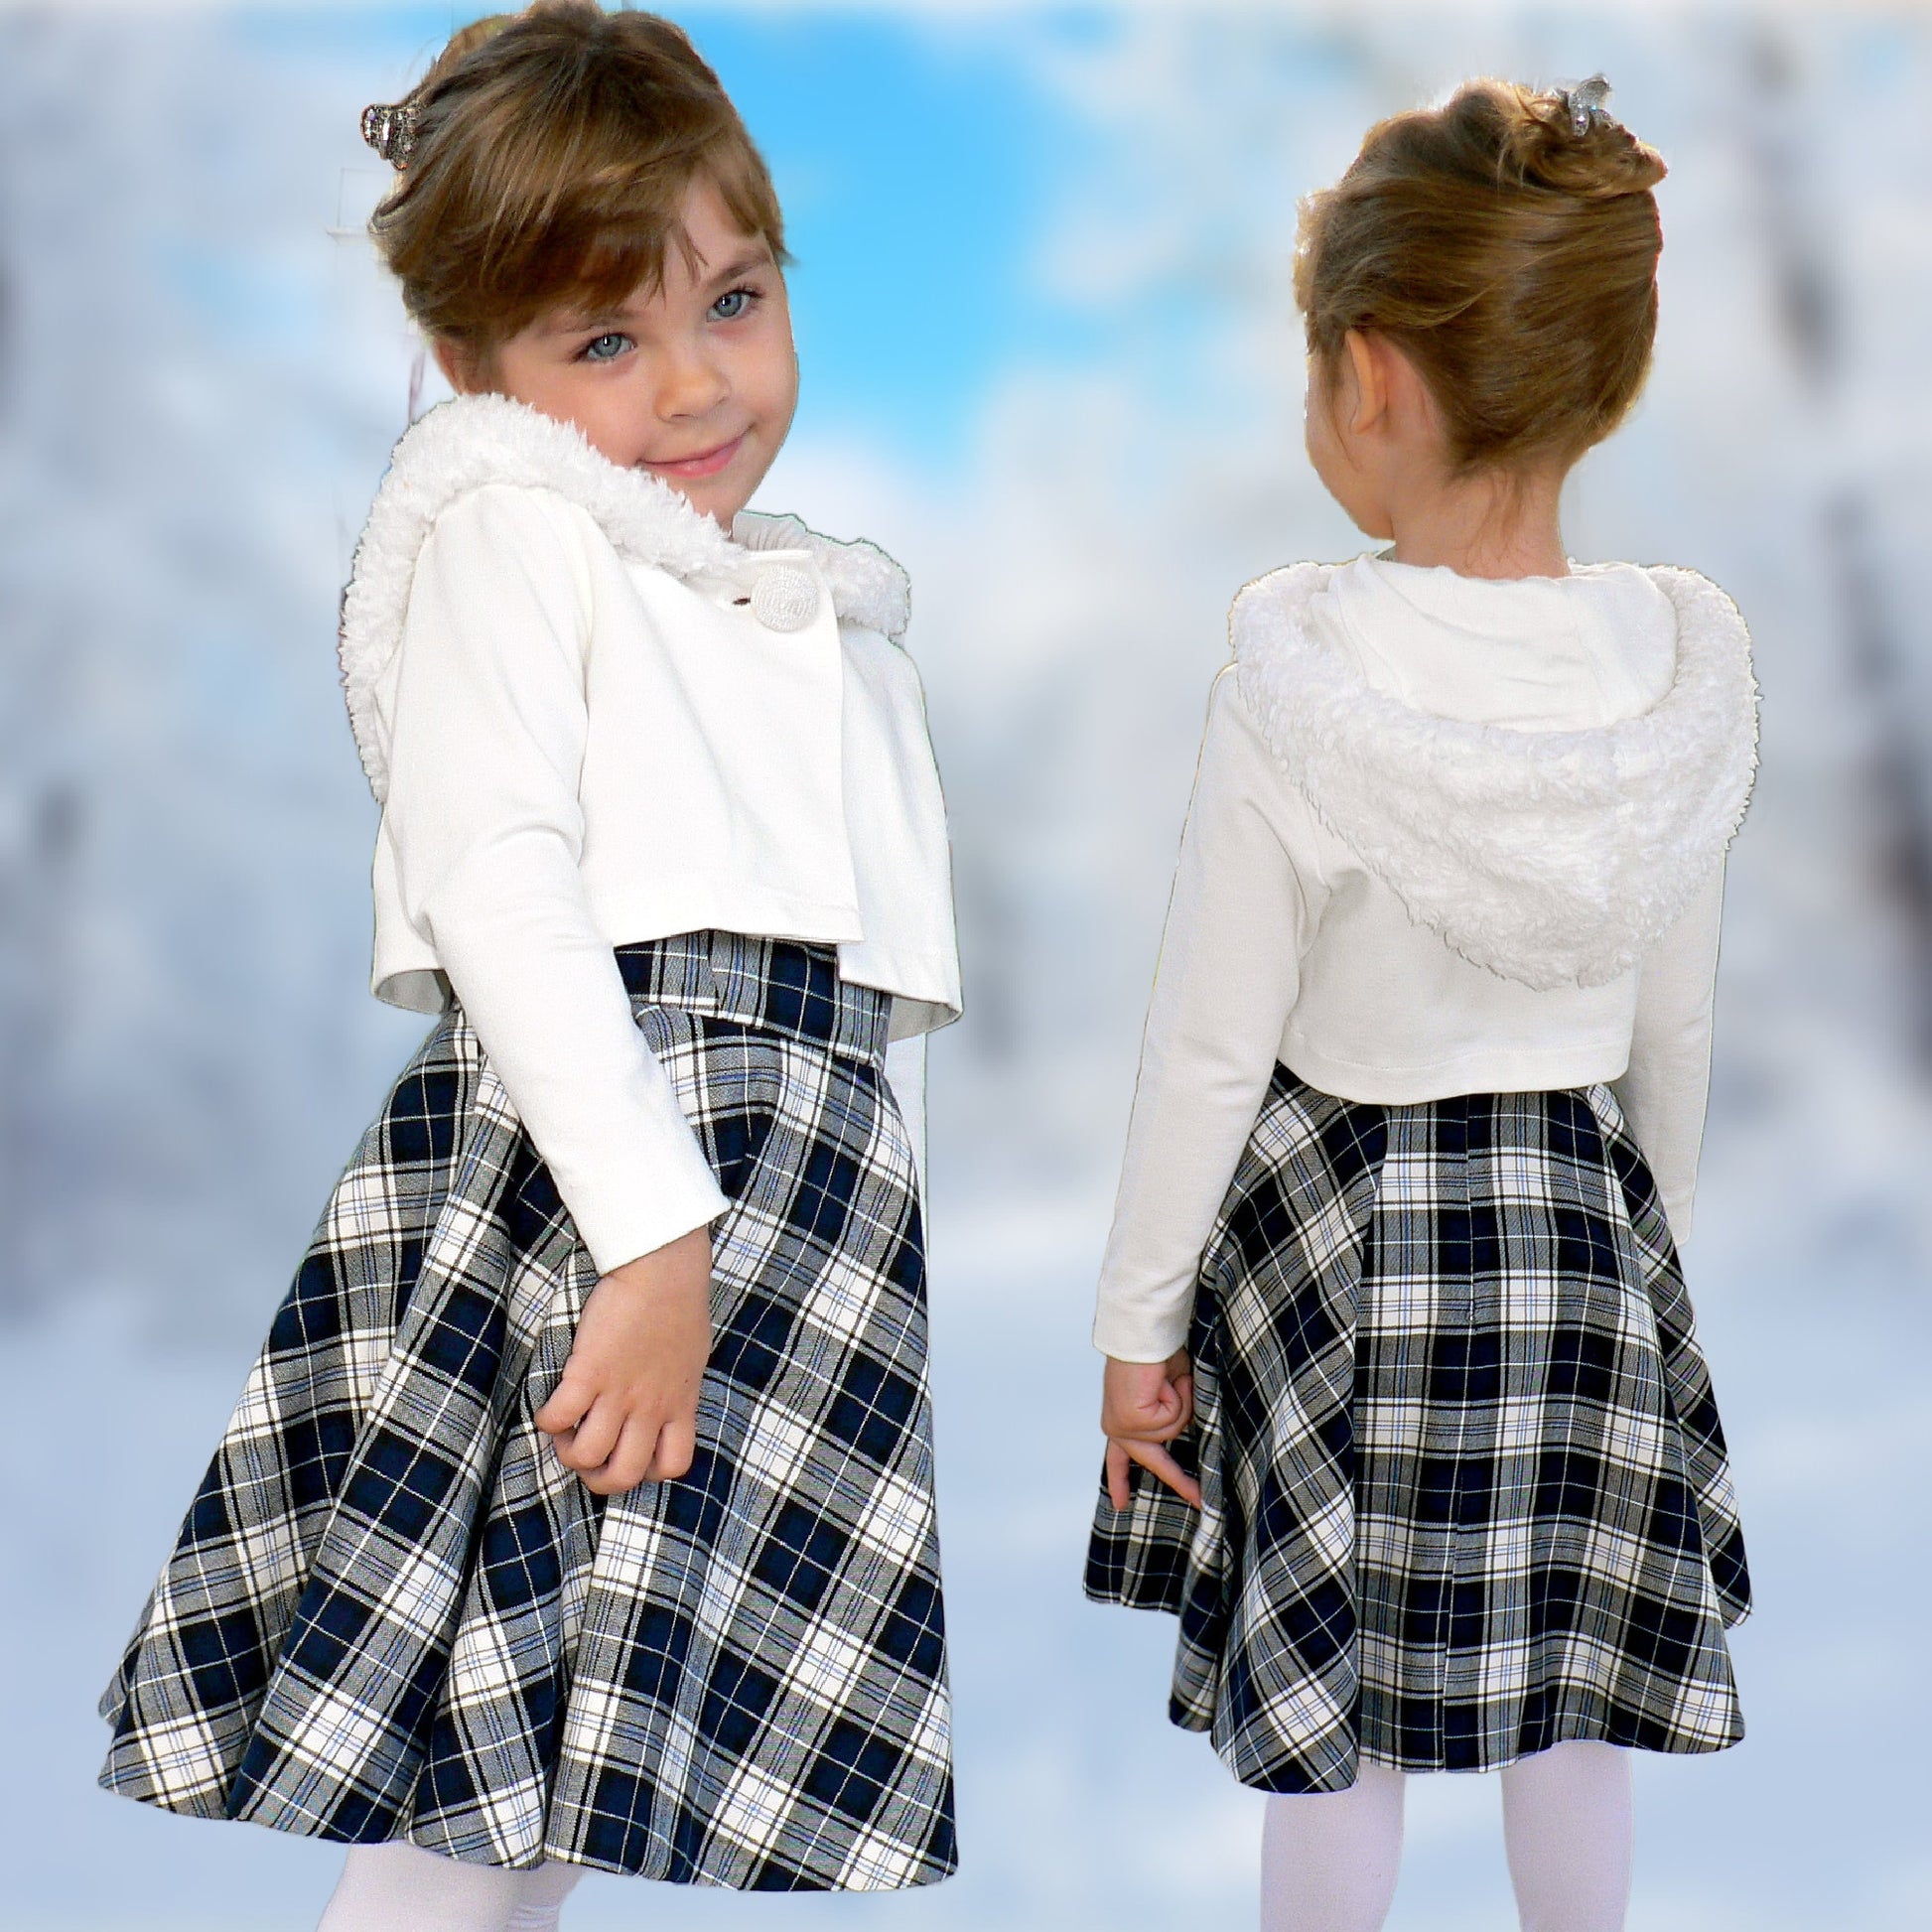
Joanna ist unsere goldige Bolero‑Sweatjacke für Mädchen und Kleinkinder. Genäht aus kuscheligem Sweatstoff und wahlweise mit Kapuze oder süßem Peter‑Pan-Kragen, verzaubert sie mit ihren asymmetrischen Linien im Vorderteil – perfekt für Feste, aber genauso hübsch für den Alltag.
Für extra Komfort sorgen die schmalen Ärmel in leichter Überlänge aus Jersey. Ein echter Lieblingsschnitt für kleine Wirbelwinde. Und natürlich wartet auch hier ein Video-Tutorial auf dich: Einfach ein Stückchen nach unten scrollen und den Nähkurs starten.
Was ist beim Schnittmuster dabei?
Was ist beim Schnittmuster dabei?
Design
Design
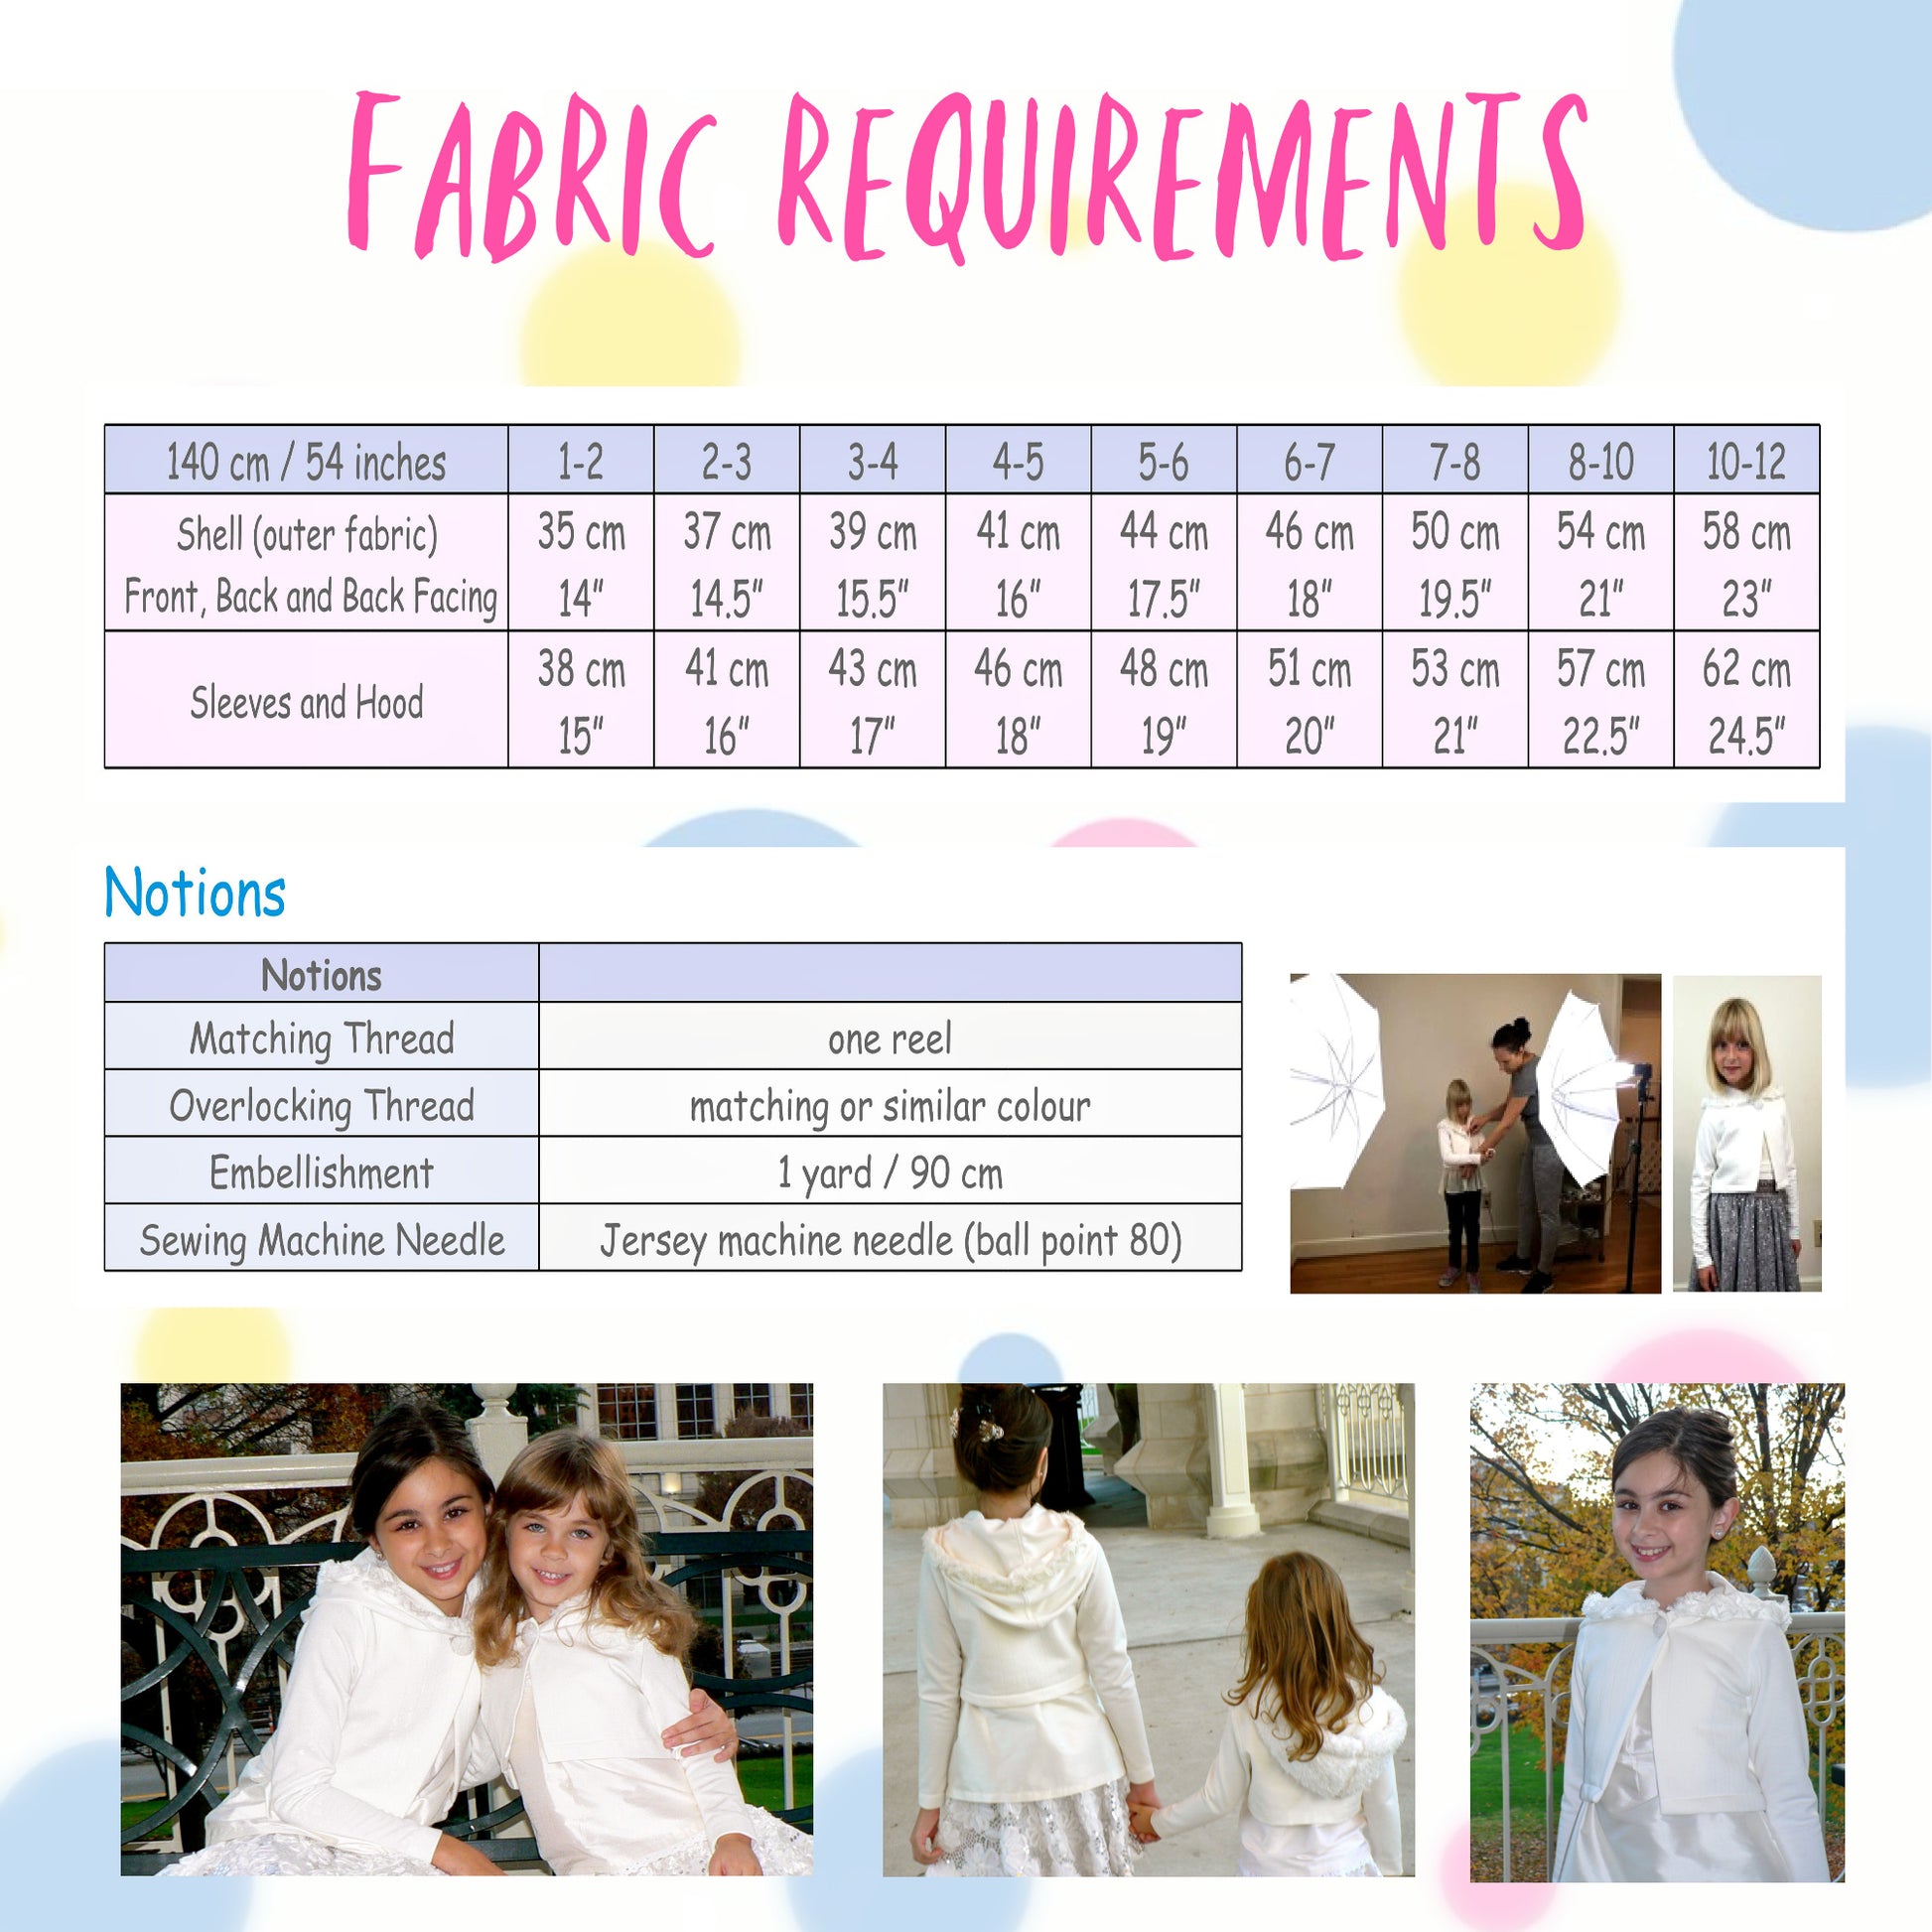
Stoffverbrauch
Stoffverbrauch
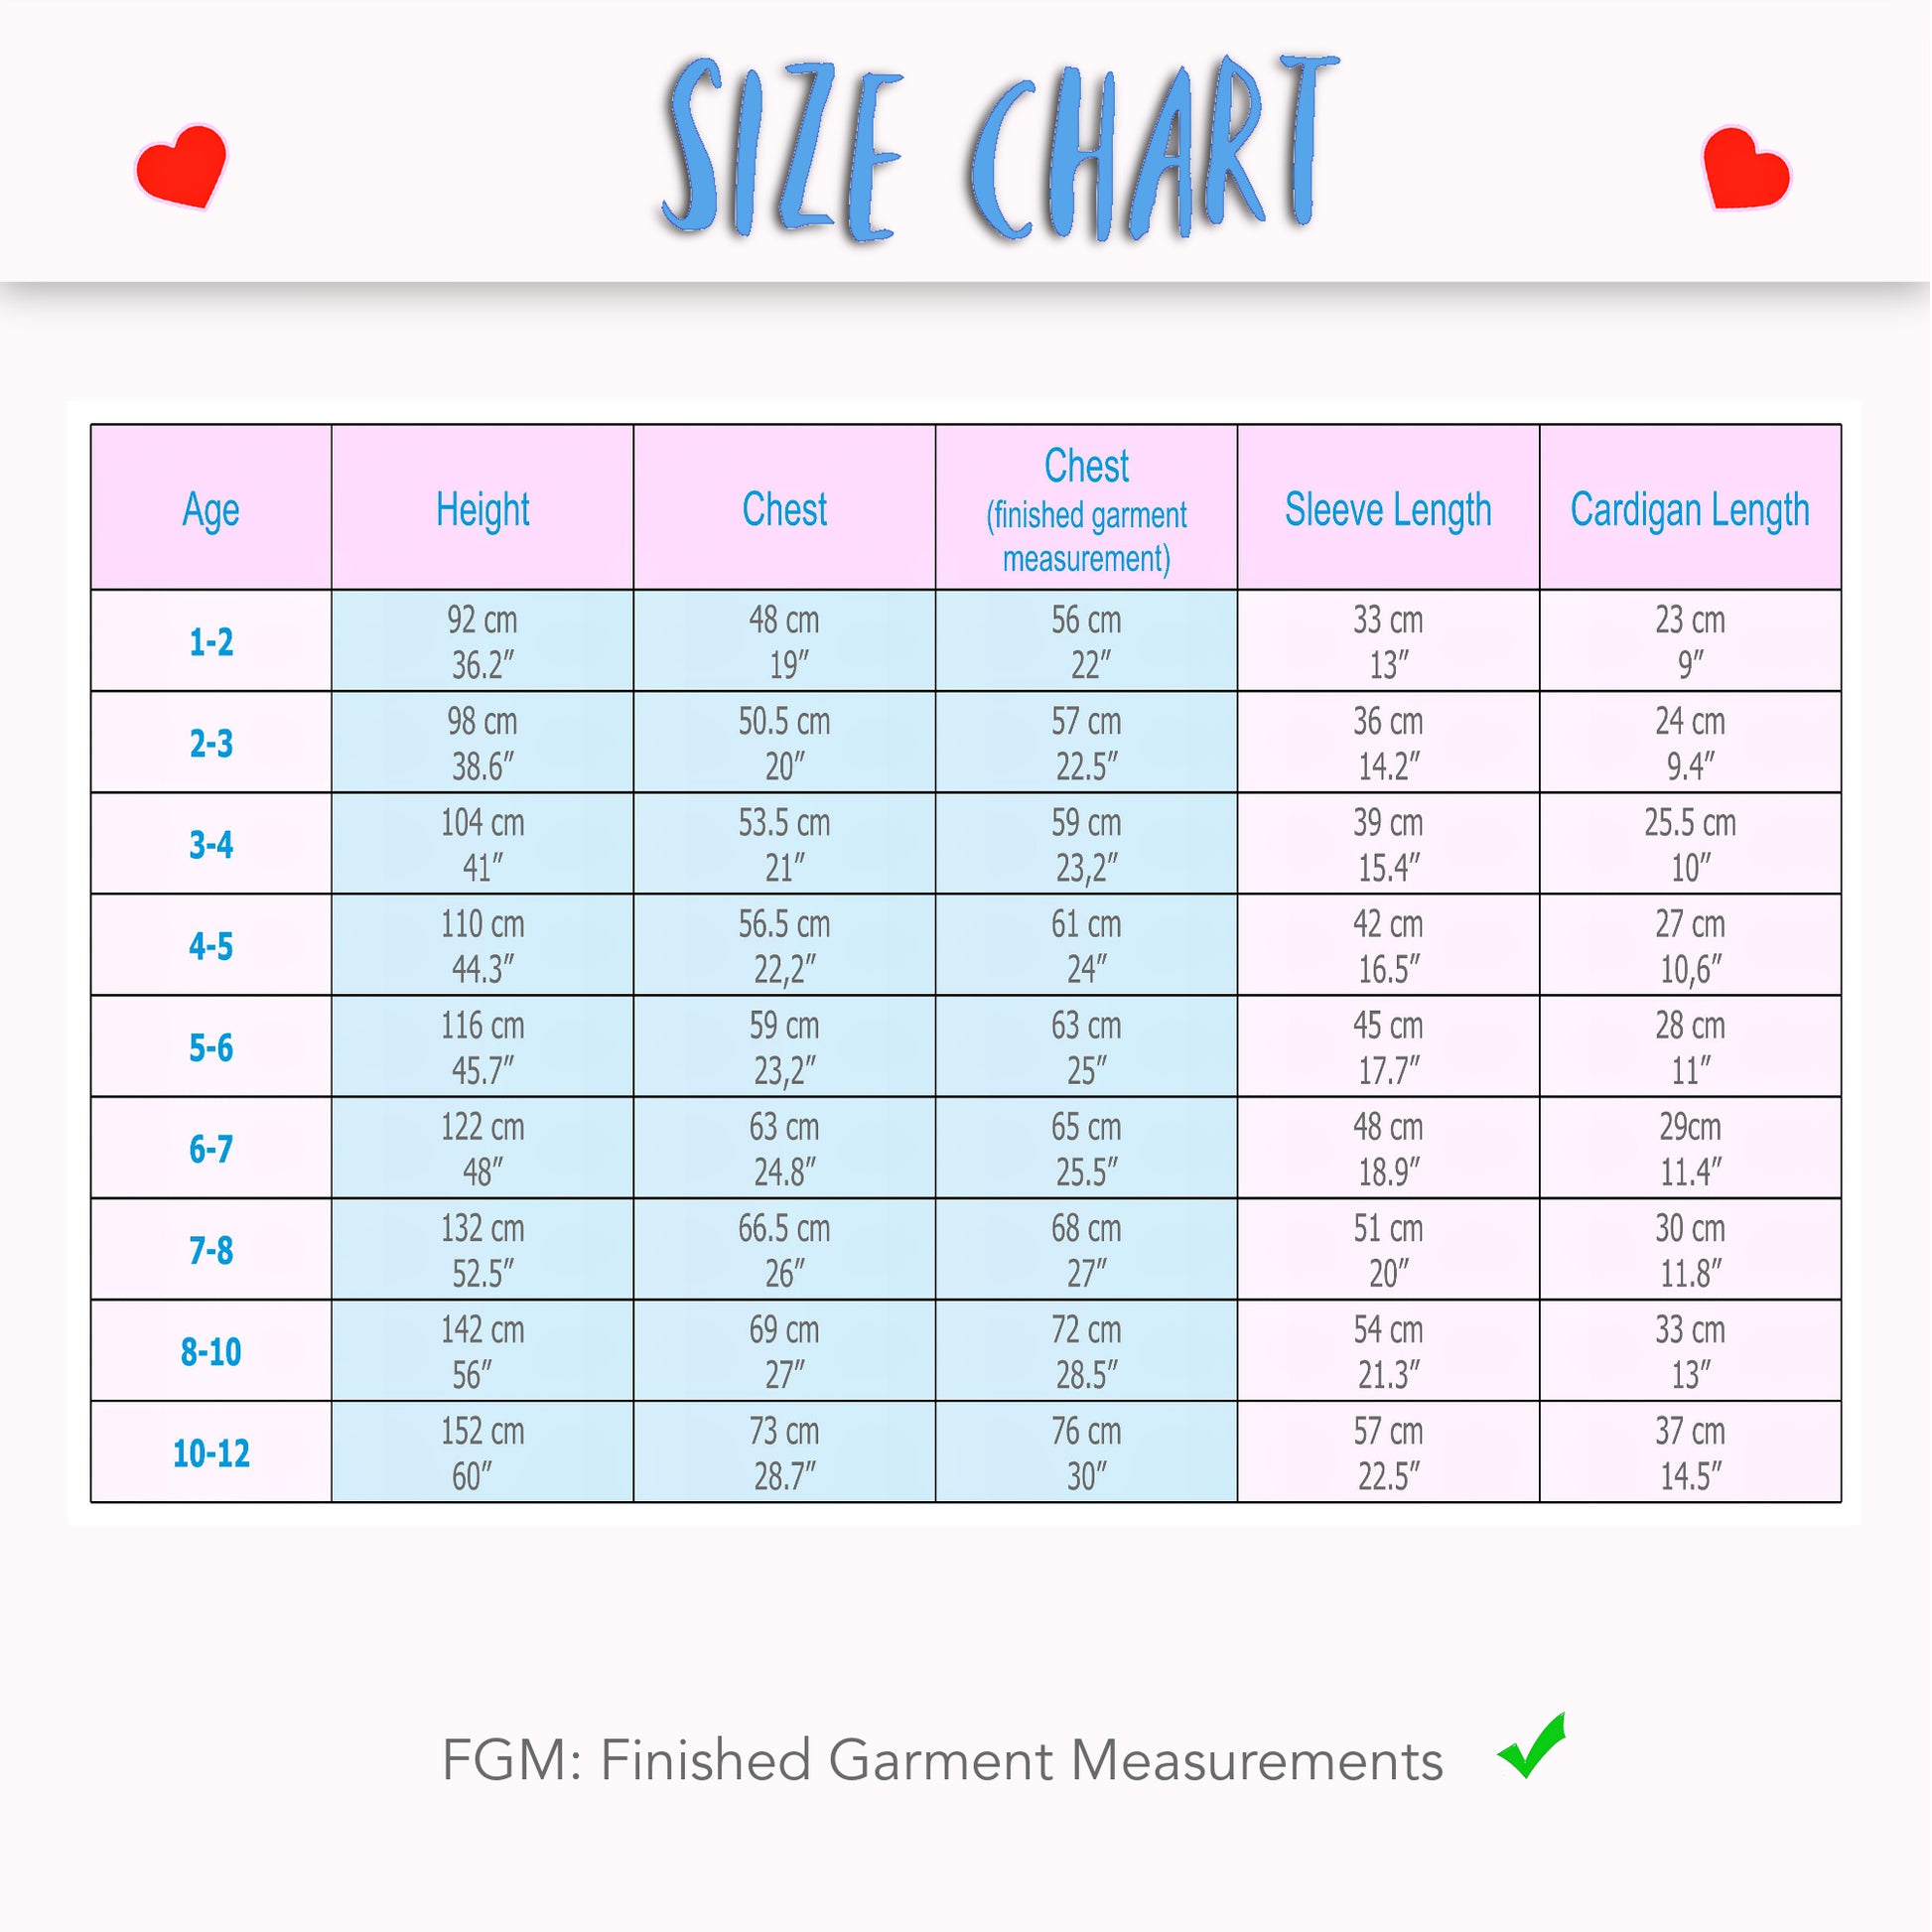
Verfügbare Größen
Verfügbare Größen
Bitte beachten
Bitte beachten


SCHRITT-FÜR-SCHRITT ANLEITUNG

DAS SCHNITTMUSTER

JOANNA ALL-IN-ONE-TUTORIAL