SCARLETT ROCKPUPPE
SCARLETT ROCKPUPPE
Verfügbarkeit für Abholungen konnte nicht geladen werden
Scarlett ist der süßeste Stufenrock in Vintage‑Länge – und ist komplett kostenlos. Das PDF Schnittmuster ist geeignet für 18 Zoll Puppen, hat einen Gummizug, integrierte Passe und einen eingereihten Rock. Dieser Rock passt zum perfekt zur Westernbluse. Zusammen sind sie der perfekte Rodeo outfit.
Scarlett enthält außerdem Marina’s fröhliches Video‑Tutorial, das dich Schritt für Schritt begleitet. Scroll einfach ein kleines Stück nach unten und schau direkt rein, sobald du bereit bist loszunähen.
Was ist beim Schnittmuster dabei?
- Sofortdownload
- DIN A4 & US Letter Größe
- Ausführliches eBook
- Video-Tutorials
Design
Design
- Elastischer Bund
- Integriertes Joch
- Geraffter Rock
- Zweilagiger Rock
- Mädchenversion im Shop erhältlich
Stoffverbrauch
Stoffverbrauch
- BESTE STOFFWAHL
Leichte Stoffe aus Baumwolle oder Leinen, bedruckt oder unifarben.
STOFFANFORDERUNGEN - Außenmaterial: 20 Zoll / 50 cm
- Elastische Länge: 9 Zoll / 23 cm (1,5 cm / 0,6 Zoll breit)
- Thread: Eine Rolle
Verfügbare Größen
Verfügbare Größen
PASST PERFEKT FÜR 18" PUPPEN
Professionell entworfen, passend für American Girl®-, Truly Me- und My Generation-Puppen
• Brustumfang: 11" (28 cm)
• Taille: 10,6" (27 cm)
• Schulter bis Taille: 4" (10 cm)
Bitte beachten
Bitte beachten
- Dies ist ein digitales Schnittmuster oder eine PDF-Datei, kein physisches Produkt. Die Zustellung erfolgt elektronisch über einen Download-Link an die beim Kauf verwendete E-Mail-Adresse. Zusätzlich kann das Schnittmuster von deinem Kundenkonto heruntergeladen werden.
- Um sicherzustellen, dass das Schnittmuster in seiner tatsächlichen Größe gedruckt wird, wird die Verwendung von Adobe Acrobat Reader empfohlen.
- Kleine Betriebe: Ich freue mich wenn meine Schnittmuster dir helfen, tolle Bekleidung für deine Kunden zu nähen. Industrielle Produktion ist untersagt.
Kunden werden ermutigt, Frocks & Frolics zu verlinken, wenn sie Projekte, die mit meinen Schnittmustern erstellt wurden, in sozialen Medien teilen.
@frocksandfrolics
#frocksandfrolics
Teilen

SCHRITT-FÜR-SCHRITT ANLEITUNG
VIDEO TEXT
Transcript for the video: Scarlett Skirt Doll Step-by-Step Tutorial
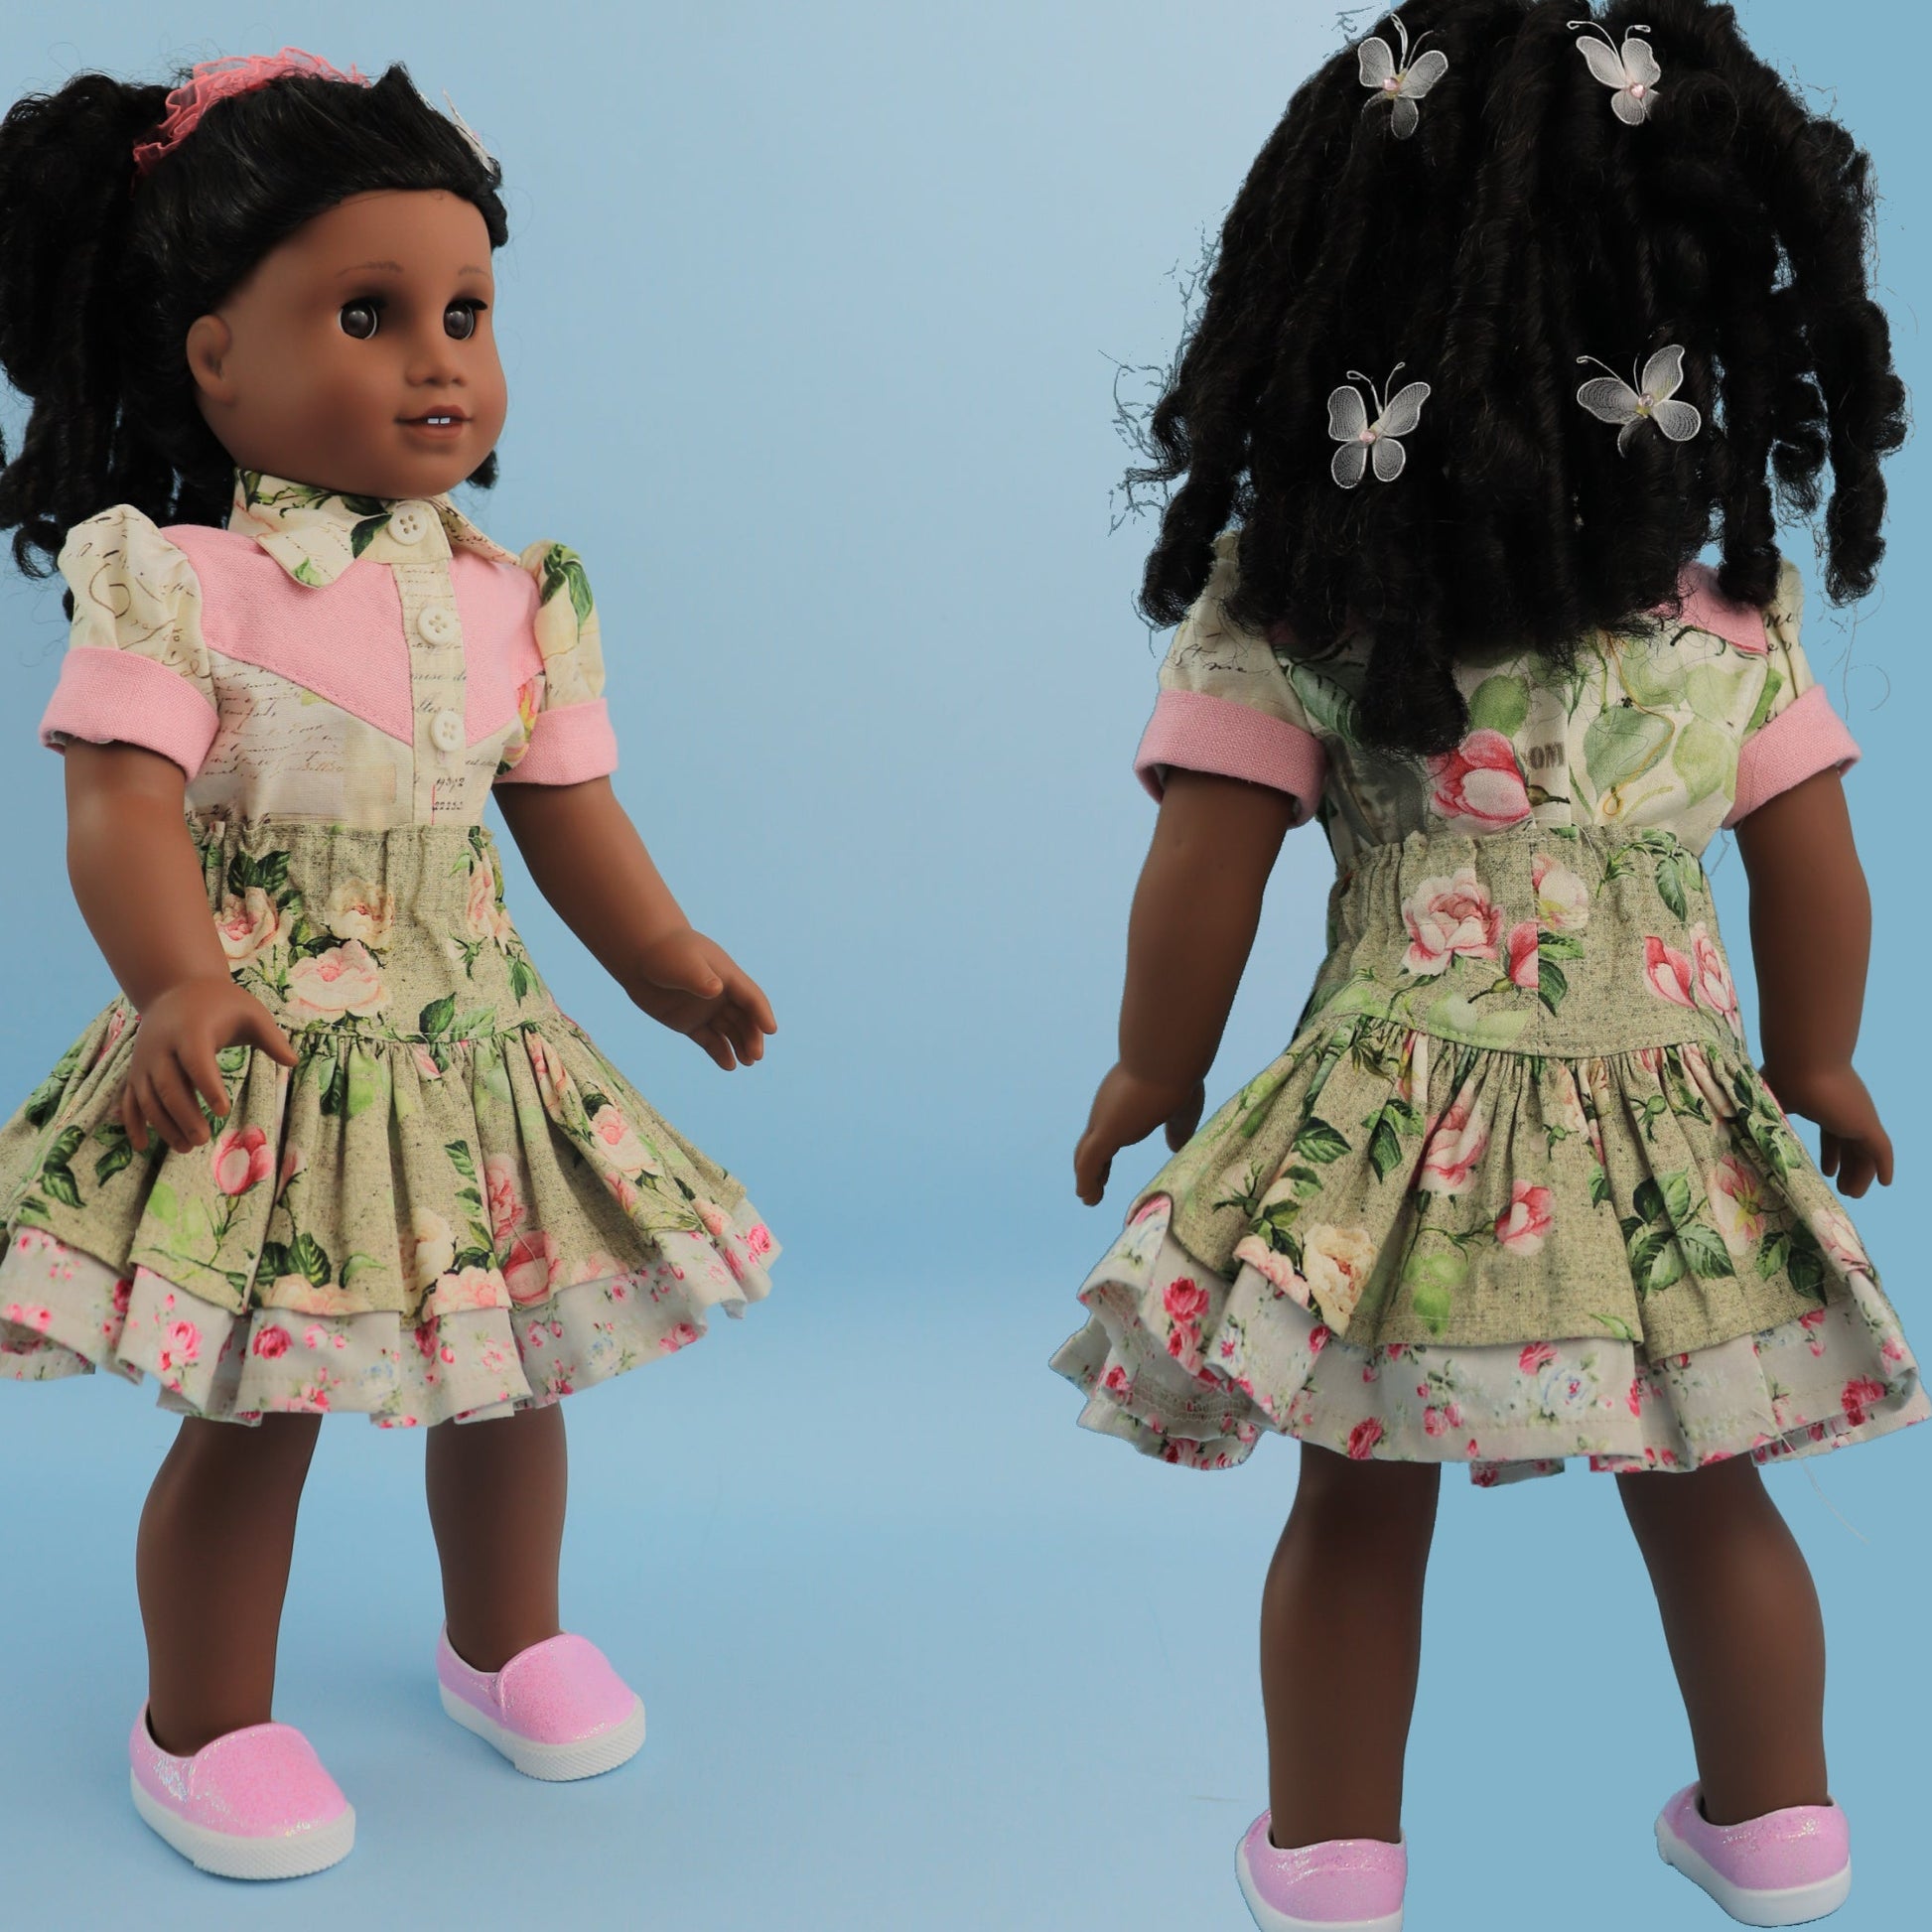
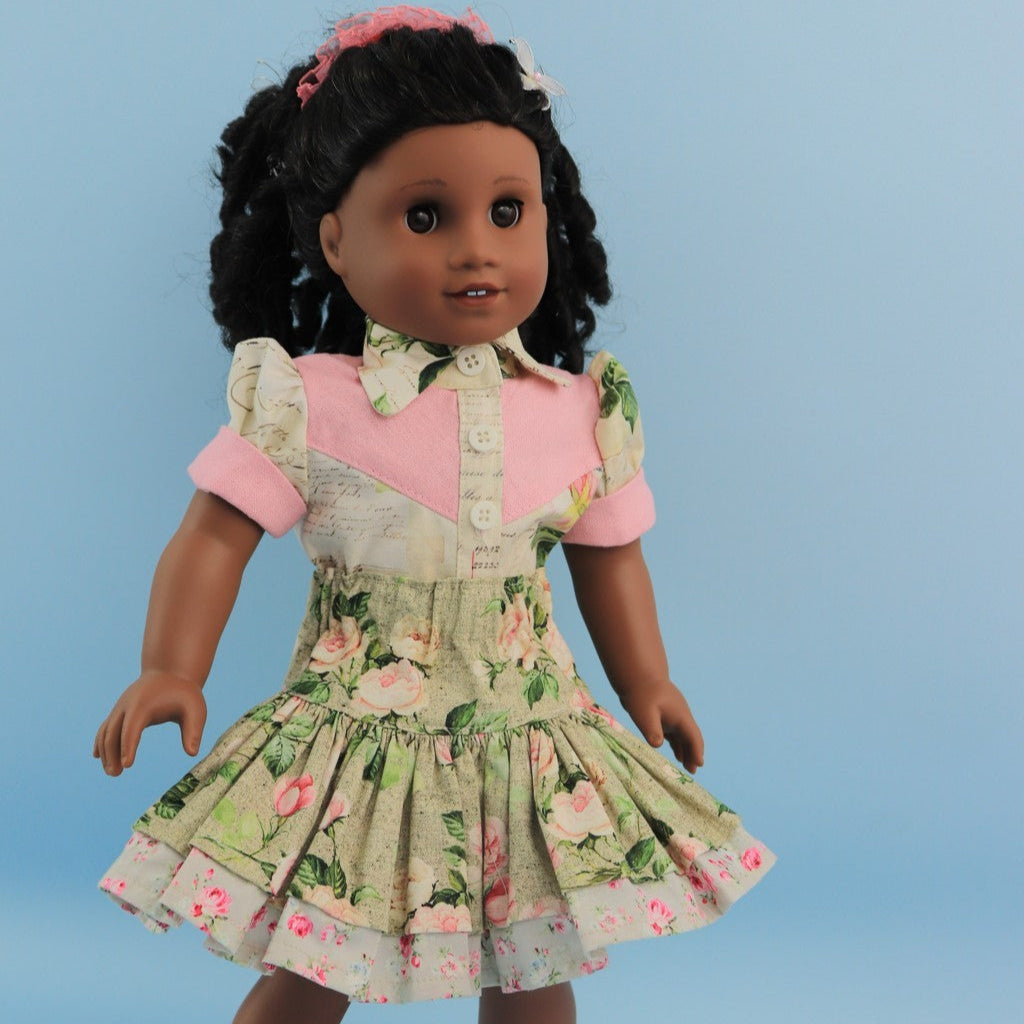
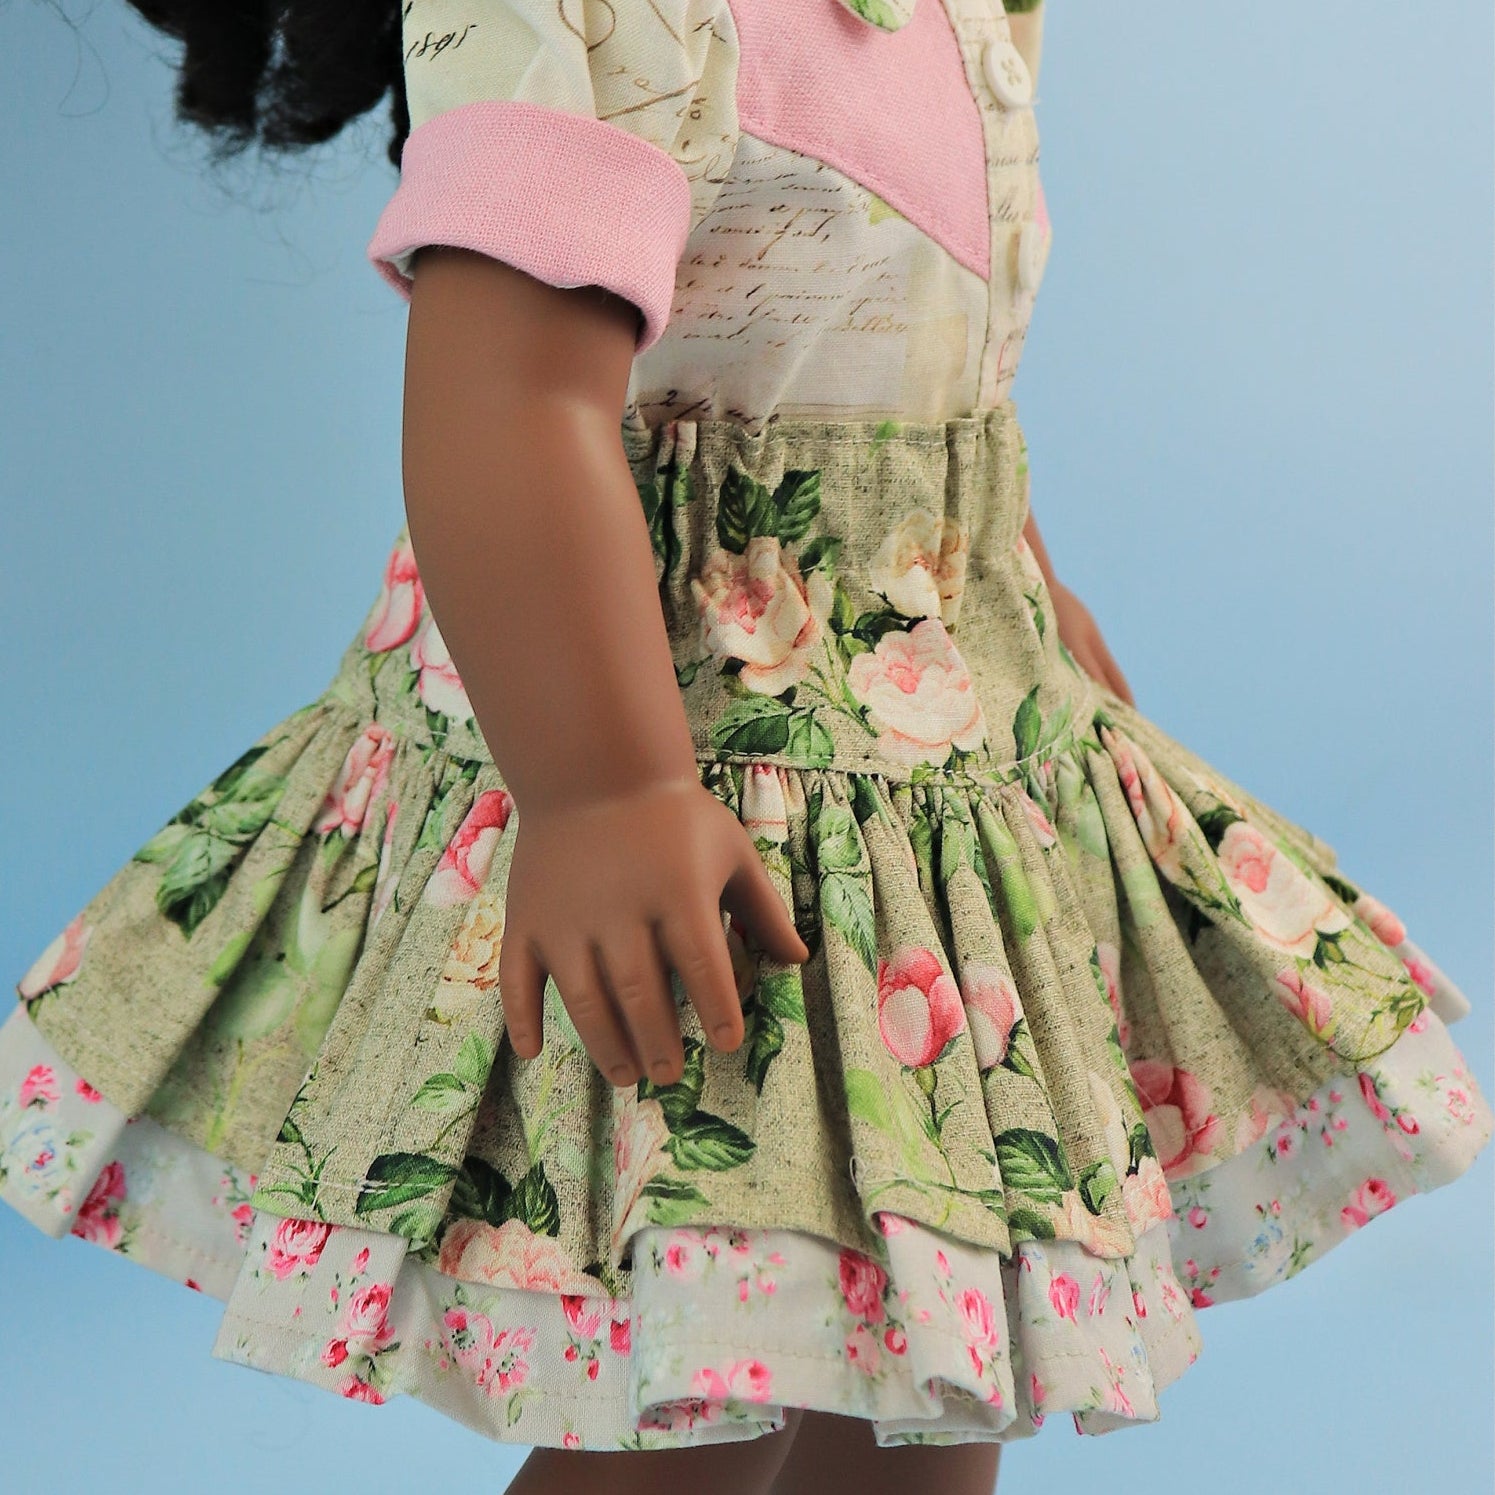
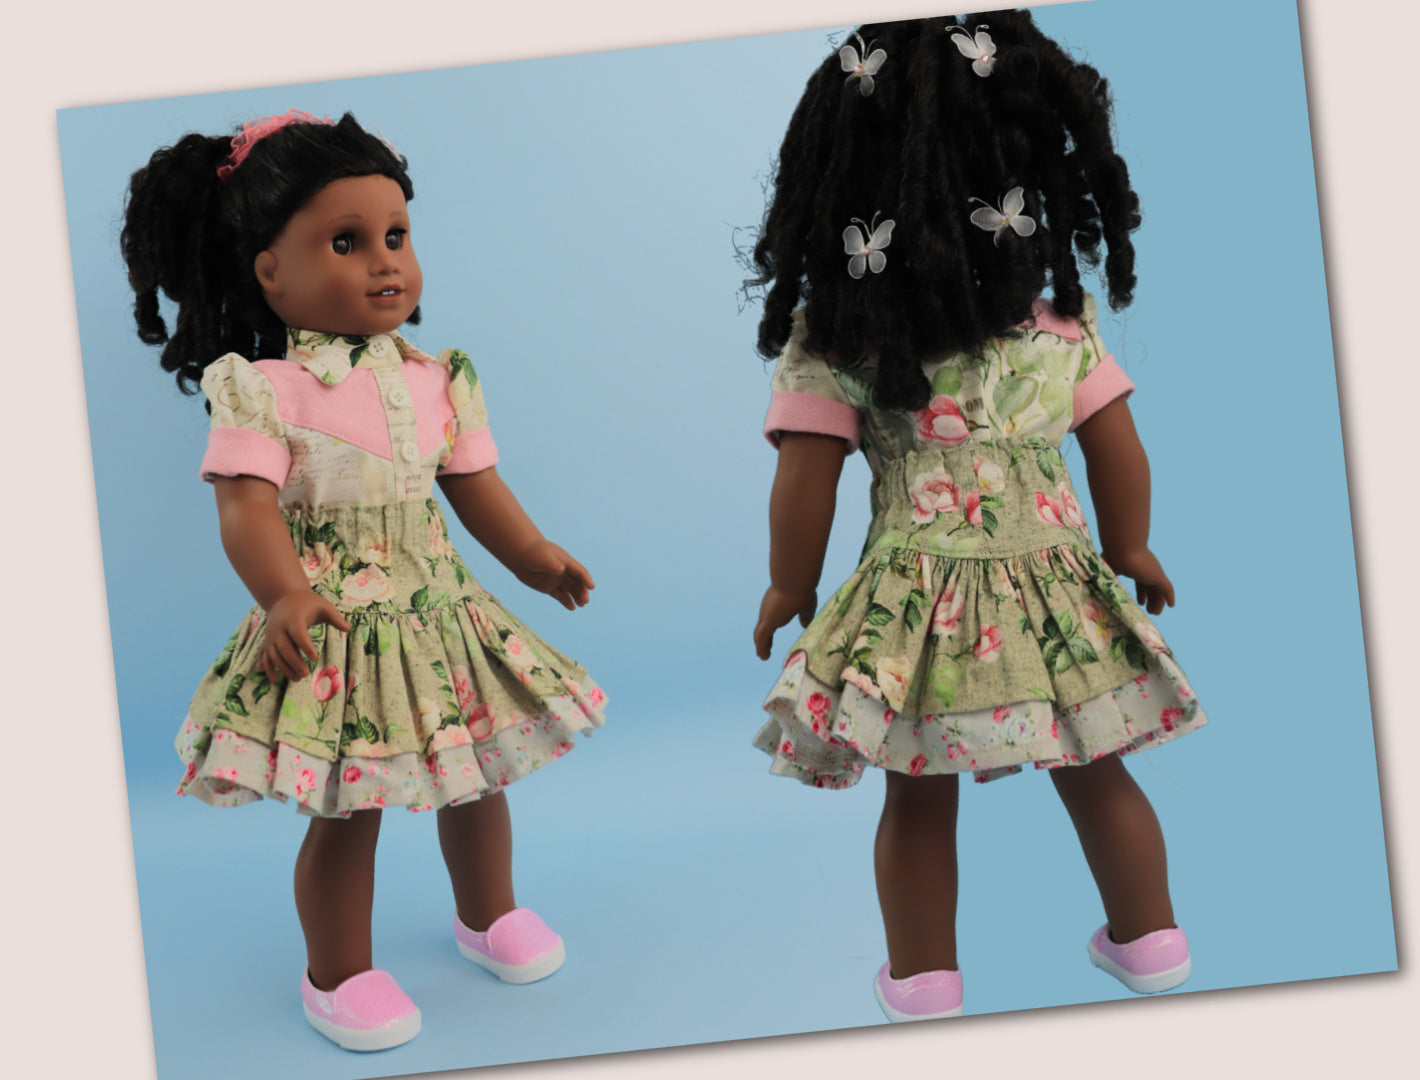
Hi, I'm Marina from Frocks and Frolics, and matching with the Western blouse, I'm going to show you how to make the Scarlett skirt for a doll.
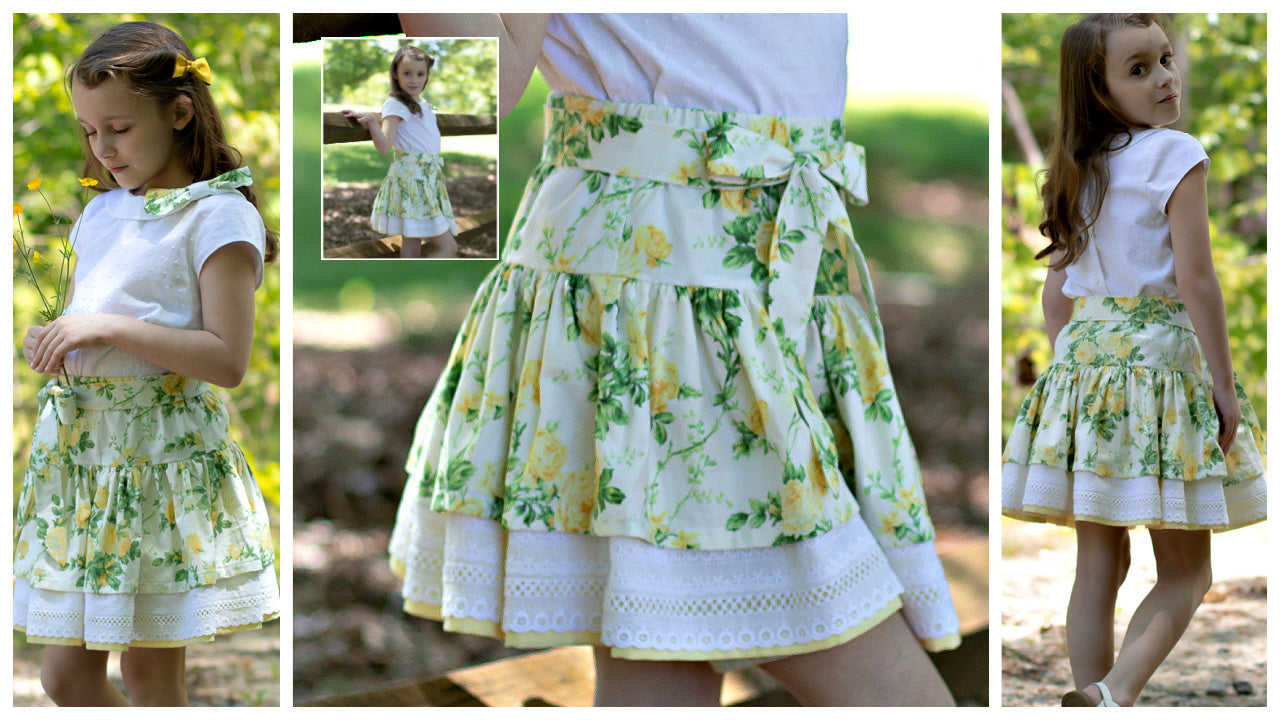
In this video, we're going to make the Scarlett skirt. Of course, the Scarlett skirt is the freebie on the website, and so is this one, so you can try both for your doll and for your girl.
There isn't much difference in the skirt, so the instructions are almost entirely the same as the girls' version. I hope you enjoy this, and if you like it, then of course go get the pattern from Frocks and Frolics. It is free, just like the video, so go ahead and make one.
Pattern Pieces Overview
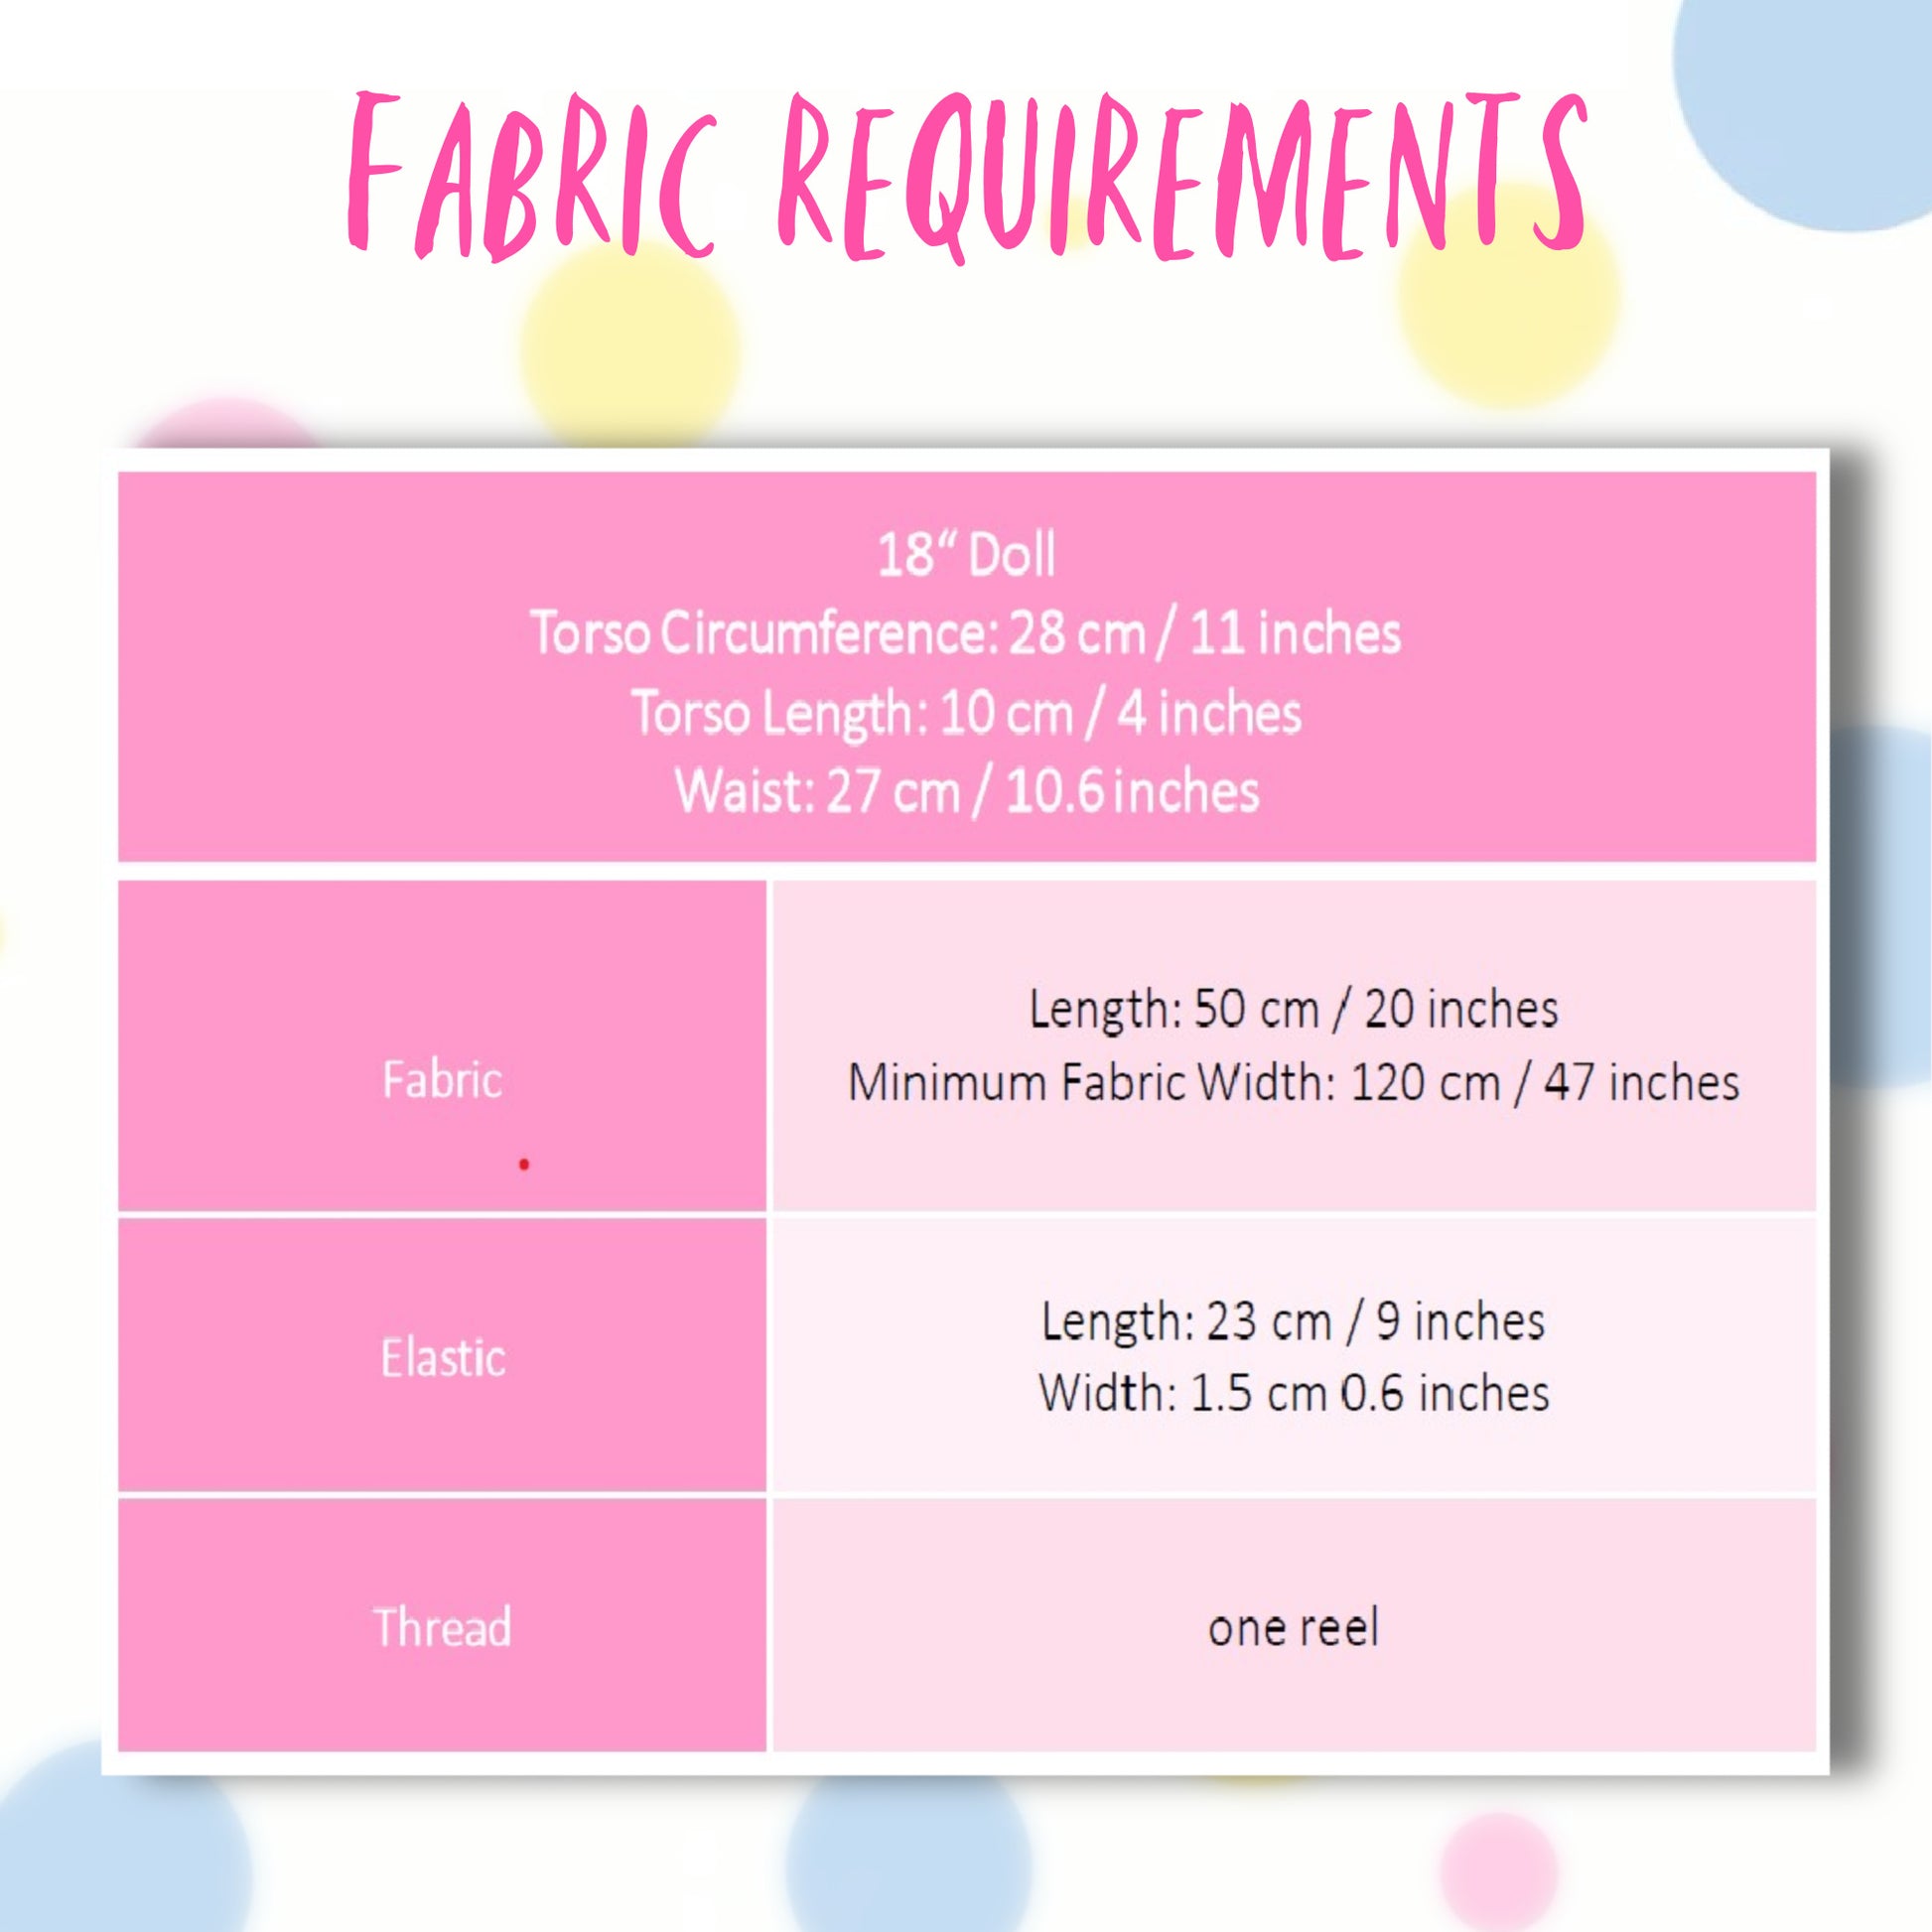
Let's have a look at what we need to make this little skirt.
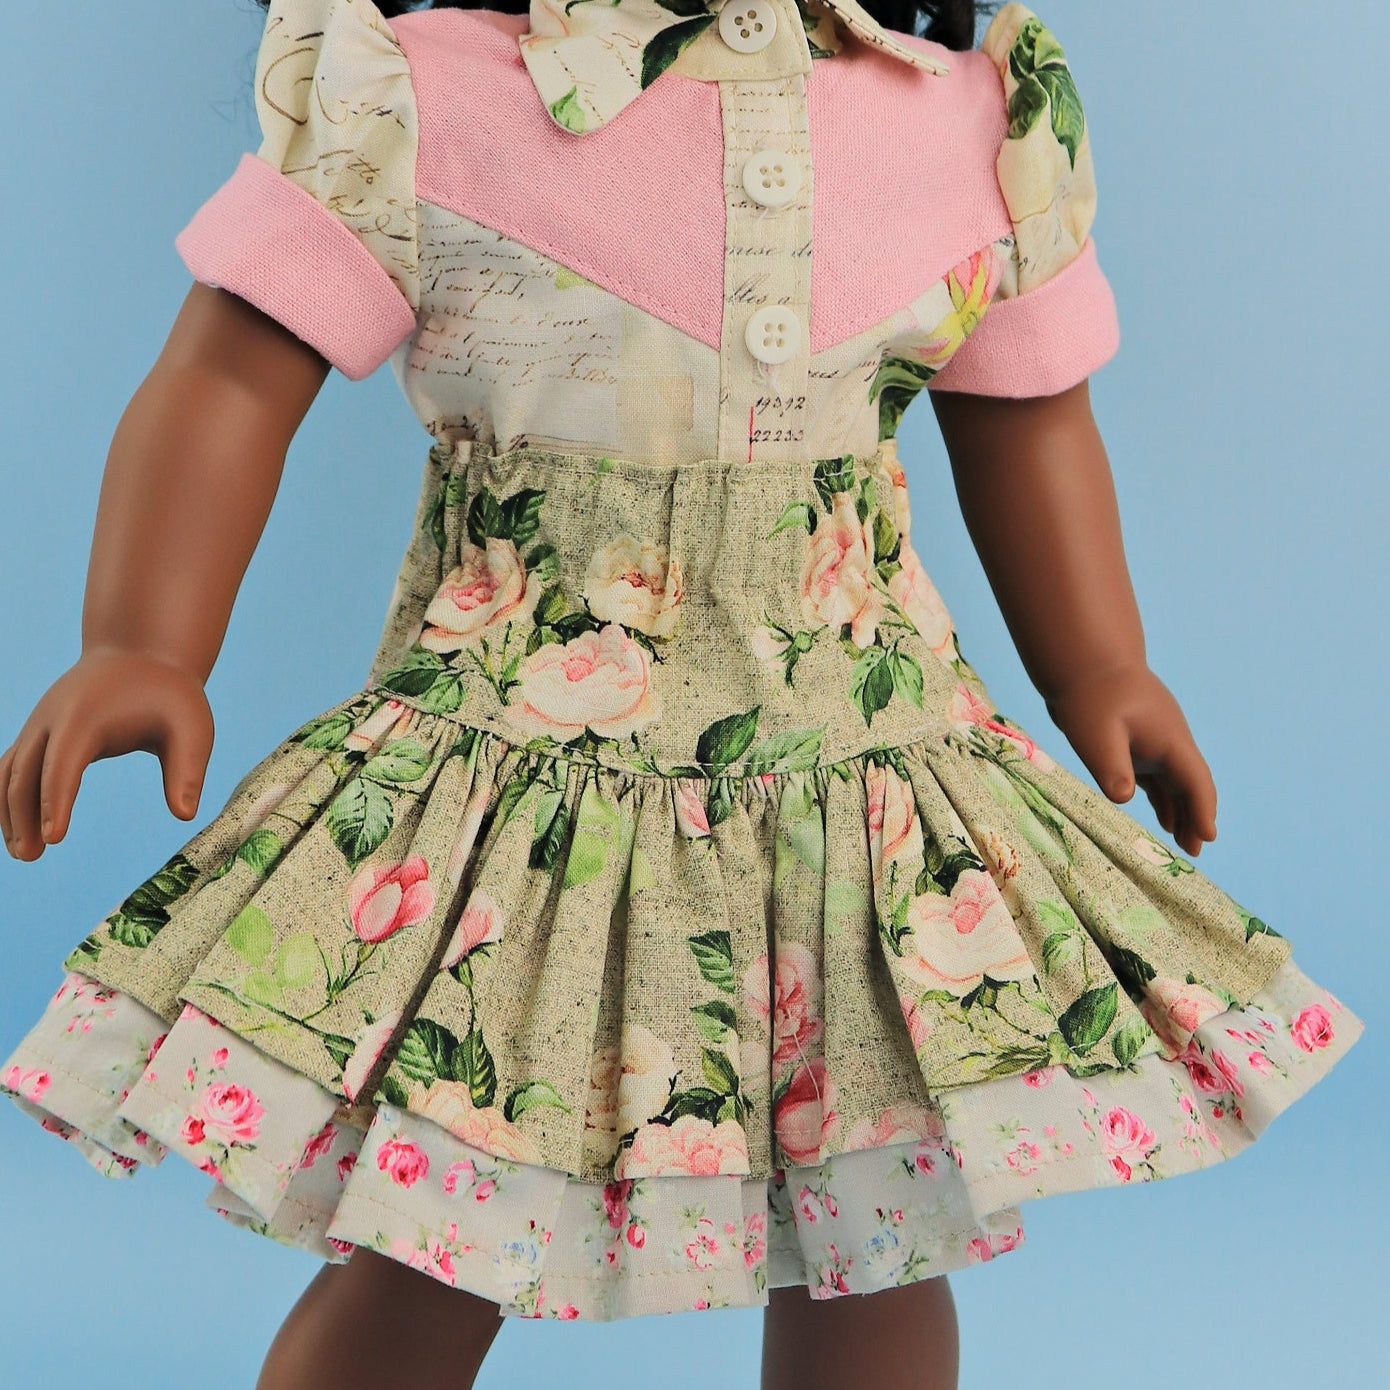
For this skirt, you've got three parts. We've got the waistband up here that comes in one piece, and it's also the tunnel for the elastic. All that's going to happen is we're going to fold over the top edge and stitch through, and that's going to be the tunnel.
We want to serge the sides and the top edge for this and leave the lower edge as it is.
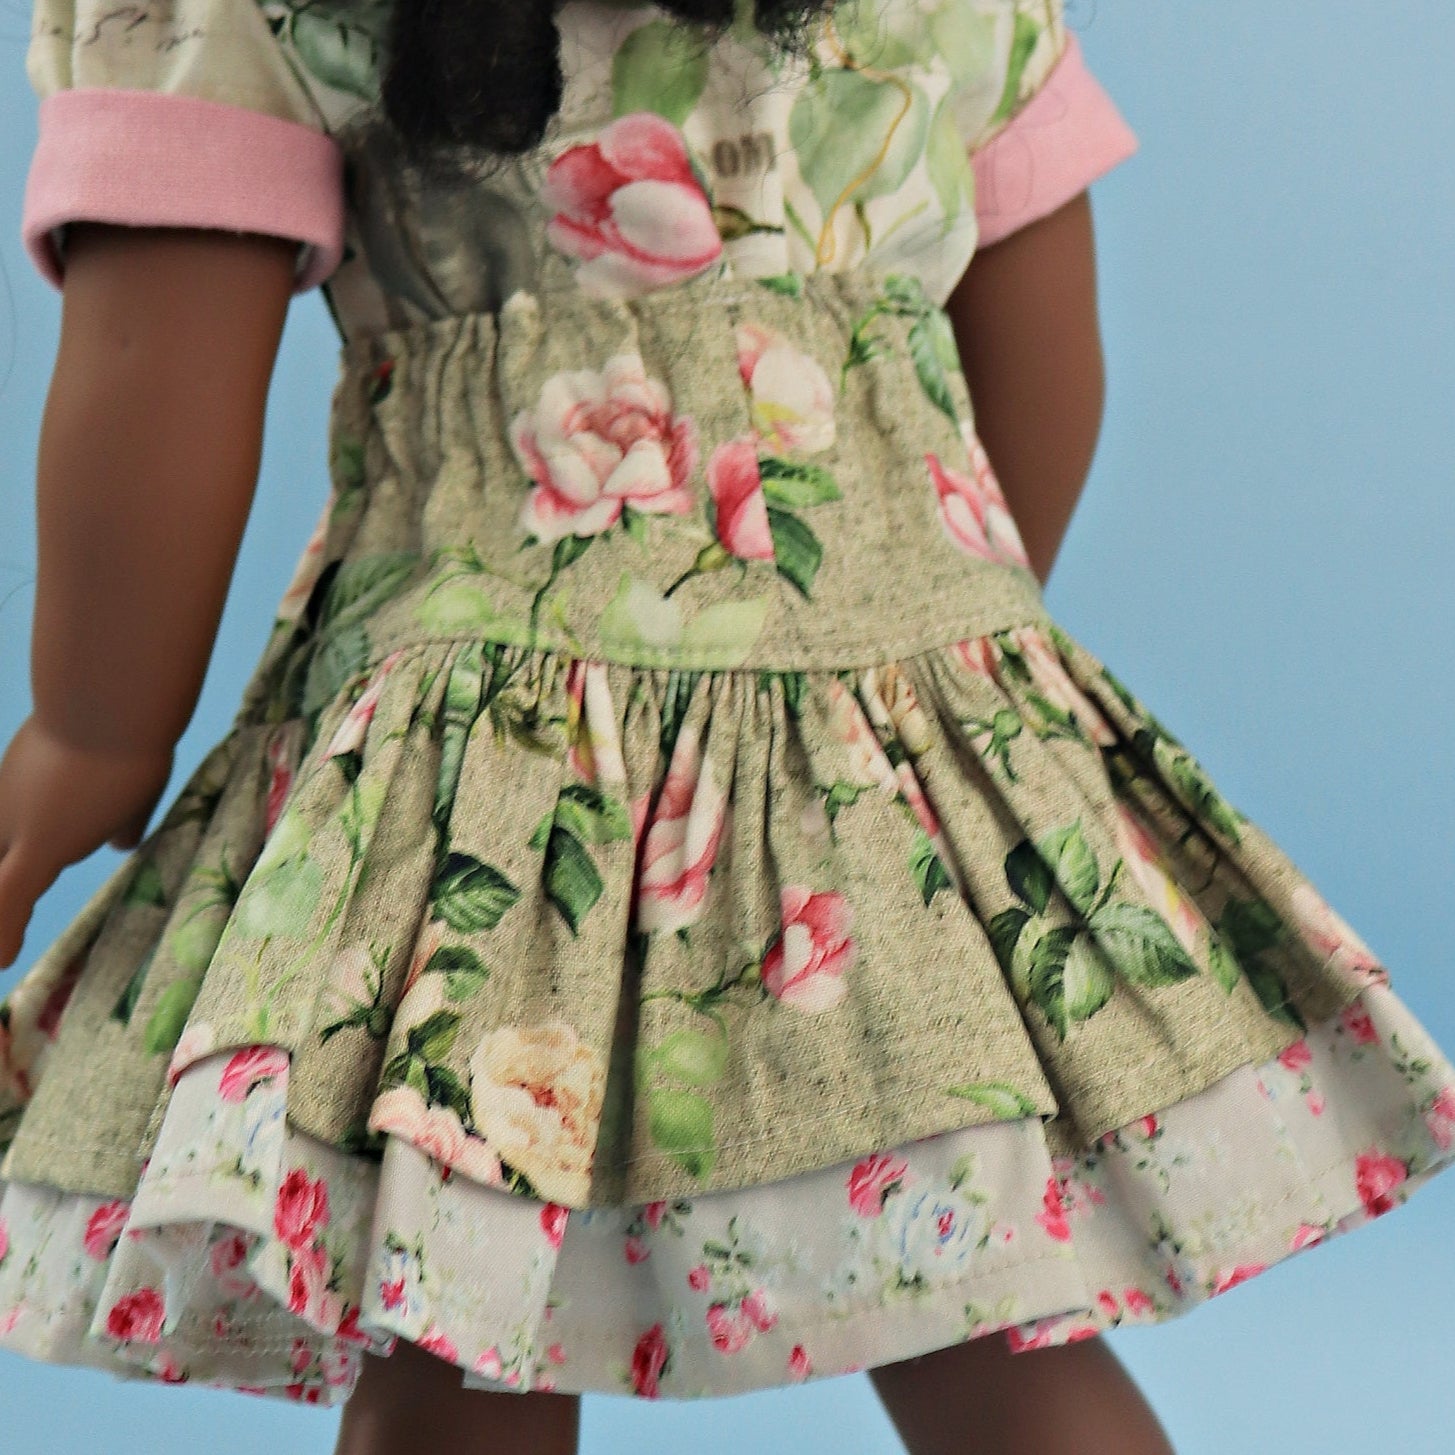
Then we've got the lower part of the skirt, and we're going to cut that two times on the fold. It's actually literally twice the width of the waistband, which works really well. You want to serge the sides again and then the lower edge, and we leave the top edge as it is.
Then the upper skirt is cut twice again on the fold, and it's exactly the same length as the lower layer. They fit on top of each other perfectly. We do the same again—we're going to serge the sides and the lower edge, and that way we're going to have a complete skirt.
Elastic Allowance
This is what it's going to look like when it sits all on top of each other.
You also need the elastic, like I said, which fits in here when it's folded over. If you're making a pattern like this yourself, always make sure that you've got enough movement room for your elastic—a little bit of wiggle room. Maybe five millimeters extra you should allow for that, or even six or seven millimeters. Both would work.
Sewing the Side Seams
The first step is to close the side seams.
We do that for the waistband by putting the right sides on top of each other. Put one pin in, or you don't really need to pin this—it's already close enough, but never mind.
We do the same on the upper layer, of course, on both sides. We pin those together, and then we do the same on the lower layer as well. We pin the side seams together.
Once we've done that, as we say in German, we're going to go over to the sewing machine and sew it together. The seam allowance here is always one centimeter, but for a gathered skirt it really doesn't matter if you want to use a little bit more or a little bit less.
Do the same on the lower layer. Obviously, it makes sense to take the next piece straight away and put it under the machine so that you're saving yourself precious thread and not wasting any. You should always really do that.
Don't forget to lock in your stitches at the beginning and end, and do the same on the upper layer of the skirt. That's it, all done.
Creating the Elastic Tunnel
Now we want to press those seam allowances open, and the next step is to create the tunnel.
I fold it over, and it's exactly one inch for me. That's perfect and leaves me a little bit of room. I'm also going to topstitch that top edge a little bit, and I can pin that one inch distance all the way around.
What I noticed afterward was that instead of leaving the opening for the tunnel at the lower edge where you sew around, you could leave it in the actual side seam. That was a little bit of an afterthought.
You can mark that like I've done here, then leave the opening there. I just opened mine back up, and now I'm pinning it all the way around.
I can start topstitching this both at the top edge and at the lower edge in the middle of the serging.
Topstitching the Tunnel
Now we're going to topstitch this. Take the plate off your sewing machine and put the piece on the arm. That makes it a lot easier, and stitch once around.
Look at that—I just let that run through my hands. It's really simple. Sewing is fun.
Don't forget to lock in your stitches.
Next, let's topstitch the edge up here as well. It makes the elastic sit a little bit better. It's not necessary, but you can do it. You could also topstitch again through the center once the elastic is in, but with this little stitch at the top, you don't need to do that. It makes it sit really nicely.
Hemming the Skirt
Next, we're going to do the hems as well. Turn them up so it's a little bit more than your serging line, and then line it up with the edge of the presser foot.
In my case, it's just a little bit less than the edge of the presser foot. I've got a little red line there. Presser feet are brilliant—they've got all these different lines that are really handy, and I love working with those.
Joining the Skirt Layers
The next step is to put together the layers of the skirt.
We put the top layer onto the lower layer. Obviously, all the right sides need to be facing up. I start by putting the seam allowances on top of each other, and the rest will automatically fit because they are the same length.
Add a few more pins and make sure that the edges are all lined up because now we're going to put the gathering threads in so that it sits together.
Gathering the Skirt
The next step is to put the waistband on top.
The only thing to watch out for is that the seam needs to sit either on the center back or center front of the skirt so that you don't end up with seam on seam.
Then gather the skirt to fit the waistband. It's super simple. We're only pulling the bobbin threads.
When you put in gathering threads, always use the longest stitch length available on your sewing machine. Put one stitching line close to the edge and another one presser-foot width next to it.
That's all there is to it. It takes a while to gather it and pin it in, but it's well worth the effort. It looks absolutely cute.
Attaching the Waistband
Over to the sewing machine, we're going to sew this together.
What I would recommend is that you always sew from the inside, meaning that you turn the skirt so it's easier to move it along.
In this instance, because the distances are so small and I wanted to show you, I did it the other way around because the fabric gets in the way.
Another tip is that you can remove the plate and sew around the arm of the machine. There are many methods you can use to sew this on.
You want to stitch right in the center between your gathering stitches, and then you hop over to your serger and serge it.
Finishing the Waistband
The next step is to topstitch that seam allowance into your waistband. I would make the stitch length longer—three or even 3.5.
We're going to stitch all the way around. There you go. It's super quick to sew this. The only time-consuming bit is the gathering, and you can see how lovely that looks on the inside.
Inserting the Elastic
Last step, people—we just need to put the elastic in now so that we have a lovely little waist and blend it in.
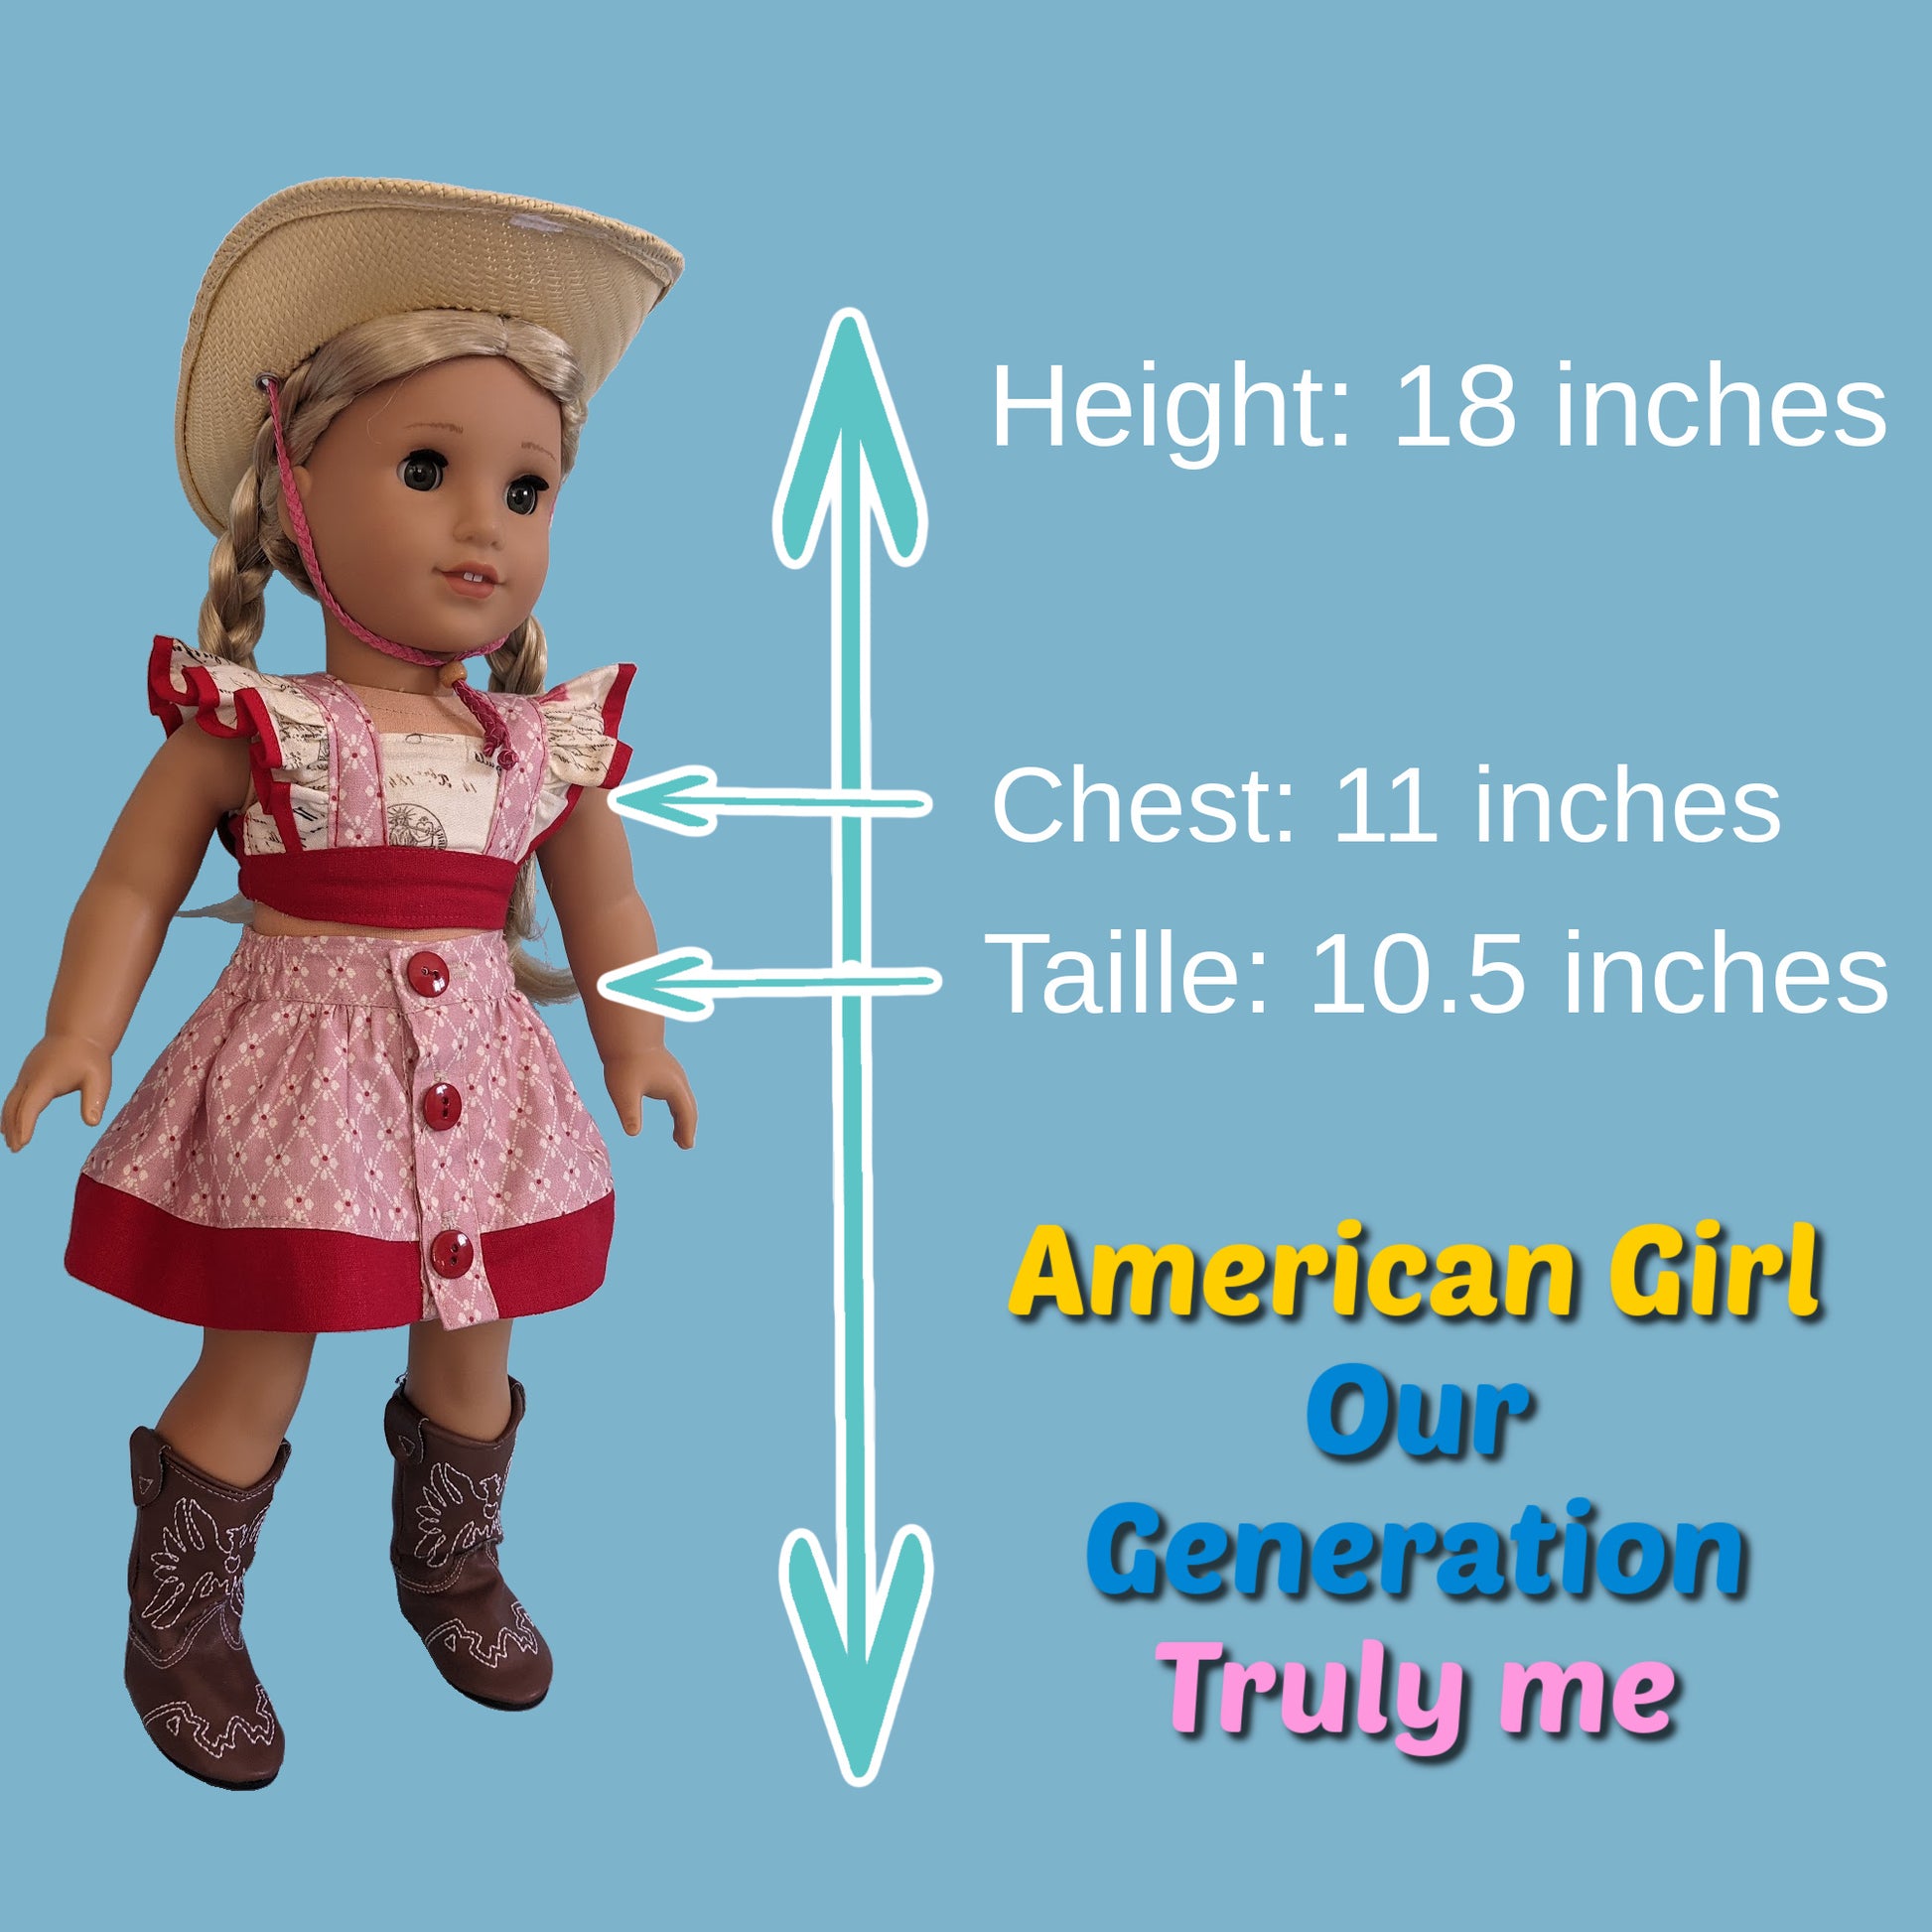
Of course, you can see more from the doll collection that I hope you're going to really enjoy. All these items are also available in girl sizes, so you can get all that on my website.
Now, when you come to the end, sometimes your safety pin will get stuck in that little bit of seam allowance. What you do in that case is grab a pair of scissors and put them in that gap.
By lifting the seam allowance out of the way with your scissors, it's really easy to slip that safety pin underneath and pull it out.
I would also recommend getting yourself a really nice steel safety pin because if you're using one of the cheaper ones, like I am doing here because I couldn't find my good one, they bend and sometimes come apart. Then you have to pull the elastic out and start again.
Final Finishing
Now we're going to quickly secure the elastic with two stitching lines where it overlaps. I tend to do that with my two fingers—just spread them out and hold it.
That's it basically. The elastic is tucked back in, and the little gap we have can be left open or closed. It doesn't really matter too much. I would probably leave it open.
You could even put a bow on as well if you like. I think it's super, super cute.
And that's it—we're finished with the skirt. I hope you enjoyed it. It's really super simple.
If I've given you an appetite for doll clothes or even girls' clothes, then visit Frocks and Frolics and have a look at the Vintage Collection, which I think is great for the summer and, of course, for all your dolls as well.
So I hope to see you soon again for another project with Frocks and Frolics.
Bye for now.
Sewing the Waistband
Transcript for the video: Scarlett Skirt Doll Girl Step-by-Step Tutorial
The first thing I need to do is to serge the edges of my waistband, and then we're going to sew the waistband together first. We're going to sew it together with a one centimeter seam allowance on either side. Line up the fabric edge to edge and then just go for that one centimeter.
There we go. Lock in your stitches at the beginning and the end, and then we're going to do the other side as well.
Now we can pop over to our ironing board and iron our seam flat first, and then we iron it apart. It's a habit that I would just get into. Do that every time and you get beautiful seams. I do the same on the other side, and there we go, all done.
Creating the Elastic Tunnel
Next, we're going to work the tunnel for the elastic. The first thing we want to do is iron over the top edge one centimeter, and then we're going to turn it over to create the tunnel.
For smaller children, I would use a three centimeter or an inch and a quarter elastic. For older children, maybe you want to use the four centimeter width. Here, this is what I am using, and your tunnel needs to be a centimeter more. So for my four centimeter elastic, I need to make it five centimeters wide.
Now I'm hopping over to my ironing board and ironing over the edge by one centimeter. Then I fold it down and get my trusty tape measure out to make sure that I iron it in correctly. I'm going for that five centimeters because my elastic is four centimeters wide, and I make sure it's the same everywhere.
I check here again, good press, and now I can put a few pins in here. I also need to leave a turning gap when I topstitch this, so I'm marking it. You don't really need to mark it unless you're bound to forget that you need to leave that opening gap.
Now I'm going to sew from this side here all the way around, close to the edge, to the other point. I'm going to lock in my stitches on either side, and I line up the edge of the fabric that's folded in with the red marking on my presser foot.
If you haven't got a presser foot that has the clear plastic in the middle, I would actually get myself one of those. It's going to make your life a lot easier. Keep it steady, and if it starts to push, you can hold it taut with your left hand all the way to the end.
Lock in your stitches and your tunnel is done. The stitching should be nice and even. I would use a stitch length of 2.5 or 3 for this. Both will do.
Sewing the Skirt Side Seams
We can now move on to the skirt. First, we're going to close the side seams, and I'm going to close them together in one go and then serge them. Of course, you could also serge the edges first and then sew them together, just like we did on the waistband. That's up to you and depends on the thickness of your fabric.
My fabric is light enough to do it in one step, so that's what I'm going to do. You also want to put the right sides together for your lower-layer skirt, and then we're just going to sew the sides together.
Hop over to your sewing machine. One centimeter seam allowance again, and I didn't even pin this. There is no need to pin these. Put the next piece straight under it, no problem. Don't waste any thread, and we go straight down.
Very, very simple skirt. I hope that you enjoy making this skirt and get a real taste for the rest of the vintage collection.
Pressing the Seams
We want to serge all four side seams, and then we're going to iron those seams in one direction.
Here's my underskirt, so I'm going to iron one side away from me and one side toward me. Then I'm going to do exactly the same on the main fabric, but when I put them together later, I want them to go in the opposite direction so that I get a really nice flat seam.
I'll do the other side as well. If you think you're going to get confused, then just serge the edges first, sew them together, and iron the seam apart.
Hemming the Skirt
Now we're going to turn up the hem. On this one, I'm just going to iron over the edge one centimeter and then turn it up at the sewing machine. I'm going to show you how that works.
For the lower layer, I'm going to do all of it on the sewing machine without even ironing anything first. See what you want to do. As a beginner, I would always iron the first edge over.
Alternatively, you could also serge that edge and then just turn it up. You can do that too.
Now on the sewing machine, I'm going to fold it over two centimeters and put my presser foot down.
Hemming the Skirt
It’s very important that you have your tape measure around your neck so that you can measure what you’re doing. Use the marker on your clear presser foot on the edge of the fabric, or you could choose a mark on your needle plate.
Make sure that you measure the two centimeters and then sew to that point. Stop, turn it over again, fold what you think is two centimeters, take your tape measure, and check that it actually is. Hold it nice and taut and then do the next section.
Everyone who has been sewing for a very long time will hardly need to measure this at all, but if you’re a beginner, this is how it’s done. Fold it over again, measure the two centimeters, hold it at that point, straighten it out neatly, and then sew close to the edge all the way around.
It’s not actually difficult. Once you’ve done this a few times, you won’t be pinning everything because it takes so much time.
For the underskirt, or the lower-layer skirt, I’m just going to turn it up. It’s two centimeters as well, folded in by one centimeter. There are two ways you can do this straight on the sewing machine. You could turn it up three centimeters to begin with so that you know that’s the right distance and then turn in the top to the two-centimeter point.
Use your finger to put in your seam allowance. With stripes, it’s particularly easy to see that you’re doing it right because the stripes will line up with each other. If you start doing it wrong, they will no longer line up.
I do that all the way around and there you go. You can see I don’t necessarily always measure. I just quickly check, “Is it still two centimeters?” If it is, go, go, go.
Adding Rickrack and Ribbon
Now you could leave it like that and give it a good press, but I’m going to put my rickrack on. What I’m going to do is use that stitching line as my guide.
If you think that’s too close to the edge, you could have always serged the edge of the hem, and then your rickrack would sit a little bit higher. I think in the case of the ribbon that would have been nicer. So if I made it again, I’d probably serge the edge and then put the rickrack and the ribbon a little bit higher.
What you want to do is place your rickrack exactly on that seam line. Then you can use a straight standard stitch all the way through, and you won’t see that stitch. There’s no need to do a zigzag stitch for this. I don’t think it’s necessary at all.
I’m just going straight through, placing it on there as I go. At the end, cut it off so it overlaps a little bit, turn in that rickrack, secure your stitches, and voilà, you’ve got a really beautiful hem that looks lovely.
Cut off the threads, and now we’re going to do the ribbon. The same thing applies. I would say try to make sure that your stitch line sits on the edge of the ribbon because the two centimeters looked a little bit too close to the edge.
Although it is very pretty, I want you to get the absolute perfect result. So if you serge the hem first, you can move it up a little further, and the stitching line should sit on the outer edge of the ribbon.
Line that up all the way around. At the end, cut it off and turn it in again. I think I cut mine a little bit more there because it was a little bit too long.
There we go. We’ll go over the edge, secure it, and then sew down the other side the same way. You may want to stretch the fabric as you’re going. When you iron it, you want to gently stretch the fabric.
If you’ve done a really good job, it should be on the same stitching line as before, as you can see here.
And that is all the hems done.
Really cute outfit. I can't wait to make it!
Great pattern easy to follow I used net for the under layer
I'll definitely be getting some more patterns thank you for designing them
Love the pattern. The fit was excellent.
Very cute. Looking forward to making this.